Posts Tagged ‘assumption’

Crossing the Finger (Crossed Fingers) – A good luck sign with Early Christian origin and deep symbology

Monday, January 21st, 2013


Why we cross the fingers good luck sign evokes Christ blessing and depicts cross with hand fingers


I had a small Skype chat today with my dear Indian friend of mine Happy. She is now in situation with uncertain outcome, where the Indian government has to approve her mother's application for Visa. As being uncertain she used the classical English saying: "fingers crossed – i cross the fingers". I was curious about the origin of Crossing the Fingers and thought for a second over how Cross-ing the fingers originated and how it visually looks like. It depicts a a X cross shape, also interestingly the X is the first letter of the Greek and Slavonic IC XC depicted on each and every icon of our Savior Jesus Christ. XC – stands for Χριστός (in Greek) and
XP-christ-church-slavonic

 in Slavonic, thus obviously crossing the fingers depicts also first letter of Χριστός – Christ  – Messiah (savior of the World). Having the insight I hurried to explain Happy, why I think people used to be crossing fingers when in situation with uncertain outcome.

Just out of curiosity I searched for Crossed_fingers and found it good explained in Wikipedia. After all, my assumption turned right, crossing the fingers is made not just out of old superstitious as many might thought, It was made on purpose by early times Christians. Crossing the fingers is an external expression of the Internal faith,hope,love and unceasing prayer that early Christians possessed.

Crossing the fingers was very popular in times, when Christians use it as a sign to recognize each other in times of persecution. The reason for crossing the fingers is that it resembles the Sign of the Cross. It is believed even  to this day in the One Holy Apostolic Church the Orthodox Church the sign of the Cross when being made invokes over one the protection and blessing of Christ. Sign of the Cross is being done in prayer in the Church in times of trouble in difficult life time events and when evil is faced. The crossed finger sign was also used as a secret way for Christians to tell each other to assemble for prayer and holy liturgy worship service. There is even symbolism in why people cross fingers with exactly those two fingers with which the gesture is done. In very ancient Church times Christians used to make the sign of the cross over their body using two fingers and not three.

Icon of Saint Paul from Ephesus 4-th century preparing to make the sign of the cross

4th-century icon of St. Paul the Apostle from Ephesus – Wall Painting

The sign of the cross when being depicted on one's body was done with the exact two fingers with which the crossed finger gesture is completed.

crossed fingers sign of the cross resembles the salvation of mankind through the Lord Jesus Christ's crucifix

Today crossing the fingers is a popular "good luck" invocation automatic reaction, most people who do it as not being realized Christian don't know why they do it they just believe it will be a magical mantra like which will give them good outcome of problem or difficult situation. It is little sad that we the modern people who think we know a lot and are smart or educated, didn't know even the basics of what made us the nations we're which in the biggest part was Christian faith kept by our ancestors for centuries.

Installing the phpbb forum on Debian (Squeeze/Sid) Linux

Saturday, September 11th, 2010

howto-easily-install-phpbb-on-debian-gnu-linux

I've just installed the phpbb forum on a Debian Linux because we needed a goodquick to install communication media in order to improve our internal communication in a student project in Strategic HR we're developing right now in Arnhem Business School.

Here are the exact steps I followed to have a properly it properly instlled:

1. Install the phpbb3 debian package
This was pretty straight forward:

debian:~# apt-get install phpbb3

At this point of installation I've faced a dpkg-reconfigure phpbb deb package configuration issue:
I was prompted to pass in the credentials for my MySQL password right after I've selected the MySQL as my preferred database back engine.
I've feeded my MySQL root password as well as my preferred forum database name, however the database installation failed because, somehow the configuration procedure tried to connect to my MySQL database with the htcheck user.
I guess this has to be a bug in the package itself or something from my previous installation misconfigured the way the debian database backend configuration was operating.
My assumption is that my previously installed htcheck package or something beforehand I've done right after the htcheck and htcheck-php packages installation.

after the package configuration failed still the package had a status of properly installed when I reviewed it with dpkg
I've thought about trying to manually reconfigure it using the dpkg-reconfigure debian command and I gave it a try like that:

debian:~# dpkg-reconfigure phpbb3

This time along with the other fields I've to fill in the ncurses interface I was prompted for a username before the password prompted appeared.
Logically I tried to fill in the root as it's my global privileges MySQL allowed user.
However that didn't helped at all and again the configuration tried to send the credentials with user htcheck to my MySQL database server.
To deal with the situation I had to approach it in the good old manual way.

2. Manually prepare / create the required phpbb forum database

To completet that connected to the MySQL server with the mysql client and created the proper database like so:

debian:~# mysql -u root -p
mysql>
CREATE database phpbb3forum;

3. Use phpmyadmin or the mysql client command line to create a new user for the phpbb forum

Here since adding up the user using the phpmyadmin was a way easier to do I decided to go that route, anyways using the mysql cli is also an option.

From phpmyadmin It's pretty easy to add a new user and grant privileges to a certain database, to do so navigate to the following database:

Privileges -> -> Add a new user ->

Now type your User name: , Host , Password , Re-type password , also for a Host: you have to choose Local from the drop down menu.

Leave the Database for user field empty as we have already previously created our desired database in step 2 of this article

Now press the "Go" button and the user will get created.

Further after choose the Privileges menu right on the bottom of the page once again, select through the checkbox the username you have just created let's say the previously created user is phpbb3

Go to Action (There is a picture with a man and a pencil on the right side of this button

Scroll down to the page part saying Database-specific privileges and in the field Add privileges on the following database: fill in your previosly created database name in our case it's phpbb3forum

and then press the "Go" button once again.
A page will appear where you will have to select the exact privileges you would like to grant on the specific selected database.
For some simplicity just check all the checkbox to grant as many privilegs to your database as you could.
Then again you will have to press the "Go" button and there you go you should have already configured an username and database ready to go with your new phpbb forum.

4. Create a virtualhost if you would like to have the forum as a subdomain or into a separate domain

If you decide to have the forum on a separate sub-domain or domain as I did you will have to add some kind of Virtualhost into either your Apache configuration /etc/apache2/apache2.conf or into where officially the virutualhosts are laid in Debian Linux in /etc/apache2/sites-available
I've personally created a new file like for instance /etc/apache2/sites-available/mysubdomain.mydomain.com

Here is an example content of the new Virtualhost:

<VirtualHost *>
ServerAdmin admin-email@domain.com
ServerName mysubdomain.domain.com

# Indexes + Directory Root.
DirectoryIndex index.php index.php5 index.htm index.html index.pl index.cgi index.phtml index.jsp index.py index.asp

DocumentRoot /usr/share/phpbb3/www/

# Logfiles
ErrorLog /var/log/apache2/yourdomain/error.log
CustomLog /var/log/apache2/yourdomain/access.log combined
# CustomLog /dev/null combined
<Directory /usr/share/phpbb3/www/>
Options FollowSymLinks MultiViews -Includes ExecCGI
AllowOverride All
Order allow,deny
allow from all </Directory>
</VirtualHost>

In above Virtualhost just change the values for ServerAdmin , ServerName , DocumentRoot , ErrorLog , CustomLog and Directory declaration to adjust it to your situation.

5. Restart the Apache webserver for the new Virtualhost to take affect

debian:~# /etc/init.d/apache2 restart

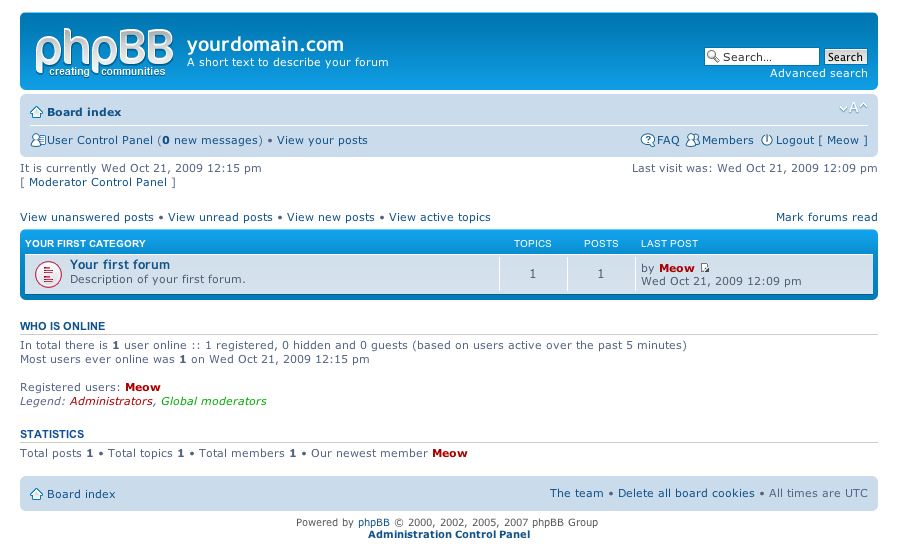
Now accessing your http://mysubdomain.domain.com should display the installed phpbb3 forum
The default username and password for your forum you can use straight are:

username: admin
password: admin

So far so good you by now have the PHPBB3 forum properly installed and running, however if you try to Register a new user in the forum you will notice that it's impossible because of a terrible ugly message reading:

Sorry but this board is currently unavailable.

I've spend few minutes online to scrape through the forums before I can understand what I have to stop that annoying message from appearing and allow new users to register in the phpbb forum

The solution came natural and was a setting that had to be changed with the forum admin account, thus login as admin and look at the bottom of the page, below the text reading Powered by phpBB © 2000, 2002, 2005, 2007 phpBB Group you will notice a link with Administration Control Panel
just press there a whole bunch of menus will appear on the screen allowing you to do numerous things, however what you will have to do is go to
Board Settings -> Disable Board

and change the radio button there to say No

That's all now your forum will be ready to go and your users can freely register and if the server where the forum is installed has an already running mail server, they will receive an emails with a registration data concerning their new registrations in your new phpbb forum.
Cheers and Enjoy your new shiny phpbb Forum 🙂

How to get rid of “PHP Warning: PHP Startup: Unable to load dynamic library ‘/usr/lib/php5/20090626/suhosin.so'” on Debian GNU / Linux

Tuesday, October 25th, 2011

PHP-warning-how-to-fix-warnings-and-errors-php-logo

After a recent new Debian Squeeze Apache+PHP server install and moving a website from another server host running on CentOS 5.7 Linux server, some of the PHP scripts running via crontab started displaying the following annoying PHP Warnings :

debian:~# php /home/website/www/cron/update.php

PHP Warning: PHP Startup: Unable to load dynamic library '/usr/lib/php5/20090626/suhosin.so' – /usr/lib/php5/20090626/suhosin.so: cannot open shared object file: No such file or directory in Unknown on line 0

Obviously the error revealed that PHP cli is not happy that, I've previously removes the suhosin php5-suhosin module from the system.
I wouldn't have removed php5-suhosin if sometimes it doesn't produced some odd experiences with the Apache webserver.
To fix the PHP Warning, I used first grep to see, where exactly the suhosin module gets included in debian's php.ini config files. debian:~# cd /etc/php5
debian:/etc/php5# grep -rli suhosin *
apache2/conf.d/suhosin.ini
cgi/conf.d/suhosin.ini
cli/conf.d/suhosin.ini
conf.d/suhosin.ini

Yeah that's right Debian has three php.ini php config files. One for the php cli/usr/bin/php, another for the Apache webserver loaded php library/usr/lib/apache2/modules/libphp5.so and one for Apache's cgi module/usr/lib/apache2/modules/mod_fcgid.so .

I was too lazy to edit all the above found declarations trying to include the suhosin module in PHP, hence I remembered that probably all this obsolete suhosin module declaration are still present because probably the php5-suhosin package is still not purged from the system.

A quick check with dpkg , further strenthened my assumption as the php5-suhosin module was still hanging around as an (rc – remove candidate);

debian:~# dpkg -l |grep -i suhosin
rc php5-suhosin 0.9.32.1-1 advanced protection module for php5

Hence to remove the obsolete package config and directories completely out of the system and hence solve the PHP Warning I used dpkg –purge, like so:

debian:~# dpkg --purge php5-suhosin
(Reading database ... 76048 files and directories currently installed.)
Removing php5-suhosin ...
Purging configuration files for php5-suhosin ...
Processing triggers for libapache2-mod-php5 ...
Reloading web server config: apache2.

Further on to make sure the PHP Warning is solved I did the cron php script another go and it produced no longer errors:

debian:~# php /home/website/www/cron/update.php
debian:~#

Recover/Restore unbootable GRUB boot loader on Debian Testing GNU/Linux using Linux LiveCD (Debian Install CD1)

Tuesday, July 6th, 2010

I’ve recently broke my grub untentianally while whiping out one of my disk partitions who was prepared to run a hackintosh.
Thus yesterday while switching on my notebook I was unpleasently surprised with an error Grub Error 17 and the boot process was hanging before it would even get to grub’s OS select menu.

That was nasty and gave me a big headache, since I wasn’t even sure if my partitions are still present.
What made things even worse that I haven’t created any backups preliminary to prepare for an emergency!
Thus restoring my system was absolutely compulsory at any cost.
In recovering the my grub boot manager I have used as a basis of my recovery an article called How to install Grub from a live Ubuntu cd
Though the article is quite comprehensive, it’s written a bit foolish, probably because it targets Ubuntu novice users 🙂
Another interesting article that gave me a hand during solving my issues was HOWTO: install grub with a chroot
Anyways, My first unsuccessful attempt was following a mix of the aforementioned articles and desperately trying to chroot to my mounted unbootable partition in order to be able to rewrite the grub loader in my MBR.
The error that slap me in my face during chroot was:

chroot: cannot execute /bin/sh : exec format error

Ghh Terrible … After reasoning on the shitty error I came to the conclusion that probably the livecd I’m trying to chroot to my debian linux partition is probably using a different incompatible version of glibc , if that kind of logic is true I concluded that it’s most likely that the glibc on my Linux system is newer (I came to that assumption because I was booting from livecds (Elive, Live CentOS as well Sabayon Linux, which were burnt about two years ago).

To proof my guesses I decided to try using Debian testing Squeeze/Sid install cd . That is the time to mention that I’m running Debian testing/unstable under the code name (Squeeze / Sid).
I downloaded the Debian testing amd64 last built image from here burnt it to a cd on another pc.
And booted it to my notebook, I wasn’t completely sure if the Install CD would have all the necessary recovery tools that I would need to rebuilt my grub but eventually it happened that the debian install cd1 has everything necessary for emergency situations like this one.

After I booted from the newly burned Debian install cd I followed the following recovery route to be able to recovery my system back to normal.It took me a while until I come with the steps described here, but I won’t get into details for brevity

1. Make new dir where you intend to mount your Linux partition and mount /proc, /dev, /dev/pts filesystems and the partition itself

noah:~# mkdir /mnt/root
noah:~# mount -t ext3 /dev/sda8 /mnt/root
noah:~# mount -o bind /dev /mnt/root/dev
noah:~# mount devpts /dev/pts -t devpts

Change /dev/sda8 in the above example commands with your partition name and number.
2. chroot to the mounted partition in order to be able to use your filesystem, exactly like you normally use it when you’re using your Linux partition

noah:~# chroot /mnt/root /bin/bash

Hopefully now you should be in locked in your filesystem and use your Linux non-bootable system as usual.

Being able to access your /boot/grub directory I suggest you first check that everything inside:

/boot/grub/menu.lst is well defined and there are no problems with the paths to the Linux partitions.

Next issue the following commands which will hopefully recover your broken grub boot loader.

noah:~# grub
noah:~# find /boot/grub/stage1

The second command find /boot/grub/stage1 should provide you with your partitions range e.g. it should return something like:

root (hd0,7)

Nevertheless in my case instead of the expected root (hd0,7) , I was returned

/boot/grub/stage1 not found

Useless to say this is uncool 🙂

As a normal reaction I tried experimenting in order to fix the mess. Logically enough I tried to reinstall grub using the

noah:~# grub-install --root-directory=/boot /dev/sda
noah:~# update-grub

To check if that would fix my grub issues I restarted my notebook. Well now grub menu appeared with some error generated by splashy
Trying to boot any of the setup Linux kernels was failing with some kind of error where the root file system was trying to be loaded from /root directory instead of the normal / because of that neither /proc /dev and /sys filesystems was unable to be mounted and the boot process was interrupting in some kind of rescue mode similar to busybox, though it was a was less flexible than a normal busybox shell.

To solve that shitty issue I once again booted with the Debian Testing (Sid / Squeeze ) Install CD1 and used the commands displayed above to mount my linux partition.

Next I reinstalled the following packages:

noah:~# apt-get update
noah:~# apt-get install --reinstall linux-image-amd64 uswsusp hibernate grub grub-common initramfs-tools

Here the grub reinstall actually required me to install the new grub generation 2 (version 2)
It was also necessary to remove the splashy

noah:~# apt-get remove splashy
As well as to grep through all my /etc/ and look for a /dev/sda6 and substitute it with my changed partition name /dev/sda8

One major thing where I substituted /dev/sda6 to my actual linux partition now with a name /dev/sda8 was in:

initramfs-tools/conf.d/resumeThe kernel reinstall and consequently (update) does offered me to substitute my normal /dev/sda* content in my /etc/fstab to some UUIDS like UUID=ba6058da-37f8-4065-854b-e3d0a874fb4e

Including this UUIDs and restarting now rendered my system completely unbootable … So I booted once again from the debian install cd .. arrgh 🙂 and removed the UUID new included lines in /etc/fstab and left the good old declarations.
After rebooting the system now my system booted once again! Hooray! All my data and everything is completely intact now Thanks God! 🙂

How to fix bug with WordPress domain extra trailing slash (Double wordpress trailing slash)

Monday, July 9th, 2012

How to fix bug with wordpress extra slash, domain double slash issue pic

2 of the wordpress installations, I take care for had been reported an annoying bug today by some colleagues.
The bug consisted in double trailing slash at the end of the domain url e.g.;

http://our-company-domainname.com//

As a result in the urls everywhere there was the double trailing slash appearing i.e.::

http://our-company-domainname.com//countact-us/
http://our-company-domainname.com//languages/

etc.

The bug was reported to happen in the multiolingual version of the wordpress based sites, as the Qtranslate plugin is used on this installations to achieve multiple languages it seemed at first logical that the double slash domain and url wordpress issues are caused for some reason by qTranslate.

Therefore, I initially looked for the cause of the problem, within the wordpress admin settings for qTranslate plugin. After not finding any clue pointing the bug to be related to qTranslate, I've then checked the settings for each individual wordpress Page and Post (There in posts usually one can manually set the exact url pointing to each post and page).
The double slash appeared also in each Post and Page and it wasn't possible to edit the complete URL address to remove the double trailin slashes. My next assumption was the cause for the double slash appearing on each site link is because of something wrong with the sites .htaccess, therefore I checked in the wp main sites directory .htaccess
Strangely .htacces seemed OKAY and there was any rule that somehow might lead to double slashes in URL. WP-sites .htaccess looked like so:
 

server:/home/wp-site1/www# cat .htaccess
RewriteEngine On
RewriteBase /

# Rewrite rules for new content and scripts folder
RewriteRule ^jscripts/(.*)$ wp-includes/js/$1
RewriteRule ^gallery/(.*)$ wp-content/uploads/$1
RewriteRule ^modules/(.*)$ wp-content/plugins/$1
RewriteRule ^gui/(.*)/(.*)$ wp-content/themes/$1/$2 [L]

# Disable direct acceees to wp files if referer is not valid
#RewriteCond %{THE_REQUEST} .wp-*
#RewriteCond %{REQUEST_URI} .wp-*
#RewriteCond %{REQUEST_URI} !.*media-upload.php.*
#RewriteCond %{HTTP_REFERER} !.*cadia.*
#RewriteRule . /error404 [L]

# Standard WordPress rewrite
RewriteCond %{REQUEST_FILENAME} !-f
RewriteCond %{REQUEST_FILENAME} !-d
RewriteRule . /index.php [L]

Onwards, I thought a possible way to fix bug by adding mod_rewrite rules in .htaccess which would do a redirect all requests to http://www.our-company-domainname.com//contact-us/ to http://www.our-company-domainname.com//contact-us/ etc. like so:

RewriteRule ^/(.*)$ /$1

This for unknown reasons to me didn't worked either, finally thanks God I remembered to check the variables in wp-config.php (some month ago or so I added there some variables in order to improve the wordpress websites opening times).

I've figured out I did a mistake in one of the variables by adding an ending slash to the URL. The variable added was:

define('WP_HOME','http://our-company-domainname.com/');

whether instead it should be without the ending trailing slash like so:

define('WP_HOME','http://our-company-domainname.com');

By removing the ending trailing slash:

define('WP_HOME','http://our-company-domainname.com/');

to:

define('WP_HOME','http://our-company-domainname.com');
fixed the issue.
Cheers 😉

Create PNG, JPG, GIF pictures / images from PDF on Linux

Saturday, February 25th, 2012

I've received a PDF file with a plan for development of a bundle of projects, My task was to evaluate this plan and give feeback on the 44 pages PDF document.

Since don't know of program to directly be able edit PDF files on GNU / Linux ?, my initial idea was to open and convert the PDF to ODT / DOC with OpenOffice (Libre Office) and then edit the ODT file.
Unfortunately Open Office oowrite program was unable to open / visualize the PDF file. My assumption is OO failure to open the PDF is because the PDF was generated on Microsoft Windows with Adobe illustrator or smth.

The idea that came to my mind as alternative, way to edit the PDF file was to convert it in pictures edit and then convert the pictures to PDF.
In other words to follow these 3 steps:
1. Convert the PDF document to multiple images
2. Edit each of the images with GIMP or Inkscape
3. Convert back all images to a single PDF file

Some time ago, I've written an article how to create PDF file from many image files in JPEG, PNG or GIF on Linux

. This prior article was exactly describing how to complete Step 3.Therefore all left was to find a way to convert the PDF file to multiple JPEG / PNG / GIF images.

convert command to convert PDF document to multiple pictures which you can take from my earlier article is:

$ convert *.jpg outputpdffile.pdf
Actually in Step 1 I was aiming to do the opposite of what I've previously done.

Hence, in order to convert the singe Project.PDF file to multiple PNG images, I just switched convert IN / OUT arguments order.

hipo@noah:~/project-pdf-to-images$ convert Project.pdf Project.png
...

I've done the PDF to pictures conversion on my notebook running Debian Squeeze (6.0.2) GNU / Linux.Convertion of the PDF file to 44 images, took 25 seconds on my dual core 1.8 Ghz / 2GB RAM Thinkpad r61.
Afterwards, I've had at hand 44 PNG files generated, e.g.:

hipo@noah:~/project-pdf-to-images$ ls -al Project-*.png |wc -l
44

convert was also smart enough to produce correct file naming. The output file names were:
Project-1.png
Project-2.png
etc.

Nicely each number (-1.png) was corresponding to the respective PDF page. For instance Project-10.png was corresponding to page 10 of the Projects.PDF file

Rather ironically, after convertion of the PDF to pictures, while opening the Project-1.png, I've noticed The GIMP – (The GNU Image Manipulation Program) is capable of directly reading PDF files. GIMP has both the option to open files in layers or separate images 😉
Anyways even if GIMP is used to modify the different PDF pages as layers, once completed GIMP doesn't have the ability to save the file as PDF and therefore once saved the file if merging of layers is done the resulting picture becomes ONE BIG MESS.
Therefore it seems my the 3 steps way e.g.:

1. convertion PDF to pictures
2. picture edit with GIMP or Inkscape
3. convertion of pictures back to PDF

is still the only way to "modify PDF" in Linux or BSDs. I will be glad to hear if someone has come up with a better solution?