Posts Tagged ‘php’

Fix “There Has Been a Critical Error on Your Website” wordpress error

Friday, December 2nd, 2022

there-has-been-a-critical-error-on-your-website-wordpress-critical-error-fix

Say you have a shiny working WordPress based website withtout any monitoring set for years but suddenly, you open the site and you get the terrifying error:
 

There Has Been a Critical Error on Your Website

That is quite of a stress for sure. As in the first few minutes you don't understand how this has happened since, you did not touched the perfeclty working site for a very, very long time.
Then you start to debug into the apache / nginx access.log, error.log and mysql mysql.err etc. franticly trying to figure it out the normal ideas pop-up immediately into mind, whether you have a recent backup for the website's database. If you have pair of high availability webservers service or backup databases that serve the traffic via a separate standby instance of the service, you might try to switch off the official service and see whether the standby Webserver / SQL server instance would serve the website fine.
However, if this is not an option and you have no standby backup service as a recovery Plan B option already set. Your only option is to continue to debug what is wrong.
Then the next thing to do is to check whether you don't have a Web Caching or Proxy in front of your webservers that are preventing you to see a recent version of the website and give you some old cache or you don't have an ISP proxy that is giving you some unreal results. That is easily seenable from the Webserver logs. If this is neither the case the next thing is to:
 

Enable WordPress (wp-config.php) Debug mode

By default for Security reasons the WordPress PHP execution debug mode is switched off inside wp-config.php.
When there are odd pages with the WordPress based blog or site however this can easily be changed by modifying the WP_DEBUG true|false value.

To do so edit with a text editor such as vim / nano / mcedit  wp-config.php or if no SSH access to the remote machine, use SFTP / FTP transfer protocol copy the file to your desktop and inspect it and make sure the WP_DEBUG / WP_DEBUG_DISPLAY / WP_DEBUG_LOG has following values:

define( 'WP_DEBUG', true );

define( 'WP_DEBUG_DISPLAY', false );

define( 'WP_DEBUG_LOG', true );

Reloading the Browser window tab with There is a critical error on Your website, you should get some Errors or Warnings like:
 

Warning: Illegal string offset 'parent_slug' in /var/www/websitecom/wp-content/plugins/photo-gallery/booster/main.php on line 180

Warning: Illegal string offset 'slug' in /var/www/websitecom/wp-content/plugins/photo-gallery/booster/main.php on line 180


Then you can temporary disable the problematic problem in that case for example the photo-gallery and recheck the website, and then restore from backup snapshot the respective plugin files version from a moment, when the website was working.

If this doesn't solve it and more plugins are crashing and you can't find an easy way to work-around it you miss a backup, you might try to


Disable all WordPress active plugins

Disable your plugins from the dashboard, visit Plugins > Installed Plugins and tick the checkbox at the top of the list to select them all.
Then click Bulk Actions -> Deactivate, which should be enough to disable any conflicts and restore your site.

You can do essentially the same thing through SSH / FTP session.

Step 1: Log in to your site with SSH / FTP.
Step 2: Open the wp-content folder to find your plugins.
Step 3: Rename the plugins folder to plugins_old and verify that your site is working again via SSH run commands:

# cd  path_to/plugins; mv plugins plugins_old

or rename via FTP client
Step 4: Rename the folder back to “plugins”. The plugins should be disabled still, so you should be able to log in to your dashboard and activate them one by one. If
the plugins reactivate automatically, rename individual plugin folders with _old until your site is restored.

Raise the PHP Memory Limit

Sometimes, a low PHP limitation causes critical errors on WP based blogs and sites, if necessery raise up the memory limitation via:

define( 'WP_MEMORY_LIMIT', '128M' );

Change Max Upload File Size and Text Processing function limits

To increase the max upload file size, add this code to wp-config.php:

ini_set('upload_max_size' , '256M' );

ini_set('post_max_size','256M');

And to fix the breaking of large pages on your site, add this code:

ini_set('pcre.recursion_limit',20000000);
ini_set('pcre.backtrack_limit',10000000);

Clear up any caches

If you use some session caching of the website on the machine such as memcached / ncache / redis / varnish or an haproxy or any proxy in front of the webserver to do some kind of High availability could produce strange  unexpected Critical errors on Your Website, thus restarting such services or cleaning up any cache would be advisable if you have such.
 

What Causes "There Has Been a Critical Error on Your Website" error?


The reason could be practically anything as WP is a kind of multi-comonent free and a bit of bloatware. The general ones could be  from a missing database table / table fields to a messed up plugin after update a disappeared critical plugin or essential wordpress PHP file, but in my specific case the reason was simple the Plugins Auto-update, which I have had the stupidity to enable.

The WordPress Automatic Updates, though saving you effort and Protecting your website in most cases against recent bugs and Exploits and increasing the WP security level, often causes issues and from my personal experience it is not recommended so better avoid it. Again next time you implement any automation to your server make sure you put some kind of monitoring.

Even if you decide to enable it make sure you do it the right way and not like me, by enabling some Monitoring to the WordPress site via Zabbix / Nagios / Cacti / monit  etc to be sure you get notified immediately if the WordPress based site is down.

Saint Georgi of Sofia “the Newest” Bulgarian Confessor Christian saint martyred 1534 AD during reign of Turkish Sultan Selim in Medieval Serdika (Sofia)

Tuesday, June 1st, 2021

Saint-Martyr-George-of-Sofia-Georgi-Sofijski-in-traditional-wear-kalpak

Troparion, voice 4
With a soul wounded by the love of your God, the wise George the Glorious, he preached to the ungodly, Christ God, trampled with his feeth, the Turkish heresy; and when he adorned himself with the crown of martyrdom, you ascended to the heavenly multitudes: ask Christ God to preserve your homeland, this city (Sofia) and the people who always worship your deeds.

On 26-th of May the Bulgarian Orthodox Church celebrates the memory of one of the great Bulgarian Martyr saints Saint Georgi the Newest.
С~тый Геԝ̀ргїй Софїѝскїй Новѣ̀йшїй) St. Georgi (The Bulgarian equivalent name of George) is one of the 3 saints holding the name Georgi which has confessed Christianity refused to accept islam and accepted Martyrdom for Christ in period of 1396 till year 1530 and one of the 9 famous Sofia city saints. Saint Georgi of Sofia the Newest was named after the highly venerated in Bulgarian just like in whole Christian world saint George.

saint-Georgi-Sofijski-saint-great-martyr-George-and-The-Mother-of-God-iconostasis

St. Georgi was born in the city of Medieval Sofia (Sredetz), fortress of Serdika today’s Sofia in a family of Ivan and Maria – a wealthy and society recognized family of that time. He has born after a fervent and lengthly prayers of his parents who couldn’t have children for a long time and has been given a kid by the prayers of Saint Great Martyr George
It is important to say Georgi (the newest) celebrated on 26-th of May is a different saint from St. Georgi called “the new” whose memory in the Church is commemorated on 11-th of February.

saint-Georgi-Sofijski-noveishij-icon

Miracle making icon of saint Georgi Sofiyski (currently in the Church in yard of Alexandrovska Hospital Sofia)

The young Georgi quickly learned to write and read, a skills that only the most educated people usually coming from noble families could do. His favourite activity
in his free time when he was not in help of his parents was reading the Holy Scriptures.
He was grown by his parents in Christian goodness and fervency for the Christian faith.

Sveti_Georgi_Novi-Sofijski-wall-painting-icon-st-George-Sofia
Aged 25 he orphaned as his beloved father passed away to Christ. Georgi posessesed an extraordinary beauty, sharp mind and virtues, seeing the young man in his grief the local Turkish authorities tried as they usually do to attract the youngster to the islamic faith to make their way to interact with Georgi and do their business easier and most importantly have Georgi in their auhotirities congregation consisting only of people belonging to the islam as it was up to the Ottoman Turkish consistution law of the day.

To attract Georgi, turks first tried with hypocritical kindness and a care for the young to help him raise in the power of authorities of the city, not succeeding with that they have, they have forcefully wrapper the Muslim turban on his head and proclaimed him officially Muslim. Feeling offended by the ungodly deed of this enemies of Christ, immediately the saint throw the imposed turban on the ground and trampled on it.
The enraged muslim crowd seing his public offence for the prophet Muhammed handed him over to the Qadi in the court.

Neither the seductive promises of high office nor the cruel tortures could break the unshakable firmness of his Christian faith. The judge ordered that his body be cut into strips from head to toe and that the wounds received be scorched with dirty candles, which made the martyr’s body so hot that his face could not be seen. But all efforts were in vain.

The final verdict of the judge followed – Georgi to be hanged on the main barn in the city of Sofia, where there was a furnace for melting iron and copper ore. The execution command also stated that his body should remain on the gallows for three days in order to begin to decay, so that the faith of the Christians in the incorruptible relics of the saints and in the resurrection of the dead to be refuted and hence disgrace christianity. However, exhausted from his suffering mrtr. Georgi died at the hands of the executioners before they managed to hang him. To fulfill the command turks, anyhow hung him on a rope to show the sentence has been successfully carried out.

For three days the body hung on the gallows without any sign of decomposition, and on the contrary, an unusual fragrance of the holy relics of the martyr wafted through the barn. His mother sat under the gallows and grieving his beloved son hugged her son’s legs, staying next three three days to her son. The hanging took place on May 26, 1530 (according to other document sources in 1534). Thus on 26th of may the Church set a service in memoriam.

Ancient-Church-ROtonda-St-George-Sofia-Bulgaria

5-th Century Church of Rotonda St. George Centre of Sofia

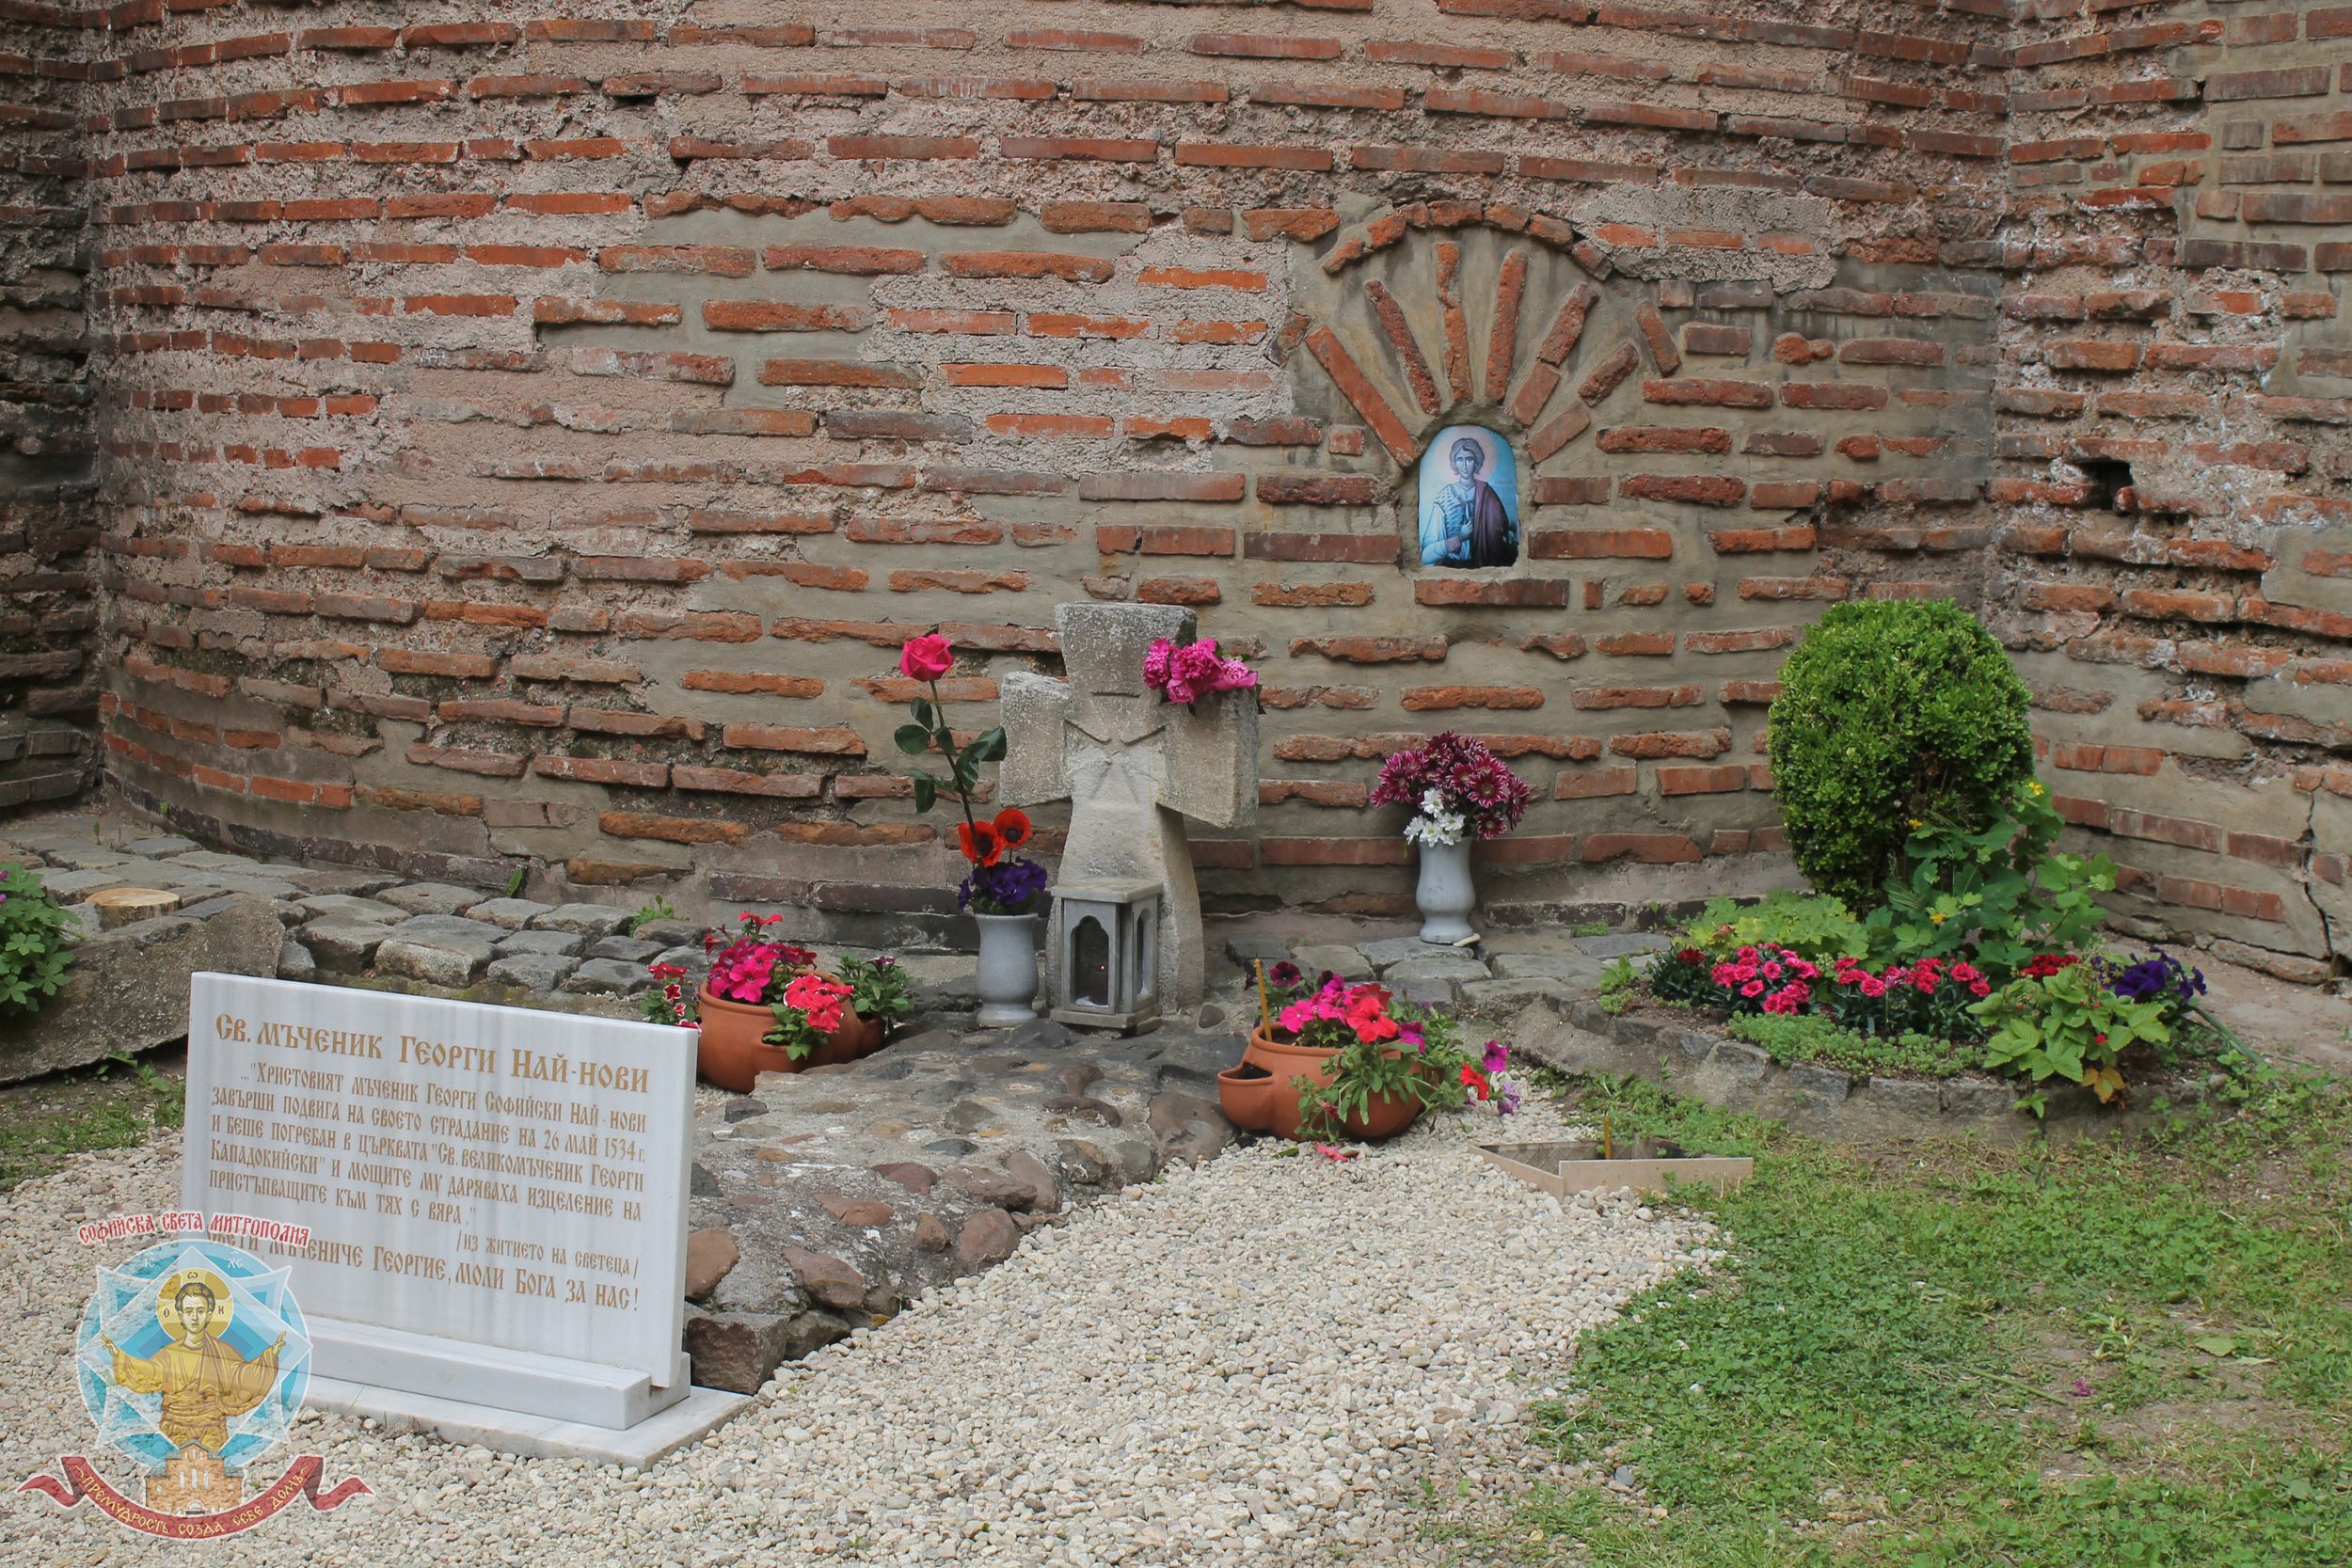
The-Grave-of-Saint-Georgi-Sofiyski-Grobat-na-sv-Georgi-nai-novi

Saint Georgi Sofiyski / Saint George of Sofia the Newest grave near Rotonda Church Saint George in City Center of Sofia, Bulgari

After the expiration of the sentence, the kadi handed over the body of the martyr to be buried in a Christian way, and the burial was solemnly performed by the then Metropolitan of Sofia Jeremiah in the church “St. the great martyr George the Victorious ”. Now these relics are in obscurity. The mother of the martyr died on the 40th day of George’s death and was buried at her son’s feet.

These events took place during the reign of Sultan Suleiman I Kanuni (the Legislator) also known as Suleiman the Magnificent. This “Golden Age” for the Ottoman Empire was a time of unheard of atrocities against Christians in the territory of the empire and very difficult times for the Bulgarian people. The reign of Suleiman I and his father Selim I was a time of obscurantism and severe persecution of the Christian population, a time during which many Christian new martyrs on Balkans had the courage to defend their faith.

saint-Georgi-Sofijski-newest-icon-painting

The capture, trial and torture of St. George of Sofia The latest took place near the then Sofia. Today the place is located in the yard of the famous Alexandrovska Hospital which was a King’s hospital during the times of Kingdom of Bulgaria after liberation took place from the Turks in 1878 y.. The exact location where martyrdom occured is between street St. Georgi Sofiyski ”and“ Pencho Slaveykov ”Blvd.

There was a large stone cross with an inscription on the site, which a few years after 1944, due to the risk of being destroyed, was collected by Sofia priests and is still preserved in the altar of the church “St. Georgi Pobedonosets ”on Blvd. Partriarch Euthymius”. Until the 1940s, a liturgical procession was held from the place of death of the saint to the Rotunda on May 26.
Nowadays happily, the old Lithia tradition is being renewed and a small Lithia is conducted by Bulgarian Orthodox Christian clergy and layman.

In the garden next to the building of the Second Surgical Clinic there was a stone cross, which indicated the place and history of the martyrdom of the saint, and today a temple was built in honor of the saint.

Church-of-saint-Georgi-Sofijski-in-Alexandrovska-hospital-Sofia-Bulgaria-the-place-of-martyrdom-of-saint-Georgi-Sofijski
source: Lives of the Saints. Synodal Publishing House, Sofia, 1991, edited by Parthenius, Bishop of Lefkada and Archimandrite Dr. Athanasius (Bonchev).

Saint_Georgi-naj-novi_Sofijski

HOLY MARTYR GEORGE OF SOFIA THE NEWEST, PRAY GOD FOR US!

Installing usual Software Tools and Development header files and libraries on a newly installed Debian Server

Thursday, February 11th, 2010

installing-usual-software-tools-and-development-header-files-and-libraries-on-newly-installed-Debian-Ubuntu-server
Today I start my work as a system administrator for a new IT company.
My first duties include configuration and installation of some usual programs
used in everyday's sys admin job.
In that manner of thoughts I have long ago realized there is a common group of
tools and software I had to install on almost each and every new configured
Debian GNU / Linux running Server.
Here is a list of packages I usually install on new Debian systems,
even though this exact commands are expected to be executed on Debian (5.0) Lenny
I believe they are quite accurate for Debian Testing and Debian Testing/Unstable,
bleeding edge distributions.
Before I show you the apt-get lines with all the packages, I would advice you to install
and use netselect-apt to select the fastest Debian package mirror near you
So to install and use run the following commands;

aptitude install netselect-apt
netselect-apt -n lenny

Now as netselect-apt would have tested for the fastest mirror and created sources.list
file in your current directory, open the sources.list file and decide what should enter your
official /etc/apt/sources.list file or in other words merge the two files as you like.
Good, now as we have a fast mirror to download our packages let's continue further with the
packages to install.
Excecute the following command to install some of the basic tools and packages:

# install some basic required tools, software and header files
debian-server:~# apt-get install tcpdump mc ncurses-dev htop iftop iptraf nmap tcpdump apache2 apachetop
mysql-server-5.0 phpmyadmin vnstat rsync traceroute tcptrace e2fsprogs hddtemp finger mtr-tiny
netcat screen imagemagick flex snort mysql-server-5.0 sysstat lm-sensors alien rar unrar util-linux curl
vim lynx links elinks sudo autoconf gcc build-essential dpkg-dev webalizer awstats

Herein I'll explain just a few of the installed package and their install
purpose,as they could be unknown to some of the people out there.

apachetop - monitors apache log file in real time similar to gnu top
iftop - display bandwidth usage on selected interface interactively
vnstat - show inbound & outbound traffic usage on selected network interfaces
e2fsprogs - some general tools for creation of ext2 file systems etc.
hddtemp - Utility to monitor hard drive temperature
mtr-tiny - matt's traceroute great traceroute proggie
netcat - TCP/IP swiss army knife, quite helpful for network maintance tasks
snort - an Intrusion Detecting System
build-essential - installs basic stuff required for most applications compiled from source code
sysstat - generates statistics about server load each and every ten minutes, check man for more
lm-sensors - enables you to track your system hardware sensors information and warn in CPU heatups etc.

I believe the rest of them are no need to be explained, if you're not familiar with them check the manuals.
So far so good but this is not all I had to install, as you probably know most Apache webservers nowadays
are running PHP and are using a dozen of PHP libraries / extensions not originally bundled with PHP install
Therefore here are some more packages related to php to install that would install some more php goodies.

# install some packages required for many php enabled applications
debian-esrver:~# apt-get install php-http php-db php-mail php-net-smtp php-net-socket php-pear php-xml-parser
php5-curl php5-gd php5-imagick php5-mysql php5-odbc php5-recode php5-sybase php5-xmlrpc php5-dev

As I said that is mostly the basic stuff that is a must have on most of the Debian servers I have
configured this days, of course this is not applicable to all situations, however I hope
this would be of use to somebody out there.

Installing the phpbb forum on Debian (Squeeze/Sid) Linux

Saturday, September 11th, 2010

howto-easily-install-phpbb-on-debian-gnu-linux

I've just installed the phpbb forum on a Debian Linux because we needed a goodquick to install communication media in order to improve our internal communication in a student project in Strategic HR we're developing right now in Arnhem Business School.

Here are the exact steps I followed to have a properly it properly instlled:

1. Install the phpbb3 debian package
This was pretty straight forward:

debian:~# apt-get install phpbb3

At this point of installation I've faced a dpkg-reconfigure phpbb deb package configuration issue:
I was prompted to pass in the credentials for my MySQL password right after I've selected the MySQL as my preferred database back engine.
I've feeded my MySQL root password as well as my preferred forum database name, however the database installation failed because, somehow the configuration procedure tried to connect to my MySQL database with the htcheck user.
I guess this has to be a bug in the package itself or something from my previous installation misconfigured the way the debian database backend configuration was operating.
My assumption is that my previously installed htcheck package or something beforehand I've done right after the htcheck and htcheck-php packages installation.

after the package configuration failed still the package had a status of properly installed when I reviewed it with dpkg
I've thought about trying to manually reconfigure it using the dpkg-reconfigure debian command and I gave it a try like that:

debian:~# dpkg-reconfigure phpbb3

This time along with the other fields I've to fill in the ncurses interface I was prompted for a username before the password prompted appeared.
Logically I tried to fill in the root as it's my global privileges MySQL allowed user.
However that didn't helped at all and again the configuration tried to send the credentials with user htcheck to my MySQL database server.
To deal with the situation I had to approach it in the good old manual way.

2. Manually prepare / create the required phpbb forum database

To completet that connected to the MySQL server with the mysql client and created the proper database like so:

debian:~# mysql -u root -p
mysql>
CREATE database phpbb3forum;

3. Use phpmyadmin or the mysql client command line to create a new user for the phpbb forum

Here since adding up the user using the phpmyadmin was a way easier to do I decided to go that route, anyways using the mysql cli is also an option.

From phpmyadmin It's pretty easy to add a new user and grant privileges to a certain database, to do so navigate to the following database:

Privileges -> -> Add a new user ->

Now type your User name: , Host , Password , Re-type password , also for a Host: you have to choose Local from the drop down menu.

Leave the Database for user field empty as we have already previously created our desired database in step 2 of this article

Now press the "Go" button and the user will get created.

Further after choose the Privileges menu right on the bottom of the page once again, select through the checkbox the username you have just created let's say the previously created user is phpbb3

Go to Action (There is a picture with a man and a pencil on the right side of this button

Scroll down to the page part saying Database-specific privileges and in the field Add privileges on the following database: fill in your previosly created database name in our case it's phpbb3forum

and then press the "Go" button once again.
A page will appear where you will have to select the exact privileges you would like to grant on the specific selected database.
For some simplicity just check all the checkbox to grant as many privilegs to your database as you could.
Then again you will have to press the "Go" button and there you go you should have already configured an username and database ready to go with your new phpbb forum.

4. Create a virtualhost if you would like to have the forum as a subdomain or into a separate domain

If you decide to have the forum on a separate sub-domain or domain as I did you will have to add some kind of Virtualhost into either your Apache configuration /etc/apache2/apache2.conf or into where officially the virutualhosts are laid in Debian Linux in /etc/apache2/sites-available
I've personally created a new file like for instance /etc/apache2/sites-available/mysubdomain.mydomain.com

Here is an example content of the new Virtualhost:

<VirtualHost *>
ServerAdmin admin-email@domain.com
ServerName mysubdomain.domain.com

# Indexes + Directory Root.
DirectoryIndex index.php index.php5 index.htm index.html index.pl index.cgi index.phtml index.jsp index.py index.asp

DocumentRoot /usr/share/phpbb3/www/

# Logfiles
ErrorLog /var/log/apache2/yourdomain/error.log
CustomLog /var/log/apache2/yourdomain/access.log combined
# CustomLog /dev/null combined
<Directory /usr/share/phpbb3/www/>
Options FollowSymLinks MultiViews -Includes ExecCGI
AllowOverride All
Order allow,deny
allow from all </Directory>
</VirtualHost>

In above Virtualhost just change the values for ServerAdmin , ServerName , DocumentRoot , ErrorLog , CustomLog and Directory declaration to adjust it to your situation.

5. Restart the Apache webserver for the new Virtualhost to take affect

debian:~# /etc/init.d/apache2 restart

Now accessing your http://mysubdomain.domain.com should display the installed phpbb3 forum
The default username and password for your forum you can use straight are:

username: admin
password: admin

So far so good you by now have the PHPBB3 forum properly installed and running, however if you try to Register a new user in the forum you will notice that it's impossible because of a terrible ugly message reading:

Sorry but this board is currently unavailable.

I've spend few minutes online to scrape through the forums before I can understand what I have to stop that annoying message from appearing and allow new users to register in the phpbb forum

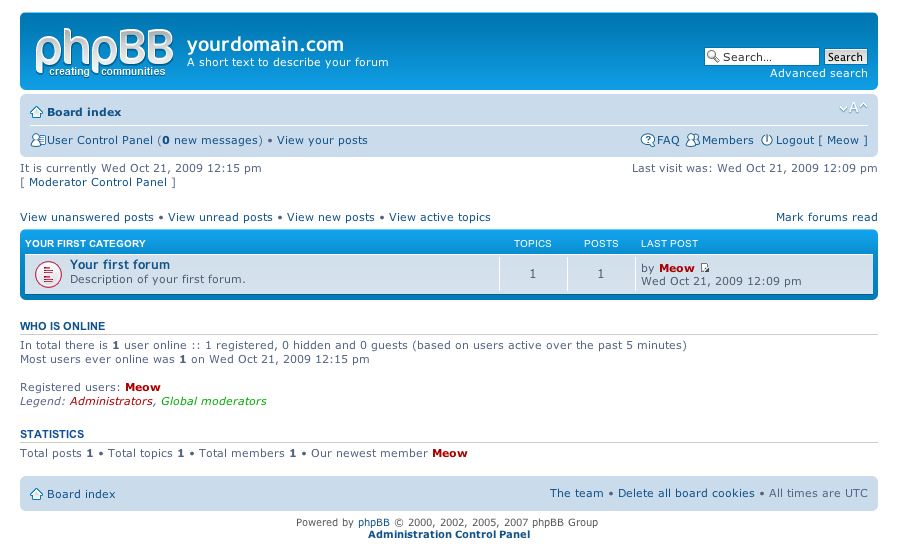
The solution came natural and was a setting that had to be changed with the forum admin account, thus login as admin and look at the bottom of the page, below the text reading Powered by phpBB © 2000, 2002, 2005, 2007 phpBB Group you will notice a link with Administration Control Panel
just press there a whole bunch of menus will appear on the screen allowing you to do numerous things, however what you will have to do is go to
Board Settings -> Disable Board

and change the radio button there to say No

That's all now your forum will be ready to go and your users can freely register and if the server where the forum is installed has an already running mail server, they will receive an emails with a registration data concerning their new registrations in your new phpbb forum.
Cheers and Enjoy your new shiny phpbb Forum 🙂

How to disable tidy HTML corrector and validator to output error and warning messages

Sunday, March 18th, 2012

I've noticed in /var/log/apache2/error.log on one of the Debian servers I manage a lot of warnings and errors produced by tidy HTML syntax checker and reformatter program.

There were actually quite plenty frequently appearing messages in the the log like:

...
To learn more about HTML Tidy see http://tidy.sourceforge.net
Please fill bug reports and queries using the "tracker" on the Tidy web site.
Additionally, questions can be sent to html-tidy@w3.org
HTML and CSS specifications are available from http://www.w3.org/
Lobby your company to join W3C, see http://www.w3.org/Consortium
line 1 column 1 - Warning: missing <!DOCTYPE> declaration
line 1 column 1 - Warning: plain text isn't allowed in <head> elements
line 1 column 1 - Info: <head> previously mentioned
line 1 column 1 - Warning: inserting implicit <body>
line 1 column 1 - Warning: inserting missing 'title' element
Info: Document content looks like HTML 3.2
4 warnings, 0 errors were found!
...

I did a quick investigation on where from this messages are logged in error.log, and discovered few .php scripts in one of the websites containing the tidy string.
I used Linux find + grep cmds find in all php files the "tidy "string, like so:

server:~# find . -iname '*.php'-exec grep -rli 'tidy' '{}' ;
find . -iname '*.php' -exec grep -rli 'tidy' '{}' ; ./new_design/modules/index.mod.php
./modules/index.mod.php
./modules/index_1.mod.php
./modules/index1.mod.php

Opening the files, with vim to check about how tidy is invoked, revealed tidy calls like:

exec('/usr/bin/tidy -e -ashtml -utf8 '.$tmp_name,$rett);

As you see the PHP programmers who wrote this website, made a bigtidy mess. Instead of using php5's tidy module, they hard coded tidy external command to be invoked via php's exec(); external tidy command invocation.
This is extremely bad practice, since it spawns the command via a pseudo limited apache shell.
I've notified about the issue, but I don't know when, the external tidy calls will be rewritten.

Until the external tidy invocations are rewritten to use the php tidy module, I decided to at least remove the tidy warnings and errors output.

To remove the warning and error messages I've changed:

exec('/usr/bin/tidy -e -ashtml -utf8 '.$tmp_name,$rett);

exec('/usr/bin/tidy --show-warnings no --show-errors no -q -e -ashtml -utf8 '.$tmp_name,$rett);

The extra switches meaning is like so:

q – instructs tidy to produce quiet output
-e – show only errors and warnings
–show warnings no && –show errors no, completely disable warnings and error output

Onwards tidy no longer logs junk messages in error.log Not logging all this useless warnings and errors has positive effect on overall server performance especially, when the scripts, running /usr/bin/tidy are called as frequently as 1000 times per sec. or more

Tools to scan a Linux / Unix Web server for Malware and Rootkits / Lynis and ISPProtect – clean Joomla / WordPress and other CMS for malware and malicious scripts and trojan codes

Monday, March 14th, 2016

Linux-BSD-Unix-Rootkit-Malware-XSS-Injection-spammer-scripts-clean-howto-manual

If you have been hacked or have been suspicious that someone has broken up in some of the shared web hosting servers you happent o manage you already probably have tried the server with rkhuter, chroot and unhide tools which gives a general guidance where a server has been compromised

However with the evolution of hacking tools out there and the boom of Web security XSS / CSS / Database injections and PHP scripts vulnerability catching an intruder especially spammers has been becoming more and more hard to achieve.

Just lately a mail server of mine's load avarage increased about 10 times, and the CPU's and HDD I/O load jump over the sky.
I started evaluating the situation to find out what exactly went wrong with the machine, starting with a hardware analysis tools and a physical check up whether all was fine with the hardware Disks / Ram etc. just to find out the machine's hardware was working perfect.
I've also thoroughfully investigated on Logs of Apache, MySQL, TinyProxy and Tor server and bind DNS and DJBDns  which were happily living there for quite some time but didn't found anything strange.

Not on a last place I investigated TOP processes (with top command) and iostat  and realized the CPU high burst lays in exessive Input / Output of Hard Drive. Checking the Qmail Mail server logs and the queue with qmail-qstat was a real surprise for me as on the queue there were about 9800 emails hanging unsent, most of which were obviously a spam, so I realized someone was heavily spamming through the server and started more thoroughfully investigating ending up to a WordPress Blog temp folder (writtable by all system users) which was existing under a Joomla directory infrastructure, so I guess someone got hacked through the Joomla and uploaded the malicious php spammer script to the WordPress blog. I've instantly stopped and first chmod 000 to stop being execuded and after examing deleted view73.php, javascript92.php and index8239.php which were full of PHP values with binary encoded values and one was full of encoded strings which after being decoding were actually the recepient's spammed emails.
BTW, the view*.php javascript*.php and index*.php files were owned by www-data (the user with which Apache was owned), so obviously someone got hacked through some vulnerable joomla or wordpress script (as joomla there was quite obscure version 1.5 – where currently Joomla is at version branch 3.5), hence my guess is the spamming script was uploaded through Joomla XSS vulnerability).

As I was unsure wheteher the scripts were not also mirrored under other subdirectories of Joomla or WP Blog I had to scan further to check whether there are no other scripts infected with malware or trojan spammer codes, webshells, rootkits etc.
And after some investigation, I've actually caught the 3 scripts being mirrored under other webside folders with other numbering on filename view34.php javascript72.php, index8123.php  etc..

I've used 2 tools to scan and catch malware the trojan scripts and make sure no common rootkit is installed on the server.

1. Lynis (to check for rootkits)
2. ISPProtect (Proprietary but superb Website malware scanner with a free trial)

1. Lynis – Universal security auditing tool and rootkit scanner

Lynis is actually the well known rkhunter, I've used earlier to check servers BSD and Linux servers for rootkits.
To have up-to-date version of Lynis, I've installed it from source:
 

cd /tmp
wget https://cisofy.com/files/lynis-2.1.1.tar.gz
tar xvfz lynis-2.1.1.tar.gz
mv lynis /usr/local/
ln -s /usr/local/lynis/lynis /usr/local/bin/lynis


Then to scan the server for rootkits, first I had to update its malware definition database with:
 

lynis update info


Then to actually scan the system:
 

lynis audit system


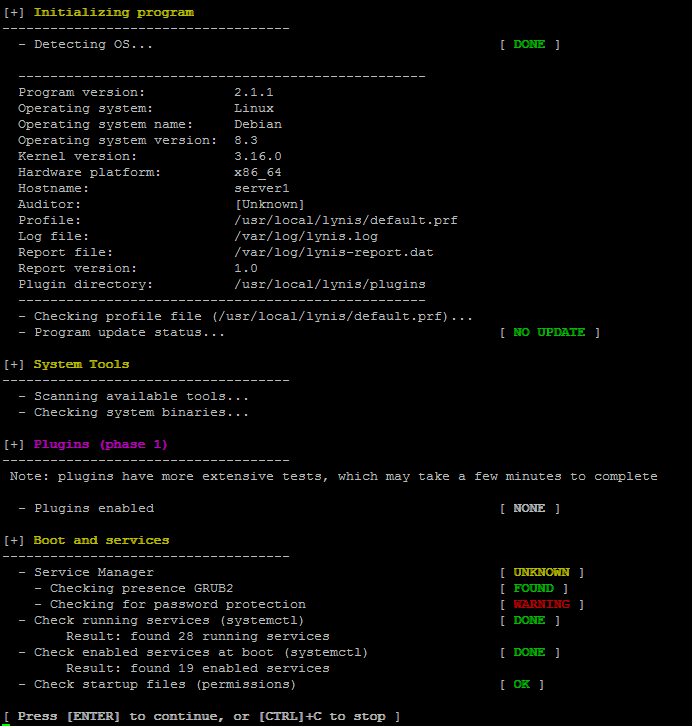
Plenty of things will be scanned but you will be asked on a multiple times whether you would like to conduct different kind fo system services and log files, loadable kernel module rootkits and  common places to check for installed rootkits or server placed backdoors. That's pretty annoying as you will have to press Enter on a multiple times.

lynis-asking-to-scan-for-rootkits-backdoors-and-malware-your-linux-freebsd-netbsd-unix-server

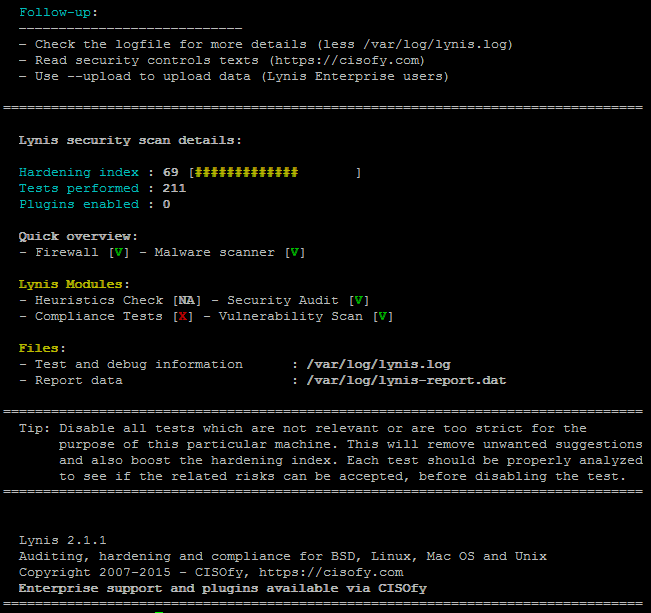
Once scan is over you will get a System Scan Summary like in below screenshot:

lynis-scanned-server-for-rootkit-summer-results-linux-check-for-backdoors-tool

Lynis suggests also a very good things that might be tampered to make the system more secure, so using some of its output when I have time I'll work out on hardening all servers.

To prevent further incidents and keep an eye on servers I've deployed Lynis scan via cron job once a month on all servers, I've placed under a root cronjob on every first dae of month in following command:


server:~# crontab -u root -e
0 3 1 * * /usr/local/bin/lynis –quick 2>&1 | mail -s "lynis output of my server" admin-mail@my-domain.com)


2. ISPProtect – Website malware scanner

ISPProtect is a malware scanner for web servers, I've used it to scan all installed  CMS systems like WordPress, Joomla, Drupal etc.
ISPProtect is great for PHP / Pyhon / Perl and other CMS based frameworks.
ISPProtect contains 3 scanning engines: a signature based malware scanner, a heuristic malware scanner, and a scanner to show the installation directories of outdated CMS systems.
Unfortunately it is not free software, but I personally used the FREE TRIAL option  which can be used without registration to test it or clean an infected system.
I first webserver first locally for the infected site and then globally for all the other shared hosting websites.

As I wanted to check also rest of hosted websites, I've run ISPProtect over the all bunch of installed websites.
Pre-requirement of ISPProtect is to have a working PHP Cli and Clamav Anti-Virus installed on the server thus on RHEL (RPM) based servers make sure you have it installed if not:
 

server:~# yum -y install php

server:~# yum -y install clamav


Debian based Linux servers web hosting  admins that doesn't have php-cli installed should run:
 

server:~# apt-get install php5-cli

server:~# apt-get install clamav


Installing ISPProtect from source is with:

mkdir -p /usr/local/ispprotect
chown -R root:root /usr/local/ispprotect
chmod -R 750 /usr/local/ispprotect
cd /usr/local/ispprotect
wget http://www.ispprotect.com/download/ispp_scan.tar.gz
tar xzf ispp_scan.tar.gz
rm -f ispp_scan.tar.gz
ln -s /usr/local/ispprotect/ispp_scan /usr/local/bin/ispp_scan


To initiate scan with ISPProtect just invoke it:
 

server:~# /usr/local/bin/ispp_scan


ispprotect-scan-websites-for-malware-and-infected-with-backdoors-or-spamming-software-source-code-files

I've used it as a trial

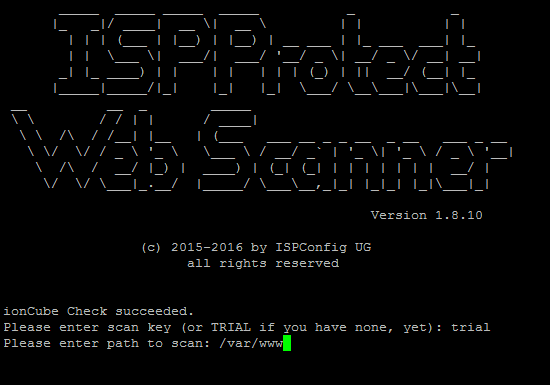
Please enter scan key:  trial
Please enter path to scan: /var/www

You will be shown the scan progress, be patient because on a multiple shared hosting servers with few hundred of websites.
The tool will take really, really long so you might need to leave it for 1 hr or even more depending on how many source files / CSS / Javascript etc. needs to be scanned.

Once scan is completed scan and infections found logs will be stored under /usr/local/ispprotect, under separate files for different Website Engines and CMSes:

After the scan is completed, you will find the results also in the following files:
 

Malware => /usr/local/ispprotect/found_malware_20161401174626.txt
Wordpress => /usr/local/ispprotect/software_wordpress_20161401174626.txt
Joomla => /usr/local/ispprotect/software_joomla_20161401174626.txt
Drupal => /usr/local/ispprotect/software_drupal_20161401174626.txt
Mediawiki => /usr/local/ispprotect/software_mediawiki_20161401174626.txt
Contao => /usr/local/ispprotect/software_contao_20161401174626.txt
Magentocommerce => /usr/local/ispprotect/software_magentocommerce_20161401174626.txt
Woltlab Burning Board => /usr/local/ispprotect/software_woltlab_burning_board_20161401174626.txt
Cms Made Simple => /usr/local/ispprotect/software_cms_made_simple_20161401174626.txt
Phpmyadmin => /usr/local/ispprotect/software_phpmyadmin_20161401174626.txt
Typo3 => /usr/local/ispprotect/software_typo3_20161401174626.txt
Roundcube => /usr/local/ispprotect/software_roundcube_20161401174626.txt


ISPProtect is really good in results is definitely the best malicious scripts / trojan / trojan / webshell / backdoor / spammer (hacking) scripts tool available so if your company could afford it you better buy a license and settle a periodic cron job scan of all your servers, like lets say:


server:~# crontab -u root -e
0 3  1 * *   /usr/local/ispprotect/ispp_scan –update && /usr/local/ispprotect/ispp_scan –path=/var/www –email-results=admin-email@your-domain.com –non-interactive –scan-key=AAA-BBB-CCC-DDD


Unfortunately ispprotect is quite expensive so I guess most small and middle sized shared hosting companies will be unable to afford it.
But even for a one time run this tools worths the try and will save you an hours if not days of system investigations.
I'll be glad to hear from readers if aware of any available free software alternatives to ISPProtect. The only one I am aware is Linux Malware Detect (LMD).
I've used LMD in the past but as of time of writting this article it doesn't seems working any more so I guess the tool is currently unsupported / obsolete.


Apache Webserver disable file extension – Forbid / Deny access in Apache config to certain file extensions for a Virtualhost

Monday, March 30th, 2015


If you're a Webhosting company sysadmin like me and you already have configured directory listing for certain websites / Vhosts and those files are mirrored from other  development webserver location but some of the uploaded developer files extensions which are allowed to be interptered such as php include files .inc / .htaccess mod_rewrite rules / .phps / .html / .txt need to be working on the dev / test server but needs to be disabled (excluded) from delivery or interpretting for some directory on the prod server.

Open Separate host VirtualHost file or Apache config (httpd.conf / apache2.conf)  if all Vhosts  for which you want to disable certain file extensions and add inside:

<Directory "/var/www/sploits">
        AllowOverride All

</Directory>


Extension Deny Rules such as:

For disabling .inc files from inclusion from other PHP sources:
 

<Files  ~ "\.inc$">
  Order allow,deny
  Deny from all
</Files>


To Disable access to .htaccess single file only


<Files ~ "^\.htaccess">
  Order allow,deny
  Deny from all
</Files>


To Disable .txt from being served by Apache and delivered to requestor browser:


<Files  ~ "\.txt$">
  Order allow,deny
  Deny from all
</Files>


To Disable any left intact .html from being delivered to client:


<Files  ~ "\.html$">
  Order allow,deny
  Deny from all
</Files>


Do it for as many extensions as you need.
Finally to make changes affect restart Apache as usual:

If on Deb based Linux issue:

/etc/init.d/apach2 restart


On CentOS / RHEL and other Redhats / RedHacks 🙂

/etc/init.d/httpd restart

WordPress Security: Fix WordPress wp-config.php improper permissions to protect your sites from Database password steal / Website deface

Thursday, March 12th, 2015

wordpress-security-Fix-wordpress-wp-config-improper-permissions-to-protect-your-sites-from-Database-pass-steal
Keeping WordPress Site / Blog and related installed plugins up-to-date
is essential to prevent an attacker to hack into your Site / Database and deface your site, however if you're a company providing shell access from Cpanel / Plesk / Kloxo Panel to customers often customers are messing up permissions leaving important security credential files such as wp-config.php (which is storing user / pass credentials about connection to MySQL / PostgreSQL to have improper permissions and be world readable e.g. have permissions such as 666 or 777 while in reality the WordPress recommended permissions for wp-config.php is 600. I will skip here to explain in details difference between file permissions on Linux as this is already well described in any Linux book, however I just will recommend for any Share hosting Admin where Wordperss is hosted on Lighttpd / Apache Webserver + Some kind of backend database to be extra cautious.

Hence it is very useful to list all your WordPress sites on server wp-config.php permissions with find like this:


find /  -iname 'wp-config.php' -print1;


I find it a generally good practice to also automatically set all wp-config.php permissions to 600 (6= Read / Write  permissions only for File Owner  user 0 = No permissions for All groups, 0 = No Permissions for all non-owner users)

If find command output gives you some file permissions such as:
 

ls -al /var/www/wordpress-bak/wp-config.php
-rw-rw-rw- 1 www-data www-data 2654 jul 28  2009 wp-config.php


E.g. file permission has 666 permissions (Readable for all users), then it is wise to fix this with:
 

chmod 600 /var/www/wordpress-bak/wp-config.php


It is generally a very good practice to run also a chmod 600 to each and every found wp-config.php file on server:
 

find /  -iname 'wp-config.php' -print1 -exec chmod 600 '{}' \;


Above command will also print each file to whcih permission is set to Read / Write for Owner (this si done with -print1 option).

It is a good practice for shared hosting server to always configure a root cronjob to run above find chmod command at least once daily (whenever server hosts 50 – 100 wordpress+ more sites).
 

crontab -u root -l | { cat; echo “05 03 * * * find /  -iname 'wp-config.php' -print1 -exec chmod 600 '{}' \; } | crontab – 


If you don't have the 600 permissions set for all wp-config.php files this security "backdoor" can be used by any existing non-root user to be read and to break up (crack)  in your database and even when there are Deface bot-nets involved to deface all your hosted server wordpress sites.

One of my servers with wordpress has just recently suffered with this little but very important security hole due to a WordPress site directory backup  with improper permissions which allowed anyone to enter MySQL database, so I guess there are plenty of servers with this hidden vulnerability silently living.

Many thanks to my dear friend (Dimitar PaskalevNomen for sharing with me about this vulnerability! Very important note to make here is admins who are using some security enhancement modules such as SuPHP (which makes Apache webserver to run Separate Website instances with different user), should be careful with his set all wp-config.php modules to Owner, as it is possible the wp-config.php owner change to make customer WP based websites inaccessible.

Another good security measure to  protect your server WordPress based sites from malicious theme template injections (for both personal own hosted wordpress based blog / sites or a WordPress hosting company) is to install and activate WordPress Antivirus plugin.

How to install nginx webserver from source on Debian Linux / Install Latest Nginx on Debian

Wednesday, March 23rd, 2011

Nginx install server logo
If you're running a large website consisting of a mixture of php scripts, images and html. You probably have noticed that using just one Apache server to serve all the content is not that efficient

Each Apache child (I assume you're using Apache mpm prefork consumes approximately (20MB), this means that each client connection would consume 20 mb of your server memory.
This as you can imagine is truly a suicide in terms of memory. Each request for a picture, css or simple html file would ask Apache to fork another process and will consume (20mb of extra memory form your server mem capacity)!.

Taking in consideration all this notes and the need for some efficiency here, the administrator should normally think about dividing the processing of the so called static content from the dynamic content served on the server.

Apache is really a nice webserver software but with all the loaded modules to serve dynamic content, for instance php, cgi, python etc., it's becoming not the best solution for handling a (css, javascript, html, flv, avi, mov etc. files).

Even a plain Apache server installation without (libphp, mod_rewrite mod deflate etc.) is still not dealing efficiently enough with the aforementioned static files content

Here comes the question if Apache is not that quick and efficient in serving static files, what then? The answer is caching webserver! By caching the regular static content files, your website visitors will benefit by experiencing shorter webserver responce files in downloading static contents and therefore will generally hasten your website and improve the end user's experience.

There are plenty of caching servers out there, some are a proprietary software and some are free software.

However the three most popular servers out there for static file content serving are:

  • Squid,
  • Varnish
  • Nginx

In this article as you should have already found out by the article title I'll discuss Nginx

You might ask why exactly Nginx and not some of the other twos, well simply cause Squid is too complicated to configure and on the other hand does provide lower performance than Nginx. On the other hand Varnish is also a good solution for static file webserver, but I believe it is not tested enough. However I should mention that my experience with testing varnish on my own home router is quite good by so far.

If you're further interested into varhisn cache I would suggest you checkout www.varhisn-cache.org .

Now as I have said a few words about squid and varhisn let's proceed to the essence of the article and say few words about nginx

Here is a quote describing nginx in a short and good manner directly extracted from nginx.com

nginx [engine x] is a HTTP and reverse proxy server, as well as a mail proxy server written by Igor Sysoev. It has been running for more than five years on many heavily loaded Russian sites including Rambler (RamblerMedia.com). According to Netcraft nginx served or proxied 4.70% busiest sites in April 2010. Here are some of success stories: FastMail.FM, WordPress.com.

By default nginx is available ready to be installed in Debian via apt-get, however sadly enough the version available for install is pretty much outdated as of time of writting the nginx debian version in lenny's deb package repositories is 0.6.32-3+lenny3

This version was release about 2 years ago and is currently completely outdated, therefore I found it is not a good idea to use this old and probably slower release of nginx and I jumped further to install my nginx from source:
Nginx source installation actually is very simple on Linux platforms.

1. As a first step in order to be able to succeed with the install from source make sure your system you have installed the packages:

debian:~# apt-get install libpcre3 libpcre3-dev libpcrecpp0 libssl-dev zlib1g-dev build-essential

2. Secondly download latest nginx source code tarball

Check out on http://nginx.com/download the latest stable release of nginx and further issue the commands below:

debian:~# cd /usr/local/src
debian:/usr/local/src# wget http://nginx.org/download/nginx-0.9.6.tar.gz

3.Unarchive nginx source code

debian:/usr/local/src#tar -zxvvf nginx-0.9.6.tar.gz
...

The nginx server requirements for me wasn't any special so I proceeded and used the nginx ./configure script which is found in nginx-0.9.6

4. Compline nginx server

debian:/usr/local/src# cd nginx-0.9.6
debian:/usr/local/src/nginx-0.9.6# ./configure && make && make install
+ Linux 2.6.26-2-amd64 x86_64
checking for C compiler ... found
+ using GNU C compiler
+ gcc version: 4.3.2 (Debian 4.3.2-1.1)
checking for gcc -pipe switch ... found
...
...

The last lines printed by the nginx configure script are actually the major interesting ones for administration purposes the default complation options in my case were:

Configuration summary
+ using system PCRE library
+ OpenSSL library is not used
+ md5: using system crypto library
+ sha1 library is not used
+ using system zlib library

nginx path prefix: "/usr/local/nginx"
nginx binary file: "/usr/local/nginx/sbin/nginx"
nginx configuration prefix: "/usr/local/nginx/conf"
nginx configuration file: "/usr/local/nginx/conf/nginx.conf"
nginx pid file: "/usr/local/nginx/logs/nginx.pid"
nginx error log file: "/usr/local/nginx/logs/error.log"
nginx http access log file: "/usr/local/nginx/logs/access.log"
nginx http client request body temporary files: "client_body_temp"
nginx http proxy temporary files: "proxy_temp"
nginx http fastcgi temporary files: "fastcgi_temp"
nginx http uwsgi temporary files: "uwsgi_temp"
nginx http scgi temporary files: "scgi_temp"

If you want to setup nginx server to support ssl (https) and for instance install nginx to a different server path you can use some ./configure configuration options, for instance:

./configure –sbin-path=/usr/local/sbin –with-http_ssl_module

Now before you can start the nginx server, you should also set up the nginx init script;

5. Download and set a ready to use script with cmd:

debian:~# cd /etc/init.d
debian:/etc/init.d# wget https://www.pc-freak.net/files/nginx-init-script
debian:/etc/init.d# mv nginx-init-script nginx
debian:/etc/init.d# chmod +x nginx

6. Configure Nginx

Nginx is a really easy and simple server, just like the Russians, Simple but good!
By the way it's interesting to mention nginx has been coded by a Russian, so it's robust and hard as a rock as all the other Russian creations 🙂
Nginx configuration files in a default install as the one in my case are to be found in /usr/local/nginx/conf

In the nginx/conf directory you're about to find the following list of files which concern nginx server configurations:

deiban:/usr/local/nginx:~# ls -1
fastcgi.conf
fastcgi.conf.default
fastcgi_params
fastcgi_params.default
koi-utf
koi-win
mime.types
mime.types.default
nginx.conf
nginx.conf.default
scgi_params
scgi_params.default
uwsgi_params
uwsgi_params.default
win-utf

The .default files are just a copy of the ones without the .default extension and contain the default respective file directives.

In my case I'm not using fastcgi to serve perl or php scripts via nginx so I don't need to configure the fastcgi.conf and fastcgi_params files, the scgi_params and uwsgi_params conf files are actually files which contain nginx configuration directives concerning the use of nginx to process SSI (Server Side Include) scripts and therefore I skip configuring the SSI conf files.
koi-utf and koi-win are two files which usually you don't need to configure and aims the nginx server to support the UTF-8 character encoding and the mime.types conf is a file which has a number of mime types the nginx server will know how to handle.

Therefore after all being said the only file which needs to configured is nginx.conf

7. Edit /usr/local/nginx/conf/nginx.conf

debian:/usr/local/nginx:# vim /usr/local/nginx/conf/nginx.conf

Therein you will find the following default configuration:

#gzip on;

server {
listen 80;
server_name localhost;

#charset koi8-r;

#access_log logs/host.access.log main;

location / {
root html;
index index.html index.htm;
}
#error_page 404 /404.html;

# redirect server error pages to the static page /50x.html
#
error_page 500 502 503 504 /50x.html;
location = /50x.html {
root html;
}

In the default configuration above you need to modify only the above block of code as follows:

server {
listen 80;
server_name yoursitedomain.com;

#charset koi8-r;

#access_log logs/access.log main;

location / {
root /var/www/yoursitedomain.com/html;
index index.html index.htm;
}

Change the yoursitedomain.com and /var/www/yoursitedomain.com/html with your directory and website destinations.

8. Start nginx server with nginx init script

debian:/usr/local/nginx:# /etc/init.d/nginx start
Starting nginx:

This should bring up the nginx server, if something is miss configured you will notice also some error messages, as you can see in my case in above init script output, thanksfully there are no error messages.
Note that you can also start nginx directly via invoking /usr/local/nginx/sbin/nginx binary

To check if the nginx server has properly started from the command line type:

debian:/usr/local/nginx:~# ps ax|grep -i nginx|grep -v grep
9424 ? Ss 0:00 nginx: master process /usr/local/nginx/sbin/nginx
9425 ? S 0:00 nginx: worker process

Another way to check if the web browser is ready to serve your website file conten,t you can directly access your website by pointing your browser to with http://yoursitedomain.com/, you should get your either your custom index.html file or the default nginx greeting Welcome to nginx

9. Add nginx server to start up during system boot up

debian:/usr/local/nginx:# /usr/sbin/update-rc.d -f nginx defaults

That's all now you have up and running nginx and your static file serving will require you much less system resources, than with Apache.
Hope this article was helpful to somebody, feedback on it is very welcome!