Posts Tagged ‘CSS’
Sunday, March 18th, 2012 
I've noticed in /var/log/apache2/error.log on one of the Debian servers I manage a lot of warnings and errors produced by tidy – HTML syntax checker and reformatter program.
There were actually quite plenty frequently appearing messages in the the log like:
...

To learn more about HTML Tidy see http://tidy.sourceforge.net

Please fill bug reports and queries using the "tracker" on the Tidy web site.

Additionally, questions can be sent to html-tidy@w3.org

HTML and CSS specifications are available from http://www.w3.org/

Lobby your company to join W3C, see http://www.w3.org/Consortium

line 1 column 1 - Warning: missing <!DOCTYPE> declaration

line 1 column 1 - Warning: plain text isn't allowed in <head> elements

line 1 column 1 - Info: <head> previously mentioned

line 1 column 1 - Warning: inserting implicit <body>

line 1 column 1 - Warning: inserting missing 'title' element

Info: Document content looks like HTML 3.2

4 warnings, 0 errors were found!

...
I did a quick investigation on where from this messages are logged in error.log, and discovered few .php scripts in one of the websites containing the tidy string.
I used Linux find + grep cmds find in all php files the "tidy "string, like so:
server:~# find . -iname '*.php'-exec grep -rli 'tidy' '{}' ;

find . -iname '*.php' -exec grep -rli 'tidy' '{}' ; ./new_design/modules/index.mod.php

./modules/index.mod.php

./modules/index_1.mod.php

./modules/index1.mod.php
Opening the files, with vim to check about how tidy is invoked, revealed tidy calls like:
exec('/usr/bin/tidy -e -ashtml -utf8 '.$tmp_name,$rett);
As you see the PHP programmers who wrote this website, made a bigtidy mess. Instead of using php5's tidy module, they hard coded tidy external command to be invoked via php's exec(); external tidy command invocation.
This is extremely bad practice, since it spawns the command via a pseudo limited apache shell.
I've notified about the issue, but I don't know when, the external tidy calls will be rewritten.
Until the external tidy invocations are rewritten to use the php tidy module, I decided to at least remove the tidy warnings and errors output.
To remove the warning and error messages I've changed:
exec('/usr/bin/tidy -e -ashtml -utf8 '.$tmp_name,$rett);
exec('/usr/bin/tidy --show-warnings no --show-errors no -q -e -ashtml -utf8 '.$tmp_name,$rett);
The extra switches meaning is like so:
q – instructs tidy to produce quiet output
-e – show only errors and warnings
–show warnings no && –show errors no, completely disable warnings and error output
Onwards tidy no longer logs junk messages in error.log Not logging all this useless warnings and errors has positive effect on overall server performance especially, when the scripts, running /usr/bin/tidy are called as frequently as 1000 times per sec. or more
Tags: apache, Auto, body, bug reports, command invocation, consortium, content, CSS, css specifications, declaration, design modules, doctype, document content, Draft, element, element info, elementInfo, elements, exec, exec grep, HEAD, How to, HTML, html syntax checker, iname, index, investigation, isn, line 1, Linux, log, logs, lt, mod, php, php exec, php programmers, php scripts, php5, queries, quot, reformatter, rett, rli, servers, Shell, show, sourceforge, text, tmp, usr bin, validator, vim
Posted in System Administration, Web and CMS | No Comments »
Monday, September 7th, 2015 
I've been annoying for quite a long time by the the Clockwise moving backward and Forward Wheel (Ring) on Top of browser Tabs everytime I navigate to a new Internet domain or request a resource on the Net.
I'm aware that seeing the wheel all the time move back and forward is a very bad manipulation technique that is often used in advertisements in old movies and some advertisements in the start of the video . I'm talking about the infamous backward counting technique in a Circle (it was moer commonly used in the dawn of Television) aiming to induce watchers mind into hypnotic state …

Those who have a degree in psychology or have been into marketing or human resources fields or any field involved where you have to influence the masses are already aware of the backward counting methology which has been practiced heavily by hypnosis practisioners such as Sigmund Freud, to induce any kind of hypnotic state the hypnotist always asks the object of hypnotism to watch closely into a moving back and forwards clock, often accompanied by counting backwards …
Well my Theory here is that the same techniques is well aware of those who planned Windows OS in which if you remember the Sand Clock has been substituted in Windows 7 / 8 and Windows 10 with the rotating back and foward Wheel for the reason that this aims to influence people mind to go into Alpha state from Beta state and thus make them feel more relaxed while doing stuff on the PC.
One thing to mention here is Back and Forward wheel is not only into OS level it has been heavily adopted by leading Software as a Service (SAS) UIs such as Google's and probably more importantly Youtube (have you noticed the Cycling Wheel when waiting for a Youtube movie to Load), the Wheel is also heavily incoruprated in most if not all biggest Websites on the Net. Even If you have noticed these days Google's Cycling (Waiting) Wheel is not only Cycling but has the colorful programming incorporated.

Well probably many people who use computers daily did not really realize that the Computer OS and Programs GUI Interface they're using is influencing their mind and some famous psychological methods such as color programming and hypnotic tricks could be used more or less.
In that regard as a Firefox user I decided to change tne Back and Forward Wheel with another one which will not trigger my subconsciousness / mind all the time while browing on the Net into Alpha State. As I'm not a Firefox expert and my quick research on search Engines on how to achieve changing or removing the Browser Tabs all time turning wheel did not led me to nothing positive, I've consulted the experts in irc.freenode.net #firefox.
As always the guys were helpful and pointed me out to UserStyles.org website's Static-Throbbler CSS. I've mirrored the CSS script under a name remove-firefox-tab-wheel-script.css in case if UserSpace.org disappears in future, below is also a paste of the script:
@namespace url(https://www.mozilla.org/keymaster/gatekeeper/there.is.only.xul); @-moz-document url(chrome://browser/content/browser.xul) { .tab-throbber { list-style-image: url('data:image/png;base64,iVBORw0KGgoAAAANSUhEUgAAABAAAAAQCAMAAAAoLQ9TAAAABGdBTUEAALGPC/xhBQAAACBjSFJNAAB6JgAAgIQAAPoAAACA6AAAdTAAAOpgAAA6mAAAF3CculE8AAAB5lBMVEUAAADMzMzr6+v////t7e1paWmYmJiampqPj4+IiIiQkJCgoKCPj49qamqQkJB2dnacnJyAgIBfX19aWlpZWVlgYGB/f399fX2Hh4eFhYWZmZlycnJaWlpjY2Nubm56enp6enptbW1XV1dxcXGbm5uAgIBiYmKenp5ra2taWlpxcXGLi4uXl5eKioqPj4+NjY1wcHBZWVlra2uYmJhiYmKBgYFbW1t1dXWSkpKEhIR6enpsbGyBgYFubm6CgoKZmZlzc3NYWFiPj4+YmJhmZmaLi4uGhoagoKC4uLi0tLSnp6eIiIhmZmafn5+RkZFcXFx1dXWZmZl8fHzt7e3////r6+uUlJRycnJbW1uQkJCHh4d4eHiKioqxsbFubm6NjY15eXlYWFiHh4dXV1d4eHiGhoZycnKvr6+JiYl4eHiGhoaOjo6MjIxxcXHq6uqjo6N5eXmVlZVzc3OcnJxfX1+JiYl7e3tra2upqamIiIiNjY1kZGReXl6YmJiOjo59fX1YWFiSkpKAgIB2dnaYmJh0dHRoaGhqamqSkpKSkpKLi4uWlpaPj49wcHBpaWlhYWGCgoKamppwcHBjY2Nubm57e3tiYmKYmJiZmZl9fX1ZWVl+fn6bm5t1dXWOjo6GhoaNjY3///+wXn5TAAAAoXRSTlMAAAAAAAYLIzM6MiENBgEII0ZzeXtzRgcBByZhe29iWFlhe2ElBwYiY3pgRzMwNkZfemIkBUZ7XzktHyAdICs3X3sMI29KLgkJCApFbSAxe2E2IAQBAzVgeTE7WjUIHTFZejp8WzIiBy5YOzM1IwMKIDVgInRKMSALKUducyINSHw6LRo2XwZjMi0vNUhgYwYHJWFuYVhuJiNGeUUjCDI6MyoACaoAAAABYktHRAMRDEzyAAABFklEQVQY02NgYGBkZWPn4OTk4ubhZWIAAj5+AUEhYRERYVExdnEJZgZGSSlpGVk5eQVFWSVlFVUmBjV1DU0tbR1dXT19A0MjYxMGNlMzcwtLK2sbWzt7B0cxJwZnURdXNxt3D08vaztvH1FfBj//gMAg92DmkFAv27DwiEiGKLPoGJtYZgaGkNi4+ITEJIao5JTUNA+gAHO6dUamYRZDtpl0Tq5XXghzaH5BYZGmH0NxiUtpWXlFuqdXXGVVdU0tQ119g3Rjk5V1c0FlS6uIIBtDm3G7iFZVR2dXd0+vYZ96PwPLhImTlCZPUZg6ZZrIpOmSjAzMEuIzZorOcnScVTN7zlw+kHeZeJ18582fv6CWjZWRgQEA0vJCZaR0FWsAAAAldEVYdGRhdGU6Y3JlYXRlADIwMTMtMDYtMjhUMDc6NDE6NDItMDY6MDC7fUviAAAAJXRFWHRkYXRlOm1vZGlmeQAyMDEzLTA2LTI4VDA3OjQxOjUxLTA2OjAwN2LpXQAAABN0RVh0U29mdHdhcmUASmFwbmcgcjExOSfos2EAAAAASUVORK5CYII=') !important; animation-name: none !important; } .tab-throbber[progress] { list-style-image: url('data:image/png;base64,iVBORw0KGgoAAAANSUhEUgAAABAAAAAQCAMAAAAoLQ9TAAAABGdBTUEAALGPC/xhBQAAACBjSFJNAAB6JgAAgIQAAPoAAACA6AAAdTAAAOpgAAA6mAAAF3CculE8AAABs1BMVEUAAAAAkwAAnwAAmAAAmQAAnQAAiQAAkgAAkAAEnAQHogcHpwcHpgcGogYEmwQAkAAAkQAAiAAAjAAAkQAEnQQMqwwhwiEhxyEiyCIgwiAMrAwEnQQAkQAEnAQauRohyCEdxh0SwRIRvxEPvw8ZxRkjyCMFnQUEnAQVuhUhyCESwRIFuAUBsAEArQABrwEBsAEMuQwRwREjyCMVuRUEnAQNrQ0TwRMBsAEAqwAAqAABsAERwREiyCIQrhAexh4CuAIDtwMbxhsgwiAEmwQGogYjxiMTwhMBrwETwRMhxiEGoQYMqAwhxyEOvg4ArQAArwAPvg8kyCQMpwwnyCcPvg8AqgAArAAOvg4hxyEMqAwGoQYkxyQVwhUBrgEBrwEjxiMGogYEmwQhwiEcxhwMuQwArQAAqwAGuAYexh4gwiAEnAQRrhEjyCMRwREBrwEBrwETwRMixyINrQ0EnAQVuRUjyCMSwRIDuAMBrgEArAAKuAohyCEEmwQFnAUauRoZxRkSwRIRvxERwREcxRwhyCEEnAQAkAAMqwwhxiEixyIgwiAMqwwHpQcHpgcHoQcEmwT////fHmrrAAAAkHRSTlMAAAAAAAAHIzBXbHZ1bFMxJAcNJ1iAo6amooBZJl2Zpp6Ui4mep11WmKWSZygXFylmk6aYWYCRMQkKL5Kngp1iZ52jVG6nkyeUpm53qo0WF4uodqqMExOMqXZwp5UmJKhvVaSfag0MaZ6kWISplC4wk6iCWpqolWklEmanV1+boJeNlqCoXyeDqKmlgnh5blghd7i+AAAAAWJLR0SQeAqODAAAAPRJREFUGNNjYGBgY+fg5OLm4eXjFxBkAAIhYRFRMXEJCXFJKWkZIaC8jKycvIKikrKiiqqcmrAgg4C6hqaWto6unr6BoZGxiQADh6mEmbkFIwMDk6WVtY0tPwOnmJ29BQMYWDo4OjkzuLi6uTNCBJj1PTy9GLx9fP0YoMA/IDCIwTs4JBQmEBYeEckQFR0TywLhs8Z5xCcwJCYlp6RCBNLSMzKzGPizc3LzUkHWpuUXFBbxMwgUl5SWlVeEVsZVKVaX1AgwCArX1uXUN4Q3NjW31LW2sQE9J1PcntnRWdjR1W0iLAQyS1CAP9Grp7evn58dKA8Ayh0xsydWuvQAAAAldEVYdGRhdGU6Y3JlYXRlADIwMTMtMDYtMjhUMDc6NDE6NTEtMDY6MDBGP1HhAAAAJXRFWHRkYXRlOm1vZGlmeQAyMDEzLTA2LTI4VDA3OjQxOjUyLTA2OjAwBorzwAAAABN0RVh0U29mdHdhcmUASmFwbmcgcjExOSfos2EAAAAASUVORK5CYII=') !important; } }
To use the script you will first need to install the Stylish FF plugin, then:
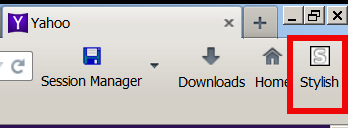
1. Enable Stylish plugin and Restart firefox when prompted
2. Click on Write New Style
3. Paste above CSS script and click on Save button
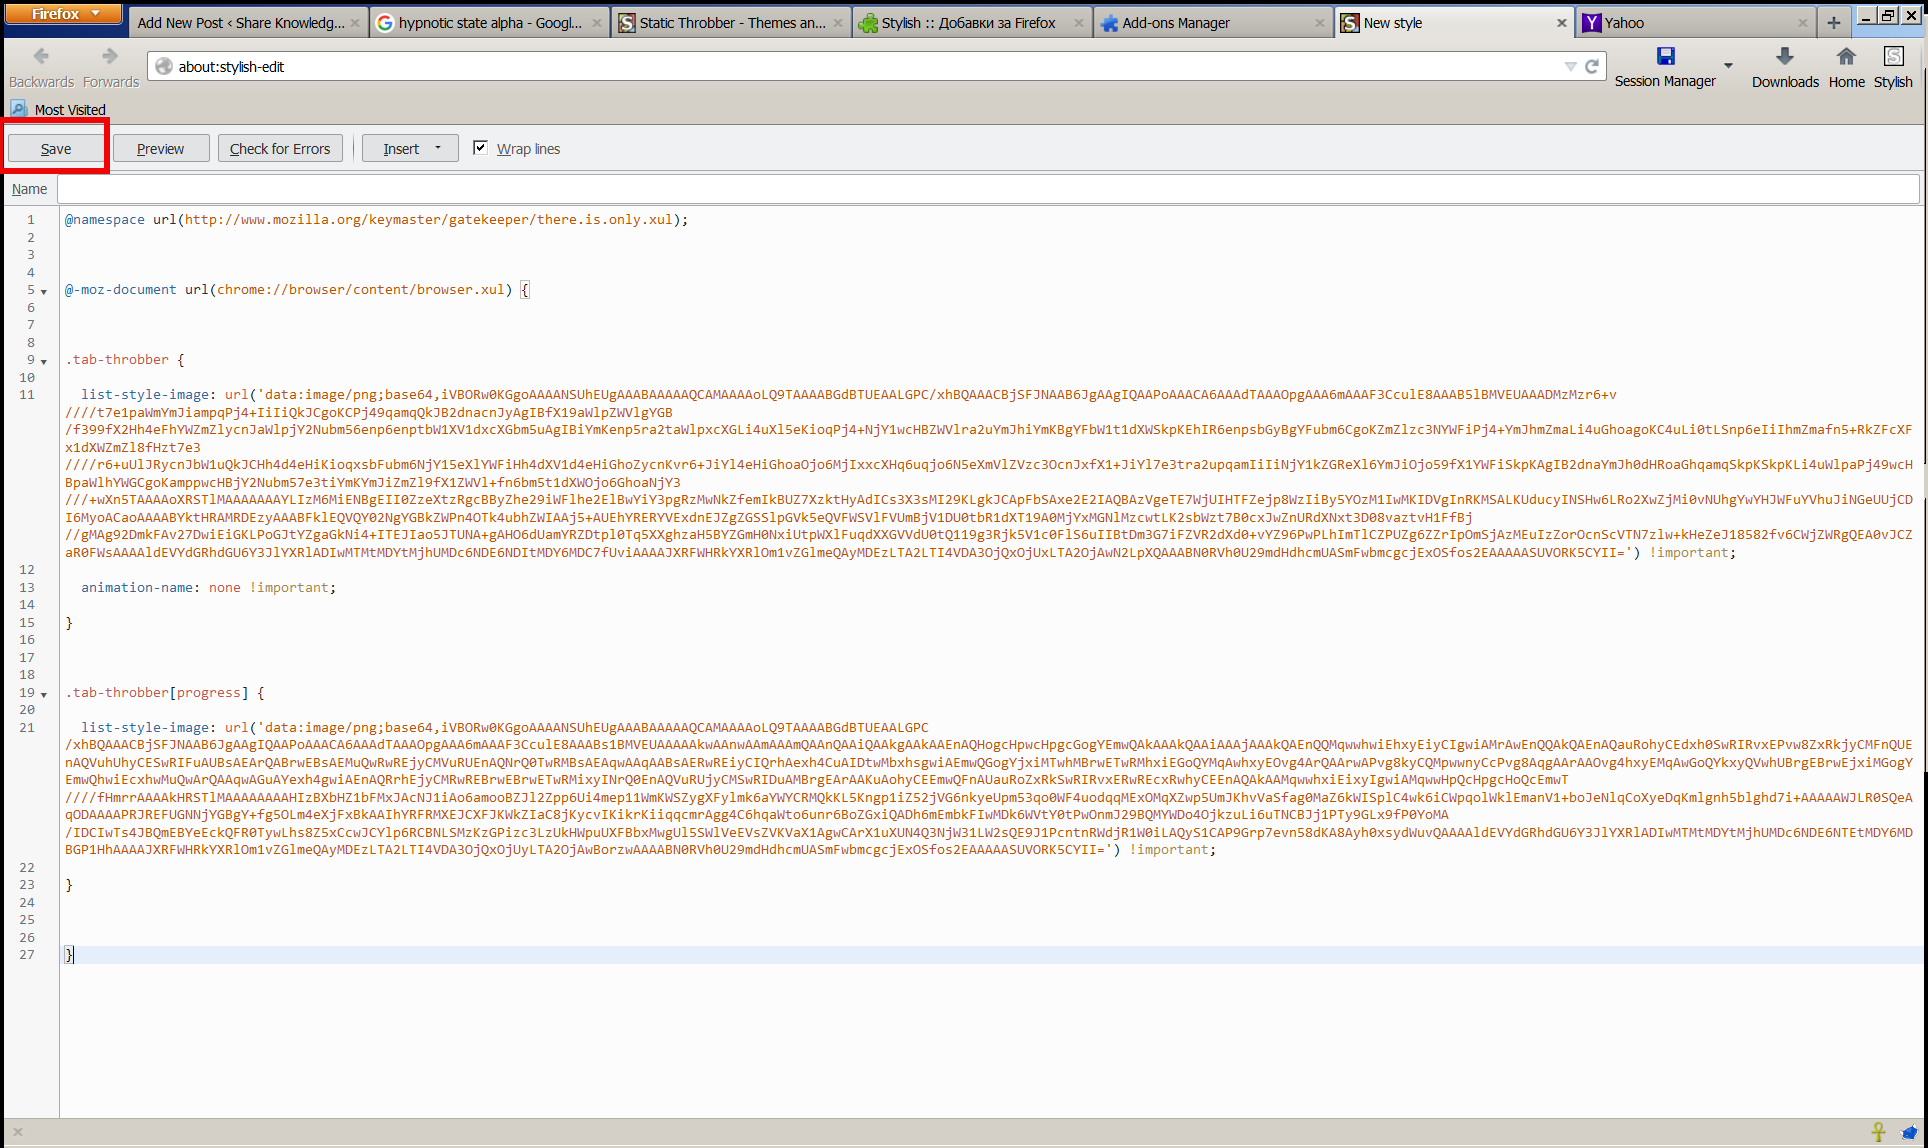
Now instead of the moving wheel you will get just a circle appearing as a static image while the page is loading.
If you want to absolutely remove any circles or images and show nothing when loading, e.g. not have any mean to monitor whether page is loaded or not, but also make it easier for the eye I even finally decided to completely remove the all time moving Wheel from Firefox Tabs even the static picture out using below CSS script with Stylish:
@namespace url(https://www.mozilla.org/keymaster/gatekeeper/there.is.only.xul); @-moz-document url(chrome://browser/content/browser.xul) { .tab-throbber { list-style-image: none !important; animation-name: none !important; } .tab-throbber[progress] { list-style-image: none !important; } }
After all even after removing the FF Tabs wheel, there is the Status being printed down the webpage, showing text based the connection status. I find this kind of page loading status much less agressive and preferrable, than the current verions Firefox 4 onwards ..
One other thing I do to prevent the annoying Windows OS default Theme wheel is to change it to the old fashioned sand clock as well as bring back the theme of Windows 7 / 8 to Classic Theme of Win 2000, as I believe this reduced the level of zoombification the PC imposes on self 🙂
Enjoy!
Tags: advertisements, change, Click, CSS, Cycling Wheel, data, Firefox, image png, influence, loading, long time, make, mind, one thing, org, paste, Pc, technique, url, use, wheel, Windows
Posted in Business Management, Curious Facts, Entertainment, Everyday Life, Firefox, System Administration, Various, Windows | 2 Comments »
Tuesday, December 9th, 2014

While optimizing picture performance with console tools optipng, jpegoptin, jpegtran, pngcrush (could save you a lot of server space and make pictures downloads faster (and hence increase your website responsiveness and SEO – check out), still for Blogs and WebSites based on WordPress its not worthy to loose time with console acrobatics but simply use EWWW Image Optimizer to Optimize all old or new uploaded Images.
To work EWWW Image Optimizer needs jpegtran, optipng, pngout and gifsicle to be installed on the Linux / BSD server. EWWW Image Optimizer can load the command line tools also from a Cloud, if a cloud service is running on the server. Once installed the plugin does scan all the imported WordPress Media files and can be run to optimize picture files on present blog psot / pages.
EWWW Image Opitimizer plugin does a good job in reducing file size on NextGEN, GRAND FlAGallery galleries.
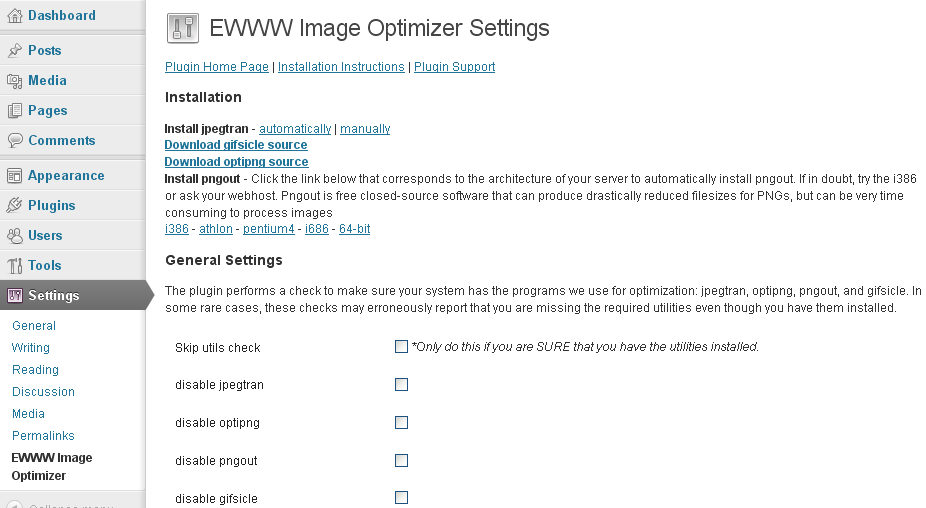
Here is how EWWW Image Optimizer works taken from plugin's website:
How are JPGs optimized?
Lossless optimization is done with the command jpegtran -copy all -optimize -progressive -outfile optimized-file original-file. Optionally, the -copy switch gets the 'none' parameter if you choose to strip metadata from your JPGs on the options page. Lossy optimization is done using the outstanding JPEGmini utility.
It is better if the server has not the jpegtran, pngout, gifsicle utilities installed as the plugin provides an uptodate static compiled Linux binaries.
How are PNGs optimized?
There are three parts (and all are optional). First, using the command pngquant original-file, then using the commands pngout-static -s2 original-file and optipng -o2 original-file. You can adjust the optimization levels for both tools on the settings page. Optipng is an automated derivative of pngcrush, which is another widely used png optimization utility.
How are GIFs optimized?
Using the command gifsicle -b -O3 –careful original file. This is particularly useful for animated GIFs, and can also streamline your color palette. That said, if your GIF is not animated, you should strongly consider converting it to a PNG. PNG files are almost always smaller, they just don't do animations. The following command would do this for you on a Linux system with imagemagick: convert somefile.gif somefile.png

Some othe plugins that could strenghten your WordPress Search Engine Optimization ranking worthy to check are:
Most importantly plugin solves "Render-blocking JavaScript and CSS" warning shown during site audit with Google Developers PageSpeed Insight. By the way Google PageSpeed Insight is a precious tool so I recommend you check if you already haven't, Google's suggestions could often double or triple daily site visitors
What Async JS and CSS does is:
Converts render-blocking CSS and JS files into NON-render-blocking, improving performance of web page
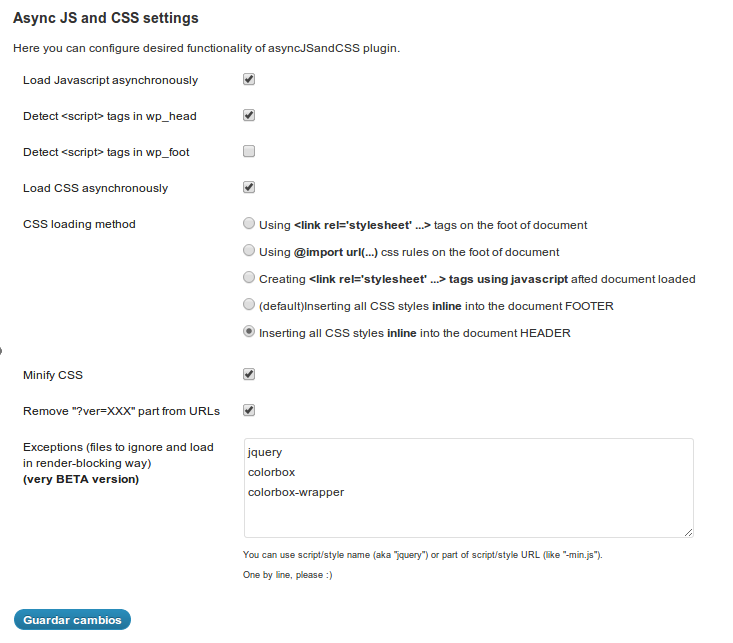
The plugin makes ALL scripts loaded by other plugins to be loaded in asynchronous. All CSS files will be inserted inline into the document code or moved from the document beginning to the end, just before closing BODY tag (or just where you placed wp_foot() function). There are various methods to do that via plugin configuration page.
- Autoptimize
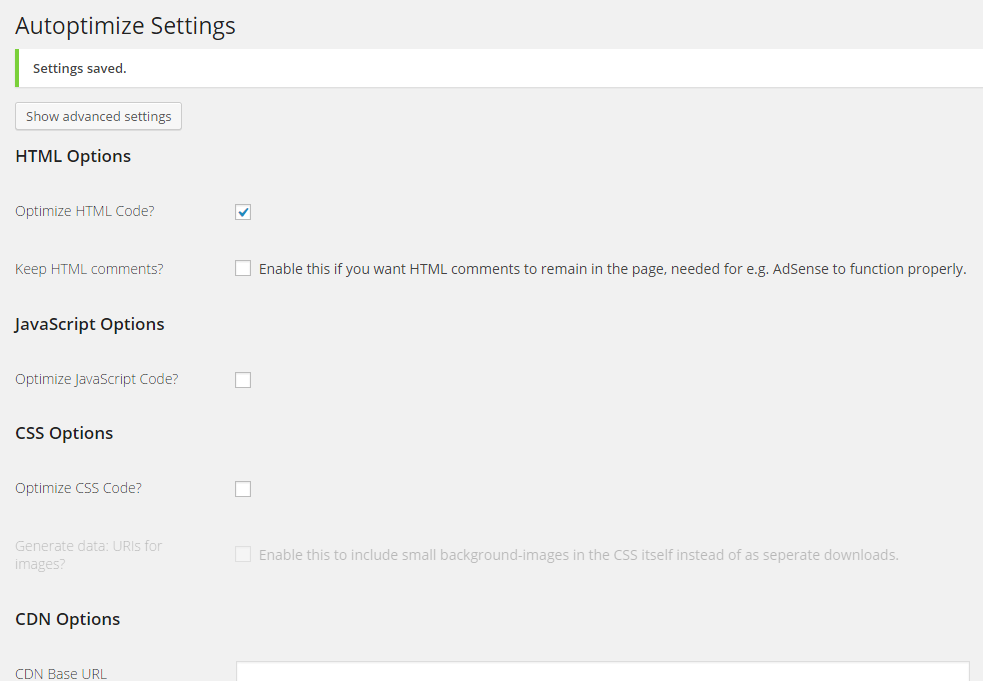
Autoptimize speeds up your website and helps you save bandwidth by aggregating and minimizing JS, CSS and HTML.
What does the plugin do to help speed up site?
It concatenates all scripts and styles, minifies and compresses them, adds expires headers, caches them, and moves styles to the page head, and scripts to the footer. It also minifies the HTML code itself, making your page really lightweight. Autoptimize is very much like WP Mnify (CSS / JS) minifaction WP plugin. The only difference and reason why you might want to use WP Mnify is it does HTML minification – something that WP Minify does not. Both plugins play nice together the only thing to be careful is not to configure CSS / JS minification in both Autoptimize and WP Minifyas this might slower instead of fasten the WP site.
A great bunch of other useful WP plugins to make a WordPress Blog friendly to Search Engines is here.
Tags: async js css, autoptimize wordpress, command line tools, CSS, css js and images optimization, HTML, images, make smaller pictures wp, optimization, optimize css and javascript wp, performance, pictures reduce, plugin, png, running, SEO, server, website, Wordpress, wp, WP JS, www image optimizer
Posted in Everyday Life, System Administration, Various, Web and CMS, Wordpress | 1 Comment »
Tuesday, April 5th, 2011 For a number of time I’ve been planning to change my blog comments placement. Until this very day however I’ve kept the default wordpress theme’s Comments button placement.
I realize the default Comments button placement is a bit hard to see and not that much intuitive for the user that enters my blog for a first time.
My first guess was that there might be somewhere a wordpress plugin which will allow me to adjust my comments button placement.
After some research online and a realization that probably there is no such plugin existing yet. I’ve forced myself to tune it up myself.
It was clear to me that in order to change the it will be necessery to edit the WordPress templates files. I’m not a designer and when I hear about templates I usually get scared, however I took the time to take a look at the default wordpress template and find out actually that template modifications is actually rather easier than I thought.
My previous idea was that in order to edit templates you have to be some kind of CSS and HTML guru (which I’m not). Nevertheless it seems that in order to play and adjust in a good way the templates you don’t need ot be a pro.
Even an uneducated fool like myself can easily do almost everything he thinks of throughout few lines of code in the wp templates.
To get back to the major topic thanks God after a bit of review and reading of wordpress.org documentation and some user forums. I’ve figured out that in order to change my Comments placement you need to modify the file:
- blog/wp-content/themes/default/index.php
In index.php find the line starting with:
You will notice within this opened paragraph the php code:
<?php the_tags('Tags: ', ', ', '

'); ?> Posted in <?php the_category(', ') ?>

| <?php edit_post_link('Edit', '', ' | '); ?>

<?php comments_popup_link('No Comments »', '1 Comment »', '% Comments »'); ?>
This is the actual default theme php code that makes the wordpress Comments or No Comments that maes the comments appear on the blog.
Now I’ve decided to let this be as it is but add one more Comment button to wordpress on a different location that is more appealing to my blog visitors
After quick evaluation I’ve determined that probably the best location that the Comments button should have is right after the end of the post text
If you think my idea for button placement is appropriate, to set this location for the Comments button, you will have to find the follwoing code in index.php:
<div class="entry">

<?php the_content('Read the rest of this entry »'); ?>

</div>
Right after the end of this code place the following code:
<?php comments_popup_link('No Comments »', '1 Comment »', '% Comments »'); ?>

</div>
Tags: amp, Auto, blog, Button, button placement, code lt, Comment, content themes, CSS, default theme, Draft, everything, file, fool, god, guess, guru, HTML, idea, index, kind, line, link, location, lt, nbsp, necessery, online, order, org, paragraph, php, php code, place, placement, plugin, quot, reading, realization, right, template, text, textIf, time, topic, way, Wordpress, wordpress plugin, wordpress templates
Posted in Various, Web and CMS, Wordpress | 1 Comment »
Thursday, December 8th, 2011 
I’m realizing the more I’m converting to a fully functional GUI user, the less I’m doing coding or any interesting stuff…
I remembered of the old glorious times, when I was full time console user and got a memory on a nifty trick I was so used to back in the day.
Back then I was quite often writing shell scripts which were fetching (html) webpages and converting the html content into a plain TEXT (TXT) files
In order to fetch a page back in the days I used lynx – (a very simple UNIX text browser, which by the way lacks support for any CSS or Javascipt) in combination with html2text – (an advanced HTML-to-text converter).
Let’s say I wanted to fetch a my personal home page https://www.pc-freak.net/, I did that via the command:
$ lynx -source https://www.pc-freak.net/ | html2text > pcfreak_page.txt
The content from www.pc-freak.net got spit by lynx as an html source and passed html2pdf wchich saves it in plain text file pcfreak_page.txt
The bit more advanced elinks – (lynx-like alternative character mode WWW browser) provides better support for HTML and even some CSS and Javascript so to properly save the content of many pages in plain html file its better to use it instead of lynx, the way to produce .txt using elinks files is identical, e.g.:
$ elinks -source https://www.pc-freak.net/blog/ | html2text > pcfreak_blog_page.txt
By the way back in the days I was used more to links , than the superior elinks , nowdays I have both of the text browsers installed and testing to fetch an html like in the upper example and pipe to html2text produced garbaged output.
Here is the time to tell its not even necessery to have a text browser installed in order to fetch a webpage and convert it to a plain text TXT!. wget file downloading tools supports source dump as well, for all those who did not (yet) tried it and want to test it:
$ wget -qO- https://www.pc-freak.net | html2text
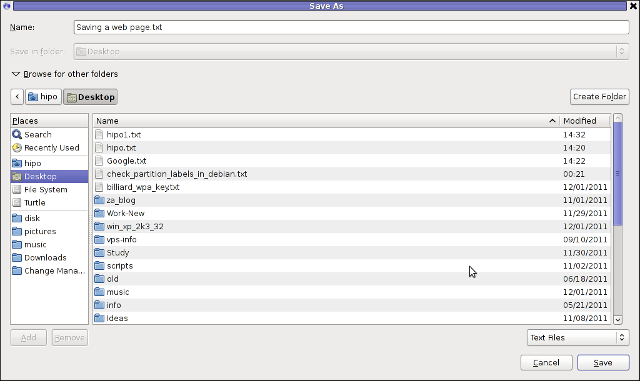
Anyways of course, some pages convertion of text inside HTML tags would not properly get saved with neither lynx or elinks cause some texts might be embedded in some elinks or lynx unsupported CSS or JavaScript. In those cases the GUI browser is useful. You can use any browser like Firefox, Epiphany or Opera ‘s File -> Save As (Text Files) embedded functionality, below is a screenshot showing an html page which I’m about to save as a plain Text File in Mozilla Firefox:
Besides being handy in conjunction with text browsers, html2text is also handy for converting .html pages already existing on the computer’s hard drive to a plain (.TXT) text format.
One might wonder, why would ever one would like to do that?? Well I personally prefer reading plain text documents instead of htmls 😉
Converting an html files already existing on hard drive with html2text is done with cmd:
$ html2text index.html >index.txt
To convert a whole directory full of .html (documentation) or whatever files to plain text .TXT , cd the directory with HTMLs and issue the one liner bash loop command:
$ cd html/

html$ for i in $(echo *.html); do html2text $i > $(echo $i | sed -e 's#.html#.txt#g'); done
Now lay off your back and enjoy reading the dox like in the good old hacker days when .TXT files were fashionable 😉
Tags: advanced html, character mode, command lynx, content, convertion, course, CSS, drive, file, freak, full time, glorious times, gnu linux, html pages, html source, HTML-to-text, html2text, index, interesting stuff, javascipt, Javascript, Lynx, necessery, nifty trick, page, page txt, pcfreak, PDF, personal home page, Shell, shell scripts, spit, support, terminal, text, text browser, text converter, time, trick, TXT, unix text, wget
Posted in Everyday Life, FreeBSD, Linux, Linux and FreeBSD Desktop, Various | 1 Comment »


How to change default Comments and No Comments location in WordPress in wordpress default theme
Tuesday, April 5th, 2011For a number of time I’ve been planning to change my blog comments placement. Until this very day however I’ve kept the default wordpress theme’s Comments button placement.
I realize the default Comments button placement is a bit hard to see and not that much intuitive for the user that enters my blog for a first time.
My first guess was that there might be somewhere a wordpress plugin which will allow me to adjust my comments button placement.
After some research online and a realization that probably there is no such plugin existing yet. I’ve forced myself to tune it up myself.
It was clear to me that in order to change the it will be necessery to edit the WordPress templates files. I’m not a designer and when I hear about templates I usually get scared, however I took the time to take a look at the default wordpress template and find out actually that template modifications is actually rather easier than I thought.
My previous idea was that in order to edit templates you have to be some kind of CSS and HTML guru (which I’m not). Nevertheless it seems that in order to play and adjust in a good way the templates you don’t need ot be a pro.
Even an uneducated fool like myself can easily do almost everything he thinks of throughout few lines of code in the wp templates.
To get back to the major topic thanks God after a bit of review and reading of wordpress.org documentation and some user forums. I’ve figured out that in order to change my Comments placement you need to modify the file:
In index.php find the line starting with:
You will notice within this opened paragraph the php code:
<?php the_tags('Tags: ', ', ', ''); ?> Posted in <?php the_category(', ') ?>
| <?php edit_post_link('Edit', '', ' | '); ?>
<?php comments_popup_link('No Comments »', '1 Comment »', '% Comments »'); ?>
This is the actual default theme php code that makes the wordpress Comments or No Comments that maes the comments appear on the blog.
Now I’ve decided to let this be as it is but add one more Comment button to wordpress on a different location that is more appealing to my blog visitors
After quick evaluation I’ve determined that probably the best location that the Comments button should have is right after the end of the post text
If you think my idea for button placement is appropriate, to set this location for the Comments button, you will have to find the follwoing code in index.php:
<div class="entry"><?php the_content('Read the rest of this entry »'); ?>
</div>
Right after the end of this code place the following code:
<?php comments_popup_link('No Comments »', '1 Comment »', '% Comments »'); ?></div>
Tags: amp, Auto, blog, Button, button placement, code lt, Comment, content themes, CSS, default theme, Draft, everything, file, fool, god, guess, guru, HTML, idea, index, kind, line, link, location, lt, nbsp, necessery, online, order, org, paragraph, php, php code, place, placement, plugin, quot, reading, realization, right, template, text, textIf, time, topic, way, Wordpress, wordpress plugin, wordpress templates
Posted in Various, Web and CMS, Wordpress | 1 Comment »