Posts Tagged ‘php code’

VIM Project (VI Improvied IDE Editor extension to facilitate web development with vi enhanced editor

Wednesday, August 25th, 2010

I use VIM as an editor of choice for many years already.
Yet it's until recently I use it for a PHP ZF (Zend Framework) web development.

Few days ago I've blogged How to configure vimrc for a php syntax highlightning (A Nicely pre-configured vimrc to imrpove the daily text editing experience

This enhancements significantly improves the overall PHP code editing with VIM. However I felt something is yet missing because I didn't have the power and functunality of a complete IDE like for instance The Eclipse IDE

I was pretty sure that VIM has to have a way to be used in a similar fashion to a fully functional IDE and looked around the net to find for any VIM plugins that will add vim an IDE like coding interface.

I then come accross a vim plugin called VIM Prokject : Organize/Navigate projects of files (like IDE/buffer explorer)

The latest VIM Project as of time of writting is 1.4.1 and I've mirrored it here

The installation of the VIM Project VIM extension is pretty straight forward to install it and start using it on your PC issue commands:

1. Install the project VIM add-on

debian:~$ wget https://www.pc-freak.net/files/project-1.4.1.tar.gz
debian:~$ mv project-1.4.1.tar.gz ~/.vim/
debian:~$ cd ~/.vim/
debian:~$ tar -zxvvf project-1.4.1.tar.gz

2. Load the plugin

Launch your vim editor and type : Project(without the space between : and P)
You will further see a screen like:
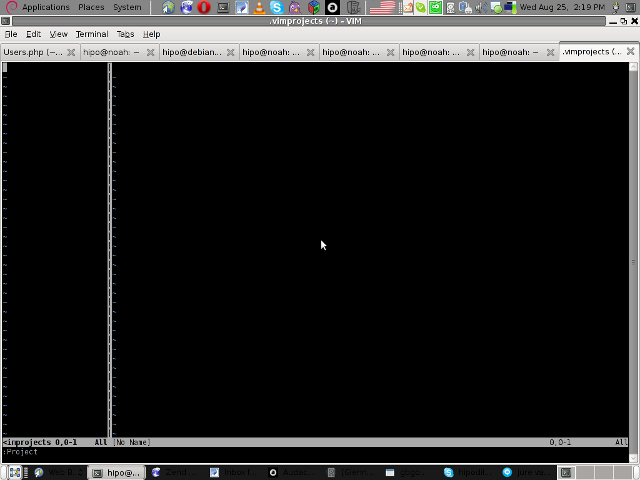
vim project entry screen

3. You will have to press C within the Project window to load a new project

Then you will have to type a directory to use to load a project sources files from:
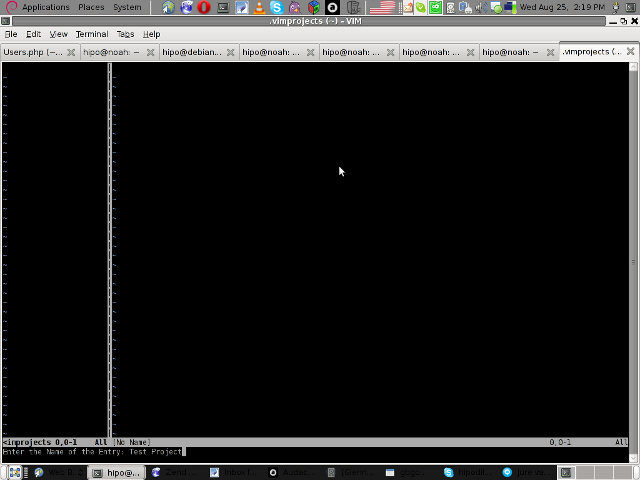
vim project enter file source directory screen

You will be prompted with to type a project name like in the screenshot below:
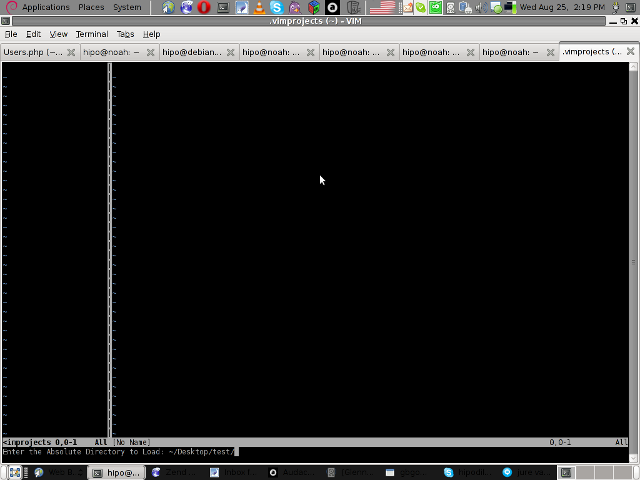
vim project load test project

4. Next you will have to type a CD (Current Dir) parameter
To see more about the CD parameter consult vim project documentation by typing in main vim pane :help project

The appearing screen will be something like:
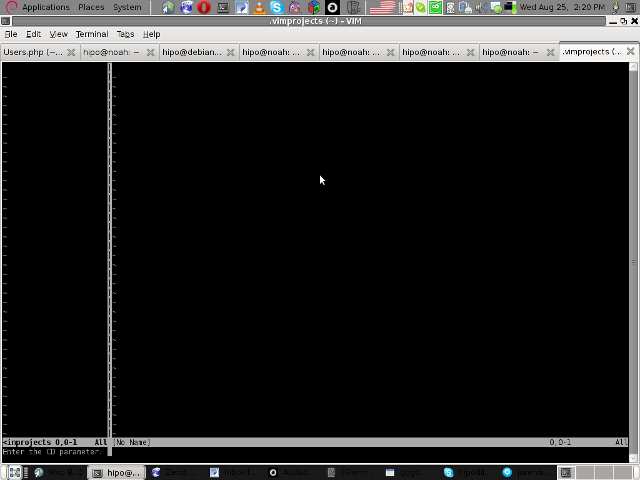
vim project extension cd parameter screen

5. Thereafter you will have to type a file filter

File filter is necessary and will instruct the vim project plugin to load all files with the specified extension within vim project pane window

You will experience a screen like:
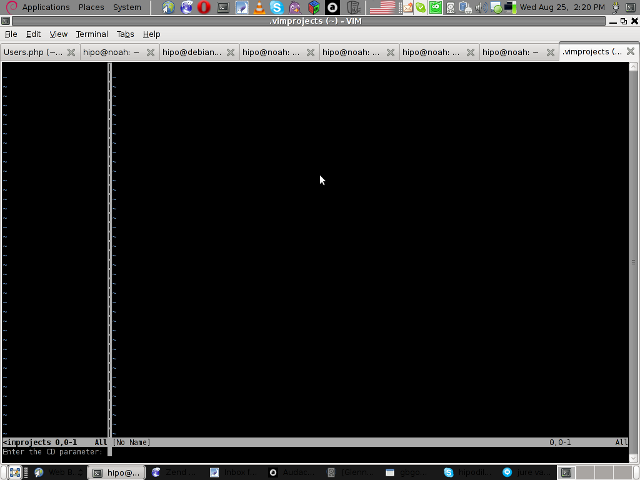

vim project plugin file filter screen

Following will be a short interval in which all specified files by the filter type will get loaded in VIM project pane and your Zend Framework, PHP or any other source files will be listed in a directory tree structure like in the picture shown below:
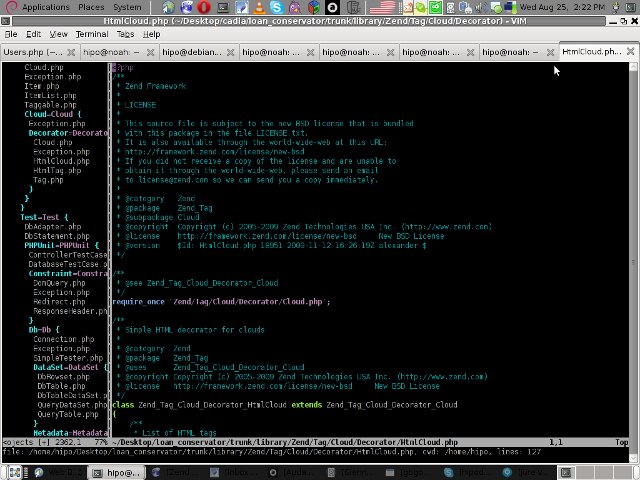
vim project successful loaded project screen

6. Saving loaded project hierarchy state

In order to save a state of a loaded project within the VIM project window pane you will have to type in vim, let's say:

:saveas .projects/someproject

Later on to load back the saved project state you will have to type in vim :r .projects/someproject

You will now have almost fully functional development IDE on top of your simple vim text editor.

You can navigate within the Project files loaded with the Project extension pane easily and select a file you would like to open up, whenever a source file is opened and you work on it to switch in between the Project file listing pane and the opened source code file you will have to type twice CTRL+w or in vim language C-w

To even further sophisticate your web development in PHP with vim you can add within your ~/.vimrc file the following two lines:

" run file with PHP CLI (CTRL-M)
:autocmd FileType php noremap <C-M> :w!<CR>:!/usr/bin/php %<CR>
" PHP parser check (CTRL-L)
:autocmd FileType php noremap <C-L> :!/usr/bin/php -l %>CR>

In the above vim configuration directovies the " character is a comment line and the autocmd is actually vim declarations.
The first :autocmd … declaration will instruct vim to execute your current opened php source file with the php cli interpreter whenever a key press of CTRL+M (C-m) occurs.

The second :autocmd … will add to your vim a shortcut, so whenever a CTRL+L (C-l) key combination is pressed VIM editor will check your current edited source file for syntax errors.
Therefore this will enable you to very easily periodically check if your file syntax is correct.

Well this things were really helpful to me, so I hope they will be profitable for you as well.
Cheers 🙂

wordpress & awstats

Wednesday, July 29th, 2009

awstats-logo and wordpress awstats

I'm planning to bring up a website for remote system administration for quite some time 'till now.A couple of days before I've installed wordpress and used the monochrome theme in combination with a couple of plugins.I've used the WordPress, "Contact Form 7" plugin. I struggled around for a day before I realize the way it's beeingembeded into the Page post. Amri (Marto) a friend of mine helped me up with the whole deal, it came to be as simple assimply adding [contact-form 1 "My feedback" to one of the pages I've created in wordpress. There were a bunch of things on my newlycreated wordpress blog that looked more like a blog than a page which was not my initial goal and therefore I had to remove some chunksof code from some of the php files that came with the monochrome theme. I've partially used a guide called
"How to create Websites using WordPress" which probably would be of an interest to you if you're trying to make wordpress look more like a website than a blog, check it out here . Amri suggested few plugins that would add up to my current wordpress installation.
This are:
Cyr2Lat Slugs
Google XML Sitemaps Generates sitemap.xml. Gives an option to setup Google WebMaster Tools and in that manner of thoughts ads up for faster indexing of the blog
All In One SEO pack – SEO instrument that optimizes your wordpress
Belavir – Tracks the changes in files in wordpress.
In my case I couldn't make the Google XML Sitemap work correctly. Probably because I've removed bits of php code from some main php pages.Anyways I was able to make my wordpress look like a normal website and in general it might be said that it looks quite decent now if I have to compare it with my previous websites I've built like let's say my home page www.pc-freak.net . I've plans to deliver remote system administration services to the masses via my Yet Another Cheap System Administration Services.
I've also installed awstats on the pcfreak box currently running on
a nice foxy IBM machine. To properly install and run the Awstats I've used fractions from the article Install Awstats on FreeBSD . What was different in my case was:
1. I had to cd /usr/ports/www/awstats/work/awstats-6.9/tools/; run ./awstats_configure.pl. Answer a couple of questions. I've initially installed awstats configurations to /etc/awstats after which I've moved it to /usr/local/etc/awstats .
2. I had to create /var/lib/awstats where awstats stores it's database files: mkdir /var/lib/awstats
3. I had to link awstats to the location where my cgi-bin dir was set up by httpd.conf: ln -sf /usr/local/www/awstats/cgi-bin/ /usr/local/www/cgi-bin/awstats
4. I had to create a link to make the awstats icons visualize: ln -sf /usr/local/www/awstats/icons /usr/local/www/data/awstatsicons
5. I had to edit my conf file and align it with my desires, most important to note is the requirement to change the location to my Apache log file in my case that was /var/log/httpd-access.log: Change LogFile value in /usr/local/etc/awstats/awstats.www.pc-freak.net.conf I've changed it to LogFile="/var/log/httpd-access.log"
6. Next I had to execute the following to generate statistics for my domain www.pc-freak.net: /usr/local/www/awstats/cgi-bin/awstats.pl -update -config=www.pc-freak.net
7. Edit the root user crontab (crontab -u root -e) and paste the following : 01 0 * * * /usr/local/www/awstats/cgi-bin/awstats.pl -update -config=www.pc-freak.net 2>&1 >/dev/null8. Change the default Directory settings for /usr/local/www/cgi-bin. Had to changed them to the following AllowOverride FileInfo AuthConfig Limit Indexes Options FollowSymLinks ExecCGI Order allow,deny Allow from all
9. After that I've protected my awstats with a pass putting /usr/local/awstats/cgi-bin/.htaccess file containing the followingAuthType BasicAuthName "Restricted Access"AuthUserFile /usr/local/etc/apache2/myawstats.passwdRequire user admin
10. And last but not least, had to create the myawstats.passwd with the following command: htpasswd -c /usr/local/etc/apache2/myawstats.passwd admin

Right after I happily accessed my newly installed awstats via my domain https://www.pc-freak.net//cgi-bin/awstats/awstats.pl END—–

Installation and Configuration of Clamav antivirus on Debian GNU / Linux

Monday, September 9th, 2013

Clamav logo installing Clamav antivirus to scan periodically Debian server websites for viruses

Clamav Antivirus is one of must have packages installed on a new Debian Linux server. It is not only necessary whether configuring a new Mail server be it Qmail or Postfix but is good to have to always check files on a Webserver. Until few years infecting of Sites with Viruses / Installing WebShells or Backdooring for further access using Perl or PHP vulnerable PHP code was not so common, However nowadays with increase of complexity of languages and increase of not security minded programmers this possibility dramatically increaed. Thus nowadays, whether I configure a new Apache + PHP + CGI support server I always install Clamav AV. Some might argue that Clamav Virus definitions are still too little compared to proprietary solutions like BitDefender / AVG or Avast but since my experience with this under Linux is not so bright as well as Clamav captures essential Viruses and Backdoors I still prefer to keep on with Clamav.  Even on home Desktops with Linux clamav is of use as there are plenty of free-ware software for Linux which come only distributed only in a binary form and hence its good to check them with clamav before use whether they don't contain some well known Rootkit or Virus. Over the years Clamav has done great job for me whether I had to clean up "hacked" hosts containing  script kiddie exploit scanners or Virus infected ELF binaries
.
1. Installing ClamAV in Debian Wheezy Linux

Before time there was a separate Debian repository called Volatille providing latest version release of Clamav, since Debian Squeeze Volatille project is discontinued, thus installing on Wheezy as a deb package is only available via standard Debian repositories.

apt-get update && apt-get --yes upgrade
...

apt-get install --yes clamav clamav-daemon

As package dependencies you get installed:

clamav clamav-base clamav-freshclam libbz2-1.0 libclamav1 libcurl3 libidn11 ucf

Clamav-Daemon will launch immediately after packages are installed and is available as process name /usr/sbin/clamd

# ps ax |grep -i clam
 2641 ?        Ssl    6:39 /usr/sbin/clamd
 2791 ?        Ss    12:04 /usr/bin/freshclam -d --quiet
12300 pts/0    S+     0:00 grep -i clam

2. Updating Clamav Antivirus Definitions

Its worthy say few words on clamav-freshclam as it is part of ClamAV which is used to update Clamav Virus definitions. Update of ClamAV vir definitions are updating automatically through /usr/bin/freshclam daemon which is started automatically by Debian postconfiguration scripts right after Clamav install.

Manual update of AV definitions can be done also with freshclam.

# freshclam
ClamAV update process started at Sun Sep  8 17:48:36 2013
main.cvd is up to date (version: 54, sigs: 1044387, f-level: 60, builder: sven)
daily.cvd is up to date (version: 17830, sigs: 1696886, f-level: 63, builder: neo)
bytecode.cld is up to date (version: 225, sigs: 42, f-level: 63, builder: dgoddard)


To keep an eye on definition auto-updates (useful to check where something fails), check out in /var/log/clamav/freshclam.log

A sure indication that Anvirus updates are conducting fine should be log records like:
 

Sun Sep  8 16:27:44 2013 -> ————————————–
Sun Sep  8 17:27:44 2013 -> Received signal: wake up
Sun Sep  8 17:27:44 2013 -> ClamAV update process started at Sun Sep  8 17:27:44 2013
Sun Sep  8 17:27:44 2013 -> main.cvd is up to date (version: 54, sigs: 1044387, f-level: 60, builder: sven)
Sun Sep  8 17:27:44 2013 -> daily.cld is up to date (version: 17830, sigs: 1696886, f-level: 63, builder: neo)
Sun Sep  8 17:27:44 2013 -> bytecode.cld is up to date (version: 225, sigs: 42, f-level: 63, builder: dgoddard)
Sun Sep  8 17:27:47 2013 -> ————————————–


3. Configuring ClamAV

For Desktop use clamav default config is pretty good. However for servers its good to raise  2 up MaxThreads:

By default MaxThreads is 12

MaxThreads 12

Change to from 30 to 80 depending on how powerful machine ClamAV runs, even on some servers more Clamav threads might be necessary

MaxThreads 30

Other value I like changing is SelfCheck 3600 is too long time for clamav Virus definitions integrity I prefer to set it to 600, i.e.

SelfCheck 600

By default ClamAV is also configured to scan archive files as well. However for this to work you will have to have previously installed unzip and unrar on system. If still you don't have them installed run:

# apt-get install --yes unrar unzip
...

Note that you will need to have non-free part of Debian deb repositories to /etc/apt/sources.list

Here is one of my sources.list
 

deb http://ftp.uk.debian.org/debian squeeze main contrib non-free
deb http://security.debian.org/ squeeze/updates main contrib non-free
deb-src http://security.debian.org/ squeeze/updates main contrib non-free

deb http://ftp.debian.skynet.be/ftp/debian/ squeeze main contrib non-free
deb-src http://ftp.debian.skynet.be/ftp/debian/ stable main contrib non-free

deb http://security.debian.org squeeze/updates main contrib non-free
deb-src http://security.debian.org/ squeeze/updates main contrib non-free

3. Scanning with ClamAV

# clamscan -r /tmp/
./dos-58.160.208.43: OK
./dos-108.18.38.140: OK
./dos-188.194.80.100: OK
./dos-91.224.160.135: OK
./dos-128.253.117.70: OK
./dos-128.172.143.110: OK
./dos-77.92.102.34: OK
./dos-195.230.5.12: OK
...

....
----------- SCAN SUMMARY -----------
Known viruses: 2735887
Engine version: 0.97.8
Scanned directories: 1
Scanned files: 129
Infected files: 0
Data scanned: 0.00 MB
Data read: 0.00 MB (ratio 0.00:1)
Time: 4.769 sec (0 m 4 s)


-r flag stands for recursive scan – e.g. scan all sub-directories in directory and its content

To not flood your console / ssh connection one very useful option is -i (print only whetherinfected files are matched). Here is one more sample case:

# clamscan -r -i /var/tmp/
----------- SCAN SUMMARY -----------
Known viruses: 2735887
Engine version: 0.97.8
Scanned directories: 1
Scanned files: 2
Infected files: 0
Data scanned: 0.26 MB
Data read: 0.13 MB (ratio 1.97:1)
Time: 4.824 sec (0 m 4 s)


Whether you're on a physical server console and it has pc speaker or sound blaster use –bell option to ring a bell every time a Virus infection is found, for exmpl.

# clamscan -r -i --bell /var/www/

4. Scanning periodically and reporting with ClamAV directories with websites

A very common use of ClamAV is to just setup a scheduled cronjob once a month to scan, whether server folder containing a bunch of websites in separate Virtualhosts contain some viruses or malicious stuff. Then as administrator check those logs once a month to make sure server site or group of sites does not become banned in search engine (blocked by Google Chrome and Firefox as Virus hotbed) …
# crontab -u root -e
00 02 01 * * clamscan -r /var/www -l /var/log/websites-scan.log

Then once a month check out /var/log/websites-scan.log

How to change default Comments and No Comments location in WordPress in wordpress default theme

Tuesday, April 5th, 2011

For a number of time I’ve been planning to change my blog comments placement. Until this very day however I’ve kept the default wordpress theme’s Comments button placement.

I realize the default Comments button placement is a bit hard to see and not that much intuitive for the user that enters my blog for a first time.

My first guess was that there might be somewhere a wordpress plugin which will allow me to adjust my comments button placement.
After some research online and a realization that probably there is no such plugin existing yet. I’ve forced myself to tune it up myself.

It was clear to me that in order to change the it will be necessery to edit the WordPress templates files. I’m not a designer and when I hear about templates I usually get scared, however I took the time to take a look at the default wordpress template and find out actually that template modifications is actually rather easier than I thought.

My previous idea was that in order to edit templates you have to be some kind of CSS and HTML guru (which I’m not). Nevertheless it seems that in order to play and adjust in a good way the templates you don’t need ot be a pro.
Even an uneducated fool like myself can easily do almost everything he thinks of throughout few lines of code in the wp templates.

To get back to the major topic thanks God after a bit of review and reading of wordpress.org documentation and some user forums. I’ve figured out that in order to change my Comments placement you need to modify the file:
 

  • blog/wp-content/themes/default/index.php

In index.php find the line starting with:

You will notice within this opened paragraph the php code:

<?php the_tags('Tags: ', ', ', '
'); ?> Posted in <?php the_category(', ') ?>
| <?php edit_post_link('Edit', '', ' | '); ?>
<?php comments_popup_link('No Comments »', '1 Comment »', '% Comments »'); ?>

This is the actual default theme php code that makes the wordpress Comments or No Comments that maes the comments appear on the blog.

Now I’ve decided to let this be as it is but add one more Comment button to wordpress on a different location that is more appealing to my blog visitors

After quick evaluation I’ve determined that probably the best location that the Comments button should have is right after the end of the post text

If you think my idea for button placement is appropriate, to set this location for the Comments button, you will have to find the follwoing code in index.php:

<div class="entry">
<?php the_content('Read the rest of this entry »'); ?>
</div>

Right after the end of this code place the following code:

<?php comments_popup_link('No Comments »', '1 Comment »', '% Comments »'); ?>
</div>

How to fix “Fatal error: Call to undefined function: curl_init()” on FreeBSD and Debian

Saturday, June 18th, 2011

After installing the Tweet Old Post wordpress plugin and giving it, I’ve been returned an error of my PHP code interpreter:

Call to undefined function: curl_init()

As I’ve consulted with uncle Google’s indexed forums 😉 discussing the issues, I’ve found out the whole issues are caused by a missing php curl module

My current PHP installation is installed from the port tree on FreeBSD 7.2. Thus in order to include support for php curl it was necessery to install the port /usr/ports/ftp/php5-curl :

freebsd# cd /usr/ports/ftp/php5-curl
freebsd# make install clean

(note that I’m using the php5 port and it’s surrounding modules).

Fixing the Call to undefined function: curl_init() on Linux hosts I suppose should follow the same logic, e.g. one will have to install php5-curl to resolve the issue.
Fixing the missing curl_init() function support on Debian for example will be as easy as using apt to install the php5-curl package, like so:

debian:~# apt-get install php5-curl
...

Now my tweet-old-post curl requirement is matched and the error is gone, hooray 😉