Why to monitoring CPU, Memory, Hard Disk, Network usage etc. with sysstats tools?
Using system monitoring tools such as Zabbix, Nagios Monit is a good approach, however sometimes due to zabbix server interruptions you might not be able to track certain aspects of system performance on time. Thus it is always a good idea to
Gain more insights on system peroformance from command line. Of course there is cmd tools such as iostat and top, free, vnstat that provides plenty of useful info on system performance issues or bottlenecks. However from my experience to have a better historical data that is systimized and all the time accessible from console it is a great thing to have sysstat package at place. Since many years mostly on every server I administer, I've been using sysstats to monitor what is going on servers over a short time frames and I'm quite happy with it. In current company we're using Redhats and CentOS-es and I had to install sysstats on Redhat 8.3. I've earlier done it multiple times on Debian / Ubuntu Linux and while I've faced on some .deb distributions complications of making sysstat collect statistics I've come with an article on Howto fix sysstat Cannot open /var/log/sysstat/sa no such file or directory” on Debian / Ubuntu Linux
Sysstat contains the following tools related to collecting I/O and CPU statistics:
iostat
Displays an overview of CPU utilization, along with I/O statistics for one or more disk drives.
mpstat
Displays more in-depth CPU statistics.
Sysstat also contains tools that collect system resource utilization data and create daily reports based on that data. These tools are:
sadc
Known as the system activity data collector, sadc collects system resource utilization information and writes it to a file.
sar
Producing reports from the files created by sadc, sar reports can be generated interactively or written to a file for more intensive analysis.
My experience with CentOS 7 and Fedora to install sysstat it was pretty straight forward, I just had to install it via yum install sysstat wait for some time and use sar (System Activity Reporter) tool to report collected system activity info stats over time.
Unfortunately it seems on RedHat 8.3 as well as on CentOS 8.XX instaling sysstats does not work out of the box.
To complete a successful installation of it on RHEL 8.3, I had to:
[root@server ~]# yum install -y sysstat
To make sysstat enabled on the system and make it run, I've enabled it in sysstat
[root@server ~]# systemctl enable sysstat
Running immediately sar command, I've faced the shitty error:
“Cannot open /var/log/sysstat/sa18:
No such file or directory. Please check if data collecting is enabled”
Once installed I've waited for about 5 minutes hoping, that somehow automatically sysstat would manage it but it didn't.
To solve it, I've had to create additionally file /etc/cron.d/sysstat (weirdly RPM's post install instructions does not tell it to automatically create it)
[root@server ~]# vim /etc/cron.d/sysstat
# run system activity accounting tool every 10 minutes
0 * * * * root /usr/lib64/sa/sa1 60 59 &
# generate a daily summary of process accounting at 23:53
53 23 * * * root /usr/lib64/sa/sa2 -A &
- /usr/local/lib/sa1 is a shell script that we can use for scheduling cron which will create daily binary log file.
- /usr/local/lib/sa2 is a shell script will change binary log file to human-readable form.
[root@server ~]# chmod 600 /etc/cron.d/sysstat
[root@server ~]# systemctl restart sysstat
In a while if sysstat is working correctly you should get produced its data history logs inside /var/log/sa
[root@server ~]# ls -al /var/log/sa
Note that the standard sysstat history files on Debian and other modern .deb based distros such as Debian 10 (in y.2021) is stored under /var/log/sysstat
Here is few useful uses of sysstat cmds
1. Check with sysstat machine history SWAP and RAM Memory use
To lets say check last 10 minutes SWAP memory use:
[hipo@server yum.repos.d] $ sar -W |last -n 10
Linux 4.18.0-240.el8.x86_64 (server) 09/28/2021 _x86_64_ (8 CPU)
12:00:00 AM pswpin/s pswpout/s
12:00:01 AM 0.00 0.00
12:01:01 AM 0.00 0.00
12:02:01 AM 0.00 0.00
12:03:01 AM 0.00 0.00
12:04:01 AM 0.00 0.00
12:05:01 AM 0.00 0.00
12:06:01 AM 0.00 0.00[root@ccnrlb01 ~]# sar -r | tail -n 10
14:00:01 93008 1788832 95.06 0 1357700 725740 9.02 795168 683484 32
14:10:01 78756 1803084 95.81 0 1358780 725740 9.02 827660 652248 16
14:20:01 92844 1788996 95.07 0 1344332 725740 9.02 813912 651620 28
14:30:01 92408 1789432 95.09 0 1344612 725740 9.02 816392 649544 24
14:40:01 91740 1790100 95.12 0 1344876 725740 9.02 816948 649436 36
14:50:01 91688 1790152 95.13 0 1345144 725740 9.02 817136 649448 36
15:00:02 91544 1790296 95.14 0 1345448 725740 9.02 817472 649448 36
15:10:01 91108 1790732 95.16 0 1345724 725740 9.02 817732 649340 36
15:20:01 90844 1790996 95.17 0 1346000 725740 9.02 818016 649332 28
Average: 93473 1788367 95.03 0 1369583 725074 9.02 800965 671266 29
2. Check system load? Are my processes waiting too long to run on the CPU?
[root@server ~ ]# sar -q |head -n 10
Linux 4.18.0-240.el8.x86_64 (server) 09/28/2021 _x86_64_ (8 CPU)12:00:00 AM runq-sz plist-sz ldavg-1 ldavg-5 ldavg-15 blocked
12:00:01 AM 0 272 0.00 0.02 0.00 0
12:01:01 AM 1 271 0.00 0.02 0.00 0
12:02:01 AM 0 268 0.00 0.01 0.00 0
12:03:01 AM 0 268 0.00 0.00 0.00 0
12:04:01 AM 1 271 0.00 0.00 0.00 0
12:05:01 AM 1 271 0.00 0.00 0.00 0
12:06:01 AM 1 265 0.00 0.00 0.00 0
3. Show various CPU statistics per CPU use
On a multiprocessor, multi core server sometimes for scripting it is useful to fetch processor per use historic data,
this can be attained with:
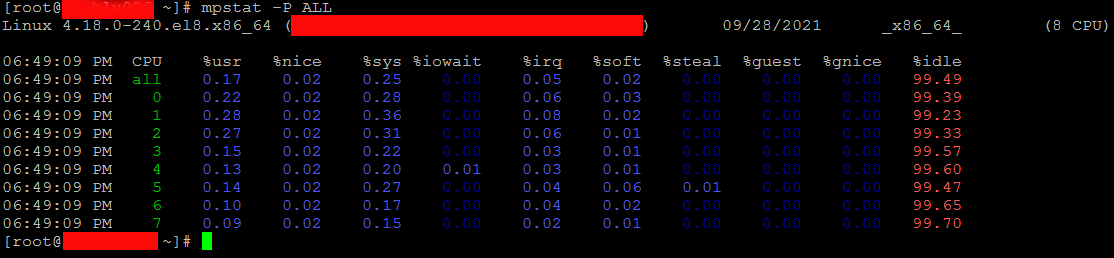
[hipo@server ~ ] $ mpstat -P ALL
Linux 4.18.0-240.el8.x86_64 (server) 09/28/2021 _x86_64_ (8 CPU)06:08:38 PM CPU %usr %nice %sys %iowait %irq %soft %steal %guest %gnice %idle
06:08:38 PM all 0.17 0.02 0.25 0.00 0.05 0.02 0.00 0.00 0.00 99.49
06:08:38 PM 0 0.22 0.02 0.28 0.00 0.06 0.03 0.00 0.00 0.00 99.39
06:08:38 PM 1 0.28 0.02 0.36 0.00 0.08 0.02 0.00 0.00 0.00 99.23
06:08:38 PM 2 0.27 0.02 0.31 0.00 0.06 0.01 0.00 0.00 0.00 99.33
06:08:38 PM 3 0.15 0.02 0.22 0.00 0.03 0.01 0.00 0.00 0.00 99.57
06:08:38 PM 4 0.13 0.02 0.20 0.01 0.03 0.01 0.00 0.00 0.00 99.60
06:08:38 PM 5 0.14 0.02 0.27 0.00 0.04 0.06 0.01 0.00 0.00 99.47
06:08:38 PM 6 0.10 0.02 0.17 0.00 0.04 0.02 0.00 0.00 0.00 99.65
06:08:38 PM 7 0.09 0.02 0.15 0.00 0.02 0.01 0.00 0.00 0.00 99.70
Monitor processes and threads currently being managed by the Linux kernel.
[hipo@server ~ ] $ pidstat
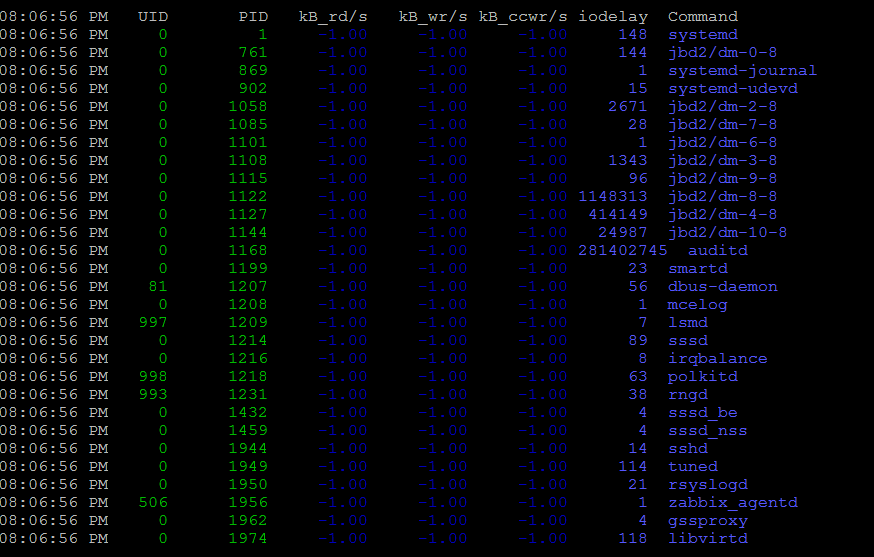
[hipo@server ~ ] $ pidstat -d 2
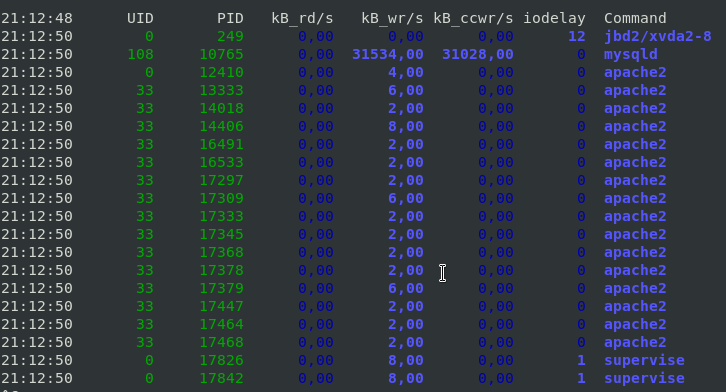
This report tells us that there is few processes with heave I/O use Filesystem system journalling daemon jbd2, apache, mysqld and supervise, in 3rd column you see their respective PID IDs.
To show threads used inside a process (like if you press SHIFT + H) inside Linux top command:
[hipo@server ~ ] $ pidstat -t -p 10765 1 3
Linux 4.19.0-14-amd64 (server) 28.09.2021 _x86_64_ (10 CPU)
21:41:22 UID TGID TID %usr %system %guest %wait %CPU CPU Command
21:41:23 108 10765 – 1,98 0,99 0,00 0,00 2,97 1 mysqld
21:41:23 108 – 10765 0,00 0,00 0,00 0,00 0,00 1 |__mysqld
21:41:23 108 – 10768 0,00 0,00 0,00 0,00 0,00 0 |__mysqld
21:41:23 108 – 10771 0,00 0,00 0,00 0,00 0,00 5 |__mysqld
21:41:23 108 – 10784 0,00 0,00 0,00 0,00 0,00 7 |__mysqld
21:41:23 108 – 10785 0,00 0,00 0,00 0,00 0,00 6 |__mysqld
21:41:23 108 – 10786 0,00 0,00 0,00 0,00 0,00 2 |__mysqld
…
10765 – is the Process ID whose threads you would like to list
With pidstat, you can further monitor processes for memory leaks with:
[hipo@server ~ ] $ pidstat -r 2
4. Report paging statistics for some old period
[root@server ~ ]# sar -B -f /var/log/sa/sa27 |head -n 10
Linux 4.18.0-240.el8.x86_64 (server) 09/27/2021 _x86_64_ (8 CPU)15:42:26 LINUX RESTART (8 CPU)
15:55:30 LINUX RESTART (8 CPU)
04:00:01 PM pgpgin/s pgpgout/s fault/s majflt/s pgfree/s pgscank/s pgscand/s pgsteal/s %vmeff
04:01:01 PM 0.00 14.47 629.17 0.00 502.53 0.00 0.00 0.00 0.00
04:02:01 PM 0.00 13.07 553.75 0.00 419.98 0.00 0.00 0.00 0.00
04:03:01 PM 0.00 11.67 548.13 0.00 411.80 0.00 0.00 0.00 0.00
5. Monitor Received RX and Transmitted TX network traffic perl Network interface real time
To print out Received and Send traffic per network interface 4 times in a raw
[hipo@server ~ ] $ sar -n DEV 1 4
To continusly monitor all network interfaces I/O traffic
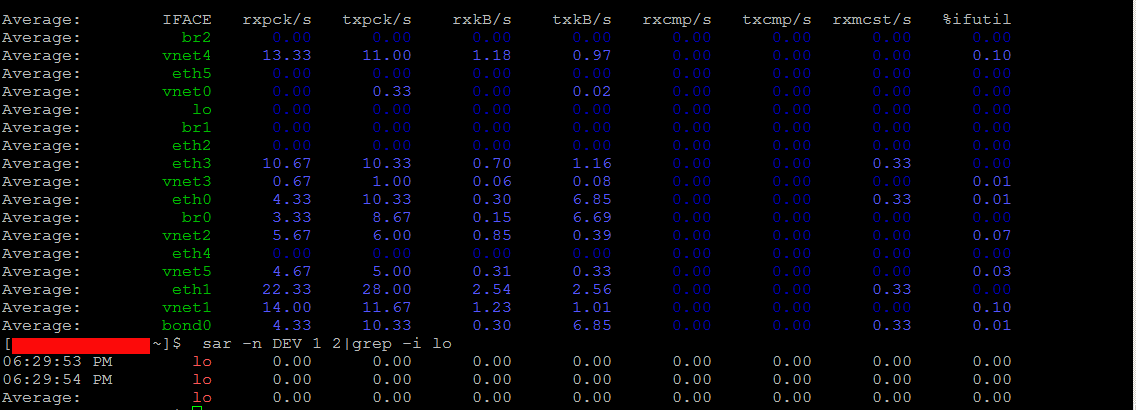
[hipo@server ~ ] $ sar -n DEV 1
To only monitor a certain network interface lets say loopback interface (127.0.0.1) received / transmitted bytes
[hipo@server yum.repos.d] $ sar -n DEV 1 2|grep -i lo
06:29:53 PM lo 0.00 0.00 0.00 0.00 0.00 0.00 0.00 0.00
06:29:54 PM lo 0.00 0.00 0.00 0.00 0.00 0.00 0.00 0.00
Average: lo 0.00 0.00 0.00 0.00 0.00 0.00 0.00 0.00
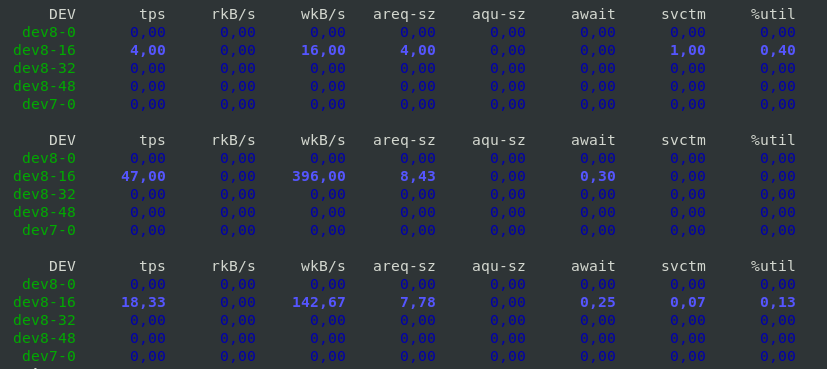
6. Monitor block devices use
To check block devices use 3 times in a raw
[hipo@server yum.repos.d] $ sar -d 1 3
7. Output server monitoring data in CSV database structured format
For preparing a nice graphs with Excel from CSV strucuted file format, you can dump the collected data as so:
[root@server yum.repos.d]# sadf -d /var/log/sa/sa27 — -n DEV | grep -v lo|head -n 10
server-name-fqdn;-1;2021-09-27 13:42:26 UTC;LINUX-RESTART (8 CPU)
# hostname;interval;timestamp;IFACE;rxpck/s;txpck/s;rxkB/s;txkB/s;rxcmp/s;txcmp/s;rxmcst/s;%ifutil
server-name-fqdn;-1;2021-09-27 13:55:30 UTC;LINUX-RESTART (8 CPU)
# hostname;interval;timestamp;IFACE;rxpck/s;txpck/s;rxkB/s;txkB/s;rxcmp/s;txcmp/s;rxmcst/s;%ifutil
server-name-fqdn;60;2021-09-27 14:01:01 UTC;eth1;19.42;16.12;1.94;1.68;0.00;0.00;0.00;0.00
server-name-fqdn;60;2021-09-27 14:01:01 UTC;eth0;7.18;9.65;0.55;0.78;0.00;0.00;0.00;0.00
server-name-fqdn;60;2021-09-27 14:01:01 UTC;eth2;5.65;5.13;0.42;0.39;0.00;0.00;0.00;0.00
server-name-fqdn;60;2021-09-27 14:02:01 UTC;eth1;18.90;15.55;1.89;1.60;0.00;0.00;0.00;0.00
server-name-fqdn;60;2021-09-27 14:02:01 UTC;eth0;7.15;9.63;0.55;0.74;0.00;0.00;0.00;0.00
server-name-fqdn;60;2021-09-27 14:02:01 UTC;eth2;5.67;5.15;0.42;0.39;0.00;0.00;0.00;0.00
…
To graph the output data you can use Excel / LibreOffice's Excel equivalent Calc or if you need to dump a CSV sar output and generate it on the fly from a script use gnuplot
What we've learned?
How to install and enable on cron sysstats on Redhat and CentOS 8 Linux ?
How to continuously monitor CPU / Disk and Network, block devices, paging use and processes and threads used by the kernel per process ?
As well as how to export previously collected data to CSV to import to database or for later use inrder to generate graphic presentation of data.
Cheers ! 🙂


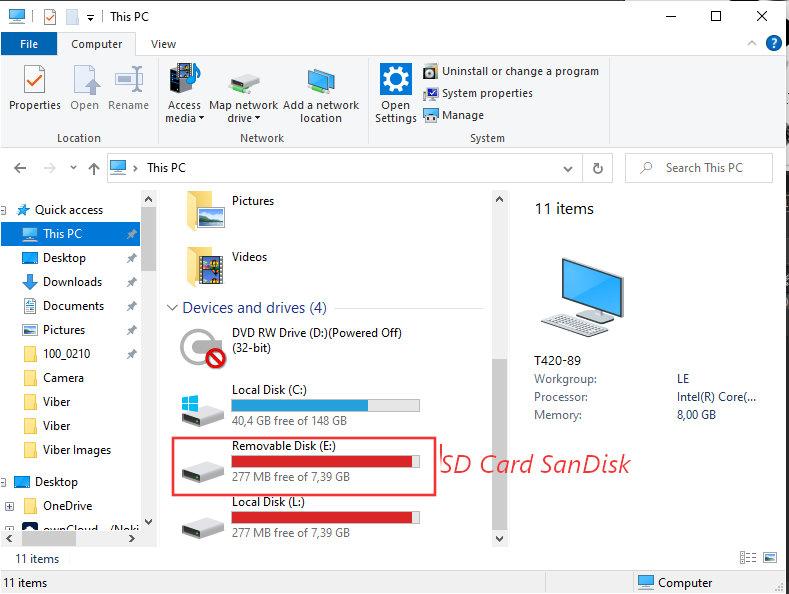
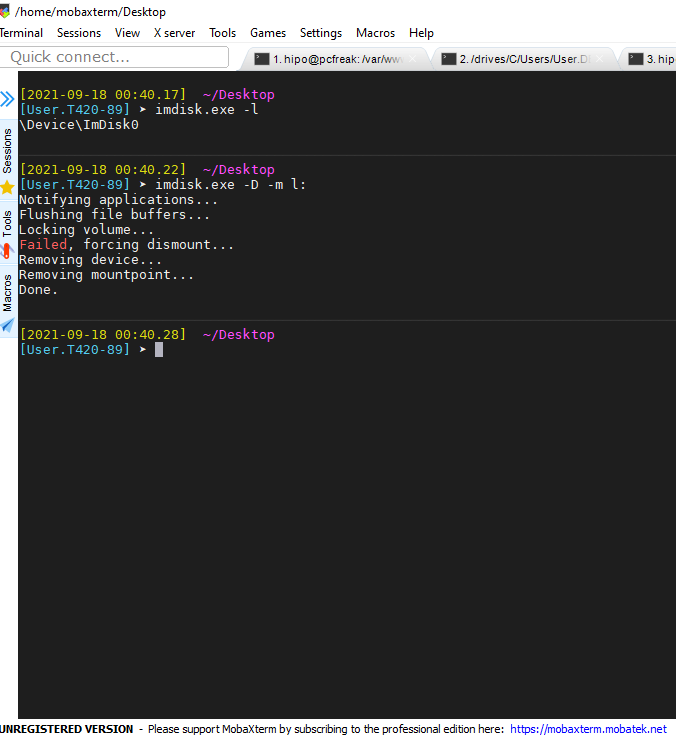
 Check drives device naming on WIndows PC – Screenshot extract from Mobaxterm


