Posts Tagged ‘application’

Mysql: How to disable single database without dropping or renaming it

Wednesday, January 22nd, 2014

mysql rename forbid disable database howto logo, how to disable single database without dropping it
A colleague of mine working on MySQL database asked me How it is possible to disable a MySQL database. He is in situation where the client has 2 databases and application and is not sure which of the two databases the application uses. Therefore the client asked one of the database is disabled and wait for few hours and see if something will break / stop working and in that way determine which of the two database is used by application.

My first guess was to backup both databases and drop one of them, then if it is the wrong one to restore from the SQL dump backup, however this wasn't acceptable solution. So second I though of RENAME of database to another one and then reverting the name, however as it is written in MySQL documentation RENAME database function was removed from MySQL (found to be dangerous) since version 5.1.23 onwards. Anyhow there is a quick hack to rename mysql database using a for loop shell script one below:

mysql -e "CREATE DATABASE \`new_database\`;"
for table in `mysql -B -N -e "SHOW TABLES;" old_database`
do
  mysql -e "RENAME TABLE \`old_database\`.\`$table\` to \`new_database\`.\`$table\`"
  done
  mysql -e "DROP DATABASE \`old_database\`;"

Other possible solution was to change permissions of Application used username, however this was also complicated from mysql cli, hence I thought of installing and using PHPMyAdmin to make modify of db user permissions easier but on this server there wasn't Apache installed and MySQL is behind a firewall and only accessible via java tomcat host.

Finally after some pondering what can be done I came with solution to request to disable mysql database using chmod in /var/lib/mysql/data/, i.e.:

sql-server:~# chmod 0 /var/lib/mysql/databasename

Where databasename is the same as the database is named listable via mysql cli.

After doing it that way with no need to restart MySQL server database stopped to appear in show databases; and client confirmed that disabled database is no longer needed so we proceeded dropping it.

Hope this little article will help someone out there. Cheers :

Windows 7 change windows behavior like XP How to / Make Windows 7 act like XP

Tuesday, January 21st, 2014

If you haven't worked for a while with Windows (since the days when XP was standard modern OS) you might be amazed that Windows like me. You might feel pretty unconfortable to work with Windows 7's "dock style" taskbar – showing application icons instead of buttons.

dock-style-taskbar-windows-7-screenshot

People who are traditionalist like me would definitely prefer to change this stupid behavior to "Windows Classic". Here is how to do it:

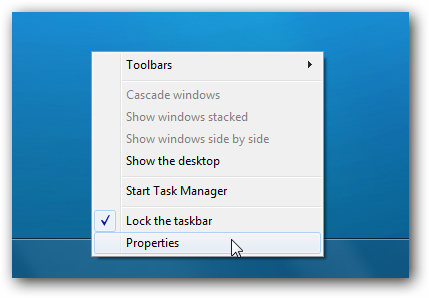
1. Right click on any open area on taskbar and choose Properties

properties-on-empty-taskbar-windows-7-screenshot
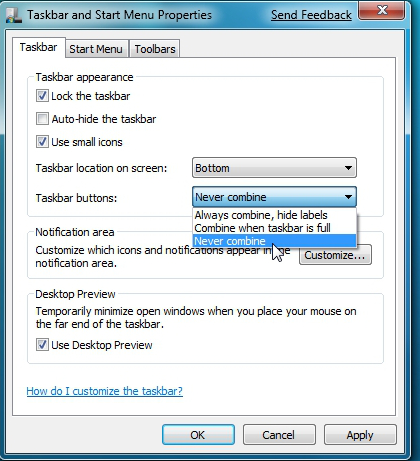
2. From Taskbar -> Taskbar Buttons choose (Never Combine).

Never Combine – option makes every new Window to show as a separate one instead of Grouping the Windows by application.
In some cases choosing (Combine when TaskBar) is full is nice new option, so you might want to check it out for a while and see if you can get used to it.

never_combine_windows-7-make-windows-look-like-XP-and-2000

3. Make Windows Start menu panel look like Windows 2000 (clear up unnecessary mambo-jumbo design)
I very much like simplicity thus I don't like Microsoft's choise to make Start Menu panel look like a Christmas Tree. To revert back:

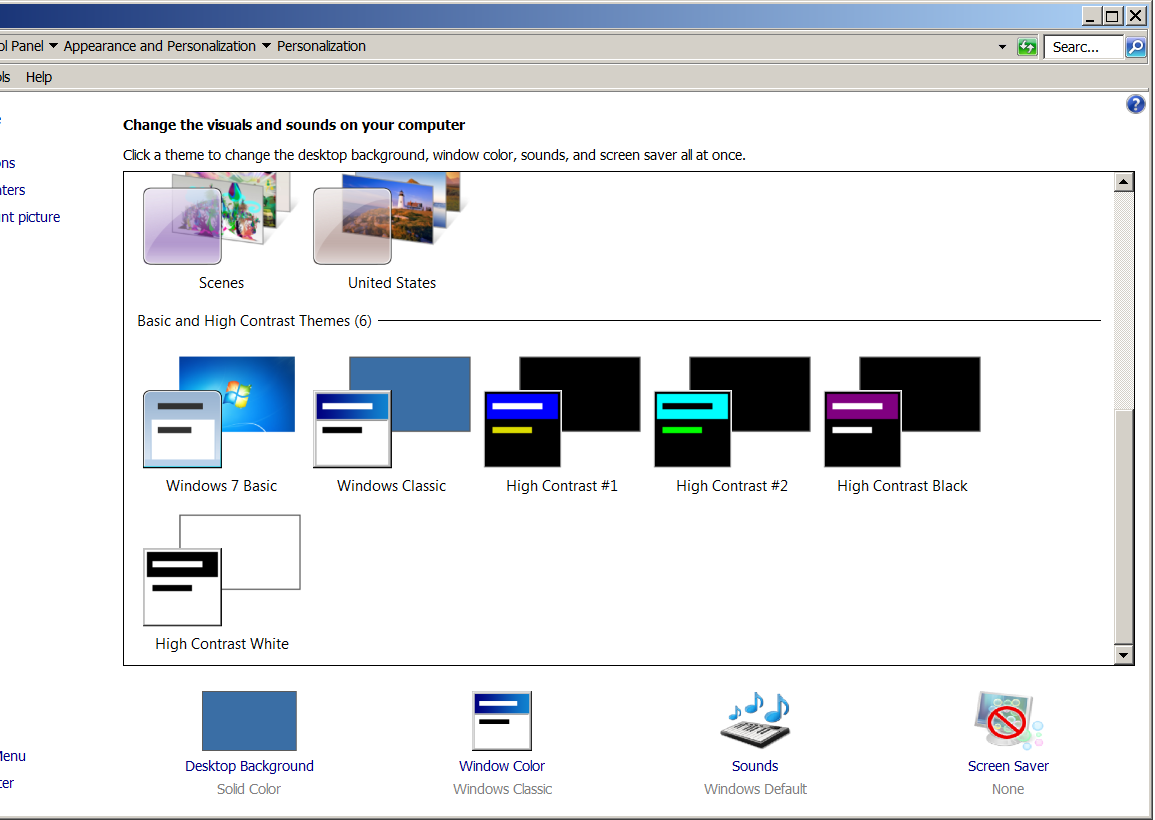
On any empty space on the Desktop press Right Mouse button (Choose Personalize); Scroll down and choose (Windows Classic theme)

windows-personalize-screenshot-windows-classics

That will change Windows to look normal again 🙂

windows-start-menu-screenshot

Cheers 🙂

MySQL SSL Configure Howto – How to Make MySQL communication secured

Wednesday, January 15th, 2014

mysql-over-ssl-how-to-configure-logo how to configure ssl on mysql server

Recently I've been asked How to make communication to MySQL database encrypted. The question was raised by a fellow developer who works on developing a Desktop standalone application in Delphi Programming Language with DevArt an (SQL Connection Component capable to connect Delphi applications to multiple databases like MySQL, Oracle, PostgreSQL, Interbase, Firebird etc.

Communicating in Secured form to MySQL database is not common task to do, as MySQL usually communicates to applications hosted on same server or applications to communicate to MySQL are in secured DMZ or administrated via phpMyAdmin web interface.

MySQL supports encrypted connections to itself using Secure Socket Layer (SSL) encryption. Setting up MySQL db to be communicated encrypted is a must for standalone Desktop applications which has to extract / insert data via remote SQL.
Configuring SQL to support communicated queries encrpytion is supported by default and easily configured on most standard Linux version distributions (Debian, RHEL, Fedora) with no need to recompile it.
1. Generate SSL Certificates

$ mkdir /etc/mysql-ssl && cd mysql-ssl

# Create CA certificate
$ openssl genrsa 2048 > ca-key.pem
$ openssl req -new -x509 -nodes -days 3600 \
         -key ca-key.pem -out ca-cert.pem

Create server certificate, remove passphrase, and sign it
server-cert.pem is public key, server-key.pem is private key
$ openssl req -newkey rsa:2048 -days 3600 \
         -nodes -keyout server-key.pem -out server-req.pem

$ openssl rsa -in server-key.pem -out server-key.pem
$ openssl x509 -req -in server-req.pem -days 3600 \
         -CA ca-cert.pem -CAkey ca-key.pem -set_serial 01 -out server-cert.pem

Create client certificate, remove passphrase, and sign it
client-cert.pem is public key and client-key.pem is private key
$ openssl req -newkey rsa:2048 -days 3600 \
         -nodes -keyout client-key.pem -out client-req.pem

$ openssl rsa -in client-key.pem -out client-key.pem
$ openssl x509 -req -in client-req.pem -days 3600 \
         -CA ca-cert.pem -CAkey ca-key.pem -set_serial 01 -out client-cert.pem

After generating the certificates, verify them:

$ openssl verify -CAfile ca-cert.pem server-cert.pem client-cert.pem
 

2. Add SSL support variables to my.cnf

Once SSL key pair files are generated in order to active SSL encryption support in MySQL server, add to (/etc/my.cnf,  /etc/mysql/my.cnf, /usr/local/etc/my.cnf … ) or wherever config is depending on distro

# SSL
ssl-ca=/etc/mysql-ssl/ca-cert.pem
ssl-cert=/etc/mysql-ssl/server-cert.pem
ssl-key=/etc/mysql-ssl/server-key.pem

3. Restart MySQL server

/etc/init.d/mysqld restart
...

4. Create SQL user to require SSL login

Create new user with access to database;

GRANT ALL ON Sql_User_DB.* TO Sql_User@localhost;
FLUSH PRIVILEGES;

To create administrator privileges user:

GRANT ALL PRIVILEGES ON *.* TO ‘ssluser’@'%’ IDENTIFIED BY ‘pass’ REQUIRE SSL;
FLUSH PRIVILEGES;

5. Test SSL Connection with MySQL CLI client or with few lines of PHP

To use mysql cli for testing whether SSL connection works:

$ mysql -u ssluser -p'pass' –ssl-ca /etc/mysql-ssl/client-cert.pem –ssl-cert /etc/mysql-ssl/client-key.pem

Once connected to MySQL to verify SSL connection works fine:

mysql> SHOW STATUS LIKE 'Ssl_Cipher';
 +---------------+--------------------+
| Variable_name | Value              |
 +---------------+--------------------+
| Ssl_cipher    | DHE-RSA-AES256-SHA |
+---------------+--------------------+

If you get this output this means MySQL SSL Connection is working as should.

Alternative way is to use test-mysqli-ssl.php script to test availability to mysql over SSL.

$conn=mysqli_init();
mysqli_ssl_set($conn, '/etc/mysql-ssl/client-key.pem', '/etc/mysql-ssl/client-cert.pem', NULL, NULL, NULL);
if (!mysqli_real_connect($conn, '127.0.0.1', 'ssluser', 'pass')) { die(); }
$res = mysqli_query($conn, 'SHOW STATUS like "Ssl_cipher"');
print_r(mysqli_fetch_row($res));
mysqli_close($conn);

Note: Change username password according to your user / pass before using the script

That's all now you have mysql communicating queries data over SSL


Adding Listing and Deleting SSL Certificates in keystore Tomcat Application server / What is keystore

Thursday, December 5th, 2013

Apache Tomcat keystore delete import list logo

 I work on ongoing project where Tomtat Application servers configured to run Clustered located behind Apache with mod_proxy configured to use ReverseProxy are used. One of customers which required a java application deployment experienced issues with application's capability to connect to SAP database.

After some investigation I figured out, the application is unable to connect to the SAP db server becuse remote host webserver running some SAP related stuff was not connecting due to expired certificate in Tomcat Keystore known also as JKS / Java Keystore– (.keystore) – which is a file containing multiple remote hosts imported certificates.

The best and shortest definition of keystore is:

Keystore entry = private + public key pair = identified by an alias

The keystore protects each private key with its individual password, and also protects the integrity of the entire keystore with a (possibly different) password.

Managing Java imported certificates later used by Tomcat is done with a command line tool part of JDK (Java Development Kit) called keystore. Keystore is usually located under /opt/java/jdk/bin/keytool. My Java VM is installed in /opt/ anyways usual location of keytool is $JAVA_HOME/bin/

Keytool has capabilities to create / modify / delete or import new SSL certificates and then Java applications can access remote applications which requires Secure Socket Layer handshake . Each certificate kept in .keystore file (usually located somewhere under Tomcat web app server directory tree), lets say – /opt/tomcat/current/conf/.keystore

1. List current existing imported SSL certificates into Java's Virtual Machine

tomcat-server:~# /opt/java/jdk/bin/keytool -list -keystore /opt/tomcat/current/conf/.keystore
password:
Command returns output similar to;

Entry type: trustedCertEntry

Owner: CN=www.yourhost.com, OU=MEMBER OF E.ON GROUP, OU=DEVICES, O=E.GP AG, C=DE
Issuer: CN=E.ON Internal Devices Sub CA V2, OU=CA, O=EGP, C=DE
Serial number: 67460001001c6aa51fd25c0e8320
Valid from: Mon Dec 27 07:05:33 GMT 2010 until: Fri Dec 27 07:05:22 GMT 2013
Certificate fingerprints:
         MD5:  D1:AA:D5:A9:A3:D2:95:28:F1:79:57:25:D3:6A:16:5E
         SHA1: 73:CE:ED:EC:CA:18:E4:E4:2E:AA:25:58:E0:2B:E4:D4:E7:6E:AD:BF
         Signature algorithm name: SHA1withRSA
         Version: 3

Extensions:

#1: ObjectId: 2.5.29.15 Criticality=true
KeyUsage [
  DigitalSignature
  Key_Encipherment
  Key_Agreement
]

#2: ObjectId: 2.5.29.19 Criticality=true
BasicConstraints:[
  CA:false
  PathLen: undefined
]

#3: ObjectId: 1.3.6.1.5.5.7.1.1 Criticality=false
AuthorityInfoAccess [
  [
   accessMethod: 1.3.6.1.5.5.7.48.2
   accessLocation: URIName: http://yourhost.com/cacerts/egp_internal_devices_sub_ca_v2.crt,
   accessMethod: 1.3.6.1.5.5.7.48.2
   accessLocation: URIName: http://www.yourhost1.com/certservices/cacerts/egp_internal_devices_sub_ca_v2.crt]
]

#4: ObjectId: 2.5.29.14 Criticality=false
SubjectKeyIdentifier [
KeyIdentifier [
0000: D3 52 C7 63 0F 98 BF 6E   FE 00 56 5C DF 35 62 22  .R.c…n..V\.5b"
0010: F2 B9 5B 8F                                        ..[.
]

Note that password that will be promtped has is by default changeit (in case if you don't have explicitly changed it from Tomcat's default config server.xml).

2. Delete Old expired SSL host Certificate from Java Keystore
It is good practice to always make backup of old .keystore before modifying, so I ran:

tomcat-server:~# cp -rpf /opt/tomcat/current/conf/.keystore /opt/tomcat/current/conf/.keystore-05-12-2013

In my case first I had to delete old expired SSL certificate with:

tomcat-server:~# /opt/java/jdk/bin/keytool -delete -alias "your-hostname" -v -keystore /opt/tomcat/current/conf/.keystore

Then to check certificate is no longer existent in keystore chain;
tomcat-server:~# /opt/java/jdk/bin/keytool -list -keystore /opt/tomcat/current/conf/.keystore

-keystore – option is obligitory it does specify where keystore file is located
-list – does list the certificate
-v – stands for verbose


3. Finally to import new SSL from already expored via a browser url in keystore

tomcat-server:~# /opt/java/jdk/bin/keytool -importcert -file /tmp/your-hostname.cer -alias your-hostname.com -keystore /opt/tomcat/current/conf/.keystore

More complete information on how to deal with keystore is available from Apache Tomcat's SSL Howto – a must read documentation for anyone managing Tomcat.

How to Screenshot single Windows on GNU / Linux GNOME Desktop

Friday, October 28th, 2011

Every now and then I have to screenshot particular windows positioned on the screen on my GNOME Desktop envronment
Recently I was happy to find there is a very easy way to do this with the default Screenshotting program that is bundled with gnome gnome-screenshot

To screenshot a particular window using gnome-screenshot , its quite easy all one has to do is point the mouse cursor to the window he wants to snapshot and press:

Alt + PrtScr (Print Screen)

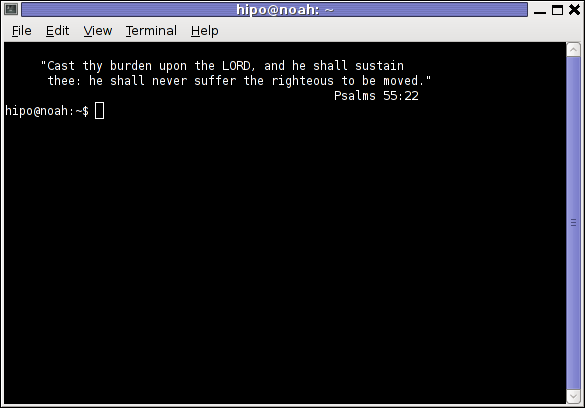
Here is a screenshot, I’ve taken of my gnome-terminal using the above command:

Particular window Screenshot Window screenshotting using GNOME gnome-screenshot

One can do it also via the command line using the /usr/bin/gnome-screenshot , by pressing Alt + F2 to invoke the run application and type in:

/usr/bin/gnome-screenshot -w


I was quite happy to find out that this is possible on Linux inside gnome without bothering to run GIMP or use any external programs for the cause. Hope this helps someone 😉 

Debian Squeeze/Sid Unstable Compiz fix Gnome Run Application Alt+F2 problem

Thursday, September 3rd, 2009

I’ve happily installed and use compiz-gnome. In order to succesfully run compiz I was required to execute itvia the command
1. # compiz –replace &
Compiz broke the default behaviour of some of my assigned keys like for example the nice handy Alt+F2 Run Application dialog box.That made me irritated and therefore I wanted to have the handy feature working as before. The suggested solution to the situation was proposedby user kiprit on the following post in ubuntuforums . I will quote here what the valueable post reads:
Start Compiz Config Settings ManagerGo to General Options, under Commands tabunder the commands fold, command line 0, type: gnome-rungo to “key bindings” fold, Run command 0, assign Alt+F2
It seems gnome for some reasons does not include application that invokes the Gnome Application Run menu. To fix that somebody out there has written a small program in C language that refers to the Run Application dialog.
Download the program gnome-run.c here . To properly compile the program use:
2. gcc -o gnome-run gnome-run.c -L/usr/lib/X11 -lX11
If you’re lucky gnome-run should be now poping up the Run Application dialog.
Afterwards please follow the instructions inabove’s forum post . I wasn’t completely happy with the solution because gnome-run doesn’t execute the Run Application dialog front focused. I’ve googled for other swift way to execute commands through a command and I came upon gmrun . Happily for me gmrun was already included in a packaged deb binary so all I had to do is install it via apt-get install gmrun and set it for execution on alt+f2 key press again as explained above.END—–

Alltray, The Linux, BSD, Unix, handy program to send any application into the system tray

Sunday, September 20th, 2009

Yesterday I found an interesting small proggie that enables you to tray in a fast manner any unix application
to the GNOME, KDE’s system tray.
Alltray also works with many other desktop environments and window managers.
This application made my life a bit easier since now I’m able to send into the tray my mail application of choice (Thunderbird),or as called in Debian icedove. To do that all I had to do was:

$ alltray icedove . To make this behaviour permanent you can use:
The program alacarte which allows you to edit your Gnome menus in a fast and comfortable manner.
For instance on Debian run alacarte Go to Internet -> Icedove Mail/News click Properties and changethe default command: icedove %u change with alltray icedove %u
Congrats your Thunderbird will now go to tray any time you run it.
Now you can do the same with any other application that lacks tray support.
Here is a link to Alltray’s website
END—–