Posts Tagged ‘rhel’

How to yum Install Gnome GUI, Latest Guest Addition Tools, Google Chrome latest version and rdesktop / xfreerdp / remmina remote RDP VNC clients On CentOS 7 / 8

Thursday, July 29th, 2021

centos7-logo

I've just reinstalled my CentOS 7 Virtual Machine since after I tried to migrate a .vdi Virtual Box image to the new company laptop using a copy of Virtualbox VM via Microsoft OneDrive was a failure.
Thus I have rebuild all my CentOS Linux programs preinstalled on the old Virtual Machines from scratch, I use this virtual machine for a very simple tasks, so basicly most imporant tools I use is a plain SSH and VNC and Remote Desktop clients just to be able to remotely connect to remote Home based server.


1.Install GNOME Graphical Environment from command line on CentOS 7 with yum and configure it to start GUI on next OS boot


I've used a minimal CentOS installation – ISO CentOS-7-x86_64-DVD-1908.iso and this brings up the OS with a text mode only as usually CentOS is used to roll on Servers and rarely and many times admins did not want to have GUI at all, however my case is different since I do like to use Graphical Environment as I use my CentOS for all kind of testing that can be later applied to a Production machines that doesn't have a GUI, hence to install GNOME on CentOS run below cmds:
 

[root@centos ~ ]# yum group list
Loaded plugins: fastestmirror
There is no installed groups file.
Maybe run: yum groups mark convert (see man yum)
Loading mirror speeds from cached hostfile
Available Environment Groups:
 Minimal Install
 Compute Node
 Infrastructure Server
 File and Print Server
 Basic Web Server
 Virtualization Host
 Server with GUI
 GNOME Desktop
 KDE Plasma Workspaces
 Development and Creative Workstation
Available Groups:
 Compatibility Libraries
 Console Internet Tools
 Development Tools
 Graphical Administration Tools
 Legacy UNIX Compatibility
 Scientific Support
 Security Tools
 Smart Card Support
 System Administration Tools
 System Management
Done


[root@centos ~ ]# yum groupinstall "GNOME Desktop" "Graphical Administration Tools" -y


Enable GUI to be automatically start on CentOS VM boot in systemd this is configured with the "targets" instead of the well known classical runlevels (the well known /etc/inittab) is now obsolete in newer Linux distros.

[root@centos ~ ]# ln -sf /lib/systemd/system/runlevel5.target /etc/systemd/system/default.target


2. Install Guest Additions Tools on CentOS


The most basic thing to do once I've had the CentOS Linux release 7.7.1908 (Core) rolled out on the VirtualBox is of course to enable Guest Additions Tools

First I had to install of course Guest Additions Tools to allow myself to have a copy paste in clip board via the Host Machine (Windows 10) and the Guest Machine.
To do I had to:

[root@centos ~ ]# yum install kernel-headers.x86_64 -y

[root@centos ~ ]# rpm -Uvh https://dl.fedoraproject.org/pub/epel/epel-release-latest-7.noarch.rpm

[root@centos ~ ]#  yum install perl gcc dkms kernel-devel kernel-headers make bzip2

To check the required VBoxLinuxAdditions.run script kernel headers are at place:

[root@centos ~ ]# ls -l /usr/src/kernels/$(uname -r)


You should get a list of kernel header files

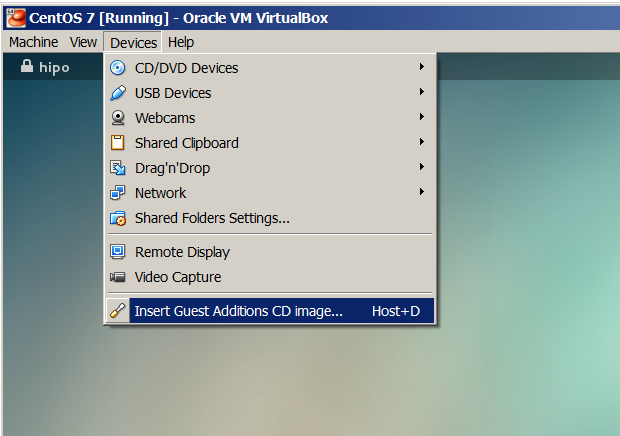
Then once I've done the Insert Guest Additions CD Image from the VirtualBox VM upper menu. I've had to mount and load the guest additions via the script:
 

[root@centos ~ ]# mkdir /mnt/cdrom
[root@centos ~ ]# mount /dev/cdrom /mnt/cdrom
[root@centos ~ ]# sh VBoxLinuxAdditions.run

After rebooting the Virtual Machine, I've used the full screen functionality to test and configured immediately Shared Clipboard and Drag and Drop to be both set to (Bidirectional) as well as configured a Shared folder to provide my Windows Desktop under /mnt/shared_folder (as read write) as I usually do to be able to easily copy files from the VM and to the Windows.

3. Install Google Chrome on the CentOS Virtual Machine with yum
 

Next I've installed the chrome browser that was pretty trivial it is up to fetching the required 32 or 64 bit latest chrome binary this is usually on URL:

[root@centos ~ ]# wget https://dl.google.com/linux/direct/google-chrome-stable_current_x86_64.rpm

and installing Google Chrome with superuser with command:

[root@centos ~ ]# yum install ./google-chrome-stable_current_*.rpm -y


Loaded plugins: fastestmirror, langpacks
Examining ./google-chrome-stable_current_x86_64.rpm: google-chrome-stable-92.0.4515.107-1.x86_64
Marking ./google-chrome-stable_current_x86_64.rpm to be installed
Resolving Dependencies
–> Running transaction check
—> Package google-chrome-stable.x86_64 0:92.0.4515.107-1 will be installed
–> Processing Dependency: liberation-fonts for package: google-chrome-stable-92.0.4515.107-1.x86_64
Loading mirror speeds from cached hostfile
 * base: mirror.digitalnova.at
 * epel: fedora.ipacct.com
 * extras: mirror.digitalnova.at
 * updates: mirror.digitalnova.at
–> Processing Dependency: libvulkan.so.1()(64bit) for package: google-chrome-stable-92.0.4515.107-1.x86_64
–> Running transaction check
—> Package liberation-fonts.noarch 1:1.07.2-16.el7 will be installed
–> Processing Dependency: liberation-narrow-fonts = 1:1.07.2-16.el7 for package: 1:liberation-fonts-1.07.2-16.el7.noarch
—> Package vulkan.x86_64 0:1.1.97.0-1.el7 will be installed
–> Processing Dependency: vulkan-filesystem = 1.1.97.0-1.el7 for package: vulkan-1.1.97.0-1.el7.x86_64
–> Running transaction check
—> Package liberation-narrow-fonts.noarch 1:1.07.2-16.el7 will be installed
—> Package vulkan-filesystem.noarch 0:1.1.97.0-1.el7 will be installed
–> Finished Dependency Resolution

Dependencies Resolved

================================================================================
 Package                 Arch   Version         Repository                 Size
================================================================================
Installing:
 google-chrome-stable    x86_64 92.0.4515.107-1 /google-chrome-stable_current_x86_64
                                                                          259 M
Installing for dependencies:
 liberation-fonts        noarch 1:1.07.2-16.el7 base                       13 k
 liberation-narrow-fonts noarch 1:1.07.2-16.el7 base                      202 k
 vulkan                  x86_64 1.1.97.0-1.el7  base                      3.6 M
 vulkan-filesystem       noarch 1.1.97.0-1.el7  base                      6.3 k

Transaction Summary
================================================================================
Install  1 Package (+4 Dependent packages)

Total size: 263 M
Total download size: 3.8 M
Installed size: 281 M
Is this ok [y/d/N]: y
Downloading packages:
(1/4): liberation-fonts-1.07.2-16.el7.noarch.rpm           |  13 kB   00:00     
(2/4): liberation-narrow-fonts-1.07.2-16.el7.noarch.rpm    | 202 kB   00:00     
(3/4): vulkan-filesystem-1.1.97.0-1.el7.noarch.rpm         | 6.3 kB   00:00     
(4/4): vulkan-1.1.97.0-1.el7.x86_64.rpm                    | 3.6 MB   00:00     
——————————————————————————–
Total                                              3.0 MB/s | 3.8 MB  00:01     
Running transaction check
Running transaction test
Transaction test succeeded
Running transaction
  Installing : vulkan-filesystem-1.1.97.0-1.el7.noarch                      1/5 
  Installing : vulkan-1.1.97.0-1.el7.x86_64                                 2/5 
  Installing : 1:liberation-narrow-fonts-1.07.2-16.el7.noarch               3/5 
  Installing : 1:liberation-fonts-1.07.2-16.el7.noarch                      4/5 
  Installing : google-chrome-stable-92.0.4515.107-1.x86_64                  5/5 
  Verifying  : vulkan-1.1.97.0-1.el7.x86_64                                 1/5 
  Verifying  : 1:liberation-narrow-fonts-1.07.2-16.el7.noarch               2/5 
  Verifying  : 1:liberation-fonts-1.07.2-16.el7.noarch                      3/5 
  Verifying  : google-chrome-stable-92.0.4515.107-1.x86_64                  4/5 
  Verifying  : vulkan-filesystem-1.1.97.0-1.el7.noarch                      5/5 

Installed:
  google-chrome-stable.x86_64 0:92.0.4515.107-1                                 

Dependency Installed:
  liberation-fonts.noarch 1:1.07.2-16.el7                                       
  liberation-narrow-fonts.noarch 1:1.07.2-16.el7                                
  vulkan.x86_64 0:1.1.97.0-1.el7                                                
  vulkan-filesystem.noarch 0:1.1.97.0-1.el7             


4. Install usable Windows VNC and remote desktop (RDP Client) for CentOS Linux


There is a plenty of clients to choice from if you need to have an RDP client for Linux, but perhaps the most useful ones I usually use are remmina / rdesktop and freerdp. Usually I use remmina on Debian Linux, but under the VM somehow I was not able to make remmina work in Full Screen mode while connected to remote Windows 7 VPS server, thus I've first tried xfreerdp (that comes from default CentOS repositories) and is open source alternative to rdesktop (which is non free distributed binary).
 

[root@centos ~ ]$ sudo yum -y install freerdp


The basic use is:

[hipo@centos ~ ]$ xfreerdp –toggle-fullscreen <remote-server-address>


Unfortunately I did not succeeded to make xfreerdp be able to show me remote desktop in FullScreen mode so had to use additional repository package called nux-dextop to have rdesktop at my disposal.

To install it had to run:

[root@centos ~ ]# rpm –import http://li.nux.ro/download/nux/RPM-GPG-KEY-nux.ro 
[root@centos ~ ]# rpm -Uvh http://li.nux.ro/download/nux/dextop/el7/x86_64/nux-dextop-release-0-1.el7.nux.noarch.rpm    
[root@centos ~ ]# yum install rdesktop

To connect to the remote RDP host in Fullscreen with rdesktop :
 

rdesktop -f <remote-server-address>

windows-7-remote-desktop-screenshot-connected-with-rdesktop

As telnet is not installed by default and it is so useful to check ports

5. Install GNU Image Manipulation Program for better screnshotting and Graphic edits


I usually do install GIMP (GNU Image Manipulation Program) since this is my favourite tool to make screenshot on Linux as well as do some minor graphic edits whenever necessery. I warmly recommend gimp to anyone. If you don't have basic GIMP tool and you plan to be daily working a lot with Linux sooner or later some skills with the program will be of a major use even for the most advanced sysadmin :)_

root@centos ~ ]# yum install -y gimp


6. Install useful administration tools for daily sysadmin work – telnet, nmap, iftop, htop, iotop, iptraf-ng, tcpdump


Having basic analys tools and remote communication port testing, DNS, resolving and connection, cpu, mem statistics I find mostly useful. 

[root@centos .ssh]# yum install telnet nmap iftop htop vnstat sysstat iptraf-ng bind-utils -y


7. Set Open Explorer and SHOW Desktop key binding shortcuts for GNOME (to make daily work easier)


Another useful I do use in my newly installed Virtual Machines is the key combination of Windows (button key) + E – to easily open the GNOME equivalent of Windows Explorer (Nautilus) and Windows (key) + D to hide the active selected Window and Show Desktop. This is configured pretty easy in GNOME through:
 

gnome-control-center

Keyboard (Section)

Perhaps there is other stuff I need to add on the freshly installed Operating System if I remember something else interesting
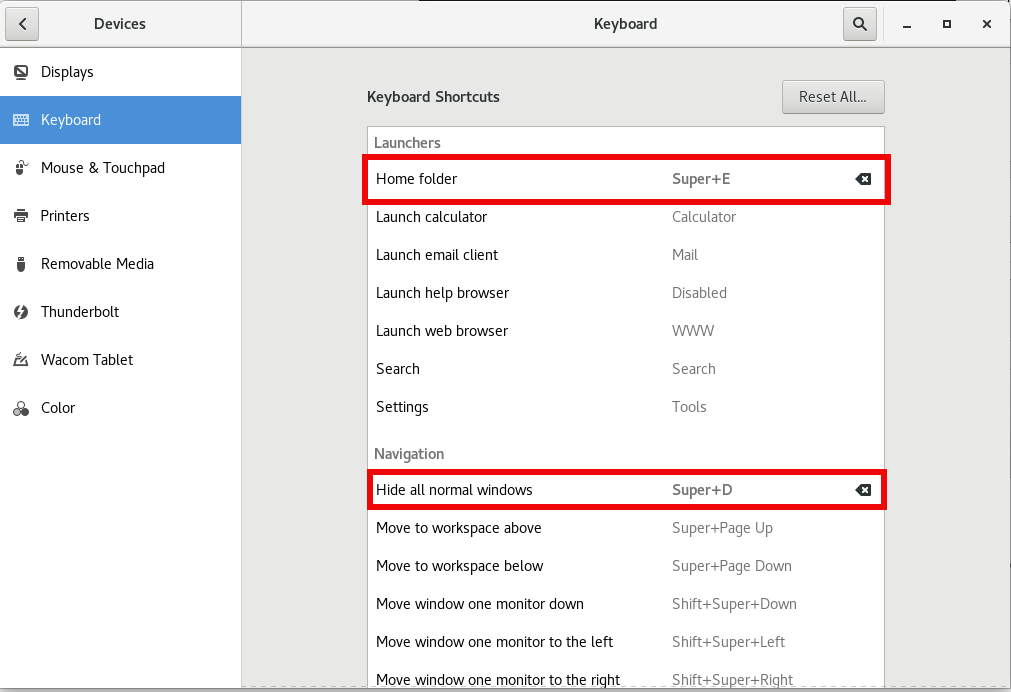
configure-home-folder-and-hide-all-normal-windows-gnome-key-binding-howto-screenshot


8. Install gnome-tweaks to tweak a bit the desktop icon positionsing and additional gnome-shell extras

[root@centos hipo]# yum install -y gnome-shell-extension-workspace-indicator.noarch gnome-shell-extension-workspace-indicator.noarch gnome-shell-extension-suspend-button.noarch gnome-shell-extension-refresh-wifi.noarch gnome-shell-extension-updates-dialog.noarch gnome-shell-extension-windowoverlay-icons.noarch gnome-shell-extension-places-menu.noarch gnome-shell-extension-drive-menu.noarch gnome-shell-extension-apps-menu.noarch gnome-shell-extension-auto-move-windows.noarch gnome-tweaks gnome-shell-extension-systemMonitor.noarch gnome-shell-extension-openweather.noarch gnome-shell-extension-user-theme.noarch gnome-shell-extension-topicons-plus.noarch


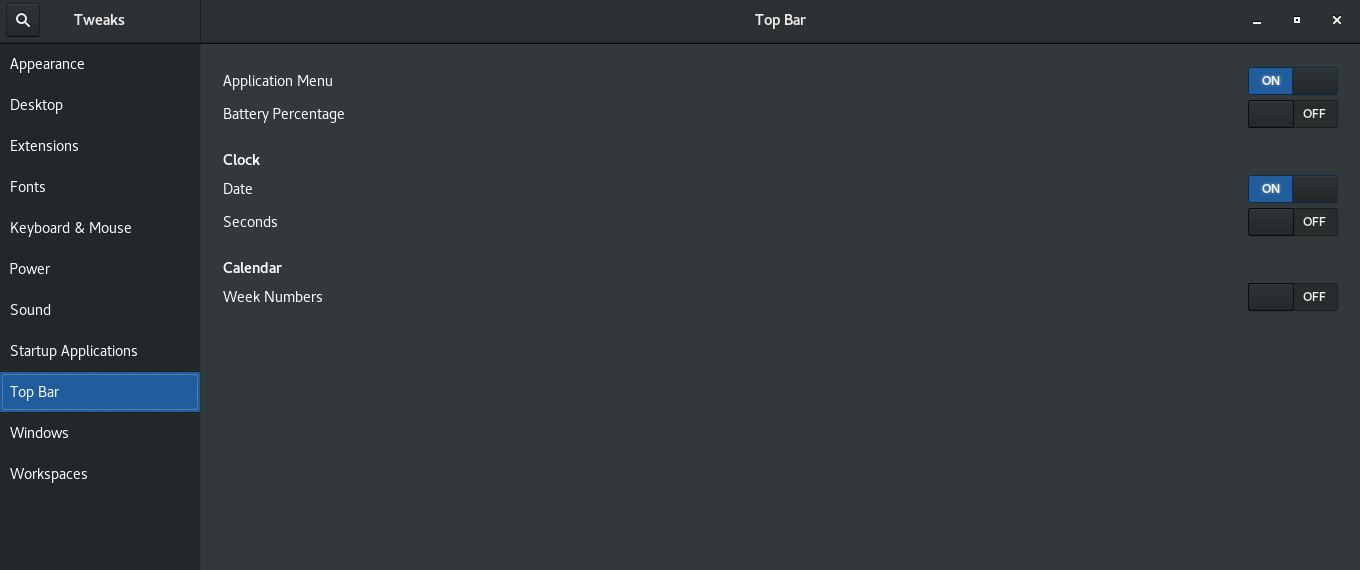
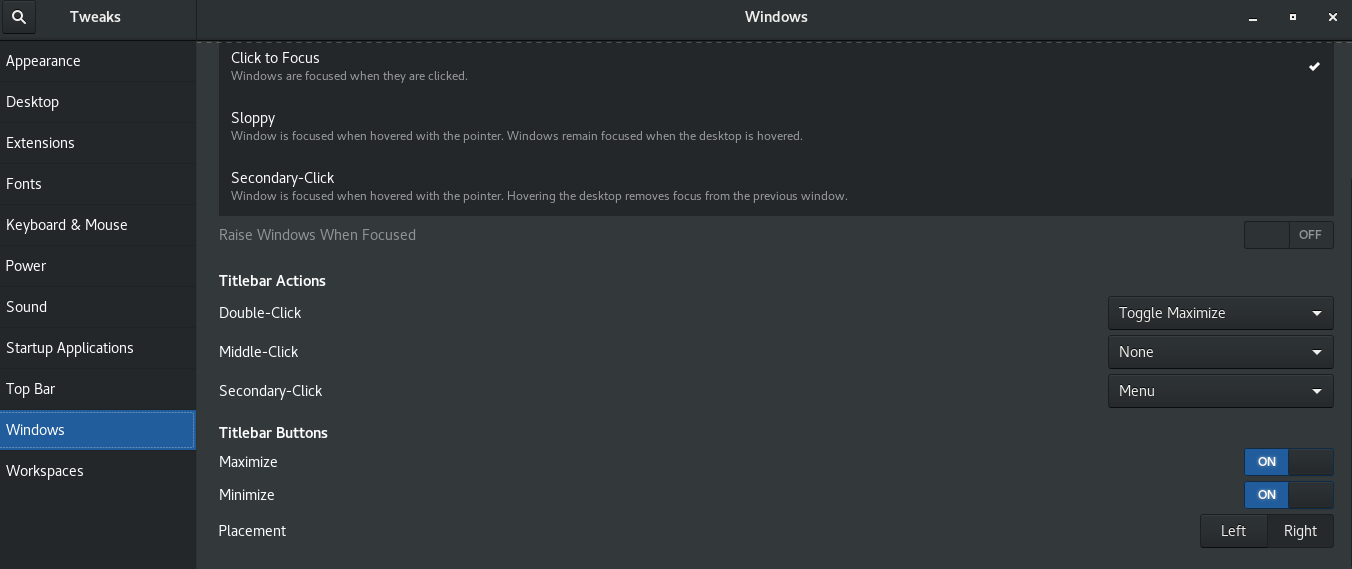
Next step is to use gnome-tweaks to set multiple custom preference stuff you like on the gnome 3.28 GUI 
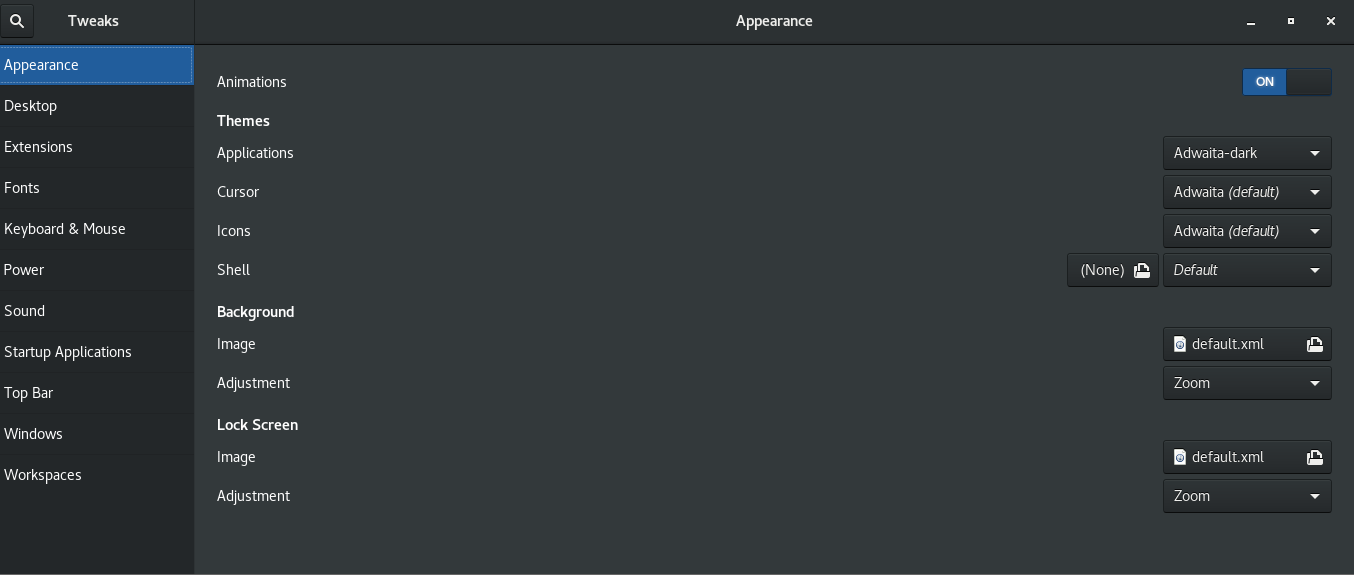
 

gnome-tweak-tool1

gnome-tweak-tool2

gnome-tweak-tool3

9. Change ( Fix) timezone to correct time on the Virtual Machine

[root@localhost ~]# timedatectl 
      Local time: Fri 2021-07-30 12:20:51 CEST
  Universal time: Fri 2021-07-30 10:20:51 UTC
        RTC time: Fri 2021-07-30 10:20:48
       Time zone: Europe/Berlin (CEST, +0200)
     NTP enabled: yes
NTP synchronized: yes
 RTC in local TZ: no
      DST active: yes
 Last DST change: DST began at
                  Sun 2021-03-28 01:59:59 CET
                  Sun 2021-03-28 03:00:00 CEST
 Next DST change: DST ends (the clock jumps one hour backwards) at
                  Sun 2021-10-31 02:59:59 CEST
                  Sun 2021-10-31 02:00:00 CET

[root@localhost ~]# ls -l /etc/localtime
lrwxrwxrwx. 1 root root 35 Jul 29 14:03 /etc/localtime -> ../usr/share/zoneinfo/Europe/Berlin


To change to correct timezone, you need to find out the long name for the timezone you want to use. The timezone naming convention usually uses “Region/City” format.

To list all available time zones, you can either list the files in the /usr/share/zoneinfo directory or use the timedatectl command.

[root@centos ~]# timedatectl list-timezones|tail -n 10
Pacific/Pohnpei
Pacific/Port_Moresby
Pacific/Rarotonga
Pacific/Saipan
Pacific/Tahiti
Pacific/Tarawa
Pacific/Tongatapu
Pacific/Wake
Pacific/Wallis
UTC


As I'm situated in Sofia Bulgaria to set the correct timezone to UTC (Universal Time Clock)  + 2 Hrs, i've checked the correct Continent/Country like so:

[root@centos ~]# timedatectl list-timezones|grep -i Sofia
Europe/Sofia

Once I've my Capital / Country time location  identified to set to it:

[root@centos ~]# timedatectl set-timezone your_time_zone


10. Configure remote connection hostname SSH aliases via ssh config ( ~/.ssh/config)


I'm having separate Virtual Machines running on my OpenXen virtualization Hypervisor server at different ports which I remember by heart under different hostnames, this saves me time to always type on command line long commands such as:


#  ssh long-hostname -p Port_number

 to make accessibility to remote machines via a simple Hostname Aliases, that forwards to remote port (that gets forwarded via a Local Network configure Netwrork Address Translation), I use the .ssh/config nice Host / Hostname / User / Port directives like below samples:

[hipo@centos .ssh]$ cat config 
Host pcfreak
User root
Port 2248
HostName 83.228.93.76

Host freak
User root
Port 2249
HostName 213.91.190.233


Host pcfrxenweb
User root
Port 2251
Hostname 83.228.93.76

Host pcfrxen
User root
Port 2250
Hostname 213.91.190.233

Now to connect to pcfrxen for example I simply type:

ssh pcfrxen

type in the password to remote VM and I'm in 🙂

The same could be achieved also with Adding Custom Hostname IP Aliases via ~/.bashrc or iteration script as I've explained earlier that fakes like custom /etc/hosts, but I usuaully prefer to use .ssh/config instead like explained above.

Note that above steps should work also on RHEL / Fedora Linux with a minor modifications, as usually this two distros share the RPM package manager. If someone tries to follow the guide and have success on any of this distros please drop a comment with feedback.

How to Import Remove List archive signing keys on CentOS / RHEL / Fedora RPM based Linux distributions

Wednesday, April 8th, 2020

how-to-import-remove-list-archiving-signing-keys-on-CentOS-RHEL-Fedora-rpm-based-Linux-distros-package
If you  plan to build and distribute  own RPMs securely, it is strongly recommended that all custom RPMs are signed using GNU Privacy Guard (GPG). Generating GPG keys and building GPG-signed packages matching it.
Hence, If you have to deal with some of the RPM based package management Linux distribution like CentOS / RHEL / Fedora etc. you will sooner or later end up in a situation where some of the archive signing keys for a package provided by some of the repositories is missing or it is not matching the keys provided for the RPM repo.

As a result you will be unable to install some package like lets say zabbix-sender or you won't be able to update a certain package to the latest available version, because the Archive Signing key is not found.
The usual naming for a RPM file with a GPG key in is YOUR-RPM-GPG-KEY.

A typical PGP Public key file content looks something like this:
 

—–BEGIN PGP PUBLIC KEY BLOCK—–

Version: GnuPG v1.0.0 (GNU/Linux)

Comment: For info see http://www.gnupg.org

mQGiBDfqVEqRBADBKr3Bl6PO8BQ0H8sJoD6p9U7Yyl7pjtZqioviPwXP+DCWd4u8

HQzcxAZ57m8ssA1LK1Fx93coJhDzM130+p5BG9mYSPShLabR3N1KXdXAYYcowTOM

GxdwYRGr1Spw8QydLhjVfU1VSl4xt6bupPbFJbyjkg5Z3P7BlUOUJmrx3wCgobNV

EDGaWYJcch5z5B1of/41G8kEAKii6q7Gu/vhXXnLS6m15oNnPVybyngiw/23dKjS

ti/PYrrL2J11P2ed0x7zm8v3gLrY0cue1iSba+8glY+p31ZPOr5ogaJw7ZARgoS8

BwjyRymXQp+8Dete0TELKOL2/itDOPGHW07SsVWOR6cmX4VlRRcWB5KejaNvdrE5

4XFtOd04NMgWI63uqZc4zkRa+kwEZtmbz3tHSdWCCE+Y7YVP6IUf/w6YPQFQriWY

FiA6fD10eB+BlIUqIw80EqjsBKmCwvKkn4jg8kibUgj4/TzQSx77uYokw1EqQ2wk

OZoaEtcubsNMquuLCMWijYhGBBgRAgAGBQI36lRyAAoJECGRgM3bQqYOhyYAnj7h

VDY/FJAGqmtZpwVp9IlitW5tAJ4xQApr/jNFZCTksnI+4O1765F7tA==

=3AHZ

—–END PGP PUBLIC KEY BLOCK—–


The usual naming for a RPM file with a GPG key in is YOUR-RPM-GPG-KEY
 

1. List RPM gpg keys installed on system

To list all the installed RPM gpg keys on the system do:

rpm -q gpg-pubkey


To get a list of the number of installed keys with verbose info with key description::

rpm -qa gpg-pubkey –qf "%{version}-%{release} %{summary}\n"|wc -l

 rpm -qa gpg-pubkey –qf "%{version}-%{release} %{summary}\n"
fdb19c98-56fd6333 gpg(Fedora 25 Primary (25) <fedora-25-primary@fedoraproject.org>)
7fac5991-4615767f gpg(Google, Inc. Linux Package Signing Key <linux-packages-keymaster@google.com>)
64dab85d-57d33e22 gpg(Fedora 26 Primary (26) <fedora-26-primary@fedoraproject.org>)
fa7a179a-562bcd6e gpg(RPM Fusion nonfree repository for Fedora (25) <rpmfusion-buildsys@lists.rpmfusion.org>)
6806a9cb-562bce39 gpg(RPM Fusion free repository for Fedora (25) <rpmfusion-buildsys@lists.rpmfusion.org>)
d38b4796-570c8cd3 gpg(Google Inc. (Linux Packages Signing Authority) <linux-packages-keymaster@google.com>)


[root@host ~:]# rpm -q gpg-pubkey –qf '%{NAME}-%{VERSION}-%{RELEASE}\t%{SUMMARY}\n'
gpg-pubkey-f4a80eb5-53a7ff4b    gpg(CentOS-7 Key (CentOS 7 Official Signing Key) )
gpg-pubkey-b6792c39-53c4fbdd    gpg(CentOS-7 Debug (CentOS-7 Debuginfo RPMS) )
gpg-pubkey-8fae34bd-538f1e51    gpg(CentOS-7 Testing (CentOS 7 Testing content) )

To list all OS installed gpg keys do:

[user@host ~:]$ $ rpm -qa | grep -i gpg
gpg-pubkey-db42a60e-37ea5438


2. Import RPM-GPG-KEY


A new key be it official archive keys issued from Fedora or a custom own build RPM package can be imported Redhat Package Manager like so:

[root@host ~:]# rpm –import RPM-GPG-KEY


It is possible to also import multiple GPG signature keys, for example on CentOS the usual path containg keys is /etc/pki/rpm-gpg/ to import all of the contained files there:

[root@host ~:]# rpm –import /etc/pki/rpm-gpg/*


3. Check package with imported gpg arch key


Once the RPM-GPG-KEY is imported you can compare whether a RPM package matches with the key signature.

[root@host ~:]# rpm –checksig package-1.3-3.src.rpm

[root@host ~:]# rpm –checksig xtoolwait-1.3-3.src.rpm
package-1.3-3.src.rpm: (sha1) dsa sha1 md5 gpg OK


4. Remove RPM installed arch key


If you have installed some gpg arch. key by mistake and you need to remove it:

[root@host ~:]#rpm -e gpg-pubkey-b6792c39-53c4fbdd


To make sure it is remove do a Listing once again signing archive keys, it should not show anymore:

[root@host ~:]# rpm -q gpg-pubkey –qf '%{NAME}-%{VERSION}-%{RELEASE}\t%{SUMMARY}\n'
gpg-pubkey-f4a80eb5-53a7ff4b    gpg(CentOS-7 Key (CentOS 7 Official Signing Key) )
gpg-pubkey-8fae34bd-538f1e51    gpg(CentOS-7 Testing (CentOS 7 Testing content) )

Linux / BSD: Check if Apache web server is listening on port 80 and 443

Tuesday, June 3rd, 2014

apache_check_if_web_server_running_port-80-and-port-443-logo-linux-and-bsd-check-apache-running
If you're configuring a new Webserver or adding a new VirtualHost to an existing Apache configuration you will need to restart Apache with or without graceful option once Apache is restarted to assure Apache is continuously running on server (depending on Linux distribution) issue:

1. On Debian Linux / Ubuntu servers

# ps axuwf|grep -i apache|grep -v grep

root 23280 0.0 0.2 388744 16812 ? Ss May29 0:13 /usr/sbin/apache2 -k start
www-data 10815 0.0 0.0 559560 3616 ? S May30 2:25 _ /usr/sbin/apache2 -k start
www-data 10829 0.0 0.0 561340 3600 ? S May30 2:31 _ /usr/sbin/apache2 -k start
www-data 10906 0.0 0.0 554256 3580 ? S May30 0:20 _ /usr/sbin/apache2 -k start
www-data 10913 0.0 0.0 562488 3612 ? S May30 2:32 _ /usr/sbin/apache2 -k start
www-data 10915 0.0 0.0 555524 3588 ? S May30 0:19 _ /usr/sbin/apache2 -k start
www-data 10935 0.0 0.0 553760 3588 ? S May30 0:29 _ /usr/sbin/apache2 -k start


2. On CentOS, Fedora, RHEL and SuSE Linux and FreeBSD

ps ax | grep httpd | grep -v grep


7661 ? Ss 0:00 /usr/sbin/httpd
7664 ? S 0:00 /usr/sbin/httpd
7665 ? S 0:00 /usr/sbin/httpd
7666 ? S 0:00 /usr/sbin/httpd
7667 ? S 0:00 /usr/sbin/httpd
7668 ? S 0:00 /usr/sbin/httpd
7669 ? S 0:00 /usr/sbin/httpd
7670 ? S 0:00 /usr/sbin/httpd
7671 ? S 0:00 /usr/sbin/httpd


Whether a new Apache IP Based VirtualHosts are added to already existing Apache and you have added new

Listen 1.1.1.1:80
Listen 1.1.1.1:443

directives, after Apache is restarted to check whether Apache is listening on port :80 and :443
 

netstat -ln | grep -E ':80|443'

tcp        0      0 0.0.0.0:80              0.0.0.0:*               LISTEN
tcp        0      0 0.0.0.0:443            0.0.0.0:*               LISTEN


Meaning of 0.0.0.0 is that Apache is configured to Listen on Any Virtualhost IPs and interfaces. This output is usually returned whether in Apache config httpd.conf / apache2.conf webserver is configured with directive.

Listen *:80
 

If in netstat output there is some IP poping up for example  "192.168.1.1:http", this means that only connections to the "192.168.1.1" IP address will be accepted by Apache.

Another way to look for Apache in netstat (in case Apache is configured to listen on some non-standard port number) is with:

netstat -l |grep -E 'http|www'

tcp        0      0 *:www                   *:*                     LISTEN


As sometimes it might be possible that Apache is listening but its processes are in in defunct (Zommbie) state it is always a good idea, also to check if pages server by Apache are opening in browser (check it with elinks, lynx or curl)

To get more thorough information on Apache listened ports, protocol, user with which Apache is running nomatter of Linux distribution use lsof command:
 

/usr/bin/lsof -i|grep -E 'httpd|http|www'

httpd     6982 nobody    3u  IPv4  29388359      0t0  TCP www.pc-freak.net:https (LISTEN)
httpd    18071 nobody    3u  IPv4 702790659      0t0  TCP www.pc-freak.net:http (LISTEN)
httpd    18071 nobody    4u  IPv4 702790661      0t0  TCP www.pc-freak.net.net:https (LISTEN)


If Apache is not showing up even though restarted check what is going wrong in the error logs:

– on Debian standard error log is /var/log/apache2/error.log
– On RHEL, CentOS, SuSE std. error log is in /var/log/httpd/error.log
– on FeeBSD /var/log/httpd-error.log


yum add proxy on CentOS, RHEL, Fedora Linux howto

Thursday, June 5th, 2014

yum-via-proxy-yum-package-management-mascot
Whether you had to install a CentOS server in a DMZ-ed network with paranoic system firewall rules or simply you want to use your own created RPM local repository to run RPM installs and CentOS system updates via monitored Proxy you will have to configure yum to use a proxy.

There is a standard way to do it by adding a proxy directive to /etc/yum.conf as explained in CentOS official documetnation.
However for some reason:

proxy=http://your-proxy-url.com:8080
proxy_username=yum-user
proxy_password=qwerty

proxy vars adding to /etc/yum.conf [main] section is not working on CentOS 6.5?
However there is a dirty patch by using the OS environment standard variable http_proxy
To make yum work via proxy in gnome-terminal run first:

export http_proxy=http://your-proxy-server.com:8080

or if proxy is protected by username / password run instead:

export username='yum-user'
export password='qwerty'
export http_proxy="http://$username:$password@your-proxy-server:8080/

Afterwards yum will work via the proxy, i.e.:

yum update && yum upgrade

To make http_proxy exported system wide check my previous post – Set Proxy System-Wide

Hope this helps someone.

Installing Virtualbox Guest Additions Vboxadditions on CentOS 7, Fedora 19 / 20 and RHEL 6.5 / 5.10 on Windows host

Thursday, July 17th, 2014

Virtualbox_guest_additions-on-centos-7-howto-virtualbox-logo
If you decided to use Redhat based Linux distribution inside Virtualbox Virtual Machine on Windows 7 / 8, first thing to do right after installing the Linux guest OS is to install Virtualbox Guest Additions. Earlier I've blogged How to enable virtualbox VM Windows XP fullscreen mode on Virtualbox running on Ubuntu now I need it vice versa a Linux OS living inside Virtual Machine running on top of Windows 7 Enterprise. need to enable Full-screen mode. Another reason why Vboxadditions should be installed right after Linux install is complete is for performance reasons and better integration between host OS and guest OS. Virtualbox Guest Additions enables mouse's copy / paste functions to work between Win and Virtualized Linux as well as enables arbitrary screen resolutions (resizing VM guest window) etc. On Windows versions of Virtualbox to install Vbox Guest Additions it is no longer necessery to download and mount a separate vbox-guest-additions ISO file, this is handled by Virtualbox itself.

The steps described here for installation of VirtualBox Guest Additions are tested and prooved as working on current latest CentOS 6.5, however they should be working (with or without minor modifications) in rest of RPM based Linux distributions

Fedora 20, 19, 18, 17, 16, 15, 14, 13, 12, CentOS 6.5, 6.4, 6.3, 6.2, 6.1, 6.0, 5.10 and Redhat Enterprise Linux (RHEL) 6.5, 6.4, 6.3, 6.2, 6.1, 6, 5.10 VirtualBox version installed on Windows 7 host is 4.3.14 build.


Devices -> Drag'n'Drop (Bidirectional)

Devices -> Share Clipboard (Bidirectional)


1. Installing VirtualBox GuestAdditions on CentOS 7, Redhat, Fedora

a) become superuser

su root
[root@centos~:]#

b) Mount Virtualbox provided Guest additions into virtual cdrom /dev/cdrom

From VirtualBox click on
 

Devices -> Install Guest Additions

centos7-install-guest-additions-cd-screenshot-microsoft-windows-virtualbox

mkdir /media/VirtualBoxGuestAdditions
mount -r /dev/cdrom /media/VirtualBoxGuestAdditions

c) Update to the latest Linux kernel with yum

yum -y update kernel*

Then to boot up into the updated kernel – restart the system

shutdown -r now


d) Install Kernel headers bzip dkms bzip2

yum install -y gcc kernel-devel kernel-headers dkms make bzip2 perl

If you're installing VirtualBox Guest Additions on CentOS 6 or RHEL 5, you will have to install also below 2 rpms:
 

## CentOS 6 and Red Hat (RHEL) 5 ##
rpm -Uvh http://dl.fedoraproject.org/pub/epel/6/i386/epel-release-6-8.noarch.rpm
 
## CentOS 5 and Red Hat (RHEL) 5 ##
rpm -Uvh http://dl.fedoraproject.org/pub/epel/5/i386/epel-release-5-4.noarch.rpm


e) export KERN_DIR to just installed kernel source


For CentOS 7 export following KERN_DIR


## Current running kernel on Fedora, CentOS 7 and Red Hat (RHEL) 7 ##
KERN_DIR=/usr/src/kernels/`uname -r`
export KERN_DIR

For older CentOS and RHEL 5 export
## Current running kernel on CentOS 5 and Red Hat (RHEL) 5 ##

KERN_DIR=/usr/src/kernels/`uname -r`-`uname -m`
export KERN_DIR

f) Download VBoxAdditions 4.3.14 iso from Virtualbox website

I've made mirror of VBoxGuestAdditions_4.3.14.iso for download here:
 

mkdir /usr/share/virtualbox
cd /usr/share/virtualbox

wget http://dlc.sun.com.edgesuite.net/virtualbox/4.3.14/VBoxGuestAdditions_4.3.14.iso

g) Mount the iso
 

mount -t iso9660 VBoxGuestAdditions_4.3.14.iso /media/VirtualBoxGuestAdditions/


h) Compile and Install Virtualbox GuestAdditions kernel modules
For both 32-bit and 64-bit systems run one and the same shell script:

cd /media/VirtualBoxGuestAdditions
./VBoxLinuxAdditions.run

Verifying archive integrity… All good.
Uncompressing VirtualBox 4.3.14_RC1 Guest Additions for Linux…………
VirtualBox Guest Additions installer
Removing installed version 4.3.14_RC1 of VirtualBox Guest Additions…
Copying additional installer modules …
Installing additional modules …
Removing existing VirtualBox non-DKMS kernel modules       [  OK  ]
Building the VirtualBox Guest Additions kernel modules
Building the main Guest Additions module                   [  OK  ]
Building the shared folder support module                  [  OK  ]
Building the OpenGL support module                         [  OK  ]
Doing non-kernel setup of the Guest Additions              [  OK  ]
You should restart your guest to make sure the new modules are actually used

Installing the Window System drivers
Installing X.Org Server 1.15 modules                       [  OK  ]
Setting up the Window System to use the Guest Additions    [  OK  ]
You may need to restart the hal service and the Window System (or just restart
the guest system) to enable the Guest Additions.

Installing graphics libraries and desktop services componen[  OK  ]

l) Restart the CentOS Virtual Machine
 

reboot

Now get a beer and celebrate the full-screen / USB / Webcamera enabled support ! 🙂

This article is possible thanks to earlier article called Virtualbox guest additions on Fedora CentOS and Redhat.

http://www.if-not-true-then-false.com/2010/install-virtualbox-guest-additions-on-fedora-centos-red-hat-rhel/


Linux: basic system CPU, Disk and Network resource monitoring via phpsysinfo lightweight script

Wednesday, June 18th, 2014

phpsysinfo-logo-simple-way-to-web-monitor-windows-linux-server-cpu-disk-network-resources

There are plenty of GNU / Linux softwares to monitor server performance (hard disk space, network and CPU load) and general hardware health both text based for SSH console) and from web.

Just to name a few for console precious tools, such are:

And for web based Linux / Windows server monitoring my favourite tools are:

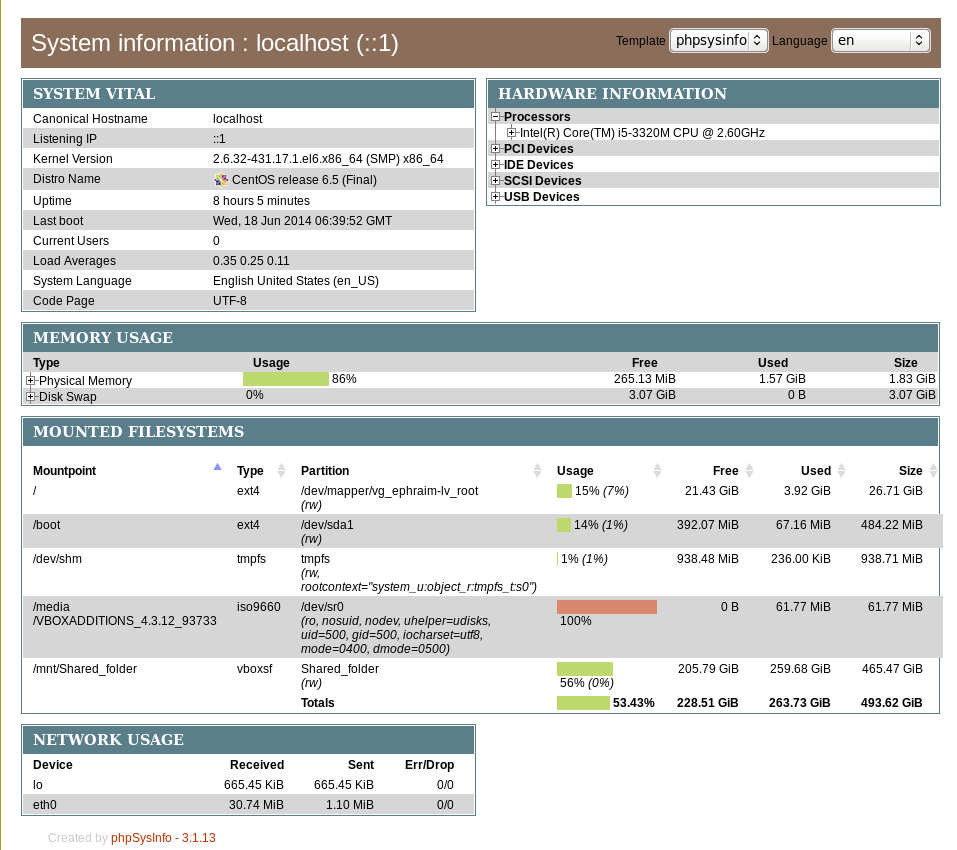
phpsysinfo is yet another web based Linux monitoring software for small companies or home router use it is perfect for people who don't want to spend time learning how to configure complicated and robust multiple server monitoring software like Nagios or Icanga.

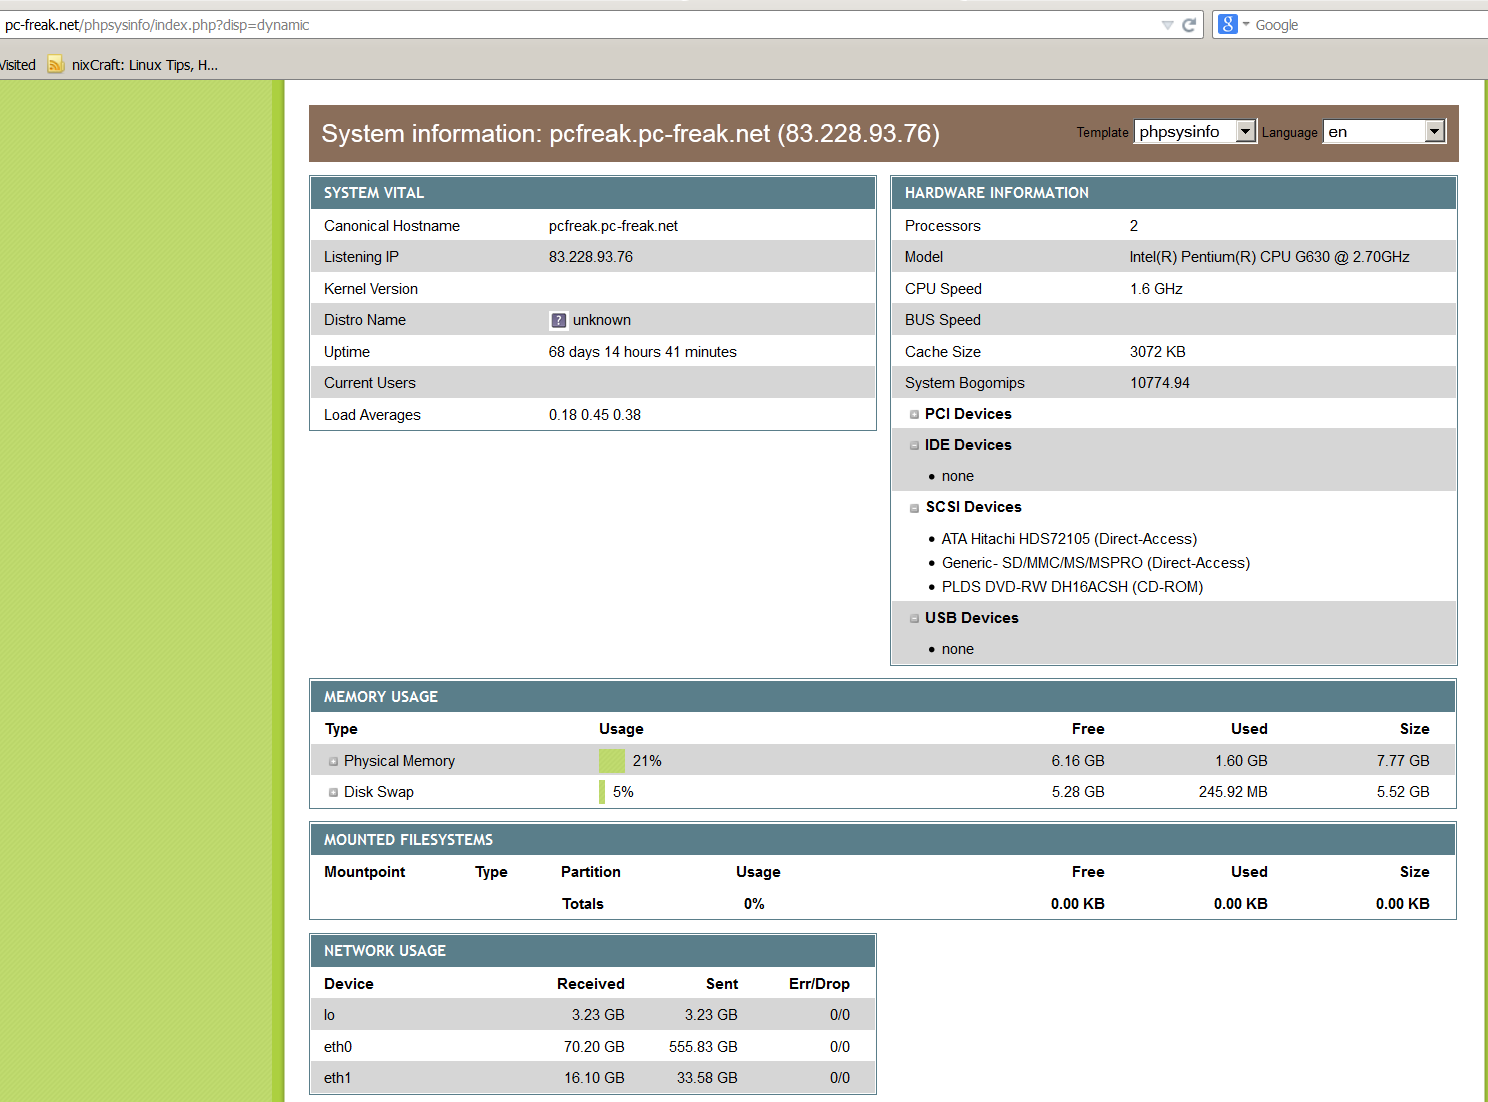
phpsysinfo is quick and dirty way to monitor system uptime, network, disk and memory usage, get information on CPU model, attached IDEs, SCSI devices and PCIs from the web and is perfect for Linux servers already running Apache and PHP.

1. Installing PHPSysInfo on Debian, Ubuntu and deb derivative Linux-es

PHPSysInfo is very convenient and could be prefered instead of above tools for the reason it is available by default in Debian and Ubuntu package repositories and installable via apt-get and it doesn't require any further configuration, to roll it you install you place a config and you forget it.
 

 # apt-cache show phpsysinfo |grep -i desc -A 2

Description: PHP based host information
 phpSysInfo is a PHP script that displays information about the
 host being accessed.


Installation is a piece of cake:

# apt-get install --yes phpsysinfo

Add phpsysinfo directives to /etc/apache2/conf.d/phpsysinfo.conf to make it accessible via default set Apache vhost domain under /phpsysinfo

Paste in root console:
 

cat > /etc/apache2/conf.d/phpsysinfo.conf <<-EOF
Alias /phpsysinfo /usr/share/phpsysinfo
<Location /phpsysinfo>
 Options None
 Order deny,allow
 Deny from all
 #Allow from localhost
 #Allow from 192.168.56.2
 Allow from all
</Location>
EOF


Above config will allow access to /phpsysinfo from any IP on the Internet, this could be a security hole, thus it is always better to either protect it with access .htaccess password login or allow it only from certain IPs, from which you will access it with something like:

Allow from 192.168.2.100

Then restart Apache server:

# /etc/init.d/apache2 restart


To access phpsysinfo monitoring gathered statistics, access it in a browser http://defaultdomain.com/phpsysinfo/

phpsysinfo_on_debian_ubuntu_linux-screenshot-quick-and-dirty-web-monitoring-for-windows-and-linux-os

2. Installing PHPSysinfo on CentOS, Fedora and RHEL Linux
 

Download and untar

# cd /var/www/html
# wget https://github.com/phpsysinfo/phpsysinfo/archive/v3.1.13.tar.gz
# tar -zxvf phpsysinfo-3.1.13.tar.gz
# ln -sf phpsysinfo-3.1.13 phpsysinfo
# mv phpsysinfo.ini.new phpsysinfo.ini


Install php php-xml and php-mbstring RPM packages
 

yum -y install php php-xml php-mbstring
...

Start Apache web service

[root@ephraim html]# /etc/init.d/httpd restart

[root@ephraim html]# ps ax |grep -i http
 8816 ?        Ss     0:00 /usr/sbin/httpd
 8819 ?        S      0:00 /usr/sbin/httpd

phpsysinfo-install-on-centos-rhel-fedora-linux-simple-monitoring

As PhpSysInfo is written in PHP it is also possible to install phpsysinfo on Windows.

phpsysinfo is not the only available simple monitoring server performance remotely tool, if you're looking for a little bit extended information and a better visualization interface alternative to phpsysinfo take a look at linux-dash.

In context of web monitoring other 2 web PHP script tools useful in remote server monitoring are:

OpenStatus – A simple and effective resource and status monitoring script for multiple servers.
LookingGlass – User-friendly PHP Looking Glass (Web interface to use Host (Nslookup), Ping, Mtr – Matt Traceroute)

Linux Bond network interfaces to merge multiple interfaces ISPs traffic – Combine many interfaces NIC into one on Debian / Ubuntu / CentOS / Fedora / RHEL Linux

Tuesday, December 16th, 2014

how-to-create-bond-linux-agregated-network-interfaces-for-increased-network-thoroughput-debian-ubuntu-centos-fedora-rhel
Bonding Network Traffic
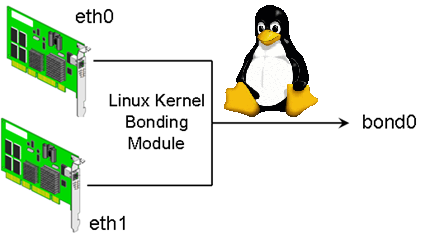
 (link aggregation) or NIC teaming is used to increase connection thoroughput and as a way to provide redundancy for a services / applications in case of some of the network connection (eth interfaces) fail. Networking Bonding is mostly used in large computer network providers (ISPs), infrastructures, university labs or big  computer network accessible infrastructures or even by enthusiatst to run home-server assuring its >= ~99% connectivity to the internet by bonding few Internet Providers links into single Bonded Network interface. One of most common use of Link Aggreegation nowadays is of course in Cloud environments.  

 Boding Network Traffic is a must know and (daily use) skill for the sys-admin of both Small Company Office network environment up to the large Professional Distributed Computing networks, as novice GNU /  Linux sys-admins would probably have never heard it and sooner or later they will have to, I've created this article as a quick and dirty guide on configuring Linux bonding across most common used Linux distributions.

It is assumed that the server where you need network boding to be configured has at least 2 or more PCI Gigabyte NICs with hardware driver for Linux supporting Jumbo Frames and some relatively fresh up2date Debian Linux >=6.0.*, Ubuntu 10+ distro, CentOS 6.4, RHEL 5.1, SuSE etc.
 

1. Bond Network ethernet interfaces on Debian / Ubutnu and Deb based distributions

To make network bonding possible on Debian and derivatives you need to install support for it through ifenslave package (command).

apt-cache show ifenslave-2.6|grep -i descript -A 8
Description: Attach and detach slave interfaces to a bonding device
 This is a tool to attach and detach slave network interfaces to a bonding
 device. A bonding device will act like a normal Ethernet network device to
 the kernel, but will send out the packets via the slave devices using a simple
 round-robin scheduler. This allows for simple load-balancing, identical to
 "channel bonding" or "trunking" techniques used in switches.
 .
 The kernel must have support for bonding devices for ifenslave to be useful.
 This package supports 2.6.x kernels and the most recent 2.4.x kernels.


apt-get –yes install ifenslave-2.6


Bonding interface works by creating a "Virtual" network interface on a Linux kernel level, it sends and receives packages via special
slave devices using simple round-robin scheduler. This makes possible a very simple network load balancing also known as "channel bonding" and "trunking"
supported by all Intelligent network switches

Below is a text diagram showing tiny Linux office network router configured to bond ISPs interfaces for increased thoroughput:


Internet
 |                  204.58.3.10 (eth0)
ISP Router/Firewall 10.10.10.254 (eth1)
   
                              | -----+------ Server 1 (Debian FTP file server w/ eth0 & eth1) 10.10.10.1
      +------------------+ --- |
      | Gigabit Ethernet       |------+------ Server 2 (MySQL) 10.10.10.2
      | with Jumbo Frame       |
      +------------------+     |------+------ Server 3 (Apache Webserver) 10.10.10.3
                               |
                               |------+-----  Server 4 (Squid Proxy / Qmail SMTP / DHCP) 10.10.10.4
                               |
                               |------+-----  Server 5 (Nginx CDN static content Webserver) 10.10.10.5
                               |
                               |------+-----  WINDOWS Desktop PCs / Printers & Scanners, Other network devices 


Next to configure just installed ifenslave Bonding  
 

vim /etc/modprobe.d/bonding.conf

alias bond0 bonding
  options bonding mode=0 arp_interval=100 arp_ip_target=10.10.10.254, 10.10.10.2, 10.10.10.3, 10.10.10.4, 10.10.10.5


Where:

  1. mode=0 : Set the bonding policies to balance-rr (round robin). This is default mode, provides load balancing and fault tolerance.
  2. arp_interval=100 : Set the ARP link monitoring frequency to 100 milliseconds. Without option you will get various warning when start bond0 via /etc/network/interfaces
  3. arp_ip_target=10.10.10.254, 10.10.10.2, … : Use the 10.10.10.254 (router ip) and 10.10.10.2-5 IP addresses to use as ARP monitoring peers when arp_interval is > 0. This is used determine the health of the link to the targets. Multiple IP addresses must be separated by a comma. At least one IP address must be given (usually I set it to router IP) for ARP monitoring to function. The maximum number of targets that can be specified is 16.

Next to make bonding work its necessery to load the bonding kernel module:

modprobe -v bonding mode=0 arp_interval=100 arp_ip_target=10.10.10.254, 10.10.10.2, 10.10.10.3, 10.10.10.4, 10.10.10.5


Loading the bonding module should spit some good output in /var/log/messages (check it out with tail -f /var/log/messages)

Now to make bonding active it is necessery to reload networking (this is extremely risky if you don't have some way of Console Web Java / VPN Access such as IPKVM / ILO / IDRAC), so reloading the network be absolutely sure to either do it through a cronjob which will automatically do the network restart with new settings and revert back to old configuration whether network is inaccessible or assure physical access to the server console if the server is at your disposal.

Whatever the case make sure you backup:

 cp /etc/network/interfaces /etc/network/interfaces.bak

vim /etc/network/interfaces

############ WARNING ####################
# You do not need an "iface eth0" nor an "iface eth1" stanza.
# Setup IP address / netmask / gateway as per your requirements.
#######################################
auto lo
iface lo inet loopback
 
# The primary network interface
auto bond0
iface bond0 inet static
    address 10.10.10.1
    netmask 255.255.255.0
    network 192.168.1.0
    gateway 10.10.10.254
    slaves eth0 eth1
    # jumbo frame support
    mtu 9000
    # Load balancing and fault tolerance
    bond-mode balance-rr
    bond-miimon 100
    bond-downdelay 200
    bond-updelay 200
    dns-nameservers 10.10.10.254
    dns-search nixcraft.net.in


As you can see from config there are some bond specific configuration variables that can be tuned, they can have positive / negative impact in some cases on network thoroughput. As you can see bonding interfaces has slaves (this are all other ethXX) interfaces. Bonded traffic will be available via one single interface, such configuration is great for webhosting providers with multiple hosted sites as usually hosting thousand websites on the same server or one single big news site requires a lot of bandwidth and of course requires a redundancy of data (guarantee it is up if possible 7/24h.

Here is what of configs stand for

 
  • mtu 9000 : Set MTU size to 9000. This is related to Jumbo Frames.
  • bond-mode balance-rr : Set bounding mode profiles to "Load balancing and fault tolerance". See below for more information.
  • bond-miimon 100 : Set the MII link monitoring frequency to 100 milliseconds. This determines how often the link state of each slave is inspected for link failures.
  • bond-downdelay 200 : Set the time, t0 200 milliseconds, to wait before disabling a slave after a link failure has been detected. This option is only valid for the bond-miimon.
  • bond-updelay 200 : Set the time, to 200 milliseconds, to wait before enabling a slave after a link recovery has been detected. This option is only valid for the bond-miimon.
  • dns-nameservers 192.168.1.254 : Use 192.168.1.254 as dns server.
  • dns-search nixcraft.net.in : Use nixcraft.net.in as default host-name lookup (optional).

To get the best network thorougput you might want to play with different bounding policies. To learn more and get the list of all bounding policies check out Linux ethernet Bounding driver howto

To make the new bounding active restart network:
 

/etc/init.d/networking stop
sleep 5;
/etc/init.d/networking start


2. Fedora / CentOS RHEL Linux network Bond 

Configuring eth0, eth1, eth2 into single bond0 NIC network virtual device is with few easy steps:

a) Create following bond0 configuration file:
 

vim /etc/sysconfig/network-scripts/ifcfg-bond0


DEVICE=bond0
IPADDR=10.10.10.20
NETWORK=10.10.10.0
NETMASK=255.255.255.0
GATEWAY=10.10.10.1
USERCTL=no
BOOTPROTO=none
ONBOOT=yes


b) Modify ifcfg-eth0 and ifcfg-eth0 files /etc/sysconfig/network-scripts/

– Edit ifcfg-eth0

vim /etc/sysconfig/network-scripts/ifcfg-eth0

DEVICE=eth0
USERCTL=no
ONBOOT=yes
MASTER=bond0
SLAVE=yes
BOOTPROTO=none

– Edit ifcfg-eth1

vim /etc/sysconfig/network-scripts/ifcfg-eth1

DEVICE=eth0
USERCTL=no
ONBOOT=yes
MASTER=bond0
SLAVE=yes
BOOTPROTO=none


c) Load bond driver through modprobe.conf

vim /etc/modprobe.conf

alias bond0 bonding
options bond0 mode=balance-alb miimon=100


Manually load the bonding kernel driver to make it affective without server reboot:
 

modprobe bonding

d) Restart networking to load just configured bonding 
 

service network restart


3. Testing Bond Success / Fail status

Periodically if you have to administrate a bonded interface Linux server it is useful to check Bonds Link Status:

cat /proc/net/bonding/bond0
 

Ethernet Channel Bonding Driver: v3.5.0 (November 4, 2008)

Bonding Mode: fault-tolerance (active-backup)
Primary Slave: None
Currently Active Slave: eth0
MII Status: up
MII Polling Interval (ms): 100
Up Delay (ms): 0
Down Delay (ms): 0

Slave Interface: eth0
MII Status: up
Link Failure Count: 0
Permanent HW addr: 00:1e:0b:d6:6c:8f

Slave Interface: eth1
MII Status: up
Link Failure Count: 0
Permanent HW addr: 00:1e:0b:d6:6c:8c

To check out which interfaces are bonded you can either use (on older Linux kernels)
 

/sbin/ifconfig -a


If ifconfig is not returning IP addresses / interfaces of teamed up eths, to check NICs / IPs:

/bin/ip a show
1: lo: <LOOPBACK,UP,LOWER_UP> mtu 16436 qdisc noqueue state UNKNOWN
    link/loopback 00:00:00:00:00:00 brd 00:00:00:00:00:00
    inet 127.0.0.1/8 brd 127.255.255.255 scope host lo
    inet 127.0.0.2/8 brd 127.255.255.255 scope host secondary lo
    inet6 ::1/128 scope host
       valid_lft forever preferred_lft forever
2: eth0: <BROADCAST,MULTICAST,SLAVE,UP,LOWER_UP> mtu 1500 qdisc mq master bond0 state UP qlen 1000
    link/ether 00:1e:0b:d6:6c:8c brd ff:ff:ff:ff:ff:ff
3: eth1: <BROADCAST,MULTICAST,SLAVE,UP,LOWER_UP> mtu 1500 qdisc mq master bond0 state UP qlen 1000
    link/ether 00:1e:0b:d6:6c:8c brd ff:ff:ff:ff:ff:ff
7: bond0: <BROADCAST,MULTICAST,MASTER,UP,LOWER_UP> mtu 1500 qdisc noqueue state UP
    link/ether 00:1e:0b:d6:6c:8c brd ff:ff:ff:ff:ff:ff
    inet 10.239.15.173/27 brd 10.239.15.191 scope global bond0
    inet 10.239.15.181/27 brd 10.239.15.191 scope global secondary bond0:7156web
    inet6 fe80::21e:bff:fed6:6c8c/64 scope link
       valid_lft forever preferred_lft forever


In case of Bonding interface failure you will get output like:

Ethernet Channel Bonding Driver: v3.5.0 (November 4, 2008)
Bonding Mode: load balancing (round-robin)
MII Status: up
MII Polling Interval (ms): 100
Up Delay (ms): 200
Down Delay (ms): 200
Slave Interface: eth0
MII Status: up
Link Failure Count: 0
Permanent HW addr: 00:xx:yy:zz:tt:31
Slave Interface: eth1
MII Status: down
Link Failure Count: 1
Permanent HW addr: 00:xx:yy:zz:tt:30

Failure to start / stop bonding is also logged in /var/log/messages so its a good idea to check there too once launched:
 

tail -f /var/log/messages
Dec  15 07:18:15 nas01 kernel: [ 6271.468218] e1000e: eth1 NIC Link is Down
Dec 15 07:18:15 nas01 kernel: [ 6271.548027] bonding: bond0: link status down for interface eth1, disabling it in 200 ms.
Dec  15 07:18:15 nas01 kernel: [ 6271.748018] bonding: bond0: link status definitely down for interface eth1, disabling it

On bond failure you will get smthing like:

Dec  15 04:19:15 micah01 kernel: [ 6271.468218] e1000e: eth1 NIC Link is Down
Dec  15 04:19:15 micah01 kernel: [ 6271.548027] bonding: bond0: link status down for interface eth1, disabling it in 200 ms.
Dec  15 04:19:15 micah01 kernel: [ 6271.748018] bonding: bond0: link status definitely down for interface eth1, disabling it


4. Adding removing interfaces to the bond interactively
 

You can set the mode through sysfs virtual filesystem with:

echo active-backup > /sys/class/net/bond0/bonding/mode

If you want to try adding an ethernet interface to the bond, type:

echo +ethN > /sys/class/net/bond0/bonding/slaves

To remove an interface type:

echo -ethN > /sys/class/net/bond0/bonding/slaves


In case if you're wondering how many bonding devices you can have, well the "sky is the limit" you can have, it is only limited by the number of NIC cards Linux kernel / distro support and ofcourse how many physical NIC slots are on your server.

To monitor (in real time) adding  / removal of new ifaces to the bond use:
 

watch -n 1 ‘cat /proc/net.bonding/bond0′


MySQL SSL Configure Howto – How to Make MySQL communication secured

Wednesday, January 15th, 2014

mysql-over-ssl-how-to-configure-logo how to configure ssl on mysql server

Recently I've been asked How to make communication to MySQL database encrypted. The question was raised by a fellow developer who works on developing a Desktop standalone application in Delphi Programming Language with DevArt an (SQL Connection Component capable to connect Delphi applications to multiple databases like MySQL, Oracle, PostgreSQL, Interbase, Firebird etc.

Communicating in Secured form to MySQL database is not common task to do, as MySQL usually communicates to applications hosted on same server or applications to communicate to MySQL are in secured DMZ or administrated via phpMyAdmin web interface.

MySQL supports encrypted connections to itself using Secure Socket Layer (SSL) encryption. Setting up MySQL db to be communicated encrypted is a must for standalone Desktop applications which has to extract / insert data via remote SQL.
Configuring SQL to support communicated queries encrpytion is supported by default and easily configured on most standard Linux version distributions (Debian, RHEL, Fedora) with no need to recompile it.
1. Generate SSL Certificates

$ mkdir /etc/mysql-ssl && cd mysql-ssl

# Create CA certificate
$ openssl genrsa 2048 > ca-key.pem
$ openssl req -new -x509 -nodes -days 3600 \
         -key ca-key.pem -out ca-cert.pem

Create server certificate, remove passphrase, and sign it
server-cert.pem is public key, server-key.pem is private key
$ openssl req -newkey rsa:2048 -days 3600 \
         -nodes -keyout server-key.pem -out server-req.pem

$ openssl rsa -in server-key.pem -out server-key.pem
$ openssl x509 -req -in server-req.pem -days 3600 \
         -CA ca-cert.pem -CAkey ca-key.pem -set_serial 01 -out server-cert.pem

Create client certificate, remove passphrase, and sign it
client-cert.pem is public key and client-key.pem is private key
$ openssl req -newkey rsa:2048 -days 3600 \
         -nodes -keyout client-key.pem -out client-req.pem

$ openssl rsa -in client-key.pem -out client-key.pem
$ openssl x509 -req -in client-req.pem -days 3600 \
         -CA ca-cert.pem -CAkey ca-key.pem -set_serial 01 -out client-cert.pem

After generating the certificates, verify them:

$ openssl verify -CAfile ca-cert.pem server-cert.pem client-cert.pem
 

2. Add SSL support variables to my.cnf

Once SSL key pair files are generated in order to active SSL encryption support in MySQL server, add to (/etc/my.cnf,  /etc/mysql/my.cnf, /usr/local/etc/my.cnf … ) or wherever config is depending on distro

# SSL
ssl-ca=/etc/mysql-ssl/ca-cert.pem
ssl-cert=/etc/mysql-ssl/server-cert.pem
ssl-key=/etc/mysql-ssl/server-key.pem

3. Restart MySQL server

/etc/init.d/mysqld restart
...

4. Create SQL user to require SSL login

Create new user with access to database;

GRANT ALL ON Sql_User_DB.* TO Sql_User@localhost;
FLUSH PRIVILEGES;

To create administrator privileges user:

GRANT ALL PRIVILEGES ON *.* TO ‘ssluser’@'%’ IDENTIFIED BY ‘pass’ REQUIRE SSL;
FLUSH PRIVILEGES;

5. Test SSL Connection with MySQL CLI client or with few lines of PHP

To use mysql cli for testing whether SSL connection works:

$ mysql -u ssluser -p'pass' –ssl-ca /etc/mysql-ssl/client-cert.pem –ssl-cert /etc/mysql-ssl/client-key.pem

Once connected to MySQL to verify SSL connection works fine:

mysql> SHOW STATUS LIKE 'Ssl_Cipher';
 +---------------+--------------------+
| Variable_name | Value              |
 +---------------+--------------------+
| Ssl_cipher    | DHE-RSA-AES256-SHA |
+---------------+--------------------+

If you get this output this means MySQL SSL Connection is working as should.

Alternative way is to use test-mysqli-ssl.php script to test availability to mysql over SSL.

$conn=mysqli_init();
mysqli_ssl_set($conn, '/etc/mysql-ssl/client-key.pem', '/etc/mysql-ssl/client-cert.pem', NULL, NULL, NULL);
if (!mysqli_real_connect($conn, '127.0.0.1', 'ssluser', 'pass')) { die(); }
$res = mysqli_query($conn, 'SHOW STATUS like "Ssl_cipher"');
print_r(mysqli_fetch_row($res));
mysqli_close($conn);

Note: Change username password according to your user / pass before using the script

That's all now you have mysql communicating queries data over SSL


Fix Apache [error] [client xx.xxx.xxx.xx] PHP Warning: Unknown: Input variables exceeded 1000. To increase the limit change max_input_vars in php.ini. in Unknown on line 0

Wednesday, August 14th, 2013

I have a busy Linux server with 24 cores each running on ..4 Ghz. Server is configured to server  Apache and MySQL queries and a dozen of high traffic websites are hosted on it. Until just recently server worked fine and since about few days I started getting SMS notifications that server is inaccessible few times a day. To check what's wrong I checked in /var/log/apache2/error.log  and there I found  following error:

[error] [client 95.107.233.2] PHP Warning:  Unknown: Input variables exceeded 1000.

To increase the limit change max_input_vars in php.ini. in Unknown on line 0 referer: http://www.site-domain-name.com/predict/2013-08-10
 

Before I check Apache error.log, I had a guess that ServerLimit of 256 (spawned servers max) is reached so solution would be raise of ServerLimit to more than MaxClients setting defined in /etc/apache2/apache2.conf. After checking /var/log/apache2/error.log I've realized problem is because the many websites hosted on server exceed maximum defined variables possible to assign by libphp in php.ini. maximum possible defined variables before PHP stops servering is set through max_input_vars variable

As I'm running a Debian Squeeze Linux server, here is what is set as default for max_input_vars in /etc/php5/apache2/php.ini:

; How many GET/POST/COOKIE input variables may be accepted
; max_input_vars = 1000

So to fix it in php.ini just raised a bit setting to 1500, i.e.:

max_input_vars = 1500

Though I hit the error on Debian I assume same error occurs on Redhat RPM based (Fedora, CentOS, RHEL Linux) servers.
Hence I assume

max_input_vars = 1500

or higher should fix on those servers too. Looking forward to hear if same error is hit on RedHats.

Enjoy 🙂
 

Remote Desktop client – Remmina, Connect Remote to MS Windows VNC hosts from Linux

Friday, May 31st, 2013

remmina remote connet to windows linux vnc client logo

If you're system administrator, who use Linux as Desktop. You surely want to check out Remmina – The GTK+ Remote Desktop Client.

As far as I tested among all VNC Linux clients I know Remmina is definitely the one of choice in terms of Interface simplicity / stability and remote connection level of responsibility.

Before finding out about Remmina existence, I tried xtightvncviewer, xvnc4viewer, gvncviewer, gtkvncviewer. xtightvncviewer, xvncviewer and gvncviewer are more for console geeks and hence either they lack GUI interface or user interface looks terrible.

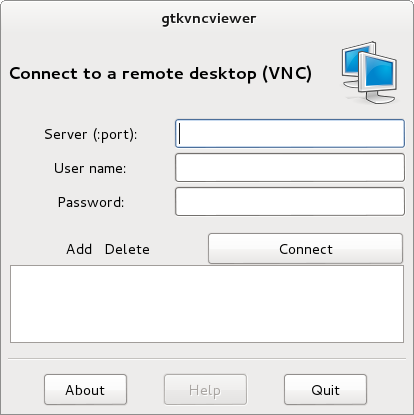
GTKVncViewer's interface is also not bad but still not со nice as Remmina's.

gtkvncviewer Debian GNU Linux Wheezy screenshot Linux VNC simple client

As you see in above shot, gtkvncviewer lacks any configuration. The only thing it can do is connect to remote host and you have option to configure nothing related how remote connection will respond, what type of Resolution to use etc.

I know of of no other Linux VNC Clients that has configurability and GUI interface of Remmina.


As of time of writting Remmina is at stable version 1.0 and supports following Remote connection protocols:

  • VNC
  • VNC
  • RDP
  • RDPF
  • RDPS
  • SFTP
  • SSH

Remmina is available across mostly all Linux mainstream distributions:

To install Remmina on Debian / Ubuntu and deb derivatives:

debian:~# apt-get –yes install remmina
….

On Redhats (Fedora, CentOS, RHEL – RPM based Linuxes) install via:

[root@centos ~]# yum –yes install remmina

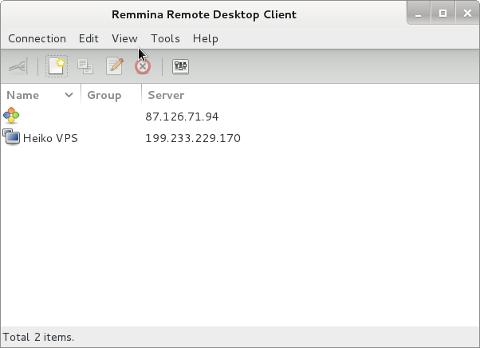
Below are few screenshots of Remmina:

Remmina Linux remote vnc connect best software gui frontend screenshot

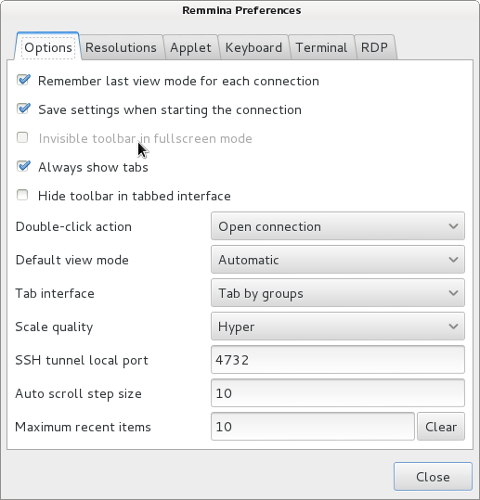
Linux VNC best VNC connect tool Remmina preferences screenshot

One of best Remmina feature is it supports Tabbing just like in Firefox. You can open a number of Remote VNC connects to different Windows hosts and manage them all by switching from tab to tab.

Remmina best vnc linux desktop client screenshot with tabs / What is best VNC client for Linux