Posts Tagged ‘instance’

VIM Project (VI Improvied IDE Editor extension to facilitate web development with vi enhanced editor

Wednesday, August 25th, 2010

I use VIM as an editor of choice for many years already.
Yet it's until recently I use it for a PHP ZF (Zend Framework) web development.

Few days ago I've blogged How to configure vimrc for a php syntax highlightning (A Nicely pre-configured vimrc to imrpove the daily text editing experience

This enhancements significantly improves the overall PHP code editing with VIM. However I felt something is yet missing because I didn't have the power and functunality of a complete IDE like for instance The Eclipse IDE

I was pretty sure that VIM has to have a way to be used in a similar fashion to a fully functional IDE and looked around the net to find for any VIM plugins that will add vim an IDE like coding interface.

I then come accross a vim plugin called VIM Prokject : Organize/Navigate projects of files (like IDE/buffer explorer)

The latest VIM Project as of time of writting is 1.4.1 and I've mirrored it here

The installation of the VIM Project VIM extension is pretty straight forward to install it and start using it on your PC issue commands:

1. Install the project VIM add-on

debian:~$ wget https://www.pc-freak.net/files/project-1.4.1.tar.gz
debian:~$ mv project-1.4.1.tar.gz ~/.vim/
debian:~$ cd ~/.vim/
debian:~$ tar -zxvvf project-1.4.1.tar.gz

2. Load the plugin

Launch your vim editor and type : Project(without the space between : and P)
You will further see a screen like:

vim project entry screen

3. You will have to press C within the Project window to load a new project

Then you will have to type a directory to use to load a project sources files from:

vim project enter file source directory screen

You will be prompted with to type a project name like in the screenshot below:

vim project load test project

4. Next you will have to type a CD (Current Dir) parameter
To see more about the CD parameter consult vim project documentation by typing in main vim pane :help project

The appearing screen will be something like:

vim project extension cd parameter screen

5. Thereafter you will have to type a file filter

File filter is necessary and will instruct the vim project plugin to load all files with the specified extension within vim project pane window

You will experience a screen like:


vim project plugin file filter screen

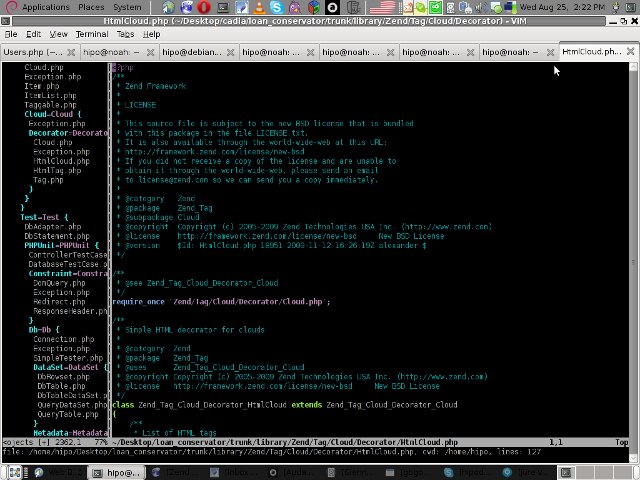
Following will be a short interval in which all specified files by the filter type will get loaded in VIM project pane and your Zend Framework, PHP or any other source files will be listed in a directory tree structure like in the picture shown below:

vim project successful loaded project screen

6. Saving loaded project hierarchy state

In order to save a state of a loaded project within the VIM project window pane you will have to type in vim, let's say:

:saveas .projects/someproject

Later on to load back the saved project state you will have to type in vim :r .projects/someproject

You will now have almost fully functional development IDE on top of your simple vim text editor.

You can navigate within the Project files loaded with the Project extension pane easily and select a file you would like to open up, whenever a source file is opened and you work on it to switch in between the Project file listing pane and the opened source code file you will have to type twice CTRL+w or in vim language C-w

To even further sophisticate your web development in PHP with vim you can add within your ~/.vimrc file the following two lines:

" run file with PHP CLI (CTRL-M)
:autocmd FileType php noremap <C-M> :w!<CR>:!/usr/bin/php %<CR>
" PHP parser check (CTRL-L)
:autocmd FileType php noremap <C-L> :!/usr/bin/php -l %>CR>

In the above vim configuration directovies the " character is a comment line and the autocmd is actually vim declarations.
The first :autocmd … declaration will instruct vim to execute your current opened php source file with the php cli interpreter whenever a key press of CTRL+M (C-m) occurs.

The second :autocmd … will add to your vim a shortcut, so whenever a CTRL+L (C-l) key combination is pressed VIM editor will check your current edited source file for syntax errors.
Therefore this will enable you to very easily periodically check if your file syntax is correct.

Well this things were really helpful to me, so I hope they will be profitable for you as well.
Cheers 🙂

Resolving “nf_conntrack: table full, dropping packet.” flood message in dmesg Linux kernel log

Wednesday, March 28th, 2012

nf_conntrack_table_full_dropping_packet
On many busy servers, you might encounter in /var/log/syslog or dmesg kernel log messages like

nf_conntrack: table full, dropping packet

to appear repeatingly:

[1737157.057528] nf_conntrack: table full, dropping packet.
[1737157.160357] nf_conntrack: table full, dropping packet.
[1737157.260534] nf_conntrack: table full, dropping packet.
[1737157.361837] nf_conntrack: table full, dropping packet.
[1737157.462305] nf_conntrack: table full, dropping packet.
[1737157.564270] nf_conntrack: table full, dropping packet.
[1737157.666836] nf_conntrack: table full, dropping packet.
[1737157.767348] nf_conntrack: table full, dropping packet.
[1737157.868338] nf_conntrack: table full, dropping packet.
[1737157.969828] nf_conntrack: table full, dropping packet.
[1737157.969928] nf_conntrack: table full, dropping packet
[1737157.989828] nf_conntrack: table full, dropping packet
[1737162.214084] __ratelimit: 83 callbacks suppressed

There are two type of servers, I've encountered this message on:

1. Xen OpenVZ / VPS (Virtual Private Servers)
2. ISPs – Internet Providers with heavy traffic NAT network routers
 

I. What is the meaning of nf_conntrack: table full dropping packet error message

In short, this message is received because the nf_conntrack kernel maximum number assigned value gets reached.
The common reason for that is a heavy traffic passing by the server or very often a DoS or DDoS (Distributed Denial of Service) attack. Sometimes encountering the err is a result of a bad server planning (incorrect data about expected traffic load by a company/companeis) or simply a sys admin error…

– Checking the current maximum nf_conntrack value assigned on host:

linux:~# cat /proc/sys/net/ipv4/netfilter/ip_conntrack_max
65536

– Alternative way to check the current kernel values for nf_conntrack is through:

linux:~# /sbin/sysctl -a|grep -i nf_conntrack_max
error: permission denied on key 'net.ipv4.route.flush'
net.netfilter.nf_conntrack_max = 65536
error: permission denied on key 'net.ipv6.route.flush'
net.nf_conntrack_max = 65536

– Check the current sysctl nf_conntrack active connections

To check present connection tracking opened on a system:

:

linux:~# /sbin/sysctl net.netfilter.nf_conntrack_count
net.netfilter.nf_conntrack_count = 12742

The shown connections are assigned dynamicly on each new succesful TCP / IP NAT-ted connection. Btw, on a systems that work normally without the dmesg log being flooded with the message, the output of lsmod is:

linux:~# /sbin/lsmod | egrep 'ip_tables|conntrack'
ip_tables 9899 1 iptable_filter
x_tables 14175 1 ip_tables

On servers which are encountering nf_conntrack: table full, dropping packet error, you can see, when issuing lsmod, extra modules related to nf_conntrack are shown as loaded:

linux:~# /sbin/lsmod | egrep 'ip_tables|conntrack'
nf_conntrack_ipv4 10346 3 iptable_nat,nf_nat
nf_conntrack 60975 4 ipt_MASQUERADE,iptable_nat,nf_nat,nf_conntrack_ipv4
nf_defrag_ipv4 1073 1 nf_conntrack_ipv4
ip_tables 9899 2 iptable_nat,iptable_filter
x_tables 14175 3 ipt_MASQUERADE,iptable_nat,ip_tables


II. Remove completely nf_conntrack support if it is not really necessery

It is a good practice to limit or try to omit completely use of any iptables NAT rules to prevent yourself from ending with flooding your kernel log with the messages and respectively stop your system from dropping connections.

Another option is to completely remove any modules related to nf_conntrack, iptables_nat and nf_nat.
To remove nf_conntrack support from the Linux kernel, if for instance the system is not used for Network Address Translation use:

/sbin/rmmod iptable_nat
/sbin/rmmod ipt_MASQUERADE
/sbin/rmmod rmmod nf_nat
/sbin/rmmod rmmod nf_conntrack_ipv4
/sbin/rmmod nf_conntrack
/sbin/rmmod nf_defrag_ipv4

Once the modules are removed, be sure to not use iptables -t nat .. rules. Even attempt to list, if there are any NAT related rules with iptables -t nat -L -n will force the kernel to load the nf_conntrack modules again.

Btw nf_conntrack: table full, dropping packet. message is observable across all GNU / Linux distributions, so this is not some kind of local distribution bug or Linux kernel (distro) customization.
 

III. Fixing the nf_conntrack … dropping packets error

– One temporary, fix if you need to keep your iptables NAT rules is:

linux:~# sysctl -w net.netfilter.nf_conntrack_max=131072

I say temporary, because raising the nf_conntrack_max doesn't guarantee, things will get smoothly from now on.
However on many not so heavily traffic loaded servers just raising the net.netfilter.nf_conntrack_max=131072 to a high enough value will be enough to resolve the hassle.

– Increasing the size of nf_conntrack hash-table

The Hash table hashsize value, which stores lists of conntrack-entries should be increased propertionally, whenever net.netfilter.nf_conntrack_max is raised.

linux:~# echo 32768 > /sys/module/nf_conntrack/parameters/hashsize
The rule to calculate the right value to set is:
hashsize = nf_conntrack_max / 4

– To permanently store the made changes ;a) put into /etc/sysctl.conf:

linux:~# echo 'net.netfilter.nf_conntrack_count = 131072' >> /etc/sysctl.conf
linux:~# /sbin/sysct -p

b) put in /etc/rc.local (before the exit 0 line):

echo 32768 > /sys/module/nf_conntrack/parameters/hashsize

Note: Be careful with this variable, according to my experience raising it to too high value (especially on XEN patched kernels) could freeze the system.
Also raising the value to a too high number can freeze a regular Linux server running on old hardware.

– For the diagnosis of nf_conntrack stuff there is ;

/proc/sys/net/netfilter kernel memory stored directory. There you can find some values dynamically stored which gives info concerning nf_conntrack operations in "real time":

linux:~# cd /proc/sys/net/netfilter
linux:/proc/sys/net/netfilter# ls -al nf_log/

total 0
dr-xr-xr-x 0 root root 0 Mar 23 23:02 ./
dr-xr-xr-x 0 root root 0 Mar 23 23:02 ../
-rw-r--r-- 1 root root 0 Mar 23 23:02 0
-rw-r--r-- 1 root root 0 Mar 23 23:02 1
-rw-r--r-- 1 root root 0 Mar 23 23:02 10
-rw-r--r-- 1 root root 0 Mar 23 23:02 11
-rw-r--r-- 1 root root 0 Mar 23 23:02 12
-rw-r--r-- 1 root root 0 Mar 23 23:02 2
-rw-r--r-- 1 root root 0 Mar 23 23:02 3
-rw-r--r-- 1 root root 0 Mar 23 23:02 4
-rw-r--r-- 1 root root 0 Mar 23 23:02 5
-rw-r--r-- 1 root root 0 Mar 23 23:02 6
-rw-r--r-- 1 root root 0 Mar 23 23:02 7
-rw-r--r-- 1 root root 0 Mar 23 23:02 8
-rw-r--r-- 1 root root 0 Mar 23 23:02 9


IV. Decreasing other nf_conntrack NAT time-out values to prevent server against DoS attacks

Generally, the default value for nf_conntrack_* time-outs are (unnecessery) large.
Therefore, for large flows of traffic even if you increase nf_conntrack_max, still shorty you can get a nf_conntrack overflow table resulting in dropping server connections. To make this not happen, check and decrease the other nf_conntrack timeout connection tracking values:

linux:~# sysctl -a | grep conntrack | grep timeout
net.netfilter.nf_conntrack_generic_timeout = 600
net.netfilter.nf_conntrack_tcp_timeout_syn_sent = 120
net.netfilter.nf_conntrack_tcp_timeout_syn_recv = 60
net.netfilter.nf_conntrack_tcp_timeout_established = 432000
net.netfilter.nf_conntrack_tcp_timeout_fin_wait = 120
net.netfilter.nf_conntrack_tcp_timeout_close_wait = 60
net.netfilter.nf_conntrack_tcp_timeout_last_ack = 30
net.netfilter.nf_conntrack_tcp_timeout_time_wait = 120
net.netfilter.nf_conntrack_tcp_timeout_close = 10
net.netfilter.nf_conntrack_tcp_timeout_max_retrans = 300
net.netfilter.nf_conntrack_tcp_timeout_unacknowledged = 300
net.netfilter.nf_conntrack_udp_timeout = 30
net.netfilter.nf_conntrack_udp_timeout_stream = 180
net.netfilter.nf_conntrack_icmp_timeout = 30
net.netfilter.nf_conntrack_events_retry_timeout = 15
net.ipv4.netfilter.ip_conntrack_generic_timeout = 600
net.ipv4.netfilter.ip_conntrack_tcp_timeout_syn_sent = 120
net.ipv4.netfilter.ip_conntrack_tcp_timeout_syn_sent2 = 120
net.ipv4.netfilter.ip_conntrack_tcp_timeout_syn_recv = 60
net.ipv4.netfilter.ip_conntrack_tcp_timeout_established = 432000
net.ipv4.netfilter.ip_conntrack_tcp_timeout_fin_wait = 120
net.ipv4.netfilter.ip_conntrack_tcp_timeout_close_wait = 60
net.ipv4.netfilter.ip_conntrack_tcp_timeout_last_ack = 30
net.ipv4.netfilter.ip_conntrack_tcp_timeout_time_wait = 120
net.ipv4.netfilter.ip_conntrack_tcp_timeout_close = 10
net.ipv4.netfilter.ip_conntrack_tcp_timeout_max_retrans = 300
net.ipv4.netfilter.ip_conntrack_udp_timeout = 30
net.ipv4.netfilter.ip_conntrack_udp_timeout_stream = 180
net.ipv4.netfilter.ip_conntrack_icmp_timeout = 30

All the timeouts are in seconds. net.netfilter.nf_conntrack_generic_timeout as you see is quite high – 600 secs = (10 minutes).
This kind of value means any NAT-ted connection not responding can stay hanging for 10 minutes!

The value net.netfilter.nf_conntrack_tcp_timeout_established = 432000 is quite high too (5 days!)
If this values, are not lowered the server will be an easy target for anyone who would like to flood it with excessive connections, once this happens the server will quick reach even the raised up value for net.nf_conntrack_max and the initial connection dropping will re-occur again …

With all said, to prevent the server from malicious users, situated behind the NAT plaguing you with Denial of Service attacks:

Lower net.ipv4.netfilter.ip_conntrack_generic_timeout to 60 – 120 seconds and net.ipv4.netfilter.ip_conntrack_tcp_timeout_established to stmh. like 54000

linux:~# sysctl -w net.ipv4.netfilter.ip_conntrack_generic_timeout = 120
linux:~# sysctl -w net.ipv4.netfilter.ip_conntrack_tcp_timeout_established = 54000

This timeout should work fine on the router without creating interruptions for regular NAT users. After changing the values and monitoring for at least few days make the changes permanent by adding them to /etc/sysctl.conf

linux:~# echo 'net.ipv4.netfilter.ip_conntrack_generic_timeout = 120' >> /etc/sysctl.conf
linux:~# echo 'net.ipv4.netfilter.ip_conntrack_tcp_timeout_established = 54000' >> /etc/sysctl.conf


Speeding up Apache through apache2-mpm-worker and php5-cgi on Debian / How to improve Apache performance and decrease server memory consumption

Friday, March 18th, 2011

speeding up apache through apache2-mpm-worker and php5-cgi on Debian Linux / how to improve apache performance and decrease server responce time
By default most Apache running Linux servers on the Internet are configured to use with the mpm prefork apache module
Historically prefork apache module is the predecessor of the worker module therefore it's believed to be a way more tested and reliable, if you need a critical reliable webserver configuration.

However from my experience by so far with the Apache MPM Worker I can boldly say that many of the rumors concerning the unreliabity of apache2-mpm-worker are just myths.

The old way Apache handles connections e.g. the mod prefork is the well known way that high amount of the daemons on Linux and BSD are still realying on.
When prefork is a used by Apache, every new TCP/IP connection arriving at your Linux server on the Apache configured port let's say on port 80 is being served by Apache in a way that the Apache process (mother process) parent does fork a new Apache parent copy in order to serve the new request.
Thus by using the prefork Apache needs to fork new process (if it doesn't have already an empty forked one waiting for connections) and serve the HTTP request of the new client, after the request of the client is completed the newly forked Apache usually dies (even though it again depends on the way the Apache server is configured via the Apache configuration – apache2.conf / httpd.conf etc.).

Now you can imagine how slow and memory consuming it is that all the time the parent Apache process spawns new processes, kills old ones etc. in order to fulfill the client requests.

Now just to compare the Apace mpm prefork does not use the old forking way, but relies on a few Apache processes which handles all the requests without constantly being destroyed and recreated like with the prefork module.
This saves operations and system resources, threaded programming has already been proven to be more efficient way to handle tasks and is heavily adopted in GUI programming for instance in Microsoft Windows, Mac OS X, Linux Gnome, KDE etc.

There is plenty of information and statistical data which compares Apache running with prefork and respectively worker modules online.
As the goal of this article is not to went in depths with this kind of information I would not say more on it but let you explore online a bit more about them in case if you're interested.

The purpose of this article is to explain in short how to substitute the Apache2-MPM-Prefork and how your server performance could benefit out of the use of Apache2-MPM-Worker.
On Debian the default Apache process serving module in Apache 1.3x,Apache 2.0x and 2.2x is prefork thus the installation of apache2-mpm-worker is not "a standard way" to install Apache

Deciding to swith from the default Debian apache-mpm-prefork to apache-mpm-worker is quite a serious and responsible decision and in some cases might cause troubles, if you have decided to follow my article be sure to consider all the possible negative consequences of switching to the apache worker !

Now after having said a bunch of info which might be not necessary with the experienced system admin I'll continue on with the steps to install the apache2-mpm-worker.

1. Install the apache2-mpm-worker

debian:~# apt-get install apache2-mpm-worker php5-cgi
Reading state information... Done
The following packages were automatically installed and are no longer required:
The following packages will be REMOVED apache2-mpm-prefork libapache2-mod-php5
The following NEW packages will be installed apache2-mpm-worker
0 upgraded, 1 newly installed, 2 to remove and 46 not upgraded.
Need to get 0B/259kB of archives.After this operation, 6193kB disk space will be freed.

As you can notice in below's text confirmation which will appear you will have to remove the apache2-mpm-prefork and the apache2-mpm-worker modules before you can proceed to install the apache2-mpm-prefork.

You might ask yourself if I remove my installed libphp how would I be able to use my Apache with my PHP based websites? And why does the apt package manager requires the libapache2-mod-php5 to get removed.
The explanation is simple apache2-mpm-worker is not thread safe, in other words scripts which does use the php fork(); function would not work correctly with the Apache worker module and will probably be leading to PHP and Apache crashes.
Therefore in order to install the apache mod worker it's necessary that no libapache2-mod-php5 is existent on the system.
In order to have a PHP installed on the server again you will have to use the php5-cgi deb package, this is the reason in the above apt-get command I'm also requesting apt to install the php5-cgi package next to apache2-mpm-worker.

2. Enable the cgi and cgid apache modules

debian:~# a2enmod cgi
debian:~# a2enmod cgid

3. Activate the mod_actions apache modules

debian:~# cd /etc/apache2/mods-enabled
debian:~# ln -sf ../mods-available/actions.load
debian:~# ln -sf ../mods-available/actions.conf

4. Add configuration options in order to enable mod worker to use the newly installed php5-cgi

Edit /etc/apache2/mods-available/actions.conf vim, mcedit or nano (e.g. your editor of choice and add inside:

&ltIfModule mod_actions.c>
Action application/x-httpd-php /cgi-bin/php5
</IfModule>

After completing all the above instructions, you might also need to edit your /etc/apache2/apache2.conf to tune up, how your Apache mpm worker will serve client requests.
Configuring the <IfModule mpm_worker_module> in apache2.conf is necessary to optimize your newly installed mpm_worker module for performance.

5. Configure the mod_worker_module in apache2.conf One example configuration for the mod worker is:

<IfModule mpm_worker_module>
StartServers 2
MaxClients 150
MinSpareThreads 25
MaxSpareThreads 75
ThreadsPerChild 25
MaxRequestsPerChild 0
</IfModule>

Consider the fact that this configuration is just a sample and it's in no means configured for serving Apache requests for high load Apache servers and you need to further play with the values to have a good results on your server.

6. Check that all is fine with your Apache configurations and no syntax errors are encountered

debian:~# /usr/sbin/apache2ctl -t
Syntax OK

If you get something different from Syntax OK track the error and fix it before you're ready to restart the Apache server.

7. Now restart the Apache server

debian:~# /etc/init.d/apache2 restart

All should run fine and hopefully your PHP scripts should be interpreted just fine through the php5-cgi instead of the libapache2-mod-php5.
Using the /usr/bin/php5-cgi will increase with some percentage your server CPU load but on other hand will drasticly decrease the Webserver memory consumption.
That's quite logical because the libapache2-mod-hp5 is loaded once during apache server whether a new instance of /usr/bin/php5-cgi is invoked during each of Apache requests via the mod worker.

There is one serious security flow coming with php5-cgi, DoS against a server processing scripts through php5-cgi is much easier to be achieved.
An example for a denial attack which could affect a website running with mod worker and php5-cgi, could be simulated from a simple user with a web browser which holds up the f5 or ctrl + r browser page refresh buttons.
In that case whenever php5-cgi is used the CPU load would rise drastic, one possible solution to this denial of service issues is by installing and using libapache2-mod-evasive like so:

8. Install libapache2-mod-evasive

debian:~# apt-get install libapache2-mod-evasive
The Apache mod evasive module is a nice apache module to minimize HTTP DoS and brute force attacks.
Now with mod worker through the php5-cgi, your apache should start serving requests more efficiently than before.
For some performance reasons some might even want to try out the fastcgi with the worker to boost the Apache performance but as I have never tried that I can't say how reliable a a mod worker with a fastcgi would be.

N.B. ! If you have some specific php configurations within /etc/php5/apache2/php.ini you will have to set them also in /etc/php5/cgi/php.ini before you proceed with the above instructions to install Apache otherwise your PHP scripts might not work as expected.

Mod worker is also capable to work with the standard mod php5 Apache module, but if you decide to go this route you will have to recompile your PHP lib manually from source as in Debian this option is not possible with the default php library.
This installation worked fine on Debian Lenny but suppose the same installation should work fine on Debian Squeeze as well as Debian testing/unstable.
Feedback on the afore-described mod worker installation is very welcome!

Auto restart Apache on High server load (bash shell script) – Fixing Apache server temporal overload issues

Saturday, March 24th, 2012

auto-restart-apache-on-high-load-bash-shell-script-fixing-apache-temporal-overload-issues

I've written a tiny script to check and restart, Apache if the server encounters, extremely high load avarage like for instance more than (>25). Below is an example of a server reaching a very high load avarage:;

server~:# uptime
13:46:59 up 2 days, 18:54, 1 user, load average: 58.09, 59.08, 60.05
load average: 0.09, 0.08, 0.08

Sometimes high load avarage is not a problem, as the server might have a very powerful hardware. A high load numbers is not always an indicator for a serious problems. Some 16 CPU dual core (2.18 Ghz) machine with 16GB of ram could probably work normally with a high load avarage like in the example. Anyhow as most servers are not so powerful having such a high load avarage, makes the machine hardly do its job routine.

In my specific, case one of our Debian Linux servers is periodically reaching to a very high load level numbers. When this happens the Apache webserver is often incapable to serve its incoming requests and starts lagging for clients. The only work-around is to stop the Apache server for a couple of seconds (10 or 20 seconds) and then start it again once the load avarage has dropped to less than "3".

If this temporary fix is not applied on time, the server load gets increased exponentially until all the server services (ssh, ftp … whatever) stop responding normally to requests and the server completely hangs …

Often this server overloads, are occuring at night time so I'm not logged in on the server and one such unexpected overload makes the server unreachable for hours.
To get around the sudden high periodic load avarage server increase, I've written a tiny bash script to monitor, the server load avarage and initiate an Apache server stop and start with a few seconds delay in between.

#!/bin/sh
# script to check server for extremely high load and restart Apache if the condition is matched
check=`cat /proc/loadavg | sed 's/\./ /' | awk '{print $1}'`
# define max load avarage when script is triggered
max_load='25'
# log file
high_load_log='/var/log/apache_high_load_restart.log';
# location of inidex.php to overwrite with temporary message
index_php_loc='/home/site/www/index.php';
# location to Apache init script
apache_init='/etc/init.d/apache2';
#
site_maintenance_msg="Site Maintenance in progress - We will be back online in a minute";
if [ $check -gt "$max_load" ]; then>
#25 is load average on 5 minutes
cp -rpf $index_php_loc $index_php_loc.bak_ap
echo "$site_maintenance_msg" > $index_php_loc
sleep 15;
if [ $check -gt "$max_load" ]; then
$apache_init stop
sleep 5;
$apache_init restart
echo "$(date) : Apache Restart due to excessive load | $check |" >> $high_load_log;
cp -rpf $index_php_loc.bak_ap $index_php_loc
fi
fi

The idea of the script is partially based on a forum thread – Auto Restart Apache on High Loadhttp://www.webhostingtalk.com/showthread.php?t=971304Here is a link to my restart_apache_on_high_load.sh script

The script is written in a way that it makes two "if" condition check ups, to assure 100% there is a constant high load avarage and not just a temporal 5 seconds load avarage jump. Once the first if is matched, the script first tries to reduce the server load by overwritting a the index.php, index.html script of the website with a one stating the server is ongoing a maintenance operations.
Temporary stopping the index page, often reduces the load in 10 seconds of time, so the second if case is not necessery at all. Sometimes, however this first "if" condition cannot decrease enough the load and the server load continues to stay too high, then the script second if comes to play and makes apache to be completely stopped via Apache init script do 2 secs delay and launch the apache server again.

The script also logs about, the load avarage encountered, while the server was overloaded and Apache webserver was restarted, so later I can check what time the server overload occured.
To make the script periodically run, I've scheduled the script to launch every 5 minutes as a cron job with the following cron:

# restart Apache if load is higher than 25
*/5 * * * * /usr/sbin/restart_apache_on_high_load.sh >/dev/null 2>&1

I have also another system which is running FreeBSD 7_2, which is having the same overload server problems as with the Linux host.
Copying the auto restart apache on high load script on FreeBSD didn't work out of the box. So I rewrote a little chunk of the script to make it running on the FreeBSD host. Hence, if you would like to auto restart Apache or any other service on FreeBSD server get /usr/sbin/restart_apache_on_high_load_freebsd.sh my script and set it on cron on your BSD.

This script is just a temporary work around, however as its obvious that the frequency of the high overload will be rising with time and we will need to buy new server hardware to solve permanently the issues, anyways, until this happens the script does a great job 🙂

I'm aware there is also alternative way to auto restart Apache webserver on high server loads through using monit utility for monitoring services on a Unix system. However as I didn't wanted to bother to run extra services in the background I decided to rather use the up presented script.

Interesting info to know is Apache module mod_overload exists – which can be used for checking load average. Using this module once load avarage is over a certain number apache can stop in its preforked processes current serving request, I've never tested it myself so I don't know how usable it is. As of time of writting it is in early stage version 0.2.2
If someone, have tried it and is happy with it on a busy hosting servers, please share with me if it is stable enough?

Shutdown tomcat server node in case of memory depletion – Avoiding Tomcat Out of memory

Friday, June 6th, 2014

fix-avoid-tomcat-out-of-memory-logo

Out Of Memory Errors, or OOMEs, are one of the most common problems faced by Apache Tomcat users. Tomcat cluster behind Apache unreachable (causing customer downtimes). OOME errors occur on production servers that are experiencing an unusually high spike of traffic.

Out of memory errors are usually a problem of application and not of Tomcat server. OMEs have become such a persistent topic of discussion in the Apache Tomcat community cause its so difficult to trace to their root cause. Usually 'incorrect' web app code causing Tomcat to run out of memory is usually technically correct.

Most common reasons for Out of Memory errors in application code are:
 

  •     the heap size being too small
  •     running out of file descriptors
  •     more open threads than the host OS allows
  •     code with high amounts of recursion
  •     code that loads a very large file into memory
  •     code that retaining references to objects or classloaders
  •     a large number of web apps and a small PermGen


The following java option -XX:OnOutOfMemoryError= could be added to any of tomcat java application servers in setenv.sh in  JAVA_OPTS= variable in case of regular Out of Memory errors occur making an application unstable.

-XX:OnOutOfMemoryError=<path_to_tomcat_shutdown_script.sh>

Where < path_to tomcat_shutdown_script.sh > is shutdown script(which performs kill <tomcat_pid> if normal shutdown fails) for the tomcat instance.

With this setup if any tomcat instance run out of memory it will be shutdown (shutdown script invoked) – as result the Apache proxy infront of Tomcats should not pass any further requests to this instance and application will visualize / work properly for end customers.

Usually a tomcat_shutdown_script.sh to invoke in case of OOM would initiate a Tomcat server restart something like:

for i in `ps -ef |grep tomcat |grep /my_path_to_my_instance | awk '{print $2}'`
do
kill -9 "$i"
#path and script to start tomcat
done

To prevent blank pages returned to customer because of shutdown_script.sh starting stopping Tomcat you can set in Reverse Apache Proxy something like:
 

<Proxy balancer://mycluster>
   BalancerMember ajp://10.16.166.48:11010/ route=delivery1 timeout=30 retry=1
   BalancerMember ajp://10.16.166.70:11010/ route=delivery2 timeout=30 retry=1
</Proxy>

Where in above example I assume, there are only two tomcat nodes, for more just add respective ones.

Note that if the deployed application along all servers is having some code making it crash all tomcat nodes can get shutdown all time and you can get in a client havoc 🙂

Redirect http URL folder to https e.g. redirect (http:// to https://) with mod_rewrite – redirect port 80 to port 443 Rewrite rule

Saturday, July 17th, 2010

There is a quick way to achieve a a full url redirect from a normal unencrypted HTTP request to a SSL crypted HTTPS

This is achieved through mod_rewrite using the RedirectMatch directive.

For instance let’s say we’d like to redirect https://www.pc-freak.net/blog to https://www.pc-freak.net/blog.
We simply put in our .htacess file the following rule:

Redirect permanent /blog https://www.cadiabank.com/login

Of course this rule assumes that the current working directory where the .htacess file is stored is the main domain directory e.g. / .
However this kind of redirect is a way inflexible so for more complex redirect, you might want to take a look at mod rewrite’s RedirectMatch directive.

For instance if you inted to redirect all urls (https://www.pc-freak.net/blog/something/asdf/etc.) which as you see includes the string blog/somestring/asdf/etc. to (https://www.pc-freak.net/blog/something/asdf/etc then you might use some htaccess RedirectMatch rule like:

RedirectMatch permanent ^/blog/(.*)$ https://www.pc-freak.net.net$1
or
RedirectMatch permanent ^/blog/(.*)$ https://www.pc-freak.net.net/$1

Hopefully your redirect from the http protocol to https protocol with mod_rewrite rule should be completed.
Also consider that the Redirect directive which by the way is an Apache directive should be faster to process requests, so everywhere you can I recommend using instead of RedirectMatch which calls the external Apache mod_rewrite and will probably be times slower.

How to count how many files are in a directory with find on Linux

Tuesday, February 21st, 2012

how to count how many directories are on your linux server

Did you ever needed to count, how many files in a directory are there?
Having the concrete number of files in a directory is not a seldom task but still very useful especially for scripts or simply for the sake of learning

The quickest and maybe the easiest way to count all files in a directory in Linux is with a combination of find and wc commands:

Here is how;

linux:~# cd ascii
linux:~/ascii# find . -type f -iname '*' -print |wc -l
407

This will find and list all matched files in any directory and subdirectories, print them out and count them with wc command.
The -type f argument instructs find to look only for files.

Other helpful variance of finding and listing all files in a directory and subdirectories is to list and count all the files with a certain file extension under a directory. For example, lets list all text files (.txt) contained in a directory and all level sub-directories:

linux:~/ascii# find . -type f -iname '*.txt' -print |wc -l
401

If you need to check the number of files in a directory for multiple directories on a server and you're aiming at doing it efficienly, issung above find .. | wc code will definitely be not a good choice. If used it will generate heavy load for the system and along with that will complete the execution in ages if issued on a large number of files containing dirs.

Thanksfully if efficiency is targetted, there is a command written in C called tree which is more efficient than find.
To count the number of files in dir but using tree :

linux:~# cd ascii
linux:/ascii# tree | tail -n 1
32 directories, 407 files

By default tree prints info for both the number of found files and directories.
To print out only the files matched, awk comes handy, e.g.:

linux:/ascii# tree |tail -n 1| awk '{ print $3 }'407

To list only the number of files in a directory without its existing sub-directories ls + wc use is also possible:

linux:~/ascii# ls -l | grep ^- | wc -l68

This result the above command would produce is +1 more than the real number of files, as it counts the directory ".." as one file (in UNIX / LINUX everything is file).

A short one liner script that can calculate all files correctly by substracting 1 is and hence present correct result on number of files is like so:

linux:~/ascii# var=$(ls -l | grep ^- | wc -l); var=$(($var - 1)); echo $var

ls can be used to calculate the number of 1-st level sub-directories under certain directory for instance:

linux:~/ascii# ls -l |grep ^d|wc -l
25

You see the ascii directory has 25 subdirectories in its 1st level.

To check symlinks under a directory with ls the command would be:

linux:~/ascii# ls -l | grep ^l | wc -l
0

Note above 3 ls | grep … examples, will not work properly if the directory contains files with SUID or some special properties set.
Hence to get the same 3 results for active files, directories and symbolic links, a one liner similar to the one below can be used instead:

linux:~/ascii# for t in files links directories; do echo `find . -type ${t:0:1} | wc -l` $t; done 2> /dev/null
407 files
0 links
33 directories

This will show statistics about all files, links and directories for all directory sub-levels.
Just in case if there is need to only count files, links and directories without directory recursion enabled, use:

linux:~/ascii# for t in files links directories; do echo `find . -maxdepth 1 -type ${t:0:1} | wc -l` $t; done 2> /dev/null
68 files
0 links
26 directories

Anyways the above bash loop will be slow, for directories containing thousands of files. For better performance the equivallent of above bash loop rewritten in perl would be:

linux:~/ascii# ls -l |perl -e 'while(<>){$h{substr($_,0,1)}+=1;} END {foreach(keys %h) {print "$_ $h{$_}\n";}}'
- 68
d 25
t 1
linux:~/ascii#
In any case the most preferrable and efficient way to count files en directories is by using tree command.
In my view using always tree command instead of code "hacks" is smart idea.

In Slackware tree command is part of the base install, on Debian and CentOS Linux, tree cmd is not part of the base system and requires install via apt / yum e.g.:

debian:~# apt-get --yes install tree
...

[root@centos:~ ]# yum --yes install tree

Happy counting 😉

How to list and exclude table names from a database in MySQL (exclude table names from an show tables in MySQL) by using information_schema

Wednesday, March 30th, 2011

Listing all table names from a MySQL database is a very easy and trivial task that every sql or system administrator out there is aware of.

However excluding certain table names from a whole list of tables belonging to a database is not that commonly used and therefore I believe many people have no clue how to do it when they have to.

Today for one of my sql backup scripts it was necessary that certain tables from a database to be excluded from the whole list of tables for a database I’m backupping.
My example database has the sample name exampledatabase and usually I do list all the table contents from that database with the well known command:

mysql> SHOW tables from exampledatabase;

However as my desire was to exclude certain tables from the list (preferrably with a certain SQL query) I had to ask around in irc.freenode.net for some hints on a ways to achieve my exclude table goals.

I was adviced by some people in #mysql that what I need to achieve my goal is the information_schema mysql structure, which is available since MySQL version 5.0.

After a bit of look around in the information_schema and the respective documentation on mysql.com, thanksfully I could comprehend the idea behind the information_schema, though to be honest the first time I saw the documentation it was completly foggy on how to use this information_schema;
It seems using the information_schema is very easy and is not much different from your normal queries syntax used to do trivial operations in the mysql server.

If you wonder just like I did what is mysql’s information_schema go and use the information_schema database (which I believe is a virtual database that is stored in the system memory).

For instance:

mysql> use information_schema;
Database changed
mysql> show tables
+---------------------------------------+
| Tables_in_information_schema |
+---------------------------------------+
| CHARACTER_SETS |
| COLLATIONS |
| COLLATION_CHARACTER_SET_APPLICABILITY |
| COLUMNS |
| COLUMN_PRIVILEGES |
| KEY_COLUMN_USAGE |
| PROFILING |
| ROUTINES |
| SCHEMATA |
| SCHEMA_PRIVILEGES |
| STATISTICS |
| TABLES |
| TABLE_CONSTRAINTS |
| TABLE_PRIVILEGES |
| TRIGGERS |
| USER_PRIVILEGES |
| VIEWS |
+---------------------------------------+
17 rows in set (0.00 sec)

To get a general view on what each of the tables in the information_schema database contains I used the normal SELECT command for example

mysql> select * from TABLES limit 10;

I used the limit clause in order to prevent being overfilled with data, where I could still see the table fields name to get general and few lines of the table to get an idea what kind of information the TABLES table contains.

If you haven’t got any ecperience with using the information_schema I would advice you do follow my example select and look around through all the listed tables in the information_schema database

That will also give you a few hints about the exact way the MySQL works and comprehends it’s contained data structures.

In short information_schema virtual database and it’s existing tables provides a very thorough information and if you’re an SQL admin you certainly want to look over it every now and then.

A bit of playing with it lead me to a command which is actually a good substitute for the normal SHOW TABLES; mysql command.
To achieve a SHOW TABLES from exampledatabase via the information_schema info structure you can for example issue:

select TABLE_NAME from TABLES where TABLE_SCHEMA='exampledatabase';

Now as I’ve said a few words about information_schema let me go back to the main topic of this small article, which is How to exclude table names from a SHOW tables list

Here is how exclude a number of tables from a complete list of tables belonging to a database:

select TABLE_NAME from TABLES where TABLE_SCHEMA='exampledatabase'
AND TABLE_NAME not in
('mysql_table1_to_exlude_from_list', 'mysql_table2_to_exclude_from_list', 'table3_to_exclude');

In this example the above mysql command will list all the tables content belonging to exampledatabase and instruct the MySQL server not to list the table names with names mysql_table1_to_exlude_from_list, mysql_table2_to_exclude_from_list, table3_to_exclude

If you need to exclude more tables from your mysql table listing just add some more tables after the …’table3_to_exclude’, ‘new_table4_to_exclude’,’etc..’);

Of course this example can easily be adopted to a MySQL backup script which requires the exclusion of certain tables from a backed up database.

An example on how you can use the above table exclude command straight from the bash shell would be:

debian:~# echo "use information_schema; select TABLE_NAME from TABLES where
TABLE_SCHEMA='exampledatabase' AND TABLE_NAME not in
('mysql_table1_to_exlude_from_list', 'mysql_table2_to_exclude_from_list', 'table3_to_exclude',);"
| mysql -u root -p

Now this little bash one-liner can easily be customized to a backup script to create backups of a certain databases with a certain tables (e.g. with excluded number of tables) from the backup.

It’s seriously a pity that by default the mysqldump command does not have an option for a certain tables exclude while making a database dump.
I’ve saw the mysqldump exclude option, being suggested somewhere online as a future feature of mysqldump, I’ve also seen it being reported in the mysql.com’s bug database, I truly hope in the upcoming releases we will see the exclude option to appear as a possible mysqldump argument.
 

Trip to Romania ( TTR ) – Few of my impressions from Ro-Mania :)

Thursday, June 21st, 2012

I just came home from a short 4 days trip to Romania. I'm truly impressed by the beauty, the people goodness and their piety.

Over the last few years, I've visited Romania numerous times, most of the times I just crossed by car while traveling to Holland. My impressions the previous years were quite good already but I didn't have the opportunity until now to see how the country looks "from within" – I mean how the life flows there etc.

I've heard quite a lot of BAD thinks about corruption (from european parliament critics in new) and gipsy like people and plenty of bad stuff over the years.
This is all lies, the country people are not corrupt, they're just smart and find plenty of ways to earn money. For instance while I was traveling there were Romanians people selling raspberries brought by the nearby woods, the raspberry selling is not entering the treasury of the country and this is considered by the European Union corruption and a crime 🙂
Well talking about police, they're a bit corrupt and stopping you for no reason sometimes to ask if you can give them some coffee or cigarettes but i wouldn't put this police act as corruption it is rather an act the patrol police do in order to find some extra cash near the low sallaries received for serving in police 🙂

Well anyways my trip to Romania here are few of my travel notes. The whole travel Route was Bulgaria – Romania, the aim of my travel can be classified as business trip, since I was travelling with a relative's husband who was their to transfer some physical goods (a kind of logistics). The wohle trip started from my hometown Dobrich; we went through Silistra and Ruse and then the so famous Danube bridge. The roads in Bulgaria are not perfect and some regions were full of road holes, but this is normal since we have a harsh winter here and now a road recovery works are in progress on the roads. Crossing the Danube bridge, there is a custom police and they charge something like 23 BGN (Bulgarian levs) for crossing it. Then there is a border police check which as most people who travelled by bus or car over borders (out of Schengen) knows pretty well. You have to hand in your ID and it is checked by a policeman and if you're not in the list of WANTED CRIMINALS 🙂 they let you go. Some 500 meters or a 1 kilometer after that is the Romanian border police which (since not part of Schengen yet checks your traveller ID again).

In Romania we travelled through Gurgevo which is one of the closest cities to Danube river bridgeroad and one of nearest romanian cities to Bulgaria.
Our first destination was a place in Romania called Targo Mures, to go their our route passed through the side road of Bucuresht – Bururesti as Domneles (misters) calls it.

As I'm trying to live an Orthodox Christian life the most striking think from the moment we entered Romania to the one we went off it was the number of Churches, Crucifix and religious references one can see by just crossing the country roads.
Many villages in Romania had 2 or 3 Churches a small chapels a Cross on the road sidewalks etc. Even many Romanian houses almost everywhere had a Christian Cross on top of the house or on the house door. Putting a Christian cross on top of your home is something I myself has thought of and wondered why Christians did not put here in Bulgaria and other Christian countries seeing this being a reality in RO-MANIA 🙂 was unexpected.

Other from my impression is that Romanian people work hard and a lot of them live in the village, owning a small land to grow vegetables and animals (sheeps and cows) mostly. While driving we saw on many places shepherds with large herds of sheeps, people mowing and generally many people who seemed to be working hard to grow their own food. This really made sense since here in Bulgaria grievously animals are rarely grown by country people and most people are living in cities (our rural population is very small).
Growing myself vegetables and having sheeps and living a village life is one of my dreams so seeing so many people growing big portion (if not all of their food on their own) especially in this crazy super-market times is really something that gives me hope, we're not completely doomed yet.

Biggest part of Romania is Orthodox Christian, while the deep central part and the western part is Roman Catholic. Nomatter the differences between the two the people in both parts seemed to live in piece. The western part was visibly more developed than the eastern.
In my observations the western part of Romania is highly influenced by Hungarian culture and architecture, while a lot of Hungarians live their today. We went through Sigishuara which seemed to be mostly Roman Catholic though I saw some Orthodox Church too on the city center. Sigishuara is amazingly beautiful. The people we met all throughout the trip was extremely friendly and always wanted to help and threated us like true Christians, something one can rarely see happening nowdays …

Most of Romania we travelled is mountain covered and the air was extremely clean, so when you're even breathing you feel very different and alive if compared to whether in my hometown.
Brasov is one of the big cities in Romania but its construction is not too much concentrated, the city is quite scattered consisting of neap houses up to few stages per hight. Generally in Romania I haven't seen too high buildings almost anywhere, in Bucurest there are some but still they're not so tall as the blocks in Bulgaria or some other ex-communist countries.

Something interesting about Brasov is that near it is Transilvania and a castle in a small village (or town) called Bran, the castle is dating back from the 12 century and is told to be the original castle where Count Dracula lived. Perhaps the region is filled with Vampire stories but unfortunately my knowledge in Romanesco was so poor so I couldn't get into contact to locals to ask for that (neither I had the time to).

Bran Count Dracula Castle

Bran castle was restored a couple of times and has been a host for the royal family of Romania (many Romanian kings, princesses) through the middle ages in Communistic time it was abandoned and just recently it was turned to a cultural museum (probably part of UNESCO).

The castle is located on a high rock and near it is a beatiful garden and an old times mention. In the castle there are plenty of objects left and traditional princess dresses, pictures, a cinema room, an ancient torture room and plenty of other medievel furniture.
The price was normal 25 LEU (the romanian currency), this equals to something like 6,5 EURO.

On the road, while travelling in Romania on many places you see the signs reading <b> DRUM BUN</b>: which in English means <b>"Have you a good trip"</b>.
During our way back from Bran we travelled through another mountain region – Sinaia.
The prices of food in the super-markets in Romania are quite almost same like in Bulgaria and if compared to western europe many products can be considered even cheap. The quality of food I found to be quite satisfying. A lot of people in Romania are still selling home made yellow cheese and natural grown products in villages as well as I've seen plenty of this street old fashioned tradesman which I like so much on the streets. The country roads especially the central ones and highways were quite good too. Well there is a lot to be said but unfortunately I don't have the time to prolonge this post anymore. In the mountain areas there were some sinaguture for monasteries according to what I've heard from some priests here in Bulgaria in Romania currently they have 7000 Orthodox Christian MONKS! ! ! The number is amazing high just for a comparison in Bulgaria as of time of writting we have not more than 300 monks.

Our trip thanksfully was safe and every romanian we met or ask anything was more than welcome to us and tried his best to help us. Finally it was time and we hit the road back to Bulgaria through Danube riverbridge – the bridge road is a bit better than before some holes are filled in but still there are plenty of holes.
We had to pass through the Romanian Customs and pay a fee for passing by and later were checked by Bulgarian border police – thanksfully with no problems. We had to deliver some cargo to Karnobat in Bulgaria so we passed by there and then through Burgas headed back through Stara Planina (Old Mountain) which is amazingly beautiful mountain and is a must visit place for any keen on mountain tourism.

Thanks God I came back home alive and well and here I am writting this post. To sum it up if I have to grade America and being asked if it is worthy as a tourist destination I would say not only worthy but it is a real pearl you must see!
 

Selecting Best Wireless channel / Choosing Best Wi-FI channel for Wireless Routers or (How to improve Wireless Network performance)

Monday, February 22nd, 2010

Wireless AP
Below are some valuable advices on Wireless Access Point initial install and configuration to better off your Wireless connection.It’s worthy to note that the 2.4 GHz

Wi-Fi signal range is divided into a number of smaller bands or “channels,” similar to television channels. I decided to run my wireless on channel 12 since this there was no other wireless routers operating on that frequency, though most routers are preconfigured to spread it’s signal on channel 6.

There is a difference in channels available for setup for 802.11b and 802.11g wireless networks in the United States and the European Union. In the USA the wireless channels available are from (1 to 11) whether in the EU it’s in the range of (1-13). Each of the Wireless channels run on a different frequency.

The lower the number of the channel is the lowest the radiating frequence band on which data is transmitted .Subsequently, increasing the channel increases the frequency slightly. Therefore the higher the channel you select on your AP the lesser the overlap with other devices running on the same channel and thus the lesser the possibility to overlap and interference.
It’s quite likely that you experience problems, if you use the default wireless channel which is 6.
If that’s the case it’s recommended to use either channel 1 or channel 11. In case of interference, i.e. overlap with other wireless networks, cellphones etc., there are 2 possible ways to approach the situation. In case of smaller interference, any change in channel on which there is no wireless device running could fix it up. The second way is to choose a wireless channel for your router in between 1,6 or 11 in (The USA) or 1,7,13 in Europe.
Up to 3 networks can run on the same space with minimum interference, therefore it would be a wise idea to check the list of wireless routers in your and check if there are others running on the same frequency.
As I mentioned in the beginning of the post I initially started running my wireless on channel 12, however after I discovered it is recommended to run your wireless router either on channel 1 7 or 13 in Europe I switched my D-Link DI-524 wireless router to transmit it’s signal on Channel 13.

I should testify that after changing the wireless channel, there was quite an improvement in my wireless connection.For instance before I change to Channel 13 (when my wireless internet was still streamed on channel 12) my wireless had constantly issues with disconnects because of low wireless signal.

Back then My wireless located physically in like 35 meters away set in another room, I can see my wireless router hardly connected on like 35%, changing to channel 13 enhanced my connection to the current 60% wireless router availability.

It’s also an interesting fact that Opened Wireless networks had better network thoroughput, so if you’re living in a house with a neighbors a bit distant from your place then you might consider it as a good idea to completely wipe out Wireless Router security encryption and abandon the use of WEP or WPA network encryption.

In case if all of the above is not working for you, you might consider take a close look at your Wireless Wireless LAN pc card and see if there are no any kind of bumps there. Another really interesting fact to know is that many people here in Bulgaria tend to configure there Wireless Access Points on channels either 1,6 or 11 which is quite inadequate considering that we’re in the EU and we should use a wireless channel between 1, 7 or 13 as prescribed for EU citizens.

Another thing not to forget is to place your wireless in a good way and prevent it from interferences with other computer equipment. For example keep the router at least few meters away from PC equipment, printers, scanners, cellphones, microwaves. Also try to put your wireless router on some kind of central place in your home, if you want to have the wireless signal all around your place.

At my place I have a microwave in the Kitchen which is sometimes an obstacle for the Wireless signal to flow properly to my notebook, fortunately this kind of interference happens rare (only when the Microwove is used to warm-up food etc.).Upgrading 802.11b wireless card / router to a better one as 802.11g is a wise idea too. 802.11g are said to be like 5 times faster than 802.11b.

You can expect 802.11b wireless network to transfer maximum between 2-5 Mbp/s whether 802.11g is claimed to transfer at approximately (12 to 23 Mbp/s). If even though the above prescriptions there is no wireless signal at some remote place at your home, you might consider adding a wireless repeater or change the AP router antenna.

By default wireless Routers are designed to be omni-directional (in other terms they broadcast the wireless signal all around the place. Thus is quite unhandy if you intend to use your Wireless net only in certain room or location at your place. If that’s the case for you, you might consider upgrading to a hi-gain antenna that will focus the wireless signal to an exact direction. Let me close this article with a small diagram taken from the net which illustrates a good router placement that will enable you to have a wwireless connection all over your place.

improve wireless router placement diagram