Posts Tagged ‘kernel module’

How to remove and disable BlueTooth support on Debian GNU / Linux servers

Thursday, October 18th, 2012

How to remove / disable bluetooth support on Debian GNU / Linux servers
If you running Debian Squeeze Linux (as server Apache, MySQL, Qmail etc.) on brand new purchased hardware with bluetooth support; you will notice default Linux kernel will detect and load modules for Bluetooth

This would not be a problem only if Bluetooth does not pose possible errors or (even at cases even maybe system hangs ups?). The actual reason in my case to want to disable bluetooth on a productive Linux server operating like host was I found out in dmesg produced output, some errors related to Bluetooth, here they are:


root@deb:~# dmesg|grep -i 'call trace' -A 8
[323406.744439] Call Trace:
[323406.744440] [] ? lapic_next_event+0x18/0x1d
[323406.744450] [] ? __report_bad_irq+0x30/0x7d
[323406.744453] [] ? note_interrupt+0x105/0x16e
[323406.744455] [] ? handle_fasteoi_irq+0x93/0xb5
[323406.744458] [] ? handle_irq+0x17/0x1d
[323406.744460] [] ? do_IRQ+0x57/0xb6
[323406.744463] [] ? ret_from_intr+0x0/0x11
[323406.744464]

I saw this error and similar ones occuring, every now and then obviously displaying something wents wrongs with IRQs related to BlueTooth Communication with Kernel (as it keeps processing requests loaded in system memory) …

Well anyways having the bluetooth kernel module loaded on memory just takes up few chunks of useless assigned memory.
I don't have intention to use bluetoothever in future on these host so I decided to completely remove bluetooth support on those Debian.

1. Remove blueetoh support on Debian GNU / Linux

First to check info about the loaded kernel module bluetooth.ko and its assigned module load alias run:


root@deb:~# /sbin/modinfo bluetooth
filename: /lib/modules/2.6.32-5-amd64/kernel/net/bluetooth/bluetooth.ko
alias: net-pf-31
license: GPL
version: 2.15
description: Bluetooth Core ver 2.15
author: Marcel Holtmann
srcversion: 9FD5BF98FC88505DC637909
depends: rfkill
vermagic: 2.6.32-5-amd64 SMP mod_unload modversions

Secondly disable memory preloaded bluetooth.ko on the current host with cmds:


root@deb:~# rmmod -f bnep
root@deb:~# rmmod -f l2cap
root@deb:~# rmmod -f sco
root@deb:~# rmmod -f bluetooth

Default way to control if Bluetooth (on host support is ON or OFF) is through /etc/default/bluetooth. Inside /etc/default/bluetooth is a control variable:


BLUETOOTH_ENABLED=1

To shut it off change its value to 0:


BLUETOOTH_ENABLED=0

Then to permanently prevent bluetooth.ko from being ever in future loaded its also good idea to blacklist modules – bnep, btusb, bluetooth:


root@deb:~# echo 'blacklist bnep' >> /etc/modprobe.d/bluetooth.conf
root@deb:~# echo 'blacklist btusb' >> /etc/modprobe.d/bluetooth.conf
root@deb:~# echo 'blacklist bluetooth' >> /etc/modprobe.d/bluetooth.conf

Onwards re-build, current kernel initramfs:


root@deb:~# update-initramfs -u -k `uname -r` -v
......
......

Next update boot init scripts with update-rc.d to make sure bluetooth (service / daemon) is not started:


root@deb:~# update-rc.d bluetooth remove
......

That's all bluetooth will not load up anymore on next boot and at present time will not take up useless mem space.

2. Re-enable disabled blueetooth on Debian Linux
 
I've been asked in one of comments, what to do If you need to re-enable bluetooth on your Debian Linux at some time in future, so here are the steps to turn back blueetooth on again


/etc/modprobe.d/bluetooth.conf

Change variable:

BLUETOOTH_ENABLED=0

to 

BLUETOOTH_ENABLED=1

Open  /etc/modprobe.d/bluetooth.conf and remove any blacklisted modules, e.g:

'blacklist bnep'
'blacklist btusb'
&39;blacklist bluetooth'

Rebuild again kernel ramfs

root@deb:~# update-initramfs -u -k `uname -r` -v
 
Enjoy 🙂
How to make GRE tunnel iptables port redirect on Linux

Saturday, August 20th, 2011

I’ve recently had to build a Linux server with some other servers behind the router with NAT.
One of the hosts behind the Linux router was running a Window GRE encrypted tunnel service. Which had to be accessed with the Internet ip address of the server.
In order < б>to make the GRE tunnel accessible, a bit more than just adding a normal POSTROUTING DNAT rule and iptables FORWARD is necessery.

As far as I’ve read online, there is quite of a confusion on the topic of how to properly configure the GRE tunnel accessibility on Linux , thus in this very quick tiny tutorial I’ll explain how I did it.

1. Load the ip_nat_pptp and ip_conntrack_pptp kernel module

linux-router:~# modprobe ip_nat_pptp
linux-router:~# modprobe ip_conntrack_pptp

These two modules are an absolutely necessery to be loaded before the remote GRE tunnel is able to be properly accessed, I’ve seen many people complaining online that they can’t make the GRE tunnel to work and I suppose in many of the cases the reason not to be succeed is omitting to load this two kernel modules.

2. Make the ip_nat_pptp and ip_nat_pptp modules to load on system boot time

linux-router:~# echo 'ip_nat_pptp' >> /etc/modules
linux-router:~# echo 'ip_conntrack_pptp' >> /etc/modules

3. Insert necessery iptables PREROUTING rules to make the GRE tunnel traffic flow

linux-router:~# /sbin/iptables -A PREROUTING -d 111.222.223.224/32 -p tcp -m tcp --dport 1723 -j DNAT --to-destination 192.168.1.3:1723
linux-router:~# /sbin/iptables -A PREROUTING -p gre -j DNAT --to-destination 192.168.1.3

In the above example rules its necessery to substitute the 111.222.223.224 ip address withe the external internet (real IP) address of the router.

Also the IP address of 192.168.1.3 is the internal IP address of the host where the GRE host tunnel is located.

Next it’s necessery to;

4. Add iptables rule to forward tcp/ip traffic to the GRE tunnel

linux-router:~# /sbin/iptables -A FORWARD -p gre -j ACCEPT

Finally it’s necessery to make the above iptable rules to be permanent by saving the current firewall with iptables-save or add them inside the script which loads the iptables firewall host rules.
Another possible way is to add them from /etc/rc.local , though this kind of way is not recommended as rules would add only after succesful bootup after all the rest of init scripts and stuff in /etc/rc.local is loaded without errors.

Afterwards access to the GRE tunnel to the local IP 192.168.1.3 using the port 1723 and host IP 111.222.223.224 is possible.
Hope this is helpful. Cheers 😉

How to disable ACPI (power saving) support in FreeBSD / Disable acpi on BSD kernel boot time

Tuesday, May 15th, 2012

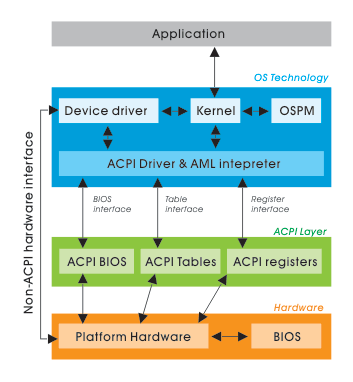
FreeBSD disable ACPI how ACPI Basic works basic diagram

On FreeBSD the default kernel is compiled to support ACPI. Most of the modern PCs has already embedded support for ACPI power saving instructions.
Therefore a default installed FreeBSD is trying to take advantage of this at cases and is trying to save energy.
This is not too useful on servers, because saving energy could have at times a bad impact on server performance if the server is heavy loaded at times and not so loaded at other times of the day.

Besides that on servers saving energy shouldn't be the main motivator but server stability and productivity is. Therefore in my personal view on FreeBSD used on servers it is better to disable complete the ACPI in order to disable CPU fan control to change rotation speeds all the time from low to high rotation cycles and vice versa at times of low / high server load.

Another benefit of removing the ACPI support on a server is this would probably increase the CPU fan life span and possibly prevent the CPU to be severely heated at times.

Moreover, some piece of hardware might have troubles in properly supporting ACPI specifications and thus ACPI could be a reason for unexpected machine hang ups.

With all said I would recommend to anyone willing to use BSD for a server to disable the ACPI (Advanced Configuration and Power Interface), just like I did.

Here is how;

1. Quick review on how ACPI is handled on FreeBSD

acpi support is being handled on FreeBSD by a number of loadable kernel modules, here is a complete list of all the kernel modules dealins with acpi:

freebsd# cd /boot
freebsd# find . -iname '*acpi*.ko'
./kernel/acpi.ko
./kernel/acpi_aiboost.ko
./kernel/acpi_asus.ko
./kernel/acpi_fujitsu.ko
./kernel/acpi_ibm.ko
./kernel/acpi_panasonic.ko
./kernel/acpi_sony.ko
./kernel/acpi_toshiba.ko
./kernel/acpi_video.ko
./kernel/acpi_dock.ko

By default on FreeBSD, if hardware has some support for ACPI the acpi gets activated by acpi.ko kernel module. The specific type of vendors specific ACPI like IBM, ASUS, Fujitsu are controlled by the respective kernel module from the list …

Hence, to control if ACPI is loaded or not on a FreeBSD system with no need to reboot one can use kldload, kldunload module management BSD cmds.

a) Check if acpi is loaded on a BSD

freebsd# kldstatkldstat | grep -i acpi
9 1 0xc9260000 57000 acpi.ko

b) unload kernel enabled ACPI support

freebsd# kldunload acpi

c) Load acpi support (not the case with me but someone might need it, if for instance BSD is running on laptop)

freebsd# kldload acpi

2. Disabling ACPI to load on bootup on BSD

a) In /boot/loader.conf add the following variables:

hint.acpi.0.disabled="1"
hint.p4tcc.0.disabled=1
hint.acpi_throttle.0.disabled=1


b) in /boot/device.hints add:

hint.acpi.0.disabled="1"

c) in /boot/defaults/loader.conf make sure:

##############################################################
### ACPI settings ##########################################
##############################################################
acpi_dsdt_load="NO" # DSDT Overriding
acpi_dsdt_type="acpi_dsdt" # Don't change this
acpi_dsdt_name="/boot/acpi_dsdt.aml"
# Override DSDT in BIOS by this file
acpi_video_load="NO" # Load the ACPI video extension driver

d) disable ACPI thermal monitoring

It is generally a good idea to disable the ACPI thermal monitoring, as many machines hardware does not support it.

To do so in /boot/loader.conf add

debug.acpi.disabled="thermal"

If you want to learn more on on how ACPI is being handled on BDSs check out:

freebsd# man acpi

Other alternative method to permanently wipe out ACPI support is by not compiling ACPI support in the kernel.
If that's the case in /usr/obj/usr/src/sys/GENERIC make sure device acpi is commented, e.g.:

##device acpi


Solve ALSA audio and mic issues on Lenovo Thinkpads on Debian and Ubuntu Linux

Wednesday, January 11th, 2012

Since I've blogged about my recent skype issues. I've played a lot with pulseaudio, alsa, alsa-oss to experimented a lot until I figured out why Skype was failing to properly delivery sound and record via my embedded laptop mic.

Anyways, while researching on the cause of my Thinkpad r61 mic issues, I've red a bunch of blog posts by people experiencing microphone oddities with Lenovo Thinkpads

Throughout the search I come across one very good article, which explained that in many cases the Thinkpad sound problems are caused by the snd-hda-intel alsa kernel module. snd-hda-intel fails to automatically set proper sb model type argument during Linux install when the soundcard is initialized with some argument like options snd-hda-intel model=auto

Hence, the suggested fix which should resolve this on many Thinkpad notebooks is up to passing the right module argument:

To fix its neceessery to edit /etc/modprobe.d/alsa-base.conf .

debian:~# vim /etc/modprobe.d/alsa-base.conf

Find the line in the file starting with:
options snd-hda-intel model=

and substitute with:

options snd-hda-intel model=thinkpad

Finally a restart of Advaned Linux Sound Architecture (alsa) is required:

debian:~# /etc/init.d/alsa restart
...

At most cases just restarting the alsa via its init script is not enough, since the ssnd-hda-intel kernel module is already in use by some program or something, so its best to do a reboot to make sure the module is loaded with the new model=thinkpad argument.

My exact laptop sound card model is:

debian:~# lspci |grep -i audio
00:1b.0 Audio device: Intel Corporation 82801H (ICH8 Family) HD Audio Controller (rev 03)

After changing the module and using alsamixer and aumix to make sure mic is unmuted and its volume is high enough, mic sound rec works fine.

How to install Microsoft Windows XP SP3 on Debian GNU / Linux Squeeze

Thursday, December 1st, 2011

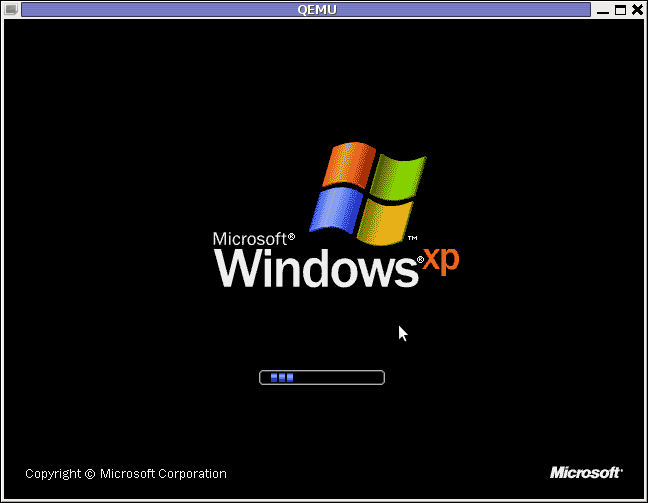
Windows XP Service Pack 3 QEMU Debian Squeeze

I have never did a proper install of Windows XP on Debian before hand. Even though I experimented once long time ago. I had zero success with installing Windows XP Service Pack 2 . The only Windows I can make correctly working before hand on these early days on my Debian powered notebook with qemu virtual machine emulator was Windows 2000 .

I decided to give it another go today as I hoped the qemu has advanced and I’ve seen many reports online of people who were able to correctly make Windows XP SP2 work out.

As I’ve seen many blog posts online of people who succesfully run with qemu Windows XP SP2, in order to escape from repeating the other guys experience and conduct a fresh experiment, I decided to give qemu a try with Microsoft.Windows.XP.Professional.SP3.Integrated.June.2011.Corporate

Before I proceed with using latest qemu I,

1. Installed qemu using the usual:

debian:~# apt-get install --yes qemu qemu-keymaps qemu-system qemu-user qemu-utils uml-utilities
...

Afterwards,

2. Created a new directory where the qemu Windows image will be stored:

debian:~# su hipo
hipo@noah:~$ mkdir windows
hipo@noah:~$ cd windows
hipo@noah:/home/hipo/windows$

As a following step I loaded the tun kernel module which is necessery for Qemu to properly handle the Windows LAN networking.

3. Load and set proper permissions for tun kernel module

In case if /dev/net is not existing first step is to create the proper device, however in most cases /dev/net should be there:

debian:~# mkdir -p /dev/net
debian:~# mknod /dev/net/tun c 10 200

As a next step its necessery to load tun kernel module and set the proper permissions:

debian:~# modprobe tun
debian:~# echo 'tun' >> /etc/modules
debian:~# chgrp users /dev/net/tun
debian:~# chmod g+w /dev/net/tun

Next step is to create an image file with dd or with qemu-img which will be holding the Virtual Machine Windows installation.

4. Create image file for Windows using dd

I decided to create a the image file to be with a size of 5 Gigabytes, this is of course custom so other people might prefer having it less or more the absolute minimum for a proper Windows XP SP3 install is 2000 Megabytes.

debian:~# su hipo -; cd windows;
debian:/home/hipo/windows$ dd of=hd.img bs=1024 seek=5000000 count=0
0+0 records in
0+0 records out
0 bytes (0 B) copied, 1.5505e-05 s, 0.0 kB/s

Notice here that the file dd will create will appear like 0 kb file until the Windows install from a BootCD is run with qemu.

5. Download an image of Microsoft.Windows.XP.Professional.SP3.Integrated.June.2011.Corporate from thepiratebay.org

Microsoft.Windows.XP.Professional.SP3.Integrated.June.2011.Corporate is currently available for download from the thepiratebay.org if in the times to come it is not available it will most likely be available from torrentz.net, isohunt.com etc. so I’ll skip more explanations with this step and let you use your favourite torrent program of choice to download the MS Windows iso. Just to make a note here I used transmission as this is my favourite torrent client. After downloading the iso I used K3B to burn the Image file as Bootable ISO. I’m naturally a GNOME user so to burn it as Image I just open it with K3B by using the GNOME menu and selecting Open with K3B

Next I instructed qemu to boot from the just burnt CD.

6. Boot windows Installation with Qemu from the Boot CD

debian:/home/hipo/windows$ qemu -boot d -cdrom /dev/cdrom -hda hd.img

Notice here that I’m running the qemu virtual machine emulator with a non-privileged reasons. This is important as qemu might have holes in the emulation of Windows Networking stack which if executed as root superuser. Can allow some malicious attacker to remotely compromise your GNU / Linux PC …

Qemu window will pop-up where one installs the Windows as it will install it using an ordinary PC. To switch qemu to fullscreen mode to have the complete feeling like installing Windows on an non-emulated PC ctrl + alt + f can be pressed.

The Windows installation took like 1 hour 20 minutes on my dual core 1.8 Ghz notebook with 2 GB of RAM. But I should say while installing I had multiple applications running; xmms, transmission, epiphany, icedove, evince etc. probably if I just run the Virtual Machine with no other applications to extra load my PC, probably the Windows install would have been done in max 50 minutes time.

After the installation is complete. To

7. Further run the installed Windows debian:/home/hipo/windows$ qemu -hda hd.img -boot c
...

As a next step its necessery to;

8. Bring up the tap0 interface and configure it for the user

I’m running my qemu emulator with my user hipo , so I run cmds:

debian:/home/hipo/windows$ su - root
debian:~# tunctl -u hipo
Set 'tap0' persistent and owned by uid 1000

9. Enable ip_forwarding and arp proxy and for wlan0 and tap0

debian:~# echo 1 > /proc/sys/net/ipv4/conf/wlan0/proxy_arp
debian:~# echo 1 > /proc/sys/net/ipv4/conf/tap0/proxy_arp

10. Install the proper Network Drivers inside Windows

That’s just in case, if they’re not supported by the Windows default existing drivers.
To do so, I downloaded my LAN drivers from the Vendor and put it on USB and sticked the USB drive to my laptop. In order to make the Kingston USB drive I used to transfer my LAN and Video drivers. I had to restart qemu with the parameter -usb -usbdevice host:0951:1625 , where I used lsusb to check and get the correct USB ID 0951:1625, like shown in the command below:

debian:~# lsusb |grep -i kingston
Bus 001 Device 006: ID 0951:1625 Kingston Technology DataTraveler 101 II

After on I booted again the Windows XP with the following command line in order to make qemu detect the USB Drive:

debian:/home/hipo/windows# sudo qemu -boot c -hda hd.img -usb -usbdevice host:0951:1625

One oddity here is that in order for qemu to detect the USB stick, I had to run it via sudo with super user privileges.Don’t ask me why this is the only way it worked …
Next on used the Windows device manager from Control Panel -> System -> Device Manager to point my undetected hardware to the correct Win drivers.

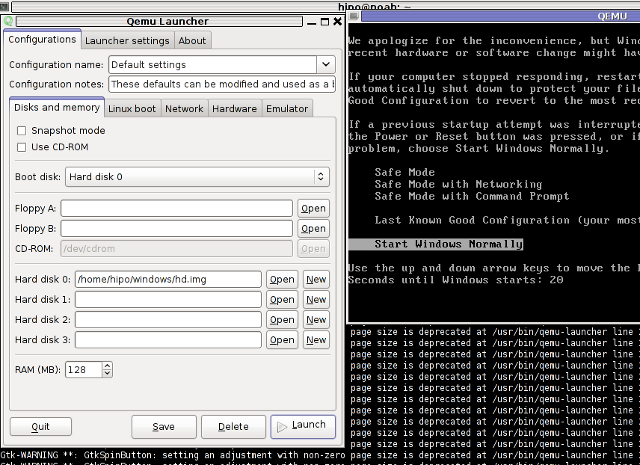
For the GUI preferring user qemu has a nice GNOME GUI interface called qemu-launcher, if you like to use qemu via it instead of scripting the qemu launcher commands, you can install and use via:

debian:~# apt-get install --yes qemu-launcher qemuctl
...
debian:/home/hipo/windows$ qemu-launcher

QEMU-Launcher Debian Squeeze Screenshot

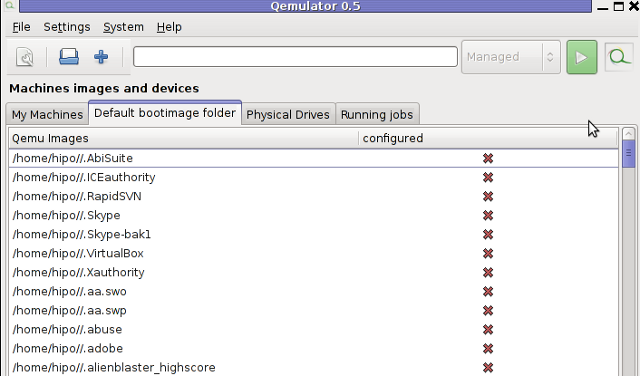
Another GUI alternative to qemu-launcher, which easifys the work with qemu is qemulator; here is a screenshot:

Qemulator 0.5 - Qemu GUI Screenshot Debian Squeeze

How to install Nvidia GeForce FX 5500 on Ubuntu 11.04

Tuesday, July 19th, 2011

Nvidia Tux GeForce GNU / Linux

Yesterday I was at a friend of mine who has recently installed Ubuntu 11.04 to his already oldish Desktop computer.

The system was 1.4Ghz (amd) with 512 RAM and some kind of Dell Trinitron 19 inch monitor
Even though he tried hard to make his NVIDIA GeForce FX 5500 ‘s drive to work properly with Ubuntu Natty Narwhal, he just has messed it even more.
As I always like helping people and I’m joyful for people who want to migrate to Linux, I took some time to make his NVIDIA GeForce work with this Ubuntu release.

First I tried to make it work by using some of the official NVIDIA Linux drivers located on nvidia.com following some online tutorial for Ubuntu claiming that it works but actually it didn’t, so finally after a bit of experimentation I found a way to make this video card work.
Here is how:

1. Install the following Ubuntu packages

root@ubuntu:~# apt-get install nouveau-firmware nvidia-173 nvidia-173-kernel-source
nvidia-cg-toolkit nvidia-common nvidia-current nvidia-glx-173 nvidia-settings
...

2. Load in the kernel and set to be auto loaded on boot nvidia’s driver kernel module nvidia-173

root@ubuntu:~# depmod -a;
root@ubutnu:~# modprobe nvidia-173
root@ubuntu:~# echo nvidia-173 >> /etc/modules

3. Stop temporary (Gnome dipsplay manager) gdm

root@ubuntu:~# service gdm stop
...

4. Use nvidia-xconfig to generate a working version of /etc/X11/xorg.conf for Nvidia

root@ubuntu:~# nvidia-xconfig
..

nvidia-xconfig will generate new /etc/X11/xorg.conf configuration corresponding to the Nvidia GeForce Fx 5500 and will move the old xorg.conf to xorg.conf.backup.

5. Start the gdm manager to be running again

root@ubuntu:~# service gdm start
...

Now the Xserver will start in a terrible mode of 640×480, probably because Ubuntu was unable to define correct VerticalSync and HorizontalSync for the 19 inch Dell Trinitron monitor or for some other weird reason, to fix this it’s quite easy though.
The fix to the NVIDIA GeForce 5500 running in 640×480 mode is done straigh via Gnome menus.

6. Use Gnome’s System -> Preferences -> Monitors to set raise up the Xserver resolution

Navigate to Gnome’s menus:

System -> Preferences -> Monitors

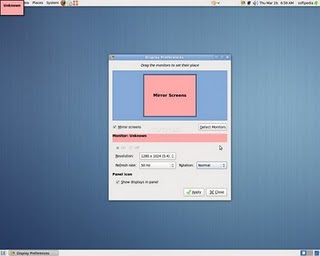
Gnome System Preferences Monitors Nvidia GeForce 5500 Ubuntu

Here you will have to select more appropriate resolution and a different refresh rate, which in my case was 1024×768 and further on to store the settings press the Apply button.

One oddity here was that according to the Monitor Preferences the refresh rate was running on 54 Hz which I don’t believe was the case as I guess it’s some kind of Gnome or Ubuntu bug. I changed the 54 Hz Refresh Rate to 50 Hz as using the 54 Hz refresh rate as the screen had a minor vibrations observable if one takes a thorough look on the screen.

Setting the NVIDIA GeForce 5500 driver to work with 50 Hz Refresh Rate in Gnome loooked like the Windows’s 85 Hz RR and looked quite nice so I left it this way.

Finally to test the newly installed driver 3D acceleration I used glxgears.

7. Install glxgears in order to be able to test that 3D acceleration on Nvidia works fine

root@ubuntu:~# apt-get install mesa-utils

After installing mesa-utils which nowdays contains glxgears executable one needs to execute the glxgears binary.

root@ubuntu:~# glxgears

Immediately after a window containing the glxgears should popup on the screen, like shown in below screenshot
Benchmark 3d Acceleration Linu glxgears

glxgears showed 3d acceleration works fine as the performance for 3d rendering shown was quite good and therefore 3D acceleration was running fine.

And that was it now the video works like and my friends, can enjoy the fun to have a generally virus Free OS 😉

How to load custom Kernel (tun) module in CentOS and RHEL Linux

Thursday, July 14th, 2011

kernel module load on boot in CentOS and Fedora

Just recently it was necessery to load up a tun kernel module on few CentOS Linux servers.

I’m using Debian on daily basis, and everybody that had even little of experience with Debian should already be aware about the existence of the handy:
/etc/modules file.
On Debian to enable a certain kernel module to load up on Linux boot, all necessery is to just place the kernel module name in /etc/modules.
For example loading the tun tunneling kernel module I issue the command:

debian:~# echo tun >> /etc/modules

I wondered if CentOS, also supports /etc/modules as it was necessery now to add this tun module to load up on CentOS’s boot.
After a bit of research I’ve figured out CentOS does not have support for adding modules names in /etc/modules , anyhow after consulting CentOS documentation on http://www.centos.org/docs/5/html/Deployment_Guide-en-US/s1-kernel-modules-persistant.html , I found CentOS and RHEL use /etc/rc.modules instead of Debian’s /etc/modules to load up any custom kernel modules not loaded by default during system boot.

Therefore instructing the RHEL Linux to load up my desired tun module in kernel on next boot was as easy as executing:

[root@centos ~]# echo 'modprobe tun' >> /etc/rc.modules
[root@centos ~]# chmod +x /etc/rc.modules

Now on next boot CentOS will load up the tun module in kernel. Achiving the same module load up is also possible through /etc/rc.local , but it’s not recommended way as /etc/rc.local would load up the kernel module after all of the rest init boot scripts complete and therefore will load up the module slightly later, at the final boot stage.