
I have recently installed Postfix on a server following WorkAround.org ISPMail Tutorial on Debian Wheezy Linux 7. Officially as you can see on their website there is no official guide still for Debian Wheezy yet. Therefore my only option was to follow ISPMail tutorial using Postfix 2.7 (Debian Squeeze).
It was quite a struggle to adapt tutorial for Squeeze deb to Wheezy and it took me an overall time of about of week (each day spending few hours trying to make various components of tutorial) work. But finally I managed to install it. This is how this article got born in hope that in future it will help others have a decent Postfix install on Wheezy..
For those unfamiliar with Workaround.org's ISPMail Postfix Tutorial it is pretty much standard step-by-step installation guide for dummies similar to QmailRocks.org or Thibs QmailRocks Updated Installation Guide.
In Other words Workaround.org is probably the best Postfix full featured install tutorial currently online as of time of writting this post. Workaround.org is great for people who want to run full featured;
Postfix SMTP configured to support;
- Postfix to support Mail Virtual Domains (store E-mails in MySQL database)
- Dovecot Secure IMAP / IMAPS / POP3 / POP3s server to offer Pop3 and Imap remote access
- Support Properly Generated SSL Certificates for POP3s and IMAPs
- Anti Spam – SMTPD restrictions, SPF, RBL, Greylisting
- Install web frontend to support Web E-mail Domaim / Accounts easy administrations for users stored in MySQL db
- Amavisd-New (to protect Mail server from Spam)
- Postfix WebMail frontend with Roundcube or Squirrelmail
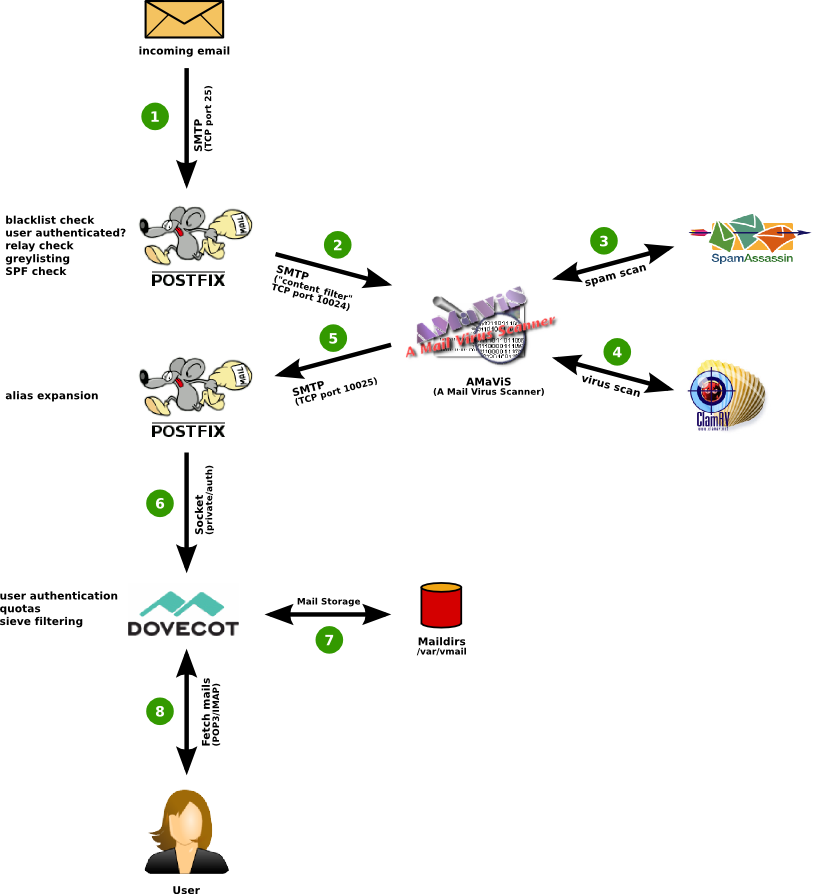
Here is the big picture as it gives good idea on how all above components correspond to each other:
So here we go:
1. Install Postfix necessary debian packages
a) Install Postfix / MySQL / phpmyadmin and Postfix support for MySQL mail storage deb packs
apt-get update
apt-get upgrade
apt-get install –yes ssh
apt-get install –yes postfix postfix-mysql
apt-get –purge remove 'exim4*'
apt-get install –yes mysql-client mysql-server dovecot-common dovecot-imapd dovecot-pop3d postfix libsasl2-2 libsasl2-modules libsasl2-modules-sql sasl2-bin libpam-mysql openssl telnet mailutils
apt-get install –yes mysql-server phpmyadmin
b) Install deb packages for Dovecot and Imap Support as well as Roundcube and / or Squirrelmail for Webmail support
squirrelmail
apt-get install –yes dovecot-pop3d dovecot-imapd dovecot-lmtpd
c) Install packages deb packages for Anti-spam greylisting (tumgreyspf)
apt-get install –yes tumgreyspf
2. Create necessary MySQL database structures
Next step is toconnect to MySQL as root via MySQL CLI or PhpMyadmin and CREATE new user "mailuser" and new database "mailserver", then create basic structure for "mailserver" database – i.e. sql tables ("virtual_domains", virtual_users", virtual_aliases")
These user and database is used laters by Dovecot server to connect and fetch emails from MySQL on user request via POP3 or IMAP. I've taken all the SQL requests and from Workaround.org's site and placed them in one SQL file:
create-postfix-mysql-user-database.sql.
Below is mysql cli query to import it. If you prefer more user friendliness do it via PhpMyAdmin with a copy / paste from file or with PhpMyAdmin import …
wget -q https://www.pc-freak.net/files/postfix/create-postfix-mysql-user-database.sql
mysql -u root -p < create-postfix-mysql-user-database.sql
Link to create-postfix-mysql-user-database.sql is here
3. Setting up Dovecot required users and directories
Next its necessary configure some users and create directories where Dovecot will store its configuration files. Dovecot requires to create its custom files for each existing users in MySQL database. Therefore whenever user receives or sends e-mail or is simply created Dovecot also creates a user directory structure in /var/vmail/, for exmpl.:
# ls -al /var/vmail/mail-domain.org/test/mail/
total 20
drwx—— 4 vmail vmail 4096 jul 29 09:15 .
drwx—— 3 vmail vmail 4096 jul 29 07:20 ..
drwx—— 3 vmail vmail 4096 jul 29 09:15 .imap
drwx—— 2 vmail vmail 4096 jul 29 09:15 INBOX
-rw——- 1 vmail vmail 24 jul 29 09:15 .subscriptions
The functions of Dovecot server again are:
- Get emails from Postfix (MySQL database) and save them to disk
- Allow mail users to fetch emails using POP3 or IMAP protocol with Outlook / Thunderbird whatever pop3 client
groupadd -g 5000 vmail
useradd -g vmail -u 5000 vmail -d /var/vmail -m
chown -R vmail:vmail /var/vmail
chmod u+w /var/vmail
chgrp vmail /etc/dovecot/dovecot.conf
chmod g+r /etc/dovecot/dovecot.conf
chown root:root /etc/dovecot/dovecot-sql.conf
chmod go= /etc/dovecot/dovecot-sql.conf
4. Create self-signed SSL certificate for Postfix mail and Dovecot pop3 server
openssl req -new -x509 -days 3650 -nodes -out /etc/ssl/certs/dovecot.pem -keyout /etc/ssl/private/dovecot.pem
chmod o= /etc/ssl/private/dovecot.pem
/etc/init.d/dovecot restart
openssl req -new -x509 -days 3650 -nodes -out /etc/ssl/certs/postfix.pem -keyout /etc/ssl/private/postfix.pem
chmod o= /etc/ssl/private/postfix.pem
5. Configuring Amavis (Anti Virus frontend) with Clamav AV
To reduce viruses it is a must nowadays to install Antivirus in Qmail I used qmail-scanner (perl script) frontend to Clamav Antivirus to check for Viruses and some messed up e-mails. In Postfix just like in Sendmail, tool that does the same is amavisd-new. There are some configuration files to do, but as its time consuming to do changes one by one I prefer moving old /etc/amavis/ to /etc/amavis-bak/ and download and untar archive with already set proper configs
apt-get install –yes amavisd-new
useradd clamav -g amavis
mv /etc/amavis /etc/amavis-old
cd /etc/
wget https://www.pc-freak.net/files/postfix/amavis-config-debian-wheezy-7.tar.gz
tar -zxvvf amavis-config-debian-wheezy-7.tar.gz
…
…..
/etc/init.d/amavis start
Starting amavisd: amavisd-new.
Amavisd is meant to communicate in two port numbers with Postfix. Postfix passes Input in one (10024) and Output – Scanned File Status in (10025). Thus for normal amavis operation this two ports has to be showing as listening on localhost, e.g.:
netstat -nap | grep -E '10024|10025'
tcp 0 0 127.0.0.1:10024 0.0.0.0:* LISTEN 13957/amavisd-new (
tcp 0 0 127.0.0.1:10025 0.0.0.0:* LISTEN 9007/master
6. Placing Dovecot working (properly configured) config files for Debian Wheezy
On Workaround.org there are plenty of configurations to copy paste inside files and how it is explained is a bit complicated thus played a lot mainly with /etc/postfix/master.cf and /etc/postfix/main.cf configurations until I finally had a working version of (SMTP) configured not to be an open relay and receive / sent email OK …
Here are configurations that worked for me:
mv /etc/postfix /etc/postfix-old
cd /etc/
wget -q https://www.pc-freak.net/files/postfix/postfix-configs-debian-wheezy.tar.gz
tar -zxvvf postfix-configs-debian-wheezy.tar.gz
… …..
[ ok ] Stopping Postfix Mail Transport Agent: postfix.
[ ok ] Starting Postfix Mail Transport Agent: postfix.
To download my good postfixs-debian-wheezy.tar.gz look here
Afterwards only setting you have to change in /etc/postfix/main.cf is:
myhostname = example-mail.org
to your Fully Qualified Domain Name (FQDN), lets say www.pc-freak.net
myhostname = www.pc-freak.net
I find it also useful to remove from SMTP after connect banner reporting that Postfix is running on Debian in main.cf change:
smtpd_banner = $myhostname ESMTP $mail_name (Debian/GNU)
to
smtpd_banner = $myhostname ESMTP $mail_name
7. Placing Dovecot working config files in /etc/
Configuring Dovecot is not an easy task in Debian Linux Squeeze and Lenny, on Postfix ISPMail guide there is a special tutorial for each as there is none yet for Debian Wheezy. It took me long to figure it out how to translate from old config settings for Wheezy's Dovecot 2.1.7-7. Configuration files places has changed for some clarity in Dovecot 2.1.7-7. So many of the Workaround.rog's Squeeze Tutorial suggested changes in /etc/dovecot/dovecot.conf are to be made in files under /etc/dovecot/conf.d
Therefore quickest way to have working Dovecot is to move default config dir /etc/dovecot to /etc/dovecot-old and place tuned configs:
cd /etc/
wget -q https://www.pc-freak.net/files/postfix/dovecot-configs-debian-wheezy.tar.gz
tar -zxvvf dovecot-configs-debian-wheezy.tar.gz
…
….
chown -R vmail:dovecot /etc/dovecot
/etc/init.d/dovecot restart
[ ok ] Restarting IMAP/POP3 mail server: dovecot.
To download dovecot-configs-debian-wheezy.tar.gz click here
8.Install Web Interface User / Domain edit Mail Frontend – Mail Admin Tool – Matv1.1
There are 4 web mail admin interfaces suggested by ISPMail tutorial:
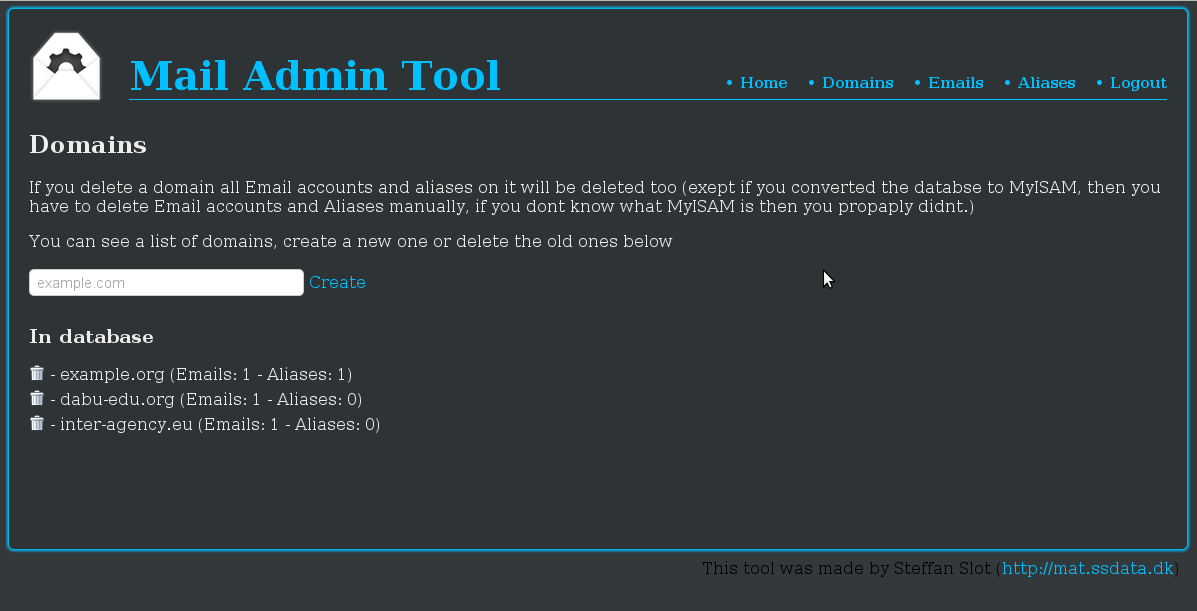
- Matv.1.1 – Mail Admin Tool
- ISPWebadmin
- Mailadm
- VEA
I tried with ISPWebadmin and VEA, but only one that worked for me is MATv1.1. Actually I liked a lot Mail Admin tool it is simple and does support; create new mail domains, create new users in domains and add user aliases.
Here is how to install
cd /var/www;
wget -q http://mat.ssdata.dk/files/MATv1.1.tar.gz
tar -zxvvf MATv1.1.tar.gz
mv "MAT v1.1" mailadmin
cd mailadmin
cd includes
wget -q https://www.pc-freak.net/files/postfix/postfix-webadmin/config.php.txt
mv config.php.txt config.php
cd /var/www/mailadmin
wget -q https://www.pc-freak.net/files/postfix/postfix-webadmin/index-matv1.php.txt
mv index-matv1.php.txt index.php
chown -R www-data:www-data /var/www/mailadmin
Now point your browser to:
http://localhost/mailadmin/
or
http://xxx.xxx.xxx.xxx/mailadmin/
(where xxx.xxx.xxx.xxx is your local or Internet IP address) and you should see Matt mailadmin popup. I hope my little tutorial will be of use to many. Comments and problems with install steps will be much appreciated and might lead hopefully to improvements of this little Postfix Install Wheezy tutorial Enjoy 🙂
9. Configuring Web mail access to Mail server Mailboxes with Squirrelmail and Roundcube
a) Configuring Squirrelmail to work with Postfix
apt-get install –yes squirrelmail
ln -s /etc/squirrelmail/apache.conf /etc/apache2/conf.d/squirrelmail.conf
squirrelmail-configure
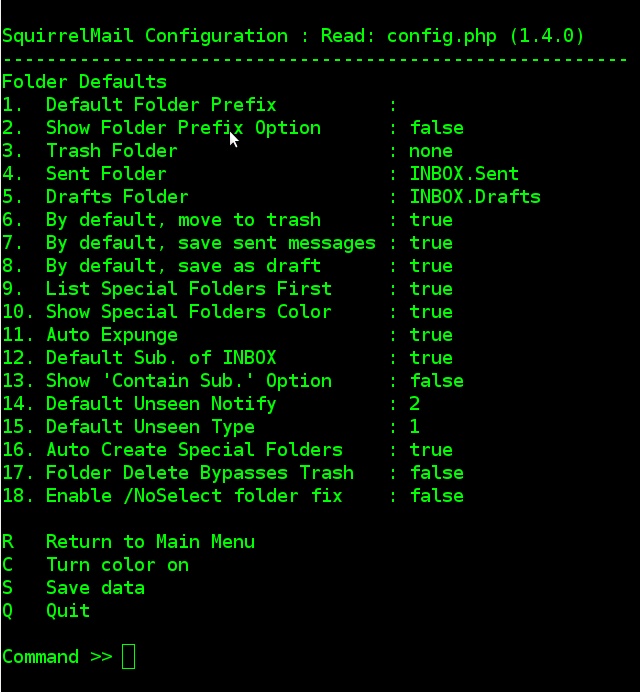
(Select option 3) – Folder Defaults
Choose Option 1 – Press 1
and set (Default Folder Prefix) to 'none'.
You can take few minutes to browse to other options too to select for example some meaningful title for your Squirrel Webmail – i.e. organization name or whatever…
That's all now to access Squirrel open in Firefox:
http://mail-domain.org/squirrelmail/
To test squirrel is configured correctly try to login with user john@example.org with pass summersun
b)Configure Roundcube + Postfix + Dovecot
Edit /etc/roundcube/apache.conf and uncomment:
#Alias /roundcube /var/lib/roundcube
to
Alias /roundcube /var/lib/roundcube
Then restart Apache:
/etc/init.d/apache2 restart
…
10. Testing if everything works fine together
a) Testing if mail server defined domain has properly configured DNS – PTR, MX and TXT records
First I assume here that mailserver has proper configured PTR record and it is defined properly in DNS to be MX (Mail Exchange server). You will have to contact your ISP (Internet Service Provider) and ask them to create new PTR record corresponding to hostname of mail server defined in myhostname var in /etc/postfix/main.cf
To test whether you have PTR record run:
host 83.228.93.76
www.pc-freak.net has address 83.228.93.76
www.pc-freak.net mail is handled by 0 mail.www.pc-freak.net.
root@websrv:/etc/dovecot# host 83.228.93.76
76.93.228.83.in-addr.arpa domain name pointer www.pc-freak.net.
In above example you see my domain www.pc-freak.net has proper defined PTR record. To test you have defined in domain DNS server (zone files) proper MX record issue:
host -t MX www.pc-freak.net
www.pc-freak.net mail is handled by 0 mail.www.pc-freak.net.
Again for sake of testing you see www.pc-freak.net has defined MX with priority of 0 (which in those case is highest), since there are no other defined MX domains and priorities.
It is good practice that domain name has also proper SPF record this is done with DNS server zone record of type TXT.
Once again here is SPF record defined for www.pc-freak.net.
host -t TXT www.pc-freak.net
www.pc-freak.net descriptive text "google-site-verification=j9d4Bt5c_1ukGf4WBng0i4esOqJtbxSFVkG144dFqv4"
www.pc-freak.net descriptive text "spf1 a mx ptr ip4:83.228.93.76 -all"
You see 2nd line is the actual SPF record
www.pc-freak.net descriptive text "spf1 a mx ptr ip4:83.228.93.76 -all"
First line command returns is actually Domain DKIM key. I tried configuring DKIM keys following ISPMail tutorial unsuccesfully so by installing Postfix by my tutorial you will not have to have DKIM keys (soft) installed or TXT records for Domain Keys defined.
b) Testing if mail server is able to send (deliver) mails to other MTA's correctly Next to test whether postfix is sending mails properly use:
mail -s "This is a simple test mail, no need to reply" systemexec@gmail.com
Heya,
Do you get this mail
?
Hope so 🙂
.
Cc:
Note that after writing the email you have to press "." and then Enter to send the mail.
To check everything is fine with sending the mail check in /var/log/mail.log, there should be something like;
Aug 2 08:29:56 websrv postfix/smtpd[16228]: connect from localhost[127.0.0.1]
Aug 2 08:29:57 websrv postfix/smtpd[16228]: 0D323662499: client=localhost[127.0.0.1]
Aug 2 08:29:57 websrv postfix/cleanup[16224]: 0D323662499: message-id=<20130802132956.3C4A766249B@www.pc-freak.net>
Aug 2 08:29:57 websrv postfix/qmgr[14241]: 0D323662499: from=<root@www.pc-freak.net>, size=749, nrcpt=1 (queue active)
Aug 2 08:29:57 websrv amavis[13958]: (13958-01) Passed CLEAN {RelayedOpenRelay}, <root@www.pc-freak.net> -> <systemexec@gmail.com>, Message-ID: <20130802132956.3C4A766249B@www.pc-freak.net>, mail_id: 1oIcE-Zc9MND, Hits: -, size: 369, queued_as: 0D323662499, 828 ms
Aug 2 08:29:57 websrv postfix/smtp[16226]: 3C4A766249B: to=<systemexec@gmail.com>, relay=127.0.0.1[127.0.0.1]:10024, delay=1, delays=0.2/0.01/0.01/0.83, dsn=2.0.0, status=sent (250 2.0.0 from MTA(smtp:[127.0.0.1]:10025): 250 2.0.0 Ok: queued as 0D323662499)
Aug 2 08:29:57 websrv postfix/qmgr[14241]: 3C4A766249B: removed
Aug 2 08:29:57 websrv postfix/smtp[16235]: connect to gmail-smtp-in.l.google.com[2a00:1450:4013:c01::1b]:25: Network is unreachable
Aug 2 08:29:58 websrv postfix/smtp[16235]: 0D323662499: to=<systemexec@gmail.com>, relay=gmail-smtp-in.l.google.com[74.125.136.27]:25, delay=1.2, delays=0.08/0.01/0.65/0.49, dsn=2.0.0, status=sent (250 2.0.0 OK 1375450198 a48si4827663eep.113 – gsmtp)
Aug 2 08:29:58 websrv postfix/qmgr[14241]: 0D323662499: removed
As you see from above output gmail server returned status of "Success" – 250 2.0.0 Ok: quequed as 0D323662499 – this means email is delivered OK and if the mail server IP from which you're sending is not listed in some Mailserver IPs Blacklist mail should arrive in a sec.
c) Testing if Dovecot POP3 and IMAP protocol are accessible by SQL kept mail accounts
Last thing to test is Dovecot (for Qmail users for sake of comparison – Dovecot is like Couirier IMAP and Courier POP3 mail server):
To test IMAP and POP3 easiest way is to use simple telnet connections. I've earlier written a small article on How to test if IMAP and POP3 mail service is working with telnet connections, so if you never done this take 2 mins to read it. By default ISPMail adds an email with username john@example.org with password summersun
telnet localhost pop3
Trying ::1…
Connected to localhost.
Escape character is '^]'.
+OK Dovecot ready.
USER john@example.org
+OK
PASS summersun
+OK Logged in.
quit
+OK Logging out.
Connection closed by foreign host.
To test IMAP protocol login
telnet localhost imap
Trying ::1…
Connected to localhost.
Escape character is '^]'.
* OK [CAPABILITY IMAP4rev1 LITERAL+ SASL-IR LOGIN-REFERRALS ID ENABLE IDLE STARTTLS AUTH=PLAIN AUTH=LOGIN] Dovecot ready.
01 login john@example.org summersun
01 OK [CAPABILITY IMAP4rev1 LITERAL+ SASL-IR LOGIN-REFERRALS ID ENABLE IDLE SORT SORT=DISPLAY THREAD=REFERENCES THREAD=REFS MULTIAPPEND UNSELECT CHILDREN NAMESPACE UIDPLUS LIST-EXTENDED I18NLEVEL=1 CONDSTORE QRESYNC ESEARCH ESORT SEARCHRES WITHIN CONTEXT=SEARCH LIST-STATUS SPECIAL-USE QUOTA] Logged in
^]
telnet> quit
Connection closed.
Well this is the end my friend 🙂 You should now have a properly running Postfix + Dovecot + Virtual Domains in SQL. Please drop me a thank you comment if it worked for you. If it doesn't drop a comment so I can integrate it and improve this tutorial. Happy Hacking 😉


Remove URL from comments in WordPress Blogs and Websites to mitigate comment spam URLs in pages
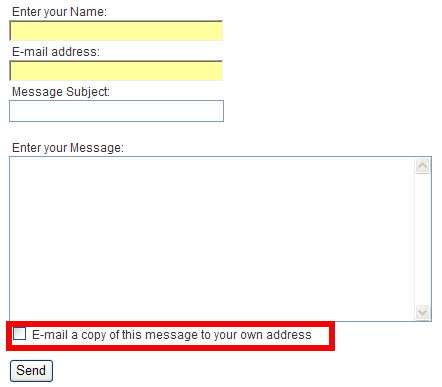
Friday, February 20th, 2015If you're running a WordPress blog or Website where you have enabled comments for a page and your article or page is well indexing in Google (receives a lot of visit / reads ) daily, your site posts (comments) section is surely to quickly fill in with a lot of "Thank you" and non-sense Spam comments containing an ugly link to an external SPAM or Phishing website.
Such URL links with non-sense message is a favourite way for SPAMmers to raise their website incoming (other website) "InLinks" and through that increase current Search Engine position.
We all know a lot of comments SPAM is generally handled well by Akismet but unfortunately still many of such spam comments fail to be identified as Spam because spam Bots (text-generator algorithms) becomes more and more sophisticated with time, also you can never stop paid a real-persons Marketers to spam you with a smart crafted messages to increase their site's SEO ).
In all those cases Akismet WP (Anti-Spam) plugin – which btw is among the first "must have" WP extensions to install on a new blog / website will be not enough ..
To fight with worsening SEO because of spam URLs and to keep your site's SEO better (having a lot of links pointing to reported spam sites will reduce your overall SEO Index Rate) many WordPress based bloggers, choose to not use default WordPress Comments capabilities – e.g. use exnternal commenting systems such as Disqus – (Web Community of Communities), IntenseDebate, LiveFyre, Vicomi …
However as Disqus and other 3rd party commenting systems are proprietary software (you don't have access to comments data as comments are kept on proprietary platform and shown from there), I don't personally recommend (or use) those ones, yes Disqus, Google+, Facebook and other comment external sources can have a positive impact on your SEO but that's temporary event and on the long run I think it is more advantageous to have comments with yourself.
A small note for people using Disqos and Facebook as comment platforms – (just imagine if Disqos or Facebook bankrupts in future, where your comments will be? 🙂 )
So assuming that you're a novice blogger and I succeeded convincing you to stick to standard (embedded) WordPress Comment System once your site becomes famous you will start getting severe amount of comment spam. There is plenty of articles already written on how to remove URL comment form spam in WordPress but many of the guides online are old or obsolete so in this article I will do a short evaluation on few things I tried to remove comment spam and how I finally managed to disable URL link spam to appear on site.
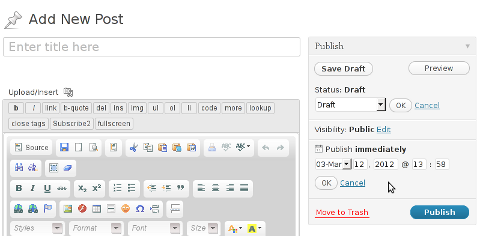
1. Hide Comment Author Link (Hide-wp-comment-author-link)
This plugin is the best one I found and I started using it since yesterday, I warmly recommend this plugin because its very easy, Download, Unzip, Activate and there you're anything typed in URL field will no longer appear in Posts (note that the URL field will stay so if you want to keep track on person's input URL you can get still see it in Wp-Admin). I'm using default WordPress WRC (Kubrick), but I guess in most newer wordpress plugins is supposed to work. If you test it on another theme please drop a comment to inform whether works for you. Hide Comment Author Link works on current latest Wordpress 4.1 websites.
A similar plugin to hide-wp-author-link that works and you can use is Hide-n-Disable-comment-url-field, I tested this one but for some reason I couldn't make it work.
Whatever I type in Website field in above form, this is wiped out of comment once submitted 🙂
2. Disable hide Comment URL (disable-hide-comment-url)
I've seen reports disable-hide-comment-url works on WordPress 3.9.1, but it didn't worked for me, also the plugin is old and seems no longer maintaned (its last update was 3.5 years ago), if it works for you please please drop in comment your WP version, on WP 4.1 it is not working.
3. WordPress Anti-Spam plugin
WordPress Anti-Spam plugin is a very useful addition plugin to install next to Akismet. The plugin is great if you don't want to remove commenter URL to show in the post but want to cut a lot of the annoying Spam Robots crawling ur site.
Anti-spam plugin blocks spam in comments automatically, invisibly for users and for admins.
Plugin is easy to use: just install it and it just works.
Anti bot works fine on WP 4.1
4. Stop Spam Comments
Stop Spam Comments is:
Stop Spam Comments works fine on WP 4.1.
I've mentioned few of the plugins which can help you solve the problem, but as there are a lot of anti-spam URL plugins available for WP its up to you to test and see what fits you best. If you know or use some other method to protect yourself from Comment Url Spam to share it please.
Import thing to note is it usually a bad idea to mix up different anti-spam plugins so don't enable both Stop Spam Comments and WordPress Anti Spam plugin.
5. Comment Form Remove Url field Manually
This (Liberian) South) African blog describes a way how to remove URL field URL manually
In short to Remove Url Comment Field manually either edit function.php (if you have Shell SSH access) or if not do it via Wp-Admin web interface:
Paste at the end of file following PHP code:
Now to make changes effect, Restart Apache / Nginx Webserver and clean any cache if you're using a plugin like W3 Total Cache plugin etc.
Other good posts describing some manual and embedded WordPress ways to reduce / stop comment spam is here and here, however as it comes to my blog, none of the described manual (code hack) ways I found worked on WordPress v. 4.1.
Thus I personally stuck to using Hide and Disable Comment URL plugin to get rid of comment website URL.
Tags: article, bloggers, btw, data, interface, lot, page, php, platform, problem, running, Search Engine, SEO, spam, Spam Robots, Stop Spam Comments, theme, URLs, use, website, Wordpress Comments, wordpress plugins, wp
Posted in Curious Facts, Various, Web and CMS, Wordpress | 2 Comments »