Creating Windows bootable installer with Windows Media Creation tool is easy, but sometimes if you're a geek like me you don't have a Windows personal PC at home and your Work PC is so paranoidly restricted by its administrator through paranoid Domain Controller Policies, that you can only copy from a USB drive towards the Win PC but you cannot write to the USB.
1. Preparing Linux installer USB via Mac's Boot Camp Assistant
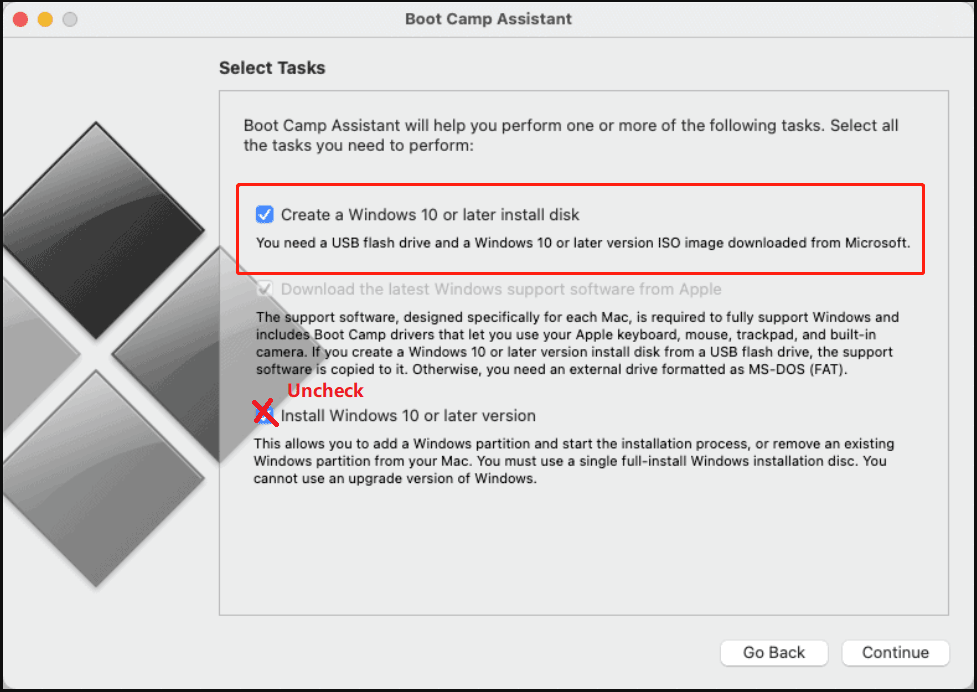
If you're lucky you might have a MAC Book Air or some kind of other mac PC, if that is the case you can burn the Windows Installer iso, with the Native Mac tool called BootCamp Assistant, by simply downloading the Win Boot ISO, launching the app and burning it:
Finder > Applications > Utilities and open Boot Camp Assistant.
2. Preparing Bootable Windows installer on Linux host machine
On DEBIAN / UBUNTU and other Deb based Linuxes
# apt install gddrescue
On CENTOS / FEDORA :
# dnf install ddrescue
To install the Windows Image to the right USB drive, first find it out with fdisk and list it:
# fdisk -l
Disk /dev/sdb: 14.41 GiB, 15472047104 bytes, 30218842 sectors
Disk model: DataTraveler 3.0
Units: sectors of 1 * 512 = 512 bytes
Sector size (logical/physical): 512 bytes / 512 bytes
I/O size (minimum/optimal): 512 bytes / 512 bytes
Disklabel type: dos
Disk identifier: 0xc23dc587Device Boot Start End Sectors Size Id Type
/dev/sdb1 8192 30216793 30208602 14.4G 7 HPFS/NTFS/exFAT
/dev/sdb2 30216794 30218841 2048 1M e W95 FAT16 (LBA)
Then Use ddrescue to create the bootable MS windows Installer USB disk.
# ddrescue windows10.iso /dev/sd1 –force -D
3. Using GUI Linux tool WoeUSB-ng to prepare Microsoft Windows start up USB drive
If you're a lazy Linux user and you plan to prepare up to date Windows image files regularly, perhaps the WoeUSB-ng Graphical tool will suit you better, to use it you will have to install a bunch of python libraries.
On Ubuntu Linux:
# apt install git p7zip-full python3-pip python3-wxgtk4.0 grub2-common grub-pc-bin
# pip3 install WoeUSB-ng
On Fedora Linux:
# dnf install git p7zip p7zip-plugins python3-pip python3-wxpython4
# sudo pip3 install WoeUSB-ng
Launch the WoeUSB-ng program :
$ python3 /usr/local/bin/woeusbgui
Download, the latest Version of Windows Installer .ISO IMAGE file, plug in your USB flash disk and let the program burn the ISO and create the GRUB boot loader, that will make WIndows installer bootable on your PC.
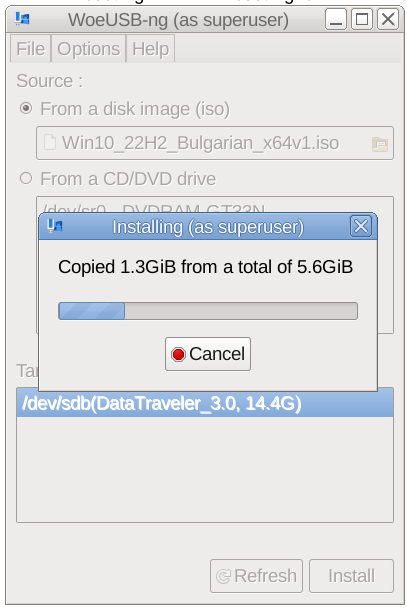
With WoeUSB-ng you have to be patient, it will take some time to prepare and copy the Windows installer content and will take about 15 to 20 minutes from my experience to finalize the GRUB records required, that will make the new burnt ISO bootable.
Then just plug it in to your Desktop PC or laptop, virtual machine, whatever where you would like to install the Windows from its latest installation Source image and Go on with doing the necessery evil to have Microsoft Spy on you permanently.
P.S. I just learned, from colleagues from Kvant Serviz (a famous hardware second hand, shop and repair shop here in Bulgaria, that nowadays Windows has evolved to the points, they can and they actually do overwrite the PC BIOS / UEFI as part of updates without any asking the end user !!!
At first I disbelived that, but after a short investigation online it turned out this is true, there are discussions online from people complaining, that WIndows updates has ovewritten their current BIOS settings and people complaining BIOS versions are ovewritten.
Enjoy your new personal Spy OS ! 🙂