Posts Tagged ‘explorer’

VIM Project (VI Improvied IDE Editor extension to facilitate web development with vi enhanced editor

Wednesday, August 25th, 2010

I use VIM as an editor of choice for many years already.
Yet it's until recently I use it for a PHP ZF (Zend Framework) web development.

Few days ago I've blogged How to configure vimrc for a php syntax highlightning (A Nicely pre-configured vimrc to imrpove the daily text editing experience

This enhancements significantly improves the overall PHP code editing with VIM. However I felt something is yet missing because I didn't have the power and functunality of a complete IDE like for instance The Eclipse IDE

I was pretty sure that VIM has to have a way to be used in a similar fashion to a fully functional IDE and looked around the net to find for any VIM plugins that will add vim an IDE like coding interface.

I then come accross a vim plugin called VIM Prokject : Organize/Navigate projects of files (like IDE/buffer explorer)

The latest VIM Project as of time of writting is 1.4.1 and I've mirrored it here

The installation of the VIM Project VIM extension is pretty straight forward to install it and start using it on your PC issue commands:

1. Install the project VIM add-on

debian:~$ wget https://www.pc-freak.net/files/project-1.4.1.tar.gz
debian:~$ mv project-1.4.1.tar.gz ~/.vim/
debian:~$ cd ~/.vim/
debian:~$ tar -zxvvf project-1.4.1.tar.gz

2. Load the plugin

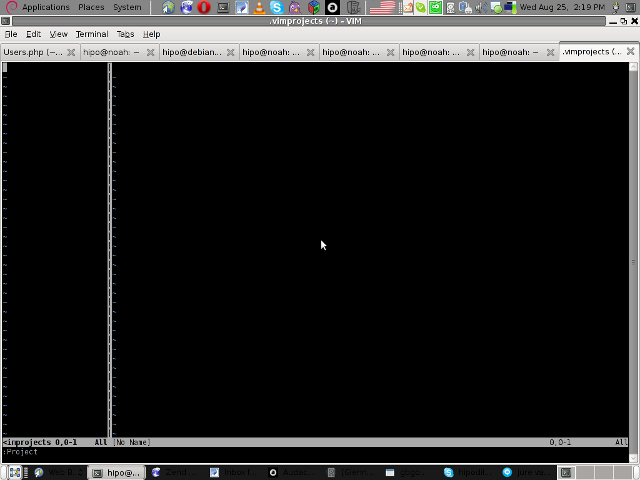
Launch your vim editor and type : Project(without the space between : and P)
You will further see a screen like:

vim project entry screen

3. You will have to press C within the Project window to load a new project

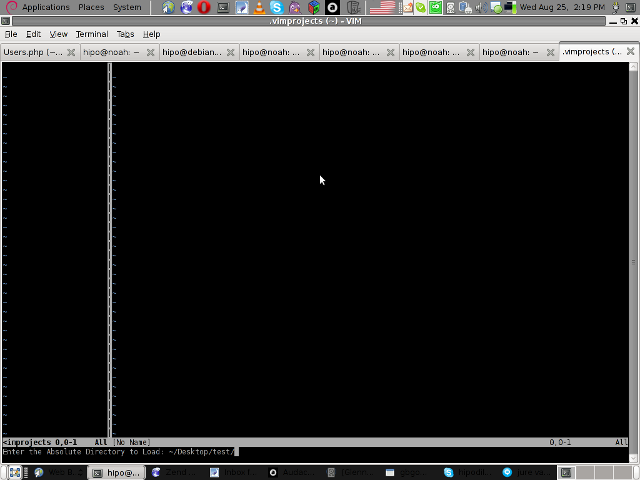
Then you will have to type a directory to use to load a project sources files from:

vim project enter file source directory screen

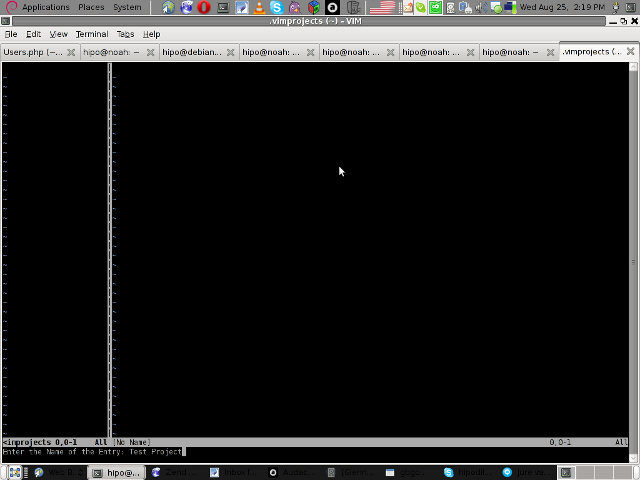
You will be prompted with to type a project name like in the screenshot below:

vim project load test project

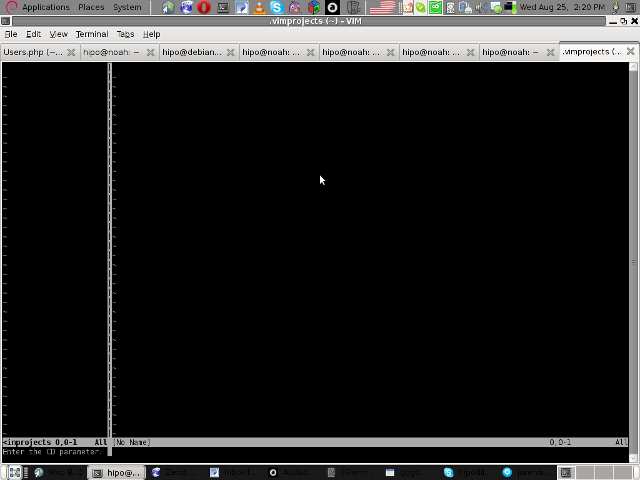
4. Next you will have to type a CD (Current Dir) parameter
To see more about the CD parameter consult vim project documentation by typing in main vim pane :help project

The appearing screen will be something like:

vim project extension cd parameter screen

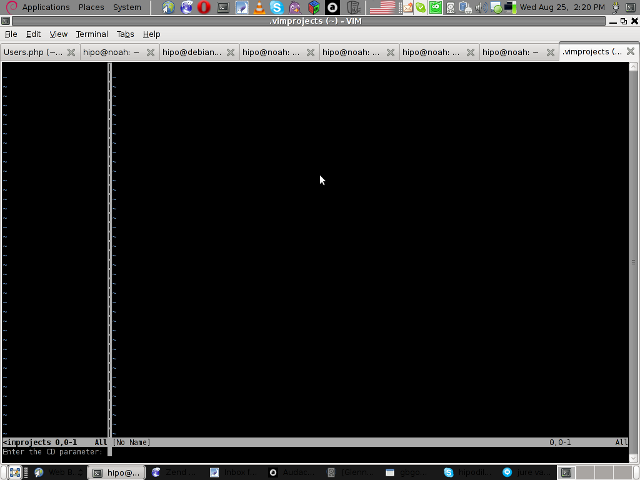
5. Thereafter you will have to type a file filter

File filter is necessary and will instruct the vim project plugin to load all files with the specified extension within vim project pane window

You will experience a screen like:


vim project plugin file filter screen

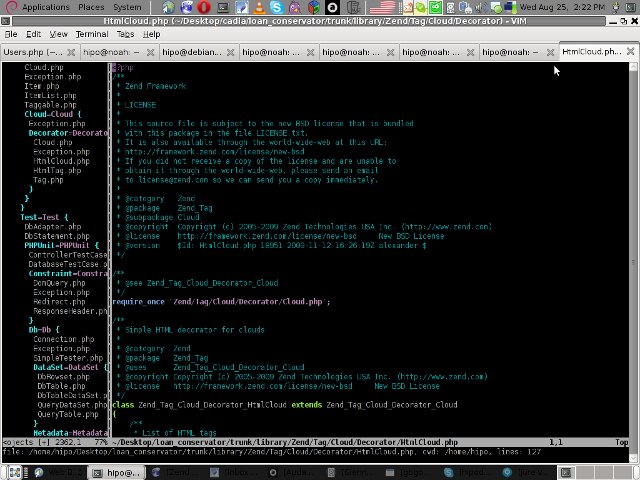
Following will be a short interval in which all specified files by the filter type will get loaded in VIM project pane and your Zend Framework, PHP or any other source files will be listed in a directory tree structure like in the picture shown below:

vim project successful loaded project screen

6. Saving loaded project hierarchy state

In order to save a state of a loaded project within the VIM project window pane you will have to type in vim, let's say:

:saveas .projects/someproject

Later on to load back the saved project state you will have to type in vim :r .projects/someproject

You will now have almost fully functional development IDE on top of your simple vim text editor.

You can navigate within the Project files loaded with the Project extension pane easily and select a file you would like to open up, whenever a source file is opened and you work on it to switch in between the Project file listing pane and the opened source code file you will have to type twice CTRL+w or in vim language C-w

To even further sophisticate your web development in PHP with vim you can add within your ~/.vimrc file the following two lines:

" run file with PHP CLI (CTRL-M)
:autocmd FileType php noremap <C-M> :w!<CR>:!/usr/bin/php %<CR>
" PHP parser check (CTRL-L)
:autocmd FileType php noremap <C-L> :!/usr/bin/php -l %>CR>

In the above vim configuration directovies the " character is a comment line and the autocmd is actually vim declarations.
The first :autocmd … declaration will instruct vim to execute your current opened php source file with the php cli interpreter whenever a key press of CTRL+M (C-m) occurs.

The second :autocmd … will add to your vim a shortcut, so whenever a CTRL+L (C-l) key combination is pressed VIM editor will check your current edited source file for syntax errors.
Therefore this will enable you to very easily periodically check if your file syntax is correct.

Well this things were really helpful to me, so I hope they will be profitable for you as well.
Cheers 🙂

ConEmu and Clink – Add Linux shell shortcuts, tabs and tab completion to Windows command line – Far Manager Windows text file explorer

Thursday, June 12th, 2014

If you're a Linux geek and forced to work on Windows for some reason. You will probably want to add some Linux & Feel to Windows console. Yesterday in a discussion with a colleague who is considered to be our team's Windows Guru, I noticed his Windows 7 command line looks slightly different and asked him, "is it some cmd.exe customization?" and this is how I learned about existence of ConEmu and Clink.
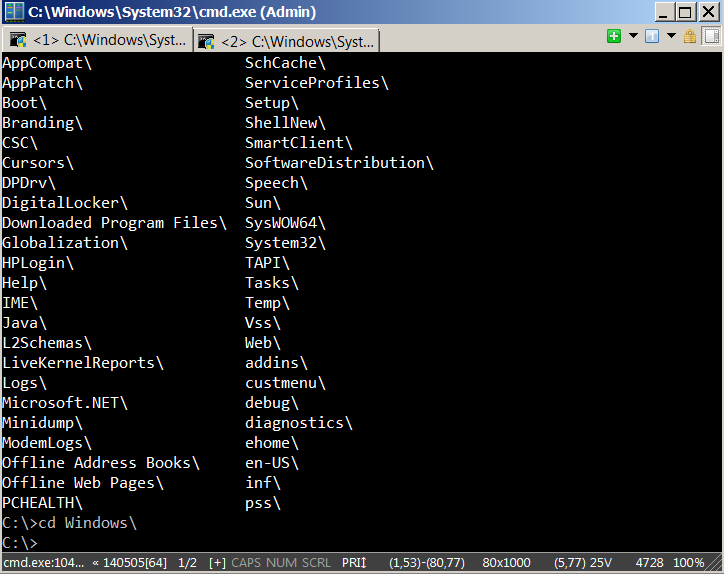
ConEmu is advanced console window where you can run any shell of your choice.

conemu-tabbed-command-prompt-cmd-wrapper-like-gnome-terminal-for-windows

ConEmu (Console Emulator) + Clink combination is very much like MobaXterm (tabbed SSH client and win cmd line) in many sense except it doesn't have an embbed ssh support client. By using Conemu + Clink (Powerful bash style line editing) wrappers to cmd.exe you get the invaluable Linux / UNIX tab completion, command line shortcuts like CTRL + R, CTRL + A, CTRL + P etc. into Windows OS. ConEmu is very useful in Windows environments when you have to heavily use Windows PowerShell

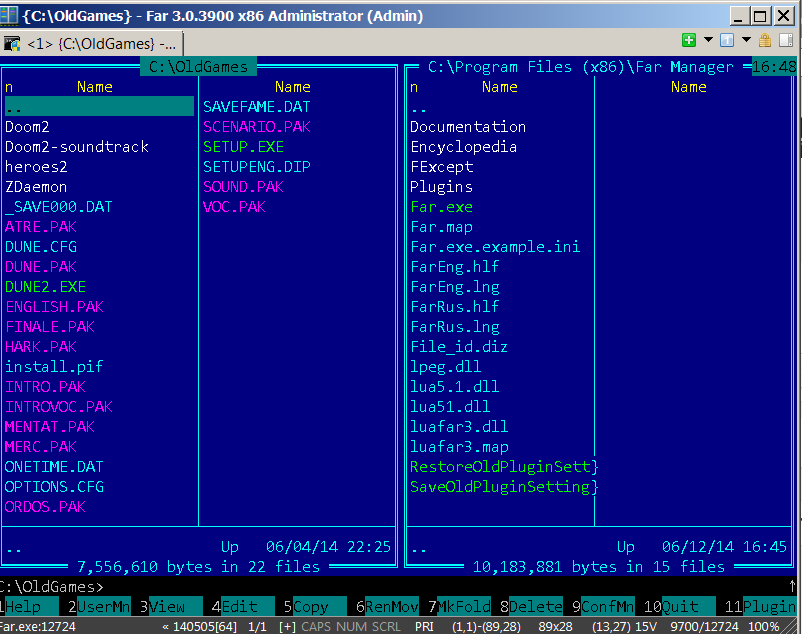
If you're get used to Linux's Midnight Commander (MC)  and you're looking for MC for Windows you will certainly want to check out Far Manager (File and Archive Manager). Far Manager provides simple and intuitive ncurses (mc) like interface on Windows and supports view, edit, copy rename and a lot of other basic operations supported also by mc.

far-manager-mc-like-text-file-browser-for-windows-linux-mc-windows-alternative-software


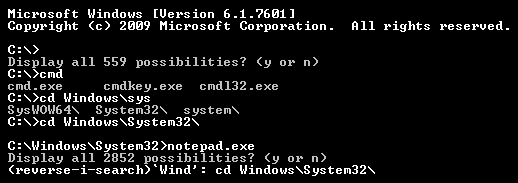
Clink combines the native Windows shell cmd.exe with the powerful command line editing features of the GNU Readline library, which provides rich completion, history, and line-editing capabilities. Readline is well-known and used in Unix shell Bash, the standard shell for Mac OS X and most of Linux distributions.

In my view coolest Clink command shortcut is reverse-search allowing you to auto-type by letters commands (from command line history), lets say you want to invoke dir – you press CTRL + r and type D and all occurances earlier typed starting with "d", pops up as possible choice.

clink_bring-linux-bash-shell-powerful-command-line-editing-for-windows
Everyone who had to administer Windows servers know how annoying is that by default cmd.exe doesn't support window resize.
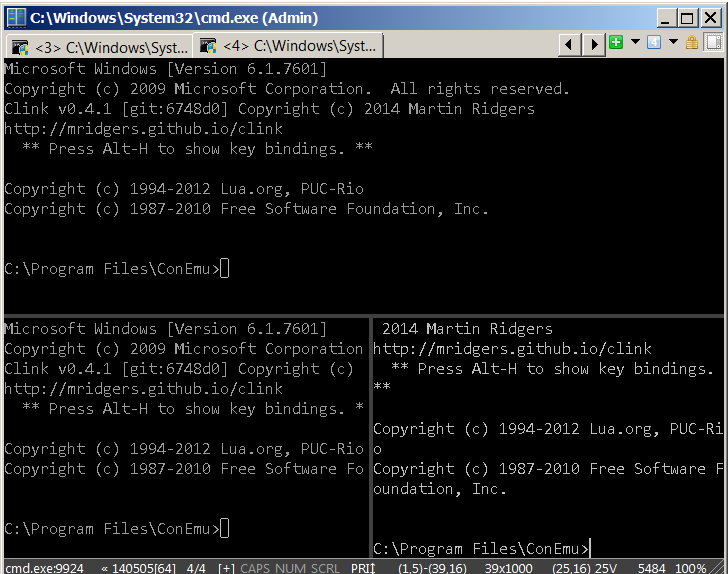
Using ConEmu solves that as it supports resize of command prompt Window (horizontal and vertical resize).
ConEmu has a status bar, support (configuration colors) and even transperancy but most importantly for old school dos geeks is that it supports integration with dosbox run old DOS applications (games) in Windows 7.

To use the tools use gui installers, here is latest mirror copy of Conemu (for download), current latest Far Manager release and latest present release of Clink (download link). Once installed it is a must to spend some time configure ConEmu to match your preferences. To configure it press with right mouse button on top of Cemu window and do the needful 🙂

windows-conemu-good-substitute-for-linux-bash-shell-for-microsoft-windows-users-split-screen-how-to-tab-completion-windows
Once everything is installed, you will have to get into the habit to launch ConEmu instead of cmd.exe (as ConEmu doesn't interfere with cmd.exe). To launch far manager from ConEmu command line simply type:

C:> far

To open new tabs in ConEmu the well known Firefox used CTRL + T will not work, but 'open new tab' key shortcut can be customized and also set to CTRL + T.  Default key shortcut for opening new tab in ConEmu is 'Windows Button' + SHIFT + W. While Opening new consoles in ConEmu, there is also the useful option of Splitting console (top and right).

Here is also list with all Clink command shortcuts

C-@     : set-mark
C-a     : beginning-of-line
C-b     : backward-char
C-c     : ctrl-c
C-d     : delete-char
C-e     : end-of-line
C-f     : forward-char
C-g     : abort
C-h     : backward-delete-char
C-i     : clink-completion-shim
C-j     : accept-line
C-k     : kill-line
C-l     : clear-screen
C-m     : accept-line
C-n     : next-history
C-p     : previous-history
C-q     : reload-lua-state
C-r     : reverse-search-history
C-s     : forward-search-history
C-t     : transpose-chars
C-u     : unix-line-discard
C-v     : paste-from-clipboard
C-w     : unix-word-rubout
C-y     : yank
C-z     : undo
C-]     : character-search
C-_     : undo
A-C-c   : copy-line-to-clipboard
A-C-e   : expand-env-vars
A-C-g   : abort
A-C-h   : backward-kill-word
A-C-i   : tab-insert
A-C-j   : vi-editing-mode
A-C-m   : vi-editing-mode
A-C-r   : revert-line
A-C-u   : up-directory
A-C-y   : yank-nth-arg
A-C-[   : complete
A-C-]   : character-search-backward
A-      : set-mark
A-#     : insert-comment
A-&     : tilde-expand
A-*     : insert-completions
A–     : digit-argument
A-.     : yank-last-arg
A-0     : digit-argument
A-1     : digit-argument
A-2     : digit-argument
A-3     : digit-argument
A-4     : digit-argument
A-5     : digit-argument
A-6     : digit-argument
A-7     : digit-argument
A-8     : digit-argument
A-9     : digit-argument
A-<     : beginning-of-history
A-=     : possible-completions
A->     : end-of-history
A-?     : possible-completions
A-     : delete-horizontal-space
A-_     : yank-last-arg
A-b     : backward-word
A-c     : capitalize-word
A-d     : kill-word
A-f     : forward-word
A-h     : show-rl-help
A-l     : downcase-word
A-n     : non-incremental-forward-search-history
A-p     : non-incremental-reverse-search-history
A-r     : revert-line
A-t     : transpose-words
A-u     : upcase-word
A-y     : yank-pop
A-~     : tilde-expand
C-x,C-g : abort
C-x,C-r : re-read-init-file
C-x,C-u : undo
C-x,C-x : exchange-point-and-mark
C-x,(   : start-kbd-macro
C-x,)   : end-kbd-macro
C-x,e   : call-last-kbd-macro


Total Commander or Free Commander a must have Windows file Explorer alternatives

Monday, December 2nd, 2013

Total Commander must have windows file explorer alternative logo

Whether coming from Linux background and you're forced to work with MS Windows or even if you're born as a Windows user  and you hold a strong dislike for Windows File Explorer. You will certainly appreacite some Windows Explorer alternative like Total Commander.
 

1. Total Commander –  Windows Advanced File Manager

Total Commander was widely spread and still is mostly used by advanced Windows users since the distant 1996 when it came to exist.
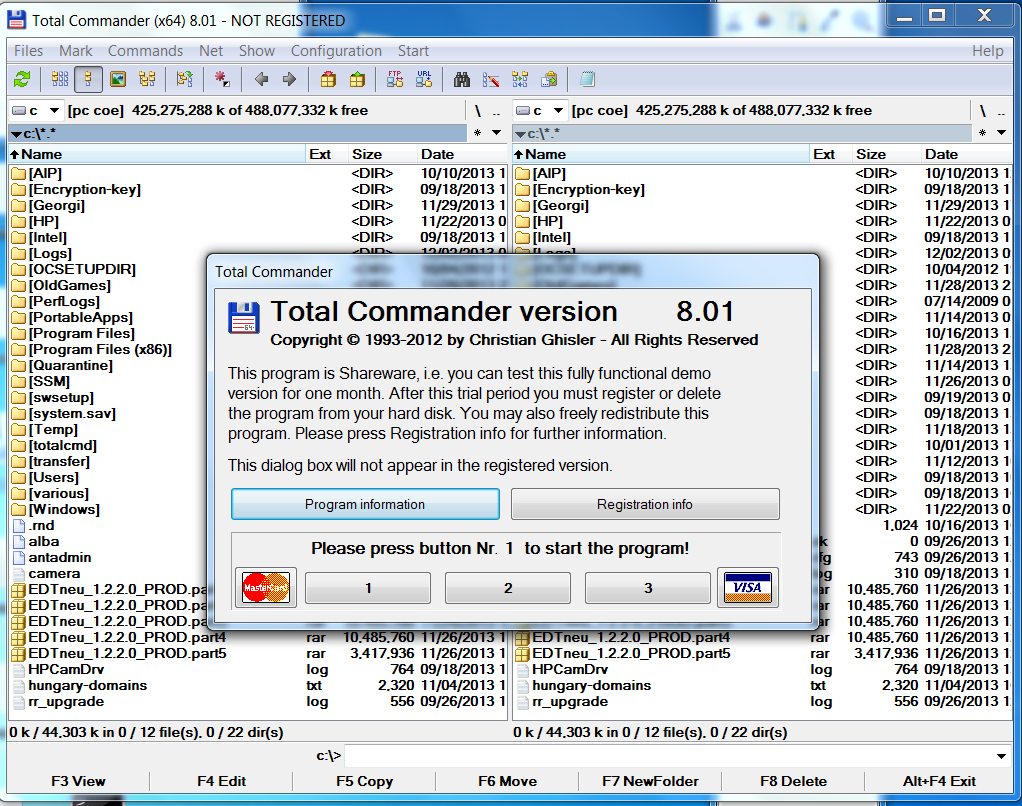
Total Commander is highly spread among programmers and computer professionals. It is well known in Russia and the ex-Soviet Union block countries Total Commander is strongly preferred over Windows Explorer by anyone who ever had to work in Old command line MS-DOS, Unix consoles / Midnight Commander etc. Total Commander has just one downside it is not free as in freedom but shareware, so you either have to find a crack for it or everytime you run it press a number before you can proceed with it, this however is not such a big issue as usually you work with computer whole day and even if you should press a number once to continue run as Shareware, you have to do it just once or twice a day.

Total Commander windows internet explorer hackers alternative not registered screenshot

So why use Total Commander or Free Commander preferred choice over Windows Explorer and why it is better for one to use it:

1. Security

Big part of viruses have hidden attribute. Of course we can’t see it’s presence in Windows Explorer, this is so common with USB Drive Viruses. While MS Explorer has limited capability in showing system file, Total Commander is different, once it is specified to show hidden files, all kind of hidden files are to be shown.

2. Support for multiple upload protocols like FTP and SFTP

Through Total Commander plugins you can enjoy simplified way to do every operation from one interface. Once plugin for SFTP / Webdav … plugins you will not have to install separate clients like WinSCP / CarotWebDav etc.

3. Play multimedia mp3 / Zip / Unzip, watch pictures

You can play your mp3s with no need for WinAmp, Unzip or IrfanView. As this is done internally in Total Commander through plugins. So using Total Commander saves you from multiple applications also gives you unified interface something which saves time and annoyance of separate applications pop-up windows.

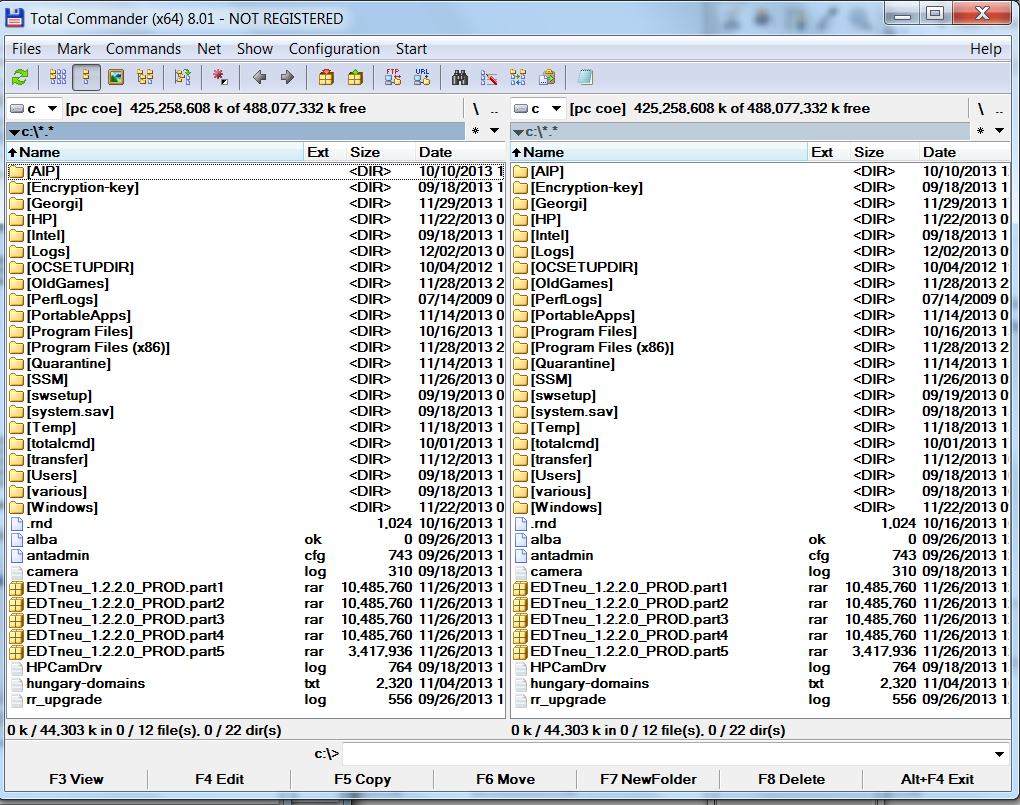
Total commander directory Cdrive listing the hacker choice for file explorer

4. Better file copying internal program

Total Commander's copier is much better than Windows Explorer default one. Lets say you have a power outage during copying a large file. What Windows Explorer will offer is overwrite the file loosing you time, whether Total Commander will continue copying from file byte size it stopped due to outage. Another advantage is it will be able to copy damaged files much better than Windows default copier program. TT's internal copy is not so quick as TerraCopy but faster than Windows Explorer default one..

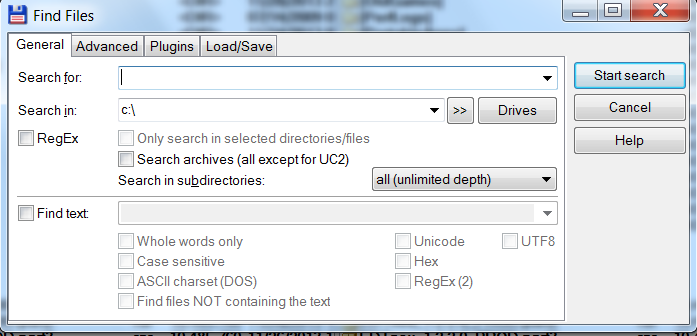
5. More powerful search than Explorer's

TT has capabilities to search inside archives, set search encoding type. Search only by directories or files, set a range of dates from which files has to be found, search only hidden directories, search by directory file attribute, file size, look for duplicate files etc. etc.

total commander more powerful windows search window screenshot

Here is a complete list of Basic features embedded in Total Commander latest version which of time of writting is 8.01;
 

  • Two file windows side by side
  • Multiple language and Unicode support
  • Enhanced search function
  • Compare files (now with editor) / synchronize directories
  • Quick View panel with bitmap display
  • ZIP, ARJ, LZH, RAR, UC2, TAR, GZ, CAB, ACE archive handling + plugins
  • Built-in FTP client with FXP (server to server) and HTTP proxy support
  • Parallel port link, multi-rename tool
  • Tabbed interface, regular expressions, history+favorites buttons
  • Thumbnails view, custom columns, enhanced search
  • Compare editor, cursor in lister, separate trees, logging, enhanced overwrite dialog etc.
  • Unicode names almost everywhere, long names (>259 characters), password manager for ftp and plugins, synchronize empty dirs, 64 bit context menu, quick file filter (Ctrl+S)
  • USB port connection via special, many improvements to ftp, synchronizing and other functions

Total Commander has a portable version for those who travel a lot and like to use it on multiple computers from a USB Stick.

2. Free Commander – A Total Commander Free for personal use Alternative

Freecommander FC / Free Commander hackers free windows explorer alternative

Free Commander is not open source but it is free to use for non-commercial use and not Shareware, so it is perfect alternative for those who like Total Commander but dislike fact you have to press a number on each TT start up and you have to see in Total Commander Title (NOT REGISTERED)

List of basic supported functions by Free Commander are;


  •     Dual-panel technology – horizontal and vertical
  •     Tabbed interface
  •     Optional tree view for each panel
  •     Built in file viewer to view files in hex, binary, text or image format
  •     File viewer inside archives too
  •     Built in archive handling: ZIP (read, write), CAB (read, write), RAR (read)
  •     Nested archive handling
  •     Built in FTP client
  •     Easy access to system folders, control panel, desktop and start menu
  •     Copy, move, delete, rename files and folders
  •     Multi rename tool
  •     Wipe files
  •     Create and verify MD5 checksums
  •     File splitting
  •     File properties and context menu
  •     Calculation of folder size
  •     Folder comparison / synchronization
  •     Modification of file date and attributes
  •     Folder / program favorites
  •     File searching (inside archive too)
  •     File filters for display
  •     User defined columns for detailed view
  •     DOS command line
  •     Multiple language  support

Just like Total Command, Free Commander has a portable version for those who want run it on Windows machines with no admin permissions to install.
 

Fixing weird problems with missing File Explorer on Polaroid MPCS700 tablet with Andorid 2.2 (Linux kernel 2.6.32)

Wednesday, October 10th, 2012

Polaroid MPCs700 Tablet Android version 2.2 with 2.6.32 linux kernel picture

I’ve been given Android Polaroid Tablet which had only 5 clickable icons on main (touchscreen) display:

  • Settings
  • Wi-Fi Settings
  • Youtube
  • Browser
  • App market

The shipped in standard applications for Listening Music, Watching Videos, Managing Photos and Browsing files / ( My Photo, My Video, My Music, File Browser) were missing.

Main problem was File Browser by default shipped with Anroid was missing, and if an USB Stick / Flash Drive is plugged in to the USB port, a message appears along with a sound indicating the USB Flash Drive is detected but there was no way to access the USB Flash drive data ….

The tablet is a second hand bought one and is not my own and it appeared like someone has messed up with it trying to change default Android Linux kernel with some “hacked” (custom compiled one?).

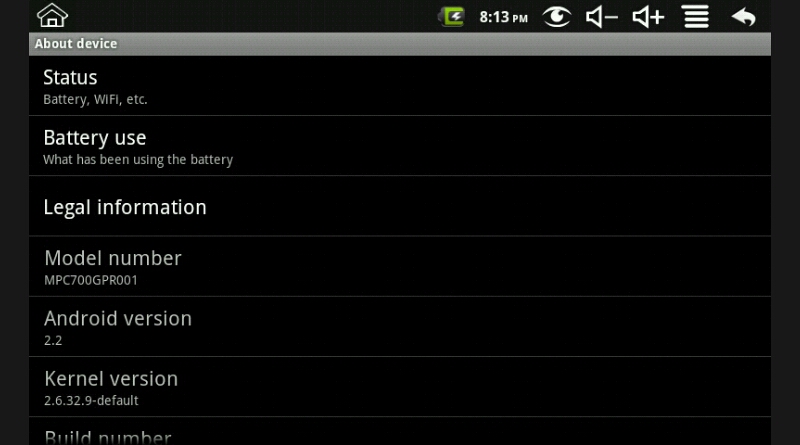
The exact Android version installed on it is 2.2, I checked navigating to:


Settings -> About Device

Android 2.2 Polaroid Settings About Device Screenshot pic

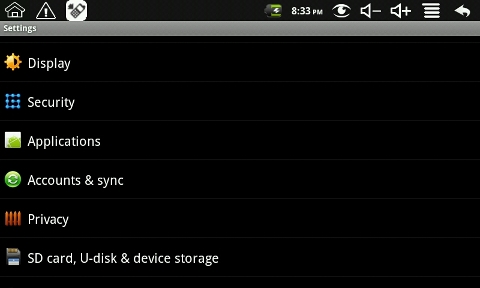
Onwards to fix the messed android I had to reset the device to its factory settings by navigating to:


Settings -> Privacy -> Factory data reset

Android 2.2 Polaroid Settings Privacy Reset to Factory Defaults Screenshot

This formats the device and all installed programs and restores the kernel to its original version, so after few minutes of waiting all worked like a charm 🙂

The normal programs for viewing pics, listening music, File Explorer all come at place. Even both VFAT (Fat 32) and NTFS formatted USB drives file systems worked normally with the device. Before that I was puzzled because I suspected the USB Drive is not detected because the kernel is not supporting NTFS and I need to install something. I was wrong just this Factory data reset and NTFS USB bundled by default works as usual 🙂

IE PassView – View stored Microsoft Internet Explorer passwords program

Thursday, January 5th, 2012

While checking a friend of mine's blog, I've seen a reference to a Windows program capable of revealing stored website passwords.
Check stored internet explorer passwords in plaintext with IE PassView

IE PassView is a small password management utility that reveals the passwords stored by Internet Explorer Web browser, and allows you to delete passwords that you don't need anymore. It supports all versions of Internet Explorer, from version 4.0 and up to 9.0.
Ie PassView is quite a good one for crackers, who would like to steal some lame poor Windows IE user facebook,gmail, yahoo etc. passwords 😉 here is a link to IE Passview's download page

Monitoring Windows hosts with Nagios on Debian GNU/Linux

Tuesday, August 30th, 2011

Nagios logo install and configure nagios to monitor Windows hosts with on Debian GNU/Linux

In this article in short, I’ll explain how I configured Nagios on a Debian GNU/Linux release (Squeeze 6) to monitor a couple of Windows hosts running inside a local network. Now let’s start.

1. Install necessery nagios debian packages

apt-get install nagios-images nagios-nrpe-plugin nagios-nrpe-server nagios-plugins nagios-plugins-basic nagios-plugins-standard
nagios3 nagios3-cgi nagios3-common nagios3-core

2. Edit /etc/nagios-plugins/config/nt.cfg

In the File substitute:

define command { command_name check_nt command_line /usr/lib/nagios/plugins/check_nt -H '$HOSTADDRESS$' -v '$ARG1$' }

With:

define command {
command_name check_nt
command_line /usr/lib/nagios/plugins/check_nt -H '$HOSTADDRESS$' -p 12489 -v $ARG1$ $ARG2$
}

3. Modify nrpe.cfg to put in allowd hoss to connect to the Nagions nrpe server

vim /etc/nagios/nrpe.cfg

Lookup inside for nagios’s configuration directive:

allowed_hosts=127.0.0.1

In order to allow more hosts to report to the nagios nrpe daemon, change the value to let’s say:

allowed_hosts=127.0.0.1,192.168.1.4,192.168.1.5,192.168.1.6

This config allows the three IPs 192.168.1.4-6 to be able to report for nrpe.

For the changes to nrpe server to take effect, it has to be restrarted.

debian:~# /etc/init.d/nagios-nrpe-server restart

Further on some configurations needs to be properly done on the nrpe agent Windows hosts in this case 192.168.1.4,192.168.1.5,192.168.1.6

4. Install the nsclient++ on all Windows hosts which CPU, Disk, Temperature and services has to be monitored

Download the agent from http://sourceforge.net/projects/nscplus and launch the installer, click twice on it and follow the installation screens. Its necessery that during installation the agent has the NRPE protocol enabled. After the installation is complete one needs to modify the NSC.ini
By default many of nsclient++ tracking modules are not enabled in NSC.ini, thus its necessery that the following DLLs get activated in the conf:

FileLogger.dll
CheckSystem.dll
CheckDisk.dll
NSClientListener.dll
SysTray.dll
CheckEventLog.dll
CheckHelpers.dll

Another requirement is to instruct the nsclient++ angent to have access to the Linux installed nagios server again with adding it to the allowed_hosts config variable:

allowed_hosts=192.168.1.1

In my case the Nagios runs on Debian Lenny (Squeeze) 6 and possess the IP address of 192.168.1.1
To test the intalled windows nsclient++ agents are properly installed a simple telnet connection from the Linux host is enough:

5. Create necessery configuration for the nagios Linux server to include all the Windows hosts which will be monitored

There is a window.cfg template file located in /usr/share/doc/nagios3-common/examples/template-object/windows.cfg on Debian.

The file is a good start point for creating a conf file to be understand by nagios and used to periodically refresh information about the status of the Windows hosts.

Thus it’s a good idea to copy the file to nagios3 config directory:

debian:~# mkdir /etc/nagios3/objects
debian:~# cp -rpf /usr/share/doc/nagios3-common/examples/template-object/windows.cfg /etc/nagios3/objects/windows.cfg

A sample windows.cfg content, (which works for me fine) and monitor a couple of Windows nodes running MS-SQL service and IIS and makes sure the services are up and running are:

define host{
use windows-server ; Inherit default values from a template
host_name Windows1 ; The name we're giving to this host
alias Iready Server ; A longer name associated with the host
address 192.168.1.4 ; IP address of the host
}
define host{
use windows-server ; Inherit default values from a template
host_name Windows2 ; The name we're giving to this host
alias Iready Server ; A longer name associated with the host
address 192.168.1.4 ; IP address of the host
}
define hostgroup{
hostgroup_name windows-servers ; The name of the hostgroup
alias Windows Servers ; Long name of the group
}
define hostgroup{
hostgroup_name IIS
alias IIS Servers
members Windows1,Windows2
}
define hostgroup{
hostgroup_name MSSQL
alias MSSQL Servers
members Windows1,Windows2
}
define service{
use generic-service
host_name Windows1
service_description NSClient++ Version
check_command check_nt!CLIENTVERSION
}
define service{ use generic-service
host_name Windows1
service_description Uptime
check_command check_nt!UPTIME
}
define service{ use generic-service
host_name Windows1
service_description CPU Load
check_command check_nt!CPULOAD!-l 5,80,90
}
define service{
use generic-service
host_name Windows1
service_description Memory Usage
check_command check_nt!MEMUSE!-w 80 -c 90
define service{
use generic-service
host_name Windows1
service_description C: Drive Space
check_command check_nt!USEDDISKSPACE!-l c -w 80 -c 90
}
define service{
use generic-service
host_name Windows1
service_description W3SVC
check_command check_nt!SERVICESTATE!-d SHOWALL -l W3SVC
}
define service{
use generic-service
host_name Windows1
service_description Explorer
check_command check_nt!PROCSTATE!-d SHOWALL -l Explorer.exe
}
define service{
use generic-service
host_name Windows2
service_description NSClient++ Version
check_command check_nt!CLIENTVERSION
}
define service{ use generic-service
host_name Windows2
service_description Uptime
check_command check_nt!UPTIME
}
define service{ use generic-service
host_name Windows2
service_description CPU Load
check_command check_nt!CPULOAD!-l 5,80,90
}
define service{
use generic-service
host_name Windows2
service_description Memory Usage
check_command check_nt!MEMUSE!-w 80 -c 90
define service{
use generic-service
host_name Windows2
service_description C: Drive Space
check_command check_nt!USEDDISKSPACE!-l c -w 80 -c 90
}
define service{
use generic-service
host_name Windows2
service_description W3SVC
check_command check_nt!SERVICESTATE!-d SHOWALL -l W3SVC
}
define service{
use generic-service
host_name Windows2
service_description Explorer
check_command check_nt!PROCSTATE!-d SHOWALL -l Explorer.exe
}
define service{ use generic-service
host_name Windows1
service_description SQL port Check
check_command check_tcp!1433
}
define service{
use generic-service
host_name Windows2
service_description SQL port Check
check_command check_tcp!1433
}
The above config, can easily be extended for more hosts, or if necessery easily setup to track more services in nagios web frontend.
6. Test if connectivity to the nsclient++ agent port is available from the Linux server

debian:~# telnet 192.168.58.6 12489
Trying 192.168.58.6...
Connected to 192.168.58.6.
Escape character is '^]'.
asd
ERROR: Invalid password.

Another good idea is to launch on the Windows host the NSClient++ (system tray) , e.g.:

Start, All Programs, NSClient++, Start NSClient++ (system tray).

Test Nagios configuration from the Linux host running nagios and nrpe daemons to check if the check_nt, can succesfully authenticate and retrieve data generated from the nsclient++ on the Windows host:

debian:~# /usr/lib/nagios/plugins/check_nt -H 192.168.1.5 -p 12489 -v CPULOAD -w 80 -c 90 -l 5,80,90,10,80,90

If everything is okay and the remote Windows system 192.168.1.5 has properly configured and running NSClient++ the above command should return an output like:

CPU Load 1% (5 min average) 1% (10 min average) | '5 min avg Load'=1%;80;90;0;100 '10 min avg Load'=1%;80;90;0;100

In case of the command returns:

could not fetch information from server

instead this means that probably there is some kind of problem with authentication or handshake of the Linux host’s nagios check_nt to the Windows server’s running on 12489.

This is sometimes caused by misconfigured NSC.ini file, however in other occasions this error is caused by misconfigured Windows Firewall or because the NSClient++ is not running with Administrator user.

By the way important note to make about Windows 2008r2 is that if NSClient++ is running there it’s absolutely required to Login with Windows Administrator and run the NSClient++ /start , if it’s run through the Run As Adminsitrator with an admin privileged user the aforementioned error might appear, so be careful.
I’ve experienced this error myself and it took me about 40 minutes to find that I have to run it directly with Administrator user after logging as Administrator.

7. Create nagios web iface Apache configuration

nagios debian pachage is shipped with a config which is suitable to be set debian:~# cp -rpf /usr/share/doc/nagios3-common/examples/apache2.conf /etc/apache2/sites-avalable/nagios
debian:~# ln -sf /etc/apache2/sites-available/nagios /etc/apache2/sites-enabled/nagios

The /etc/apache2/sites-available/nagios can easily be configured to work on Virtualhost, to do so the above copied file need to be wrapped inside a VirtualHost directive. For that put in the beginning of the file;

<VirtualHost *:80>

and in the end of the file:

<VirtualHost *:80>

8. Restart nagios server and Apache for the new settings to take effect

debian:~# /etc/init.d/apache2 restart
...
debian:~# /etc/init.d/nagios3 restart

If some custom configuration about tracking the Debian Linux nagios host running services needs to be made, its also helpful for one to check in /etc/nagios3/conf.d

Well that’s mostly what I had to do to make the Nagios3 server to keep track of a small Windows network on Debian GNU/Linux Squeeze 6, hope this small article helps. Cheers 😉
Getting around “Secure Connection Failed Peer’s, Certificate has been revoked., (Error code: sec_error_revoked_certificate)

Friday, April 8th, 2011

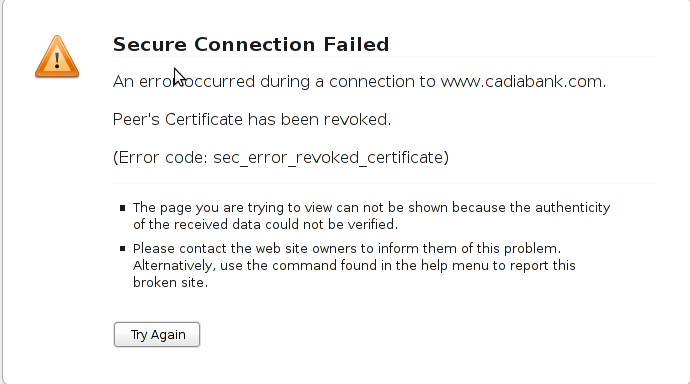
Certificate has been revoked, sec_error_revoked_certificate screenshot

One of the SSL secured websites (https://) which I have recently accessed couldn’t be opened with an error message showing up:

Secure Connection Failed

An error occurred during a connection to www.domain.com.

Peer’s Certificate has been revoked.

(Error code: sec_error_revoked_certificate)

* The page you are trying to view can not be shown because the authenticity of the received data could not be verified.
* Please contact the web site owners to inform them of this problem. Alternatively, use the command found in the help menu to report this broken site.

That error catched my attention so I digged further in what the message means. Here is what I found as an explanation to what is certificate revocation online

What is a SSL Certificate revocation

Revocation of a certificate means that the Certificate Authority (CA) that issuer of the certificate for a website have decided that the certificate is no longer valid, even if it has not expired.

The information about revocation can be distributed in two ways: Certificate Revocation Lists (CRLs), or by using the Online Certificate Status Protocol (OCSP).

CRLs are (usually) large files that contain a list with information about all the currentely active (unexpired) certificates that are no longer valid. This file has to be downloaded from the CA by the client at regular intervals (usually at least a week apart), and may be quite large.

OCSP, on the other hand, means that the client asks the CA “Is this particular certificate still valid?”, and the server responds “Yes” or “No”. This method can usually be fairly well up to date, meaning the information is at most a few days old, as opposed to at least a week for CRLs.

All the major browsers support OCSP, but some (like Opera) does not currently support CRLs.

By this time most of the modern browsers (Firefox, Chrome, Opera and Internet explorer does support revocation lists and all of the aforementioned hsa enabled at least OCSP by default.

Why SSL revocation error might occur:

A CA can revoke a certificate due to a number of reasons:

– A new certificate has been issued to the website, meaning the old one is not going to be used anymore.
– The website with the certificate is being used for purposes that are not accepted by the CA.
– The certificate was issued based on incorrect information.
– The owner is no longer able to use the private key associated with the certificate, for example the password is lost, the key storage was destroyed somehow, etc.
– The private key has been compromised or stolen, which means traffic to the site is no longer secure.
– The certificate and key have been stolen and is actually being used for fraud while posing as a legitimate website …

Now after all above being said the error:

Secure Connection Failed Peer's, Certificate has been revoked., (Error code: sec_error_revoked_certificate)

is a sure indicator that the website which had the certificate problem as a one you could not trust to make money transactions or do any operation that has a direct relation to your personal private date.

However as there are still websites which use an SSL encryption and are entertainment websites or just a news websites, sometimes getting around the ssl revocation issue to check this website is a necessity.

Therefore to enable your Firefox 3.5 / Iceweasel browser with a website which has ssl certificate revocation issue you need to do the following:

Edit -> Preferences -> Advanced -> Encryption -> Validation

After you see the Certificate Validation screen remove the tick set on:

Use the Online Certificate Status Protocol (OCSP) to confirm the current validity of certificates

Now refresh the website and you will skip the certificate revocation issue error and the webpage will open up.
Note that even though this will work, it’s not recommended to use this work around!