Posts Tagged ‘editor’

Set proxy only for apt, apt-get, aptitude package manager on Debian / Ubuntu Linux

Wednesday, December 22nd, 2021

debian-package-manager-run-via-a-proxy


Intro

Main console package install apt-get / apt and / aptitude did not use the HTTP Proxy environment variables by default as there is no default proxy set on Debian / Ubuntu / Mint and other deb based distros after OS Install. Under some circunstances for DMZ placed or firewall secured servers, direct access to internet address or even Package repository is only allowed via a proxy and hence the package manager needs to have a proxy host set.
 Setting a global wide proxy on Linux is easily possible by setting http_proxy="http://yourhost.com:8080" and https_proxy or if FTP connection via ftp_proxy somewhere in /etc/profile , /etc/bashrc or via /etc/environment but as using this Shell variables set it global wide for all applications lynx / links / wget / curl, sometimes it is useful to set the Proxy host only for deb package management tools.

Note that if you want to set a proxy host for deb operations this can be done during initial OS install installation, the Apt configuration file would have been automatically updated then. 

Creating  an Apt Proxy Conf File

Apt loads all configuration files under /etc/apt/apt.conf.d. We can create a configuration specifically for our proxy there, keeping it separate from all other configurations.

  1. Create a new configuration file named proxy.conf.


    # touch /etc/apt/apt.conf.d/proxy.conf
    
  2. Open the proxy.conf file in a text editor.


    # vi /etc/apt/apt.conf.d/proxy.conf
    
  3. Add the following line to set your HTTP proxy for apt.


    Acquire::http::Proxy "http://username:password@proxy.server:port/";
    
  4. Add the following line to set your HTTPS proxy.


    Acquire::https::Proxy "http://username:passw0rd@proxy.server:port/";
    
  5. Save your changes and exit the text editor.
     

Your proxy settings will be applied the next time you run Apt.

Simplifying the Configuration

As mentioned by a user in the comments below, there is an alternative way for defining the proxy settings. While similar, it removes some redundancy.

Just like in the first example, create a new file under the /etc/apt/apt.conf.d directory for example /etc/apt/apt.conf.d/proxies, and then add the lines as.

Acquire {
HTTP::proxy "http://127.0.0.1:8080";
HTTPS::proxy "http://127.0.0.1:8080";
}


Update reverse sshd config with cronjob to revert if sshd reload issues

Friday, February 12th, 2021

Update-reverse-sshd-config-with-cronjob-to-revert-if-sshd-reload-issues

Say you're doing ssh hardening modifying /etc/ssh/sshd_config for better system security or just changing options in sshd due to some requirements. But you follow the wrong guide and you placed some ssh variable which is working normally on newer SSH versions ssh OpenSSH_8.0p1 / or 7 but the options are applied on older SSH server and due to that restarting sshd via /etc/init.d/… or systemctl restart sshd cuts your access to remote server located in a DC and not attached to Admin LAN port, and does not have a working ILO or IDRAC configured and you have to wait for a couple of hours for some Support to go to the server Room / Rack / line location to have access to a Linux physical tty console and fix it by reverting the last changes you made to sshd and restarting.

Thus logical question comes what can you do to assure yourself you would not cut your network access to remote machine after modifying OpenSSHD and normal SSHD restart?

There is an old trick, I'm using for years now but perhaps if you're just starting with Linux as a novice system administrator or a server support guy you would not know it, it is as simple as setting a cron job for some minutes to periodically overwrite the sshd configuration with a copy of the old working version of sshd before modification.

Here is this nice nify trick which saved me headache of call on technical support line to ValueWeb when I was administering some old Linux servers back in the 2000s

root@server:~# crontab -u root -e

# create /etc/ssh/sshd_config backup file
cp -rpf /etc/ssh/sshd_config /etc/ssh/sshd_config_$(date +%d-%m-%y)
# add to cronjob to execute every 15 minutes and ovewrite sshd with the working version just in case
*/15 * * * * /bin/cp -rpf /etc/ssh/sshd_config_$(date +%d-%m-%y) /etc/ssh/sshd_config && /bin/systemctl restart sshd
# restart sshd 
cp -rpf /etc/ssh/sshd_config_$(date +%d-%m-%y) /etc/ssh/sshd_config && /bin/systemctl restart sshd


Copy paste above cron definitions and leave them on for some time. Do the /etc/ssh/sshd_config modifications and once you're done restart sshd by lets say

root@server:~#  killall -HUP sshd 


If the ssh connectivity continues to work edit the cron job again and delete all lines and save again.
If you're not feeling confortable with vim as a text editor (in case you're a complete newbie and you don't know) how to get out of vim. Before doing all little steps you can do on the shell with  export EDITOR=nano or export EDITOR=mcedit cmds,this will change the default text editor on the shell. 

Hope this helps someone… Enjoy 🙂

VIM Project (VI Improvied IDE Editor extension to facilitate web development with vi enhanced editor

Wednesday, August 25th, 2010

I use VIM as an editor of choice for many years already.
Yet it's until recently I use it for a PHP ZF (Zend Framework) web development.

Few days ago I've blogged How to configure vimrc for a php syntax highlightning (A Nicely pre-configured vimrc to imrpove the daily text editing experience

This enhancements significantly improves the overall PHP code editing with VIM. However I felt something is yet missing because I didn't have the power and functunality of a complete IDE like for instance The Eclipse IDE

I was pretty sure that VIM has to have a way to be used in a similar fashion to a fully functional IDE and looked around the net to find for any VIM plugins that will add vim an IDE like coding interface.

I then come accross a vim plugin called VIM Prokject : Organize/Navigate projects of files (like IDE/buffer explorer)

The latest VIM Project as of time of writting is 1.4.1 and I've mirrored it here

The installation of the VIM Project VIM extension is pretty straight forward to install it and start using it on your PC issue commands:

1. Install the project VIM add-on

debian:~$ wget https://www.pc-freak.net/files/project-1.4.1.tar.gz
debian:~$ mv project-1.4.1.tar.gz ~/.vim/
debian:~$ cd ~/.vim/
debian:~$ tar -zxvvf project-1.4.1.tar.gz

2. Load the plugin

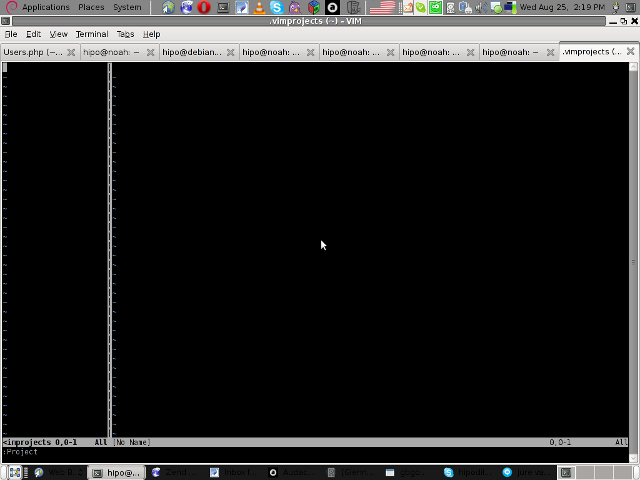
Launch your vim editor and type : Project(without the space between : and P)
You will further see a screen like:

vim project entry screen

3. You will have to press C within the Project window to load a new project

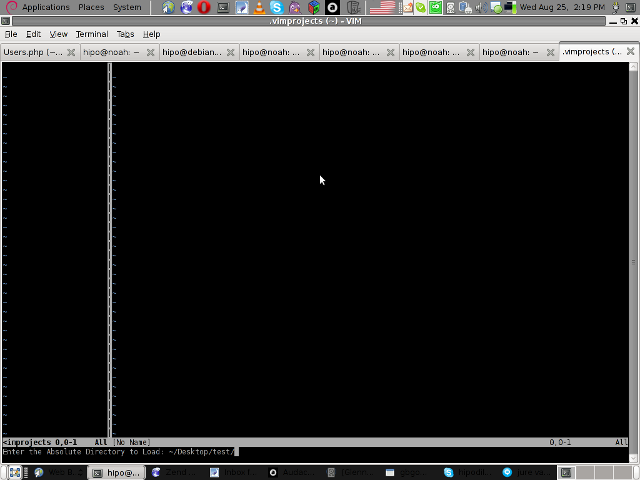
Then you will have to type a directory to use to load a project sources files from:

vim project enter file source directory screen

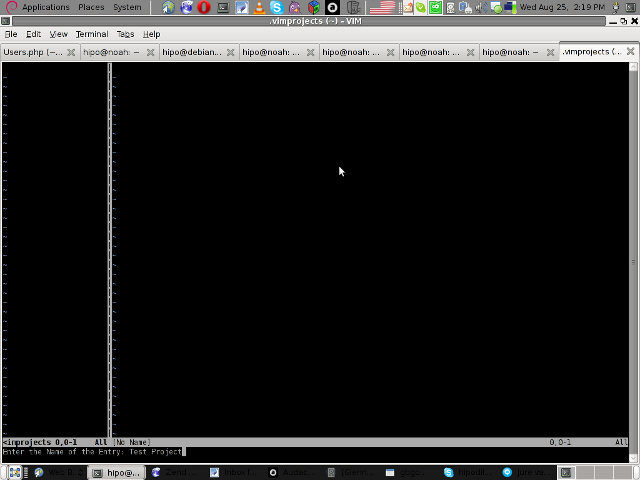
You will be prompted with to type a project name like in the screenshot below:

vim project load test project

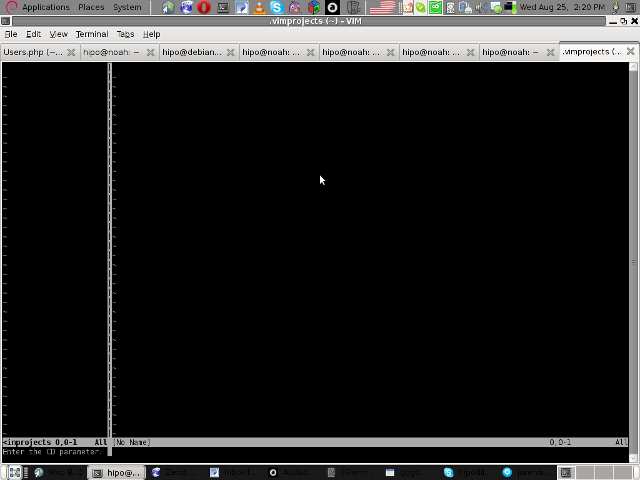
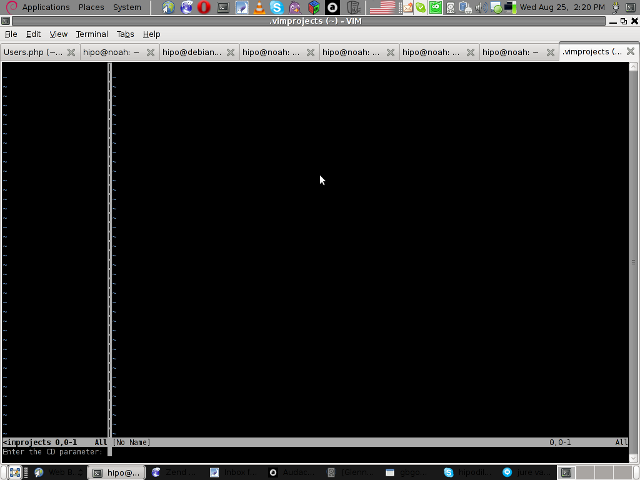
4. Next you will have to type a CD (Current Dir) parameter
To see more about the CD parameter consult vim project documentation by typing in main vim pane :help project

The appearing screen will be something like:

vim project extension cd parameter screen

5. Thereafter you will have to type a file filter

File filter is necessary and will instruct the vim project plugin to load all files with the specified extension within vim project pane window

You will experience a screen like:


vim project plugin file filter screen

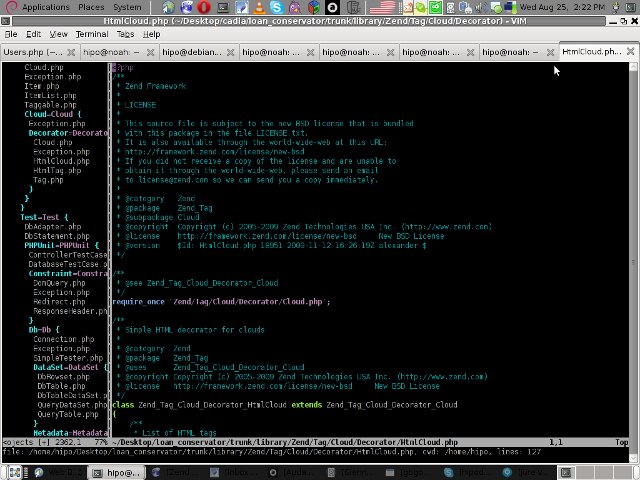
Following will be a short interval in which all specified files by the filter type will get loaded in VIM project pane and your Zend Framework, PHP or any other source files will be listed in a directory tree structure like in the picture shown below:

vim project successful loaded project screen

6. Saving loaded project hierarchy state

In order to save a state of a loaded project within the VIM project window pane you will have to type in vim, let's say:

:saveas .projects/someproject

Later on to load back the saved project state you will have to type in vim :r .projects/someproject

You will now have almost fully functional development IDE on top of your simple vim text editor.

You can navigate within the Project files loaded with the Project extension pane easily and select a file you would like to open up, whenever a source file is opened and you work on it to switch in between the Project file listing pane and the opened source code file you will have to type twice CTRL+w or in vim language C-w

To even further sophisticate your web development in PHP with vim you can add within your ~/.vimrc file the following two lines:

" run file with PHP CLI (CTRL-M)
:autocmd FileType php noremap <C-M> :w!<CR>:!/usr/bin/php %<CR>
" PHP parser check (CTRL-L)
:autocmd FileType php noremap <C-L> :!/usr/bin/php -l %>CR>

In the above vim configuration directovies the " character is a comment line and the autocmd is actually vim declarations.
The first :autocmd … declaration will instruct vim to execute your current opened php source file with the php cli interpreter whenever a key press of CTRL+M (C-m) occurs.

The second :autocmd … will add to your vim a shortcut, so whenever a CTRL+L (C-l) key combination is pressed VIM editor will check your current edited source file for syntax errors.
Therefore this will enable you to very easily periodically check if your file syntax is correct.

Well this things were really helpful to me, so I hope they will be profitable for you as well.
Cheers 🙂

How to change default Text editor in Linux

Saturday, August 31st, 2019

This is a very trivial question but, as I thought someone that is starting with Linux basics Operating might be interested I will shortly explain in this small article how to change default text editor on Linux.

Changing default text editor is especially helpful if you have to administer a newly purchased dedicated servers, that comes with default Operating System preinstalled.

By default many Linux distributions versions such as Debian / Ubuntu comes with nano comes with a default text editor nano (ANOther enhanced free Pico editor clone) many people as me are irritated and prefer to use instead vim (Vi Improved), mcedit (the Midnight Commander), joe or emacs as a default.
 

1. Changing default console text editor on Debian based Linux


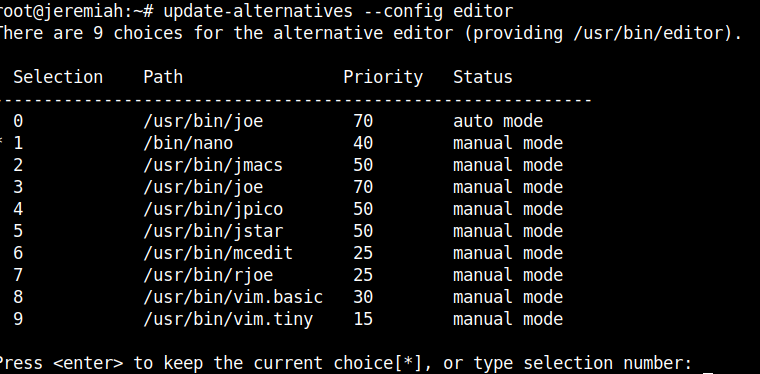
On Debian / Ubuntu / Mint and other deb based distributions the easiest way to change text editor is with update-alternatives cmd.
 

update-alternatives –config editor


changing-default-text-editor-in-linux

Using Debian update-alternatives is useful as it makes the change OS global wide and the default mc viewer program mcview will also understand the change in the default text editor, which makes it the preferrable way to do it on deb based OS family.

An alternative way to set the default programs for the OS system wide is to create the respective symbolic link in /etc/alternatives actually what update-alternatives wrapper script does is exactly this it creates the required symlink.

2. Changing default text editor on any Linux


To change the text editor for only a single system existing user in /etc/passwd you need to edit $HOME/.bashrc, e.g. ~/.bashrc on Debian based Linux or on Fedora / RHEL / CentOS by adding to ~/.bash_profile
 

vim ~/.bashrc


And add

alias editor=vim

or

export EDITOR='/path/to/text-editor/program'
export VISUAL='/path/to/text-editor/program'

To change to mcedit for example when opening in any program that triggers to run default text editor

export EDITOR='/usr/bin/mcedit'
export VISUAL='/usr/bin/mcedit'


To make the change system wide on any Linux distribution you have to add the export EDITOR / export VISUAL at the end of /etc/bash.bashrc

To load the newly included .bashrc* instructions use source command
 

source ~/.bashrc


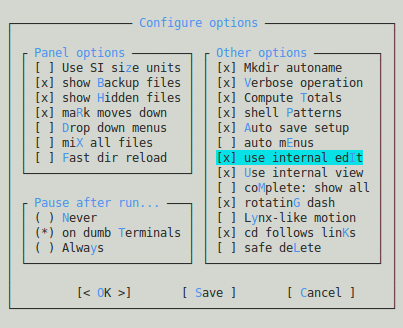
3. Changing the default text editor for mcview if all else fails


Once mc is running, use following menu keys order (also visible from Midnight Commander) menus:
 

    F9 Activates the top menu.
    o Selects the Option menu.
    c Opens the configuration dialog.
    i Toggles the use internal edit option.
    s Saves your preferences.

mcview-how-to-change-default-text-editor-screenshot

That's all folks Enjoy !


How to add (.srt , .sub) subtitles to .flv flash movie video on Linux

Friday, April 15th, 2011

how-to-add-srt-subtitles-to-flv-flash-movie-video-on-linux
If you're on Linux the questions like, how can I convert between video and audio formats, how to do photo editing etc. etc. have always been a taugh question as with it's diversity Linux often allows too many ways to do the same things.

In the spirit of questioning I have been recently curious, how can a subtitles be added to a flash video (.flv) video?

After some research online I've come up with the below suggested solution which uses mplayer to do the flash inclusion of the subtitles file.

mplayer your_flash_movie.flv -fs -subfont-text-scale 3

While including the subtitles to the .flv file, it's best to close up all the active browsers and if running something else on the desktop close it up.
Note that above's mplayer example for (.srt and .sub) subtitle files example is only appropriate for a .flv movie files which already has a third party published subtitle files.

What is interesting is that often if you want to make custom subtitles to let's say a video downloaded from Youtube on Linux the mplayer way pointed above will be useless. Why?

Well the Linux programs that allows a user to add custom subtitles to a movie does not support the flv (flash video) file format.

My idea on how to create custom subtitles and embed them into a flv movie file is very simple and it goes like this:

1. Convert the .flv file format to let's say .avi or .mpeg
2. Use gnome-subitles or subtitleeditor to create the subtitles for the .avi or .mpeg file
3. Convert back the .avi/.mpeg file with included subtitles to .flv (flash video format)

This methodology is really long and time consuming, but pitily as far as my understanding goes it's the only way to do that on your Linux until now.

To make the conversations between .flv and .avi format you will need to use the ffmpeg – (FFMpeg command line tool video converter), here is how:

– Convert .flv to .avi

debian:~# /usr/bin/ffmpeg -i input_flvfilename.flv output_avifilename.avi

– Convert .avi file to .flv

debian:~# /usr/bin/ffmpeg -y -i /path/to/your/avi/input_avifilename.avi -acodec mp3 -ar 22050 -f flv
/path/to/your/flv/output_flvfilename.flv

The required overall tools which you will have to have installed on your Debian or Ubuntu Linux are:

1. ffmpeg
2. gnome-subtitles
3. subtitleeditor
4. mplayer

You will also have to spend some time to get to know gnome-subtitles or subtitleeditor, but it won't be that long until you get the idea on how to use them.

12 must have Joomla extension plugins / Essential modules for new Joomla CMS install

Thursday, June 16th, 2011

Joomla bundle of must have extensions picture

These days very often I have to install, plain new Joomla based websites. I’ve realized that since there is no structured guide to follow describing the most essential plugins that every new fresh new joomla installation is required to have.
Thus I took the time and wrote this post, as it will be useful to myself in my future new joomla based websites establishment, I also believe these guide will be useful to other Joomla enthusiasts or administrators in their daily work.

Below I will describe in short the installation, configuration and oddities I’ve faced during installment of the above described bundle of plugins on a plan Joomla 1.5 install.These article will walk through 12 joomla essential plugins that I believe every fresh Joomla installation should be equipped with.
Hope this guide will be helpful to you. Now let’s start it up:

1. JoomlaXplorer – A sophisticated web file explorer for Joomla

One of the basic modules, beneficial with a new joomla CMS install is Joomla Xptplorer . This module enables the joomla admin to browse files in a web file explorer, on the server where the joomla CMS is installed. Below you see how handy the joomla web explorer provided by the plugin is:
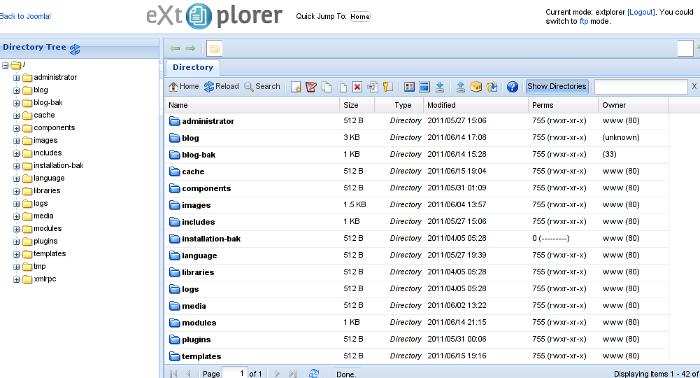
Joomla file explorer extplorer module

Installing and using the plugin is a piece of cake. To install the plugin:

a. download Joomla file Xplorer from here or from the official plugin website.

b. Install the plugin through the admin joomla menu:

Extensions -> Install/Uninstall

c. Start using the newly installed plugin by following to menus:

Components -> eXtplorer

2. JCrawler Generate easily sitemap.xml to aim the overall Joomla website SEO optimization

JCrawler logo plugin joomla

I have previously written a very through tutorial on how to install configure and generate website sitemap with Jcrawler module, You can read my article titled: How to build website sitemap.xml in Joomla here

3. sh404SEF – Make your Joomla links and content more user friendly

sh404sef Joomla Search Engine Optimization plugin

sh404SEF is a great Joomla plugin, which will seriously improve SEO and could contribute well for a website to be better indexed with major search engines.

I have previously written an article describing thoroughfully the install and use procedures for the module.
You can read the article Making your Joomla URLS Google friendly with sh404sef plugin / Simple Joomla link SEO here

4. Akeeba Backup Joomla solution

Akeeba backup Joomla Module

Installing a joomla backup solution is very essential if you does take care about your data, it often happens that server hard disk got crashes or a RAID massives got corrupted or some kind of other unexpected disaster hits the server. In these terrible times, having a website backup will save you nerves and data recovery funds, not to mention that in many cases data recovery is impossible.

Joomla has a very easy to use software for creating full website backup called Akeeba Backup

To start using the software one must:

a. Download Akeeba Backup and install it via:

Extensions -> Install/Uninstall

After the Akeeba Backup installation is over, to create your first backup, one needs to navigate to:

Components -> Akeeba Backup -> Backup Now

Each Akeeba backup (a version of the website’s files data and sql info) will be created in an archive file with the extension .jpa
The backup files are created under joomla’s website (main) root directory in directory location administrator/components/com_akeeba/backup

The Akeeba plugin also has capabilities to recover a (.jpa) backup restore point easily.
To recover a backup with the Akeeba plugin one needs to do it once again, via the plugin joomla web interface.
5. Google Analytics (place easy tracking code) in Joomla

Google Analytics Tracking Module for Joomla

a. Download the Google Analytics Tracking Module
The module is available from Joomla Extensions on joomla.org

At the current time of writting you need to download the analytics_tracking15,zip file

b. Install the Google Analytics Tracking Module;
Login as joomla admin and navigate to;

Extensions -> Install

Place the analytics_tracking15.zip url to the Install URL: field.
Again as of time of writting you need to place https://www.pc-freak.net/files/analytics_tracking15.zip;

c. Open the Module Manager

Extensions -> Module Manager

d. Click over Google Analytics Tracking Module
On the right pane you will notice in the Module Parameters the Analytics_uacct_code field. In the uacct_code field you need to paste your UA obtained from your created google-analytics account.
This code is usually something like UA-2101595-10
Now place your code their and press the save green button located near the right top of the screen. You should see the text in blue Item Saved which would indicate your UA code is stored already in the Google Analytics Tracking Module, now press the Cancel button located again on the right top.
As a last step before the Google analytics is set-up on the Joomla you need to enable the plugin to do you need to press over the tick left sided from the text reading Google Analytics Tracking Module in the Module Manager
e. Click over the Enabled button in Module Manager;
Google Analytics Tracking Module -> Enabled

6. Itprism (Facebook, Twitter etc.) Social Network share buttons Joomla plugin

ITPShare Large Social Buttons Joomla

a. to add the itpsocialbuttons to joomla Download the Itpsocialbuttons latest module files from http://itprism.com/free-joomla-extensions/social-buttons-plugin or use my mirrored module files below:

Download mod_itpsocialbuttons .zip file
Download plg_itpsocialbuttons .zip

After having the two files necessery to be installed to make the ITPSocialButtons appear on website, installation is done like with any other installation:

Extensions -> Install/Uninstall -> Upload Package File (Choose File)

Next its necessery to configure the plugin to do so, follow to menus:

Extensions -> Module Manager -> Share

You will notice the Share dialog in the list of Module Name column in Module Manager

Here is a screenshot on how the settings options for ITpsocialbuttons will look like:
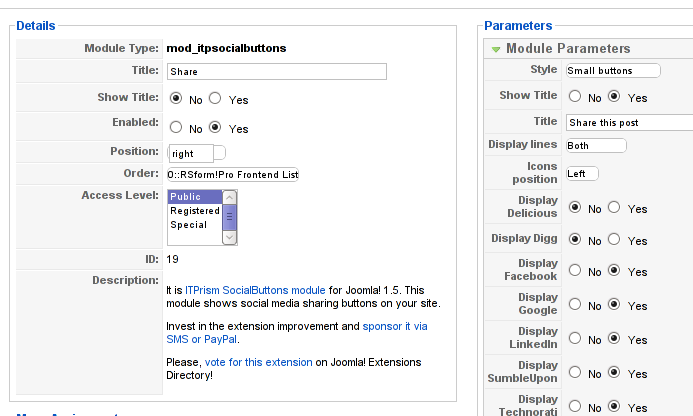
Mod ITpSocialButtons settings screen

The options which I personally changed was:

Show Title – I set this one to No as I wanted to omit the plugin title text to appear on my website.
Further on I’ve set the Enabled option to Yes to enable the plugin and choose the buttons Style option to be of a Small buttons type.
I’ve also found that the most suitable position for the Social Share buttons were to be of a right – Position .

Here is how the social network itprism share buttons looks like:

ITprism Joomla Social Share Plugin various button types

The plugin supports sharing of joomla pages to the following list of social networks:
 

  • Delicios.com
  • Digg.com
  • Facebook
  • Google Bookmarks
  • StumbleUpon
  • Technorati
  • Twitter
  • LinkedIn

The module configuration, also allows the user to configure the type of social network buttons, one wants to display on the website.

7. Joomla JCE Content Editor

This content editor is really awesome compared to the default editor TinyMCE. If you want to have an options rich content editor for Joomla, then this is the one for you 🙂
download JCE Content Editor here

After installing the JCE Joomla content editor in order to enable it as a default editor you need to go to the following location:

Site -> Global Configuration -> Default WYSIWYG Editor

There place on Editor TinyMCE and change it with Editor – JCE

Now go to edit some article, and you will see the difference in the editor 🙂

8. Add gallery Joomla capabilities with sigplus (Image Gallery Plus) and Very Simple Image Gallery

Image Gallery Plus sigplus Joomla Screenshot

Image Gallery Plus plugin (sigplus) gallery review screenshot

sigplus Image Gallery Plus is a straightforward way to add image or photo galleries to a Joomla article with a simple syntax. It takes a matter of minutes to set up a gallery but those who are looking for a powerful gallery solution will not be disappointed either: sigplus is suitable for both beginner and advanced users.

Download Sigplus Joomla Image Gallery plugin here
Using sigllus is quite easy all one has to do is use Joomla Media Manager from links:

Site -> Media Manager

Create new folder in the stories folder, let’s say New Pictures and further on use Media Manager to upload all desired pictures to be later displayed.

Being done with uploading the images you want to display, go to Article Manager :

Content -> Article Manager

From there choose your article where new uploaded pictures you want to display and type in the article:

{gallery}New Pictures{/gallery}.

Note that New Pictures is the directory just recently created as stated below, it’s important that there is no spacing between {gallery}and New Pictures, if one tries {gallery} New Pictures {/gallery} instead of {gallery}New Pictures{/gallery} an error will occur instead of the pictures being displayed in a scrolled gallery.

Sigplus Image Gallery has also a number of configuration options, which might make it look a bit more decent.
I have to say in my view the default way sigplus displays pictures is awful!

Another alternative if you don’t like Sigplus ‘s way of creating new galleries is to use Very Simple Image Gallery

Very Simple Image Gallery joomla screenshot

Here is a screenshot on a sample gallery created with Very Simple Image Gallery Joomla Plugin

You can download Very simple image gallery here

After installing the plugin. It’s use is analogous to the Sigplus . To use it likewise sigplus create new directory through Media Manager and in stories and upload your files in let’s say New Pictures1 . Later on in your article place, the code

{vsig}New Pictures1{/vsig}

Gallery will be generated automatically by the plugin. I think Simple Image Gallery is a bit more advanced and gives a better outlook to Galleries, though it’s configuration settings are much less than with SigPlus image gallery.

To add pictures comments e.g. img link alt=” and title=” tib you need to place a code within the Article manager similar to:

{vsig_c}0|Picture_1.JPG|Some sample text|Some other text{/vsig_c}
{vsig_c}0|Picture_2.JPG|Some example text|Some text{/vsig_c}
etc. ..

Note that the 0 in above example specifies the gallery number if you for instance are using a couple of galleries with Simple Image Gallery , the first one you used would be call 0 . The text specified as comments to the picture will also appear after you preview the gallery right below the picture when clicked on as a picture description in a really nice way.
9. Install Google maps plugin for Joomla
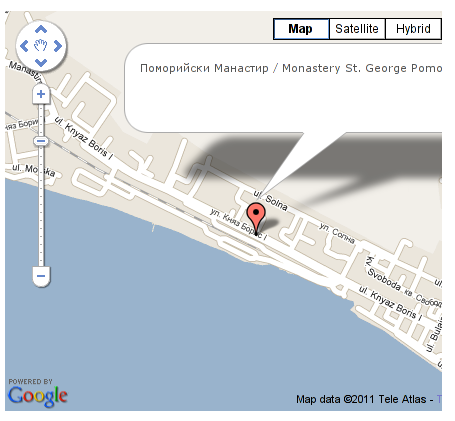
Google Maps plugin for Joomla screenshot

It’s a wise idea that every website has a location map on it’s website, for that reason Google maps is just great.
To install Google maps capability to joomla one can use a plugin called Google Maps .

You can straighly download Joomla’s Googlemap plugin from here

Afterwards use Extension Manager to install the plugin e.g. follow:

Extensions -&gr; Install/Uninstall (Choose File)

and click on Upload File & Install button.

To further enable and configure the Joomla Googlemap plugin you will have to go to the location:

Extensions -> Plugin Manager

Therein you will have to find and enable the Google Maps plugin which is to be found in the column named Plugin Manager
On my Joomla installation the plugin was located in the second page with modules, so if you don’t find the module on the listing with modules on the first page, make sure you scroll to the bottom of the page and click on Next button.

Therein in the list you will most likely notice Google Maps use the Enable button to enable it.

Next step is to configure the plugin, to do so press on the plugin name Google Maps
All configuration necessery here is to place Googlemaps API Key in the respective field (you will see it among config options).

Issuing a new Google Maps api key takes just few seconds, if you already have a gmail account just go to http://code.google.com/apis/maps/signup.html and take few seconds to issue the key.

You will get the key right on your gmail account after being issued (to repeat myself issuing takes few seconds so no worrier here).

One moreOnce having the key place it in the Googlemaps API Key field and configuring Address (which is one of the list of many options the plugin provides) you will be done with configuration.

To display a google map the location you just configured go to the Article Manager , select the article where you want the google maps location picture of your address to appear and type in the Article:

{mosmap|text='Exact street address location'|zoom='15'|zoomType='Large'|zoomNew='0'}

After you save the article a very nice Google map showing you the location’s streets will appear.
You can further conifgure a number of things related to the google map to appear, one thing you might want to play with is the zoom option which as you see in below’s code is equal to 15, e.g. zoom=’15’
Set it to another one if you want to regulate your googlemaps zoom level. For more thoroughful options take a look at the extensive plugin documentation.

10. Joomla Xmap (generating static HTML sitemap) Download Xmap from here , install it the usual plugin way.

Right after installation on the plugin succesful install screen you will notice the link component menu .
Clicking on the component menu you will be leaded to a page showing you few links Sitemap’s URL :
 

  • XML Sitemap:
  • HTML Sitemap:
  • News Sitemap:
  • Images Sitemap:

11. Add Joomla donate Paypal capabilities with Joomla PAYPAL DONATION MODULE

Paypal Donation Module Joomla Screenshot

Just recently I’ve written a a post on how to add a paypal donation capabilities to joomla, you can read my previous post here

12. Install Joomla RSForms Module (Advanced Joomla Forms Support)
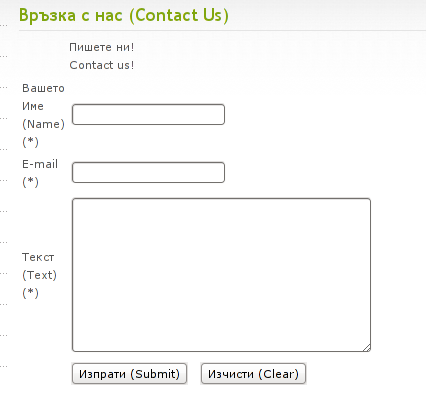
Simple Joomla RsForm contact form

If you’re planning to add a complicated form support for Joomla, there are plenty of plugins, however one that was suggested by a friend of mine which is deep in Joomla world and moreover works good on my joomla installations is RSForms

Joomla – RSForms! is free to download and has great and easy interface to create new joomla forms.

At the time of writting I use these three RSForms components on new Joomla installations:

RSform Pro 1.1.0 com
Mod RsForm for Joomla 1.5
Mod Rsform list for Joomla

For latest release of RSForms! use the link http://www.rsjoomla.com/joomla-components/rsform.html

Installation is like any other module and is done through Extensions -> Install/Uninstall menu.

After installation, setting up a new form is available from the Joomla Menus:

Components -> RSform!Pro -> Manage Forms

I would not enter in details on how to edit the default RSForms or create a new RSForm. Just take some time and learn it by trying 😉

After the rsform is ready, to enable the new form, navigate to Joomla menus:

Menus -> Main Menu

Press the New button located in the buttons bar nearby the page header in the list of options in Select Menu item Type you will notice the RSForm!Pro as an option, press on it to establish the new form in the menus.

A follow up window will appear where one can set a Title: and Alias: for the new form as well as few other options.
After finalizing the settings press on Apply button to save the settings and the new form should appear in Joomla.

Probably there are many more handy plugins, which I’m missing here thus I’ll be glad if readers suggest some more helpful essential (must have plugins) for Joomla.
Feedback on this tutorial is very welcome!
Looking forward to hear for your opinions if my article was helpful to you 😉

VIM and VI UNIX text editor syntax highlighting and howto add remove code auto indent

Tuesday, February 4th, 2014

vim-vi-linux-text-editor-logo-vim-highlighting how to turn vim syntax highlighting on linux

For my daily system administration job I have to login to many SuSE Linux servers and do various configugration edits.
The systems are configured in different ways and the only text editors available across all servers I can use are VI and VIM (VI Improved).

As I usually had to edit configuration files and scripts and I'm on SSH color terminal its rather annoying that on some of the servers opening a file with VIM is not displayed with SYNTAX HIGHLIGHTING. Not having syntax highlighting is ugly and makes editting ugly and unreadable.
Thus it is useful to enable VI syntax highlighting straight into the file being editted. I suspect many novice sysadmins might not know how to turn syntax highlighting in vi so here is how.
 

Turn Syntax Highlighting in VIM


1. Open file with vim lets say Apache configuration

# vim /etc/apache2/apache2.conf

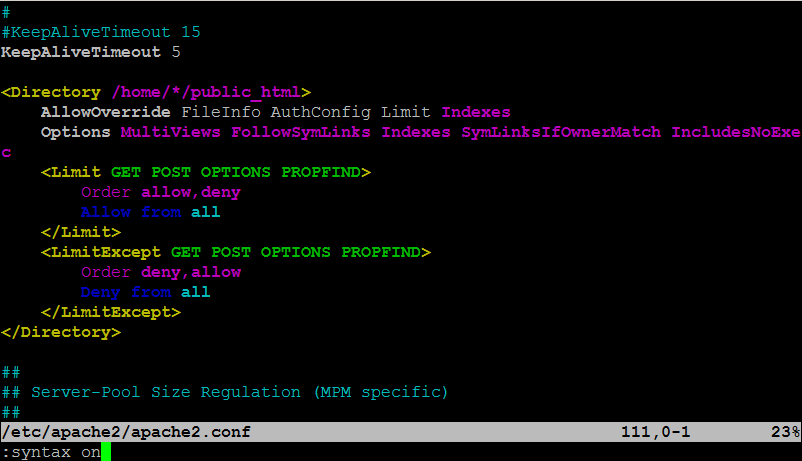
2. Press (Esc) Escape and ":" from kbd and then type in syntax on

:syntax on

vim-syntax-highlighting-howto-syntax-on-picture-screenshot-apache-config

To Turn On / Off VI Syntax Highlighting permanent add ":syntax on"
into ~/.vimrc

~/.vimrc file is red automatically on VIM start, so right after :syntax on is appended in it on relaunch vim will start showing colorfully.

Enjoy ! 🙂


How to convert FLV to AVI and AVI to FLV Videos on Linux and BSD with avidemux and ffmpeg – Simple video editting with LiVES

Tuesday, May 8th, 2012

I'm starting to learn some video editing, as I need it sometimes for building client websites.
As a Linux user I needed to have some kind of software for amateur video editing.
For Microsoft Windows OS, there are tons of video editor programs both free and proprietary (paid).
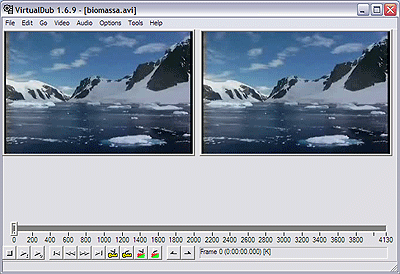
Windows users can for instance use the free software program VirtualDub (licensed under GPL license) to easily cut movie scenes from a video.

Unfortunately VirtualDub didn't have a Linux or BSD version so in my case I had to look for another soft.

VirtualDub running on Microsoft Windows XP Screenshot (Biomassa)

I consulted a friend of mine who recommended a video editor program called LiVES.

If you haven't done any video editing previously on Linux (like my case was), you will certainly be happy to try LiVES

Debian GNU / Linux LiVES video editor logo bootscreen shot

LiVES can extract only sound from videos, cut selected parts (frames) from videos and do plenty of other nice stuff. It is just great piece of software for anyone, who needs to do simply (newbie) video editting.

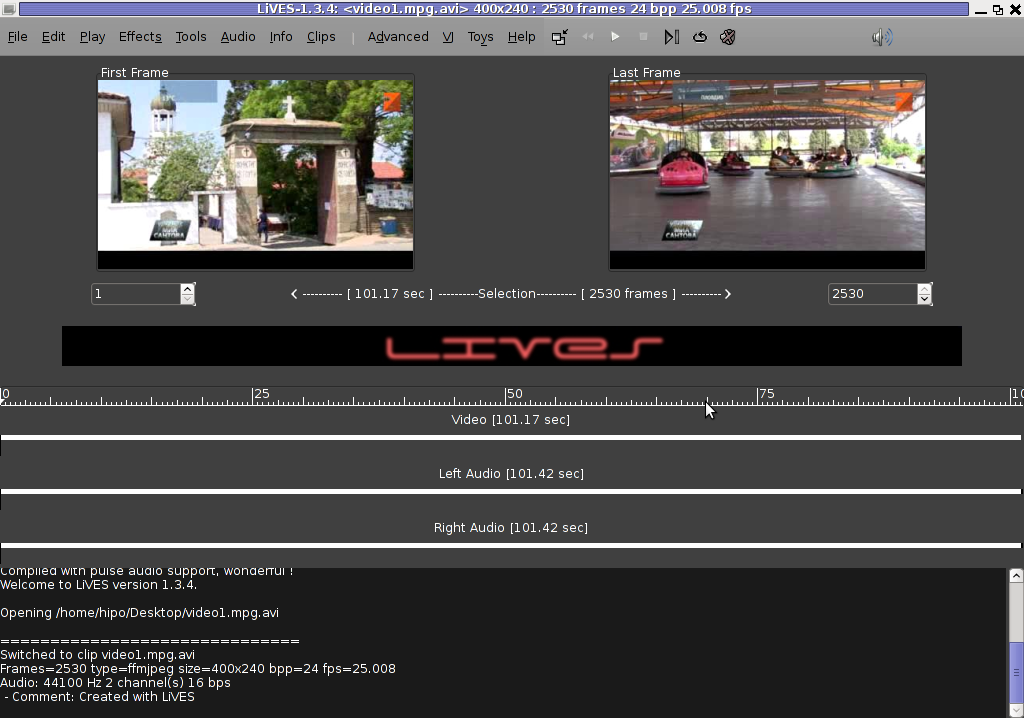
With LiVES even an amateur video editor like me could, immediately learn how to chop a movie scenes

Screenshot opened video for editting with LiVES Linux movie editor Debian Squeeze Linux shot

To master the basics and edit one video in FLV format it took me about 1 hour of time, as in the beginning it was confusing to get confortable with the program scenes selector.

One downside of LiVES it failure to open a FLV file I wanted to edit.
In order to be able to edit the flv movie hence I first had to convert the FLV to AVI or MPEG, as this two (video multimedia formats) are supported by LiVES video editor.

After completing my video scenes chopping to the AVI file I had to convert back to FLV.

In order to complete the convertion between FLV to AVI format on my Debian Linux, I used a program called avidemux

Avidemux has a nice GUI interface and also like Lives has support for video editting, though I have never succesfully done any video edits with it.

Avidemux IMHO is user (completely intuitive). To convert the FLV to AVI, all I had to do was simply open the file FLV file, press (CTRL+S) select my FLV video file format and select the output file extension format to be AVI.

Further on, used LiVES to cut my desired parts from my video of choice. Once the cuts were complete I saved the new cutted version of video to AVI.
Then I needed the video again in FLV to upload it in Joomla, so used ffmpegcommand line tool to do the AVI to FLV file converstion, like so:

hipo@noah:~$ /usr/bin/ffmpeg -i my_media_file.avi my_video_file.flv

Hope this article helps someone aiming to do basic video editting on Linux with LiVES and just like needed FLV to AVI and AVI to FLV convertions.

Editting binary files in console and GUI on FreeBSD and Linux

Thursday, April 26th, 2012

I’ve recently wanted to edit one binary file because there was compiled in the binary a text string with a word I didn’t liked and therefore I wanted to delete. I know I can dig in the source of the proggie with grep and directly substitute my “unwatned text” there but I wanted to experiment, and see what kind of hex binary text editors are for Free OSes.
All those who lived the DOS OS computer era should certainly remember the DOS hex editors was very enjoyable. It was not rare case, where in this good old days, one could simply use the hex editor to “hack” the game and add extra player lives or modify some vital game parameter like put himself first in the top scores list. I even remember some DOS programs and games was possible to be cracked with a text editor … Well it was times, now back to current situation as a Free Software user for the last 12 years it was interesting to see what is the DOS hexeditor like alternatives for FreeBSD and Linux and hence in this article I will present my findings:

A quick search in FreeBSD ports tree and Debian installable packages list, I’ve found a number of programs allowing one to edit in console and GUI binary files.

Here is a list of the hex editors I will in short review in this article:

  • hexedit
  • dhex
  • chexedit
  • hte
  • hexer
  • hexcurse
  • ghex
  • shed
  • okteta
  • bless
  • lfhex

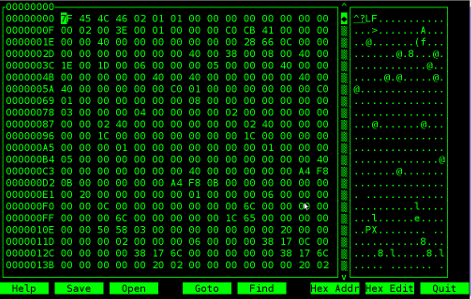
1. hexedit on Linux and BSD – basic hex editor

I’ve used hexedit already on Linux so I’ve used it some long time ago.

My previou experience in using hexedit is not too pinky, I found it difficult to use on Redhat and Debian Linux back in the day. hexedit is definitely not a choice of people who are not “initiated” with hex editting.
Anyways if you want to give it a try you can install it on FreeBSD with:

freebsd# cd /usr/ports/editors/hexedit
freebsd# make install clean

On Debian the hexedit, install package is named the same so installation is with apt:

debian:~# apt-get –yes install hexedit

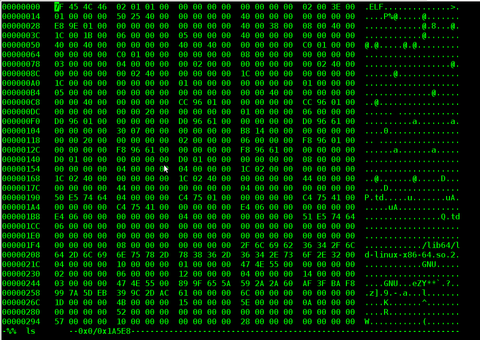
hexedit screenshot Debian Linux Squeeze

2. Hex editting with chexedit

I’ve installed chexedit the usual way from ports:

freebsd# cd /usr/ports/editors/chexedit
freebsd# make install clean

chexedit is using the ncurses text console library, so the interface is very similar to midnight commander (mc) as you see from below’s screenshot:

Chexeditor FreeBSD 7.2 OS Screenshot

Editting the binary compiled in string was an easy task with chexedit as most of the commands are clearly visible, anyways changing a certain text string contained within the binary file with some other is not easy with chexedit as you need to know the corresponding binary binary value representing each text string character.
I’m not a low level programmer, so I don’t know the binary values of each keyboard character and hence my competence came to the point where I can substitute the text string I wanted with some unreadable characters by simply filling all my text string with AA AA AA AA values…

chexedit on Debian is packaged under a deb ncurses-hexedit. Hence to install it on Deb run:

debian:~# apt-get –yes install ncurses-hexedit

Further on the binary to run chexedit on binary contained within ncurses-hexedit is:

debian:~# hexeeditor

3. Hex Editting on BSD and Linux with hte

Just after trying out chexedit, I’ve found about the existence of one even more sophisticated hexeditor console program available across both FreeBSD and Linux.
The program is called hte (sounds to me a bit like the Indian word for Elephant “Hatti” :))

hte is installable on Debian with cmd:

debian:~# apt-get install ht

On FreeBSD the port name is identical, so to install it I execed:

freebsd# cd /usr/ports/editors/hte
freebsd# make install clean

hte is started on Debian Linux (and presumably other Linux distros) with:

$ hte

On FreeBSD you need to run it with ht command:

freebsd# ht

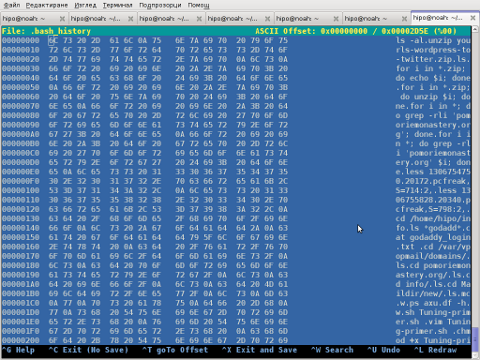
You see how hte looks like in below screenshot:

ht has the look & feel like midnight commander and I found it easier to use than chexedit and hexeditor
4. hexer VI like interface for Linux

As I was looking through the available packages ready to install, I’ve tried hexer

debian:~# apt-get install –yes hexer

hexer does follow the same standard commands like VIM, e.g. i for insert, a for append etc.

Hexer Debian Linux vim like binary editor screenshot

It was interesting to find out hexer was written by a Bulgarian fellow Petar Penchev 🙂
(Proud to be Bulgarian)

http://people.freebsd.org/~roam/ – Petar Penchev has his own page on FreeBSD.org

As a vim user I really liked the idea, the only thing I didn’t liked is there is no easy way to just substitute a string within the binary with another string.

5. hexcurse another ncurses library based hex editor

On Deb install and run via:

debian:~# apt-get –yes install hexcurse
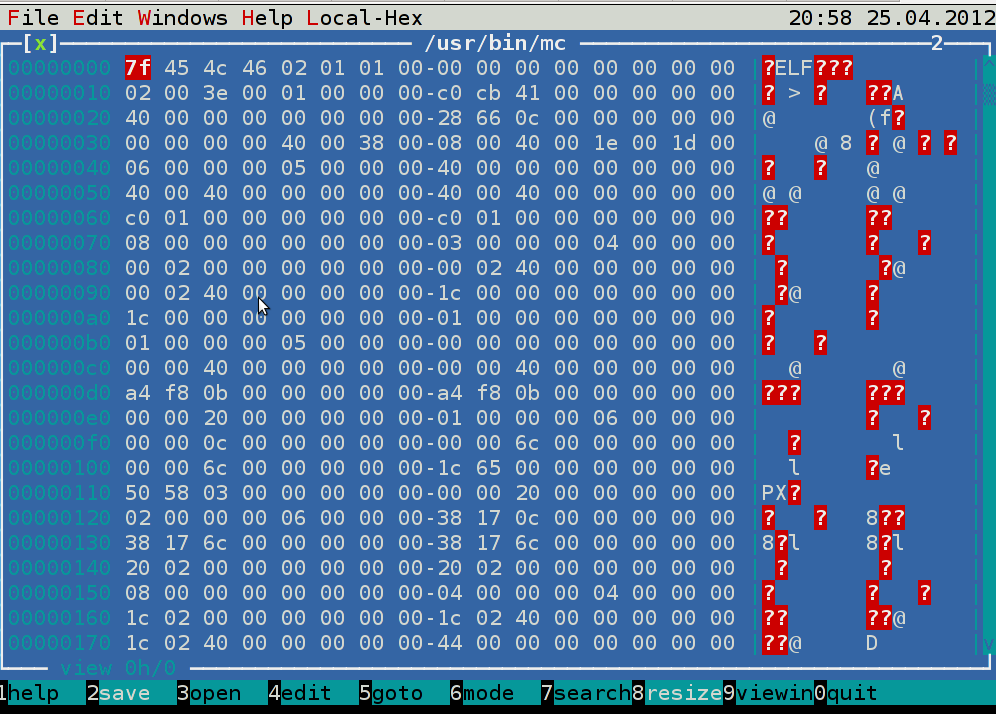
debian:~# hexcurse /usr/bin/mc

Hexcurse Debian Linux text binary editor screenshot

hexcurse is also available on FreeBSD to install it use cmd:

freebsd# cd /usr/ports/editors/hexcurse
freebsd# make install clean
….

To access the editor functions press CTRL+the first letter of the word in the bottom menu, CTRL+H, CTRL+S etc.
Something I disliked about it is the program search is always in hex, so I cannot look for a text string within the binaries with it.

6. ghex – Editting binary files in graphical environment

If you’re running a graphical environment, take a look at ghex. ghex is a gnome (graphical hex) editor.Installing ghex on Debian is with:

debian:~# apt-get –yes install ghex
….

To run ghex from terminal type:

debian:~# ghex2

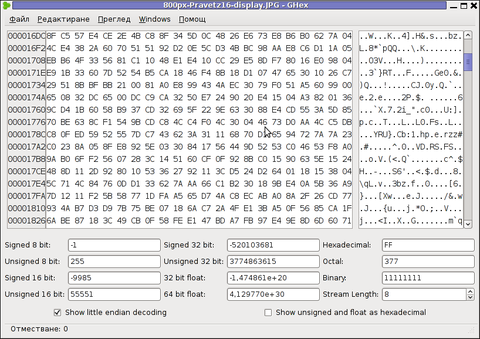
GHex2 GNOME hex binary editor screenshot

To install ghex on FreeBSD (and I assume other BSDs), install via port:

freebsd# cd /usr/ports/editors/ghex
freebsd# make install clean

Gnome hex editor have plenty of tools, useful for developers to debug binary files.

Some nice tools one can find are under the the menus:

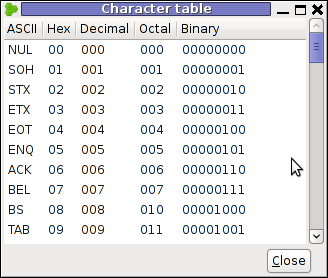
Windows -> Character Table

This will show a complete list of each keyboard sent character in ASCII, Hex, Decimal, Octal and Binary

Screenshot ghex Character table Debian Linux

Another useful embedded tool in ghex is:

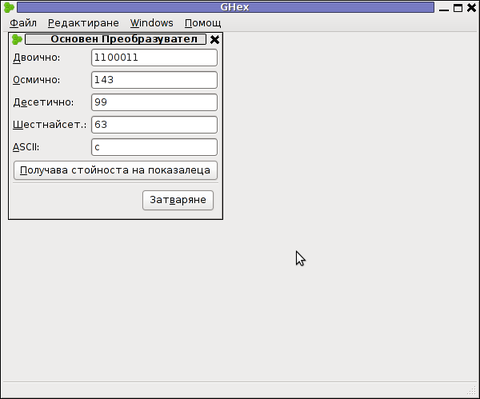
Windows -> Type Convertion Dialog

Ghex type convertion dialog screenshot

Note that if you want to use the Type Convertion Dialog tool to find the representing binary values of a text string you will have to type in the letters one by one and save the output within a text file and later you can go and use the same editor to edit the text string within the binary file you like.

I’m not a programmer but surely for programmers or people who want to learn some binary counting, this 2 ghex edmebbed tools are surely valuable.

To conclude even though there are plenty of softwares for hex editting in Linux and BSD, none of them is not so easy to use as the old DOS hexdedit tool, maybe it will be a nice idea if someone actually rewrites the DOS tool and they package it for various free operating systems, I’m sure many people will find it helpful to have a 1:1 equivalent to the DOS tool.

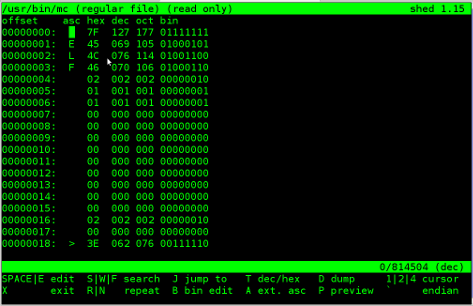
7. Shed pico like interfaced hex editor

For people, who use pico / nano as a default text editor in Linux shed will probably be the editor of choice as it follows the command shortcuts of picoOn Deb based distros to install it run:

debian:~# apt-get install –yes shed

shed pico like hex binary editor Linux

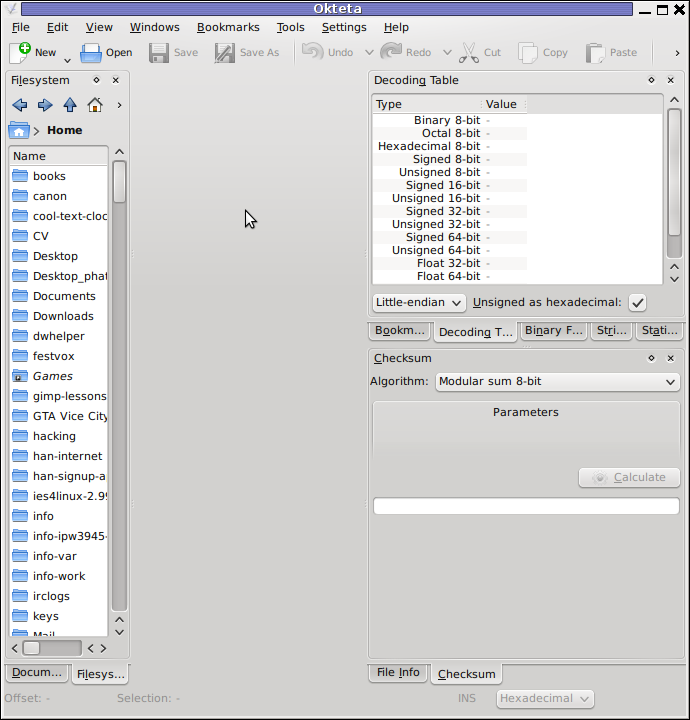
Shed has no BSD port as of time of writting.8. Okteta a KDE GUI hex editor

For KDE users, I found a program called okteta. It is available for Deb based Linuxes as deb to install it:

debian:~# apt-get –yes install okteta

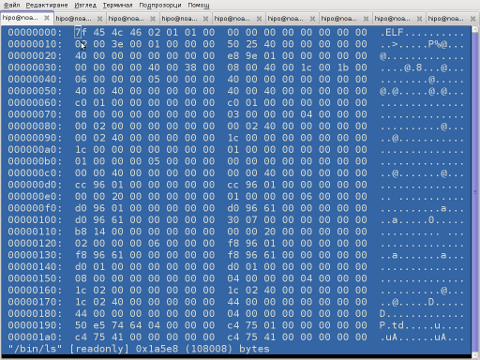
Screenshot Okteta Debian GNU / Linux Squeeze

As of time of writting this article there is no okteta port for BSDs.
Okteta has plenty of functions and even has more of a functions than ghexedit. Something distinctive for it is it supports opening multiple files in tabs.

9. lfhex a large file text editor

lfhex is said to be a large (binary) file text editor, I have not tested it myself but just run it to see how it looks like. I don’t have a need to edit large binary files too, but I guess there are people with such requirements too 🙂

lfhex - Linux The Large file hex editor

To install lfhex on Debian:

debian:~# apt-get install –yes lfhex

lfhex has also a FreeBSD port installable via:

freebsd# cd /usr/ports/editors/lfhex
freebsd# make install clean

10. Bless a GUI tool for editting large hex (binary) files

Here is the description directly taken from the BSD port /usr/ports/editors/bless

Bless is a binary (hex) editor, a program that enables you to edit files asa sequence of bytes. It is written in C# and uses the Gtk# bindings for theGTK+ toolkit.

To install and use ot on deb based Linuxes:

debian:~# apt-get install –yes bless
….

On BSD installation is again from port:

freebsd# cd /usr/ports/editors/bless
freebsd# make install clean
….

Something that makes bless, maybe more desirable choice for GUI users than ghex is its availability of tabs. Opening multiple binaries in tabs will be useful only to few heavy debuggers.

Bless GUI hex editor Debian Linux tabs opened screenshot

11. Ghextris – an ultra hard hacker tetris game 🙂

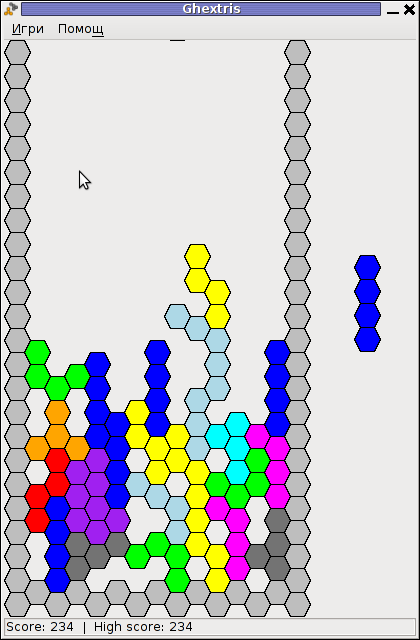
For absolute, hacker / (geeks), there is a tetris game called ghextris. The game is the hardest tetris game I ever played in my life. It requires more than regular IQ and a lot of practice if you want to become really good in this game.

To enjoy it:

debian:~# apt-get –yes install ghextris

Ultra hrad hardcore hackers game ghextris screenshot

Unfortunately there is no native port of ghextris for BSD (yet). Anyhow, it can be probably run using the Linux emulation or even compiled from source.
Well that’s all I found for hexedit-ing, I’ll be happy to hear if someone can give me some feedback on his favourite editor.

Convert Windows / MS-DOS end of line characters (CR/LF) to UNIX (LF) with sed

Tuesday, November 29th, 2011

I guess everyone has ended up with problems into a script files written under Windows using some text editor which incorrectly placed into the end of lines Windows (rn) end of lines instead of the UNIX (r).
Those who have have already take advantage of the nice tiny utility dos2unix which is capable of convert the Windows end of lines to UNIX. However some older UNIXes, like SunOS or HP-UX does not have the dos2unix utility into the list of packages one can install or even if its possible to install dos2unix it takes quite a hassle.
In that cases its good to say convertion of end of lines can be done without using external end programs by simply using UNIX sed .
The way to remove the incorrect Windows ^M (as seen in unix text editors) is by using the sed one liner:

server# sed 's/.$//' file-with-wrong-windows-eol.txt > file-with-fixed-unix-eol.txt