Posts Tagged ‘sessions’

Improve Apache Load Balancing with mod_cluster – Apaches to Tomcats Application servers Get Better Load Balancing

Thursday, March 31st, 2016

improve-apache-load-balancing-with-mod_cluster-apaches-to-tomcats-application-servers-get-better-load-balancing-mod_cluster-logo


Earlier I've blogged on How to set up Apache to to serve as a Load Balancer for 2, 3, 4  etc. Tomcat / other backend application servers with mod_proxy and mod_proxy_balancer, however though default Apache provided mod_proxy_balancer works fine most of the time, If you want a more precise and sophisticated balancing with better load distribuion you will probably want to install and use mod_cluster instead.


So what is Mod_Cluster and why use it instead of Apache proxy_balancer ?
 

Mod_cluster is an innovative Apache module for HTTP load balancing and proxying. It implements a communication channel between the load balancer and back-end nodes to make better load-balancing decisions and redistribute loads more evenly.

Why use mod_cluster instead of a traditional load balancer such as Apache's mod_balancer and mod_proxy or even a high-performance hardware balancer?

Thanks to its unique back-end communication channel, mod_cluster takes into account back-end servers' loads, and thus provides better and more precise load balancing tailored for JBoss and Tomcat servers. Mod_cluster also knows when an application is undeployed, and does not forward requests for its context (URL path) until its redeployment. And mod_cluster is easy to implement, use, and configure, requiring minimal configuration on the front-end Apache server and on the back-end servers.


So what is the advantage of mod_cluster vs mod proxy_balancer ?

Well here is few things that turns the scales  in favour for mod_cluster:


  •     advertises its presence via multicast so as workers can join without any configuration
     
  •     workers will report their available contexts
     
  •     mod_cluster will create proxies for these contexts automatically
     
  •     if you want to, you can still fine-tune this behaviour, e.g. so as .gif images are served from httpd and not from workers…
     
  •     most importantly: unlike pure mod_proxy or mod_jk, mod_cluster knows exactly how much load there is on each node because nodes are reporting their load back to the balancer via special messages
     
  •     default communication goes over AJP, you can use HTTP and HTTPS


1. How to install mod_cluster on Linux ?


You can use mod_cluster either with JBoss or Tomcat back-end servers. We'll install and configure mod_cluster with Tomcat under CentOS; using it with JBoss or on other Linux distributions is a similar process. I'll assume you already have at least one front-end Apache server and a few back-end Tomcat servers installed.

To install mod_cluster, first download the latest mod_cluster httpd binaries. Make sure to select the correct package for your hardware architecture – 32- or 64-bit.
Unpack the archive to create four new Apache module files: mod_advertise.so, mod_manager.so, mod_proxy_cluster.so, and mod_slotmem.so. We won't need mod_advertise.so; it advertises the location of the load balancer through multicast packets, but we will use a static address on each back-end server.

Copy the other three .so files to the default Apache modules directory (/etc/httpd/modules/ for CentOS).
Before loading the new modules in Apache you have to remove the default proxy balancer module (mod_proxy_balancer.so) because it is not compatible with mod_cluster.

Edit the Apache configuration file (/etc/httpd/conf/httpd.conf) and remove the line


LoadModule proxy_balancer_module modules/mod_proxy_balancer.so


Create a new configuration file and give it a name such as /etc/httpd/conf.d/mod_cluster.conf. Use it to load mod_cluster's modules:


LoadModule slotmem_module modules/mod_slotmem.so
LoadModule manager_module modules/mod_manager.so
LoadModule proxy_cluster_module modules/mod_proxy_cluster.so

In the same file add the rest of the settings you'll need for mod_cluster something like:

And for permissions and Virtualhost section

Listen 192.168.180.150:9999
<virtualhost  192.168.180.150:9999="">
<directory>
Order deny,allow
Allow from all 192.168
</directory>
ManagerBalancerName mymodcluster
EnableMCPMReceive
</virtualhost>

ProxyPass / balancer://mymodcluster/


The above directives create a new virtual host listening on port 9999 on the Apache server you want to use for load balancing, on which the load balancer will receive information from the back-end application servers. In this example, the virtual host is listening on IP address 192.168.204.203, and for security reasons it allows connections only from the 192.168.0.0/16 network.
The directive ManagerBalancerName defines the name of the cluster – mymodcluster in this example. The directive EnableMCPMReceive allows the back-end servers to send updates to the load balancer. The standard ProxyPass and ProxyPassReverse directives instruct Apache to proxy all requests to the mymodcluster balancer.
That's all you need for a minimal configuration of mod_cluster on the Apache load balancer. At next server restart Apache will automatically load the file mod_cluster.conf from the /etc/httpd/conf.d directory. To learn about more options that might be useful in specific scenarios, check mod_cluster's documentation.

While you're changing Apache configuration, you should probably set the log level in Apache to debug when you're getting started with mod_cluster, so that you can trace the communication between the front- and the back-end servers and troubleshoot problems more easily. To do so, edit Apache's configuration file and add the line LogLevel debug , then restart Apache.
 

2. How to set up Tomcat appserver for mod_cluster ?
 

Mod_cluster works with Tomcat version 6, 7 and 8, to set up the Tomcat back ends you have to deploy a few JAR files and make a change in Tomcat's server.xml configuration file.
The necessary JAR files extend Tomcat's default functionality so that it can communicate with the proxy load balancer. You can download the JAR file archive by clicking on "Java bundles" on the mod_cluster download page. It will be saved under the name mod_cluster-parent-1.2.6.Final-bin.tar.gz.

Create a new directory such as /root/java_bundles and extract the files from mod_cluster-parent-1.2.6.Final-bin.tar.gz there. Inside the directory /root/java_bundlesJBossWeb-Tomcat/lib/*.jar you will find all the necessary JAR files for Tomcat, including two Tomcat version-specific JAR files – mod_cluster-container-tomcat6-1.2.6.Final.jar for Tomcat 6 and mod_cluster-container-tomcat7-1.2.6.Final.jar for Tomcat 7. Delete the one that does not correspond to your Tomcat version.

Copy all the files from /root/java_bundlesJBossWeb-Tomcat/lib/ to your Tomcat lib directory – thus if you have installed Tomcat in

/srv/tomcat

run the command:


cp -rpf /root/java_bundles/JBossWeb-Tomcat/lib/* /srv/tomcat/lib/ .


Then edit your Tomcat's server.xml file

/srv/tomcat/conf/server.xml.


After the default listeners add the following line:


<listener classname="org.jboss.modcluster.container.catalina.standalone.ModClusterListener" proxylist="192.168.204.203:9999"> </listener>


This instructs Tomcat to send its mod_cluster-related information to IP 192.168.180.150 on TCP port 9999, which is what we set up as Apache's dedicated vhost for mod_cluster.
While that's enough for a basic mod_cluster setup, you should also configure a unique, intuitive JVM route value on each Tomcat instance so that you can easily differentiate the nodes later. To do so, edit the server.xml file and extend the Engine property to contain a jvmRoute, like this:
 

.


<engine defaulthost="localhost" jvmroute="node2" name="Catalina"></engine>


Assign a different value, such as node2, to each Tomcat instance. Then restart Tomcat so that these settings take effect.

To confirm that everything is working as expected and that the Tomcat instance connects to the load balancer, grep Tomcat's log for the string "modcluster" (case-insensitive). You should see output similar to:

Mar 29, 2016 10:05:00 AM org.jboss.modcluster.ModClusterService init
INFO: MODCLUSTER000001: Initializing mod_cluster ${project.version}
Mar 29, 2016 10:05:17 AM org.jboss.modcluster.ModClusterService connectionEstablished
INFO: MODCLUSTER000012: Catalina connector will use /192.168.180.150


This shows that mod_cluster has been successfully initialized and that it will use the connector for 192.168.204.204, the configured IP address for the main listener.
Also check Apache's error log. You should see confirmation about the properly working back-end server:

[Tue Mar 29 10:05:00 2013] [debug] proxy_util.c(2026): proxy: ajp: has acquired connection for (192.168.204.204)
[Tue Mar 29 10:05:00 2013] [debug] proxy_util.c(2082): proxy: connecting ajp://192.168.180.150:8009/ to  192.168.180.150:8009
[Tue Mar 29 10:05:00 2013] [debug] proxy_util.c(2209): proxy: connected / to  192.168.180.150:8009
[Tue Mar 29 10:05:00 2013] [debug] mod_proxy_cluster.c(1366): proxy_cluster_try_pingpong: connected to backend
[Tue Mar 29 10:05:00 2013] [debug] mod_proxy_cluster.c(1089): ajp_cping_cpong: Done
[Tue Mar 29 10:05:00 2013] [debug] proxy_util.c(2044): proxy: ajp: has released connection for (192.168.180.150)


This Apache error log shows that an AJP connection with 192.168.204.204 was successfully established and confirms the working state of the node, then shows that the load balancer closed the connection after the successful attempt.

You can start testing by opening in a browser the example servlet SessionExample, which is available in a default installation of Tomcat.
Access this servlet through a browser at the URL http://balancer_address/examples/servlets/servlet/SessionExample. In your browser you should see first a session ID that contains the name of the back-end node that is serving your request – for instance, Session ID: 5D90CB3C0AA05CB5FE13121E4B23E670.node2.

Next, through the servlet's web form, create different session attributes. If you have a properly working load balancer with sticky sessions you should always (that is, until your current browser session expires) access the same node, with the previously created session attributes still available.

To test further to confirm load balancing is in place, at the same time open the same servlet from another browser. You should be redirected to another back-end server where you can conduct a similar session test.
As you can see, mod_cluster is easy to use and configure. Give it a try to address sporadic single-back-end overloads that cause overall application slowdowns.
How to check Microsoft Windows uptime – Check server uptime in Windows server

Wednesday, May 21st, 2014

how-to-check-windows-uptime-windows-server-uptime-logo
In Linux to check uptime there is the uptime command, so how is it possible to check your system uptime – e.g. check when was last time Windows host was rebooted?

Or in other words what is Windows server equivalent to Linux's uptime command?

To check uptime on Windows OS, there is the:

net statistics server

command a shorter reference to this command is net stats srv

To run it quickest way is to press Windows (button)+r type cmd.exe and exec command in Windows command prompt:


C:UsersGeorgi>net statistics server
Server Statistics for \SM07862

Statistics since 21.05.2014 09:55:21

Sessions accepted 1
Sessions timed-out 0
Sessions errored-out 0

Kilobytes sent 0
Kilobytes received 0

Mean response time (msec) 0

System errors 0
Permission violations 0
Password violations 0

Files accessed 0
Communication devices accessed 0
Print jobs spooled 0

Times buffers exhausted

Big buffers 0
Request buffers 0

The command completed successfully.

C:UsersGeorgi>

Statistics since 21.05.2014 09:55:21 – shows when system booted last time, so to check the difference between current time and when system booted last – you need to check current time with time command


C:UsersGeorgi>time
The current time is: 16:59:26,60
Enter the new time:

Alternative command to check when Windows system booted is:

C:UsersGeorgi>systeminfo|findstr "System Boot Time"
System Boot Time: 21.05.2014, 09:54:11
System Manufacturer: HP
System Model: ProLiant BL460c G7
System Type: x64-based PC
System Directory: C:Windowssystem32
Boot Device: DeviceHarddiskVolume1
System Locale: de;German (Germany)
Time Zone: (UTC+01:00) Amsterdam, Berlin, Bern, Rome, Stockholm, Vienna

C:UsersGeorgi>

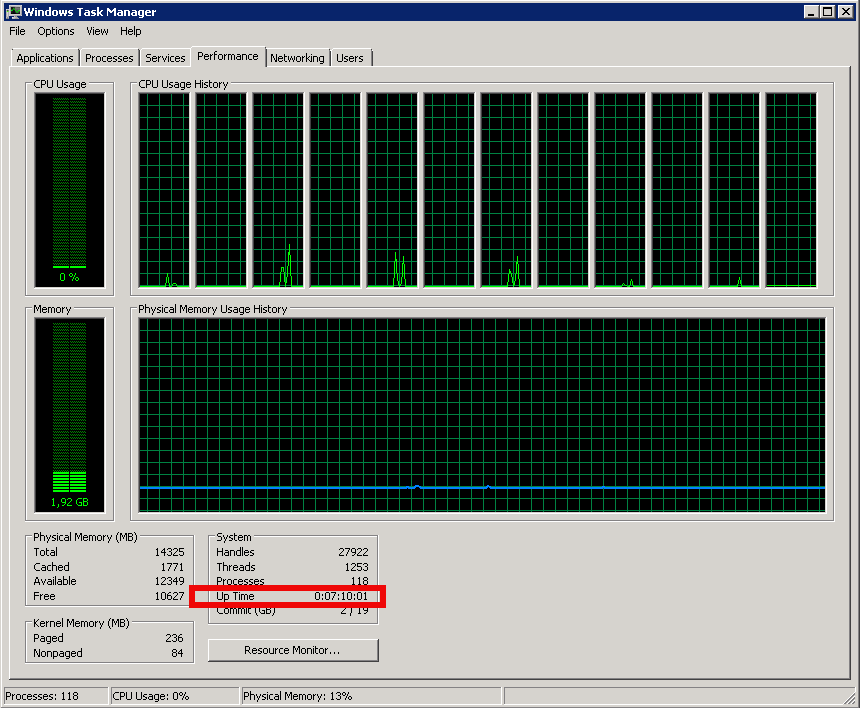
If you want to check Windows boot time "the Windows way" through the GUI, launch Windows Task Manager – run taskmgr command and go to Performance tab

images/check-windows-server-uptime-with-taskmanager-performance-tab-screenshot


Free Software Remote Desktop for Mac OS X – CoRD simple RDP remote desktop for Mac

Monday, August 4th, 2014

free-software-remote-desktop-client-to-connect-to-windows-rdp-for-MAC-OSX-CoRD-logo
If you're admin using Mac OS X Desktop or casually on a place where you have no access to a Windows / Linux PC (only have access to your girlfriend of wife MAC OS notebook) and you need to administrate Windows hosts remotely out of office hours (from home), you will need some remote desktop client for Mac OS X.

I was just recently in that situation as we were guests to a friend in Shabla village nearby Sea coast and the only near PC, I had was my wife's MacBook Air running Mac OS X.

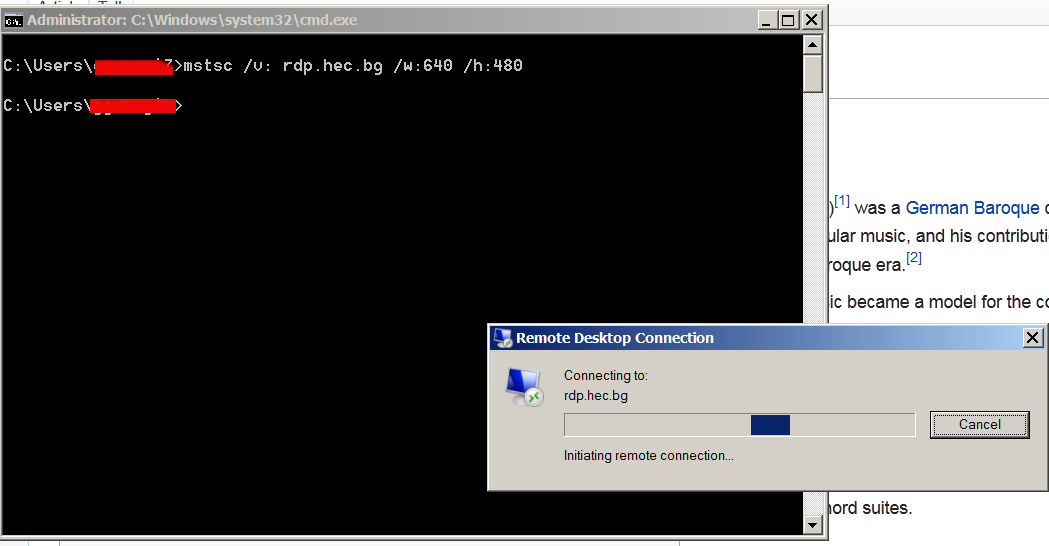
I looked in google to see if there is some default RDP (remote desktop protocol) client like MS Windows remote desktop command line client, i.e. (yes there is way to invoke remote desktop on Windows from command line 🙂 ):

mstsc [] [/v:] [/admin] [/f[ullscreen]] [/w:] [/h:] [/public] | [/span] [/edit “connection file”] [/migrate] [/?]

remote-desktop-run-from-windows-command-line-rdp-command-line-ms-windows-screenshot

I also looked if there is Mac OS X version ofLinux's rdesktop (command) or RDP Linux GUI remmina 
however  I didn't find direct port of em, neither there is default integrated RDP Client on Mac OS X, thus after researching a bit further I tried installing the first returned result in Google which was leading to Apple's AppStore – Apple – Remote Desktop.

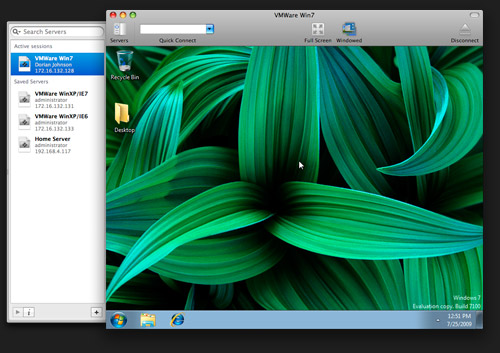
I tried installing the clicking it but it seemed my wife, didn't know her AppStore as it was her cousin which earlier configured her Mac OS PC on laptop initial install time. Contacting her cousin to ask for the password was a time eater as well as I was lazy to create new appstore account (plus I always prefer to use free software alternative when possible) …  did a quick search in Google whether there is some Open Source / Free Software Remote Desktop Client for Mac OS X and I found CoRD – Mac OS X remote desktop client for Microsoft Windows computers using the RDP protocol.
CoRD was originally ported from UNIX program rdesktop.
To have CoRD working you will need as a minimum requirement Mac OS X version 10.5 or later.

CoRD-Free-Software-Open_Source-remote-desktop-client-for-mac-osx
Here is CoRD's description quoted from its SourceForge website:

CoRD: Simple RDP Remote Desktop

Macs interact well with Windows, and with CoRD the experience is a bit smoother. Great for working on the office terminal server, administrating servers or any other time you'd like your PC to be a bit closer without leaving your Mac. CoRD allows you to view each session in its own window, or save space with all sessions in one window. Scale session windows to whatever size fits you—the screen is resized automatically. Enter full screen mode and feel like you're actually at the computer. The clipboard is automatically synchronized between CoRD and the server. For system administrators, CoRD creates a simpler workflow by allowing you to save server information, then quickly connect to that server by using HotKeys or the server drawer. This makes quickly connecting to a specific server easy, even when managing many servers.

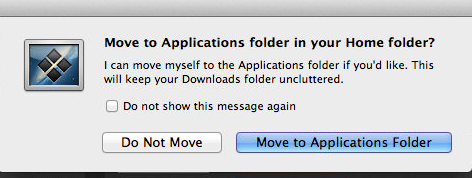
Installing CoRD is pretty, straight forward, just download unzip the archive and run it:

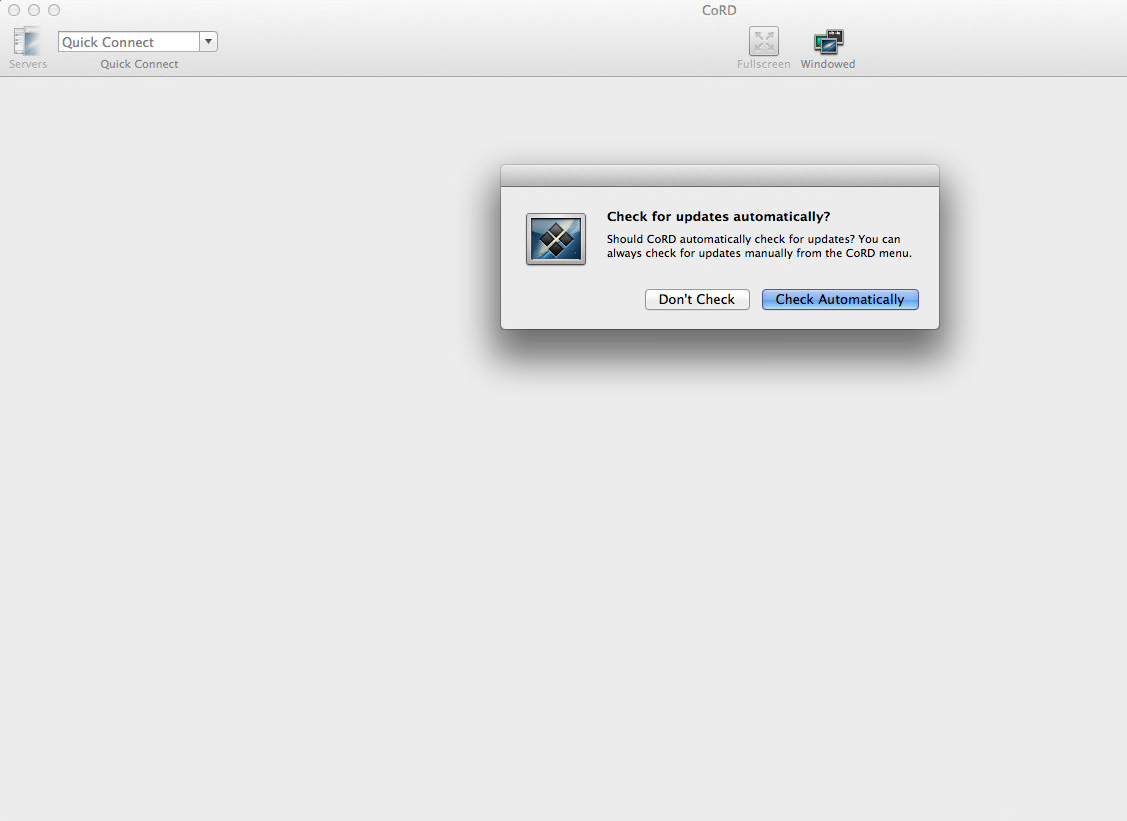
cord-remote-desktop-free-software-client-mac-osx-install-warning-screenshot

cord-remote-desktop-free-software-client-mac-osx-install-warning-screenshot.png

cord-open-source-rdp-client-mac-osx

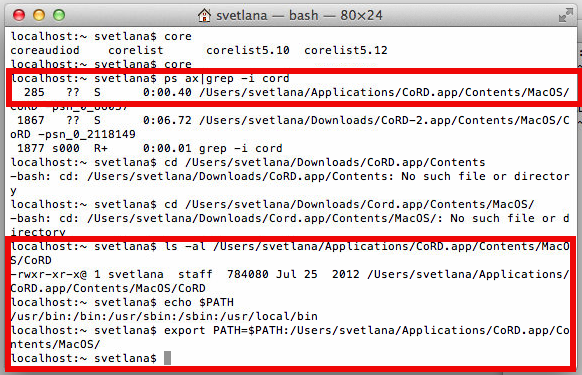
To later run Cord either look it up in Finder or if you prefer like me to access it from command line, you will need to export CoRD PATH in Mac Terminal $PATH variable:

add-cord-remote-desktop-lcient-command-to-default-path-mac-osx

As you see in above screenshot to find out which directory is CoRD located, I've grepped through the processes with

ps ax | grep cord

and then added it to PATH with:

export PATH=$PATH:/Users/svetlana/Application/CoRD.app/Contents/MacOS/

Remembering CoRD to type it each time is annoying, thus to make CorD be accessed like on Linux with rdesktop (easy to remember command), I've used alias:

alias rdesktop='CoRD'

To make the new PATH and alias permanent for the user, I've added it to (/Users/svetlana) – ~/.profile

echo "export PATH=$PATH:/Users/svetlana/Application/CoRD.app/Contents/MacOS/" >> ~/.profile
echo "alias rdesktop='CoRD'" >> ~/.profile


Current CoRD MacOSX version is 0.5.7, for personal ease if I need to install it in future time, I've made my own mirror of cord here.

There is also Microsoft Remote Desktop client for Mac OS 2.1.1 however this version was released back in 2011 and is outdated (not supported for use with Mac OS X v10.7 (Lion) or later).

Create video from linux console / terminal – Record ssh terminal session as video with asciinema, showterm, termrecord

Thursday, August 21st, 2014

/var/www/images/asciinema-create-and-upload-ascii-terminal-console-videos-debian-gnu-linux-screenshot
You probably already know of existence of two Linux commands available by default across all Linux distributions scriptwhich makes a text based save of all commands executed on console and scriptreplay – which playbacks saved script command typescripts. Using this two you can save terminal sessions without problem, but in order to play them you need to have a Linux / UNIX computer at hand.
However If you want to make a short video record displaying what you have done on Linux console / terminal, you have few other options with which you can share your Linux terminal sessions on the web. In this short article I will go through 3 popular tools to do that – asciinema, showterm and termrecord.

1. Asciinema Current most popular tool to create video from Linux terminal

Here is how ASCIINEMA's website describes it:

"Asciinema is a free and open source solution for recording the terminal sessions and sharing them on the web."

apt-get –yes install python-pip

To install it with pip python package installer

pip install asciinema

Or if the machine is in DMZ secured zone and have access to the internet over a Proxy:

pip install –proxy=http://internet-proxy-host.com:8080 asciinema

It will get installed in /usr/local/bin/asciinema to make a terminal screen video capture just launch it (nomatter if it is privileged or non-privileged user):

asciinema

To finalize and upload the recorded terminal session, just type exit (to exit the shell), hopefully it will get you an upload link.

exit

You can claim authorship on video you issue:

asciinema auth

Use can then embed the new Linux terminal session video to your website.
 

2. ShowTerm – "It's showtime in a terminal near you!"

ShowTerm have same features as AsciiNema. Just like AsciiNema, what it does is it creates a record of your terminal session and then uploads it to showterm.io website, providing you a link over which you can share your terminal lesson / ascii art video / whatever with your friends. ShowTerm is written in, the world famous Ruby on Railsruby web development framework, so you will need to have ruby programming language installed before use. As showterm uses the Internet to upload video, so it is not really an option to create videos from remote terminal session on servers which are in DMZ with no access to the internet, I will explain in a little while how to create video of your terminal / console for private purpose on local server and then share it online on your own site.

a) To install ShowTerm:

– First be sure to have ruby installed:

On Debian / Ubuntu and derives deb Linux, as supersuser:

apt-get install –yes ruby curl

On CentOS / RHEL / Fedora Linux

yum -y install ruby curl

NB! curl is real requirement but as showterm.io website recommends downloading the script with it and later same curl tool is used to upload the created showterm file to http://showterm.io .

– Then to finalize install, download showterm script and make it executable

curl showterm.io/showterm > ~/bin/showterm

% Total    % Received % Xferd  Average Speed   Time    Time     Time  Current
                                       Dload  Upload   Total   Spent    Left  Speed
100  2007  100  2007    0     0   2908      0 –:–:– –:–:– –:–:–  8468

mkdir ~/bin
chmod +x ~/bin/showterm

This will save the script into your home folder ~/bin/showterm

b) Using showterm

To run it to create video from your terminal simply start it and do whatver you will in terminal.

~/bin/showterm

After you're done with the video you like type exit

exit

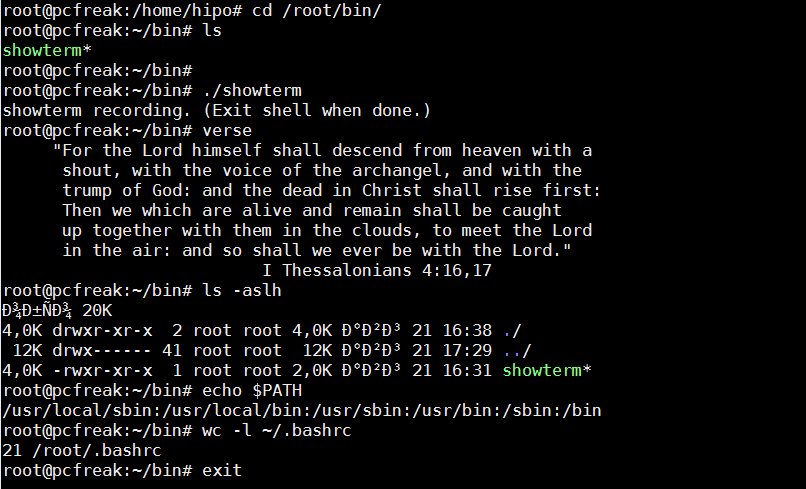
create-video-from-your-linux-console-terminal-with-showterm-screenshot

Note that if your server is behind a proxy curl will not understand proxy set inside Linux shell variable with http_proxy var, to upload the file if you're behind a proxy you will have to pass to curl –proxy setting, once you get the curl line invoked after failure to upload use something like:

curl –proxy $(echo $http_proxy)  https://showterm.herokuapp.com/scripts –data-urlencode cols=80 –data-urlencode lines=24 –data-urlencode scriptfile@/tmp/yCudk.script –data-urlencode timingfile@/tmp/lkiXP.timing

Where assuming proxy is defined already inside http_proxy shell variable.


3. Creating video from your terminal / console on Linux for local (private) use with TermRecord

In my humble view TermRecord is the most awesome of all the 3, as it allows you to make records with an own generated Javascript based video player and allows you to keep the videos on your own side, guaranteeing you independence of external services. Its
 

pip install TermRecord

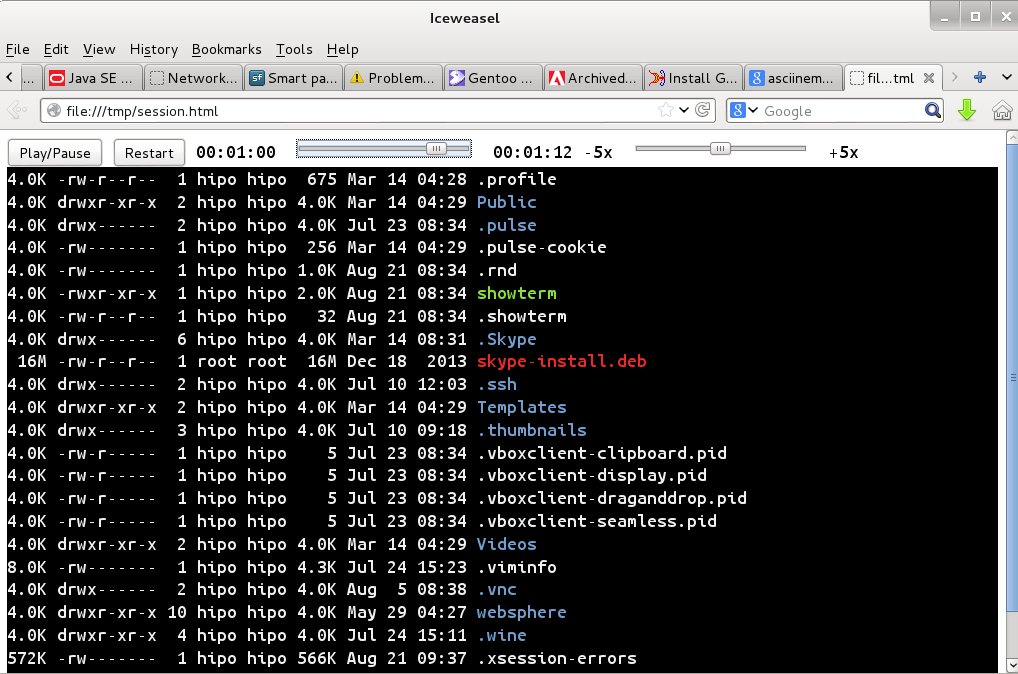
TermRecord -o /tmp/session.html


You can further access the video in a local browser in Firefox / Chrome / Epiphany type in URL address bar:

/tmp/session.html to play the video

create-video-from-terminal-console-on-gnu-linux-howto-screenshot-with-termrecord

TermRecord uses term.js javascript to create the video web player and play the video which is directly encoded inside session.html.
If you want to share the video online, place it on your webserver and you're done 🙂
Check out my TermRecord generated video terminal sample session here.
 

Fixing PHP Fatal error: Call to undefined function session_register()

Monday, July 1st, 2013

While moving Website from older Debian 6 to Debian 7 server with Apache I encountered PHP Fatal error:

PHP Fatal error:  Call to undefined function session_register() in /var/www2/site/www/include/modules/core/session.class.php on line 7, referer: http://192.168.1.9/

In PHP newer than PHP 5.3, session_register(): function is obsolete, there is no need anymore to have this function initiated before using SESSION variables.

Comment out  in PHP files prompting error in Apache error.log everywhere where matched:

session_register();
session_register('session');


to look like this:
 

//session_register();
//session_register('session');

In newer PHP versions to initialize sessions:

 $_SESSION['session']="session_variable";

Before test it again in browser, restart Browser and Apache server to make sure some caching from Apache or Browser doesn't influence. That's all now site  works fine 🙂

How to check and repair broken MySQL ISAM tables

Monday, July 11th, 2011

MySQL repair artistic picture

If you are stuffed with errors in /var/log/mysqld.log similar to:

110711 11:00:48 [ERROR] /usr/libexec/mysqld: Incorrect information in file: './anyboots_moncler_spaccio/zen_seo_cache.frm'
110711 11:00:48 [ERROR] /usr/libexec/mysqld: Incorrect information in file: './anyboots_moncler_spaccio/zen_sessions.frm'

This is a sure sign something terrible has happened with your mysql database tables that lead to corruption.
Having corrupt table in mysql installation can severely lead to data loss as well as significantly reduce the speed and performance of a MySQL server in this awful times mysqlcheck is the best friend of the administrator, here is how you can check and repair broken tables in MySQL server:

mysql-server:~# mysqlcheck --all-databases -u root -p
chillor_hjbgl.vn_users OK
chillor_lul.mybb_adminlog OK
chillor_lul.mybb_adminoptions OK
chillor_lul.mybb_adminsessions OK
chillor_lul.mybb_adminviews OK
chillor_lul.mybb_announcements OK
...

You will notice the corrupt sql tables will be reported as corrupt by the tool and mysqlcheck will try it’s best to recover the corrupt tables.

In most cases this should be enough to recover corrupt tables.

Make custom installed Mozilla Firefox restore tab sessions on Debian GNU / Linux

Tuesday, October 30th, 2012

How to make custom installed Firefox restore tabs on browser close up - firefox restore website windows sessions

As my blog readers might, know I'm running Debian Squeeze on my notebook as a Desktop OS. Until some time I used to be a big fan of Epiphany but lately I started not using Epiphany so much because of its too frequent crashes while browsing a website that contains Flash. The problem of course is not in Epiphany itself but in the flash but still, as this is really disturbing if someone works, I nowdays use only Firefox. I tried for a while to use IceWeasel, but IceWeasel (Firefox) version is too old:

hipo@noah:~$ iceweasel –version
Mozilla Iceweasel 3.5.17, Copyright (c) 1998 – 2011 mozilla.org

Thus I use a custom download binary release from Firefox's website the one distributed as of time of writing post in archive firefox-16.0.2.tar.bz2

One of main advantages of installing the custom binary from Firefox, website is it auto updates and I'm always running the latest Release on myLinux Desktop, something IceWeasel still doesn't.

My current firefox version is:

hipo@noah:/opt/firefox$ /opt/firefox/firefox –version
Mozilla Firefox 16.0.2

All works fine with it, except two little things;

  • One is Firefox development team compiled the Browser to still use OSS and not the newer and used almost by all programs ALSA (Advanced Linux Sound Architecture) – something that is unfortunately irreversalble
     
  • Secondly  (which is the reason to write this) Firefox Linux version – doesn't by default Restore closed browser open tab websites! – e.g. session restore in those Firefox version is not working.

In Windows Firefox usually asks, while closing the whole browser, if the user wants to Save Browser Session, on the Linux version this is not default behavior, maybe developers have to answer why?

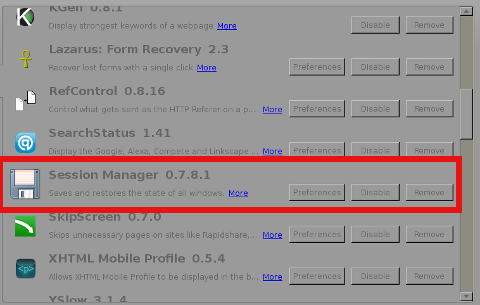
I was not sure if this would work but I went googling about a plugin to make Firefox Restore Sessions and tried installing first query matched FF plugin Session Manager

I was a bit sceptical that this would work

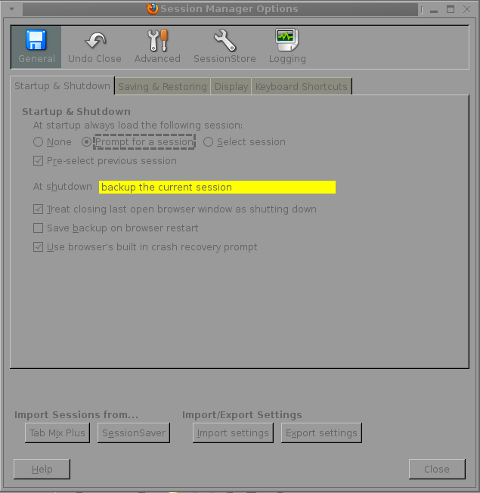
and actually just intalling the plugin didn't changed Firefox to save websites open in tabs on a close. After however I configured the plugin from FF menus:

Tools -> Session Manager -> Session Manager Options Tab restoration in Firefox worked

In below screnshot from Session Manager Options you can see my exact selected settings


Well that's all, finally I can remember what I had my browser before PC shutdown 🙂

Where does Debian GNU / Linux Apache + PHP stores session files?

Tuesday, November 22nd, 2011

In order to debug some PHP session problems on Debian, I needed to check the count of existing session files.
When PHP is compiled from source usually, by default sessions are stored in /tmp directory, however this is not the case on Debian.

Debian’s PHP session directory is different, there the sessions are stored in the directory:

/var/lib/php5

I’ve discovered the session directory location by reading Debian’s cron shell script, which delete session files on every 30 minutes.

Here is the file content:

debian~# cat /etc/cron.d/php5
# /etc/cron.d/php5: crontab fragment for php5
# This purges session files older than X, where X is defined in seconds
# as the largest value of session.gc_maxlifetime from all your php.ini
# files, or 24 minutes if not defined. See /usr/lib/php5/maxlifetime

# Look for and purge old sessions every 30 minutes
09,39 * * * * root [ -x /usr/lib/php5/maxlifetime ] &&
[ -d /var/lib/php5 ] && find /var/lib/php5/ -type f -cmin +$(/usr/lib/php5/maxlifetime) -delete

To check the amount of existing PHP opened session files:

debian:~# ls -1 /var/lib/php5|wc -l
14049