Posts Tagged ‘argument’

Reinstall all Debian packages with a copy of apt deb package list from another working Debian Linux installation

Wednesday, July 29th, 2020

Reinstall-all-Debian-packages-with-copy-of-apt-packages-list-from-another-working-Debian-Linux-installation

Few days ago, in the hurry in the small hours of the night, I've done something extremely stupid. Wanting to move out a .tar.gz binary copy of qmail installation to /var/lib/qmail with all the dependent qmail items instead of extracting to admin user /root directory (/root), I've extracted it to the main Operating system root / directrory.
Not noticing this, I've quickly executed rm -rf var with the idea to delete all directory tree under /root/var just 3 seconds later, I've realized I'm issuing the rm -rf var with the wrong location WITH a root user !!!! Being scared on what I've done, I've quickly pressed CTRL+C to immedately cancel the deletion operation of my /var.
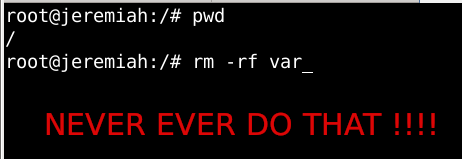
wrong-system-var-rm-linux-dont-do-that-ever-or-your-system-will-end-up-irreversably-damaged

But as you can guess, since the machine has an Slid State Drive drive and SSD memory drive are much more faster in I/O operations than the classical ATA / SATA disks. I was not quick enough to cancel the operation and I've noticed already some part of my /var have been R.I.P-pped in the heaven of directories.

This was ofcourse upsetting so for a while I rethinked the situation to get some ideas on what I can do to recover my system ASAP!!! and I had the idea of course to try to reinstall All my installed .deb debian packages to restore system closest to the normal, before my stupid mistake.

Guess my unpleasent suprise when I have realized dpkg and respectively apt-get apt and aptitude package management tools cannot anymore handle packages as Debian Linux's package dependency database has been damaged due to missing dpkg directory 


/var/lib/dpkg 


Oh man that was unpleasent, especially since I've installed plenty of stuff that is custom on my Mate based desktop and, generally reinstalling it updating the sytem to the latest Debian security updates etc. will be time consuming and painful process I wanted to omit.

So of course the logical thing to do here was to try to somehow recover somehow a database copy of /var/lib/dpkg  if that was possible, that of course led me to the idea to lookup for a way to recover my /var/lib/dpkg from backup but since I did not maintained any backup copy of my OS anywhere that was not really possible, so anyways I wondered whether dpkg does not keep some kind of database backups somewhere in case if something goes wrong with its database.
This led me to this nice Ubuntu thred which has pointed me to the part of my root rm -rf dpkg db disaster recovery solution.
Luckily .deb package management creators has thought about situation similar to mine and to give the user a restore point for /var/lib/dpkg damaged database

/var/lib/dpkg is periodically backed up in /var/backups

A typical /var/lib/dpkg on Ubuntu and Debian Linux looks like so:
 

hipo@jeremiah:/var/backups$ ls -l /var/lib/dpkg
total 12572
drwxr-xr-x 2 root root    4096 Jul 26 03:22 alternatives
-rw-r–r– 1 root root      11 Oct 14  2017 arch
-rw-r–r– 1 root root 2199402 Jul 25 20:04 available
-rw-r–r– 1 root root 2199402 Oct 19  2017 available-old
-rw-r–r– 1 root root       8 Sep  6  2012 cmethopt
-rw-r–r– 1 root root    1337 Jul 26 01:39 diversions
-rw-r–r– 1 root root    1223 Jul 26 01:39 diversions-old
drwxr-xr-x 2 root root  679936 Jul 28 14:17 info
-rw-r—– 1 root root       0 Jul 28 14:17 lock
-rw-r—– 1 root root       0 Jul 26 03:00 lock-frontend
drwxr-xr-x 2 root root    4096 Sep 17  2012 parts
-rw-r–r– 1 root root    1011 Jul 25 23:59 statoverride
-rw-r–r– 1 root root     965 Jul 25 23:59 statoverride-old
-rw-r–r– 1 root root 3873710 Jul 28 14:17 status
-rw-r–r– 1 root root 3873712 Jul 28 14:17 status-old
drwxr-xr-x 2 root root    4096 Jul 26 03:22 triggers
drwxr-xr-x 2 root root    4096 Jul 28 14:17 updates

Before proceeding with this radical stuff to move out /var/lib/dpkg/info from another machine to /var mistakenyl removed oned. I have tried to recover with the well known:

  • extundelete
  • foremost
  • recover
  • ext4magic
  • ext3grep
  • gddrescue
  • ddrescue
  • myrescue
  • testdisk
  • photorec

Linux file deletion recovery tools from a USB stick loaded with a Number of LiveCD distributions, i.e. tested recovery with:

  • Debian LiveCD
  • Ubuntu LiveCD
  • KNOPPIX
  • SystemRescueCD
  • Trinity Rescue Kit
  • Ultimate Boot CD


but unfortunately none of them couldn't recover the deleted files … 

The reason why the standard file recovery tools could not recover ?

My assumptions is after I've done by rm -rf var; from sysroot,  issued the sync (- if you haven't used it check out man sync) command – that synchronizes cached writes to persistent storage and did a restart from the poweroff PC button, this should have worked, as I've recovered like that in the past) in a normal Sys V System with a normal old fashioned blocks filesystem as EXT2 . or any other of the filesystems without a journal, however as the machine run a EXT4 filesystem with a journald and journald, this did not work perhaps because something was not updated properly in /lib/systemd/systemd-journal, that led to the situation all recently deleted files were totally unrecoverable.

1. First step was to restore the directory skele of /var/lib/dpkg

# mkdir -p /var/lib/dpkg/{alternatives,info,parts,triggers,updates}


2. Recover missing /var/lib/dpkg/status  file

The main file that gives information to dpkg of the existing packages and their statuses on a Debian based systems is /var/lib/dpkg/status

# cp /var/backups/dpkg.status.0 /var/lib/dpkg/status


3. Reinstall dpkg package manager to make package management working again

Say a warm prayer to the Merciful God ! and do:

# apt-get download dpkg
# dpkg -i dpkg*.deb


4. Reinstall base-files .deb package which provides basis of a Debian system

Hopefully everything will be okay and your dpkg / apt pair will be in normal working state, next step is to:

# apt-get download base-files
# dpkg -i base-files*.deb


5. Do a package sanity and consistency check and try to update OS package list

Check whether packages have been installed only partially on your system or that have missing, wrong or obsolete control  data  or  files.  dpkg  should suggest what to do with them to get them fixed.

# dpkg –audit

Then resynchronize (fetch) the package index files from their sources described in /etc/apt/sources.list

# apt-get update


Do apt db constistency check:

#  apt-get check


check is a diagnostic tool; it updates the package cache and checks for broken dependencies.
 

Take a deep breath ! …

Do :

ls -l /var/lib/dpkg
and compare with the above list. If some -old file is not present don't worry it will be there tomorrow.

Next time don't forget to do a regular backup with simple rsync backup script or something like Bacula / Amanda / Time Vault or Clonezilla.
 

6. Copy dpkg database from another Linux system that has a working dpkg / apt Database

Well this was however not the end of the story … There were still many things missing from my /var/ and luckily I had another Debian 10 Buster install on another properly working machine with a similar set of .deb packages installed. Therefore to make most of my programs still working again I have copied over /var from the other similar set of package installed machine to my messed up machine with the missing deleted /var.

To do so …
On Functioning Debian 10 Machine (Working Host in a local network with IP 192.168.0.50), I've archived content of /var:

linux:~# tar -czvf var_backup_debian10.tar.gz /var

Then sftped from Working Host towards the /var deleted broken one in my case this machine's hostname is jericho and luckily still had SSHD and SFTP running processes loaded in memory:

jericho:~# sftp root@192.168.0.50
sftp> get var_backup_debian10.tar.gz

Now Before extracting the archive it is a good idea to make backup of old /var remains somewhere for example somewhere in /root 
just in case if we need to have a copy of the dpkg backup dir /var/backups

jericho:~# cp -rpfv /var /root/var_backup_damaged

 
jericho:~# tar -zxvf /root/var_backup_debian10.tar.gz 
jericho:/# mv /root/var/ /

Then to make my /var/lib/dpkg contain the list of packages from my my broken Linux install I have ovewritten /var/lib/dpkg with the files earlier backupped before  .tar.gz was extracted.

jericho:~# cp -rpfv /var /root/var_backup_damaged/lib/dpkg/ /var/lib/


7. Reinstall All Debian  Packages completely scripts


I then tried to reinstall each and every package first using aptitude with aptitude this is done with

# aptitude reinstall '~i'

However as this failed, tried using a simple shell loop like below:

for i in $(dpkg -l |awk '{ print $2 }'); do echo apt-get install –reinstall –yes $i; done

Alternatively, all .deb package reninstall is also possible with dpkg –get-selections and with awk with below cmds:

dpkg –get-selections | grep -v deinstall | awk '{print $1}' > list.log;
awk '$1=$1' ORS=' ' list.log > newlist.log
;
apt-get install –reinstall $(cat newlist.log)

It can also be run as one liner for simplicity:

dpkg –get-selections | grep -v deinstall | awk '{print $1}' > list.log; awk '$1=$1' ORS=' ' list.log > newlist.log; apt-get install –reinstall $(cat newlist.log)

This produced a lot of warning messages, reporting "package has no files currently installed" (virtually for all installed packages), indicating a severe packages problem below is sample output produced after each and every package reinstall … :

dpkg: warning: files list file for package 'iproute' missing; assuming package has no files currently installed
dpkg: warning: files list file for package 'brscan-skey' missing; assuming package has no files currently installed
dpkg: warning: files list file for package 'libapache2-mod-php7.4' missing; assuming package has no files currently installed
dpkg: warning: files list file for package 'libexpat1:amd64' missing; assuming package has no files currently installed
dpkg: warning: files list file for package 'libexpat1:i386' missing; assuming package has no files currently installed
dpkg: warning: files list file for package 'php5.6-readline' missing; assuming package has no files currently installed
dpkg: warning: files list file for package 'linux-headers-4.19.0-5-amd64' missing; assuming package has no files currently installed
dpkg: warning: files list file for package 'libgraphite2-3:amd64' missing; assuming package has no files currently installed
dpkg: warning: files list file for package 'libgraphite2-3:i386' missing; assuming package has no files currently installed
dpkg: warning: files list file for package 'libbonoboui2-0:amd64' missing; assuming package has no files currently installed
dpkg: warning: files list file for package 'libxcb-dri3-0:amd64' missing; assuming package has no files currently installed
dpkg: warning: files list file for package 'libxcb-dri3-0:i386' missing; assuming package has no files currently installed
dpkg: warning: files list file for package 'liblcms2-2:amd64' missing; assuming package has no files currently installed
dpkg: warning: files list file for package 'liblcms2-2:i386' missing; assuming package has no files currently installed
dpkg: warning: files list file for package 'libpixman-1-0:amd64' missing; assuming package has no files currently installed
dpkg: warning: files list file for package 'libpixman-1-0:i386' missing; assuming package has no files currently installed
dpkg: warning: files list file for package 'gksu' missing; assuming package has no files currently installed
dpkg: warning: files list file for package 'liblogging-stdlog0:amd64' missing; assuming package has no files currently installed
dpkg: warning: files list file for package 'mesa-vdpau-drivers:amd64' missing; assuming package has no files currently installed
dpkg: warning: files list file for package 'mesa-vdpau-drivers:i386' missing; assuming package has no files currently installed
dpkg: warning: files list file for package 'libzvbi0:amd64' missing; assuming package has no files currently installed
dpkg: warning: files list file for package 'libzvbi0:i386' missing; assuming package has no files currently installed
dpkg: warning: files list file for package 'libcdparanoia0:amd64' missing; assuming package has no files currently installed
dpkg: warning: files list file for package 'libcdparanoia0:i386' missing; assuming package has no files currently installed
dpkg: warning: files list file for package 'python-gconf' missing; assuming package has no files currently installed
dpkg: warning: files list file for package 'php5.6-cli' missing; assuming package has no files currently installed
dpkg: warning: files list file for package 'libpaper1:amd64' missing; assuming package has no files currently installed
dpkg: warning: files list file for package 'mixer.app' missing; assuming package has no files currently installed

After some attempts I found a way to be able to work around the warning message, for each package by simply reinstalling the package reporting the issue with

apt –reinstall $package_name


Though reinstallation started well and many packages got reinstalled, unfortunately some packages such as apache2-mod-php5.6 and other php related ones  started failing during reinstall ending up in unfixable states right after installation of binaries from packages was successfully placed in its expected locations on disk. The failures occured during the package setup stage ( dpkg –configure $packagename) …

The logical thing to do is a recovery attempt with something like the usual well known by any Debian admin:

apt-get install –fix-missing

As well as Manual requesting to reconfigure (issue re-setup) of all installed packages also did not produced a positive result

dpkg –configure -a

But many packages were still failing due to dpkg inability to execute some post installation scripts from respective .deb files.
To work around that and continue installing the rest of packages I had to manually delete all files related to the failing package located under directory 

/var/lib/dpkg/info#

For example to omit the post installation failure of libapache2-mod-php5.6 and have a succesful install of the package next time I tried reinstall, I had to delete all /var/lib/dpkg/info/libapache2-mod-php5.6.postrm, /var/lib/dpkg/info/libapache2-mod-php5.6.postinst scripts and even sometimes everything like libapache2-mod-php5.6* that were present in /var/lib/dpkg/info dir.

The problem with this solution, however was the package reporting to install properly, but the post install script hooks were still not in placed and important things as setting permissions of binaries after install or applying some configuration changes right after install was missing leading to programs failing to  fully behave properly or even breaking up even though showing as finely installed …

The final solution to this problem was radical.
I've used /var/lib/dpkg database (directory) from ther other working Linux machine with dpkg DB OK found in var_backup_debian10.tar.gz (linux:~# host with a working dpkg database) and then based on the dpkg package list correct database responding on jericho:~# to reinstall each and every package on the system using Debian System Reinstaller script taken from the internet.
Debian System Reinstaller works but to reinstall many packages, I've been prompted again and again whether to overwrite configuration or keep the present one of packages.
To Omit the annoying [Y / N ] text prompts I had made a slight modification to the script so it finally looked like this:
 

#!/bin/bash
# Debian System Reinstaller
# Copyright (C) 2015 Albert Huang
# Copyright (C) 2018 Andreas Fendt

# This program is free software: you can redistribute it and/or modify
# it under the terms of the GNU General Public License as published by
# the Free Software Foundation, either version 3 of the License, or
# (at your option) any later version.

# This program is distributed in the hope that it will be useful,
# but WITHOUT ANY WARRANTY; without even the implied warranty of
# MERCHANTABILITY or FITNESS FOR A PARTICULAR PURPOSE.  See the
# GNU General Public License for more details.

# You should have received a copy of the GNU General Public License
# along with this program.  If not, see <http://www.gnu.org/licenses/>.

# —
# This script assumes you are using a Debian based system
# (Debian, Mint, Ubuntu, #!), and have sudo installed. If you don't
# have sudo installed, replace "sudo" with "su -c" instead.

pkgs=`dpkg –get-selections | grep -w 'install$' | cut -f 1 |  egrep -v '(dpkg|apt)'`

for pkg in $pkgs; do
    echo -e "\033[1m   * Reinstalling:\033[0m $pkg"    

    apt-get –reinstall -o Dpkg::Options::="–force-confdef" -o Dpkg::Options::="–force-confold" -y install $pkg || {
        echo "ERROR: Reinstallation failed. See reinstall.log for details."
        exit 1
    }
done


 debian-all-packages-reinstall.sh working modified version of Albert Huang and Andreas Fendt script  can be also downloaded here.

Note ! Omitting the text confirmation prompts to install newest config or keep maintainer configuration is handled by the argument:


-o Dpkg::Options::="–force-confold


I however still got few NCurses Console selection prompts during the reinstall of about 3200+ .deb packages, so even with this mod the reinstall was not completely automatic.

Note !  During the reinstall few of the packages from the list failed due to being some old unsupported packages this was ejabberd, ircd-hybrid and a 2 / 3 more.
This failure was easily solved by completely purging those packages with the usual

# dpkg –purge $packagename

and reruninng  debian-all-packages-reinstall.sh on each of the failing packages.

Note ! The failing packages were just old ones left over from Debian 8 and Debian 9 before the apt-get dist-upgrade towards 10 Duster.
Eventually I got a success by God's grance, after few hours of pains and trials, ending up in a working state package database and a complete set of freshly reinstalled packages.

The only thing I had to do finally is 2 hours of tampering why GNOME did not automatically booted after the system reboot due to failing gdm
until I fixed that I've temprary used ligthdm (x-display-manager), to do I've

dpkg –reconfigure gdm3
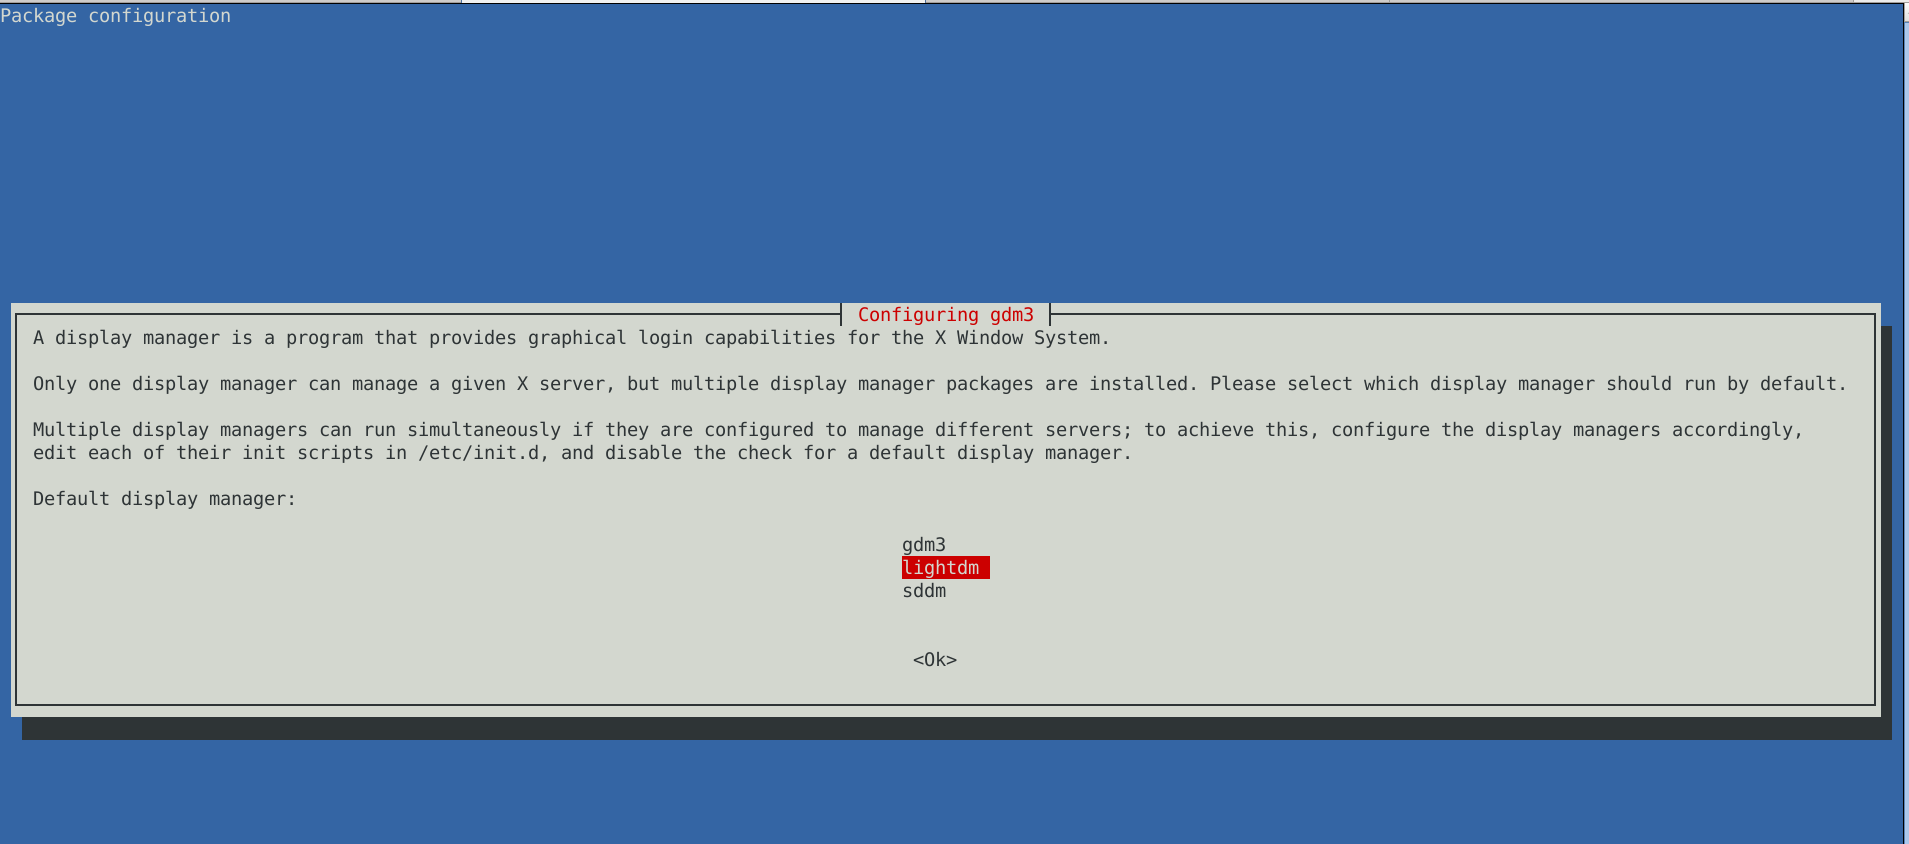
lightdm-x-display-manager-screenshot-gdm3-reconfige

 to work around this I had to also reinstall few libraries, reinstall the xorg-server, reinstall gdm and reinstall the meta package for GNOME, using below set of commands:
 

apt-get install –reinstall libglw1-mesa libglx-mesa0
apt-get install –reinstall libglu1-mesa-dev
apt install –reinstallgsettings-desktop-schemas
apt-get install –reinstall xserver-xorg-video-intel
apt-get install –reinstall xserver-xorg
apt-get install –reinstall xserver-xorg-core
apt-get install –reinstall task-desktop
apt-get install –reinstall task-gnome-desktop


As some packages did not ended re-instaled on system because on the original host from where /var/lib/dpkg db was copied did not have it I had to eventually manually trigger reinstall for those too:


apt-get install –reinstall –yes vlc
apt-get install –reinstall –yes thunderbird
apt-get install –reinstall –yes audacity
apt-get install –reinstall –yes gajim
apt-get install –reinstall –yes slack remmina
apt-get install –yes k3b
pt-get install –yes gbgoffice
pt-get install –reinstall –yes skypeforlinux
apt-get install –reinstall –yes vlc
apt-get install –reinstall –yes libcurl3-gnutls libcurl3-nss
apt-get install –yes virtualbox-5.2
apt-get install –reinstall –yes vlc
apt-get install –reinstall –yes alsa-tools-gui
apt-get install –reinstall –yes gftp
apt install ./teamviewer_15.3.2682_amd64.deb –yes


Note that some of above packages requires a properly configured third party repositories, other people might have other packages that are missing from the dpkg list and needs to be reinstalled so just decide according to your own case of left aside working system present binaries that doesn't belong to any dpkg installed package.

After a bit of struggle everything is back to normal Thanks God! 🙂 !



How to Avoid the 7 Most Frequent Mistakes in Python Programming

Monday, September 9th, 2019

python-programming-language-logo

Python is very appealing for Rapid Application Development for many reasons, including high-level built in data structures, dynamic typing and binding, or to use as glue to connect different components. It’s simple and easy to learn but new Python developers can fall in the trap of missing certain subtleties.

Here are 7 common mistakes that are harder to catch but that even more experienced Python developers have fallen for.


1. The misuse of expressions as function argument defaults

Python allows developers to indicate optional function arguments by giving them default values. In most cases, this is a great feature of Python, but it can create some confusion when the default value is mutable. In fact, the common mistake is thinking that the optional argument is set to whatever default value you’ve set every time the function argument is presented without a value. It can seem a bit complicated, but the answer is that the default value for this function argument is only evaluated at the time you’ve defined the function, one time only.  

how-to-avoid-the-7-most-frequent-mistakes-in-python-programming-3


2. Incorrect use of class variables

Python handles class variables internally as dictionaries and they will follow the Method Resolution Order (MRO). If an attribute is not found in one class it will be looked up in base classes so references to one part of the code are actually references to another part, and that can be quite difficult to handle well in Python. For class attributes, I recommend reading up on this aspect of Python independently to be able to handle them.

how-to-avoid-the-7-most-frequent-mistakes-in-python-programming-2


3. Incorrect specifications of parameters for exception blocks

There is a common problem in Python when except statements are provided but they don’t take a list of the exceptions specified. The syntax except Exception is used to bind these exception blocks to optional parameters so that there can be further inspections. What happens, however, is that certain exceptions are then not being caught by the except statement, but the exception becomes bound to parameters. The way to get block exceptions in one except statement has to be done by specifying the first parameter as a tuple to contain all the exceptions that you want to catch.

how-to-avoid-the-7-most-frequent-mistakes-in-python-programming-1
 

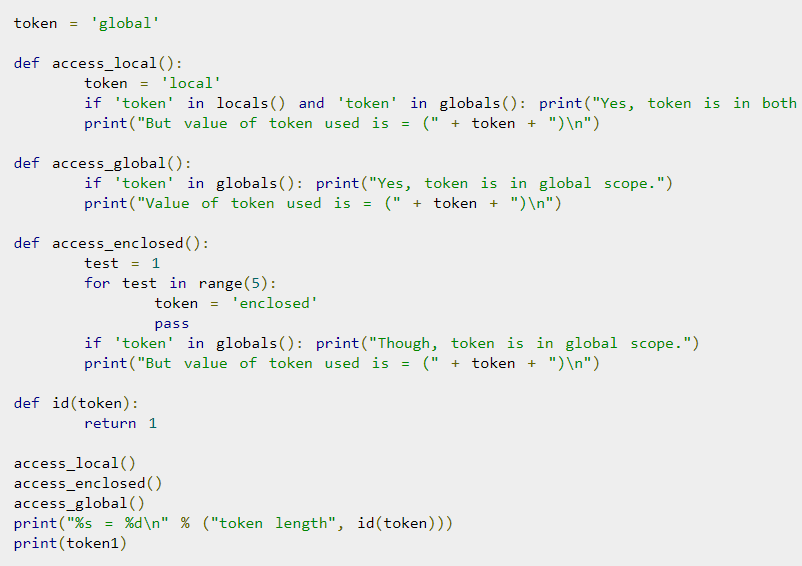
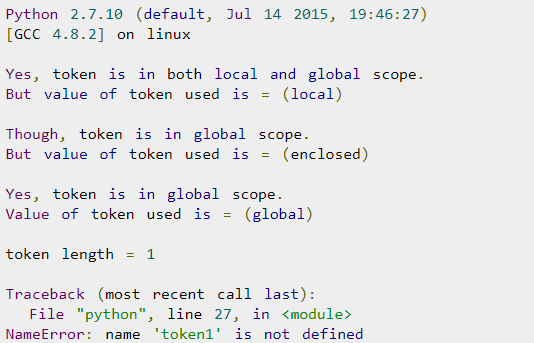
4. Failure to understand the scope rules

The scope resolution on Python is built on the LEGB rule as it’s commonly known, which means Local, Enclosing, Global, Built-in. Although at first glance this seems simple, there are some subtleties about the way it actually works in Python, which creates a more complex Python problem. If you make an assignment to a variable in a scope, Python will assume that variable is local to the scope and will shadow a variable that’s similarly named in other scopes. This is a particular problem especially when using lists.


5. Modifying lists during iterations over it


When a developer deletes an item from a list or array while iterating, they stumble upon a well known Python problem that’s easy to fall into. To address this, Python has incorporated many programming paradigms which can really simplify and streamline code when they’re used properly. Simple code is less likely to fall into the trap of deleting a list item while iterating over it. You can also use list comprehensions to avoid this problem.

how-to-avoid-the-7-most-frequent-mistakes-in-python-programming-8


6. Name clash with Python standard library


Python has so many library modules which is a bonus of the language, but the problem is that you can inadvertently have a name clash between your module and a module in the standard library. The problem here is that you can accidentally import another library which will import the wrong version. To avoid this, it’s important to be aware of the names in the standard library modules and stay away from using them.

how-to-avoid-the-7-most-frequent-mistakes-in-python-programming-5


7. Problems with binding variables in closures


Python has a late binding behavior which looks up the values of variables in closure only when the inner function is called. To address this, you may have to take advantage of default arguments to create anonymous functions that will give you the desired behavior – it’s either elegant or a hack depending on how you look at it, but it’s important to know.


how-to-avoid-the-7-most-frequent-mistakes-in-python-programming-6

Python is very powerful and flexible and it’s a great language for developers, but it’s important to be familiar with the nuances of it to optimize it and avoid these errors.

Ellie Coverdale, a technical writer at Essay roo and UK Writings, is involved in tech research and projects to find new advances and share her insights. She shares what she has learned with her readers on the Boom Essays blog.

How to make a mirror of website on GNU / Linux with wget / Few tips on wget site mirroring

Wednesday, February 22nd, 2012

how-to-make-mirror-of-website-on-linux-wget

Everyone who used Linux is probably familiar with wget or has used this handy download console tools at least thousand of times. Not so many Desktop GNU / Linux users like Ubuntu and Fedora Linux users had tried using wget to do something more than single files download.
Actually wget is not so popular as it used to be in earlier linux days. I've noticed the tendency for newer Linux users to prefer using curl (I don't know why).

With all said I'm sure there is plenty of Linux users curious on how a website mirror can be made through wget.
This article will briefly suggest few ways to do website mirroring on linux / bsd as wget is both available on those two free operating systems.

1. Most Simple exact mirror copy of website

The most basic use of wget's mirror capabilities is by using wget's -mirror argument:

# wget -m http://website-to-mirror.com/sub-directory/

Creating a mirror like this is not a very good practice, as the links of the mirrored pages will still link to external URLs. In other words link URL will not pointing to your local copy and therefore if you're not connected to the internet and try to browse random links of the webpage you will end up with many links which are not opening because you don't have internet connection.

2. Mirroring with rewritting links to point to localhost and in between download page delay

Making mirror with wget can put an heavy load on the remote server as it fetches the files as quick as the bandwidth allows it. On heavy servers rapid downloads with wget can significantly reduce the download server responce time. Even on a some high-loaded servers it can cause the server to hang completely.
Hence mirroring pages with wget without explicity setting delay in between each page download, could be considered by remote server as a kind of DoS – (denial of service) attack. Even some site administrators have already set firewall rules or web server modules configured like Apache mod_security which filter requests to IPs which are doing too frequent HTTP GET /POST requests to the web server.
To make wget delay with a 10 seconds download between mirrored pages use:

# wget -mk -w 10 -np --random-wait http://website-to-mirror.com/sub-directory/

The -mk stands for -m/-mirror and -k / shortcut argument for –convert-links (make links point locally), –random-wait tells wget to make random waits between o and 10 seconds between each page download request.

3. Mirror / retrieve website sub directory ignoring robots.txt "mirror restrictions"

Some websites has a robots.txt which restricts content download with clients like wget, curl or even prohibits, crawlers to download their website pages completely.

/robots.txt restrictions are not a problem as wget has an option to disable robots.txt checking when downloading.
Getting around the robots.txt restrictions with wget is possible through -e robots=off option.
For instance if you want to make a local mirror copy of the whole sub-directory with all links and do it with a delay of 10 seconds between each consequential page request without reading at all the robots.txt allow/forbid rules:

# wget -mk -w 10 -np -e robots=off --random-wait http://website-to-mirror.com/sub-directory/

4. Mirror website which is prohibiting Download managers like flashget, getright, go!zilla etc.

Sometimes when try to use wget to make a mirror copy of an entire site domain subdirectory or the root site domain, you get an error similar to:

Sorry, but the download manager you are using to view this site is not supported.
We do not support use of such download managers as flashget, go!zilla, or getright

This message is produced by the site dynamic generation language PHP / ASP / JSP etc. used, as the website code is written to check on the browser UserAgent sent.
wget's default sent UserAgent to the remote webserver is:
Wget/1.11.4

As this is not a common desktop browser useragent many webmasters configure their websites to only accept well known established desktop browser useragents sent by client browsers.
Here are few typical user agents which identify a desktop browser:
 

  • Mozilla/5.0 (Windows NT 6.1; rv:6.0) Gecko/20110814 Firefox/6.0
  • Mozilla/5.0 (X11; Linux i686; rv:6.0) Gecko/20100101 Firefox/6.0
  • Mozilla/6.0 (Macintosh; I; Intel Mac OS X 11_7_9; de-LI; rv:1.9b4) Gecko/2012010317 Firefox/10.0a4
  • Mozilla/5.0 (Windows NT 6.1; Win64; x64; rv:2.2a1pre) Gecko/20110324 Firefox/4.2a1pre

etc. etc.

If you're trying to mirror a website which has implied some kind of useragent restriction based on some "valid" useragent, wget has the -U option enabling you to fake the useragent.

If you get the Sorry but the download manager you are using to view this site is not supported , fake / change wget's UserAgent with cmd:

# wget -mk -w 10 -np -e robots=off \
--random-wait
--referer="http://www.google.com" \--user-agent="Mozilla/5.0 (Windows; U; Windows NT 5.1; en-US; rv:1.8.1.6) Gecko/20070725 Firefox/2.0.0.6" \--header="Accept:text/xml,application/xml,application/xhtml+xml,text/html;q=0.9,text/plain;q=0.8,image/png,*/*;q=0.5" \--header="Accept-Language: en-us,en;q=0.5" \--header="Accept-Encoding: gzip,deflate" \--header="Accept-Charset: ISO-8859-1,utf-8;q=0.7,*;q=0.7" \--header="Keep-Alive: 300"

For the sake of some wget anonimity – to make wget permanently hide its user agent and pretend like a Mozilla Firefox running on MS Windows XP use .wgetrc like this in home directory.

5. Make a complete mirror of a website under a domain name

To retrieve complete working copy of a site with wget a good way is like so:

# wget -rkpNl5 -w 10 --random-wait www.website-to-mirror.com

Where the arguments meaning is:
-r – Retrieve recursively
-k – Convert the links in documents to make them suitable for local viewing
-p – Download everything (inline images, sounds and referenced stylesheets etc.)
-N – Turn on time-stamping
-l5 – Specify recursion maximum depth level of 5

6. Make a dynamic pages static site mirror, by converting CGI, ASP, PHP etc. to HTML for offline browsing

It is often websites pages are ending in a .php / .asp / .cgi … extensions. An example of what I mean is for instance the URL http://php.net/manual/en/tutorial.php. You see the url page is tutorial.php once mirrored with wget the local copy will also end up in .php and therefore will not be suitable for local browsing as .php extension is not understood how to interpret by the local browser.
Therefore to copy website with a non-html extension and make it offline browsable in HTML there is the –html-extension option e.g.:

# wget -mk -w 10 -np -e robots=off \
--random-wait \
--convert-links http://www.website-to-mirror.com

A good practice in mirror making is to set a download limit rate. Setting such rate is both good for UP and DOWN side (the local host where downloading and remote server). download-limit is also useful when mirroring websites consisting of many enormous files (documental movies, some music etc.).
To set a download limit to add –limit-rate= option. Passing by to wget –limit-rate=200K would limit download speed to 200KB.

Other useful thing to assure wget has made an accurate mirror is wget logging. To use it pass -o ./my_mirror.log to wget.
 

How to count how many files are in a directory with find on Linux

Tuesday, February 21st, 2012

how to count how many directories are on your linux server

Did you ever needed to count, how many files in a directory are there?
Having the concrete number of files in a directory is not a seldom task but still very useful especially for scripts or simply for the sake of learning

The quickest and maybe the easiest way to count all files in a directory in Linux is with a combination of find and wc commands:

Here is how;

linux:~# cd ascii
linux:~/ascii# find . -type f -iname '*' -print |wc -l
407

This will find and list all matched files in any directory and subdirectories, print them out and count them with wc command.
The -type f argument instructs find to look only for files.

Other helpful variance of finding and listing all files in a directory and subdirectories is to list and count all the files with a certain file extension under a directory. For example, lets list all text files (.txt) contained in a directory and all level sub-directories:

linux:~/ascii# find . -type f -iname '*.txt' -print |wc -l
401

If you need to check the number of files in a directory for multiple directories on a server and you're aiming at doing it efficienly, issung above find .. | wc code will definitely be not a good choice. If used it will generate heavy load for the system and along with that will complete the execution in ages if issued on a large number of files containing dirs.

Thanksfully if efficiency is targetted, there is a command written in C called tree which is more efficient than find.
To count the number of files in dir but using tree :

linux:~# cd ascii
linux:/ascii# tree | tail -n 1
32 directories, 407 files

By default tree prints info for both the number of found files and directories.
To print out only the files matched, awk comes handy, e.g.:

linux:/ascii# tree |tail -n 1| awk '{ print $3 }'407

To list only the number of files in a directory without its existing sub-directories ls + wc use is also possible:

linux:~/ascii# ls -l | grep ^- | wc -l68

This result the above command would produce is +1 more than the real number of files, as it counts the directory ".." as one file (in UNIX / LINUX everything is file).

A short one liner script that can calculate all files correctly by substracting 1 is and hence present correct result on number of files is like so:

linux:~/ascii# var=$(ls -l | grep ^- | wc -l); var=$(($var - 1)); echo $var

ls can be used to calculate the number of 1-st level sub-directories under certain directory for instance:

linux:~/ascii# ls -l |grep ^d|wc -l
25

You see the ascii directory has 25 subdirectories in its 1st level.

To check symlinks under a directory with ls the command would be:

linux:~/ascii# ls -l | grep ^l | wc -l
0

Note above 3 ls | grep … examples, will not work properly if the directory contains files with SUID or some special properties set.
Hence to get the same 3 results for active files, directories and symbolic links, a one liner similar to the one below can be used instead:

linux:~/ascii# for t in files links directories; do echo `find . -type ${t:0:1} | wc -l` $t; done 2> /dev/null
407 files
0 links
33 directories

This will show statistics about all files, links and directories for all directory sub-levels.
Just in case if there is need to only count files, links and directories without directory recursion enabled, use:

linux:~/ascii# for t in files links directories; do echo `find . -maxdepth 1 -type ${t:0:1} | wc -l` $t; done 2> /dev/null
68 files
0 links
26 directories

Anyways the above bash loop will be slow, for directories containing thousands of files. For better performance the equivallent of above bash loop rewritten in perl would be:

linux:~/ascii# ls -l |perl -e 'while(<>){$h{substr($_,0,1)}+=1;} END {foreach(keys %h) {print "$_ $h{$_}\n";}}'
- 68
d 25
t 1
linux:~/ascii#
In any case the most preferrable and efficient way to count files en directories is by using tree command.
In my view using always tree command instead of code "hacks" is smart idea.

In Slackware tree command is part of the base install, on Debian and CentOS Linux, tree cmd is not part of the base system and requires install via apt / yum e.g.:

debian:~# apt-get --yes install tree
...

[root@centos:~ ]# yum --yes install tree

Happy counting 😉

How to digital watermark to a picture – Protect pic with copyright image or text with composite, convert and Phatch on GNU / Linux

Friday, March 23rd, 2012

Watermarking is a technique to identify a physical or non-physical object with its owner (creator). First watermarks in history originates from very ancient times.

There are two basic types of Watermark types:

I. Physical Watermarks (classical)

II. Digital Watermarks

Historically Classical Watermarks, were mostly important. As we tend to use more and more visible and we switch to use of more invisible stuff, nowdays the importance and use of digital watermarks is steadily raising.

You have most likely already seen pictures from websites which contain a copyright holder message stamp or website logo on it.
As you could imagine the picture watermark is placed in order to prevent pictures from being re-used in another internet space ,without the picture copyright holder explicit permission…

Watermarks have entered most if not all areas of our life, but we often don't recognize they're there / rarely think about them.
Few of the many "physical watermarks" we use daily are:
 

  • paper money watermark (to protect against anti money forgery)
  • bank debit / credit cards stamps near the card chip
  • postcards paper stamps

There are too many different kind of "physical watermarks" and since this is not the accent of this article, I will continue straight to explaiin a bit on Digital (picture) watermarks and how to watermark images with ImageMagick image editting command line suit.

Just like with physical watermarks, there are different kinds of digital watermarks. There are:
 

  • Picture (Images) digital watermarks
  • – Steganography

  • Video watermarks
  • Audio stream digital watermarks
  • Visual digital watermarks
  • – Visible area of text or picture over another text picture or video

  • Invisible digital watermarks
  • – digital information (files) metadata with watermark content etc.

The topic of watermarking is quite wide, so I will stop here and focus on the main idea of this article – to show how to place digital watermark on graphic image or collection of pictures.

The most straightway non-interactive way to do picture watermarking is with ImageMagick's composite command line tool. This little handy tool is capable of creating watermarks in single and multiple pictures.

If you prefer to have a simple text as a watermark, then you should use imagick's convert cmd.

1. Putting a watermark of picture in the right bottom corner

$ composite -gravity southeast -dissolve 100 \
watermark_picture.png image-to-watermark.png \
output-watermarked-image.png

Snoopy Writting pc freak watermark picture text watermark on the right bottom corner with composite

2. Placing watermark to picture in the bottom right corner

$ composite -gravity northeast -dissolve 80 \
watermark_picture.png image-to-watermark.png \
output-watermarked-image.png

Snoopy Writting pc freak picture text watermark on the right bottom corner with composite

3. Watermarking picture in the bottom left corner

$ composite -gravity southwest -dissolve 90 \
watermark_picture.png image-to-watermark.png \
output-watermarked-image.png

Snoopy writting watermarking picture on the bottom left corner imagemagick (composite)

4. Watermarking picture in the top left corner

$ composite -gravity northwest -dissolve 100 \
watermark_picture.png image-to-watermark.jpg \
output-watermarked-image.jpg

As you see from above example, composite even accept mixing up input / output between PNG and JPEG pictures 🙂

Output Watermarked Image picture on top left corner with pc-freak logo image Imagick composite

5. Put a watermark in the image center

$ composite -gravity center -dissolve 100 \
watermark_picture.png image-to-watermark.png \
output-watermarked-image.png

position watermark on the picture middle (center) composite output picture

6. Sealing image with custom text / Text Watermarking a picture

a) Writting text watermark to an image centered in "footer"

$ convert image-to-watermark.png -pointsize 20 \
-draw "gravity south fill black text 0,12 \
'hip0s Watermark'" output-watermarked-image.jpg

This will place a watermark in position 0,12, meaning the text will be added in the bottom center of the watermarked image.

Watermarking a picture sealing with custom text image imagick composite pic

-pointsize 20 defines the text font size. hip0s Watermark is the actual text that will be stamped.

b) Writting image watermark with font type customization (Arial Tahoma etc.):

To list all available fonts ready to be used by convert, type:

$ convert -list font
$ convert -list font |grep -i arial
Font: Arial-Black-Regular
family: Arial Black
glyphs: /usr/share/fonts/truetype/msttcorefonts/Arial_Black.ttf
Font: Arial-Bold
family: Arial
glyphs: /usr/share/fonts/truetype/msttcorefonts/Arial_Bold.ttf
Font: Arial-Bold-Italic
family: Arial
glyphs: /usr/share/fonts/truetype/msttcorefonts/arialbi.ttf
Font: Arial-Italic
family: Arial
glyphs: /usr/share/fonts/truetype/msttcorefonts/ariali.ttf
Font: Arial-Regular
family: Arial
glyphs: /usr/share/fonts/truetype/msttcorefonts/Arial.ttf

$ convert -list type
Bilevel
ColorSeparation
ColorSeparationMatte
Grayscale
GrayscaleMatte
Optimize
Palette
PaletteBilevelMatte
PaletteMatte
TrueColorMatte
TrueColor

On my system, I have 392 of fonts installed, to check the number of installed fonts ready for use by convert I used:

$ convert -list font|grep -i 'font:'|wc -l
392

To only check exact fonts names usable in convert:

$ convert -list font|grep -i 'font:'

To use the red marked Arial-Regular for font of the text picture timestamp issue;

$ convert watermark_picture.jpg -font Arial-Regular \
-pointsize 20 -draw "gravity south fill black text 0,12 'hip0s Watermark'" \
output-watermarked-image.jpg

Watermark and with Arial-Regular font image magick convert screenshot dog type writter

c) Using external font with convert to place image text watermark

Lets say you would like to use an external font (arhangai.ttf) not listed in convert -font list usable fonts:

$ convert image-to-watermark.png -pointsize 20 \
-font /usr/share/fonts/truetype/arhangai/arhangai.ttf \
-draw "gravity south fill black text 0,12 \
'hip0s Watermark'" output-watermarked-image_7.png

Talking about fonts, if you would like to add some external, nice free-fonts (ttf) files to your current logged in user, exec:

hipo@noah:~$ cd ~/fonts
hipo@noah:/fonts$ for i in \
$(lynx -dump http://www.webpagepublicity.com/free-fonts.html|grep -i .ttf|grep -i http|awk '{ print $2 }'); \
do wget -r -l2 -nd -Nc $i;
done

This will add 85 new nice looking fonts. Putting fonts in .fonts/ directory, are red while fonts are looked up by applications installed on respective the server or desktop GNU / Linux systems. Any font put there is ready to be used across all ImageMagick command line tools, as well as will be added across the list of possible fonts to use in GIMP and the rest of gui editors installed on the system.

According to the (watermark) texts font size passed to convert on some pictures the text written will exceed the picture dimensions and only partially some of the text intended as watermark will be visible.
If you encounter the exceed picture text problem, take few minutes and play with fonts sizes until you have a good font size to fit the approximate dimensions of the (expected minimum / maximum – horizontal and vertical) stamped picture dimensions.

For the sake of clarity, here is a list with arguments used in above, composite and convert examples.
 

  • composite — The ImageMagick command that combines two images.
  • -dissolve 80 — The number after the option determines the brightness of the watermark.  100 is full strength.
  • -gravity southeast — Determines the placement of watermark.
    Possible options are; north, west, south, east, northwest, northeast, southeast, southwest, center
  • watermark_picture.png — The watermark image is the first argument.
  • image-to-watermark.jpg — The second argument is the original image to be watermarked.
  • output-watermarked-image.jpg — The third argument is the new composite image to be created.
    N. B. !  If you don't specify a new file, be careful, the original file will be overwritten.

As ImageMagick is cross platform graphic editting suit – it runs on both *nix (Linux,BSD) and Windows. I have tested it on Linux, only but on FreeBSD and other BSDs it should work without any problem.
The composite and convert above examples should be easily rewritten to run on achieve watarmarking on MS Windows too.

7. Watermarking multiple pictures in a directory

To watermark multiple pictures within a directory use, a short bash loop in combination with either convert or composite could be used:

$ cd your-directory/
$ for i in *; do
convert $i -pointsize 20 -draw "gravity south fill black text 0,12 'hip0s Watermark'" output-watermarked-image.jpg
done

convert and composite also support wildcards like '*.JPG, *.PNG', but I'm not sure if this syntax can be used for mass picture marking?

8. Adding watermark and doing other various advanced Image Edit, Convert and Compose stuff with Phatch GUI program

Another program that is capable to put watermarks on pictures and besides that doing a number of routine graphic manipulation operations achievable with expert Image manipulation programs like GIMP / Inkscape is PHATCH = PHOTO & BATCH

Phatch is swiss army knife for doing web design or or graphics design on Linux.

Phatch is really great and easy to use program. Tt makes putting basic designer effects on pictures with no requirement for any design skills.
With Phatch you can become a designer for a day literally 😉

If you haven't used it yet, make sure you try it!
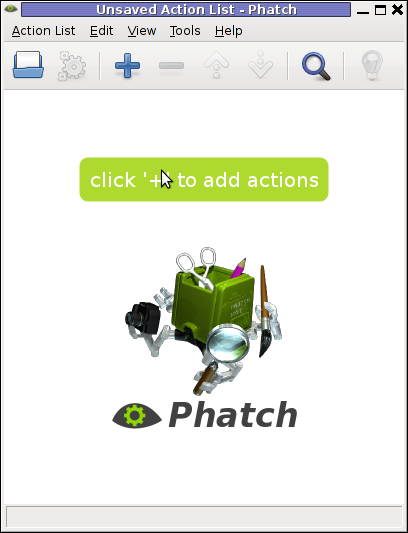
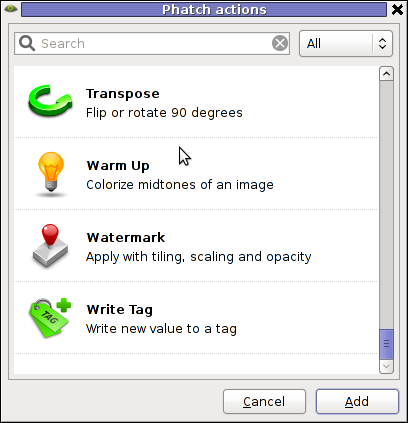
Below, are two screenshots of Phatch running on my Debian G* / Linux

Phatch Linux Debian Squeeze Screenshot

Phatch Linux Debian Squeeze Screenshot Watermark effect

Phatch is installable via apt on Debian and Ubuntu Linux. It has also a phatch-cli tools, which are a possible substitute to ImageMagick's composite / convert tools.

On deb based distros install Phatch with:

noah:~# apt-get --yes install phatch phatch-cli

In Phatch it is also possible, to create a combination of filters to be later applied to an image file or a group of image files all in a directory. The program capabilities are really outstanding, it is pure joy to work with it.

Using Phatch GUI interface is hard to comprehend in the beginning, I needed few minutes until I can get the idea how to use it. Anyhow once you know the basics, its very easy to use onwards.

Phatch currently can perform the following actions:
 

  • Auto Contrast – Maximize image contrast
  • Border – Crop or add border to all sides
  • Brightness – Adjust brightness from black to white
  • Canvas – Crop the image or enlarge canvas without resizing the image
  • Colorize – Colorize grayscale image
  • Common – Copies the most common pixel value
  • Contrast – Adjust from grey to black & white
  • Convert Mode – Convert the color mode of an image (grayscale, RGB, RGBA or CMYK)
  • Effect – Blur, Sharpen, Emboss, Smooth, ..
  • Equalize – Equalize the image histogram
  • Fit – Downsize and crop image with fixed ratio
  • Grayscale – Fade all colours to gray
  • Invert – Invert the colors of the image (negative)
  • Maximum – Copies the maximum pixel value
  • Median – Copies the median pixel value
  • Minimum – Copies the minimum pixel value
  • Offset – Offset by distance and wrap around
  • Posterize – Reduce the number of bits of colour channel
  • Rank – Copies the rank'th pixel value
  • Rotate – Rotate with random angle
  • Round – Round or crossed corners with variable radius and corners
  • Saturation – Adjust saturation from grayscale to high
  • Save – Save an image with variable compression in different types
  • Scale – Scale an image with different resample filters.
  • Shadow – Drop a blurred shadow under a photo with variable position, blur and color
  • Solarize – Invert all pixel values above threshold
  • Text – Write text at a given position
  • Transpose – Flip or rotate an image by 90 degrees
  • Watermark – Apply a watermark image with variable placement (offset, scaling, tiling) and opacity

Most of the function / effects Phatch in the up list works fine as I tested them to get to know the program.
The only effect that didn't worked for me is Blender effect.
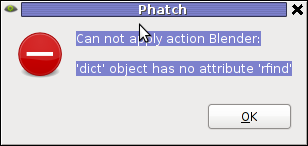
Trying to apply the Blending effect I got error:

Can not apply action Blender:
'dict' object has no attribute 'rfind'

dict object has not attribiture rfind error screenshot my linux

Its really a pity blender filter don't work. I've seen on Phatch's website some pictures showing the blender effect in action and it looks really awesome.

In attempt to work around the err, I tried downloading Phatch's latest release and running it with python interpreter but it didn't work out …
I tried also to install some packages to the system that somehow seemed to be related to blenderversatile 3D modeller/renderer program but this worked neither.
I suspect Phatch blender effect is not working on Ubuntu too as I've red complains in some Ubuntu forums.
If someone succeeding making blend effect work please let me know how?

Interesting feature of Phatch is the program support for applying its predefined filters using a cli interface.
The syntax for phatch cli, should be something like:

phatch -console action_list.phatch

Where action_list.phatch is a Phatch predefined filter. Anyways I didn't manage to figure out how to use the program CLI. I'll be glad to hear if someone succeeded in using the program console, if so please share with me how?

9. Adding Watermark to pictures with GIMP

To add a watermark text or picture in GIMP, there are plenty of ways but is more time consuming by both Phatch or convert, composite..
There is a script in gimp plugin registry site – watermark.scm which adds watermarking capability to GIMP

On my system this script was installed with the deb package gimp-data-extras. To apply the plugin on a pic, I used GIMP menus:

Filters -> Eg -> Copyright Placer

GIMP Copyright Holder plugin Watermark Screenshot

If someone knows about better or quicker ways to do watermarking, please share 🙂

How to exclude files on copy (cp) on GNU / Linux / Linux copy and exclude files and directories (cp -r) exclusion

Saturday, March 3rd, 2012

I've recently had to make a copy of one /usr/local/nginx directory under /usr/local/nginx-bak, in order to have a working copy of nginx, just in case if during my nginx update to new version from source mess ups.

I did not check the size of /usr/local/nginx , so just run the usual:

nginx:~# cp -rpf /usr/local/nginx /usr/local/nginx-bak
...

Execution took more than 20 seconds, so I check the size and figured out /usr/local/nginx/logs has grown to 120 gigabytes.

I didn't wanted to extra load the production server with copying thousands of gigabytes so I asked myself if this is possible with normal Linux copy (cp) command?. I checked cp manual e.g. man cp, but there is no argument like –exclude or something.

Even though the cp command exclude feature is not implemented by default there are a couple of ways to copy a directory with exclusion of subdirectories of files on G / Linux.

Here are the 3 major ones:

1. Copy directory recursively and exclude sub-directories or files with GNU tar

Maybe the quickest way to copy and exclude directories is through a littke 'hack' with GNU tar nginx:~# mkdir /usr/local/nginx-new;
nginx:~# cd /usr/local/nginx#
nginx:/usr/local/nginx# tar cvf - \. --exclude=/usr/local/nginx/logs/* \
| (cd /usr/local/nginx-new; tar -xvf - )

Copying that way however is slow, in my case it fits me perfectly but for copying large chunks of data it is better not to use pipe and instead use regular tar operation + mv

# cd /source_directory
# tar cvf test.tar --exclude=dir_to_exclude/*\--exclude=dir_to_exclude1/* . \
# mv test.tar /destination_directory
# cd /destination# tar xvf test.tar

2. Copy folder recursively excluding some directories with rsync

P>eople who has experience with rsync , already know how invaluable this tool is. Rsync can completely be used as for substitute=de.a# rsync -av –exclude='path1/to/exclude' –exclude='path2/to/exclude' source destination

This example, can also be used as a solution to my copy nginx and exclude logs directory casus like so:

nginx:~# rsync -av --exclude='/usr/local/nginx/logs/' /usr/local/nginx/ /usr/local/nginx-new

As you can see for yourself, this is a way more readable for the tar, however it will not work on servers, where rsync is not installed and it is unusable if you have to do operations as a regular users on such for that case surely the GNU tar hack is more 'portable' across systems.
rsync has also Windows version and therefore, the same methodology should be working on MS Windows and good for batch scripting.
I've not tested it myself, yet as I've never used rsync on Windows, if someone has tried and it works pls drop me a short msg in comments.
3. Copy directory and exclude sub directories and files with find

Find in collaboration with cp can also be used to exclude certain directories while copying. Actually this method is better than the GNU tar hack and surely more efficient. For machines, where rsync is not installed it is just a perfect way to copy files from location to location, while excluding some directories, here is an example use of find and cp, for the above nginx case:

nginx:~# cd /usr/local/nginx
nginx:~# mkdir /usr/local/nginx
nginx:/usr/local/nginx# find . -type d \( ! -name logs \) -print -exec cp -rpf '{}' /usr/local/nginx-bak \;

This will find all directories inside /usr/local/nginx with find command print them on the screen, then execute recursive copy over each found directory and copy to /usr/local/nginx-bak

This example will work fine in the nginx case because /usr/local/nginx does not contain any files but only sub-directories. In other occwhere the directory does contain some files besides sub-directories the files had to also be copied e.g.:

# for i in $(ls -l | egrep -v '^d'); do\
cp -rpf $i /destination/directory

This will copy the files from source directory (for instance /usr/local/nginx/my_file.txt, /usr/local/nginx/my_file1.txt etc.), which doesn't belong to a subdirectory.

The cmd expression:

# ls -l | egrep -v '^d'

Lists only the files while excluding all the directories and in a for loop each of the files is copied to /destination/directory

If someone has better ideas, please share with me 🙂

How to fix “sslserver: fatal: unable to load certificate” Qmail error on GNU / Linux

Friday, October 14th, 2011

After setupping a brand new Qmail installation following the QmailRocks Thibs Qmail Debian install guide , I’ve come across unexpected re-occuring error message in /var/log/qmail/qmail-smtpdssl/ , here is the message:

@400000004e9807b10d8bdb7c command-line: exec sslserver -e -vR -l my-mailserver-domain.com -c 30 -u 89 -g 89
-x /etc/tcp.smtp.cdb 0 465 rblsmtpd -r zen.spamhaus.org -r dnsbl.njabl.org -r dnsbl.sorbs.net -r bl.spamcop.net qmail-smtpd
my-mailserver-domain.com /home/vpopmail/bin/vchkpw /bin/true 2>&1
@400000004e9807b10dae2ca4 sslserver: fatal: unable to load certificate

I was completely puzzled initially by the error as the sertificate file /var/qmail/control/servercert.pem was an existing and properly self generated one. Besides that qmail daemontools init script /service/qmail-smtpd/run was loading the file just fine, where the same file failed to get loaded when sslserver command with the cert argument was invoked via /service/qmail-smtpdssl/run

It took me quite a while to thoroughfully investigate on what’s wrong with the new qmail install. Thanksfully after almost an hour of puzzling I found it out and I was feeling as a complete moron to find that the all issues was caused by incorrect permissions of the /var/qmail/control/servercert.pem file.
Here are the incorrect permissions the file possessed:

linux:~# ls -al /var/qmail/control/servercert.pem
-rw------- 1 qmaild qmail 2311 2011-10-12 13:21 /var/qmail/control/servercert.pem

To fix up the error I had to allow all users to have reading permissions over servercert.pem , e.g.:

linux:~# chmod a+r /var/qmail/control/servercert.pem

After adding all users readable bit on servercert.pem the file permissions are like so:

linux:~# ls -al /var/qmail/control/servercert.pem
-rw-r--r-- 1 qmaild qmail 2311 2011-10-12 13:21 /var/qmail/control/servercert.pem

Consequently I did a qmail restart to make sure the new readable servercert.pem will get loaded from the respective init script:

linux:~# qmailctl restart
* Stopping qmail-smtpdssl.
* Stopping qmail-smtpd.
* Sending qmail-send SIGTERM and restarting.
* Restarting qmail-smtpd.
* Restarting qmail-smtpdssl.

Now the annoying sslserver: fatal: unable to load certificate message is no more and all works fine, Hooray! 😉

Fix audioCD play problems with VLC on GNU Linux

Monday, January 23rd, 2012

I've not played audio CD for ages. Anyways I had to set up one computer with Linux just recently and one of the requirements was to be able to play audiocds.
I was surprised that actually a was having issue with such as simple tasks.
Here is how i come with this article.

If you encounter errors playing Audio CDs on any Linux distro in VLC or other players, you might need to apply the following fix.

root@xubuntu-desktop:~# apt-get install xubuntu-restricted-extras
...
root@xubuntu-desktop:~# apt-get install ubuntu-restricted-extras
...

I'm not sure if this packages are required, anyways having them installed is a good idea especially on computers which will have to support as much multimedia as possible.

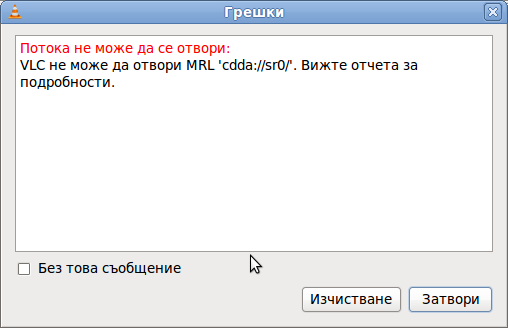
Trying to play a CD with VLC the result was not nice, you see in the picture above the error that poped up while trying it with VLC:

Due to wrong configuration of the play device VLC will be looking to read the audio cd from.

To succesfully play the audiocd invoke VLC command with a cdda///dev/sr0 argument like so:

hipo@xubuntu-desktop:~$ vlc cdda:///dev/sr0
...

To permanently fix the error you will have to edit ~/.config/vlc/vlcrc :

Inside ~/.config/vlc/vlcrc find the lines:

dvd=/dev/cdrom

Substitute the above line with:

dvd=/dev/sr0

Next find the line:

vcd=/dev/cdrom

Change the above line with:

vcd=/dev/sr0
Due to a bug in generating vlcrc , the dvd= might be set also to other messy unreadable characters (different from /dev/cdrom). This can also be the reason why it fails to properly read the disc.

If dvd= and vcd is set to a different unreadable characters delete them and substitute with /dev/sr0 .I've experienced this on Xubuntu Linux with a Bulgarian localization (probably the bug can be seen in other Linuxes when GNOME is installed in Russian, Chineese and other UTF-8 languages.

The strange error can be observed also in other players when the localization is set to someone's native language …
Alternative solution is to install and use rhythmbox instead of VLC.
Other program to play audio CDs called workman , you will have to get used to the interface which uses gtk1 and therefore obsolete. Putting aside the ugly interface it works 😉

Solve ALSA audio and mic issues on Lenovo Thinkpads on Debian and Ubuntu Linux

Wednesday, January 11th, 2012

Since I've blogged about my recent skype issues. I've played a lot with pulseaudio, alsa, alsa-oss to experimented a lot until I figured out why Skype was failing to properly delivery sound and record via my embedded laptop mic.

Anyways, while researching on the cause of my Thinkpad r61 mic issues, I've red a bunch of blog posts by people experiencing microphone oddities with Lenovo Thinkpads

Throughout the search I come across one very good article, which explained that in many cases the Thinkpad sound problems are caused by the snd-hda-intel alsa kernel module. snd-hda-intel fails to automatically set proper sb model type argument during Linux install when the soundcard is initialized with some argument like options snd-hda-intel model=auto

Hence, the suggested fix which should resolve this on many Thinkpad notebooks is up to passing the right module argument:

To fix its neceessery to edit /etc/modprobe.d/alsa-base.conf .

debian:~# vim /etc/modprobe.d/alsa-base.conf

Find the line in the file starting with:
options snd-hda-intel model=

and substitute with:

options snd-hda-intel model=thinkpad

Finally a restart of Advaned Linux Sound Architecture (alsa) is required:

debian:~# /etc/init.d/alsa restart
...

At most cases just restarting the alsa via its init script is not enough, since the ssnd-hda-intel kernel module is already in use by some program or something, so its best to do a reboot to make sure the module is loaded with the new model=thinkpad argument.

My exact laptop sound card model is:

debian:~# lspci |grep -i audio
00:1b.0 Audio device: Intel Corporation 82801H (ICH8 Family) HD Audio Controller (rev 03)

After changing the module and using alsamixer and aumix to make sure mic is unmuted and its volume is high enough, mic sound rec works fine.

How to copy CD or DVD on GNU/Linux and FreeBSD using console or terminal

Monday, November 14th, 2011

CD Burning Console Terminal Linux / FreeBSD picture

These days more and more people start to forget the g* / Linux old times when we used to copy CDs from console using dd in conjunction with mkisofs .

Therefore to bring some good memories back of the glorious console times I decided to come up with this little post.

To copy a CD or DVD the first thing one should do is to make an image copy of the present inserted CD into the CD-drive with dd :

1. Make copy of the CD/DVD image using dd

# dd if=/dev/cdrom of=/tmp/mycd.iso bs=2048 conv=notrunc

/dev/cdrom is the location of the cdrom device, on many Linuces including (Debian) /dev/cdrom is just a link to the /dev/ which corresponds to the CD drive. Note on FreeBSD the location for the CD Drive is /dev/acd0
/tmp/mycd.iso instructs dd CD image creation to be placed in /tmp/ directory.
bs argument instructs it about the byte size portions by which the content of the CD-Drive inserted CD will be read. bs value of 2048 is actually only 2KB per dd read, increasing this value will decrease the time required for the CD image to be extracted.

2. Prepare CD image file to be ready for burning

After dd completes the image copy operation, next to prepare the extracted image / ISO to be ready for burning mkisofs is used:

# mkisofs -J -L -r -V TITLE -o /tmp/imagefile.iso /tmp/mycd.iso

The -J option makes the CD compatible for Pcs running Microsoft Windows. The -V TITLE option should be changed to whatever title the new CD should have, -r will add up status bar for the mkisofs operation.
-r is passed to create specific file permissions on the newly created CD, -o specifies the location where mkisofs will produce its file based on the CD image /tmp/mycd.iso .

3. Burning the mkisofs image file to a CD/DVD on GNU / Linux

linux:~# cdrecord -scanbus
linux:~# cdrecord dev=1,0,0 /tmp/imagefile.iso

If all wents okay with cdrecord operation, after a while the CD should be ready.

4. Burning the mkisofs image file to CD on FreeBSD

freebsd# burncd -f /dev/acd0 data /tmp/imagefile.iso fixate