Posts Tagged ‘rsync’

Rsync copy files with root privileges between servers with root superuser account disabled

Tuesday, December 3rd, 2019


rsync-copy-files-between-two-servers-with-root-privileges-with-root-superuser-account-disabled

Sometimes on servers that follow high security standards in companies following PCI Security (Payment Card Data Security) standards it is necessery to have a very weird configurations on servers,to be able to do trivial things such as syncing files between servers with root privileges in a weird manners.This is the case for example if due to security policies you have disabled root user logins via ssh server and you still need to synchronize files in directories such as lets say /etc , /usr/local/etc/ /var/ with root:root user and group belongings.

Disabling root user logins in sshd is controlled by a variable in /etc/ssh/sshd_config that on most default Linux OS
installations is switched on, e.g. 

grep -i permitrootlogin /etc/ssh/sshd_config
PermitRootLogin yes


Many corporations use Vulnerability Scanners such as Qualys are always having in their list of remote server scan for SSH Port 22 to turn have the PermitRootLogin stopped with:


PermitRootLogin no


In this article, I'll explain a scenario where we have synchronization between 2 or more servers Server A / Server B, whatever number of servers that have already turned off this value, but still need to
synchronize traditionally owned and allowed to write directories only by root superuser, here is 4 easy steps to acheive it.


1. Add rsyncuser to Source Server (Server A) and Destination (Server B)


a. Execute on Src Host:


groupadd rsyncuser
useradd -g 1000 -c 'Rsync user to sync files as root src_host' -d /home/rsyncuser -m rsyncuser


b. Execute on Dst Host:


groupadd rsyncuser
useradd -g 1000 -c 'Rsync user to sync files dst_host' -d /home/rsyncuser -m rsyncuser


2. Generate RSA SSH Key pair to be used for passwordless authentication


a. On Src Host
 

su – rsyncuser

ssh-keygen -t rsa -b 4096


b. Check .ssh/ generated key pairs and make sure the directory content look like.


[rsyncuser@src-host .ssh]$ cd ~/.ssh/;  ls -1

id_rsa
id_rsa.pub
known_hosts


3. Copy id_rsa.pub to Destination host server under authorized_keys


scp ~/.ssh/id_rsa.pub  rsyncuser@dst-host:~/.ssh/authorized_keys


Next fix permissions of authorized_keys file for rsyncuser as anyone who have access to that file (that exists as a user account) on the system
could steal the key and use it to run rsync commands and overwrite remotely files, like overwrite /etc/passwd /etc/shadow files with his custom crafted credentials
and hence hack you 🙂
 

Hence, On Destionation Host Server B fix permissions with:
 

su – rsyncuser; chmod 0600 ~/.ssh/authorized_keys
[rsyncuser@dst-host ~]$


An alternative way for the lazy sysadmins is to use the ssh-copy-id command


$ ssh-copy-id rsyncuser@192.168.0.180
/usr/bin/ssh-copy-id: INFO: Source of key(s) to be installed: "/root/.ssh/id_rsa.pub"
/usr/bin/ssh-copy-id: INFO: attempting to log in with the new key(s), to filter out any that are already installed
/usr/bin/ssh-copy-id: INFO: 1 key(s) remain to be installed — if you are prompted now it is to install the new keys
root@192.168.0.180's password: 


For improved security here to restrict rsyncuser to be able to run only specific command such as very specific script instead of being able to run any command it is good to use little known command= option
once creating the authorized_keys


4. Test ssh passwordless authentication works correctly


For that Run as a normal ssh from rsyncuser

On Src Host


[rsyncuser@src-host ~]$ ssh rsyncuser@dst-host


Perhaps here is time that for those who, think enabling a passwordless authentication is not enough secure and prefer to authorize rsyncuser via a password red from a secured file take a look in my prior article how to login to remote server with password provided from command line as a script argument / Running same commands on many servers 

5. Enable rsync in sudoers to be able to execute as root superuser (copy files as root)


For this step you will need to have sudo package installed on the Linux server.

Then, Execute once logged in as root on Destionation Server (Server B)


[root@dst-host ~]# grep 'rsyncuser ALL' /etc/sudoers|wc -l || echo ‘rsyncuser ALL=NOPASSWD:/usr/bin/rsync’ >> /etc/sudoers


Note that using rsync with a ALL=NOPASSWD in /etc/sudoers could pose a high security risk for the system as anyone authorized to run as rsyncuser is able to overwrite and
respectivle nullify important files on Destionation Host Server B and hence easily mess the system, even shell script bugs could produce a mess, thus perhaps a better solution to the problem
to copy files with root privileges with the root account disabled is to rsync as normal user somewhere on Dst_host and use some kind of additional script running on Dst_host via lets say cron job and
will copy gently files on selective basis.

Perhaps, even a better solution would be if instead of granting ALL=NOPASSWD:/usr/bin/rsync in /etc/sudoers is to do ALL=NOPASSWD:/usr/local/bin/some_copy_script.sh
that will get triggered, once the files are copied with a regular rsyncuser acct.


6. Test rsync passwordless authentication copy with superuser works


Do some simple copy, lets say copy files on Encrypted tunnel configurations located under some directory in /etc/stunnel on Server A to /etc/stunnel on Server B

The general command to test is like so:
 

rsync -aPz -e 'ssh' '–rsync-path=sudo rsync' /var/log rsyncuser@$dst_host:/root/tmp/


This will copy /var/log files to /root/tmp, you will get a success messages for the copy and the files will be at destination folder if succesful.


On Src_Host run:


[rsyncuser@src-host ~]$ dst=FQDN-DST-HOST; user=rsyncuser; src_dir=/etc/stunnel; dst_dir=/root/tmp;  rsync -aP -e 'ssh' '–rsync-path=sudo rsync' $src_dir  $rsyncuser@$dst:$dst_dir;


7. Copying files with root credentials via script


The simlest file to use to copy a bunch of predefined files  is best to be handled by some shell script, the most simple version of it, could look something like this.
 

#!/bin/bash
# On server1 use something like this
# On server2 dst server
# add in /etc/sudoers
# rsyncuser ALL=NOPASSWD:/usr/bin/rsync

user='rsyncuser';

dst_dir="/root/tmp";
dst_host='$dst_host';
src[1]="/etc/hosts.deny";
src[2]="/etc/sysctl.conf";
src[3]="/etc/samhainrc";
src[4]="/etc/pki/tls/";
src[5]="/usr/local/bin/";


for i in $(echo ${src[@]}); do
rsync -aPvz –delete –dry-run -e 'ssh' '–rsync-path=sudo rsync' "$i" $rsyncuser@$dst_host:$dst_dir"$i";
done


In above script as you can see, we define a bunch of files that will be copied in bash array and then run a loop to take each of them and copy to testination dir.
A very sample version of the script rsync_with_superuser-while-root_account_prohibited.sh 
 

Conclusion


Lets do short overview on what we have done here. First Created rsyncuser on SRC Server A and DST Server B, set up the key pair on both copied the keys to make passwordless login possible,
set-up rsync to be able to write as root on Dst_Host / testing all the setup and pinpointing a small script that can be used as a backbone to develop something more complex
to sync backups or keep system configurations identicatial – for example if you have doubts that some user might by mistake change a config etc.
In short it was pointed the security downsides of using rsync NOPASSWD via /etc/sudoers and few ideas given that could be used to work on if you target even higher
PCI standards.


Why du and df reporting different on a filesystem / How to fix inconsistency between used space on FS and disk showing full strangeness

Wednesday, July 24th, 2019

linux-why-du-and-df-shows-different-result-inconsincy-explained-filesystem-full-oddity

If you're a sysadmin on a large server environment such as a couple of hundred of Virtual Machines running Linux OS on either physical host or OpenXen / VmWare hosted guest Virtual Machine, you might end up sometimes at an odd case where some mounted partition mount point reports its file use different when checked with
df
cmd than when checked with du command, like for example:
 

root@sqlserver:~# df -hT /var/lib/mysql
Filesystem   Type  Size Used Avail Use% Mounted On
/dev/sdb5      ext4    19G  3,4G    14G  20% /var/lib/mysql

Here the '-T' argument is used to show us the filesystem.

root@sqlserver:~# du -hsc /var/lib/mysql
0K    /var/lib/mysql/
0K    total


1. Simple debug on what might be the root cause for df / du inconsistency reporting


Of course the basic thing to do when in that weird situation is to be totally shocked how this is possible and to investigate a bit what is the biggest first level sub-directories that eat up the space on the mounted location, with du:


# du -hkx –max-depth=1 /var/lib/mysql/|uniq|sort -n
4       /var/lib/mysql/test
8       /var/lib/mysql/ezmlm
8       /var/lib/mysql/micropcfreak
8       /var/lib/mysql/performance_schema
12      /var/lib/mysql/mysqltmp
24      /var/lib/mysql/speedtest
64      /var/lib/mysql/yourls
144     /var/lib/mysql/narf
320     /var/lib/mysql/webchat_plus
424     /var/lib/mysql/goodfaithair
528     /var/lib/mysql/moonman
648     /var/lib/mysql/daniel
852     /var/lib/mysql/lessn
1292    /var/lib/mysql/gallery

The given output is in Kilobytes so it is a little bit hard to read, if you're used to Mbytes instead, do


 # du -hmx –max-depth=1 /var/lib/mysql/|uniq|sort -n|less


I've also investigated on the complete /var directory contents sorted by size with:


 # du -akx ./ | sort -n
5152564    ./cache/rsnapshot/hourly.2/localhost
5255788    ./cache/rsnapshot/hourly.2
5287912    ./cache/rsnapshot
7192152    ./cache


Even after finding out the bottleneck dirs and trying to clear up a bit, continued facing that inconsistently shown in two commands and if you're likely to be stunned like me and try … to move some files to a different filesystem to free up space or assigned inodes with a hope that shown inconsitency output will be fixed as it might be caused  due to some kernel / FS caching ?? and this will eventually make the mounted FS to refresh …

But unfortunately, if you try it you'll figure out clearing up a couple of Megas or Gigas will make no difference in cmd output.

In my exact case /var/lib/mysql is a separate mounted ext4 filesystem, however same issue was present also on a Network Filesystem (NFS) and thus, my first thought that this is caused by a network failure problem or NFS bug turned to be wrong.

After further short investigation on the inodes on the Filesystem, it was clear enough inodes are available:
 

# df -i /var/lib/mysql
Filesystem       Inodes  IUsed   IFree IUse% Mounted on
/dev/sdb5      1221600  2562 1219038   1% /var/lib/mysql


So the filled inodes count assumed issue also has been rejected.
P.S. (if you're not well familiar with them read manual, i.e. – man 7 inode).
 

– Remounting the mounted filesystem

To make sure the filesystem shown inconsistency between du and df is not due to some hanging network mount or bug, first logical thing I did is to remount the filesytem showing different in size, in my case this was done with:
 

# mount -o remount,rw -t ext4 /var/lib/mysql

For machines with NFS remote mounted storage locations, used:

# mount -o remount,rw -t nfs /var/www


FS remount did not solved it so I continued to ponder what oddity and of course I thought of a workaround (in case if this issues are caused by kernel bug or OS lib issue) reboot might be the solution, however unfortunately restarting the VMs was not a wanted easy to do solution, thus I continued investigating what is wrong …

Next check of course was to check, what kind of network connections are opened to the affected hosts with:
 

# netstat -tupanl


Did not found anything that might point me to the reported different Megabytes issue, so next step was to check what is the situation with currently opened files by running processes on the weird df / du reported systems with lsof, and boom there I observed oddity such as multiple files


# lsof -nP | grep '(deleted)'

COMMAND   PID   USER   FD   TYPE DEVICE    SIZE NLINK  NODE NAME
mysqld   2588  mysql    4u   REG 253,17      52     0  1495 /var/lib/mysql/tmp/ibY0cXCd (deleted)
mysqld   2588  mysql    5u   REG 253,17    1048     0  1496 /var/lib/mysql/tmp/ibOrELhG (deleted)
mysqld   2588  mysql    6u   REG 253,17       777884290     0  1497 /var/lib/mysql/tmp/ibmDFAW8 (deleted)
mysqld   2588  mysql    7u   REG 253,17       123667875     0 11387 /var/lib/mysql/tmp/ib2CSACB (deleted)
mysqld   2588  mysql   11u   REG 253,17       123852406     0 11388 /var/lib/mysql/tmp/ibQpoZ94 (deleted)


Notice that There were plenty of '(deleted)' STATE files shown in memory an overall of 438:


# lsof -nP | grep '(deleted)' |wc -l
438


As I've learned a bit online about the problem, I found it is also possible to find deleted unlinked files only without any greps (to list all deleted files in memory files with lsof args only):


# lsof +L1|less


The SIZE field (fourth column)  shows a number of files that are really hard in size and that are kept in open on filesystem and in memory, totally messing up with the filesystem. In my case this is temp files created by MYSQLD daemon but depending on the server provided service this might be apache's www-data, some custom perl / bash script executed via a cron job, stalled rsync jobs etc.
 

2. Check all the list open files with the mysql / root user as part of the the server filesystem inconsistency debugging with:


– Grep opened files on server by user

# lsof |grep mysql
mysqld    1312                       mysql  cwd       DIR               8,21       4096          2 /var/lib/mysql
mysqld    1312                       mysql  rtd       DIR                8,1       4096          2 /
mysqld    1312                       mysql  txt       REG                8,1   20336792   23805048 /usr/sbin/mysqld
mysqld    1312                       mysql  mem       REG               8,21      24576         20 /var/lib/mysql/tc.log
mysqld    1312                       mysql  DEL       REG               0,16                 29467 /[aio]
mysqld    1312                       mysql  mem       REG                8,1      55792   14886933 /lib/x86_64-linux-gnu/libnss_files-2.28.so


# lsof | grep root
COMMAND    PID   TID TASKCMD          USER   FD      TYPE             DEVICE   SIZE/OFF       NODE NAME
systemd      1                        root  cwd       DIR                8,1       4096          2 /
systemd      1                        root  rtd       DIR                8,1       4096          2 /
systemd      1                        root  txt       REG                8,1    1489208   14928891 /lib/systemd/systemd
systemd      1                        root  mem       REG                8,1    1579448   14886924 /lib/x86_64-linux-gnu/libm-2.28.so

Other command that helped to track the discrepancy between df and du different file usage on FS is:
 

# du -hxa  / | egrep '^[[:digit:]]{1,1}G[[:space:]]*'


3. Fixing large files kept in memory filesystem problem


What is the real reason for ending up with this file handlers opened by running backgrounded programs on the Linux OS?
It could be multiple  but most likely it is due to exceeded server / client interactions or breaking up RAM or HDD drive with writing plenty of logs on the FS without ending keeping space occupied or Programming library bugs used by hanged service leaving the FH opened on storage.

What is the solution to file system files left in memory problem?

The best solution is to first fix custom script or hanged service and then if possible to simply restart the server to make the kernel / services reload or if this is not possible just restart the problem creation processes.

Once the process is identified like in my case this was MySQL on systemd enabled newer OS distros, just do:


# systemctl restart mysqld.service


or on older init.d system V ones:

# /etc/init.d/service restart


For custom hanged scripts being listed in ps axuwef you can grep the pid and do a kill -HUP (if the script is written in a good way to recognize -HUP and restart the sub-running process properly – BE EXTRA CAREFUL IF YOU'RE RESTARTING BROKEN SCRIPTS as this might cause your running service disruptions …).

# pgrep -l script.sh
7977 script.sh


# kill -HUP PID


Now finally this should either mitigate or at best case completely solve the reported disagreement between df and du, after which the calculated / reported disk space should be back to normal and show up approximately the same (note that size changes a bit as mysql service is writting data) constantly extending the size between the two checks.


# df -hk /var/lib/mysql; du -hskc /var/lib/mysql
Filesystem       Inodes  IUsed   IFree IUse% Mounted on
/dev/sdb5        19097172 3472744 14631296  20% /var/lib/mysql
3427772    /var/lib/mysql
3427772    total


What we learned?

What I've explained in this article is why and how it comes that 'zoombie' files reside on a filesystem
appearing to be eating disk space on a mounted local or network partition, giving strange inconsistent
reports, leading to system service disruptions and impossibility to have correctly shown information on used
disk space on mounted drive.

I went through with some standard logic on debugging service / filesystem / inode issues up explainat, that led me to the finding about deleted files being kept in filesystem and producing the filesystem strange sized / showing not correct / filled even after it was extended with tune2fs and was supposed to have extra 50GBs.

Finally it was explained shortly how to HUP / restart hanging script / service to fix it.

Some few good readings that helped to fix the issue:

What to do when du and df report different usage is here
df in linux not showing correct free space after file removal is here
Why do “df” and “du” commands show different disk usage?
 

Prevent rsync cronjob to run multiple times via cronjob on Linux

Wednesday, November 21st, 2018

prevent-rsync-rsync-to-run-multiple-times-via-cronjob-on-linux

Today I had a report of a server whose Load Avarage keeps at the high level of 86, the machine runs on a bare metal rock solid hardware and even with such high Loads of the kernel it runs fine, but due to the I/O overhead the SANs red from a remote NetApp storage device started to be sluggish and hence it needed to be reviewed, thus I jumped in via the hop station (jump host) into the server.
 

1. Short investation on root cause for high server load


After a short investigation, I've found an rsync job set by someone on a cron job to be routinely run every 30 minutes, thus the old scheduled rsync, which seemed to run multiple times on the server (about 50 processes) of same rsync (file system synchronization was running) and as expected the storage was saddled with mutiple Input / Output requests.

The root cron job was like that:
 

server:~# crontab -u root -l |grep -i rsync
/usr/bin/rsync -ax /var/www/htdocs/directory_to_synchronize / /srv/www/synch_back/directory_to_synchrnize


A process list showed the following high number of running mirrored rsyncs:


server:~# ps axuwwf | grep -i rsync | wc -l
80


2. The Fix – Set Rsync to only via cron only in case if it is not already running in background


In order to fix it, I had to kill all current running rsync (here luckily only same single instance of rsync was running, but generally I was cautious to check no other rsync jobs are running – otherwise I would have mistakenly killed some other rsync job ongoing …)

Then I set the following new cron job one liner quick shell script that does the job to assign a pid file that is created before rsync and deleted after rsync completion.
 

if [ ! -e /tmp/repo_dba_sync.lock ]; then touch /tmp/repo_dba_sync.lock; /usr/bin/rsync -ax /var/www/htdocs/directory_to_synchronize / /srv/www/synch_back/directory_to_synchrnize ; trap 'rm -f /tmp/repo_dba_sync.lock; fi' EXIT  >/dev/null 2>&1


The cron job looked like so:


*/30 * * * * if [ ! -e /tmp/repo_dba_sync.lock ]; then touch /tmp/repo_dba_sync.lock; /usr/bin/rsync -ax /var/www/htdocs/directory_to_synchronize / /srv/www/synch_back/directory_to_synchrnize ; trap 'rm -f /tmp/repo_dba_sync.lock; fi'  EXIT >/dev/null 2>&1

Just in case if you're wondering
a trap should be used to verify that the lock file is removed when the script is exited for any reason.
This way the lock file will be removed even if the script exits before the end of the script.

An alternative and more simple ways to do it is via:
 

pgrep rsync > /dev/null || rsync -ax /var/www/htdocs/directory_to_synchronize / /srv/www/synch_back/directory_to_synchrnize


Or if you don't want to use bash's:
 

if []; then; fi


condition but still use a file lock the flock command can be used like so:
 

flock -n lock_file -c "rsync …"

How to synchronize with / from Remote FTP server using LFTP like with rsync

Sunday, October 15th, 2017

how-to-synchronize-from-remote-ftp-server-easily-like-rsync.jpg

Have you ever been in a need to easily synchronize with a remote host which only runs FTP server?

Or are you in a local network and you need to mirror a directory or a couple of directories in a fast and easy to remember way?

If so then you'll be happy to use below LFTP command that is doing pretty much the same as Rsync, with only difference that it can mirror files over FTP (old but gold File Transfer Protocol).
 

lftp -u FTP_USERNAME,FTP_PASSWORD -e 'mirror REMOTE_DIRECTORY LOCAL_DIRECTORY' FTP_SERVER_HOSTNAME


Enjoy and thanks to my dear friend Amridikon for the tip ! 🙂

Resume sftp / scp cancelled (interrupted) network transfer – Continue (large) partially downloaded files on Linux / Windows

Thursday, April 23rd, 2015

resume-sftp-scp-cancelled-interrupted-file-transfer-download-upload-network-transfer-continue-large-partially-downloaded-file-howto-linux-windows
I've recentely have a task to transfer some huge Application server long time stored data (about 70GB) of data after being archived between an old Linux host server and a new one to where the new Tomcat Application (Linux) server will be installed to fit the increased sites accessibility (server hardware overload).

The two systems are into a a paranoid DMZ network and does not have access between each other via SSH / FTP / FTPs and even no Web Access on port (80 or SSL – 443) between the two hosts, so in order to move the data I had to use a third HOP station Windows (server) which have a huge SAN network attached storage of 150 TB (as a Mapped drive I:/).

On the Windows HOP station which is giving me access via Citrix Receiver to the DMZ-ed network I'm using mobaxterm so I have the basic UNIX commands such as sftp / scp already existing on the Windows system via it.
Thus to transfer the Chronos Tomcat application stored files .tar.gz archived I've sftp-ed into the Linux host and used get command to retrieve it, e.g.:


sftp UserName@Linux-server.net
Password:
Connected to Linux-server.
sftp> get Chronos_Application_23_04_2015.tar.gz

….


The Secured DMZ Network seemed to have a network shaper limiting my get / Secured SCP download to be at 2.5MBytes / sec, thus the overall file transfer seemed to require a lot of time about 08:30 hours to complete. As it was the middle of day about 13:00 and my work day ends at 18:00 (this meant I would be able to keep the file retrieval session for a maximum of 5 hrs) and thus file transfer would cancel when I logout of the HOP station (after 18:00). However I've already left the file transfer to continue for 2hrs and thus about 23% of file were retrieved, thus I wondered whether SCP / SFTP Protocol file downloads could be resumed. I've checked thoroughfully all the options within sftp (interactive SCP client) and the scp command manual itself however none of it doesn't have a way to do a resume option. Then I thought for a while what I can use to continue the interrupted download and I remembered good old rsync (versatile remote and local file copying tool) which I often use to create customer backup stragies has the ability to resume partially downloaded files I wondered whether this partially downloaded file resume could be done only if file transfer was only initiated through rsync itself and luckily rsync is able to continue interrupted file transfers no matter what kind of HTTP / HTTPS / SCP / FTP program was used to start file retrievalrsync is able to continue cancelled / failed transfer due to network problems or user interaction activity), that turned even pretty easy to continue failed file transfer download from where it was interrupted I had to change to directory where file is located:
 

cd /path/to/interrupted_file/


and issue command:
 

rsync -av –partial username@Linux-server.net:/path/to/file .


the –partial option is the one that does the file resume trick, -a option stands for –archive and turns on the archive mode; equals -rlptgoD (no -H,-A,-X) arguments and -v option shows a file transfer percantage status line and an avarage estimated time for transfer to complete, an easier to remember rsync resume is like so:
 

rsync -avP username@Linux-server.net:/path/to/file .
Password:
receiving incremental file list
chronos_application_23_04_2015.tar.gz
  4364009472   8%    2.41MB/s    5:37:34

To continue a failed file upload with rsync (e.g. if you used sftp put command and the upload transfer failed or have been cancalled:
 

rsync -avP chronos_application_23_04_2015.tar.gz username@Linux-server.net:/path/where_to/upload


Of course for the rsync resume to work remote Linux system had installed rsync (package), if rsync was not available on remote system this would have not work, so before using this method make sure remote Linux / Windows server has rsync installed. There is an rsync port also for Windows so to resume large Giga or Terabyte file archive downloads easily between two Windows hosts use cwRsync.

luckyBackup Linux GUI back-up and synchronization tool

Wednesday, May 14th, 2014

luckybackup_best-linux-graphical-tool-for-backup_linux_gui-defacto-standard-tool
If you're a using GNU / Linux  for Desktop and you're already tired of creating backups by your own hacks using terminal and you want to make your life a little bit more easier and easily automate your important files back up through GUI program take a look at luckyBackup.

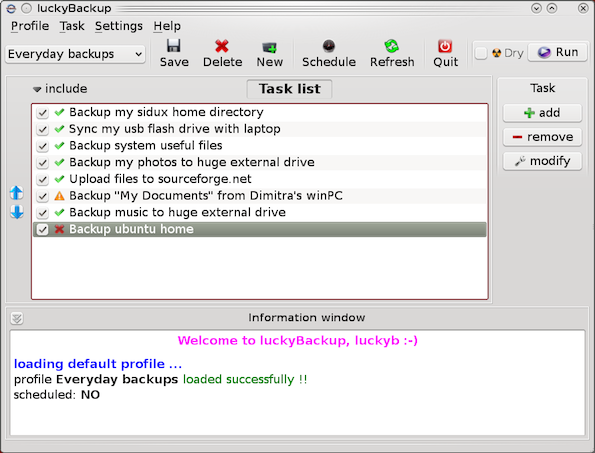
Luckibackup is a GUI frontend to the infamous rsync command line backup  tool. Luckibackup is available as a package in almost all modern Linux distributions its very easy to setup and can save you a lot of time especially if you have to manage a number of your Workplace Desktop Office Linux based computers.
Luckibackup is an absolute must have program for Linux Desktop start-up users. If you're migrating from Microsoft Windows realm and you're used to BackupPC, Luckibackup is probably the defacto Linux BackupPC substitute.

The sad news for Linux GNOME Desktop users is luckibackup is written in QT and it using it will load up a bit your notebook.
It is not installed by default so once a new Linux Desktop is installed you will have to install it manually on Debian and Ubuntu based Linux-es to install Luckibackup apt-get it.

debian:~# apt-get install --yes luckibackup
...

On Fedora and CentOS Linux install LuckiBackup via yum rpm package manager

[root@centos :~]# yum -y install luckibackup
.

Luckibackup is also ported for OpenSuSE Slackware, Gentoo, Mandriva and ArchLinux. In 2009 Luckibackup won the prize of Sourceforge Community Choice Awards for "best new project".

luckyBackup copies over only the changes you've made to the source directory and nothing more.
You will be surprised when your huge source is backed up in seconds (after the first backup).

Whatever changes you make to the source including adding, moving, deleting, modifying files / directories etc, will have the same effect to the destination.
Owner, group, time stamps, links and permissions of files are preserved (unless stated otherwise).

Luckibackup creates different multiple backup "snapshots".Each snapshot is an image of the source data that refers to a specific date-time.
Easy rollback to any of the snapshots is possible. Besides that luckibackup support Sync (just like rsync) od any directories keeping the files that were most recently modified on both of them.

Useful if you modify files on more than one PCs (using a flash-drive and don't want to bother remembering what did you use last. Luckibackup is capable of excluding certain files or directories from backupsExclude any file, folder or pattern from backup transfer.

After each operation a logfile is created in your home folder. You can have a look at it any time you want.

luckyBackup can run in command line if you wish not to use the gui, but you have to first create the profile that is going to be executed.
Type "luckybackup –help" at a terminal to see usage and supported options.
There is also TrayNotification – Visual feedback at the tray area informs you about what is going on.


How to copy / clone installed packages from one Debian server to another

Friday, April 13th, 2012

1. Dump all installed server packages from Debian Linux server1

First it is necessery to dump a list of all installed packages on the server from which the intalled deb packages 'selection' will be replicated.

debian-server1:~# dpkg --get-selections \* > packages.txt

The format of the produced packages.txt file will have only two columns, in column1 there will be the package (name) installed and in column 2, the status of the package e.g.: install or deinstall

Note that you can only use the –get-selections as root superuser, trying to run it with non-privileged user I got:

hipo@server1:~$ dpkg --set-selections > packages.txt
dpkg: operation requires read/write access to dpkg status area

2. Copy packages.txt file containing the installed deb packages from server1 to server2

There is many way to copy the packages.txt package description file, one can use ftp, sftp, scp, rsync … lftp or even copy it via wget if placed in some Apache directory on server1.

A quick and convenient way to copy the file from Debian server1 to server2 is with scp as it can also be used easily for an automated script to do the packages.txt file copying (if for instance you have to implement package cloning on multiple Debian Linux servers).

root@debian-server1:~# scp ./packages.txt hipo@server-hostname2:~/packages.txt
The authenticity of host '83.170.97.153 (83.170.97.153)' can't be established. RSA key fingerprint is 38:da:2a:79:ad:38:5b:64:9e:8b:b4:81:09:cd:94:d4. Are you sure you want to continue connecting (yes/no)? yes Warning: Permanently added '83.170.97.153' (RSA) to the list of known hosts. hipo@83.170.97.153's password:
packages.txt

As this is the first time I make connection to server2 from server1, I'm prompted to accept the host RSA unique fingerprint.

3. Install the copied selection from server1 on server2 with apt-get or dselect

debian-server2:/home/hipo# apt-get update
...
debian-server2:/home/hipo# apt-get upgrade
Reading package lists... Done
Building dependency tree
Reading state information... Done
debian-server2:/home/hipo# dpkg --set-selections < packages.txt
debian-server2:/home/hipo# apt-get -u dselect-upgrade --yes

The first apt-get update command assures the server will have the latest version of the packages currently installed, this will save you from running an outdated versions of the installed packages on debian-server2

Bear in mind that using apt-get sometimes, might create dependency issues. This is depending on the exact package names, being replicated in between the servers

Therefore it is better to use another approach with bash for loop to "replicate" installed packages between two servers, like so:

debian-server2:/home/hipo# for i in $(cat packages.txt |awk '{ print $1 }'); do aptitude install $i; done

If you want to automate the questioning about aptitude operations pass on the -y

debian-server2:/home/hipo# for i in $(cat packages.txt |awk '{ print $1 }'); do aptitude -y install $i; done

Be cautious if the -y is passed as sometimes some packages might be removed from the server to resolve dependency issues, if you need this packages you will have to again install them manually.

4. Mirroring package selection from server1 to server2 using one liner

A quick one liner, that does replicate a set of preselected packages from server1 to server2 is also possible with either a combination of apt, ssh, awk and dpkg or with ssh + dpkg + dselect :

a) One-liner code with apt-get unifying the installed packages between 2 or more servers

debian-server2:~# apt-get --yes install `ssh root@debian-server1 "dpkg -l | grep -E ^ii" | awk '{print $2}'`
...

If it is necessery to install on more than just debian-server2, copy paste the above code to all servers you want to have identical installed packages as with debian-server1 or use a shor for loop to run the commands for each and every host of multiple servers group.

In some cases it might be better to use dselect instead as in some situations using apt-get might not correctly solve the package dependencies, if encountering problems with dependencies better run:

debian-server2:/home/hipo# ssh root@debian-server1 'dpkg --get-selections' | dpkg --set-selections && dselect install

As you can see using this second dselect installed "package" mirroring is also way easier to read and understand than the prior "cryptic" method with apt-get, hence I personally think using dselect method is a better.

Well that's basically it. If you need to synchronize also configurations, either an rsync/scp shell script, should be used with all defined server1 config files or in case if a cloning of packages between identical server machines is necessery dd or some other tool like Norton Ghost could be used.
Hope this helps, someone.

How to exclude files on copy (cp) on GNU / Linux / Linux copy and exclude files and directories (cp -r) exclusion

Saturday, March 3rd, 2012

I've recently had to make a copy of one /usr/local/nginx directory under /usr/local/nginx-bak, in order to have a working copy of nginx, just in case if during my nginx update to new version from source mess ups.

I did not check the size of /usr/local/nginx , so just run the usual:

nginx:~# cp -rpf /usr/local/nginx /usr/local/nginx-bak
...

Execution took more than 20 seconds, so I check the size and figured out /usr/local/nginx/logs has grown to 120 gigabytes.

I didn't wanted to extra load the production server with copying thousands of gigabytes so I asked myself if this is possible with normal Linux copy (cp) command?. I checked cp manual e.g. man cp, but there is no argument like –exclude or something.

Even though the cp command exclude feature is not implemented by default there are a couple of ways to copy a directory with exclusion of subdirectories of files on G / Linux.

Here are the 3 major ones:

1. Copy directory recursively and exclude sub-directories or files with GNU tar

Maybe the quickest way to copy and exclude directories is through a littke 'hack' with GNU tar nginx:~# mkdir /usr/local/nginx-new;
nginx:~# cd /usr/local/nginx#
nginx:/usr/local/nginx# tar cvf - \. --exclude=/usr/local/nginx/logs/* \
| (cd /usr/local/nginx-new; tar -xvf - )

Copying that way however is slow, in my case it fits me perfectly but for copying large chunks of data it is better not to use pipe and instead use regular tar operation + mv

# cd /source_directory
# tar cvf test.tar --exclude=dir_to_exclude/*\--exclude=dir_to_exclude1/* . \
# mv test.tar /destination_directory
# cd /destination# tar xvf test.tar

2. Copy folder recursively excluding some directories with rsync

P>eople who has experience with rsync , already know how invaluable this tool is. Rsync can completely be used as for substitute=de.a# rsync -av –exclude='path1/to/exclude' –exclude='path2/to/exclude' source destination

This example, can also be used as a solution to my copy nginx and exclude logs directory casus like so:

nginx:~# rsync -av --exclude='/usr/local/nginx/logs/' /usr/local/nginx/ /usr/local/nginx-new

As you can see for yourself, this is a way more readable for the tar, however it will not work on servers, where rsync is not installed and it is unusable if you have to do operations as a regular users on such for that case surely the GNU tar hack is more 'portable' across systems.
rsync has also Windows version and therefore, the same methodology should be working on MS Windows and good for batch scripting.
I've not tested it myself, yet as I've never used rsync on Windows, if someone has tried and it works pls drop me a short msg in comments.
3. Copy directory and exclude sub directories and files with find

Find in collaboration with cp can also be used to exclude certain directories while copying. Actually this method is better than the GNU tar hack and surely more efficient. For machines, where rsync is not installed it is just a perfect way to copy files from location to location, while excluding some directories, here is an example use of find and cp, for the above nginx case:

nginx:~# cd /usr/local/nginx
nginx:~# mkdir /usr/local/nginx
nginx:/usr/local/nginx# find . -type d \( ! -name logs \) -print -exec cp -rpf '{}' /usr/local/nginx-bak \;

This will find all directories inside /usr/local/nginx with find command print them on the screen, then execute recursive copy over each found directory and copy to /usr/local/nginx-bak

This example will work fine in the nginx case because /usr/local/nginx does not contain any files but only sub-directories. In other occwhere the directory does contain some files besides sub-directories the files had to also be copied e.g.:

# for i in $(ls -l | egrep -v '^d'); do\
cp -rpf $i /destination/directory

This will copy the files from source directory (for instance /usr/local/nginx/my_file.txt, /usr/local/nginx/my_file1.txt etc.), which doesn't belong to a subdirectory.

The cmd expression:

# ls -l | egrep -v '^d'

Lists only the files while excluding all the directories and in a for loop each of the files is copied to /destination/directory

If someone has better ideas, please share with me 🙂

Use rsync to copy from files from destination host to source host (rsync reverse copy) / few words on rsync

Monday, January 9th, 2012

I've recently had to set up a backup system to synchronize backup archive files between two remote servers and as I do usually with this situation I just set up a crontab job to periodically execute rsync to copy data from source server to the destination server . Copying SRC to DEST is the default behaviour rsync uses, however in this case I had to copy from the destination server to the source server host (in other words sync files the reversely.

The usual way to copy with rsync via SSH (from SRC to DEST) is using a cmd line like:

debian:~$ /usr/bin/rsync -avz -e ssh backup-user@xxx.xxx.xxx.xxx:/home/backup-user/my-directory .

Where the xxx.xxx.xxx.xxx is my remote server IP with which files are synched.
According to rsync manual, the proposed docs SYNOPSIS is in the format;
Local: rsync [OPTION…] SRC… [DEST

Obviusly the default way to use rsync is to copy source to destination which I used until now, but in this case I had to the other way around and copy files from a destination host to the source server. It was logical that swapping the SRC and DEST would complete my required task. Anyways I consulted with some rsync gurus in irc.freenode.net , just to make sure it is proper to just swap the SRC, DEST arguments.
I was told this is possible, so I swapped args;

debian:~$ /usr/bin/rsync -avz -e ssh . backup-user@xxx.xxx.xxx.xxx:/home/backup-user/my-directory
...

Surprisingly this worked 😉 Anyways I was adviced by by a good guy nick named scheel , that putting -e ssh to command line is generally unnecessery except if there is no some uncommon used SSH port over which the data is transferred. An example case in which -e 'ssh is necessery would be if transferring via lets say SSH port 1234;

rsync -avz -e 'ssh -p1234' /source user@host:/dest

In all other cases omitting '-e ssh' is better as '-e ssh' is rsync default. Therefore my final swapped line I put in cron to copy from a destinatio to source host with rsync looked like so:

05 03 2 * * /usr/bin/ionice -c 3 /usr/bin/rsync -avz my-directory backup-user@xxx.xxx.xxx.xxx:/home/backup-user/ >/dev/null 2>&1