UNetbootin is a nice easy to use Free Software Universal mutli OS program that makes creation of Bootable USB Stick Linux, FreeBSD, NetBSD and other free operating systems a piece of cake
UNetbootin support the three major operating system architectures Windows, Mac OS X and GNU / Linux . In Debian and Ubuntu based distributions Unetbootin is available as a deb binary package:
debian:~$ dpkg -l |grep -i 'usb' |grep -i 'install'

ii unetbootin 471-2

installer of Linux/BSD distributions to a partition or USB drive
To install it with apt:
debian:~# apt-get install unetbootin

...
debian:~# unetbootin
Alternatively for all those who prefer to run it via the GNOME Application menu follow to the menu path:
Applications -> System Tools -> Unetbootin
If the program is launched with non privileged account (like via GNOME Application menu), in order to to properly tamper with any connected USB Flash drive you will be asked about the super user password.
The shipped uniboot version in current Debian stable version Squeeze is 471-2 is a bit outdated. For everyone eager to use the latest version which as of time of writting is 565 check out UnetBootin’s Official Homepage on SourceForge
Installing the distributed binary of unetbootin downloadable from its website is a trivial one. Simply download the file from the Download (for Linux) link and run the binary unetbootin-linux-565:
debian:~$ ./unetbootin-linux-565
There is one annoying thing about the latest downloadable (static compiled) unetbootin version, it was built to run using KDE’s QT library and therefore the interface that poped up while trying it was KDE like, pitily did not take advantage of my native GNOME GTK2 library :
Though this little note, unetbootin developers has done a truly great job! I tried unetbootin and was more than pleasently surprised that it prepares bootable USB sticks with only 4 mouse clicks!!! 😉 The program worked out of the box without any external or additional hacks like many of the programs I daily use it just worked 😉
UNetbootin has a thoroughful list of Free Software operating system distributions in the distributions list. Many of the offered Open Source & Free Software distributions has even possibility of installing a multiple versions of the respective distro.
Here is a complete list of all the Free & Open Source Operating Systems, unetbootin program can burn and make bootable on USB stick.
1. Ubuntu
2. Debian
3. Fedora
4. PCLinuxOS
5. Linux Mint
6. Sabayon Linux
7. Gentoo
8. OpenSUSE
9. MEPIS
10. Zenwalk
11. Arch Linux
12. Slax
13. Dream Linux
14. Damn Small Linux
15. SliTaz
16. Elive
17. CentOS
18. Puppy Linux
19. Mandriva
20. FreeBSD
21. LinuxConsole
22. Frugalware Linux
23. NetBSD
24. xPUD
25. gNewSense
26. GeeXboX
27. Gujin
28. Kaspersky Rescue Disc
29. NimbleX
30. Sabayon Linux
31. Puppy Linux
32. Mandriva
33. SuperOS
34. Xubuntu
35. Parted Magic
36. Super Grub Disk
37. Smart Boot Manager
38. 0phcrack
40. FreeNAS
41. NetBootCD
42. FreeDOS
43. Dr. Web Antivirus
44. CloneZilla
45. Kubutun
46. BackTrack
To burn and make bootable on the USB flash drive any of the listed distributions, choose the distribution name and version number as well as the Drive: (which usually will be selected by default to the first sticked USB drive let’s say /dev/sdb1). Afterwards press on the OK button and that’s it, lay down your back and wait until the distribution is downloaded from the Internet, burned into the USB pendrive and made bootable. I’ve tested Unetbootin with two distributions;
1. Xubuntu 10_04_live and; 2. Fedora 13
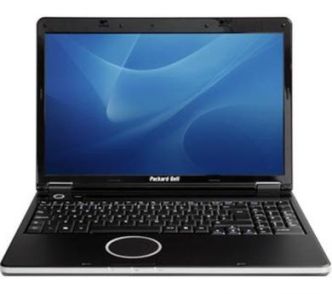
Both of the distributions got burned properly to the USB drive usng the CD images and booted fine on a Packard Bell notebook on. Having an USB drive with LiveCD GNU / Linux or BSD everywhere with you is hand and is a sort of substitute to the old linux boot floopy disk of Tomsrtbt linux distribution, I used to keep everywhere with me . Now I can move to any PC installed with Windows and use my preferred Free Software OS using an USB Stick.
Besides that, there are laptops whose CD-ROM / DVD-ROM drive is broken and therefore if one wants to re-install an improperly working Windows XP / Vista / 7 and substitute with Free operating system this task is only possible using USB Flash Disk or NetBoot Install. Installing using USB has its advantageous as you don’t depend on the network as well as the installation from USB is in most of the cases few times faster. There are plenty of other USB Linux installer programs, most of them however are only available with a Windows version.
Here are few prgrams which can be used to burn a number of Linux and *BSD installations using Microsoft Windows to create Linux / BSD liveUSB:
Universal USB Installer – http://live.learnfree.eu/download
YUMI – Your Universal Multiboot Installer – http://www.pendrivelinux.com/yumi-multiboot-usb-creator/
xBOOT – http://sites.google.com/site/shamurxboot/
I was happy to find out ’bout the existence of Universal USB Installer (this proggie written in Python) is made by a Bulgarian mate! Proud to be Bulgarian 😉 Universal USB Installer is actually multiplatform since written in Python and therefore can be used to burn a LiveUSB on GNU / Linux and (possibly on FreeBSD?)I would be glad to get feedback from other people who had experience with programs to prepare LiveUSB bootable sticks on Free Software OSes. Does anybody tried that on who *BSDs? Cheers 😉
Yesterday, one (girl)friend of mine brought me one Packard Bell notebook, which had a 2 years old Windows installed on it. As one can imagine Windows XP on it is full of Spyware and Viruses. Besides the software problems the notebook had some hardware problems with the CD / DVD which is not reading CD / DVDs at all.
Initially I thought, the CD unable to read problems are caused by the infected Windows, however even restarting the PC with a bootable Hirens BootCD and a Whoppix liveCD and trying to boot from it failed this convinced me its a CD / DVD combo drive hardware failure.
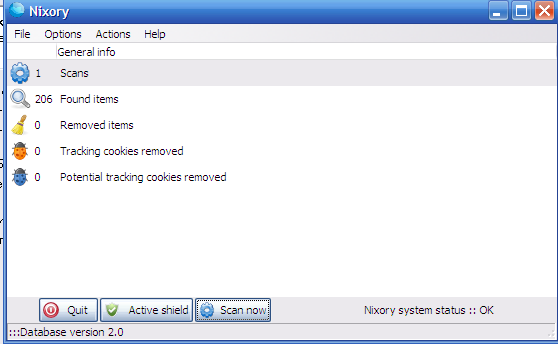
By the way, I’ve just recently found out about Nixory – Is a nice Free Software Open Source AntiSpyware tool for Firefox, IE and Chrome.
I hope it will get a sharp development and soon, when some friend asks me to fix his stupid non free-Windows PC, I would not have to use a trial version of Malware Bytes but directly use only Nixory
Anyways after using Nixory, MalwareBytes and Avira and thoroughfully scanned the system in Safe Mode and found and deleted some 15 Spyware / Viruses and tampered a bit with the Wireless Driver settings all the notebook devices started working fine again.
The wireless had also one really odd problem on this Packard Bell – Hera GL, even though the notebook wireless antenna was capable of detecting all the wireless networks it couldn’t properly connect to any of it but failed to get proper IP addresses. Partially the unable to grab an IP via wireless router dhcp server got fixed by using the Wireless restart Button (located on the Notebook corpus). However even after cleaning up the Virus and Spyware the Wireless Networks connectivity problems on this Packard Bell continued, until I changed also few settings in the Control PanelI never thought Viruses / Spyware infected can have some bad impact on Wireless Card and CD drive make them unsusable though they showed like working correctly in Windows Control Panel -> System ??
In the meantime I reinstalled the Wireless Driver for the notebook, the Wireless card on the notebook was showing up itself under the name of Ralink 802.11n Wireless Lan Card in Windows Device Manager
After re-installing the wireless driver I had to also change few settings for the Wireless Network Connection using the menus Properties -> Configure -> Extended; therein everywhere for each Value I make it be Enable and for Power Saving Mode , I’ve choose the Value option of CAM
After a system reboot, everything started working finally fine. One last thing to add is that before I fixed the Ralink wireless to work under Windows, I tried to use a Bootable Linux LiveCD but even there the wireless was failing to connect to the wireless networks (maybe this shit wireless device has some issues with its Linux drivers).
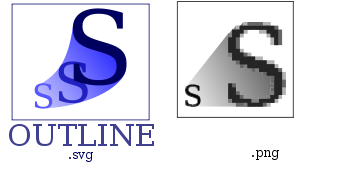
I’ve playing trying to learn InkScape – The Open Source vector graphic editor .By so far I’m quite impressed on how easy this program is learned and how easy graphical manipulation with this nifty program can be done. The default format in which InkScape saves its files is SVG (Scalable Vectors Graphics). For all those unfamiliar with SVG – SVG is an open (free format) format developed in 1999 which insetad of containing binary data like PNG or JPEG does contain plain XML content. SVG being consisted of plain XML has multiple advantageous, the most important one makes it easy for text and visual data to be displayed among different program svg readers in absolutely identical way. Besides that the format if read with plain text editor like vim or emacs can be altered directly via the source. Being multi system interoperable makes SVG as a great format for text and visual data storage in HTML5, actually SVG is already a part of the HTML5 html coding standard. And most probably its adoption rate will raise up drastically as soon as HTML5 starts substitute HTML4 and lower web standards.
Anyways I’m slipping away from the aim of this post so I’ll stop blabbering on how great SVG is and let people check it out for themselves (if not already).
Going back to the aim of my article to show How to convert SVG to PNG graphical extension on GNU / Linux and FreeBSD
After producing a bunch of files with InkScape I realized the default format in which Inkscape stores its files is SVG , this was okay with me but since I wanted to have my experimental produced content in PNG I needed a way to convert SVG to My first logical guess was that The Gimp will be able to handle the situation and after opening my SVG file with GIMP and used the gimp File -> Save As option and give the SVGfile an extension of PNG , Gimp succesfully converted the file to PNG.
However I wanted to dig further and check out what is the standard accepted way to convert SVG files using a plain command. This will possibly be handy to me if I had to do something online (let’s say a website) which will accept SVG and will require the SVG files to be converted and also stored in PNG or other Graphic file formats.
After checking online, I’ve found a post which pointed me to librsvg2 which contains RSVG – (Turn SVG files into raster images.)
librsvg is available as a package in most mainstream Linux distributions nowdays, Fedora, Debian etc., as well as contains a port inside the FreeBSD ports system. Since I’m using Debian on my notebook where I installed and tested the command line SVG to PNG convertion the way I did it is:
noah:/home/hipo/Desktop# apt-get --yes install librsvg2-bin

Reading package lists... Done

Building dependency tree

Reading state information... Done

The following NEW packages will be installed:

librsvg2-bin

0 upgraded, 1 newly installed, 0 to remove and 16 not upgraded.

Need to get 72.5 kB of archives.

After this operation, 180 kB of additional disk space will be used.

Get:1 http://ftp.nl.debian.org/debian/ squeeze/main librsvg2-bin amd64 2.26.3-1 [72.5 kB]

Fetched 72.5 kB in 0s (184 kB/s)

Selecting previously deselected package librsvg2-bin.

(Reading database ... 376046 files and directories currently installed.)

Unpacking librsvg2-bin (from .../librsvg2-bin_2.26.3-1_amd64.deb) ...

Processing triggers for man-db ...

Setting up librsvg2-bin (2.26.3-1) ...
Afterwards the exact convertion of my Inscape SVG file drawing.svg to drawing.png using rsvg I’ve done like so:
hipo@noah:~/Desktop$ rsvg drawing.svg drawing.png
The convertion results for me was 100% uniqueness between the file converted and the output PNG. Some people might wonder why I didn’t used Inkscape’s Export to Bitmap function and then use convert command part of ImageMagick in order to convert the produced Inkscape bitmap to PNG.
One other thing worthy to mention is on Debian, librsvg2-bin contains 2 more executable besides rsvg. One is the rsvg-view command which allows one to view SVG files using command line or Graphic enviroment, the other one is rsvg-convert which supports again SVG convertion to PDF and to PNG
Before proceeding with the other described ways to convert SVG to PNG earlier in this article, I give a try to Inkscape’s Export to Bitmap embedded function but the produced bitmap did not resembled the original SVG file so I decided to completely abandon this method Maybe there is some particular reason of the chaotic way I’ve tested Inkscape to place random images sometimes going out of the field of a paper etc. which influenced the improper generation of Bitmap using Inkscape, despite that it seems InkScape needs some more development until the bugs in Bitmap producing get fixed and it can be freely used to produce Bitmaps.
Maybe there is some particular reason for the failure of Inkscape to produce a good BMP file, like for example the chaotic way I’ve tested Inkscape to place random images sometimes going out of the field of a paper borders etc.This should have influenced the improper generation of Bitmap using Inkscape, anyhow it seems InkScape needs some more development until the bugs in Bitmap creation get fixed.
By the way if you’re wondering how to convert PNG to bitmap BMP after, once having converted SVG to PNG this is easily doable with convert command, like so:
Maybe in future releases it will be a good idea if InkScape developers integrate a convertion to other formats this will make it handy and make surely these nice program more popular among users. Hope this is helpful. Cheers and as RMS likes to say Happy Hacking 😉
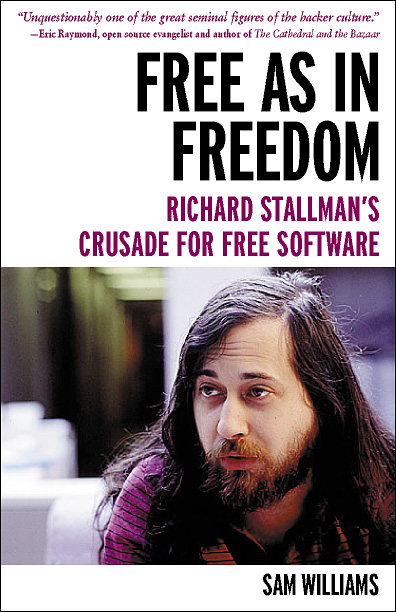
I’m currently reading Free as in Freedom (2.0) R. Stallman and the Free Software Revolution The book includes a reference to Eric S. Raymond ‘s famous The Cathedral and the Bazaar which does makes a point about the important of Open Source . I’ve read the The Cathedral and the Bazaar paper some very long time ago (in my young days so to say) and hence I couldn’t resemble much of the document so I jumped in after the footnote in the FAIF book and decided to take a quick look on The Cathedral and the Bazaar once again to bring up some memories. I was stunned to find the paper is available in many formats but officially not included in PDF . Since i’m a GNU / Linux user I’ve never managed to get into the habit to read postscript documents which from modern day stand point are also already a bit of obsolete and therefore I found it as a wise idea to convert and mirror the POSTSCRIPT (PS) version of the document to PDF on www.pc-freak.net
Happily the ps2pdf command to convert the ps to pdf on my debian gnu / linux is really easy:
Even though the “open source” movement is an interesting idea and it had some major impact on the development of some free software the idiology of open source which was very much influenced by this document is very weak compared to the philosophy Richard Stallman indcuded as of the great need of the software to be free.
To be honest looking back in time for a long time being a Linux user I did not make any distinguishment between “Free Software” concept and “Open Source”, even worser I considered to evangelize on Open Source not realizing that initially what attracted me to free software was the idiology of open source and not the real values on which ground free software is built. This kind of miss understanding between perception of “open source” and “free software” I got and spread for years now I fully realize and I seem like when I red back then The Cathedral and the Bazaar document I didn’t looked any critical at the document but it had a major, I would say “bad” impact on my idiology on software for a long time. So for all those who had not checked it it’s worthy checking but only in case if one fully understands Richard Stallman’s concept of Free Software, without this understanding one can easily slip into the wrong believe (just like me back in thme) that open source is the same as free software. Even though open source can be free software it is not presumably that an open source is free software and that it guarantees that the published source will be free. But I’ll stop now as I slept away from my goal of the article to just log here how a convertion of postscript to pdf on gnu / linux is done. Just to close up this article I warmly recommend on all people interested into hacking and the history of Free operating systems and Free software as FreeBSD and GNU / Linux the Free as in Freedom (2.0) book ! Its truly a remarkable and great inspirational reading for all people like me involved into free software realm of ICT.
The classical way to keep a process running in background after log out of a shell is using screen Anyways using screen is not the only way to detach a running process , GNU / Linux and BSDs (Free, Open, Net BSDs) had a command nohup which aim is to run a command immune to hangups, with output to a non-tty
Let’s say one wants to keep track (log) constantly ICMP traffic to a certain host with ping command on a UNIX server / desktop which doesn’t have the screen manager … terminal emulation program installed. Achieving this task is possible with nohup cmd by backgrounding the ping process, like so:
guoi@host:~$ nohup ping google.com >ping.log &[1] 45931hipo@host:~$ nohup: ignoring input and redirecting stderr to stdout
Afterwards even after closing up the opened ssh session or console (tty) / terminal (pts) on which the ping process is background nohup prevents the ping to be sent kill SIGNAL so the process continues running in the background.
Later on to check in real time the statistics of the continuous ICMP ping requests tail, less, or cat can be used for example watching the tail:
hipo@host:~$ tail -f ping.log

64 bytes from fx-in-f106.1e100.net (74.125.39.106): icmp_req=562 ttl=51 time=44.0 ms

64 bytes from fx-in-f106.1e100.net (74.125.39.106): icmp_req=563 ttl=51 time=43.8 ms

64 bytes from fx-in-f106.1e100.net (74.125.39.106): icmp_req=564 ttl=51 time=43.3 ms

64 bytes from fx-in-f106.1e100.net (74.125.39.106): icmp_req=565 ttl=51 time=43.1 ms

64 bytes from fx-in-f106.1e100.net (74.125.39.106): icmp_req=566 ttl=51 time=43.4 ms

64 bytes from fx-in-f106.1e100.net (74.125.39.106): icmp_req=567 ttl=51 time=43.6 ms
I’m using Linux / BSD for quite a lot of time and never before put in use the nohup cmd I guess there are more ppl who never heard of this handy UNIX basic command. Hope I’m not the only one who never heard about it and its useful knowledge to someone out. Cheers 😉
I was looking for a way to convert some Video and Sound files, downloaded from Youtube (mostly things dedicated to free software) and as far as I looked online unfortunately these pieces of nice music and tutorials are not available for download anywhere else or at least not available for download in some of the Open / Free Format (OGG Vorbis or OGV (OGG / Theora Video).
When it comes to convertion between different formats, always the first things that I think of is ffmpeg or mencoder , however I was not sure if some of this tools are doing the trick so I did a quick research online if there is some specialised console or GUI program that can do the convertions between MP4, FLV etc. to OGV.
In less than 10 minutes I found a threat mentioning about ffmpeg2theora – A Simple Convertor to create Ogg Theora files
As I’m running Debian GNU / Linux, I installed ffmpeg2theora straight via apt, according to some reports online ffmpeg2theora cmd convertion tool is also available straight from repositories on Ubuntu as well. On FreeBSD there is a port /usr/ports/multimedia/ffmpeg2theora available for install. Of course FFmpeg2Theora can be installed from source on other Linux distributions that might be missing a pre-built binary.
Using ffmpeg2theora to convert some kind of non-free video format is very simple, though the tool provides quite a numerous options for all those who want to have some customization for the video to be converted. To convert the flash file “The Gnu Song.flv” for example to The Gnu Song.flv , I invoked ffmpeg2theora like this:
debian:~# ffmpeg2theora "The Gnu Song.flv"

...
The conversion took few minutes of time, as my machine is not ultra powerful and apparently the conversion to OGV format is not too quick but the good news is it works. After the conversion was completed I used ogginfo to check the information about the recent converted file The Gnu Song.flv , below you see the file info ogginfo returns
debian:~# ogginfo The Gnu Song.ogv

Processing file "The Gnu Song.ogv"...
New logical stream (#1, serial: 5d65413f): type skeleton New logical stream (#2, serial: 0570412d): type theora New logical stream (#3, serial: 7e679651): type vorbis Theora headers parsed for stream 2, information follows… Version: 3.2.1 Vendor: Xiph.Org libtheora 1.1 20090822 (Thusnelda) Width: 320 Height: 240 Total image: 320 by 240, crop offset (0, 0) Framerate 25/1 (25.00 fps) Aspect ratio undefined Colourspace: Rec. ITU-R BT.470-6 Systems B and G (PAL) Pixel format 4:2:0 Target bitrate: 0 kbps Nominal quality setting (0-63): 32 User comments section follows… ENCODER=ffmpeg2theora-0.24 Vorbis headers parsed for stream 3, information follows… Version: 0 Vendor: Xiph.Org libVorbis I 20101101 (Schaufenugget) Channels: 1 Rate: 22050 Nominal bitrate: 30.444000 kb/s Upper bitrate not set Lower bitrate not set User comments section follows… ENCODER=ffmpeg2theora-0.24 Logical stream 1 ended Theora stream 2: Total data length: 1525324 bytes Playback length: 2m:41.360s Average bitrate: 75.623401 kb/s Logical stream 2 ended Vorbis stream 3: Total data length: 646729 bytes Playback length: 2m:41.384s Average bitrate: 32.059041 kb/s
ogginfo is a part of a package installed under the name vorbis-tools, vorbis tools also contains a few other helpful tools, whether operations with OGV or OGG file formats are at hand, the complete binaries vorbis-tools contains on Debian as of time of writting this post is:
ogg123 is a player for ogg files, however as far as I’ve tested it it doesn’t work too well. And just to compare ogg audio files were played just nice using the play command. oggenc is used to encode ogg audio file, based on a stream haneded to it from other audio encoded stream (let’s say mp3). Hence oggenc can be used to convert mp3 files to ogg audio files , like so:
oggdec is used to convert to wav files or raw PCM audio, whether; vcut is used to cut ogg video file on parts. vorbiscomment and vorbistagedit is used to edit information on already existing ogg audio files
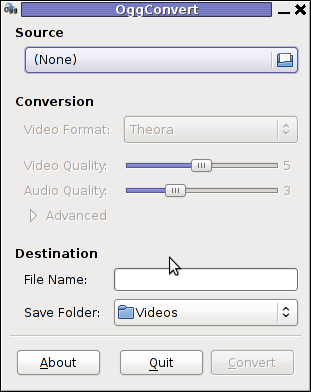
There is also a GUI programmer for people who doesn’t want to bother with writting on the command line called oggconvert . OggConvert is written for GNOME and uses GTK gnome library, here is how the program looks like:
If you're looking for a command line utility to generate PDF file out of any webpage located online you are looking for Wkhtmltopdf The conversion of webpages to PDF by the tool is done using Apple's Webkit open source render. wkhtmltopdf is something very useful for web developers, as some webpages has a requirement to produce dynamically pdfs from a remote website locations. wkhtmltopdf is shipped with Debian Squeeze 6 and latest Ubuntu Linux versions and still not entered in Fedora and CentOS repositories.
To use wkhtmltopdf on Debian / Ubuntu distros install it via apt;
If the web page to be snapshotted in long few pages a few pages PDF will be generated by wkhtmltopdf wkhtmltopdf also supports to create the website snapshot with a specified orientation Landscape / Portrait
Debian and Ubuntu version of wkhtmltopdf does not support TOC generation and Adding headers and footers, to support it one has to download and install the static version of wkhtmltopdf Using the static version of the tool is also the only option for anyone on Fedora or any other RPM based Linux distro.
A friend of mine has sent me a link to awesome videos produced with an open source tool called Gource
The tool is really awesome as its capable of producing amazing graphical visualizations from source tree repositories obtained from software SVN or GIT repositories
Someone used it to create a wonderful videos and relate the graphical visualization with wondeful music to show graphically the Software development for the main Free Software Projects. 😉
The points which move around in videos are graphical representation of the repository source, the nodes which buzzle around are users who commit source in the project repositories. The whole graphical representation is being generated based on all the latest source hold inside the software repository, on top of the videos its visible the date of each of the source commits. Below are few of the nice videos, the rest are available for checkout in Youtube, Enjoy! 😉
OpenOffice Development – Graphical representation
PHP Development – Graphical representation
History of Python development since 1990 with Gource
Development of MySQL 2000-2010 – Graphical representation
Perl development history in less then 4 minutes. Visualized with gource.
I really hate this new Debian theme SpaceFun / MoreBlue Orbit – (cosmic stars theme). I find it too childish and the combination of the blue color and the stars is so dis-tasteful.
If you’re not using a Debian GNU/Linux 6.0 or Debian Testing/Unstable you have probably not encountered this ugliness, you see on below’s picture.
I do understand the theme design guys wanted to have something which ties to Christmas (at the time of creating it), but come on Christmas has gone long time ago and it’s about Easter and the bad Christmas looking theme is still there … The possibility that this theme might stay as a default one for the GRUB boot manager and for Gnome Display Manager during the whole Debian Squeeze 6.0 release cycle (about 2 years time) is quite sad.
My dislike for the more blue orbit theme has pushed me into a desire to change this theme into something which is more likeable for the eye.
The idea behind this post was to express my thoughts on the bad graphic design policy Debian has recently embraced, along with the few lines concerning the gdm theme change setup.
This ugly new theme picture has even appeared on the official website of Debian ( debian.org ).
We all know that Linux is not notable with a great Design, as most good graphic designers are Windows users, but still the old simplistic Debian ideas about themes made more sense to me.
Now after I’ve expressed my personal thoughts and feelings on Debian’s new graphic design policy I’ll skip further and will explain how to change the gdm theme: in few seconds:
1. Open gnome-terminal and become root and launch gdmsetup:
GDMSetup requires root privileges as it changes the theme of Gnome Display Manager for the whole system:
hipo@debian:~$ su root

debian:~# gdmsetup
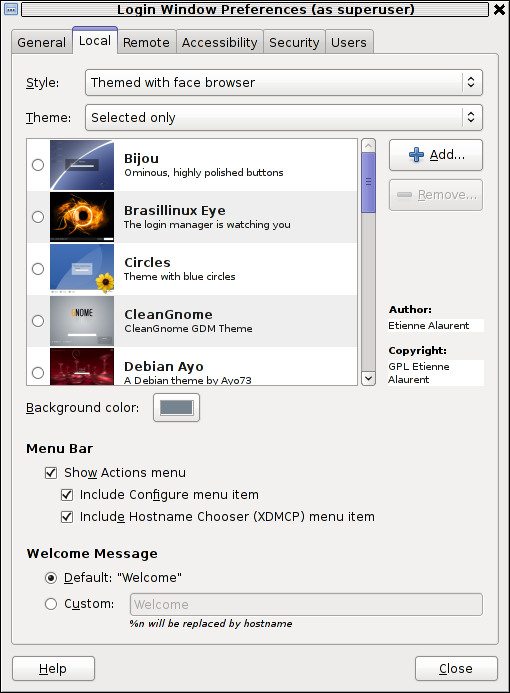
2. You will see the gnome display manager setup program to appear on the screen :
3. As you see in the screenshot you need to go to the menu:
Local and scroll down to see the complete list of system installed themes. Installing new themes is also a piece of cake, all you have to do is download a selected GDM from art.gnome.org or gnome-look.org and use the Add button you see on the screenshot to include the theme from the list of themes you can further use.
There are number of options in gdmsetup which can change the way gdmsetup authenticates users in Gnome, it also allows useful things like for example:
Remote Login (located in Remote menu, for example remote gdm logins through Xserver)
Accessibility (see Accessibility menu) – options (for blind and deaf people’s login)
Automatic user login (Logging in Gnome without a password)
Enabling the root (administrator) user login
Disable certain system user’s ability to login via gdm
etc.
The default Welcome screen text “Welcome” could also easily be changed from the menus:
Local -> Custom
Just type in your custom text you want to appear on Gnome’s user login screen in the Custom field, and restart gdm:
debian:~# killall -HUP gdm
Next gdm login will prompt you with your new selected theme and text.
I personally liked LiNsta (LiNsta is Not Vista GDM theme with Gnome Logo) the most and I recommend it to everybody who wants to switch from the old Debian MoreBlue Orbit ugly theme.
Concerning the Debian themes bad design, I hope truly that this will change soon. I’m quite interested if other people share my opinion about the new themes implemented in Debian. Looking forward to hear for your opinions!

 Though this little note, unetbootin developers has done a truly great job! I tried unetbootin and was more than pleasently surprised that it prepares bootable USB sticks with only 4 mouse clicks!!! 😉