Posts Tagged ‘installed’

How to check version of most used mail servers Postfix / Qmail / Exim / Sendmail

Wednesday, October 14th, 2020

How to check version of a Linux host's installed Mail server?

Most used mail servers Postfix / Qmail / Exim / Sendmail and usually you have to do a dpkg -l / rpm -qa or whatever package manager to get the package version. But sometimes the package is built to have a different naming convention from the actual installed MTA.

As recently I had to check on a Linux host what kind of version was the installed and used one to the SMTP, below is how to find conrete versions of Postfix / Qmail / Exim / Sendmail.
If none of the 4 is installed and something more cryptic like ssmtp is installed if another one is installed perhaps the best way would be to check with lsof -i :25 command and see  what process has binded and listens on TCP port 25.

mail-server-lsof-linux-screenshot-qmail-vpopmail


1. How to check Postfix exact mail server version

mail-server-exim-check-lsof-screenshot

Once you can find Postfix is the Network listening MTA, you might think you can simply use postfix -v however, but no …
Unlike many other applications, Postfix has no -v or –versions switch. But you can get the version information easily by using the postconf command as shown below:

root@server :~# postconf mail_version

postfix-show-version-postconf-linux

Other approach is to dump all postfix configuration settings (this is useful to get more info on how postfix is configured) and explicitly grep for the version.
 How to check version of a Linux host's installeded webserver?

root@server :~# postconf -d | grep mail_version


2. How to check Exim MTA running version ?

root@exim-mail :/ # exim -bV
Exim version 4.72 #1 built 13-Jul-2010 21:54:55
Copyright (c) University of Cambridge, 1995 – 2007
Berkeley DB: Sleepycat Software: Berkeley DB 4.3.29: (September 19, 2009)
Support for: crypteq iconv() Perl OpenSSL move_frozen_messages Content_Scanning DKIM Old_Demime
Lookups: lsearch wildlsearch nwildlsearch iplsearch cdb dbm dbmnz
Authenticators: cram_md5 plaintext spa
Routers: accept dnslookup ipliteral manualroute queryprogram redirect
Transports: appendfile/maildir/mailstore/mbx autoreply lmtp pipe smtp
Size of off_t: 8
OpenSSL compile-time version: OpenSSL 0.9.8e-fips-rhel5 01 Jul 2008
OpenSSL runtime version: OpenSSL 0.9.8e-fips-rhel5 01 Jul 2008
Configuration file is /etc/exim.conf

how-to-get-exim-version-on-gnu-linux-screenshot


3. How to check Sendmail Mail Transport Agent exact Mail version ?

Though sendmail is rarely used this days and it usually works mostly on obsolete old scrap hosts
or in some old fashioned conservative organizations such as Banks and Payment services providers, you might need to invertise it, just like the configuration m4 format complexity with its annoying macros, getting the version is also not straight forward:

# sendmail -d0.4 -bv root | grep Version
Version 8.14.4

Above commands should be working on most Linux distributions such as Debian / Ubuntu / Fedora / CentOS / SuSE and other Linux derivatives
 

4. How to check Qmail MTA version?

This is a bit of complicated question, as Qmail's base has not been significantly changed for years.
The latest published qmail package is qmail-1.03.tar.gz.  1.03 was released in 1998, Qmail is famous for its unbreakable security. The author of qmail  Daniel J. Bernstein is famous for writting Qmail to make the work installation and configuration of SMTP simple as of the time of writting sendmail was the defacto standard and sendmail was hard to configure.
Also sendmail was famous for a set of Security holes that got a lot of Sendmail MTA's on the Net got hacked. Thus the QMAIL was written as a more security-aware mail transport agent.

In contrast to sendmail, qmail has a modular architecture composed of mutually untrusting components; for instance, the SMTP listener component of qmail runs with different credentials from the queue manager or the SMTP sender. qmail was also implemented with a security-aware replacement to the C standard library, and as a result has not been vulnerable to stack and heap overflows, format string attacks, or temporary file race conditions.

The core qmail package has not been updated for many years. New features were initially provided by third party patches, from which the most important at the time were brought together in a single meta-patch set called netqmail.

The current version of netqmail is at 1.06 netqmail-1.06.tar.gz as of year 2020.

One possible way to get some info about installed qmail or components is to use the documentation look up command apropos

qmail:~# apropos qmail


or check the manual or at worst check for the installation source files that the person that installed the qmail used 🙂

A fun fact about qmail few might know is D. Bernstein offered in 1997 a US$500 reward for the first person to publish a verifiable security hole in the latest version of the software, for many years till 2005 no hole was found security researcher Georgi Guninski found an integer overflow in qmail. On 64-bit platforms, in default configurations with sufficient virtual memory, the delivery of huge amounts of data to certain qmail components may allow remote code execution. Bernstein disputes that this is a practical attack, arguing that no real-world deployment of qmail would be susceptible. Configuration of resource limits for qmail components mitigates the vulnerability.

On November 1, 2007, Bernstein raised the reward to US$1000. At a slide presentation the following day, Bernstein stated that there were 4 "known bugs" in the ten-year-old qmail-1.03, none of which were "security holes." He characterized the bug found by Guninski as a "potential overflow of an unchecked counter." "Fortunately, counter growth was limited by memory and thus by configuration, but this was pure luck.

5. Quick way to check the type of Mail server installed on Debian based Linux that doesn't have telnet installed


As you know simple telnet localhost 25 or a simple ps -ef could reveal at most times general information on the installed server. However there is another way to do it using package manager. by using embedded bash shell type type command like so:
 

# type -p sendmail |
xargs dpkg -S

type-x-bash-command-to-find-out-email-server-version-on-linux

Another hacky way to check whether exim, postfix or sendmail SMTP is installed is with:

hipo@freak:~$ echo $(man sendmail)| grep "exim"|wc -l
1
hipo@freak:~$ echo $(man sendmail)| grep "postfix"|wc -l
0
hipo@freak:~$ echo $(man sendmail)| grep "sendmail"|wc -l
0

I guess there are nice hacks and ways to get versions, so if you're aware of any please share with me.
Enjoy !

Reinstall all Debian packages with a copy of apt deb package list from another working Debian Linux installation

Wednesday, July 29th, 2020

Reinstall-all-Debian-packages-with-copy-of-apt-packages-list-from-another-working-Debian-Linux-installation

Few days ago, in the hurry in the small hours of the night, I've done something extremely stupid. Wanting to move out a .tar.gz binary copy of qmail installation to /var/lib/qmail with all the dependent qmail items instead of extracting to admin user /root directory (/root), I've extracted it to the main Operating system root / directrory.
Not noticing this, I've quickly executed rm -rf var with the idea to delete all directory tree under /root/var just 3 seconds later, I've realized I'm issuing the rm -rf var with the wrong location WITH a root user !!!! Being scared on what I've done, I've quickly pressed CTRL+C to immedately cancel the deletion operation of my /var.
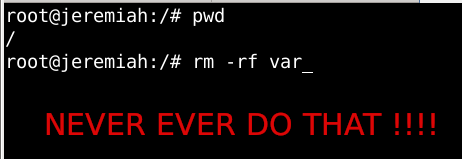
wrong-system-var-rm-linux-dont-do-that-ever-or-your-system-will-end-up-irreversably-damaged

But as you can guess, since the machine has an Slid State Drive drive and SSD memory drive are much more faster in I/O operations than the classical ATA / SATA disks. I was not quick enough to cancel the operation and I've noticed already some part of my /var have been R.I.P-pped in the heaven of directories.

This was ofcourse upsetting so for a while I rethinked the situation to get some ideas on what I can do to recover my system ASAP!!! and I had the idea of course to try to reinstall All my installed .deb debian packages to restore system closest to the normal, before my stupid mistake.

Guess my unpleasent suprise when I have realized dpkg and respectively apt-get apt and aptitude package management tools cannot anymore handle packages as Debian Linux's package dependency database has been damaged due to missing dpkg directory 


/var/lib/dpkg 


Oh man that was unpleasent, especially since I've installed plenty of stuff that is custom on my Mate based desktop and, generally reinstalling it updating the sytem to the latest Debian security updates etc. will be time consuming and painful process I wanted to omit.

So of course the logical thing to do here was to try to somehow recover somehow a database copy of /var/lib/dpkg  if that was possible, that of course led me to the idea to lookup for a way to recover my /var/lib/dpkg from backup but since I did not maintained any backup copy of my OS anywhere that was not really possible, so anyways I wondered whether dpkg does not keep some kind of database backups somewhere in case if something goes wrong with its database.
This led me to this nice Ubuntu thred which has pointed me to the part of my root rm -rf dpkg db disaster recovery solution.
Luckily .deb package management creators has thought about situation similar to mine and to give the user a restore point for /var/lib/dpkg damaged database

/var/lib/dpkg is periodically backed up in /var/backups

A typical /var/lib/dpkg on Ubuntu and Debian Linux looks like so:
 

hipo@jeremiah:/var/backups$ ls -l /var/lib/dpkg
total 12572
drwxr-xr-x 2 root root    4096 Jul 26 03:22 alternatives
-rw-r–r– 1 root root      11 Oct 14  2017 arch
-rw-r–r– 1 root root 2199402 Jul 25 20:04 available
-rw-r–r– 1 root root 2199402 Oct 19  2017 available-old
-rw-r–r– 1 root root       8 Sep  6  2012 cmethopt
-rw-r–r– 1 root root    1337 Jul 26 01:39 diversions
-rw-r–r– 1 root root    1223 Jul 26 01:39 diversions-old
drwxr-xr-x 2 root root  679936 Jul 28 14:17 info
-rw-r—– 1 root root       0 Jul 28 14:17 lock
-rw-r—– 1 root root       0 Jul 26 03:00 lock-frontend
drwxr-xr-x 2 root root    4096 Sep 17  2012 parts
-rw-r–r– 1 root root    1011 Jul 25 23:59 statoverride
-rw-r–r– 1 root root     965 Jul 25 23:59 statoverride-old
-rw-r–r– 1 root root 3873710 Jul 28 14:17 status
-rw-r–r– 1 root root 3873712 Jul 28 14:17 status-old
drwxr-xr-x 2 root root    4096 Jul 26 03:22 triggers
drwxr-xr-x 2 root root    4096 Jul 28 14:17 updates

Before proceeding with this radical stuff to move out /var/lib/dpkg/info from another machine to /var mistakenyl removed oned. I have tried to recover with the well known:

  • extundelete
  • foremost
  • recover
  • ext4magic
  • ext3grep
  • gddrescue
  • ddrescue
  • myrescue
  • testdisk
  • photorec

Linux file deletion recovery tools from a USB stick loaded with a Number of LiveCD distributions, i.e. tested recovery with:

  • Debian LiveCD
  • Ubuntu LiveCD
  • KNOPPIX
  • SystemRescueCD
  • Trinity Rescue Kit
  • Ultimate Boot CD


but unfortunately none of them couldn't recover the deleted files … 

The reason why the standard file recovery tools could not recover ?

My assumptions is after I've done by rm -rf var; from sysroot,  issued the sync (- if you haven't used it check out man sync) command – that synchronizes cached writes to persistent storage and did a restart from the poweroff PC button, this should have worked, as I've recovered like that in the past) in a normal Sys V System with a normal old fashioned blocks filesystem as EXT2 . or any other of the filesystems without a journal, however as the machine run a EXT4 filesystem with a journald and journald, this did not work perhaps because something was not updated properly in /lib/systemd/systemd-journal, that led to the situation all recently deleted files were totally unrecoverable.

1. First step was to restore the directory skele of /var/lib/dpkg

# mkdir -p /var/lib/dpkg/{alternatives,info,parts,triggers,updates}


2. Recover missing /var/lib/dpkg/status  file

The main file that gives information to dpkg of the existing packages and their statuses on a Debian based systems is /var/lib/dpkg/status

# cp /var/backups/dpkg.status.0 /var/lib/dpkg/status


3. Reinstall dpkg package manager to make package management working again

Say a warm prayer to the Merciful God ! and do:

# apt-get download dpkg
# dpkg -i dpkg*.deb


4. Reinstall base-files .deb package which provides basis of a Debian system

Hopefully everything will be okay and your dpkg / apt pair will be in normal working state, next step is to:

# apt-get download base-files
# dpkg -i base-files*.deb


5. Do a package sanity and consistency check and try to update OS package list

Check whether packages have been installed only partially on your system or that have missing, wrong or obsolete control  data  or  files.  dpkg  should suggest what to do with them to get them fixed.

# dpkg –audit

Then resynchronize (fetch) the package index files from their sources described in /etc/apt/sources.list

# apt-get update


Do apt db constistency check:

#  apt-get check


check is a diagnostic tool; it updates the package cache and checks for broken dependencies.
 

Take a deep breath ! …

Do :

ls -l /var/lib/dpkg
and compare with the above list. If some -old file is not present don't worry it will be there tomorrow.

Next time don't forget to do a regular backup with simple rsync backup script or something like Bacula / Amanda / Time Vault or Clonezilla.
 

6. Copy dpkg database from another Linux system that has a working dpkg / apt Database

Well this was however not the end of the story … There were still many things missing from my /var/ and luckily I had another Debian 10 Buster install on another properly working machine with a similar set of .deb packages installed. Therefore to make most of my programs still working again I have copied over /var from the other similar set of package installed machine to my messed up machine with the missing deleted /var.

To do so …
On Functioning Debian 10 Machine (Working Host in a local network with IP 192.168.0.50), I've archived content of /var:

linux:~# tar -czvf var_backup_debian10.tar.gz /var

Then sftped from Working Host towards the /var deleted broken one in my case this machine's hostname is jericho and luckily still had SSHD and SFTP running processes loaded in memory:

jericho:~# sftp root@192.168.0.50
sftp> get var_backup_debian10.tar.gz

Now Before extracting the archive it is a good idea to make backup of old /var remains somewhere for example somewhere in /root 
just in case if we need to have a copy of the dpkg backup dir /var/backups

jericho:~# cp -rpfv /var /root/var_backup_damaged

 
jericho:~# tar -zxvf /root/var_backup_debian10.tar.gz 
jericho:/# mv /root/var/ /

Then to make my /var/lib/dpkg contain the list of packages from my my broken Linux install I have ovewritten /var/lib/dpkg with the files earlier backupped before  .tar.gz was extracted.

jericho:~# cp -rpfv /var /root/var_backup_damaged/lib/dpkg/ /var/lib/


7. Reinstall All Debian  Packages completely scripts


I then tried to reinstall each and every package first using aptitude with aptitude this is done with

# aptitude reinstall '~i'

However as this failed, tried using a simple shell loop like below:

for i in $(dpkg -l |awk '{ print $2 }'); do echo apt-get install –reinstall –yes $i; done

Alternatively, all .deb package reninstall is also possible with dpkg –get-selections and with awk with below cmds:

dpkg –get-selections | grep -v deinstall | awk '{print $1}' > list.log;
awk '$1=$1' ORS=' ' list.log > newlist.log
;
apt-get install –reinstall $(cat newlist.log)

It can also be run as one liner for simplicity:

dpkg –get-selections | grep -v deinstall | awk '{print $1}' > list.log; awk '$1=$1' ORS=' ' list.log > newlist.log; apt-get install –reinstall $(cat newlist.log)

This produced a lot of warning messages, reporting "package has no files currently installed" (virtually for all installed packages), indicating a severe packages problem below is sample output produced after each and every package reinstall … :

dpkg: warning: files list file for package 'iproute' missing; assuming package has no files currently installed
dpkg: warning: files list file for package 'brscan-skey' missing; assuming package has no files currently installed
dpkg: warning: files list file for package 'libapache2-mod-php7.4' missing; assuming package has no files currently installed
dpkg: warning: files list file for package 'libexpat1:amd64' missing; assuming package has no files currently installed
dpkg: warning: files list file for package 'libexpat1:i386' missing; assuming package has no files currently installed
dpkg: warning: files list file for package 'php5.6-readline' missing; assuming package has no files currently installed
dpkg: warning: files list file for package 'linux-headers-4.19.0-5-amd64' missing; assuming package has no files currently installed
dpkg: warning: files list file for package 'libgraphite2-3:amd64' missing; assuming package has no files currently installed
dpkg: warning: files list file for package 'libgraphite2-3:i386' missing; assuming package has no files currently installed
dpkg: warning: files list file for package 'libbonoboui2-0:amd64' missing; assuming package has no files currently installed
dpkg: warning: files list file for package 'libxcb-dri3-0:amd64' missing; assuming package has no files currently installed
dpkg: warning: files list file for package 'libxcb-dri3-0:i386' missing; assuming package has no files currently installed
dpkg: warning: files list file for package 'liblcms2-2:amd64' missing; assuming package has no files currently installed
dpkg: warning: files list file for package 'liblcms2-2:i386' missing; assuming package has no files currently installed
dpkg: warning: files list file for package 'libpixman-1-0:amd64' missing; assuming package has no files currently installed
dpkg: warning: files list file for package 'libpixman-1-0:i386' missing; assuming package has no files currently installed
dpkg: warning: files list file for package 'gksu' missing; assuming package has no files currently installed
dpkg: warning: files list file for package 'liblogging-stdlog0:amd64' missing; assuming package has no files currently installed
dpkg: warning: files list file for package 'mesa-vdpau-drivers:amd64' missing; assuming package has no files currently installed
dpkg: warning: files list file for package 'mesa-vdpau-drivers:i386' missing; assuming package has no files currently installed
dpkg: warning: files list file for package 'libzvbi0:amd64' missing; assuming package has no files currently installed
dpkg: warning: files list file for package 'libzvbi0:i386' missing; assuming package has no files currently installed
dpkg: warning: files list file for package 'libcdparanoia0:amd64' missing; assuming package has no files currently installed
dpkg: warning: files list file for package 'libcdparanoia0:i386' missing; assuming package has no files currently installed
dpkg: warning: files list file for package 'python-gconf' missing; assuming package has no files currently installed
dpkg: warning: files list file for package 'php5.6-cli' missing; assuming package has no files currently installed
dpkg: warning: files list file for package 'libpaper1:amd64' missing; assuming package has no files currently installed
dpkg: warning: files list file for package 'mixer.app' missing; assuming package has no files currently installed

After some attempts I found a way to be able to work around the warning message, for each package by simply reinstalling the package reporting the issue with

apt –reinstall $package_name


Though reinstallation started well and many packages got reinstalled, unfortunately some packages such as apache2-mod-php5.6 and other php related ones  started failing during reinstall ending up in unfixable states right after installation of binaries from packages was successfully placed in its expected locations on disk. The failures occured during the package setup stage ( dpkg –configure $packagename) …

The logical thing to do is a recovery attempt with something like the usual well known by any Debian admin:

apt-get install –fix-missing

As well as Manual requesting to reconfigure (issue re-setup) of all installed packages also did not produced a positive result

dpkg –configure -a

But many packages were still failing due to dpkg inability to execute some post installation scripts from respective .deb files.
To work around that and continue installing the rest of packages I had to manually delete all files related to the failing package located under directory 

/var/lib/dpkg/info#

For example to omit the post installation failure of libapache2-mod-php5.6 and have a succesful install of the package next time I tried reinstall, I had to delete all /var/lib/dpkg/info/libapache2-mod-php5.6.postrm, /var/lib/dpkg/info/libapache2-mod-php5.6.postinst scripts and even sometimes everything like libapache2-mod-php5.6* that were present in /var/lib/dpkg/info dir.

The problem with this solution, however was the package reporting to install properly, but the post install script hooks were still not in placed and important things as setting permissions of binaries after install or applying some configuration changes right after install was missing leading to programs failing to  fully behave properly or even breaking up even though showing as finely installed …

The final solution to this problem was radical.
I've used /var/lib/dpkg database (directory) from ther other working Linux machine with dpkg DB OK found in var_backup_debian10.tar.gz (linux:~# host with a working dpkg database) and then based on the dpkg package list correct database responding on jericho:~# to reinstall each and every package on the system using Debian System Reinstaller script taken from the internet.
Debian System Reinstaller works but to reinstall many packages, I've been prompted again and again whether to overwrite configuration or keep the present one of packages.
To Omit the annoying [Y / N ] text prompts I had made a slight modification to the script so it finally looked like this:
 

#!/bin/bash
# Debian System Reinstaller
# Copyright (C) 2015 Albert Huang
# Copyright (C) 2018 Andreas Fendt

# This program is free software: you can redistribute it and/or modify
# it under the terms of the GNU General Public License as published by
# the Free Software Foundation, either version 3 of the License, or
# (at your option) any later version.

# This program is distributed in the hope that it will be useful,
# but WITHOUT ANY WARRANTY; without even the implied warranty of
# MERCHANTABILITY or FITNESS FOR A PARTICULAR PURPOSE.  See the
# GNU General Public License for more details.

# You should have received a copy of the GNU General Public License
# along with this program.  If not, see <http://www.gnu.org/licenses/>.

# —
# This script assumes you are using a Debian based system
# (Debian, Mint, Ubuntu, #!), and have sudo installed. If you don't
# have sudo installed, replace "sudo" with "su -c" instead.

pkgs=`dpkg –get-selections | grep -w 'install$' | cut -f 1 |  egrep -v '(dpkg|apt)'`

for pkg in $pkgs; do
    echo -e "\033[1m   * Reinstalling:\033[0m $pkg"    

    apt-get –reinstall -o Dpkg::Options::="–force-confdef" -o Dpkg::Options::="–force-confold" -y install $pkg || {
        echo "ERROR: Reinstallation failed. See reinstall.log for details."
        exit 1
    }
done


 debian-all-packages-reinstall.sh working modified version of Albert Huang and Andreas Fendt script  can be also downloaded here.

Note ! Omitting the text confirmation prompts to install newest config or keep maintainer configuration is handled by the argument:


-o Dpkg::Options::="–force-confold


I however still got few NCurses Console selection prompts during the reinstall of about 3200+ .deb packages, so even with this mod the reinstall was not completely automatic.

Note !  During the reinstall few of the packages from the list failed due to being some old unsupported packages this was ejabberd, ircd-hybrid and a 2 / 3 more.
This failure was easily solved by completely purging those packages with the usual

# dpkg –purge $packagename

and reruninng  debian-all-packages-reinstall.sh on each of the failing packages.

Note ! The failing packages were just old ones left over from Debian 8 and Debian 9 before the apt-get dist-upgrade towards 10 Duster.
Eventually I got a success by God's grance, after few hours of pains and trials, ending up in a working state package database and a complete set of freshly reinstalled packages.

The only thing I had to do finally is 2 hours of tampering why GNOME did not automatically booted after the system reboot due to failing gdm
until I fixed that I've temprary used ligthdm (x-display-manager), to do I've

dpkg –reconfigure gdm3
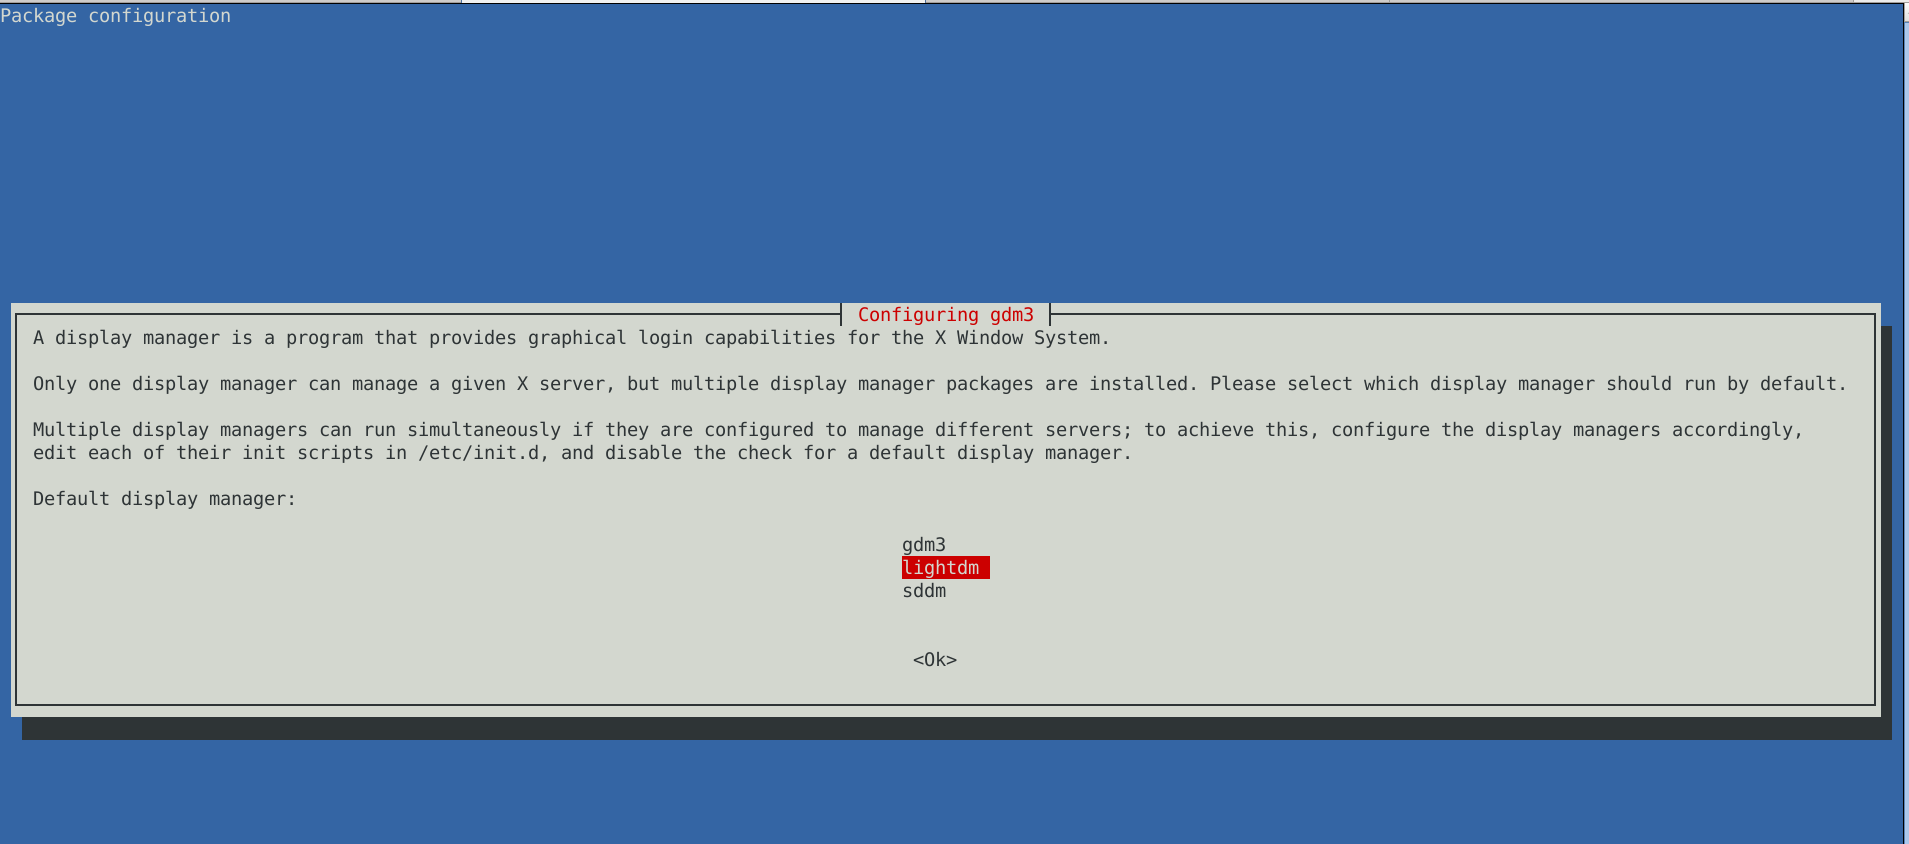
lightdm-x-display-manager-screenshot-gdm3-reconfige

 to work around this I had to also reinstall few libraries, reinstall the xorg-server, reinstall gdm and reinstall the meta package for GNOME, using below set of commands:
 

apt-get install –reinstall libglw1-mesa libglx-mesa0
apt-get install –reinstall libglu1-mesa-dev
apt install –reinstallgsettings-desktop-schemas
apt-get install –reinstall xserver-xorg-video-intel
apt-get install –reinstall xserver-xorg
apt-get install –reinstall xserver-xorg-core
apt-get install –reinstall task-desktop
apt-get install –reinstall task-gnome-desktop


As some packages did not ended re-instaled on system because on the original host from where /var/lib/dpkg db was copied did not have it I had to eventually manually trigger reinstall for those too:


apt-get install –reinstall –yes vlc
apt-get install –reinstall –yes thunderbird
apt-get install –reinstall –yes audacity
apt-get install –reinstall –yes gajim
apt-get install –reinstall –yes slack remmina
apt-get install –yes k3b
pt-get install –yes gbgoffice
pt-get install –reinstall –yes skypeforlinux
apt-get install –reinstall –yes vlc
apt-get install –reinstall –yes libcurl3-gnutls libcurl3-nss
apt-get install –yes virtualbox-5.2
apt-get install –reinstall –yes vlc
apt-get install –reinstall –yes alsa-tools-gui
apt-get install –reinstall –yes gftp
apt install ./teamviewer_15.3.2682_amd64.deb –yes


Note that some of above packages requires a properly configured third party repositories, other people might have other packages that are missing from the dpkg list and needs to be reinstalled so just decide according to your own case of left aside working system present binaries that doesn't belong to any dpkg installed package.

After a bit of struggle everything is back to normal Thanks God! 🙂 !


How to check how many processor and volume groups IBM AIX eServer have

Monday, July 13th, 2020

how-many-cpus-are-on-commands-Linux-sysadmin-and-user-show-know-AIX-logo
In daily sysadmin duties I have been usually administrating GNU / Linux or FreeBSD servers.
However now in my daily sysadmin jobs I've been added to do some minor sysadmin activities on  a few IBM AIX eServers UNIX machines.

As the eServers were completely unknown to me and I logged in for a first time I needed a way to get idea on what kind of hardware I'm logging in so I wanted to get information about the Central Processing UNIT CPUs on the host.

On Linux I'm used to do a cat /proc/cpuinfo or do dmidecode etc. to get the number of CPUs, however AIX does not have /proc/cpuinfo and has its own way to get information about the system hardware.
As I've red in the IBM AIX's RedBook to get system information on AIX there is the lscfg command.
 

aix:/# lscfg
INSTALLED RESOURCE LIST

The following resources are installed on the machine.
+/- = Added or deleted from Resource List.
*   = Diagnostic support not available.

  Model Architecture: chrp
  Model Implementation: Multiple Processor, PCI bus

+ sys0                                                            System Object
+ sysplanar0                                                      System Planar
* vio0                                                            Virtual I/O Bus
* vscsi3           U8205.E6B.068D6AP-V4-C21-T1                    Virtual SCSI Client Adapter
* vscsi2           U8205.E6B.068D6AP-V4-C20-T1                    Virtual SCSI Client Adapter
* vscsi1           U8205.E6B.068D6AP-V4-C11-T1                    Virtual SCSI Client Adapter
* hdisk1           U8205.E6B.068D6AP-V4-C11-T1-L8100000000000000  Virtual SCSI Disk Drive
* vscsi0           U8205.E6B.068D6AP-V4-C10-T1                    Virtual SCSI Client Adapter
* hdisk0           U8205.E6B.068D6AP-V4-C10-T1-L8100000000000000  Virtual SCSI Disk Drive
* ent3             U8205.E6B.068D6AP-V4-C5-T1                     Virtual I/O Ethernet Adapter (l-lan)
* ent2             U8205.E6B.068D6AP-V4-C4-T1                     Virtual I/O Ethernet Adapter (l-lan)
* ent1             U8205.E6B.068D6AP-V4-C3-T1                     Virtual I/O Ethernet Adapter (l-lan)
* ent0             U8205.E6B.068D6AP-V4-C2-T1                     Virtual I/O Ethernet Adapter (l-lan)
* vsa0             U8205.E6B.068D6AP-V4-C0                        LPAR Virtual Serial Adapter
* vty0             U8205.E6B.068D6AP-V4-C0-L0                     Asynchronous Terminal
+ L2cache0                                                        L2 Cache
+ mem0                                                            Memory
+ proc0                                                           Processor
+ proc4                                                           Processor


To get the number of processors on the host I've had to use:


aix:/# lscfg|grep -i proc
  Model Implementation: Multiple Processor, PCI bus
+ proc0                                                           Processor
+ proc4                                                           Processor


Another way to get the CPU number is with:

aix:/# lsdev -C -c processor
proc0 Available 00-00 Processor
proc4 Available 00-04 Processor


aix:/# lsattr -EH -l proc4
attribute   value          description           user_settable


frequency   3720000000     Processor Speed       False
smt_enabled true           Processor SMT enabled False
smt_threads 4              Processor SMT threads False
state       enable         Processor state       False
type        PowerPC_POWER7 Processor type        False

aix:/# lsattr -EH -l proc0
attribute   value          description           user_settable


frequency   3720000000     Processor Speed       False
smt_enabled true           Processor SMT enabled False
smt_threads 4              Processor SMT threads False
state       enable         Processor state       False
type        PowerPC_POWER7 Processor type        False


As you can see each of the processor is multicore has 2 Cores and each of the cores have for Threads, to get the overall number of CPUs on the system including the threaded Virtual CPUs:

aix:/# bindprocessor -q
The available processors are:  0 1 2 3 4 5 6 7


This specific machine has overall of 8 CPUs cores.

lscfg can be used to get various useful other info of the iron:

aix:/# lscfg -s
INSTALLED RESOURCE LIST


The following resources are installed on the machine.
+/- = Added or deleted from Resource List.
*   = Diagnostic support not available.

  Model Architecture: chrp
  Model Implementation: Multiple Processor, PCI bus

+ sys0
        System Object
+ sysplanar0
        System Planar
* vio0
        Virtual I/O Bus
* vscsi3           U8305…………….
        Virtual SCSI Client Adapter
* vscsi2           U8305…………….
        Virtual SCSI Client Adapter
* vscsi1           U8305…………….
        Virtual SCSI Client Adapter
* hdisk1           U8305…………….
        Virtual SCSI Disk Drive
* vscsi0           U8305……………..
        Virtual SCSI Client Adapter
* hdisk0           U8305…………….
        Virtual SCSI Disk Drive
* ent3             U8305…………….
        Virtual I/O Ethernet Adapter (l-lan)
* ent2             U8305.E6B…………….
        Virtual I/O Ethernet Adapter (l-lan)
* ent1             U8305.E6B…………….
        Virtual I/O Ethernet Adapter (l-lan)
* ent0             U8305.E6B…………….
        Virtual I/O Ethernet Adapter (l-lan)
* vsa0             U8305.E7B…………….
        LPAR Virtual Serial Adapter
* vty0             U8305.E7B…………….
        Asynchronous Terminal
+ L2cache0
        L2 Cache
+ mem0
        Memory
+ proc0
        Processor
+ proc4
        Processor

aix:/# lscfg -p
INSTALLED RESOURCE LIST

The following resources are installed on the machine.

  Model Architecture: chrp
  Model Implementation: Multiple Processor, PCI bus

  sys0                                                            System Object
  sysplanar0                                                      System Planar
  vio0                                                            Virtual I/O Bus
  vscsi3           U8305.E7B…………….V6-C40-T1                    Virtual SCSI Client Adapter
  vscsi2           U8305.E7B…………….V6-C40-T1                     Virtual SCSI Client Adapter
  vscsi1           U8305.E7B…………….V6-C40-T1                    Virtual SCSI Client Adapter
  hdisk1           U8305.E7B…………….V6-C40-T1-L8500000000000000  Virtual SCSI Disk Drive
  vscsi0           U8305.E7B…………….V6-C40-T1                    Virtual SCSI Client Adapter
  hdisk0           U8305.E7B…………….V6-C40-T1-L8500000000000000  Virtual SCSI Disk Drive
  ent3             U8305.E7B…………….V6-C40-T1                     Virtual I/O Ethernet Adapter (l-lan)
  ent2             U8305.E7B…………….V6-C40-T1                     Virtual I/O Ethernet Adapter (l-lan)
  ent1             U8305.E7B…………….V6-C40-T1                     Virtual I/O Ethernet Adapter (l-lan)
  ent0             U8305.E7B…………….V6-C40-T1                     Virtual I/O Ethernet Adapter (l-lan)
  vsa0             U8305.E7B.069D7AP-V5-C1                        LPAR Virtual Serial Adapter
  vty0             U8305.E7B.069D7AP-V5-D1-L0                     Asynchronous Terminal
  L2cache0                                                        L2 Cache
  mem0                                                            Memory
  proc0                                                           Processor
  proc4                                                           Processor

  PLATFORM SPECIFIC

  Name:  IBM,8305-E7B
    Model:  IBM,8305-E7B
    Node:  /
    Device Type:  chrp

  Name:  openprom
    Model:  IBM,AL730_158
    Node:  openprom

  Name:  interrupt-controller
    Model:  IBM, Logical PowerPC-PIC, 00
    Node:  interrupt-controller@0
    Device Type:  PowerPC-External-Interrupt-Presentation

  Name:  vty
    Node:  vty@30000000
    Device Type:  serial
    Physical Location: …………………………………………..

  Name:  l-lan
    Node:  l-lan@30000002
    Device Type:  network
    Physical Location: …………………………………………..

  Name:  l-lan
    Node:  l-lan@30000003
    Device Type:  network
    Physical Location: …………………………………………..

  Name:  l-lan
    Node:  l-lan@30000004
    Device Type:  network
    Physical Location: …………………………………………..

  Name:  l-lan
    Node:  l-lan@30000005
    Device Type:  network
    Physical Location: …………………………………………..

  Name:  v-scsi
    Node:  v-scsi@3000005a
    Device Type:  vscsi
    Physical Location: …………………………………………..

  Name:  v-scsi
    Node:  v-scsi@3000005b
    Device Type:  vscsi
    Physical Location: …………………………………………..

  Name:  v-scsi
    Node:  v-scsi@30000014
    Device Type:  vscsi
    Physical Location: ………………………………..

  Name:  v-scsi
    Node:  v-scsi@30000017
    Device Type:  vscsi
    Physical Location: …………………………………


Another useful command I found is to list the equivalent of Linux's LVM Logical Volumes configured on the system, below is how:

aix:/# lspv hdisk0
00f68c6a84acb0d5 rootvg active hdisk1 00f69d6a85400468 dsvg active

To get more info on a volume group:

aix:/# lspv hdisk0 PHYSICAL VOLUME: hdisk0 VOLUME GROUP: rootvg PV IDENTIFIER: 00f68d6a85acb0d5 VG IDENTIFIER 00f68d6a00004c0000000131353444a5 PV STATE: active STALE PARTITIONS: 0 ALLOCATABLE: yes PP SIZE: 32 megabyte(s) LOGICAL VOLUMES: 12 TOTAL PPs: 959 (30688 megabytes) VG DESCRIPTORS: 2 FREE PPs: 493 (15776 megabytes) HOT SPARE: no USED PPs: 466 (14912 megabytes) MAX REQUEST: 256 kilobytes FREE DISTRIBUTION: 191..00..00..110..192 USED DISTRIBUTION: 01..192..191..82..00 MIRROR POOL: None


You can get which local configured partition is set on which ( PV )Physical Volume

aix:/# lspv -l hdisk0
hdisk0:
LV NAME               LPs     PPs     DISTRIBUTION          MOUNT POINT
lg_dumplv             64      64      00..64..00..00..00    N/A
hd8                   1       1       00..00..01..00..00    N/A
hd6                   16      16      00..16..00..00..00    N/A
hd2                   166     166     00..45..89..32..00    /usr
hd4                   29      29      00..11..18..00..00    /
hd3                   40      40      00..04..04..32..00    /tmp
hd9var                55      55      00..00..37..18..00    /var
hd10opt               74      74      00..37..37..00..00    /opt
hd1                   8       8       00..07..01..00..00    /home
hd5                   1       1       01..00..00..00..00    N/A

Check if server is Physical Bare Metal or a Virtual Machine and its type

Tuesday, March 17th, 2020

check-if-linux-operating-system-is-running-on-physical-bare-metal-or-virtual-machine

In modern times the IT employee system administrator / system engineer / security engineer or a developer who has to develop and test code remotely on UNIX hosts, we have to login to multiple of different servers located in separate data centers around the world situated in Hybrid Operating system environments running multitude of different Linux OSes. Often especially for us sysadmins it is important to know whether the remote machine we have SSHed to is physical server (Bare Metal) or a virtual machines running on top of different kind of Hypervisor node OpenXen / Virtualbox / Virtuosso  / VMWare etc.
 

Then the question comes how to determine whether A remote Installed Linux is Physical or Virtual ?
 

1. Using the dmesg kernel log utility


The good old dmesg that is used to examine and control the kernel ring buffer detects plenty of useful information which gives you the info whether a server is Virtual or Bare Metal. It is present and accessible on every Linux server out there, thus using it is the best and simplest way to determine the OS system node type.

To grep whether a machine is Virtual and the Hypervisor type use:


nginx:~# dmesg | grep "Hypervisor detected"
[0.000000] Hypervisor detected: KVM


As you see above OS installed is using the KVM Virtualization technology.

An empty output of this command means the Remote OS is installed on a physical computer.


2. Detecting the OS platform the systemd way


Systemd along with the multiple over-complication of things that nearly all sysadmins (including me hate) so much introduced something useful in the fact of hostnamectl command
that could give you the info about the OS chassis platform.


root@pcfreak:~# hostnamectl status
 
 Static hostname: pcfreak
         Icon name: computer-desktop
           Chassis: desktop
        Machine ID: 02425d67037b8e67cd98bd2800002671
           Boot ID: 34a83b9a79c346168082f7605c2f557c
  Operating System: Debian GNU/Linux 10 (buster)
            Kernel: Linux 4.19.0-5-amd64
      Architecture: x86-64


Below is output of a VM running on a Oracle Virtualbox HV.


linux:~# hostnamectl status
Static hostname: ubuntuserver
 Icon name: computer-vm
 Chassis: vm
 Machine ID: 2befe86cf8887ca098f509e457554beb
 Boot ID: 8021c02d65dc46b1885afb25fddcf18c
 Virtualization: oracle
 Operating System: Ubuntu 16.04.1 LTS
 Kernel: Linux 4.4.0-78-generic
 Architecture: x86-64


3. Detect concrete container virtualization with systemd-detect-virt 


Another Bare Metal or VM identify tool that was introducted some time ago by freedesktop project is systemd-detect-virt (usually command is part of systemd package).
It is useful to detect the exact virtualization on a systemd running OS systemd-detect-virt is capable to detect many type of Virtualization type that are rare like: IBM zvm S390 Z/VM, bochs, bhyve (a FreeBSD hypervisor), Mac OS's parallels, lxc (linux containers), docker containers, podman etc.

The output from the command is either none (if no virtualization is present or the VM Hypervisor Host type):


server:~# systemd-detect-virt
none


quake:~# systemd-detect-virt
oracle


4. Install and use facter to report per node facts


debian:~# apt-cache show facter|grep -i desc -A2
Description-en: collect and display facts about the system
 Facter is Puppet’s cross-platform system profiling library. It discovers and
 reports per-node facts, which are collected by the Puppet agent and are made

Description-md5: 88cdf9a1db3df211de4539a0570abd0a
Homepage: https://github.com/puppetlabs/facter
Tag: devel::lang:ruby, devel::library, implemented-in::ruby,
root@jeremiah:/home/hipo# apt-cache show facter|grep -i desc -A1
Description-en: collect and display facts about the system
 Facter is Puppet’s cross-platform system profiling library. It discovers and

Description-md5: 88cdf9a1db3df211de4539a0570abd0a
Homepage: https://github.com/puppetlabs/facter


– Install facter on Debian / Ubuntu / deb based Linux


# apt install facter –yes


– Install facter on RedHat / CentOS RPM based distros

# yum install epel-release


# yum install facter


– Install facter on OpenSuSE / SLES

# zypper install facter


Once installed on the system to find out whether the remote Operating System is Virtual:

# facter 2> /dev/null | grep virtual
is_virtual => false
virtual => physical


If the machine is a virtual machine you will get some different output like:

# facter 2> /dev/null | grep virtual
is_virtual => true
virtual => kvm


If you're lazy to grep you can use it with argument.

# facter virtual
physical


6. Use lshw and dmidecode (list hardware configuration tool)


If you don't have the permissions to install facter on the system and you can see whether lshw (list hardware command) is not already present on remote host.

# lshw -class system  
storage-host                  
    description: Computer
    width: 64 bits
    capabilities: smbios-2.7 vsyscall32

If the system is virtual you'll get an output similar to:

# lshw -class system  
debianserver 
 description: Computer
 product: VirtualBox
 vendor: innotek GmbH
 version: 1.2
 serial: 0
 width: 64 bits
 capabilities: smbios-2.5 dmi-2.5 vsyscall32
 configuration: family=Virtual Machine uuid=78B58916-4074-42E2-860F-7CAF39F5E6F5


Of course as it provides a verbosity of info on Memory / CPU type / Caches / Cores / Motherboard etc. virtualization used or not can be determined also with dmidecode / hwinfo and other tools that detect the system hardware this is described thoroughfully in my  previous article Get hardware system info on Linux.


7. Detect virtualziation using virt-what or imvirt scripts


imvirt is a little script to determine several virtualization it is pretty similar to virt-what the RedHat own script for platform identification. Even though virt-what is developed for RHEL it is available on other distros, Fedoda, Debian, Ubuntu, Arch Linux (AUR) just like is imvirt.

installing both of them is with the usual apt-get / yum or on Arch Linux with yay package manager (yay -S virt-what) …

Once run the output it produces for physical Dell / HPE / Fujitsu-Siemens Bare Metal servers would be just empty string.

# virt-what
#

Or if the system is Virtual Machine, you'll get the type, for example KVM (Kernel-based Virtual Machine) / virtualbox / qemu etc.

#imvirt
Physical


Conclusion


It was explained how to do a simple check whether the server works on a physical hardware or on a virtual Host hypervisor. The most basic and classic way is with dmesg. If no access to dmesg is due to restrictions you can try the other methods for systemd enabled OSes with hostnamectl / systemd-detect-virt. Other means if the tools are installed or you have the permissions to install them is with facter / lshw or with virt-what / imvirt scripts.
There definitely perhaps much more other useful tools to grasp hardware and virtualization information but this basics could be useful enough for shell scripting purposes.
If you know other tools, please share.
 

How to check if shared library is loaded in AIX OS – Fix missing libreadline.so.7

Thursday, February 20th, 2020

ibm-aix-logo1

I've had to find out whether an externally Linux library is installed  on AIX system and whether something is not using it.
The returned errors was like so:


# gpg –export -a

Could not load program gpg:
Dependent module /opt/custom/lib/libreadline.a(libreadline.so.7) could not be loaded.
Member libreadline.so.7 is not found in archive


After a bit of investigation, I found that gpg was failing cause it linked to older version of libreadline.so.6, the workaround was to just substitute the newer version of libreadline.so.7 over the original installed one.

Thus I had a plan to first find out whether this libreadline.a is loaded and recognized by AIX UNIX first and second find out whether some of the running processes is not using that library.
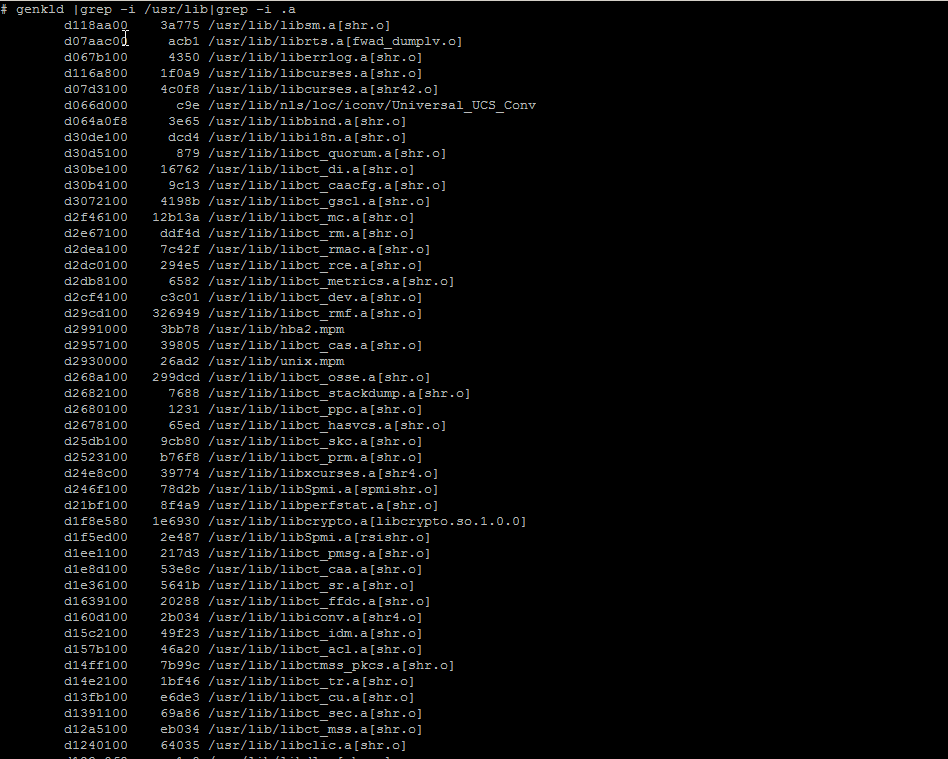
I've come across this interesting IBM official documenation that describes pretty good insights on how to determine whether a shared library  is currently loaded on the system. which mentions the genkld command that is doing
exactly what I needed.

In short:
genkld – creates a list that is printed to the console that shows all loaded shared libraries

genkld-screenshot-aix-unix

Next I used lsof (list open files) command to check whether there is in real time opened libraries by any of the running programs on the system.

After not finding anything and was sure the library is neither loaded as a system library in AIX nor it is used by any of the currently running AIX processes, I was sure I could proceed to safely overwrite libreadline.a (libreadline.so.6) with libreadline.a with (libreadline.so.7).

The result of that is again a normally running gpg as ldd command shows the binary is again normally linked to its dependend system libraries.
 

aix# ldd /usr/bin/gpg
/usr/bin/gpg needs:
         /usr/lib/threads/libc.a(shr.o)
         /usr/lib/libpthreads.a(shr_comm.o)
         /usr/lib/libpthreads.a(shr_xpg5.o)
         /opt/freeware/lib/libintl.a(libintl.so.1)
         /opt/freeware/lib/libreadline.a(libreadline.so.7)
         /opt/freeware/lib/libiconv.a(libiconv.so.2)
         /opt/freeware/lib/libz.a(libz.so.1)
         /opt/freeware/lib/libbz2.a(libbz2.so.1)
         /unix
         /usr/lib/libcrypt.a(shr.o)
         /opt/freeware/lib/libiconv.a(shr4.o)
         /usr/lib/libcurses.a(shr42.o)


# gpg –version
gpg (GnuPG) 1.4.22
Copyright (C) 2015 Free Software Foundation, Inc.
License GPLv3+: GNU GPL version 3 or later <http://gnu.org/licenses/gpl.html>
This is free software: you are free to change and redistribute it.
There is NO WARRANTY, to the extent permitted by law.


Home: ~/.gnupg
Supported algorithms:
Pubkey: RSA, RSA-E, RSA-S, ELG-E, DSA
Cipher: IDEA, 3DES, CAST5, BLOWFISH, AES, AES192, AES256, TWOFISH,
        CAMELLIA128, CAMELLIA192, CAMELLIA256
Hash: MD5, SHA1, RIPEMD160, SHA256, SHA384, SHA512, SHA224
Compression: Uncompressed, ZIP, ZLIB, BZIP2


Procedure Instructions to safe upgrade CentOS / RHEL Linux 7 Core to latest release

Thursday, February 13th, 2020

safe-upgrade-CentOS-and_Redhat_Enterprise_Linux_RHEL-7-to-latest-stable-release

Generally upgrading both RHEL and CentOS can be done straight with yum tool just we're pretty aware and mostly anyone could do the update, but it is good idea to do some
steps in advance to make backup of any old basic files that might help us to debug what is wrong in case if the Operating System fails to boot after the routine Machine OS restart
after the upgrade that is usually a good idea to make sure that machine is still bootable after the upgrade.

This procedure can be shortened or maybe extended depending on the needs of the custom case but the general framework should be useful anyways to someone that's why
I decided to post this.

Before you go lets prepare a small status script which we'll use to report status of  sysctl installed and enabled services as well as the netstat connections state and
configured IP addresses and routing on the system.

The script show_running_services_netstat_ips_route.sh to be used during our different upgrade stages:
 

# script status ###
echo "STARTED: $(date '+%Y-%m-%d_%H-%M-%S'):" | tee /root/logs/yumcheckupdate-$(hostname)-$(date '+%Y-%m-%d_%H-%M-%S').out
systemctl list-unit-files –type=service | grep enabled
systemctl | grep ".service" | grep "running"
netstat -tulpn
netstat -r
ip a s
/sbin/route -n
echo "ENDED $(date '+%Y-%m-%d_%H-%M-%S'):" | tee /root/logs/yumcheckupdate-$(hostname)-$(date '+%Y-%m-%d_%H-%M-%S').out
####


– Save the script in any file like /root/status.sh

– Make the /root/logs directoriy.
 

[root@redhat: ~ ]# mkdir /root/logs
[root@redhat: ~ ]# vim /root/status.sh
[root@redhat: ~ ]# chmod +x /root/status.sh


1. Get a dump of CentOS installed version release and grub-mkconfig generated os_probe


[root@redhat: ~ ]# cat /etc/redhat-release  > /root/logs/redhat-release-vorher-$(hostname)-$(date '+%Y-%m-%d_%H-%M-%S').out
[root@redhat: ~ ]# cat /etc/grub.d/30_os-prober > /root/logs/grub2-efi-vorher-$(hostname)-$(date '+%Y-%m-%d_%H-%M-%S').out


2. Clear old versionlock marked RPM packages (if there are such)


On servers maintained by multitude of system administrators just like the case is inside a Global Corporations and generally in the corporate world , where people do access the systems via LDAP and more than a single person
has superuser privileges. It is a good prevention measure to use yum package management  functionality to RPM based Linux distributions called  versionlock.
versionlock for those who hear it for a first time is locking the versions of the installed RPM packages so if someone by mistake or on purpose decides to do something like :

[root@redhat: ~ ]# yum install packageversion

Having the versionlock set will prevent the updated package to be installed with a different branch package version.

Also it will prevent a playful unknowing person who just wants to upgrade the system without any deep knowledge to be able to
run

[root@redhat: ~ ]# yum upgrade

update and leave the system in unbootable state, that will be only revealed during the next system reboot.

If you haven't used versionlock before and you want to use it you can do it with:

[root@redhat: ~ ]# yum install yum-plugin-versionlock

To add all the packages for compiling C code and all the interdependend packages, you can do something like:


[root@redhat: ~ ]# yum versionlock gcc-*

If you want to clear up the versionlock, once it is in use run:

[root@redhat: ~ ]#  yum versionlock clear
[root@redhat: ~ ]#  yum versionlock list


3.  Check RPC enabled / disabled


This step is not necessery but it is a good idea to check whether it running on the system, because sometimes after upgrade rpcbind gets automatically started after package upgrade and reboot. 
If we find it running we'll need to stop and mask the service.


# check if rpc enabled
[root@redhat: ~ ]# systemctl list-unit-files|grep -i rpc
var-lib-nfs-rpc_pipefs.mount                                      static
auth-rpcgss-module.service                                        static
rpc-gssd.service                                                  static
rpc-rquotad.service                                               disabled
rpc-statd-notify.service                                          static
rpc-statd.service                                                 static
rpcbind.service                                                   disabled
rpcgssd.service                                                   static
rpcidmapd.service                                                 static
rpcbind.socket                                                    disabled
rpc_pipefs.target                                                 static
rpcbind.target                                                    static

[root@redhat: ~ ]# systemctl status rpcbind.service
● rpcbind.service – RPC bind service
   Loaded: loaded (/usr/lib/systemd/system/rpcbind.service; disabled; vendor preset: enabled)
   Active: inactive (dead)


[root@redhat: ~ ]# systemctl status rpcbind.socket
● rpcbind.socket – RPCbind Server Activation Socket
   Loaded: loaded (/usr/lib/systemd/system/rpcbind.socket; disabled; vendor preset: enabled)
   Active: inactive (dead)
   Listen: /var/run/rpcbind.sock (Stream)
           0.0.0.0:111 (Stream)
           0.0.0.0:111 (Datagram)
           [::]:111 (Stream)
           [::]:111 (Datagram)


4. Check any previously existing downloaded / installed RPMs (check yum cache)


yum install package-name / yum upgrade keeps downloaded packages via its operations inside its cache directory structures in /var/cache/yum/*.
Hence it is good idea to check what were the previously installed packages and their count.


[root@redhat: ~ ]# cd /var/cache/yum/x86_64/;
[root@redhat: ~ ]# find . -iname '*.rpm'|wc -l


5. List RPM repositories set on the server


 [root@redhat: ~ ]# yum repolist
Loaded plugins: fastestmirror, versionlock
Repodata is over 2 weeks old. Install yum-cron? Or run: yum makecache fast
Determining fastest mirrors
repo id                                                                                 repo name                                                                                                            status
!atos-ac/7/x86_64                                                                       Atos Repository                                                                                                       3,128
!base/7/x86_64                                                                          CentOS-7 – Base                                                                                                      10,019
!cr/7/x86_64                                                                            CentOS-7 – CR                                                                                                         2,686
!epel/x86_64                                                                            Extra Packages for Enterprise Linux 7 – x86_64                                                                          165
!extras/7/x86_64                                                                        CentOS-7 – Extras                                                                                                       435
!updates/7/x86_64                                                                       CentOS-7 – Updates                                                                                                    2,500


This step is mandatory to make sure you're upgrading to latest packages from the right repositories for more concretics check what is inside in confs /etc/yum.repos.d/ ,  /etc/yum.conf 
 

6. Clean up any old rpm yum cache packages


This step is again mandatory but a good to follow just to have some more clearness on what packages is our upgrade downloading (not to mix up the old upgrades / installs with our newest one).
For documentation purposes all deleted packages list if such is to be kept under /root/logs/yumclean-install*.out file

[root@redhat: ~ ]# yum clean all |tee /root/logs/yumcleanall-$(hostname)-$(date '+%Y-%m-%d_%H-%M-%S').out


7. List the upgradeable packages's latest repository provided versions


[root@redhat: ~ ]# yum check-update |tee /root/logs/yumcheckupdate-$(hostname)-$(date '+%Y-%m-%d_%H-%M-%S').out


Then to be aware how many packages we'll be updating:


[root@redhat: ~ ]#  yum check-update | wc -l


8. Apply the actual uplisted RPM packages to be upgraded


[root@redhat: ~ ]# yum update |tee /root/logs/yumupdate-$(hostname)-$(date '+%Y-%m-%d_%H-%M-%S').out


Again output is logged to /root/logs/yumcheckupate-*.out 


9. Monitor downloaded packages count real time


To make sure yum upgrade is not in some hanging state and just get some general idea in which state of the upgrade is it e.g. Download / Pre-Update / Install  / Upgrade/ Post-Update etc.
in mean time when yum upgrade is running to monitor,  how many packages has the yum upgrade downloaded from remote RPM set repositories:


[root@redhat: ~ ]#  watch "ls -al /var/cache/yum/x86_64/7Server/…OS-repository…/packages/|wc -l"


10. Run status script to get the status again


[root@redhat: ~ ]# sh /root/status.sh |tee /root/logs/status-before-$(hostname)-$(date '+%Y-%m-%d_%H-%M-%S').out


11. Add back versionlock for all RPM packs


Set all RPM packages installed on the RHEL / CentOS versionlock for all packages.


#==if needed
# yum versionlock \*


12. Get whether old software configuration is not messed up during the Package upgrade (Lookup the logs for .rpmsave and .rpmnew)


During the upgrade old RPM configuration is probably changed and yum did automatically save .rpmsave / .rpmnew saves of it thus it is a good idea to grep the prepared logs for any matches of this 2 strings :
 

[root@redhat: ~ ]#   grep -i ".rpm" /root/logs/yumupdate-server-host-2020-01-20_14-30-41.out
[root@redhat: ~ ]#  grep -i ".rpmsave" /root/logs/yumupdate-server-host-2020-01-20_14-30-41.out
[root@redhat: ~ ]#  grep -i ".rpmnew" /root/logs/yumupdate-server-host-2020-01-20_14-30-41.out


If above commands returns output usually it is fine if there is is .rpmnew output but, if you get grep output of .rpmsave it is a good idea to review the files compare with the original files that were .rpmsaved with the 
substituted config file and atune the differences with the changes manually made for some program functionality.

What are the .rpmsave / .rpmnew files ?
This files are coded files that got triggered by the RPM install / upgrade due to prewritten procedures on time of RPM build.


If a file was installed as part of a rpm, it is a config file (i.e. marked with the %config tag), you've edited the file afterwards and you now update the rpm then the new config file (from the newer rpm) will replace your old config file (i.e. become the active file).
The latter will be renamed with the .rpmsave suffix.

If a file was installed as part of a rpm, it is a noreplace-config file (i.e. marked with the %config(noreplace) tag), you've edited the file afterwards and you now update the rpm then your old config file will stay in place (i.e. stay active) and the new config file (from the newer rpm) will be copied to disk with the .rpmnew suffix.
See e.g. this table for all the details. 

In both cases you or some program has edited the config file(s) and that's why you see the .rpmsave / .rpmnew files after the upgrade because rpm will upgrade config files silently and without backup files if the local file is untouched.

After a system upgrade it is a good idea to scan your filesystem for these files and make sure that correct config files are active and maybe merge the new contents from the .rpmnew files into the production files. You can remove the .rpmsave and .rpmnew files when you're done.


If you need to get a list of all .rpmnew .rpmsave files on the server do:

[root@redhat: ~ ]#  find / -print | egrep "rpmnew$|rpmsave$


13. Reboot the system 

To check whether on next hang up or power outage the system will boot normally after the upgrade, reboot to test it.


you can :


[root@redhat: ~ ]#  reboot


either

[root@redhat: ~ ]#  shutdown -r now


or if on newer Linux with systemd in ues below systemctl reboot.target.

[root@redhat: ~ ]#  systemctl start reboot.target


14. Get again the system status with our status script after reboot

[root@redhat: ~ ]#  sh /root/status.sh |tee /root/logs/status-after-$(hostname)-$(date '+%Y-%m-%d_%H-%M-%S').out


15. Clean up any versionlocks if earlier set


[root@redhat: ~ ]# yum versionlock clear
[root@redhat: ~ ]# yum versionlock list


16. Check services and logs for problems


After the reboot Check closely all running services on system make sure every process / listening ports and services on the system are running fine, just like before the upgrade.
If the sytem had firewall,  check whether firewall rules are not broken, e.g. some NAT is not missing or anything earlier configured to automatically start via /etc/rc.local or some other
custom scripts were run and have done what was expected. 
Go through all the logs in /var/log that are most essential /var/log/boot.log , /var/log/messages … yum.log etc. that could reveal any issues after the boot. In case if running some application server or mail server check /var/log/mail.log or whenever it is configured to log.
If the system runs apache closely check the logs /var/log/httpd/error.log or php_errors.log for any strange errors that occured due to some issues caused by the newer installed packages.
Usually most of the cases all this should be flawless but a multiple check over your work is a stake for good results.
 

Getting Console and Graphical hardware system information on Linux with cpuinfo, neofetch, CPU-X (CPU-Z Unix alternative), I-nex and inxi

Tuesday, September 17th, 2019

getting-console-information-and-graphical-hardware-system-information-Linux-cpuinfo-neofetch-cpu-x-i-nex-1

Earlier I've wrote extensive article on how to get hardware information on Linux using tools such as dmidecode, hardinfo, lshw, hwinfo, x86info and biosdecode but there are few other hardware reporting tools for Linux worthy to mention that has been there for historical reasons such as cpuinfo as we as some new shiny ones such as neofetch (a terminal / console hardware report tool as well the CPU-X and I-Nex  which is Linux equivalent to the all known almost standard for Windows hardware detection CPU-Z worthy to say few words about.
 

1. cpuinfo


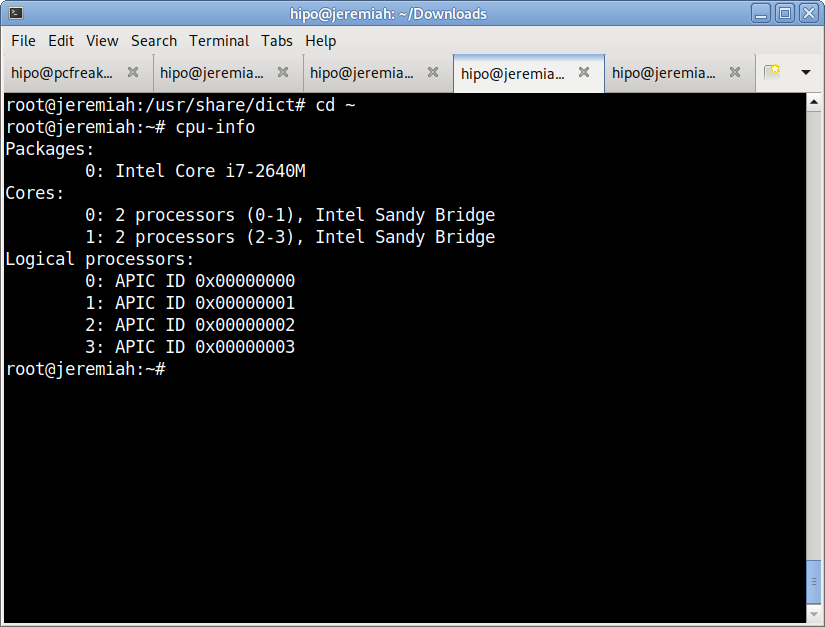
Perhaps the most basic tool to give you a brief information about your Processor type (model) number of Cores and Logical Processors is cpuinfo

I remember cpuinfo has been there since the very beginning on almost all Linux distributions's repository, nowadays its popularity of the days when the kings on the Linux OS server scenes were Slackware, Caldera OpenLinux and Redhat 6.0 Linux and Debian 3.0  declined but still for scripting purposes it is handy small proggie.

To install and run it in Debian  / Ubuntu / Mint Linux etc.:


aptitude install -y cpuinfo

/usr/bin/cpu-info


Linux-get-processor-system-info-in-console-cpu-info


2. neofetch


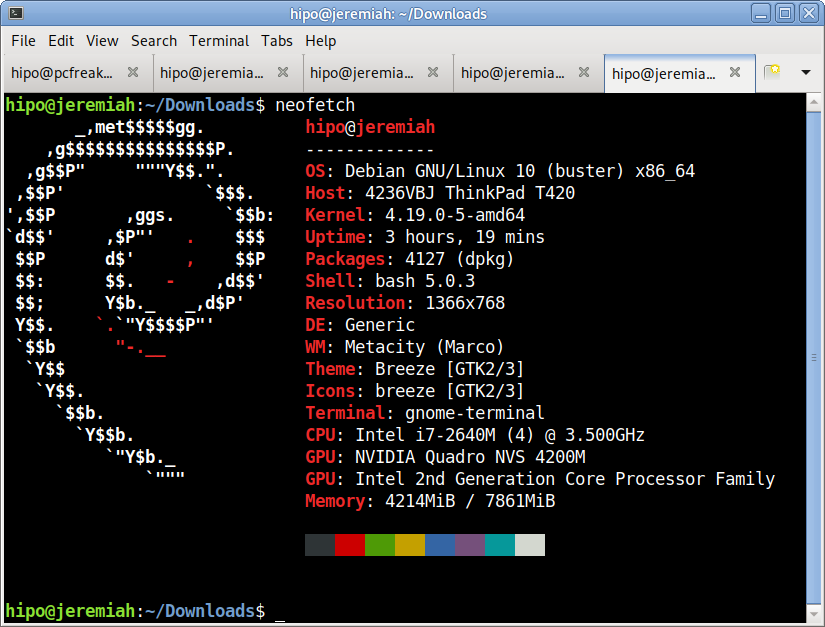
The next one worthy to install and check is neofetch (a cross-platform and easy-to-use system information
 command line script that collects your Linux system information and display it on the terminal next to an image, it could be your distributions logo or any ascii art of your choice.)

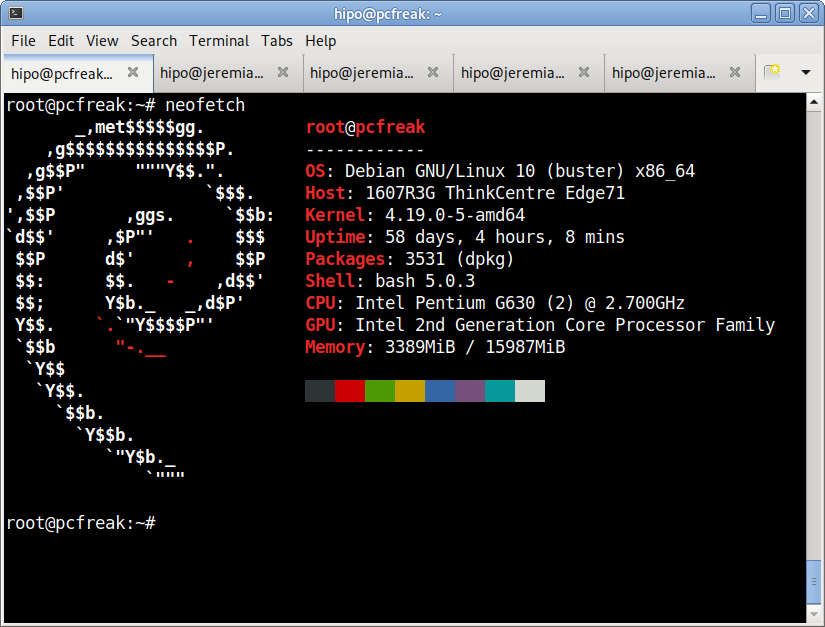
The cool thing about neofetch is besides being able to identify the System server / desktop hardware parameters, it gives some basic info about number of packages installed on the system, memory free and in use, used kernel and exact type of System (be it Dell PowerEdge Model XX, IBM eSeries Model / HP Proliant Model etc.

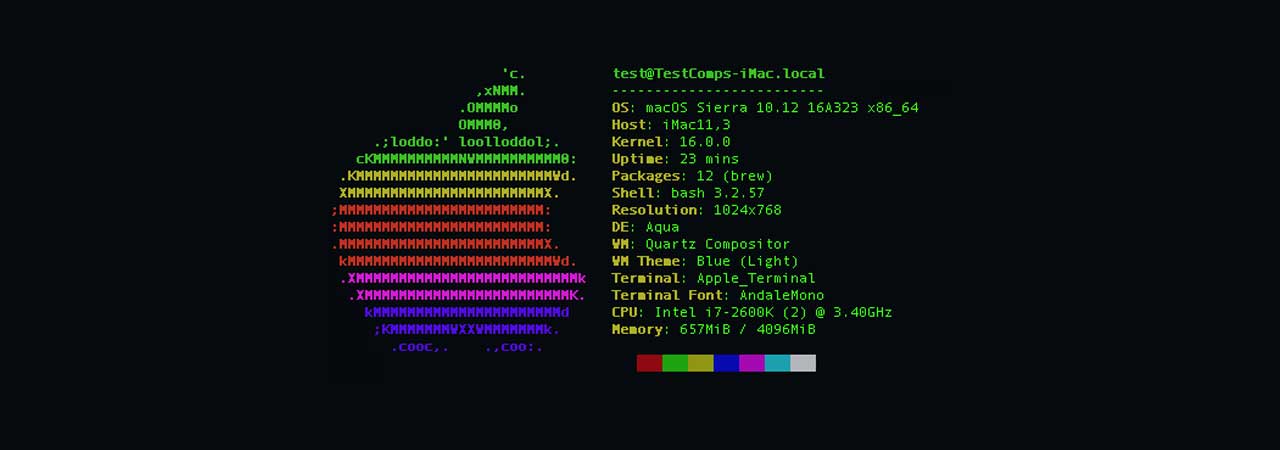
neofetch-OS-hardware-information-Linux-ascii-system-info-desktop-notebook

neofetch info generated on my home used Lenovo Thikpad T420

neofetch-OS-hardware-information-Linux-ascii-system-info-pcfreak-home-server
neofetch info from www.pc-freak.net running current machine

neofetch even supports Mac OS X and Windows OS ! 🙂
To install neofetch on Mac OS X:
 

/usr/bin/ruby -e "$(curl -fsSL https://raw.githubusercontent.com/Homebrew/install/master/install)"


or via Mac ported packages using brew

brew install neofetch


neofetch-screenshot-from-Mac-OS-X

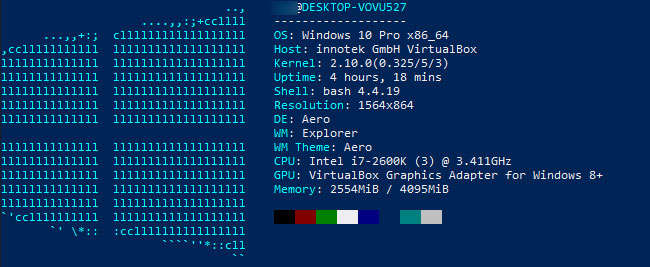
neofetch is even installable on Windows OS that has the scoop command line installer tool installer manager with below PowerShell code in cmd.exe (Command line):

powershell Set-ExecutionPolicy RemoteSigned -scope CurrentUser
iex (new-object net.webclient).downloadstring('https://get.scoop.sh')
scoop install git
scoop install neofetch

neofetch-microsoft-windows-hardware-command-line-report-tool-screenshot


By the way Scoop was quite a finding for me and it is pretty handy to install plenty of useful command line Linux / UNIX tools, such as curl, wget, git etc. in the same easy straight forward way as a standard yum or apt-get on Windows (without explicitly installing things as GnuWin and CygWin).
 

3. CPU-X graphical user interface hardware report Linux GUI alternative to Windows CPU-Z


The packages for CPU-X are a bit outdated and even though there are rpm packages for Fedora, OpenSuSE and .deb package for Debian for Debian, Ubuntu and ArchLinux (pacman), there is no up to date version for Debian 10 and the package builds distributed for different Linux distros are a bit outdated.

Thus to install CPU-X on any Linux distribution it is perhaps best to use the portable version (static binary) of CPU-X.
It is currently available on https://github.com/X0rg/CPU-X/releases

To install latest portable version of CPU-X

wget https://github.com/X0rg/CPU-X/releases/download/v3.2.4/CPU-X_v3.2.4_portable.tar.gz

mkdir CPU-X
cd CPU-X

tar -zxvvf CPU-X_v3.2.4_portable.tar.gz
-rwxr-xr-x yohan/users 4563032 2019-01-13 22:15 CPU-X_v3.2.4_portable.bsd64
-rwxr-xr-x yohan/users 5484968 2019-01-13 22:15 CPU-X_v3.2.4_portable.linux64


cp -rpf CPU-X_v3.2.4_portable.linux64 /usr/local/bin/
ln -sf /usr/local/bin/CPU-X_v3.2.4_portable.linux64 /usr/local/bin/cpu-x


Next run as superuser (root)
 

hipo@jeremiah:~$ su -c 'cpu-x'


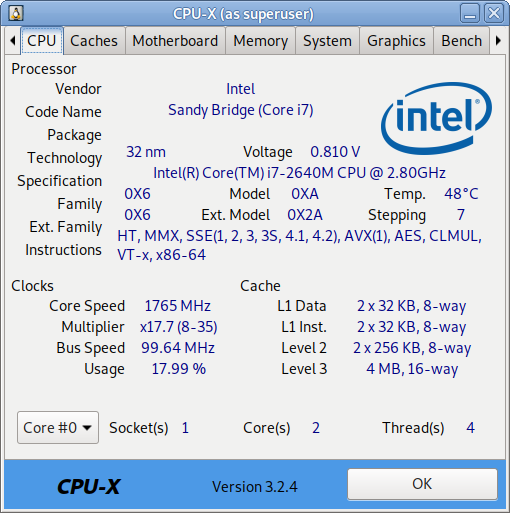
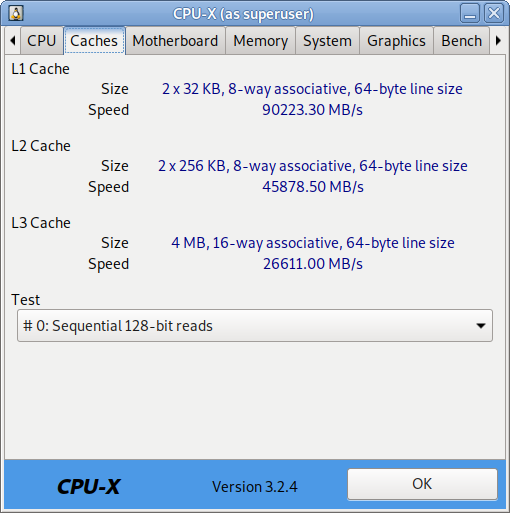
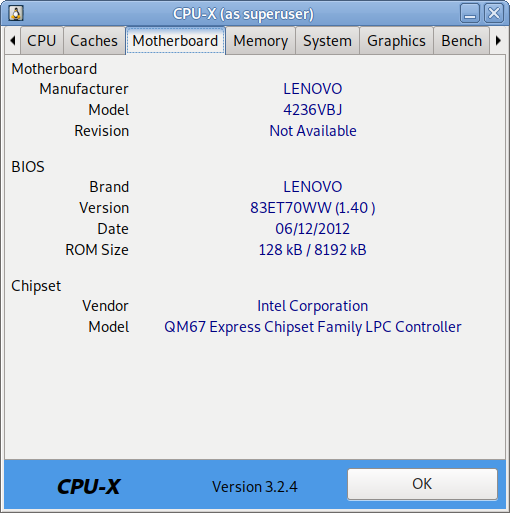
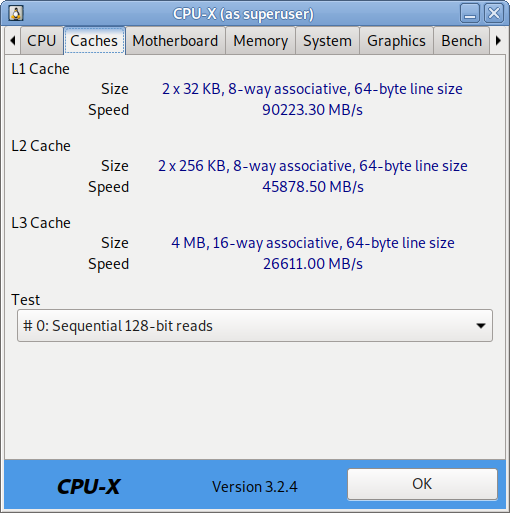
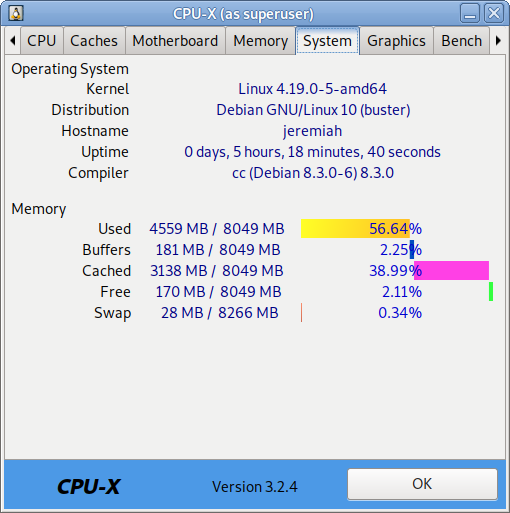
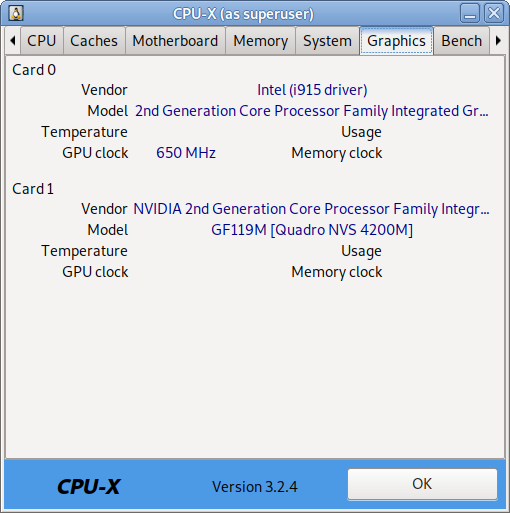
As seen from below screenshots cpu-x reports a lot of concrete specific hardware data on:

  • Processor
  • Motherboard
  • Memory
  • System
  • Graphic card
  • Performance

cpu-x-cpu-cpu-z-alternative-linux-screenshot-CPU-info

cpu-x-cpu-cpu-z-alternative-linux-screenshot-caches-info

cpu-x-cpu-cpu-z-alternative-linux-screenshot-Motherboard-info

cpu-x-cpu-cpu-z-alternative-linux-screenshot-memory-info

cpu-x-cpu-cpu-z-alternative-linux-screenshot-system-info

cpu-x-cpu-cpu-z-alternative-linux-screenshot-graphics-info

CPU-X can be installed also on FreeBSD very easily by just installing from BSD port tree sysutils/cpu-x/
It is also said to work on other *BSDs, NetBSD, OpenBSD Unixes but I guess this will require a manual compilation based on FreeBSD's port Makefile.

4. I-Nex another GUI alternative to CPU-Z for UNIX / Linux

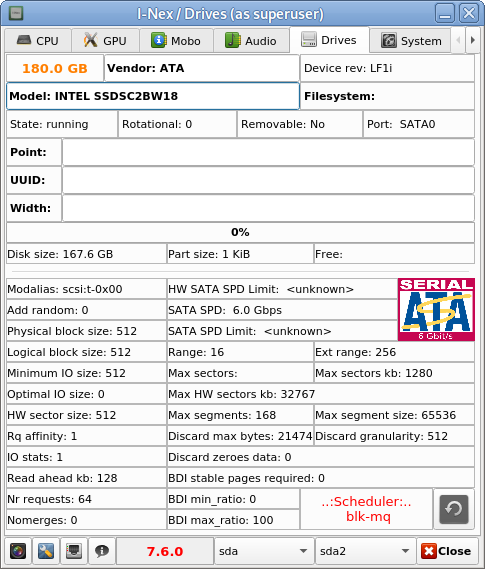
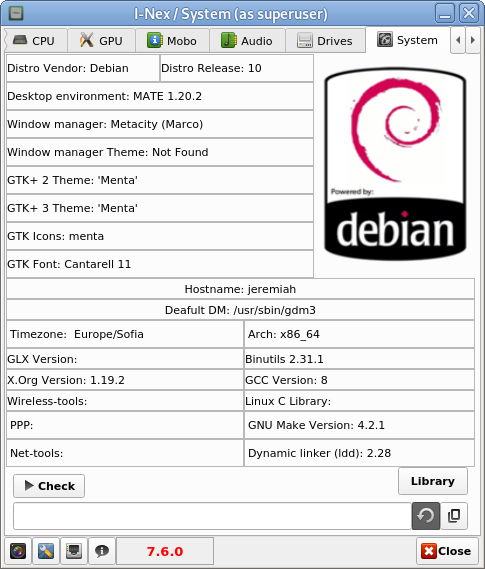
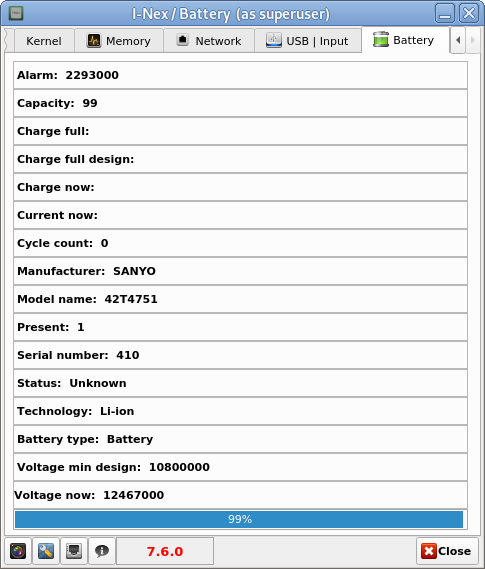
I-Nex is even more useful for general hardware reporting as it reports many hardware specifications not reported by CPU-X such as Battery type and Model Name  (if the hardware report is on a laptop), info on USB devices slots or plugged USB devices brand and specifications, the available Network devices on the system (MAC Addresses) of each of it, Installed and used drivers on Hard Disk (ATA / SATA / SCSI / SSD), HW Sector size, Logical Block size, HDD Sectors count and other specific Hard Drive data as well as information on available Audio (Sound Blaster) devices (HDA-Intel), used Codecs, loaded kernel ALSA driver, Video card used and most importantly indicators on Processor reported CPU (temperature).


To install I-nex

Go to https://launchpad.net/i-nex or any of the mirror links where it resides and install the respective package, in my case, I was doing the installation on Debian Linux, so fetched current latest amd64 package which as of moment of writting this article is i-nex_7.6.0-0-bzr977-20161012-ubuntu16.10.1_amd64.deb , next installed it with dpkg
 

dpkg -i i-nex_7.6.0-0-bzr977-20161012-ubuntu16.10.1_amd64.deb


As the package was depending on some other .deb packages, which failed to install to install the missing ones I had to further run
 

apt –fix-broken install

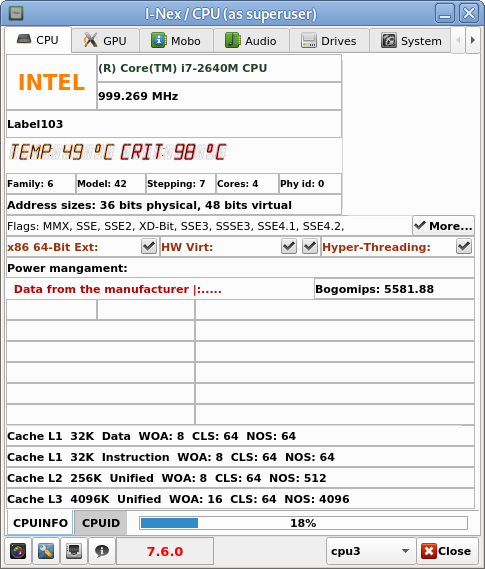
i-nex-cpu-info-linux-hardware-info-program


hre

I-Nex thermal indicators about CPU temperature on a Linux Desktop notebook

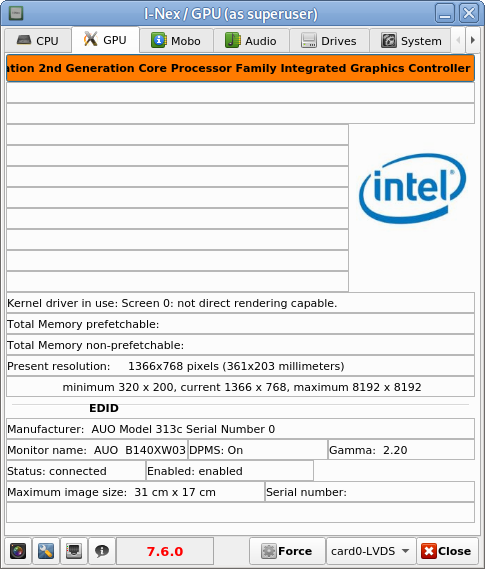
i-nex-gpu-info-linux-hardware-info-program

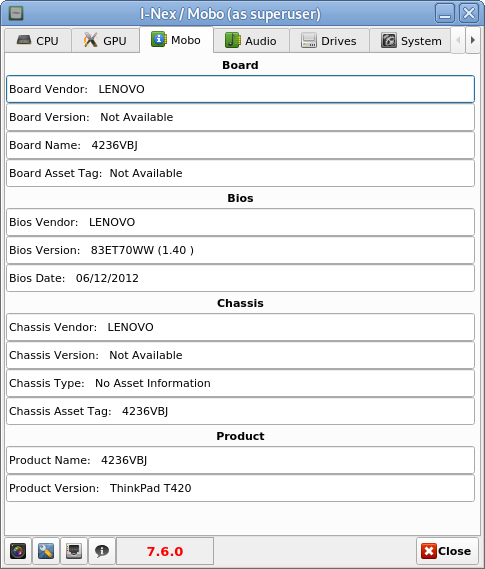
i-nex-mobo-info-linux-hardware-info-program

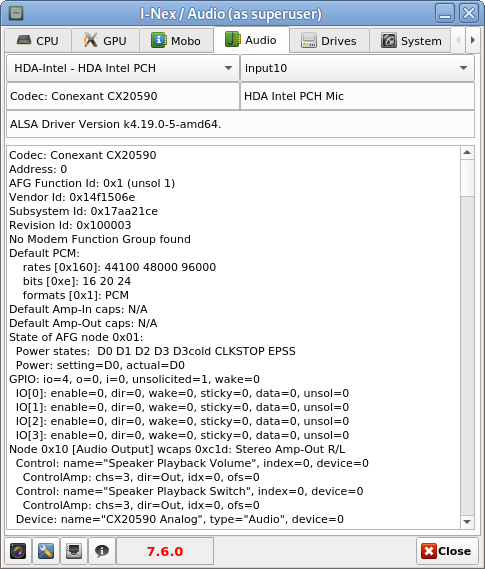
i-nex-audio-info-linux-hardware-info-program

i-nex-drivers-info-linux-hardware-info-program

i-nex-system-info-linux-hardware-info-program

i-nex-battery-info-linux-hardware-info-program


There are other Hardware identification report tools such as CUDA-Z that are useful to check if you have Nvidia Video Card hardware Installed on the PC to check the status of CUDA enabled GPUs, useful if working with nVidia Geforce, Quadro, Tesla cards and ION chipsets.

If you use it however be aware that CUDA-Z is not compatible with 3rd-party linux drivers for NVidia so make sure you have the current official Nvidia version.


5. Inxi full featured system information script


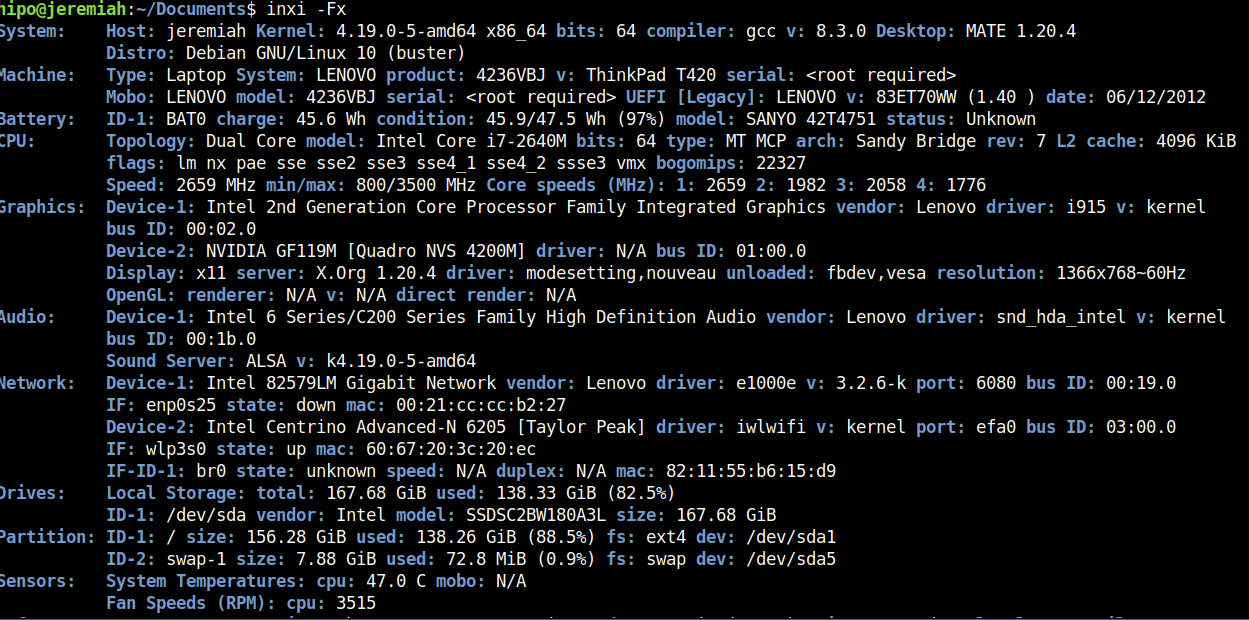
Inxi is a 10000 lines mega bash script that fetches hardware details from multiple different sources in /proc /sys and from commands on the system, and generates a beautiful looking console report that non technical users can read easily.

inxi-10-k-mega-bash-shell-script-reporting-on-installed-system-computer-hardware


inxi -Fx


inxi-report-on-installed-hardware-on-my-lenovo-thinkpad-home-laptop

Each of the pointed above tools has different method of collection of Hardware information from various resources e.g. – kernel loaded modules, dmesg, files like /proc/meminfo /proc/version /proc/scsi/scsi /proc/partitions.
Hence some of the tools are likely to report more info than otheres, so in case if some information you need regarding the system plugged in hardware is missing you can perhaps obtain it from another program. Most Linux distribution desktop provided GNOME package are including Hardinfo gui tool, but in many cases above mentioned tools are likely to add even more on info on what is inside your PC Box.
If you're aware of others tools that are useful not mentioned here please share it.

How to install BlueJeans Video calls, sharing, Conference software on Debian / Ubuntu Linux – Convert RPM to DEB package with alien howto

Tuesday, August 28th, 2018

bluejeans-linux-logo

As I'm currently looking for ways to maximize my incomes without taking participation in 5 days week 8 hours schedule in a Big Corporation office job (which prooved for me to be a terrible slavery) I decided to give Free Lancing a try once again. 
Historically I have registrations in some of the most popular Free Lancing services Web platforms such as freelancer.com and upwork.com.
But none of them really was easy enough to handle as applying and winning a project there is usually a lot of headbanging into the walls and the platforms are full of clients that are looking for free lancers for short-term projects the work selection there required too much work, often projects offered there are seriously under-paid and its really hard to negotiate with many of the clients as they're unprofessional in the fields they're working (don't get me wrong I'm not saying many people are not very successful with this platforms, and that the platforms are not providing work for me I only say it is not really something to my liking …

In the mean time if you happen to read this article and looking for a High Quality Empoyee Cheap System Administrator or automation developmer, an IT counseling FreeLancer or a Ultra cheap WebHosting service in the European Union, I'll be very happy if you become my client.

Anyways … further on I decided to further experiment a little bit with other Free Lancing platforms (suggested by a friend Mitko Ivanov who helped me a lot with things and is continuing to help me over the last year ).

So following his kind suggestion I already tried one of the popular FreeLancing freeeup.com which is looking only for a best specialists into the fields of Marketing, Development, System Administration etc. but even though I tried hard with them the guys decided I am not matching there criteria for a the best 1% of all the people in the field of IT so my application for the platform was rejected twice over the last 1 month and a half.

Another similar new platform for free lancing that looks promising that I've learned about is toptal.com (there site Slogan is Hire FreeLance Talent from the Top 3%) so I went there and registered.

I had hit a road block there too as it seems, there website registration form was not tested enough with non-Windows operating systems with Mozilla Firefox and as it happens that I am using Debian GNU / Linux for my Desktop their drop-down menus was not working, just like some of the form on their website regular expression checks failed.

I've contacted the guys to inform them about their problems (and they kindly advised) I just give a try a registration with different browser (i.e. Google Chrome) which I immediately did and registratoin there was finally a success.
I have to say the new user application form registration of toptal also annoyed me with the stupid requirement to provide a picture in 1000px x 1000px but as this freelancing platform is still new and has way to go until it is established name in the field of freelancing such as upwork.com and I warmly excuse them.

Once registerered for them the user has to schedule an entry interview just like it goes with a standard company interview with a kind of Human Resources (HR) specialist and I guess some technical guys in order to evaluate on your value (Ha-Ha, someone else to determine your value is already crazy but all crazy employees do it still, of course I don't care as I well know that my value is much more than what they put on me).
The online interview once scheduled has to be done in a Web Meeting (Online Rooms) Platform called BlueJeans similar to Cisco WebEx (that is today heavily used in Corporate world in companies such as Hewlett Packard where we used it heavily, IBM, Concentrix etc.) and others Zoom, JoinMe GotoMeeting, HighFive.

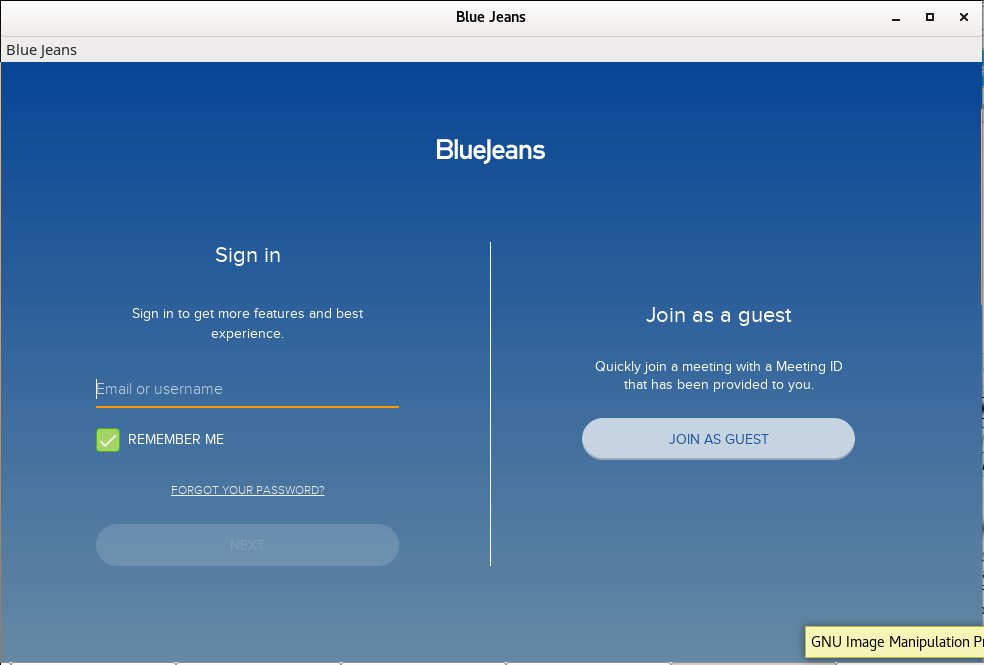
As you could guess BlueJeans (which is by the way a Cloud based meeting software – yackes !) is planned to work mainly on Windows and Mac OS Operating Systems and even though there is a BlueJeans Linux version the provided binary is only for RedHat based linuxes in the RPM binary package format, so in order for me to participate in the scheduled meeting, I either had to port the package and install it on my Debian (what triggeted me to write this article or) use a Virtual Machine such as VirtualBox or VMWare running some kind of Windows OS such as Windows 8 / 10 etc.

Even though I have a Windows 10 OS testbed in a Virtualbox container, I preferred to not use it for BlueJeans and do it the hard way and install BlueJeans on my Debian 9.5 Stretch Linux.

That appeared to be a relatively easy process, so below is how I did it:

1. Download alien convertion (tool) that allows you to convert RPM -> deb, Slackware -> Deb and Linux Standard Base (LDB) packages to deb package format


noah:~# apt-get install –yes alien


2. Download latest BlueJeans version from BlueJeans website
 

As of time of writting this article the download link for bluejeans online conferencing software is here


noah:~# wget https://swdl.bluejeans.com/desktop/linux/1.36/1.36.9/bluejeans-1.36.9.x86_64.rpm


3. Convert bluejeans rpm package with alien


noah:~# alien –to-deb bluejeans-*.rpm


Warning: Skipping conversion of scripts in package bluejeans: postinst postrm preinst prerm
Warning: Use the –scripts parameter to include the scripts.
bluejeans_1.36.9-2_amd64.deb generated
root@jericho:/home/hipo/Свалени# dpkg -i bluejeans_*.deb
Selecting previously unselected package bluejeans.
(Reading database … 516203 files and directories currently installed.)
Preparing to unpack bluejeans_1.36.9-2_amd64.deb …
Unpacking bluejeans (1.36.9-2) …
Setting up bluejeans (1.36.9-2) …


4. Install the deb package as usual with dpkg tool


noah: ~# dpkg -i bluejeans_*.deb


By default BlueJeans were installed under directory /opt/bluejeans


noah:~# ls -al /opt/bluejeans/bluejeans-bin
-rwxr-xr-x 1 root root 72423392 Jun 14 02:31 /opt/bluejeans/bluejeans-bin*


5. Fix missing library links if such are present in order to make BlueJeans workable

Historically I have dealt with many Linux programs that are provided only in RPM package format and I knew that often once an RPM is converted to DEB with alien due to the package dependency differences on Redhats (CentOS / Fedora etc.) there are problems with missing libraries.

This time this was the case as well, so as usual right after install I did a check up with ldd (print shared object dependencies Linux command) to find out about missing libraries and one library appeared missing.


noah:~# ldd /opt/bluejeans/bluejeans-bin
    linux-vdso.so.1 (0x00007fffa2182000)
    librt.so.1 => /lib/x86_64-linux-gnu/librt.so.1 (0x00007fae95f5e000)
    libdl.so.2 => /lib/x86_64-linux-gnu/libdl.so.2 (0x00007fae95d5a000)
    libgtk-x11-2.0.so.0 => /usr/lib/x86_64-linux-gnu/libgtk-x11-2.0.so.0 (0x00007fae95718000)
    libgdk-x11-2.0.so.0 => /usr/lib/x86_64-linux-gnu/libgdk-x11-2.0.so.0 (0x00007fae95463000)
    libatk-1.0.so.0 => /usr/lib/x86_64-linux-gnu/libatk-1.0.so.0 (0x00007fae9523d000)
    libpangocairo-1.0.so.0 => /usr/lib/x86_64-linux-gnu/libpangocairo-1.0.so.0 (0x00007fae95030000)
    libgdk_pixbuf-2.0.so.0 => /usr/lib/x86_64-linux-gnu/libgdk_pixbuf-2.0.so.0 (0x00007fae94e0c000)
    libcairo.so.2 => /usr/lib/x86_64-linux-gnu/libcairo.so.2 (0x00007fae94aef000)
    libpango-1.0.so.0 => /usr/lib/x86_64-linux-gnu/libpango-1.0.so.0 (0x00007fae948aa000)
    libfreetype.so.6 => /usr/lib/x86_64-linux-gnu/libfreetype.so.6 (0x00007fae945f5000)
    libfontconfig.so.1 => /usr/lib/x86_64-linux-gnu/libfontconfig.so.1 (0x00007fae943b2000)
    libgobject-2.0.so.0 => /usr/lib/x86_64-linux-gnu/libgobject-2.0.so.0 (0x00007fae9415e000)
    libglib-2.0.so.0 => /usr/lib/x86_64-linux-gnu/libglib-2.0.so.0 (0x00007fae93e48000)
    libX11.so.6 => /usr/lib/x86_64-linux-gnu/libX11.so.6 (0x00007fae93b0a000)
    libXi.so.6 => /usr/lib/x86_64-linux-gnu/libXi.so.6 (0x00007fae938fa000)
    libnss3.so => /usr/lib/x86_64-linux-gnu/libnss3.so (0x00007fae935b1000)
    libnssutil3.so => /usr/lib/x86_64-linux-gnu/libnssutil3.so (0x00007fae93381000)
    libsmime3.so => /usr/lib/x86_64-linux-gnu/libsmime3.so (0x00007fae93154000)
    libplc4.so => /usr/lib/x86_64-linux-gnu/libplc4.so (0x00007fae92f4f000)
    libnspr4.so => /usr/lib/x86_64-linux-gnu/libnspr4.so (0x00007fae92d10000)
    libgconf-2.so.4 => /usr/lib/x86_64-linux-gnu/libgconf-2.so.4 (0x00007fae92adf000)
    libexpat.so.1 => /lib/x86_64-linux-gnu/libexpat.so.1 (0x00007fae928ad000)
    libXext.so.6 => /usr/lib/x86_64-linux-gnu/libXext.so.6 (0x00007fae9269b000)
    libXfixes.so.3 => /usr/lib/x86_64-linux-gnu/libXfixes.so.3 (0x00007fae92495000)
    libXrender.so.1 => /usr/lib/x86_64-linux-gnu/libXrender.so.1 (0x00007fae9228b000)
    libXcomposite.so.1 => /usr/lib/x86_64-linux-gnu/libXcomposite.so.1 (0x00007fae92088000)
    libasound.so.2 => /usr/lib/x86_64-linux-gnu/libasound.so.2 (0x00007fae91d8a000)
    libXdamage.so.1 => /usr/lib/x86_64-linux-gnu/libXdamage.so.1 (0x00007fae91b87000)
    libXtst.so.6 => /usr/lib/x86_64-linux-gnu/libXtst.so.6 (0x00007fae91981000)
    libpthread.so.0 => /lib/x86_64-linux-gnu/libpthread.so.0 (0x00007fae91763000)
    libcap.so.2 => /lib/x86_64-linux-gnu/libcap.so.2 (0x00007fae9155d000)
    libudev.so.0 => not found
    libdbus-1.so.3 => /lib/x86_64-linux-gnu/libdbus-1.so.3 (0x00007fae9130c000)
    libnotify.so.4 => /usr/lib/x86_64-linux-gnu/libnotify.so.4 (0x00007fae91104000)
    libstdc++.so.6 => /usr/lib/x86_64-linux-gnu/libstdc++.so.6 (0x00007fae90d85000)
    libm.so.6 => /lib/x86_64-linux-gnu/libm.so.6 (0x00007fae909f2000)
    libgcc_s.so.1 => /lib/x86_64-linux-gnu/libgcc_s.so.1 (0x00007fae907db000)
    libc.so.6 => /lib/x86_64-linux-gnu/libc.so.6 (0x00007fae90421000)
    /lib64/ld-linux-x86-64.so.2 (0x00007fae96166000)
    libgmodule-2.0.so.0 => /usr/lib/x86_64-linux-gnu/libgmodule-2.0.so.0 (0x00007fae9021d000)
    libgio-2.0.so.0 => /usr/lib/x86_64-linux-gnu/libgio-2.0.so.0 (0x00007fae8fe7f000)
    libpangoft2-1.0.so.0 => /usr/lib/x86_64-linux-gnu/libpangoft2-1.0.so.0 (0x00007fae8fc6a000)
    libfribidi.so.0 => /usr/lib/x86_64-linux-gnu/libfribidi.so.0 (0x00007fae8fa53000)
    libXinerama.so.1 => /usr/lib/x86_64-linux-gnu/libXinerama.so.1 (0x00007fae8f850000)
    libXrandr.so.2 => /usr/lib/x86_64-linux-gnu/libXrandr.so.2 (0x00007fae8f645000)
    libXcursor.so.1 => /usr/lib/x86_64-linux-gnu/libXcursor.so.1 (0x00007fae8f43b000)
    libpng16.so.16 => /usr/lib/x86_64-linux-gnu/libpng16.so.16 (0x00007fae8f208000)
    libz.so.1 => /lib/x86_64-linux-gnu/libz.so.1 (0x00007fae8efea000)
    libpixman-1.so.0 => /usr/lib/x86_64-linux-gnu/libpixman-1.so.0 (0x00007fae8ed44000)
    libxcb-shm.so.0 => /usr/lib/x86_64-linux-gnu/libxcb-shm.so.0 (0x00007fae8eb41000)
    libxcb.so.1 => /usr/lib/x86_64-linux-gnu/libxcb.so.1 (0x00007fae8e919000)
    libxcb-render.so.0 => /usr/lib/x86_64-linux-gnu/libxcb-render.so.0 (0x00007fae8e70b000)
    libthai.so.0 => /usr/lib/x86_64-linux-gnu/libthai.so.0 (0x00007fae8e501000)
    libuuid.so.1 => /lib/x86_64-linux-gnu/libuuid.so.1 (0x00007fae8e2fa000)
    libffi.so.6 => /usr/lib/x86_64-linux-gnu/libffi.so.6 (0x00007fae8e0f1000)
    libpcre.so.3 => /lib/x86_64-linux-gnu/libpcre.so.3 (0x00007fae8de7f000)
    libplds4.so => /usr/lib/x86_64-linux-gnu/libplds4.so (0x00007fae8dc7b000)
    libgthread-2.0.so.0 => /usr/lib/x86_64-linux-gnu/libgthread-2.0.so.0 (0x00007fae8da79000)
    libdbus-glib-1.so.2 => /usr/lib/x86_64-linux-gnu/libdbus-glib-1.so.2 (0x00007fae8d851000)
    libsystemd.so.0 => /lib/x86_64-linux-gnu/libsystemd.so.0 (0x00007fae8d5c9000)
    libselinux.so.1 => /lib/x86_64-linux-gnu/libselinux.so.1 (0x00007fae8d3a1000)
    libresolv.so.2 => /lib/x86_64-linux-gnu/libresolv.so.2 (0x00007fae8d18a000)
    libmount.so.1 => /lib/x86_64-linux-gnu/libmount.so.1 (0x00007fae8cf31000)
    libharfbuzz.so.0 => /usr/lib/x86_64-linux-gnu/libharfbuzz.so.0 (0x00007fae8cc81000)
    libXau.so.6 => /usr/lib/x86_64-linux-gnu/libXau.so.6 (0x00007fae8ca7d000)
    libXdmcp.so.6 => /usr/lib/x86_64-linux-gnu/libXdmcp.so.6 (0x00007fae8c877000)
    libdatrie.so.1 => /usr/lib/x86_64-linux-gnu/libdatrie.so.1 (0x00007fae8c66f000)
    liblzma.so.5 => /lib/x86_64-linux-gnu/liblzma.so.5 (0x00007fae8c449000)
    liblz4.so.1 => /usr/lib/x86_64-linux-gnu/liblz4.so.1 (0x00007fae8c22c000)
    libgcrypt.so.20 => /lib/x86_64-linux-gnu/libgcrypt.so.20 (0x00007fae8bf10000)
    libblkid.so.1 => /lib/x86_64-linux-gnu/libblkid.so.1 (0x00007fae8bcc1000)
    libgraphite2.so.3 => /usr/lib/x86_64-linux-gnu/libgraphite2.so.3 (0x00007fae8ba94000)
    libbsd.so.0 => /lib/x86_64-linux-gnu/libbsd.so.0 (0x00007fae8b87d000)
    libgpg-error.so.0 => /lib/x86_64-linux-gnu/libgpg-error.so.0 (0x00007fae8b65d000)


As I am on my notebook with Debian 9 and on Debian / Ubuntus and other Linuxes udevd daemon and connected libraries are long time existing, it was obvious the problems to dependencies are because of missing library links (or library version inconsistencies).

To find out what kind of libudev.so* are present I used slocate package (locate) command.


noah:~# locate libudev.so
/lib/i386-linux-gnu/libudev.so.1
/lib/i386-linux-gnu/libudev.so.1.6.10
/lib/x86_64-linux-gnu/libudev.so
/lib/x86_64-linux-gnu/libudev.so.1
/lib/x86_64-linux-gnu/libudev.so.1.6.10


Obviously the missing library libudev.so.0 was present under a different name so I give a try to just create a new symbolic link from libudev.so.1 to libudev.so.0 hoping that the libudev library version Blue Jeans was compiled against did not have a missing binary objects from the ones installed on my OS.


noah:~# ln -sf /lib/x86_64-linux-gnu/libudev.so.1 /lib/x86_64-linux-gnu/libudev.so.0


noah:~# ldd /opt/bluejeans/bluejeans-bin |grep -i 'not found'


Above command did not return any missing libraries, so I went further and executed it.

6. Go start BlueJeans and register a user or use the anonymous login to be ready for the scheduled online meting

… And, Guess, what it works! 🙂


noah:~# /opt/bluejeans/bluejeans-bin


To make it easy to remember to later start the binary under a familiar name, I've also created a link into


noah:~# ln -sf /opt/bluejeans/bluejeans-bin /usr/bin/bluejeans


noah:~#  sudo su – hipo
hipo@noah:~$ /usr/bin/bluejeans


bluejeans-video-conferencing-online-sharing-meeting-software-running-on-debian-gnu-linux-screenshot
 

Make custom installed Mozilla Firefox restore tab sessions on Debian GNU / Linux

Tuesday, October 30th, 2012

How to make custom installed Firefox restore tabs on browser close up - firefox restore website windows sessions

As my blog readers might, know I'm running Debian Squeeze on my notebook as a Desktop OS. Until some time I used to be a big fan of Epiphany but lately I started not using Epiphany so much because of its too frequent crashes while browsing a website that contains Flash. The problem of course is not in Epiphany itself but in the flash but still, as this is really disturbing if someone works, I nowdays use only Firefox. I tried for a while to use IceWeasel, but IceWeasel (Firefox) version is too old:

hipo@noah:~$ iceweasel –version
Mozilla Iceweasel 3.5.17, Copyright (c) 1998 – 2011 mozilla.org

Thus I use a custom download binary release from Firefox's website the one distributed as of time of writing post in archive firefox-16.0.2.tar.bz2

One of main advantages of installing the custom binary from Firefox, website is it auto updates and I'm always running the latest Release on myLinux Desktop, something IceWeasel still doesn't.

My current firefox version is:

hipo@noah:/opt/firefox$ /opt/firefox/firefox –version
Mozilla Firefox 16.0.2

All works fine with it, except two little things;

  • One is Firefox development team compiled the Browser to still use OSS and not the newer and used almost by all programs ALSA (Advanced Linux Sound Architecture) – something that is unfortunately irreversalble
     
  • Secondly  (which is the reason to write this) Firefox Linux version – doesn't by default Restore closed browser open tab websites! – e.g. session restore in those Firefox version is not working.

In Windows Firefox usually asks, while closing the whole browser, if the user wants to Save Browser Session, on the Linux version this is not default behavior, maybe developers have to answer why?

I was not sure if this would work but I went googling about a plugin to make Firefox Restore Sessions and tried installing first query matched FF plugin Session Manager

I was a bit sceptical that this would work

and actually just intalling the plugin didn't changed Firefox to save websites open in tabs on a close. After however I configured the plugin from FF menus:

Tools -> Session Manager -> Session Manager Options Tab restoration in Firefox worked

In below screnshot from Session Manager Options you can see my exact selected settings


Well that's all, finally I can remember what I had my browser before PC shutdown 🙂