Posts Tagged ‘screen’

Viewing JPEG,GIF and PNG in ASCII with cacaview on GNU / Linux – Review on caca-utils text mode graphics utilities

Thursday, May 17th, 2012

Stitch 80x45 libcaca mascot cacaview viewing JPG, PNG, GIF images as ASCII on Linux libcaca

Probably, many don't know that it is possible to view normal graphical pictures (JPG, PNG, GIF, BMP) etc. in plain console tty.

Being able to view pictures in ASCII is something really nice especially for console geeks like me.
The images produced sometimes are a bit unreadable, if compared to the original graphics, but anyways most of the pictures looks pretty decent 🙂

Viewing in console / terminal images on GNU / Linux is possible thanks to a library called libcaca, caca labs libcaca project official website here.
Below is a shot description of libcaca:
hipo@noah:~$ apt-cache show libcaca0|grep 'Description' -A 4
Description: colour ASCII art library
libcaca is the Colour AsCii Art library. It provides high level functions
for colour text drawing, simple primitives for line, polygon and ellipse
drawing, as well as powerful image to text conversion routines.

In Debian, Ubuntu and other deb Linux distros viewing GUI images with no need for Xserver or any kind of window manager in plain ASCII is possible with cacaview.

cacaview is part of a package called caca-utils. caca-utils is providing few other great utilities for ASCII freaks 🙂 along with cacaview console ascii viewer prog.
The package> is available for Debian distributins since many years, so even on a very old Debians like Debian – (Potato, Woody, Sarge) the package is available in default free package repositories ready to install via apt

To install apt-get it as usual:

noah:~# apt-get --yes install caca-utils

Here is a list of the binaries the package provides:

hipo@noah:~$ dpkg -L caca-utils|grep -i /usr/bin/
/usr/bin/cacaserver
/usr/bin/cacaplay
/usr/bin/cacafire
/usr/bin/cacademo
/usr/bin/cacaview
/usr/bin/img2txt

1. cacaserver a tiny program allowing network streaming of applications written in caca

Belkow is a chop, from man cacaserver
 

cacaserver reads libcaca animation files in its standard input and
serves them as ANSI art on network port 51914. These animations can be
created by any libcaca program by setting the CACA_DRIVER environment
variable to raw and piping the program's standard output to cacaserver.

Clients can then connect to port 51914 using telnet or netcat to see
the output.

The example section of the manual points 1 example use of cacaserver to stream the console output from cacademo.
cacademo binary is a short presentation ASCII DEMO in the spirit of the old school assembly demos (demoscene) .
To run it to bind on port 51914 one has to type in bash shell:
hipo@noah:~$ CACA_DRIVER=raw cacademo | cacaserver
initialised network, listening on port 51914

Then to check out how the demo looks, open telnet connection to the cacaserver host; In my case the cacaserver is binded and streamed over IP 192.168.0.2:

hipo@debian:~$ telnet 192.168.0.2 51914

Immediately you got the demo shining; Below are two screenshots of the demo played after succesful telnet connection:

Cacaserver - caca for the network screenshot Matrix cacademo

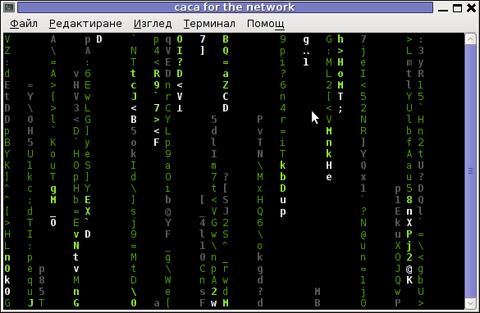
cacademo running over telnet network connection – Matrix

cacaserver running on Debian GNU / Linux drug addict like spots streamed via telnet

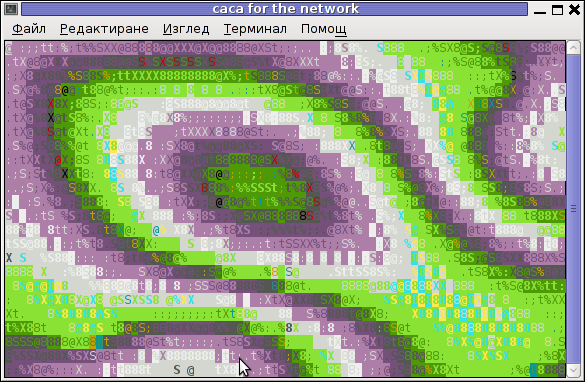
Blur spots cacademo shot of cacademo streamed via network

You see the demo looks quite awesome 🙂

2. Running cacafire to stream over network

Another possible example use of cacaserver is in conjunction with cacafire libcaca test application:

noah:~# CACA_DRIVER=raw cacafire | cacaserver
initialised network, listening on port 51914
cacafire is a short application written to render ASCII via libcaca and is just displaying a screen with ASCII (moving) burning fire.
It is quite spectacular if you, ask an unexpecting friend to connect to your host to 51914 🙂

Cacafire Screenshot Debian GNU / Linux cacaserver streaming ASCII demo via network port 51914

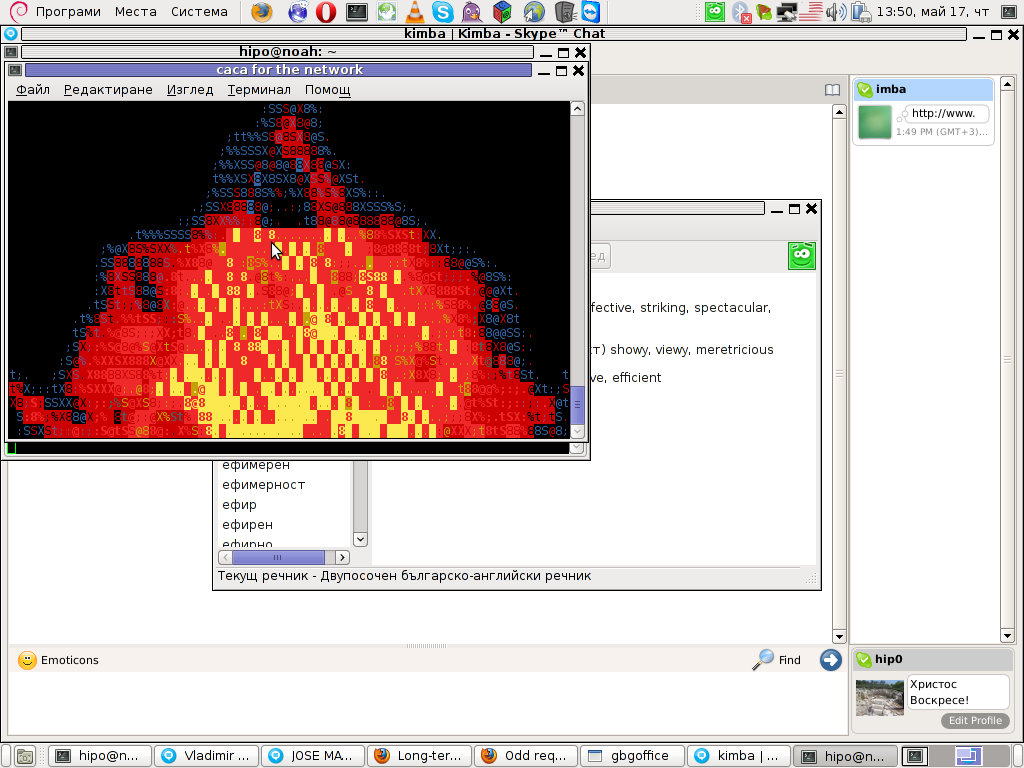
Besides that bored sys admins, could run cacafire in console to hypnotize themselves watching dumb the burning fire screen for few hoursor just use it as a screensaver 😉

3. cacaview a program to display a graphic images in console using ASCII art

cacaview takes just one argument – the picture to be displayed.

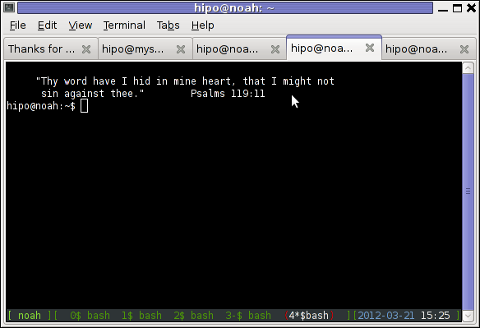
Below is a screenshot of cacaview ran from my gnome-terminal displaying a ASCII text version of the MySQL server logo

hipo@noah:~$ cd /disk/pictures
hipo@noah:/disk/pictures$ cacaview mysql_logo.png


cacaview displaying MySQL database logo in ASCII using caca for X

Whether cacaview is invoked in GUI, the libcaca X support is used, so the text image is visualized in new window with graphics, if however it is invoked in plain let's say tty1 libcaca displays the graphics pictures drawing it with only text characters.

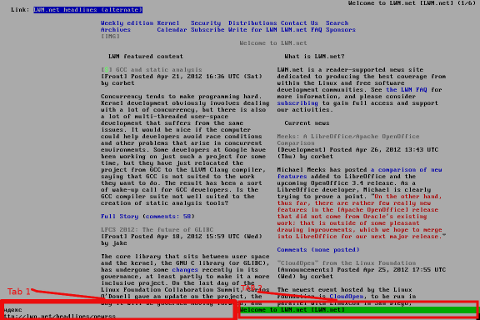
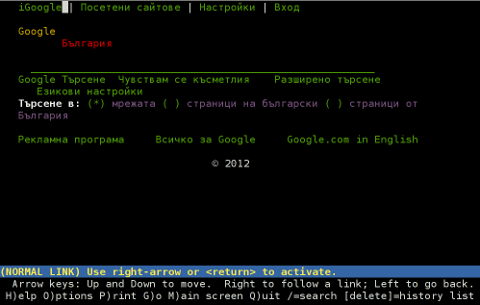
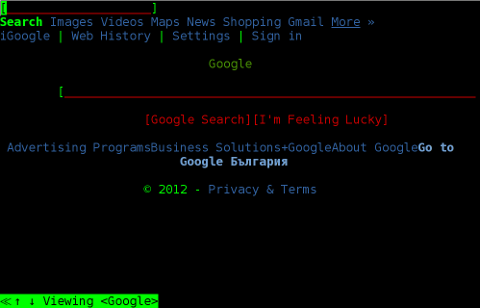
Here is also a screenshot, I've made while viewing a GIF website logo in ASCII in plain tty console:

hipo@noah:~$ cacaview /disk/pictures/logo.gif

cacaview plain tty console screenshot of a website logo graphics pictures 17-05-2012

The logo is in cyrillic, so for latin speaking people some of the characters in the two words seen will be unreadable 🙂

cacaview even supports viewing, the next and previous picture in line, like in any modern graphics image viewer program.
To view a bunch of graphic pictures in ASCII with cacaview pass it *.*:

hipo@noah:~$ cacaview /disk/pictures/*.*

For simplicity the common unix * is also supported, so I find it quicker to do:

hipo@noah:~$ cacaview /disk/pictures/*

Showing pictures forward and backward (Previous / Next) picture is done with n and p kbd keys, whether;
n - next;
p - previous

cacaview doesn't crash or stop but skip unknown file formats – if for instance encounters filenames which are not images; lets say you have *.rar archive files along with other pictures.

The complete list of keys cacaview supports are:
br />

KEYS
? show the help screen

n, p switch to next image, previous image

Left, Right, Up, Down or h, l, k, j
scroll the image around

+, – zoom in and out

z reset the zoom level to normal

f switch fullscreen mode (hide/show menu and status bars)

d toggle the dithering mode (no dithering, 4×4 ordered dithering, 8×8 ordered dithering and random dithering)

q exit the program

4. Converting graphics images to ASCII art like (plain text pictures)

The tool that does "the trick" is img2txt. img2txt has a bit more options while compared to the rest of the aforementioned tools.The following list of arguments are recognized:

  • the size (font, height)
  • brightness
  • contrast
  • gamma and dither
  • format type of out the output pic

Anyways I found that the basic just in / out arguments passed are enough to produce pretty good results:

hipo@noah:~$ img2txt hipo_avatar.gif >hipo_avatar_pic.txt

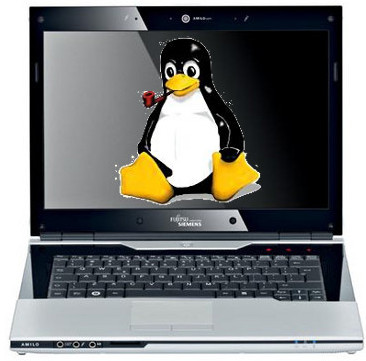
The original hipo_avatar.gif file looks like so:

hipo avatar gif picture before img2txt convertion to text

After above img2txt command is run and hipo_avatar_pic.txt to see the colorful output ASCII art img2txt produces, cat it:

hipo@noah:~$ cat hipo_avatar_pic.txt

The image result if screenshot looks quite beautiful and even, can be considered or used as an ART effect image (filter) 🙂

Console Screenshot hipo avatar pic ASCII img2txt output picture

The picture colors are plain ANSI color, so in order to display properly the picture with colors on another computers or Operating System you will need at least basic support for ANSI colors.

Plenty of output file formats are supported by img2txt

Here is the complete list of supported output formats:
 

ansi : coloured ANSI
caca : internal libcaca format
utf8 : UTF8 with CR
utf8 : UTF8 with CRLF (MS Windows)
html : HTML with CSS and DIV support
html3 : Pure HTML3 with tables
irc : IRC with ctrl-k codes
bbfr : BBCode (French)
ps : Postscript
svg : Scalable Vector Graphics
tga : Targa Image

libcaca is available for FreeBSD too, but the caca-utils is not available as a port yet, though probably the deb or rpm packages can easily be ported to BSD.

Well that's all, Enjoy.

Facebook use in organizations harmful for company businesses – How to block facebook access to company or organization network on Linux routers

Wednesday, May 2nd, 2012

Facebook harms company and organization employee efficiency picture, Falling company efficiency diagram due to facebook employee use

I don't know if someone has thought about this topic but in my view Facebook use in organizations has a negative influence on companies overall efficiency!
Think for a while, facebook's website is one of the largest Internet based "people stealing time machine" so to say. I mean most people use facebook for pretty much useless stuff on daily basis (doesn't they ??). The whole original idea of facebook was to be a lay off site for college people with a lot of time to spend on nothing.
Yes it is true some companies use facebook succesfully for their advertising purposes and sperading the awareness of a company brand or product name but it is also true that many companies administration jobs like secretaries, accountants even probably CEOs loose a great time in facebook useless games and picture viewing etcetera.

Even government administration job positioned people who have access to the internet access facebook often from their work place. Not to mention, the mobility of people nowdays doesn't even require facebook to be accessed from a desktop PC. Many people employeed within companies, who does not have to work in front of a computer screen has already modern mobile "smart phones" as the business people incorrectly call this mini computer devices which allows them to browse the NET including facebook.

Sadly Microsoft (.NET) programmers and many of the programmers on various system platforms developers, software beta testers and sys admins are starting to adopt this "facebook loose your time for nothing culture". Many of my friends actively use the Facebook, (probably) because they're feeling lonely in front of the computer screen and they want to have interaction with someone.

Anyways, the effect of this constant fb use and aline social networks is clear. If in the company the employeed personal has to do work on the computer or behind any Internet plugged device, a big time of the use of the device is being 'invested' in facebook to kill some time instead of investing the same time for innovation within the company or doing the assigned tasks in the best possible way

Even those who use facebook occasionally from their work place (by occasionally I mean when they don't have any work to do on the work place), they are constantly distracted (focus on work stealed) by the hanging opened browser window and respectively, when it comes to do some kind of work their work efficiency drops severely.
You might wonder how do I know that facebook opened browser tab would have bad interaction with the rest of the employee work. Well let me explain. Its a well known scientifically proven fact that the human mind is not designed to do simultaneously multiple tasks (we're not computers, though even computers doesn't work perfect when simultaneous tasks are at hand.).
Therefore using facebook in parallel with their daily job most people nowdays try to "multi task" their job and hence this reflects in poor work productivity per employee. The chain result cause of the worsened productivity per employee is therefore seen in the end of the fiscal quarter or fiscal year in bad productivity levels, bad or worsened quality of product and hence to poor financial fiscal results.

I've worked before some time for company whose CEO has realized that the use of certain Internet resources like facebook, gmail and yahoo mail – hurts the employee work productivity and therefore the executive directors asked me to filter out facebook, GMAIL and mail.yahoo as well as few other website which consumed a big portion of the employees time …
Well apparantly this CEO was smart and realized the harm this internet based resources done to his business. Nowdays however many company head executives did not realize the bad effect of the heavy use of public internet services on their work force and never ask the system administrator to filter out this "employees efficiency thefts".

I hope this article, will be eventually red by some middle or small sized company with deteriorating efficiency and this will motivate some companies to introduce an anti-facebook and gmail use policy to boost up the company performance.

As one can imagine, if you sum up all the harm all around the world to companies facebook imposed by simply exposing the employees to do facebooking and not their work, this definitely worsenes the even severe economic crisis raging around …
The topic of how facebook use destroyes many businesses is quite huge and actually probably I'm missing a lot of hardmful aspects to business that can be imposed by just a simple "innocent facebook use", so I will be glad to hear from people in comments, if someone at all benefits of facebook use in an company office (I seriously doubt there is even one).

Suppose you are a company that does big portion of their job behind a computer screen over the internet via a Software as a Service internet based service, suppose you have a project deadline you have to match. The project deadline is way more likely to be matched if you filter out facebook.
Disabling access to facebook of employees and adding company policy to prohibit social network use and rules & regulations prohibiting time consuming internet spaces should produce good productivity results for company lightly.
Though still the employees can find a way to access their out of the job favourite internet services it will be way harder.
If the employee work progress is monitored by installed cameras, there won't be much people to want to cheat and use Facebook, Gmail or any other service prohibited by the company internal codex

Though this are a draconian measures, my personal view is that its better for a company to have such a policy, instead of pay to their emloyees to browser facebook….

I'm not aware what is the situation within many of the companies nowdays and how many of them prohibit the fb, hyves, google plus and the other kind of "anti-social" networks.
But I truly hope more and more organizations chairman / company management will comprehend the damages facebook makes to their business and will issue a new policy to prohibit the use of facebook and the other alike shitty services.

In the mean time for those running an organization routing its traffic through a GNU / Linux powered router and who'd like to prohibit the facebook use to increase the company employees efficiency use this few lines of bash code + iptables:

#!/bin/sh
# Simple iptables firewall rules to filter out www.facebook.com
# Leaving www.facebook.com open from your office will have impact on employees output ;)
# Written by hip0
# 05.03.2012
get_fb_network=$(whois 69.63.190.18|grep CIDR|awk '{ print $2 }');
/sbin/iptables -A OUTPUT -p tcp -d ${get_fb_network} -j DROP

Here is also the same filter out facebook, tiny shell script / blocks access to facebook script

If the script logic is followed I guess facebook can be disabled on other company networks easily if the router is using CISCO, BSD etc.
I will be happy to hear if someone did a research on how much a company efficiency is increased whether in the company office facebook gets filtered out. My guess is that efficiency will increase at least with 30% as a result of prohibition of just facebook.

Please drop me a comment if you have an argument against or for my thesis.

How to make screenshot in /dev/tty console on GNU / Linux – Taking picture JPEG / PNG snapshot of text console in systems without graphical environment

Monday, April 30th, 2012

I'm used to making picture screenshots in GNOME desktop environment. As I've said in my prior posts, I'm starting to return to my old habits of using console ttys for regular daily jobs in order to increase my work efficiency. In that manner of thoughts sometimes I need to take a screenshot of what I'm seeing in my physical (TTY consoles) to be able to later reuse this. I did some experimenting and this is how this article got born.

In this post, I will shortly explain how a picture of a command running in console or terminal in GNU / Linux can be made

Before proceeding to the core of the article, I will say few words on ttys as I believe they might be helpful someone.
The abbreviation of tty comes after TeleTYpewritter phrase and is dating back somewhere near the 1960s. The TTY was invented to help people with impaired eyesight or hearing to use a telephone like typing interface.

In Unix / Linux / BSD ttys are the physical consoles, where one logs in (typing in his user/password). There are physical ttys and virtual vtys in today *nixes. Today ttys, are used everywhere in a modern Unixes or Unix like operating system with or without graphical environments.
Various Linux distributions have different number of physical consoles (TTYs) (terminals connected to standard output) and this depends mostly on the distro major contributors, developers or surrounding OS community philosophy.
Most modern Linux distributions have at least 5 to 7 physical ttys. Some Linux distributions like Debian for instance as of time of writting this, had 7 active by default physical consoles.
Adding 3 more ttys in Debian / Ubuntu Linux is done by adding the following lines in /etc/inittab:
 

7:23:respawn:/sbin/getty 38400 tty7
8:23:respawn:/sbin/getty 38400 tty8
9:23:respawn:/sbin/getty 38400 tty9

On some Linux distributions like Fedora version 9 and newer ones, new ttys can no longer be added via /etc/inittab,as the RedHat guys changed it for some weird reason, but I guess this is too broad issue to discuss ….

In graphical environments ttys are called methaphorically "virtual". For instance in gnome-terminal or while connecting to a remote SSH server, a common tty naming would be /dev/pts/8 etc.

tty command in Linux and BSDs can be used to learn which tty, one is operating in.

Here is output from my tty command, issued on 3rd TTY (ALT+F3) on my notebook:
 

noah:~# tty
/dev/tty3

A tty cmd output from mlterm GUI terminal is like so:
 

hipo@noah:~$ tty/dev/pts/9

Now as mentioned few basic things on ttys I will proceed further to explain how I managed to:

a) Take screenshot of a plain text tty screen into .txt file format
b) take a (picture) JPG / PNG screenshot of my Linux TTY consoles content

1. Take screenshot of plain text tty screen into a plain (ASCII) .txt file:

To take a screenshot of tty1, tty2 and tty3 text consoles in a txt plain text format, cat + a standard UNIX redirect is all necessery:
 

noah:~# cat /dev/vcs1 > /home/hipo/tty1_text_screenshot.txt
noah:~# cat /dev/vcs2 > /home/hipo/tty2_text_screenshot.txt
noah:~# cat /dev/vcs3 > /home/hipo/tty3_text_screenshot.txt

This will dump the text content of the console into the respective files, if however you try to dump an ncurses library like text interactive interfaces you will end up with a bunch of unreadable mess.
In order to read the produced text 'shots' onwards less command can be used …
 

noah:~# less /home/hipo/tty1_text_screenshot.txt
noah:~# less /home/hipo/tty2_text_screenshot.txt
noah:~# less /home/hipo/tty3_text_screenshot.txt

2. Take picture JPG / PNG snapshot of Linux TTY console content

To take a screenshot of my notebook tty consoles I had to first install a "third party program" snapscreenshot . There is no deb / rpm package available as of time of writting this post for the 4 major desktop linux distributions Ubuntu, Debian, Fedora and Slackware.
Hence to install snapscreenshot,I had to manually download the latest program tar ball source and compile e.g.:
 

noah:~# cd /usr/local/src
noah:/usr/local/src# wget -q http://bisqwit.iki.fi/src/arch/snapscreenshot-1.0.14.3.tar.bz2
noah:/usr/local/src# tar -jxvvvf snapscreenshot-1.0.14.3.tar.bz2

noah:/usr/local/src# cd snapscreenshot-1.0.14.3
noah:/usr/local/src/snapscreenshot-1.0.14# ./configure && make && make install
Configuring…
Fine. Done. make.
make: Nothing to be done for `all'.
if [ ! "/usr/local/bin" = "" ]; then mkdir –parents /usr/local/bin 2>/dev/null; mkdir /usr/local/bin 2>/dev/null; \
for s in snapscreenshot ""; do if [ ! "$s" = "" ]; then \
install -c -s -o bin -g bin -m 755 "$s" /usr/local/bin/"$s";fi;\
done; \
fi; \
if [ ! "/usr/local/man" = "" ]; then mkdir –parents /usr/local/man 2>/dev/null; mkdir /usr/local/man 2>/dev/null; \
for s in snapscreenshot.1 ""; do if [ ! "$s" = "" ]; then \
install -m 644 "$s" /usr/local/man/man"`echo "$s"|sed 's/.*\.//'`"/"$s";fi;\
done; \
fi

By default snapscreenshot command is made to take screenshot in a tga image format, this format is readable by most picture viewing programs available today, however it is not too common and not so standartized for the web as the JPEG and PNG.
Therefore to make the text console tty snapshot taken in PNG or JPEG one needs to use ImageMagick's convert tool. The convert example is also shown in snapscreenshot manual page Example section.

To take a .png image format screenshot of lets say Midnight Commander interactive console file manager running in console tty1, I used the command:
 

noah:/home/hipo# snapscreenshot -c1 -x1 > ~/console-screenshot.tga && convert ~/console-screenshot.tga console-screenshot.png

Linux text console tty mc screenshot with snapscreenshot terminal / console snapshotting program

Note that you need to have read/write permissions to the /dev/vcs* otherwise the snapscreenshot will be unable to read the tty and produce an error:
 

hipo@noah:~/Desktop$ snapscreenshot -c2 -x1 > snap.tga && convert snap.tga snap.pngGeometry will be: 1x2Reading font…/dev/console: Permission denied

To take simultaneous picture screenshot of everything contained in all text consoles, ranging from tty1 to tty5, issue:
 

noah:/home/hipo# snapscreenshot -c5 -x1 > ~/console-screenshot.tga && convert ~/console-screenshot.tga console-screenshot.png

Here is a resized 480×320 pixels version of the original screenshot the command produces:

All text Consoles tty1 to tty5 merged screenshot png image with snapscreenshot taken on Debian GNU / Linux

Storing a picture shot of the text (console) screen in JPEG (JPG) format is done analogously just the convert command output extension has to be changed to jpeg i.e.:
 

noah:/home/hipo# snapscreenshot -c5 -x1 > ~/console-screenshot.tga && convert ~/console-screenshot.tga console-screenshot.jpeg

I've also written a tiny wrapper shell script, to facilitate myself picture picture taking as I didn't like to type each time I want to take a screenshot of a tty the above long line.

Here is the wrapper script I wrote:
 

#!/bin/sh
### Config
# .tga produced file name
output_f_name='console-screenshot.tga';
# gets current date
cur_date=$(date +%d_%m_%Y|sed -e 's/^ *//');
# png output f name
png_f_name="console-screenshot-$cur_date.png";
### END Config
snapscreenshot -c$arg1 -x1 > $output_f_name && convert $output_f_name $png_f_name;
echo "Output png screenshot from tty1 console produced in";
echo "$PWD/$png_f_name";
/bin/rm -f $output_f_name;

You can also download my console-screenshot.sh snapscreenshot wrapper script here

The script is quite simplistic to use, it takes just one argument which is the number of the tty you would like to screenshot.
To use my script download it in /usr/local/bin and set it executable flag:
 

noah:~# cd /usr/local/bin
noah:/usr/local/bin# wget -q https://www.pc-freak.net/~bshscr/console-screenshot.sh
noah:/usr/local/bin# chmod +x console-screenshot.sh

Onwards to use the script to snapshot console terminal (tty1) type:
 

noan:~# console-screenshot.sh

I've made also mirror of latest version of snapscreenshot-1.0.14.3.tar.bz2 here just in case this nice little program disappears from the net in future times.


Text mode (console) browsing with tabs with Elinks / Text browsers – (lynx, elinks, links and w3m) useful HTTP debugging tools for Linux and FreeBSD servers

Friday, April 27th, 2012

The last days, I'm starting to think the GUI use is making me brainless so I'm getting back to my old habits of using console.
I still remember with a grain of nostalgy how much more efficient I used to be when the way to interact with my computer was primary in text mode console.
Actually, I'm starting to get this idea the more new a software is the more inefficient it makes your use of computer, not to mention the hardware resources required by newer software is constantly increasing.

With this said, I started occasionally browsing again like in the old days by using links text browser.
In the old days I mostly used lynx and its more advanced "brother" text browser links.
The main difference between lynx and links is that lynx does not have any support for the terrible "javascript", whether links supports most of the Javascript ver 2.
Also links and has a midnight commander like pull down menus on the screen top, – handy for people who prefer some more interactivity.

In the past I remember I used also to browse graphically in normal consoles (ttys) with a hacked version of links calledTThere is also a variation of linksxlinks suitable for people who would like to have graphical browser in console (ttys).

I used xlinks quite heavily in the past, when I have slower computer P166Mhz with 64MB of memory 2.5 GB HDD (What a times boy what a times) .
Maybe when I have time I will install it on my PC and start using it again like in the old days to boost my computer use efficiency…
I remember the only major xlinks downside was it doesn't included support for Adobe flash (though this is due to the bad non-free software nature of Adobe lack of proper support for free software and not a failure of xlinks developers. Anyways for me this wasn't a big trouble since, ex Macromedia (Adobe) Flash support is not something essential for most of my work…

links2 is actually the naming of links version 2. elinks emerged later (if I remember correctly, as fork project of links).
elinks difference with links constitutes in this it supports tabbed browsing as well as colors (links browser displays results monochrome).

Having a tabbed browsing support in tty console is a great thing…
I personally belive text browsing if properly used can in many ways outbeat, graphic browsing in terms of performance and time spend to obtain data. I'm convinced text browsing is superior for two reasons:
1. with text there is way less elements to obstruct your attention.
– No graphical annoying flash banners, no annoying taking the attention pictures

2. Navigating in web pages using the keyboard is more efficient than mouse
– Using keyboard shorcuts is always quicker than mouse, generally keboard has always been a quicker way to access computer commands.

Another reason to use text browsing is, it is mostly the text part of a page that matters, most of the pages that provide images to better explain a topic are bloated (this is my personal view though, i'm sure designer guys will argue me :D).
Here is a screenshot of a my links text browser in action, I'm sorry the image is a bit unreadable, but after taking a screenshot of the console and resizing it with GIMP this is what I got …

Links text console browser screenshot with 2 tabs opened Debian GNU / Linux

For all those new to Linux who didn't tried text browsing yet and for those interested in computer history, I suggest you install and give a try to following text browsers:
 

  • lynx
  • (Supports colorful text console text browsing)
    lynx text console browser Debian Squeeze GNU / Linux Screenshot

  • links
  • Links www text console browser screenshot on Debian Linux

  • elinks
  • (Supports colors filled text browsing and tabs)
    elinks opened duckduckgo.com google alternative search engine in mlterm terminal Debian Linux

  • w3m
  • w3m one of the oldest text console browsers screenshot Debian Linux Squeeze 6.2

By the way having the 4 text browsers is very useful for debugging purposes for system administrators too, so in any case I think this 4 web browsers are absoutely required software for newly installed GNU / Linux or BSD* based servers.

For Debian and the derivatives Linux distributions, the 4 browsers are available as deb packages, so install them with following apt 1 liner:
 

debian:~# apt-get –yes install w3m elinks links lynx
….

FreeBSD users can install the browsers using, cmd:
 

freebsd# cd /usr/ports/www/w3mfreebsd# make install clean
….
freebsd# cd /usr/ports/www/elinksfreebsd# make install clean
….
freebsd# cd /usr/ports/www/linksfreebsd# make install clean
….
freebsd# cd /usr/ports/www/lynxfreebsd# make install clean
….

In links using the tabs functionality appeared, somewhere near the 2001 or 2000 (at least that was the first time I saw links with tabbed browsing enabled). My first time to saw links support opening multiple pages within the same screen under tabs was on Redhat Linux 9

Opening multiple pages in tabs in the text browser is done by pressing the t key and typing in the desired URL to open isnide.
For more than 2 tabs, again t has to be pressed and same procedure goes on and on.
It was pretty hard for me to figure out how I can do a text browsing with tabs, though I found a way to open new tabs it took me some 10 minutes in pondering how to switch between the new opened links browser tabs.

Hence, I thought it would be helpful to mention here how tabs can be switched in links text browser. Actually it turned it is pretty easy to Switch tabs tabs back and foward.

1 tab to move backwards is done with < (key), wheter switching one tab forward is done with the > key.

On UK and US qwerty keyboards alignment the movement a tab backward and forward is done with holding shift and pressing < onwards holding both keys simultaneously and analogously with pressing shift + >
 

How to delete your linkedin account – I don’t want to be LINKED IN!

Tuesday, April 24th, 2012

I don't want to be linkedin, Linkedin is a fake and non-sense time wasting anti-social network

I've decided to delete my linkedin account as I don't see any good in constact connectiodness and being part of many "social" networks which if one thinks in deeply are not social but anti-social.

You just stay at home staring at a screen and it will be like this until the end of your days and even worser for the generations to come. Computer revolution or digital revolution is in reality huge devolutin (devil-lution)

To delete the linkedin account I used a short tutorial provided by This post

How to delete your linkedin account picture

TO reach to your Profile settings, use upper right corner of your browser and follow the menus:

Settings -> Account -> Close your account

Once, trying to delete your account, linkedin will try to manipulate you to stay in Linkedin by pushing some of your contacts, pointing how you will get disconnected from him.
I'm amazed how impudent this guys can be, actually, its not just them. If you have tried or deleted your facebook account before time you will have faced, exactly the same thing. A profile (person picture) which was recently browsed by you will be shown to you and be said you will be unable to connect with him any more. Well who cares if it is God's will we will connect again 🙂

The problem with us modern people is we're so deluded that we have started relying more on technology and human knowledge than to God. For most people who are atheists relying more on technology than on God for their lives seems reasanable However for us Christians putting more trust in technology than in Gods providence for us is sinful and deadly.
I'm starting to get the conclusion, non-technological societies are more happier than technological ones. In that sense, we the Bulgarians are blessed, because technology is not so widely spread.

How to take area screenshots in GNOME – Take quick area selection screenshots in G* / Linux and BSD

Thursday, March 15th, 2012

Quick Area screenshot in GNOME how to make quick area selection screenshots in Linux and FreeBSD gnome-screenshot shot

Often when, you do something on your PC, you need to make a quick screenshot of a screen area.. Yes GNOME's feature to take complete screenshots of Screen with Print Screen SysRQ and consequential picture edit with GIMP is one way, but this is far away from quick. This method to chop out of a complete display screenshot usually takes from 40 secs to 1 minute to properly cut and save a selection of the whole picture.
Another common use, that I love in GNOME is the ALT + Print Screen SysRQ key combination. alt+ print scr sysrq is handy while taking a single window screenshot is desired. Anyways often you only need to make a screenshot of a tiny area of the screen. Many people might think this is not possible currently in GNOME, but they will be wrong as there are no impossible but hard things to achieve on Linux / FreeBSD 😉

There are at least two ways using a predefined command for taking quick area screen snapshot.

1. Taking quick area screenshot by using ImageMagick's import command

To use import you will need to have installed ImageMagickswiss army knife of command line image manipulation 😉
For area screenshot with import, press ALT+F2 and type inside Run Application box:

Screenshot GNOME run application GNU / Linux Debian ImageMagick import area screenshot

import -frame screenshot.png

Now make the selection of the exact screen area you would like to screeshot in file screenshot.png
Note that screenshot.png file will be saved by default in your home directory as it is read from $HOME shell variable:

hipo@noah:~$ echo $HOME/home/hipo
hipo@noah:~$ ls -al screenshot.png
-rw-r--r-- 1 hipo hipo 4950 Mar 14 21:11 screenshot.png

You see my $HOME equals /home/hipo, therefore screenshot.png just grabbed is saved in there.

One downside of taking the screenshot with import is that picture snapshot is not further edittable, if it has to be further processed with GIMP or some other graphic editor program.

In the screenshot, below I show you one screen area of my XMMS taken with import -frame screenshot.png cmd:

XMMS Screen Area Screenshot import screenshot

Trying to open the screenshot.png, file with GIMP displays the following error in GIMP:

PNG image message PNG the file specifies offset that caused the layer to be positioned outiside image GIMP screenshot

Not all area snapshots taken with import -frame, create this issue sometimes screenshots are opening in GIMP but only area of the screenshot.png is visible in gimp.

Thanksfull, there is work around to this issue by converting the import generated PNG format picture to JPEG with ImageMagick's convert and then edit the .JPEG with GIMP etc.:

hipo@noah:~$ convert screenshot.png screenshot.jpg

Hence to permanently work around it, in case you intend to apply (GIMP modifications), once area snapshot is made instruct import to save its output picture in .jpeg, e.g.:

hipo@noah:~$ import -frame screenshot.jpeg

2. Taking quick area screenshot using gnome-screenshot cmd

Once again invoke the GNOME command Launcher by pressing Alt+F2 (holding alt and pressing F2) and type in the launch box:

gnome-screenshot -a

gnome-screenshot Run Application in GNOME 2.30 on Debian GNU / Linux

Below is a small area from my desktop, chopped with gnome-screenshot 🙂

GNOME desktop area chop screenshot with gnome-screenshot on my home Debian Linux

You see on above screenshot a tiny (picture) icon one of the greatest, if not the greatest bulgarian saint – saint John of Rila. St. John's lived as hermit for many years in Rila mountain and by God's grace possessed incorruptable body. His incorruptable body is still kept and can be venerated in Rila Monastery. The monastery is located 160 km from Bulgaria's capital city Sofia

St. Johns first Bulgarian established monastery Rila Monastery is currently the biggest functioing monastery in Bulgaria. The saints monastery is considered one of the most holy places in Bulgaria. If you have a travel or plan a holiday in Bulgaria, I warmly recommend you go there and venerate the saint incorruptable relics.

3. Binding keys to allow quick area screenshot taking with gnome-screenshot in GNOME

This configuration is for GNOME 2.x and is tested to work on my Debian (Squeeze 6.0), GNOME ver. 2.30.2, it should work in earlier Ubuntu versions shipped with GNOME 2.2.xx too. As I've red on the Internet it works well with Ubuntu 10.10Binding a key for screenshot area grab, should be working properly also on any GNOME 2.2.x supporting OS, including the BSD family OSes (FreeBSD, OpenBSD, NetBSD)

a) setting gnome-screenshot key binding for interactive screenshot area grab

Navigate the mouse cursor to GNOME main menus panel in left top, where you see (Applications, Places, System).
Therein use menus:

System -> Preferences -> Keybord Shortcuts -> Add ->

Alternatively if you prefer you can directly invoke the Keyboard Shortcuts configuration with command:

hipo@noah:~$ gnome-keybinding-properties

Further on, assign a shortcut by filling in something like:

name: grab-screen-area
command: gnome-screenshot -i -a

GNOME add keyboard shortcut map key for area interactive screenshot

press Apply and next map a key to the new defined key binding:

GNOME add keyboard shortcut map key

Under the Shortcut column click on Disabled and assign some key combination to invoke the cmd for example Ctrl+F4

The command gnome-screenshot -i makes gnome-screenshot, show interactive make screenshot dialog like the one in below screenshot.

GNOME screenshot interactive screenshot select area grab shot

b) creating gnome-screenshot -a area screenshot key binding for quick area screenshots "on the fly"

The procedure is precisely the same as with adding interactive screenshot; Under Keyboard Shortcuts GNOME config assign new key binding by pressing Add button and adding:

name: grab-screen-area1
command: gnome-screenshot -a

Once again in Shortcut column in line starting with grab-screen-area1 add your desired key switch. I personally like Ctrl+Print Screen SysRQ as it is close to the default GNOME key combination assigned for taking screenshot for a Windows Alt+Print SysRq

It was logical, that this key binding should work and a direct selection mouse cursor to appear once Alt+Print SysRQ is pressed, however for some reason this is not working (hmm, maybe due to bug) ??

Thanksfully it is always possible to substitute the just assigned gnome-screenshot -a key binding with import -frame /home/hipo/Desktop/screenshot.png

If you have followed literally my article so far and you did tried to place a bind for gnome-screenshot -a, modifty grab-screen-area1 to be something like:

name: grab-screen-area1
command: import -frame /home/hipo/Desktop/screenshot.png

Where modify the path /home/hipo/Desktop/screenshot.png, to wherever you prefer the region screep capture to be stored.

c) bind keys for delayed screenshot

This also a handy binding, especially if you every now and then need to make screenshots of screen with a few secs interval.
Add one more keyboard shortcut;

name: grab-screen-area2
command: gnome-screenshot -d 5

Assign a key to make a screenshot of the active display after a delay of 5 seconds. I prefer Ctrl+F5

Onwards every time you would like to make an area screenshot, just use the defined keys:

Ctrl+F4 - will prompt you interactively for the precise type of screenshot you would like to take
Ctrl+Print SysRQ - will prompt you for a direct area to select and once selected will immediately screenshot it
Ctrl+F5 - would do delayed screenshot of entire screen after a delay of 5 seconds

4. Adding border and drop shadow effects with gnome-screenshot Actually, there is plenty of interesting things to do with Screenshots which I never thought were possible.
While reading gnome-screenshot's man page, I've stumbled to an interesting argument:

-e, --effect=EFFECT,
Add an effect to the outside of the screenshot border. EFFECT can be ``shadow'' (adding drop shadow), ``border'' (adding
rectangular space around the screenshot) or ``none'' (no effect). Default is ``none''.

This would have been a nice feature but as of time of writting this article, untofrtunately it is not working in GNOME 2.30.2. I'm not sure if this is a local Debian bug, however I suspect on other Linux distributions with different GNOME build configuration, this features might be working well. My guess here is drop shadow effect and border effect are not working because, gnome-screenshot was compiled without (support for ImageMagick?).
Anyways the way the feature is supposed to be work is by invoking commands:
:

hipo@noah:~$ gnome-screenshot --border-effect=shadow
hipo@noah:~$ nome-screenshot --border-effect=border

The same basic effects, are also available through GIMP's menus:

Image -> Effects

5. Setting default behaviour of gnome-screenshot in gconf-editor GConf (Gnome config registry db)

Experienced, GNOME users should already know about the existence of gconf-editor and the gnome registry database. For those who have don't, coming from MS-Windows background gconf-editor is GNOME (graphical environment) equivalent to Microsoft Windows registry regedit command

gconf-editor can be used to atune the way the screenshots are taken by default. To do so, launch gconf-editor cmd and follow to sub-structure:

/ -> apps -> gnome-screenshot

gconf-editor GNOME screenshot border effect none default gnome-screenshot gnome behaviour

The settings in above screenshot are configurations which are used by default by gnome-screenshot, right after install.
You can play with the options to change the default way PrintScreen SysRQ key press will take screenshots.
Here is one example for changing the gnome-screenshot default GNOME behaviour:

GConf Editor GNOME screenshot, border effect drop shadow and include border option set on Linux Debian

As you can see in above screenshot, I've changed my default gnome-screenshot snap taking to include a drop shadow effect:
Name | Value
border_effect | shadow include_border | (tick on)
last_save_directory | file://home/hipo/Desktop

As you see you can also control, where by default gnome-screenshot will save its screenshots, by default, its saved in $HOME/Desktop
. If you prefer some custom directory to only contain Screenshots taken for instance $HOME/Screenshots, create the directory:
hipo@noah:~$ mkdir ~/Screenshots

and then change the value for last_save_directory gconf var:

last_save_directory | file://home/hipo/Screenshots

Once settings are applied screenshots with Print Screen SysRQ key will be made with Shadow Border effect and saved in /home/hipo/Screenshots

Strangely enough, changing gnome-screenshot default screenshotting values to include screenshot effects like drop shadow or screenshot border effect works just fine.
Even though gnome-screenshot –border-effect=shadow and gnome-screenshot –border-effect=border doesn't directly affect the current screenshot to be made, I've later noticed writting this two commands in the gnome-terminal, does change the border settings for gconf-editor screenshot border.

If you enjoyed, this article and you intend to become "a professional screnshotter" :), you might also enjoy my two other articles:

Happy screenshotting 😉

FreeBSD Jumbo Frames network configuration short how to

Wednesday, March 14th, 2012

FreeBSD Jumbo Frames Howto configure FreeBSD

Recently I wrote a post on how to enable Jumbo Frames on GNU / Linux , therefore I thought it will be useful to write how Jumbo Frames network boost can be achieved on FreeBSD too.

I will skip the details of what is Jumbo Frames, as in the previous article I have thoroughfully explained. Just in short to remind you what is Jumbo Frames and why you might need it? – it is a way to increase network MTU transfer frames from the MTU 1500 to MTU of 9000 bytes

It is interesting to mention that according to specifications, the maximum Jumbo Frames MTU possible for assignment are of MTU=16128
Just like on Linux to be able to take advantage of the bigger Jumbo Frames increase in network thoroughput, you need to have a gigabyt NIC card/s on the router / server.

1. Increasing MTU to 9000 to enable Jumbo Frames "manually"

Just like on Linux, the network tool to use is ifconfig. For those who don't know ifconfig on Linux is part of the net-tools package and rewritten from scratch especially for GNU / Linux OS, whether BSD's ifconfig is based on source code taken from 4.2BSD UNIX

As you know, network interface naming on FreeBSD is different, as there is no strict naming like on Linux (eth0, eth1, eth2), rather the interfaces are named after the name of the NIC card vendor for instance (Intel(R) PRO/1000 NIC is em0), RealTek is rl0 etc.

To set Jumbro Frames Maximum Transmission Units of 9000 on FreeBSD host with a Realtek and Intel gigabyt ethernet cards use: freebsd# /sbin/ifconfig em0 192.168.1.2 mtu 9000
freebsd# /sbin/ifconfig rl0 192.168.2.2 mtu 9000

!! Be very cautious here, as if you're connected to the system remotely over ssh you might loose connection to it because of broken routing.

To prevent routing loss problems, if you're executing the above two commands remotely, you better run them in GNU screen session:

freebsd# screen
freebsd# /sbin/ifconfig em0 192.168.1.2 mtu 9000; /sbin/ifconfig rl0 192.168.1.2 mtu 9000; \
/etc/rc.d/netif restart; /etc/rc.d/routed restart

2. Check MTU settings are set to 9000

If everything is fine the commands will return empty output, to check further the MTU is properly set to 9000 issue:

freebsd# /sbin/ifconfig -a|grep -i em0em0: flags=8843<UP,BROADCAST,RUNNING,SIMPLEX,MULTICAST> metric 0 mtu 9000freebsd# /sbin/ifconfig -a|grep -i rl0
rl0: flags=8843<UP,BROADCAST,RUNNING,SIMPLEX,MULTICAST> metric 0 mtu 9000

3. Reset routing for default gateway

If you have some kind of routing assigned for em0 and rl0, network interfaces they will be affected by the MTU change and the routing will be gone. To reset the routing to the previously properly assigned routing, you have to restart the BSD init script taking care for assigning routing on system boot time:

freebsd# /etc/rc.d/routing restart
default 192.168.1.1 done
add net default: gateway 192.168.1.1
Additional routing options: IP gateway=YES.

4. Change MTU settings for NIC card with route command

There is also a way to assign higher MTU without "breaking" the working routing, e.g. avoiding network downtime with bsd route command:

freebsd# grep -i defaultrouter /etc/rc.conf
defaultrouter="192.168.1.1"
freebsd# /sbin/route change 192.168.1.1 -mtu 9000
change host 192.168.1.1

5. Finding the new MTU NIC settings on the FreeBSD host

freebsd# /sbin/route -n get 192.168.1.1
route to: 192.168.1.1
destination: 192.168.1.1
interface: em0
flags: <UP,HOST,DONE,LLINFO,WASCLONED>
recvpipe sendpipe ssthresh rtt,msec rttvar hopcount mtu expire
0 0 0 0 0 0 9000 1009

6. Set Jumbo Frames to load automatically on system load

To make the increased MTU to 9000 for Jumbo Frames support permanent on a FreeBSD system the /etc/rc.conf file is used:

The variable for em0 and rl0 NICs are ifconfig_em0 and ifconfig_rl0.
The lines to place in /etc/rc.conf should be similar to:

ifconfig_em0="inet 192.168.1.1 netmask 255.255.255.0 media 1000baseTX mediaopt half-duplex mtu 9000"

Change in the above lines the gateway address 192.168.1.1 and the netmask 255.255.255.0 to yours corresponding gw and netmask.
Also in the above example you see the half-duplex ifconfig option is set insetad of full-duplex in order to prevent some duplex mismatches. A full-duplex could be used instead, if you're completely sure on the other side of the host is configured to support full-duplex connections. Otherwise if you try to set full-duplex with other side set to half-duplex or auto-duplex a duplex mismatch will occur. If this happens insetad of taking the advantage of the Increase Jumbo Frames MTU the network connection could become slower than originally with standard ethernet MTU of 1500. One other bad side if you end up with duplex-mismatch could be a high number of loss packets and degraded thoroughout …

7. Setting Jumbo Frames for interfaces assigning dynamic IP via DHCP

If you need to assign an MTU of 9000 for a gigabyt network interfaces, which are receiving its TCP/IP network configuration over DHCP server.
First, tell em0 and rl0 network interfaces to dynamically assign IP addresses via DHCP proto by adding in /etc/rc.conf:

ifconfig_em0="DHCP"
ifconfig_rl0="DHCP"

Secondly make two files /etc/start_if.em0 and /etc/start_if.rl0 and include in each file:

ifconfig em0 media 1000baseTX mediaopt full-duplex mtu 9000
ifconfig rl0 media 1000baseTX mediaopt full-duplex mtu 9000

Copy / paste in root console:

echo 'ifconfig em0 media 1000baseTX mediaopt full-duplex mtu 9000' >> /etc/start_if.em0
echo 'ifconfig rl0 media 1000baseTX mediaopt full-duplex mtu 9000' >> /etc/start_if.rl0

Finally, to load the new MTU for both interfaces, reload the IPs with the increased MTUs:

freebsd# /etc/rc.d/routing restart
default 192.168.1.1 done
add net default: gateway 192.168.1.1

8. Testing if Jumbo Frames is working correctly

To test if an MTU packs are transferred correctly through the network you can use ping or tcpdumpa.) Testing Jumbo Frames enabled packet transfers with tcpdump

freebsd# tcpdump -vvn | grep -i 'length 9000'

You should get output like:

16:40:07.432370 IP (tos 0x0, ttl 50, id 63903, offset 0, flags [DF], proto TCP (6), length 9000) 192.168.1.2.80 > 192.168.1.1.60213: . 85825:87285(1460) ack 668 win 14343
16:40:07.432588 IP (tos 0x0, ttl 50, id 63904, offset 0, flags [DF], proto TCP (6), length 9000) 192.168.1.2.80 > 192.168.1.1.60213: . 87285:88745(1460) ack 668 win 14343
16:40:07.433091 IP (tos 0x0, ttl 50, id 63905, offset 0, flags [DF], proto TCP (6), length 9000) 192.168.1.2.80 > 192.168.1.1.60213: . 23153:24613(1460) ack 668 win 14343
16:40:07.568388 IP (tos 0x0, ttl 50, id 63907, offset 0, flags [DF], proto TCP (6), length 9000) 192.168.1.2.80 > 192.168.1.1.60213: . 88745:90205(1460) ack 668 win 14343
16:40:07.568636 IP (tos 0x0, ttl 50, id 63908, offset 0, flags [DF], proto TCP (6), length 9000) 192.168.1.2.80 > 192.168.1.1.60213: . 90205:91665(1460) ack 668 win 14343
16:40:07.569012 IP (tos 0x0, ttl 50, id 63909, offset 0, flags [DF], proto TCP (6), length 9000) 192.168.1.2.80 > 192.168.1.1.60213: . 91665:93125(1460) ack 668 win 14343
16:40:07.569888 IP (tos 0x0, ttl 50, id 63910, offset 0, flags [DF], proto TCP (6), length 9000) 192.168.1.2.80 > 192.168.1.1.60213: . 93125:94585(1460) ack 668 win 14343

b.) Testing if Jumbo Frames are enabled with ping

Testing Jumbo Frames with ping command on Linux

linux:~# ping 192.168.1.1 -M do -s 8972
PING 192.168.1.1 (192.168.1.1) 8972(9000) bytes of data.
9000 bytes from 192.168.1.1: icmp_req=1 ttl=52 time=43.7 ms
9000 bytes from 192.168.1.1: icmp_req=2 ttl=52 time=43.3 ms
9000 bytes from 192.168.1.1: icmp_req=3 ttl=52 time=43.5 ms
9000 bytes from 192.168.1.1: icmp_req=4 ttl=52 time=44.6 ms
--- 192.168.0.1 ping statistics ---
4 packets transmitted, 4 received, 0% packet loss, time 3003ms
rtt min/avg/max/mdev = 2.397/2.841/4.066/0.708 ms

If you get insetad an an output like:

From 192.168.1.2 icmp_seq=1 Frag needed and DF set (mtu = 1500)

--- 192.168.1.1 ping statistics ---
0 packets transmitted, 0 received, +4 errors

This means a packets with maximum MTU of 1500 could be transmitted and hence something is not okay with the Jumbo Frames config.
Another helpful command in debugging MTU and showing which host in a hop queue support jumbo frames is Linux's traceroute

To debug a path between host and target, you can use:

linux:~# traceroute --mtu www.google.com
...

If you want to test the Jumbo Frames configuration from a Windows host use ms-windows ping command like so:

C:\>ping 192.168.1.2 -f -l 8972
Pinging 192.168.1.2 with 8972 bytes of data:
Reply from 192.168.1.2: bytes=8972 time=2ms TTL=255
Ping statistics for 192.168.1.2:
Packets: Sent = 4, Received = 4, Lost = 0 (0% loss),
Approximate round trip times in milli-seconds:
Minimum = 2ms, Maximum = 2ms, Average = 2ms

Here -l 8972 value is actually equal to 9000. 8972 = 9000 – 20 (20 byte IP header) – 8 (ICMP header)

How to increase brightness on Fujitsu Siemens Amilo PI22515 notebook with Slackware Linux

Friday, March 9th, 2012

Increase LCD screen brightness on Fujitsu Siemens Amilo laptop with Linux Slackware

A friend of mine has Fujitsu Siemens Amilo laptop and is full time using his computer with Slackware Linux.

He is quite happy with Slackware Linux 13.37 on the laptop, but unfortunately sometimes his screen brightness lowers. One example when the screen gets darkened is when he switch the computer on without being plugged in the electricity grid. This lowered brightness makes the screen un-user friendly and is quite tiring for the eye …

By default the laptop has the usual function keys and in theory pressing Function (fn) + F8 / F7 – should increase / decrease the brightness with no problems, however on Slackware Linux (and probably on other Linuxes too?), the function keys are not properly recognized and not responding whilst pressed.
I used to have brigtness issues on my Lenovo notebook too and remember how irritating this was.
After a bit of recalling memories on how I solved this brightness issues I remembered the screen brigthness on Linux is tunable through /proc virtual (memory) filesystem.

The laptop (Amilo) Fujitsu Siemens video card is:

lspci |grep -i vga
00:02.0 VGA compatible controller: Intel Corporation Mobile GM965/GL960 Integrated Graphics Controller (primary) (rev 03)

I took a quick look in /proc and found few files called brightness:
 

  • /proc/acpi/video/GFX0/DD01/brightness
  • /proc/acpi/video/GFX0/DD02/brightness
  • /proc/acpi/video/GFX0/DD03/brightness
  • /proc/acpi/video/GFX0/DD04/brightness
  • /proc/acpi/video/GFX0/DD05/brightness

cat-ting /proc/acpi/video/GFX0/DD01/brightness, /proc/acpi/video/GFX0/DD03/brightness, /proc/acpi/video/GFX0/DD04/brightness all shows not supported and therefore, they cannot be used to modify brightness:

bash-4.1# for i in $(/proc/acpi/video/GFX0/DD0{1,3,4,5}/brightness); do \
cat $i;
done
<not supported>
<not supported>
<not supported>
<not supported>

After a bit of testing I finally succeeded in increasing the brightness.
Increasing the brightness on the notebook Intel GM965 video card model is done, through file:

/proc/acpi/video/GFX0/DD02/brightness

To see all the brightness levels the Fujitsu LCD display supports:

bash-4.1# cat /proc/acpi/video/GFX0/DD02/brightness
levels: 13 25 38 50 63 75 88 100
current: 25

As you can see the dark screen was caused cause the current: brightness is set to a low value of 25.
To light up the LCD screen and make the screen display fine again, I increased the brightness to the maximum level 100, e.g.:

bash-4.1# echo '100' > /proc/acpi/video/GFX0/DD02/brigthness

Just for the fun, I've written also a two lines script which gradually increases LCDs brightness 🙂

bash-4.1# echo '13' > /proc/acpi/video/GFX0/DD02/brightness;
bash-4.1# for i in \
$(cat /proc/acpi/video/GFX0/DD02/brightness|grep 'levels'|sed -e 's#levels:##g'); do \
echo $i > /proc/acpi/video/GFX0/DD02/brightness; sleep 1; \done

fujitsu_siemens_brightness_fun.sh script is fun to observe in changing the LCD screen gradually in one second intervals 🙂

Here is also a tiny program that reduces and increases the notebook laptop brightness written in C. My friend Dido, coded it in just few minutes just for the fun 🙂
To permanently solve the issues with darkened screen on boot time it is a good idea to include echo '100' > /proc/acpi/video/GFX0/DD02/brigthness in /etc/rc.local:

bash-4.1# echo '100' > /proc/acpi/video/GFX0/DD02/brigthness

I've also written another Universal Linux Increase laptop screen brightness Shell script which should be presumable also working for all Laptop models running Linux 🙂

My maximize_all_linux_laptops_brightness.sh "universal increase Linux brightness" script is here
I'll be glad to hear from people who had tested the script on other laptops and can confirm it works fine for them.
 

Nikwi Deluxe a top quality Freeware Debian / Ubuntu Linux Jump and Run Arcade Game

Monday, December 19th, 2011

Nikwi Deluxe Linux arcade game Freeware game main screen screenshot

Nikwi Deluxe is another good quality jump and run game for Linux

The main actor you play with is a (Dexter like) looking kid who has to collect all candy items on the level screen. The game graphics are quite a good level if compared to the most Linux jump and run games. Nikwi Deluxe Freeware Game GNU / Linux game

Your game hero is not equipped with any weapon or (jump over the enemies like in Maries) and you not haven't got any mean to kill enemies, but you have to always avoid them. There are some funny looking crawl (birds) shitting from the above every now and then, if you're hit by a the bird's droplet you die. The game has 30 levels and after each level succesful completion you're provided with a password that can be used as a "Save Game" like if you quit from game and on next game run you would like to start directly from the last game level you reachedNikwi Deluxe is another good quality jump and run game for Linux

nikwi deluxe Linux level screenshot

The only game downfall is the missing music as well as the not too brilliant sound. To boost my game experience, however put some background music and give the game a try 😉