Posts Tagged ‘Gnome’

Make Laptop Sleep on LID (Monitor) close in Linux Debian and Ubuntu systemd Linux

Monday, June 22nd, 2020

make-laptop-auto-sleep-on-lid-close-in-Linux-Ubuntu-Debian-Linux


I need to make my laptop automatically sleep on LID Screen close but it doesn't why?

If have used your laptop for long years with Windows or any Windows user is used to the default beavrior of Windows to automatically sleep the computer on PC close. This default behavior of automatically sleep on LID Close has been Windows standard for many years
and the reason behind that usually laptop is used for mobility and working on a discharging battery so a LID screen close puts the laptop in (SLEEP) BATTERY SUSPEND MODE aiming to make the charged battery last longer. However often for Desktop use in the Office LID close 
trigger of laptop sleep mode is annoying and undesired I've blogged earlier on that issue and how to make laptop not to sleep on LID close on M$ Windows 10 here.

This bahavior was copied and was working in many of the Linux distributions for years however in Debian GNU / Linux and Ubuntu 16.X this feature is often not properly working due to a systemd bug. Of course closing the notebook LID screen without putting
the PC in sleep mode is not a bug but a very useful feature for those who use their laptop as a Desktop machine that is non-stop running, however for most ppl default behavior to auto-suspend the computer on Laptop Monitor close is desired.

Here is how to  force the close of the laptop lid to go to suspend/sleep mode and when open the lid, it wake it up.


1. First requirement is to make sure the laptop has installed the package pm-utils, if it is not there install it with:


# apt-get install –yes pm-utils


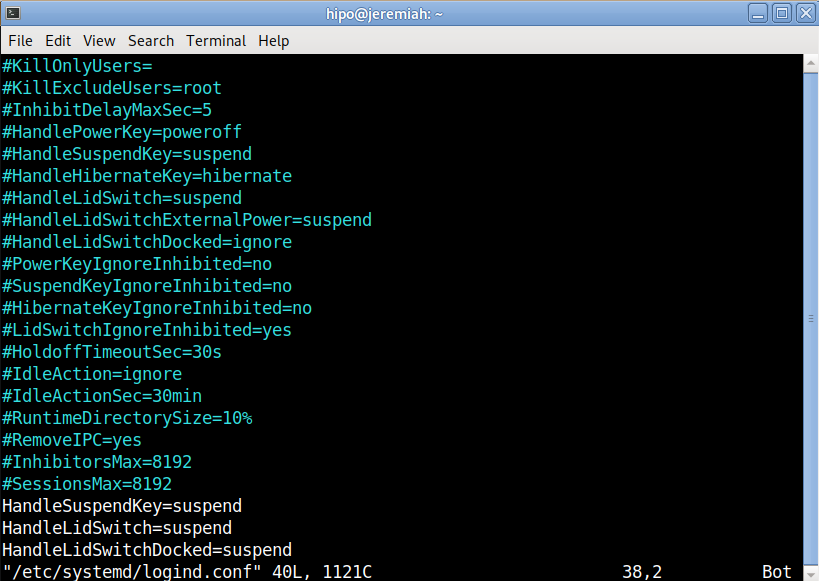
2. Next we need to edit logind.conf and append 3 variables


# vim /etc/systemd/logind.conf


Normally the file should have a bit of commented informative lines as well as a commented variables that could be enabled like so:


[Login]
#NAutoVTs=6
#ReserveVT=6
#KillUserProcesses=no
#KillOnlyUsers=
#KillExcludeUsers=root
#InhibitDelayMaxSec=5
#HandlePowerKey=poweroff
#HandleSuspendKey=suspend
#HandleHibernateKey=hibernate
#HandleLidSwitch=suspend
#HandleLidSwitchExternalPower=suspend
#HandleLidSwitchDocked=ignore
#PowerKeyIgnoreInhibited=no
#SuspendKeyIgnoreInhibited=no
#HibernateKeyIgnoreInhibited=no
#LidSwitchIgnoreInhibited=yes
#HoldoffTimeoutSec=30s
#IdleAction=ignore
#IdleActionSec=30min
#RuntimeDirectorySize=10%
#RemoveIPC=yes
#InhibitorsMax=8192
#SessionsMax=8192


These entries are usually the files that are used by default as a systemd settings.
Before starting make a copy just you happen to mess systemd.conf, e.g.:


cp -rpf /etc/systemd/logind.conf /etc/systemd/logind.conf_bak


To make the PC LID close active append in the end of file below 3 lines:


HandleSuspendKey=suspend
HandleLidSwitch=suspend
HandleLidSwitchDocked=suspend


systemd-logind-conf-enable-suspend-sleep-on-laptop-lid-screen-close-linux

Save the file and to make systemd daemon reload restart the PC, even though theoretically systemd can be reloaded to digest its new /etc/systemd/logind.conf with:


# systemctl daemon-reexec


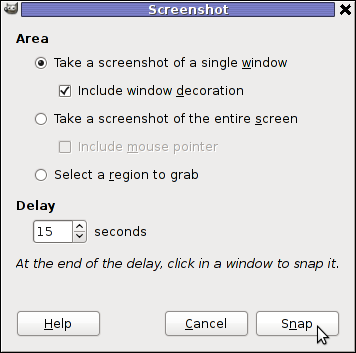
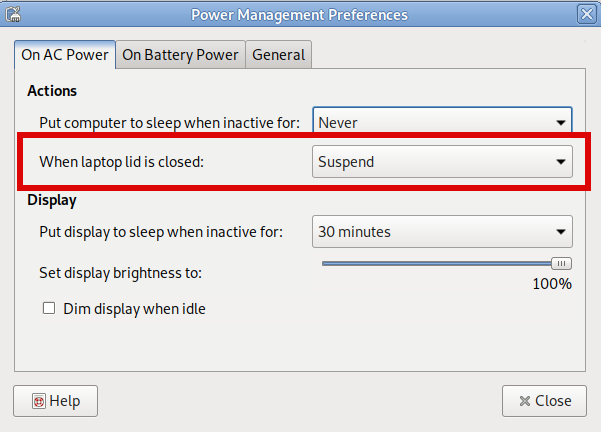
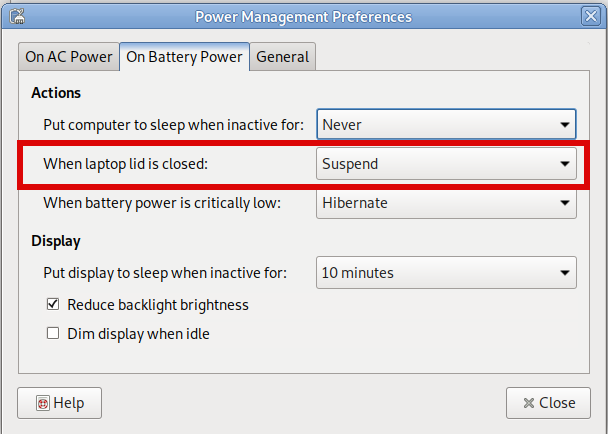
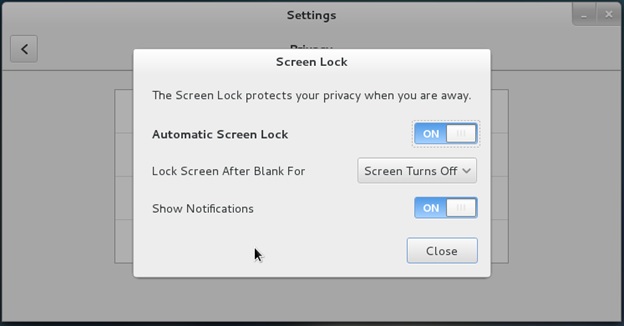
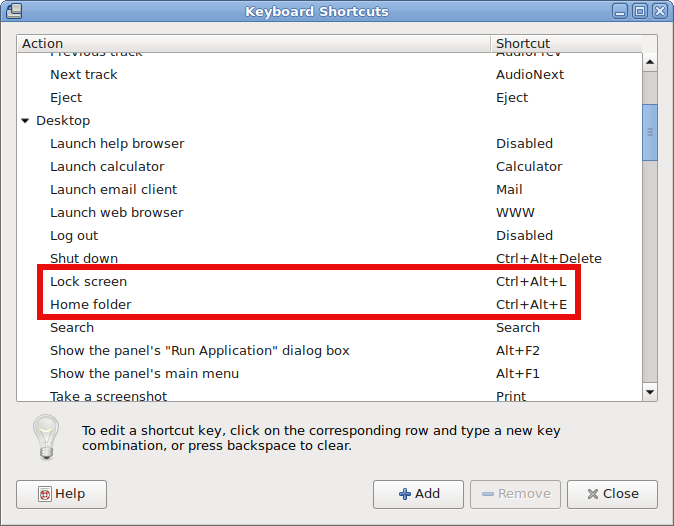
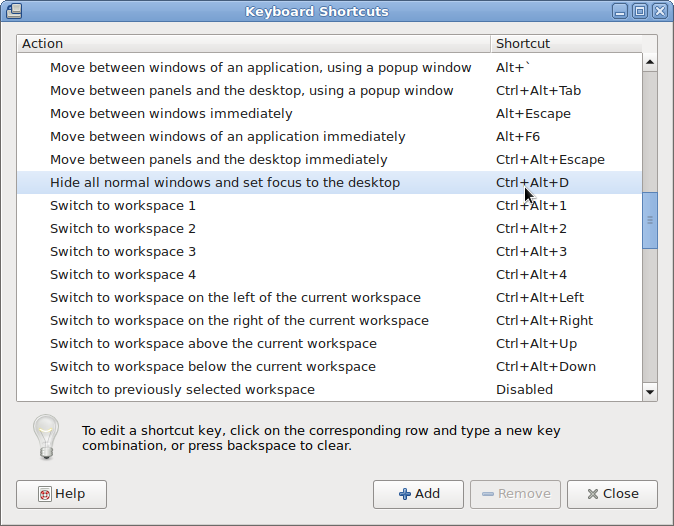
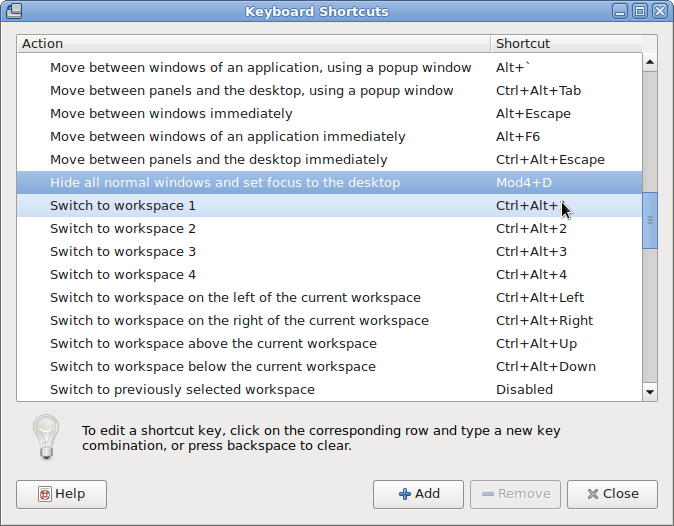
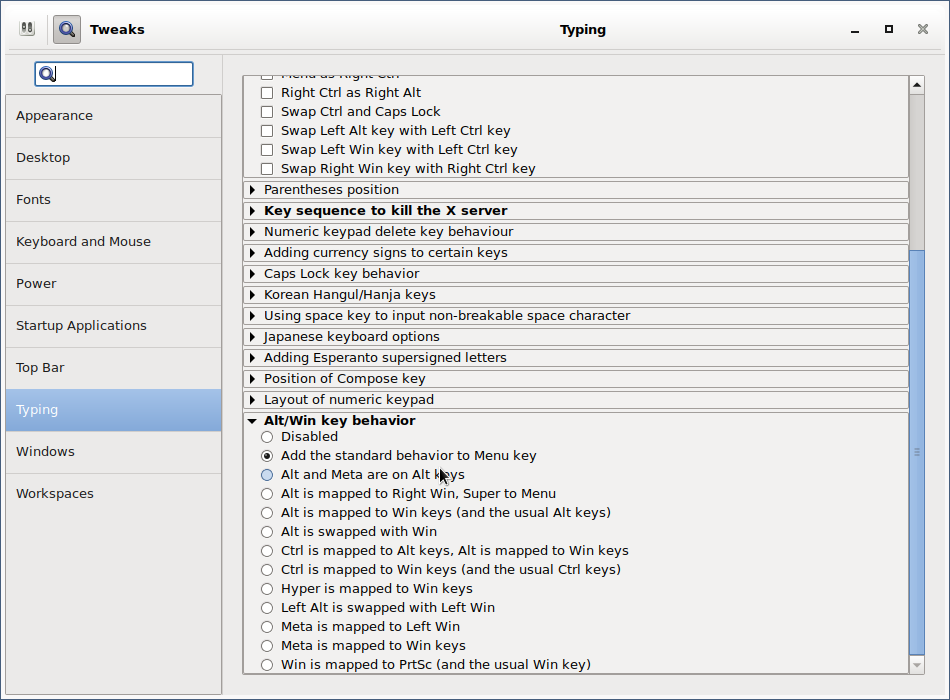
3. Assure yourself the Power Management LID setting of the Desktop Graphical User Interface are set to SUSPEND on close


I use MATE Desktop environment as it is simplistic and quite stable fork of GNOME 2.0, anyway depending on the GUI used on the Linux powered laptop e.g. GNOME / KDE Plasma / XFce etc. make sure the respective
 

Control Panel -> Power Management


settings are set to Force the Laptop Screen LID SUSPEND on Close.

Below is how this is done on MATE:

power-management-preferences-when-lid-is-closed-MATE-on-AC-power

power-management-preferences-when-lid-closed-on-battery-suspend

That's all folks, now close your Laptop and enjoy it going to sleep, open it up and get it awaked 🙂 Cheers ! 
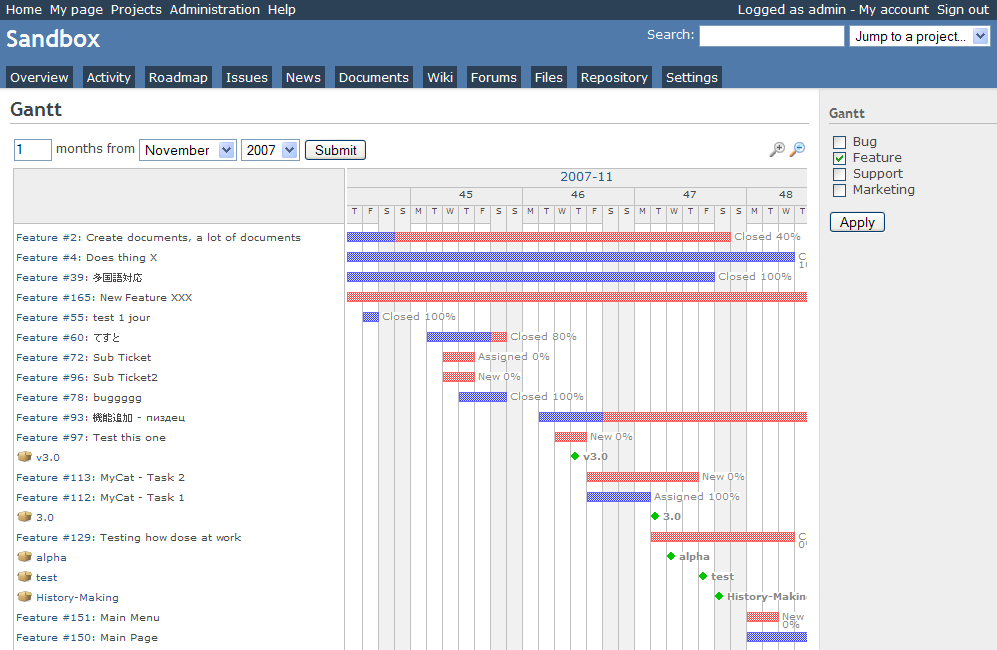
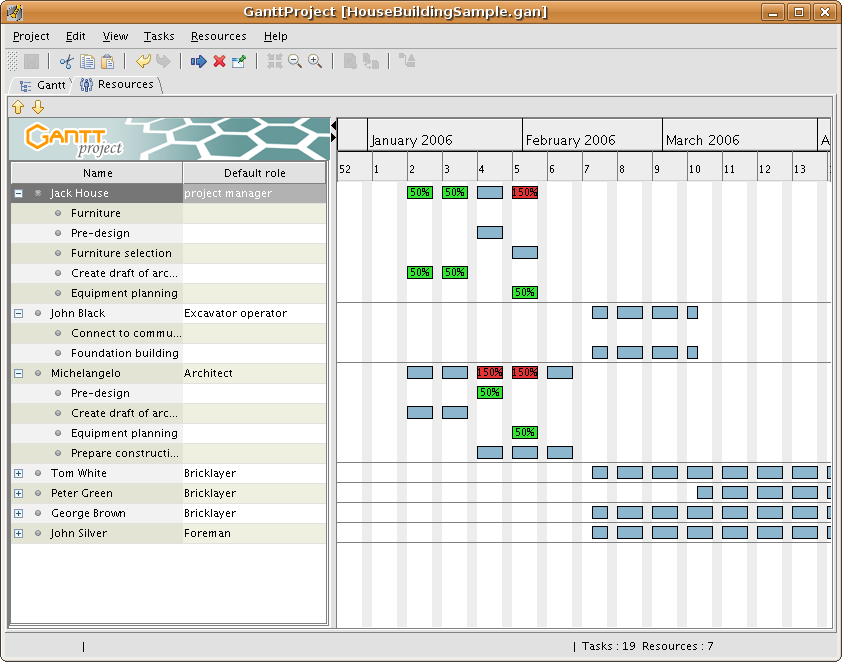
 

How to configure VIVACOM 3g USB ( internet ) modem HUAWEI Mobile broadband E173 on Debian and Ubuntu GNU / Linux

Wednesday, July 4th, 2012

sakis3g-configure-usb-modem-kdialog-shot

I've been given a HUAWEI Mobile Broadband E173 USB 3g model. The USB modem contains a flash USB Storage segment storing a little install program dedicated to make the modem work fine on Microsoft Windows XP / Vista / 7 and probably other M$ OSes. I'm a long time DebianGNU / Linux user and as a free software enthusiast I ofcourse wanted to be able to use Vivacom's 3G USB Modem on my Linux powered notebook.

Thanksfully as I've red on Vivacom's website the modem supports Linux OS 🙂

For those unaware in Bulgaria there are currently 3 major GSM network providers providing 3G internet this are;;;
 

  • VIVACOM – The ex Government ran national company BTC (Bulgarian Telecommunication Company)
  • M-Tel – The first GSM network provider that entered Bulgaria around year 1995
  • GLOBUL – The 3rd and last GSM mobile and net provider entered last and not so much used by Bulgarians today

Until today I had no experience in running any 3G modems on Linux, neither I had used the 3 networks 3G internet to determine which one is best, however I've been given for temporal use a VIVACOM 3G internet modem today so I proceeded to try installing it on my Debian host.

My Linux system is a bit strangely configured as I use wicd network connection manager -( wicd-gtk ) to manage wireless and LAN connections instead of the standard installed GNOME network manager – available through package ( network-manager-gnome ).

The reason I use wicd is not that it is so much better than GNOME network manger but rather for historical reasons because few years past I had impression it works better in connecting me to wireless networks. Another reason why I choosed wicd back then was the nice looking stats …

I tried plugging in the Vivacom USB 3G modem stick and checked in wicd to see if I can see a possibility to connect to the mobile opeartor 3G network but unfortunately nothing appeared.

Though the 3G adsl modem was unavailable straing in wicd, checking about it in the list of attached USB devices I could see it detected, e.g.:

noah:~# lsusb |grep -i huawei
Bus 001 Device 007: ID 12d1:1c05 Huawei Technologies Co., Ltd.

This was at least a good sign pointing me to the thoughts that the modem is probably gonna work.

I did a quick Google search to see if other people succeded running the device on a Linux host and came across a few blog posts in Bulgarian explaining a "success story" on Ubuntu Linux through using a tweakened shell script – sakis3g. For more on how the script works and script download check out Sakis3g

Here is a quote from sakis3g's website describing the script:
 

It automagically setups your USB or Bluetooth™ modem, and may even detect operator settings.
You should try it when anything else fails!

Sakis3g has different versions designed for for plenty of spacific hware architectures i.e. for (i386, amd64, armv4t, armv5t).
There is also a version of the script which by the way contains a combination of bash shell scripting instruction and some binary exec data.

To run sakis3g on my laptop I did:

1. Download sakis3g

My notebook architecture is 64 bit so I download and used the amd64 version of the script;;;

hipo@noah:~$ mkdir sakis3g
hipo@noah:~$ cd sakis3g
hipo@noah:~/sakis3g$ wget http://www.sakis3g.org/versions/latest/amd64/sakis3g.gz

I've made also a mirror of sakis3g i386, 64 bit and all architecture the mirrors just in case it disappears in future. The mirror versions of sakis3g are here:

a. sakis3g i386 b. sakis3g amd64 c. sakis3g all architectures source

2. Unarchive and make it executable

After downloading it as it is in gzip I had to do the usual de-gzipping and making the file executable;;;

hipo@noah:~/sakis3g$ /bin/gzip -d sakis3g.gz
hipo@noah:~/sakis3g$ chmod +x sakis3g

The script is then ready to run by either clicking twice on it or (as I prefer for debugging reasons to run it in terminal):

hipo@noah:~$ ./sakis3g

Something that I have wondered a bit was the dialog where I had to fill in some data of some variable APN abbreviation for – (Access Point Name)

The APN host for VIVACOM mobile internet is;;;
APN: internet.vivacom.bg

I've used the Windows configuration progrma to gather also the following data that I thought might be important for configuring the 3G adsl modem on the Linux host;;;

Auth: *99#
User: VIVACOM
pass: VIVACOM

Here are all the configuration screenshots I've taken from sakis3g and all the data that I filled in.
Next the following tiny window appeared on screen:

Sakis3g configure usb modem kdialog shot 1 VIVACOM USB Modem Sakis 3g Shot 2 sakis 3g usb modem vivacom connect screenshot 2 vivacom 3g modem linux sakis3g enter pin dialog shot 4 Sending pin screenshot 5 sakis3g APN Dialog sakis3g screenshot 6sakis3g Internet Linux VIVACOM screenshot 7sakis3g Debian GNU Linux VIVACOM 3g Internet screenshot 8sakis3g initializing modem screenshot 9sakis3g successful connect to VIVACOM mobile 3g usb adls modem shot 10

Well that's all folks, now sakis3g succesfully connected to the I_net via an (PPP) VPN connection tunnel here is data from ifconfig command showing the succesful 3G connection to VIVACOM;;;

noah:~# /sbin/ifconfig ppp0
ppp0 Link encap:Point-to-Point Protocol
inet addr:10.58.146.232 P-t-P:10.64.64.64 Mask:255.255.255.255
UP POINTOPOINT RUNNING NOARP MULTICAST MTU:1500 Metric:1
RX packets:2066 errors:1 dropped:0 overruns:0 frame:0
TX packets:1609 errors:0 dropped:0 overruns:0 carrier:0
collisions:0 txqueuelen:3
RX bytes:2232058 (2.1 MiB) TX bytes:341693 (333.6 KiB)

The internet via the 3G connection is not blazing fast but good enough to check your mail or read some webpages. VIVACOM currently has different (traffic limited packages) for their 3G internet, I'm not sure which package exactly is the 3G USB stick modem but probably the "quick" internet connection that is now would slow down once the traffic limit is reached …
Hope this post helps someone to configure 3G internet on VIVACOM in Debian and Ubuntu Linux. Though I've tested sakis3g on Debian it should work with no hassles on any other GNU Linux distribution that has bash installed.

Change GNOME lock time settings in Linux

Wednesday, September 26th, 2018

https://www.pc-freak.net/images/change-gnome-lock-time-settings-debian-linux-screenshot

In GNOME 3.X The screen lock time setting is set either to 1 minute 15 minutes or NEVER
So what if you would like to,

Set the gnome screen lock settings value to 30 minutes or one Hour

Here is how:

For 30 minutes lock screen setting:


linux:~$ gsettings set org.gnome.desktop.session idle-delay 1800


Set GNOME lock time to 1 hour


linux:~$ gsettings set org.gnome.desktop.session idle-delay 3600


The setting is set in seconds so quickest way to calculate is to divide by 60 (seconds), you can calculate easily the time you like with BC (arbitrary precision calculation language) like so:


linux:~$ echo '3600/60' | bc
60


Lets say you would like to set your screen to lock every 3 hours, the delay value to set in org.gnome.desktop.session would be:


linux:~$ echo '3600*3' | bc
10800


Once you set the value to a different than the 3 recognized ones would show in GNOME Control Center as Never (depending on the distro).
 

How to install Toshiba Satellite L40 B14 Wireless Adapter ( ID 0bda:8197 Realtek Semiconductor Corp. RTL8187B) on Ubuntu and Debian Linux

Thursday, April 28th, 2011

https://www.pc-freak.net/images/toshiba-satellite-l40

How to install Toshiba L40 B14 Wireless Adapter ( ID 0bda:8197 Realtek Semiconductor Corp. RTL8187B) on Ubuntu and Debian Linux
I've been struggling for more than 10 hours to fix up issues on a Ubuntu Maverick-Meerkaat with a rtl8187B Wireless Adapter

The RTL8187B almost drove me mad. I could see the wlan0 which meant the kernel is detecting the device, I could even bring it up with ifconfig wlan0 up , however when I tried it in gnome's network-manager or wicd the wireless networks were not showing up.

Trying to scan for networks using the commands:


ubuntu:~# iwlist wlan0 scan

was also unsuccesful, trying to bring up and down the wireless wlan0 interface with:


ubuntu:~# iwconfig wlan0 up

or


ubuntu:~# iwconfig wlan0 down

Both returned the error:
iwconfig: unknown command "up" and iwconfig: unknown command "down"

Running simply iwconfig was properly returning information about my Wireless Interface wlan0 :


wlan0 IEEE 802.11bg ESSID:off/any
Mode:Managed Access Point: Not-Associated Tx-Power=20 dBm
Retry long limit:7 RTS thr:off Fragment thr:off
Encryption key:off
Power Management:off

The exact information I could get about the wireless device was via the command:


ubuntu:~# lsusb | grep realtek
Bus 001 Device 002: ID 0bda:8197 Realtek Semiconductor Corp. RTL8187B Wireless Adapter

Trying manually to scan for wireless networks from console or gnome-terminal with command returned also the below weird results:


ubuntu:~# iwconfig wlan0 scan
iwconfig: unknown command "scan"

More oddly tunning wlan0 interface with commands like:


ubuntu:~# iwconfig wlan0 mode managed
ubuntu:~# iwconfig wlan0 essid ESSID
ubuntu:~# iwconfig wlan0 rate 11M

were succesful …

I read a bunch of documentation online concerning the wireless card troubles on Ubuntu, Gentoo, Debian etc.

Just few of all the resources I've read and tried are:

http://rtl-wifi.sourceforge.net/wiki/Main_Page (Returning empty page already a lot resource)
http://rtl8187b.sourceforge.net (A fork of rtl-wifi.sourceforge.net which is still available though it was not usable)

Some of the other resources which most of the people recommended as a way to properly install the RTL8187B wireless driver on linux was located on the website:

http://datanorth.net/~cuervo/rtl8187b/ (Trying to access this page returned a 404 error e.g. this page is no-longer usable)

I found even a webpage in Ubuntu Help which claimed to explain how to properly install and configure the RTL8187B wireless driver on which is below:

https://help.ubuntu.com/community/WifiDocs/Device/RealtekRTL8187b

Even the Ubuntu help instructions were pointing me to the broken cuervo's website URL

Anyways I was able to find the rtl8187b-modified-dist.tar.gz online and made a mirror of rtl8187b-modified-dist.tar.gz which you can download here

Another rtl8187b driver I found was on a toshiba website made especailly for the wireless linux drivers:

http://linux.toshiba-dme.co.jp/linux/eng/pc/sat_PSPD0_report.htm

The questionable file which was claimed to properly be able to make the Realtek Semiconductor Corp. RTL8187B Wireless Adapter to work out was called rl8187b-modified-804.tar.gz.
I've made a mirror of rtl8187b-modified-804.tar.gz is here

None of the driver archives rtl8187b-modified-dist.tar.gz and rl8187b-modified-804.tar.gz that was supposed to make the Toshiba L40 realtek wireless to work out, after compiling and installing the drivers from source worked out …

Both archives produced plenty of error messages and it seems on newer kernels like the one on this notebook:

Linux zlatina 2.6.35-28-generic #50-Ubuntu SMP Fri Mar 18 19:00:26 UTC 2011 i686 GNU/Linux, they're no longer usable.

The compile errors I got when I tried compiling the rtl8187b driver provided by the archive rtl8187b-modified-dist were:


root@ubuntu:/home/zlatina/rtl8187b-modified# sh makedrv
rm -fr *.mod.c *.mod *.o .*.cmd *.mod.* *.ko *.o *~
make -C /lib/modules/2.6.35-28-generic/build M=/home/zlatina/rtl8187b-modified/ieee80211 CC=gcc modules
make[1]: Entering directory `/usr/src/linux-headers-2.6.35-28-generic'
scripts/Makefile.build:49: *** CFLAGS was changed in "/home/zlatina/rtl8187b-modified/ieee80211/Makefile". Fix it to use EXTRA_CFLAGS. Stop.
make[1]: *** [_module_/home/zlatina/rtl8187b-modified/ieee80211] Error 2
make[1]: Leaving directory `/usr/src/linux-headers-2.6.35-28-generic'
make: *** [modules] Error 2
rm -fr *.mod.c *.mod *.o .*.cmd *.ko *~
make -C /lib/modules/2.6.35-28-generic/build M=/home/zlatina/rtl8187b-modified/rtl8187 CC=gcc modules
make[1]: Entering directory `/usr/src/linux-headers-2.6.35-28-generic'
scripts/Makefile.build:49: *** CFLAGS was changed in "/home/zlatina/rtl8187b-modified/rtl8187/Makefile". Fix it to use EXTRA_CFLAGS. Stop.
make[1]: *** [_module_/home/zlatina/rtl8187b-modified/rtl8187] Error 2
make[1]: Leaving directory `/usr/src/linux-headers-2.6.35-28-generic'
make: *** [modules] Error 2
root@ubuntu:/home/zlatina/rtl8187b-modified#

Another driver I tried which was found on aircrack-ng.org's website was rtl8187_linux_26.1010.zip

Here are the error messages I experienced while I tried to compile the realtek wireless driver from the archive rtl8187_linux_26.1010.0622.2006


compilation terminated.
make[2]: *** [/home/zlatina/rtl8187_linux_26.1010.0622.2006/beta-8187/r8187_core.o] Error 1
make[1]: *** [_module_/home/zlatina/rtl8187_linux_26.1010.0622.2006/beta-8187] Error 2
make[1]: Leaving directory `/usr/src/linux-headers-2.6.35-28-generic'
make: *** [modules] Error 2

I tried a number of fix ups hoping to solve the compile error messages, but my efforts were useless, as it seems many things has changed in newer Ubuntu versions and they could no longer be compiled.

As I realized I couldn't make the native drivers provided by the above sources compile, I decided to give a try to the Windows drivers for Realtek 8187B with ndiswrapper, a link for download of Realtek 8187B (RTL8187B_XP_6.1163.0331.2010_Win7_62.1182.0331.2010_UI_1.00.0179 is found here

I untarred the
RTL8187B_XP driver
and used ndiswrapper to load driver like so:


root@ubuntu:~# tar -zxvf
RTL8187B_XP_6.1163.0331.2010_Win7_....L.tar.gz
root@ubuntu:/home/zlatina/RTL8187B#
root@ubuntu:/home/zlatina/RTL8187B# cd Driver/WinXP
root@ubuntu:/home/zlatina/RTL8187B/Driver/WinXP# ndiswrapper -i net8187b.inf

In order to test the RTL8178B Windows driver I used:


root@ubuntu:~# ndiswrapper -l
net8187b : driver installed
device (0BDA:8197) present (alternate driver: rtl8187)

To finally load the Windows XP RTL8187B driver on the Ubuntu I used again ndiswrapper:


root@ubuntu:~# ndiswrapper -m

Further on I used the ndisgtk graphical ndiswrapper interface to once again test if the Windows driver is working on the Ubuntu and it seemed like it is working, however still my wicd was unable to find any wireless network ….

There were many online documentation which claimed that the driver for rtl8187b works out of the box on newer kernel releases (kernel versions > 2.6.24)

Finally I found out there is a driver which is a default one with the Ubuntu e.g. rtl8187.ko , I proceeded and loaded the module:


root@ubuntu:~# modprobe rtl8187

I also decided to check out if the hardware switch button of the Toshiba Satellite L40 notebook is not switched off and guess what ?! The Wireless ON/OFF button was switched OFF!!! OMG …

I switched on the button and wicd immediately started showing up the wireless networks …

To make the rtl8187 module load on Ubuntu boot up, I had to issue the command:


root@ubuntu:~# echo 'rtl8187' >> /etc/modules

Voila after all this struggle the wireless card is working now, it's sad I had to loose about 10 hours of time until I come with the simple solution of using the default provided ubuntu driver rtl8187 , what is strange is how comes that it does not load up automatically.

Thanks God it works now.

How to configure Nautilus (Linux application like Windows Explorer) to work with standard Windows button + E On Linux GNOME en Mate

Monday, October 9th, 2017

how-to-configure-nautilus-linux-applicatoin-to-act-like-windows-explorer-make-windows-button-work-in-GNOME-and-Mate
As an ex-Windows user I'm still addicted to Windows User brainwashing as an ex-victim of Windows 95 / 98 and XP:), so I tend to love very much and its still hard for me to forget some major Key Binding (Windows Key Combinations).

On every new Desktop Linux I install, I have the habit to configure few great key combination shortcuts that makes my digital life much easier.
I use usually as a graphical environment GNOME and recently switched to MATE (GNOME 2 fork, cause GNOME 3 is totally messed up and unworthy to me), that's why this article is targetting this two Linux GUI envs, I'll be glad to hear in article comments for any other useful key bindings and how to configure similar key bindings for other Major Linux graphical environments (Cinnamon, KDE Plasma, XFCE, LXDE).


1. Configuring Lock Screen (Win button + L), Open Explorer(Win button + E), View Desktop (Win + D) in MATE graphic env


———  WINDOWS BUTTON, OFTEN USED KEY SHORTCUTS ———

Windows + E – Open new Windows File Explorer 

Windows + L – Lock Computer

Windows + M – To minimize All Windows

Windows + D – Show Desktop (similar to Windows +M though it doesn't switch to Desktop)

Win – + / – To Maginfy Text and Windows

Shift + Win + Left/Right Arrow – (In Windows if you have multiple monitors connected to the same computer lets say Right Monitor and Left, that combination switches between left monitor and right monitor)


——————————————————————–


The list goes on but I'm not used to all of them, I'll stop here and continue on with how to remake some of my favourite Windows keybindings in Gnu / Linux

Either run it from Menus:
 

System -> Settings -> Hardware -> Keyboard Shortcuts


Or run command


$ mate-keybinding-properties


howto-gnome-mate-remap-shortcut-keybinding-keys-mate-keybinding-properties


After rebinding the Windows: 
– Lock Screen and Open New Nautilus Explorer Window (Home folder) variable to be invoked with Windows button, the result
is as that:

howto-gnome-mate-remap-shortcut-keybinding-keys-mate-keybinding-properties


Scroll down Mate Keyboard shortcuts and you'll find

also how to configure Windows Button and D Key Combination, following 2 more screenshots showing how to do it note that MOD Key appears once you press Windows Keyboard Key + something (e.g. MATE recognizes MOD Key as Win Key):

Before the change to bind Win Key + D to work:

mate-how-to-make-desktop-view-open-with-standard-windows-button_and_d-combination-linux-debian

When configured Win Button + D looks like so:

mate-how-to-make-desktop-view-open-with-standard-windows-button_and_d-combination-linux-debian-1

2. Configuring Lock Screen (Win button + L), Open Explorer(Win button + E), View Desktop (Win + D) in GNOME

Usually in GNOME until > version 3.X.X (in older GNOME graphic environment access to KeyBinding Properties was done via:


System -> Preferences -> Keybord Shortcuts -> Add ->


In fallback gnome with Metacity (if installed along with GNOME Desktop 3.2.X environment to access Key Bindings):

d

System->Apps->Metacity->global_keybindings  


Also it is possible to remap keys via dconf-editor, I've written a small article earlier explaining how to remap Screenshotting buttons with dconf-editor but the example could be easily adapted, so you can edit almost everything.

Besides that you can use a command to run the keyboard configuration (in older GNOMEs) via:


linux:~$ gnome-keybinding-properties


Just for information for those who might know, many Key Binding interesting options are available via gnome-tweak-tool, so if you don't have it yet install it and give it a try:


linux:~# apt-get install –yes gnome-tweak-tool


As you can see, there are plenty of options to make Win (key) to act like Alt (key):

linux:~# gnome-tweak-tool
 

gnome-tweak-tool-make-win-key-to-behave-like-alt-key-howto 


After configuring the changes enjoy your WINDOWS Button + L, WINDOWS + E and WINDOWS + D WORKING AGAIN HOORAY !!! 🙂 


3. Most used shortcuts in Gnome and Nautilus 
 

Below are most used shortcuts thanks to LinuxQuestions Forum for providing them

Howdy! I thought that it would be useful to post a practical selection of shortcut keys for GNOME (the Desktop Environment) and Nautilus (the File Manager) and some information about customizing shortcut keys in Ubuntu. I wrote it especially for Ubuntu beginners, but I hope it will prove useful for all. 


2.1 GNOME/Nautilus shortcut keys – Very useful for the keyboard maniax like me :):
 

Ctrl-H: show hidden files

Ctrl-N: new window

Ctrl-Shift-N: create new folder

Alt-Home : jump to home folder

Alt-Enter : file / folder properties

F9 : toggle side-pane

Alt-F1 : launch applications menu

Alt-F2 : launch "run application" dialogue

Ctrl-Alt – Right/Left arrow : move to the next virtual desktop

Ctrl-Alt-Shift – Right/Left arrow : take current window to the next virtual desktop

Ctrl-Alt-D: minimize all windows, and gives focus to the desktop. 

Alt-Tab: switch between windows. When you use these shortcut keys, a list of windows that you can select is displayed. Release the keys to select a window. 

Ctrl-Alt-Tab: switch the focus between the panels and the desktop. When you use these shortcut keys, a list of items that you can select is displayed. Release the keys to select an item. 

Ctrl-Alt-L: lock the screen (tested only in Ubuntu) 

Ctrl-L: shortcut for opening locations-by default the path is the home folder*
/ : same as Ctrl-L but has the root (/) as default path* (shortcut found on here)
* both shortcuts can be used while you are on the desktop (no window active)

Ctrl-T : move to trash (in Nautilus)
Quite dangerous key combination because many of us are used to press these keys in order to open a new tab. Because we all delete items using the Delete key, I recommend to deactivate this shortcut key. To do that, go to System » Preferences » Appearance » Interface. Select Editable menu shortcut keys and close the dialog box. Click on the Edit menu in the File Browser. Click the Empty Trash item (it has Ctrl-T as the keyboard shortcut) Press the Delete key to get rid of the shortcut.
You can find all GNOME shortcut keys here


2.2 How to create a custom hotkey to launch whatever application you want in GNOME
 

As an example, we will set a lock-screen shortcut.


Open "gconf-editor" as the user as you're logged in in GNOME (typing gconf-editor in the terminal or "Run Application").
 

Go to apps > metacity > keybinding_commands


Here we have a list of twelve slots for commands.


Double click on e.g. "run_command_1" 

In Key Value Type in the name of the application or command you want to launch (e.g. gnome-screensaver-command –lock).


Go to apps -> Metacity -> global_keybindings 

Double click on e.g. "run_command_1" 
Change the key value to whatever key combination you like (e.g. <Ctrl><Alt>L).Press "Ok".


2.3.How to create/change GNOME shortcuts


Click on System -> Preferences -> Keyboard Shortcuts


Click the action in the list and press Enter. 
Press the new key or key combination you want to assign to the action. (To clear a shortcut, press the Backspace key)


Hope it helps, Enjoy Life .;)

Drawing GANTT Charts and Project Management on Linux, (Microsoft Project substitute for Unix)

Tuesday, October 12th, 2010

I'm studying Project Management, right now. In that spirit of thoughts I and a couple of other guys are building a Project Plan.
As it Project Plan it's necessary to put a GANTT Chart in it to show visually the project timeline (the phases), the duration and the inter-relation between the different tasks which leads the project to an actual completion.

After a bit of thorough research online on available software to deal with project management and particularly, ones that are capable to build a GANTT charts on Linux / BSD.

I've come with the following list of software capable to be a substitute for the Microsoft Project software.
Redmine GANTT Chart

GANTT chart Redmine

1. Gantt Project
GANTTProject chart GANTTProject Chart

2. Gnome Planner
Planner GANTT Gnome Chart 
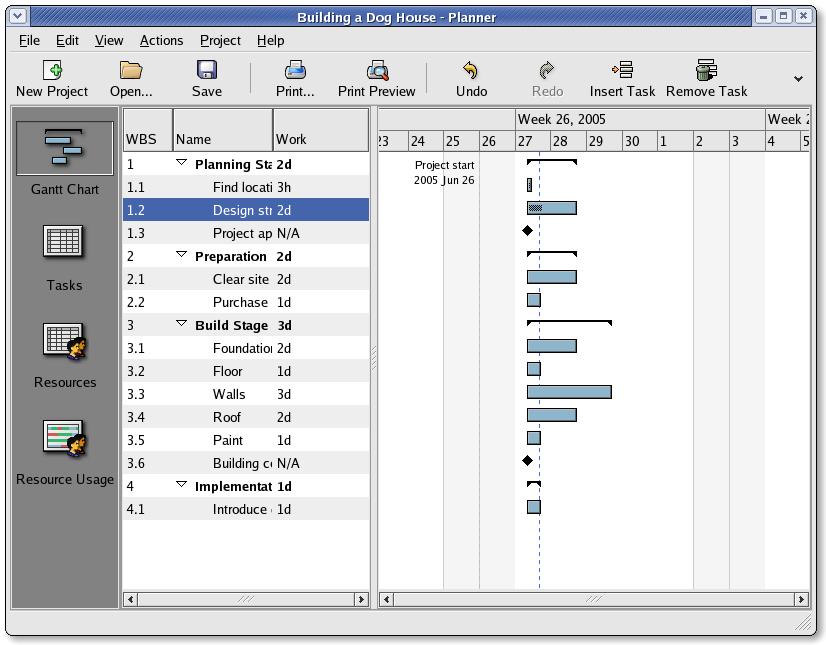
Planner GANTT Chone Chart
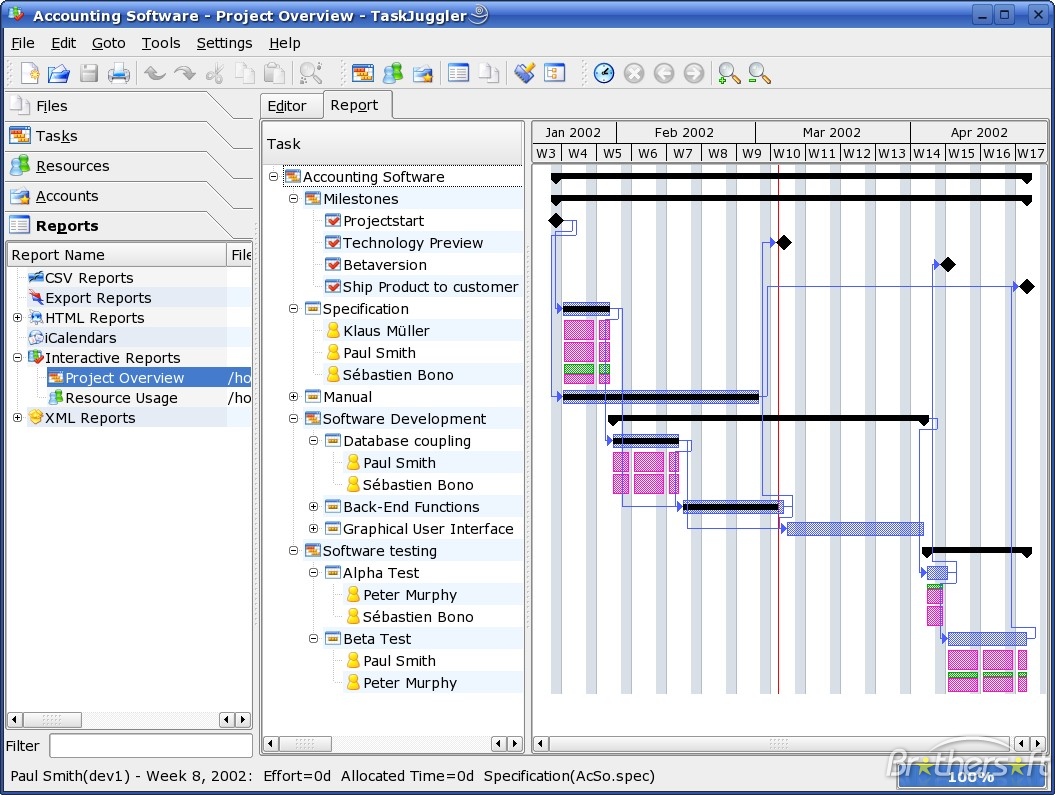
3. Task Juggler Project Manager with GANTT Capability for (KDE)
Task Juggler

4. JxProject – This software is not free, though it can be considered almost free
Take a look also at:
5. Trac , though it doesn't really support GANTT charts it's a lovely software to be used for PM.
Trac Project Management

Another option you have is to try out:
6. PHProjekt

Update 20.09.2016 – PHPProject Old download link is no longer active

It is this link http://www.phprojekt.com/, but the page doesn’t seem to be active any more. I thought you might want to update.

If you are looking for an alternative please check out http://wiht.link/PHProjekt-PM, it may make a suitable replacement.

Kind Regards,
Tom Wilcox


That piece of softwre really looks promising, especially if we consider that it's web based and how much essential is today to have an anline tools for doing the ordinary desktop jobs.

You can even check an online demo of the PHPProjekt software here

If you're a type of KDE user you definitely has to try out Kplato

As I've tested the software the software is easy to be used, however it still is missing some essential parts that Microsoft Project includes so it's not 100% substitute.
Also it's not able to open Microsoft Project (MPP) files, neither able to save the charts in the .mpp format.

Moving ahead I've came across DotProject DotProject Gantt Chart
DottProject Gantt Chart

I haven't took the time to test it myself but however, as I go through the software website the project looked quite good.
Lastly you can take a look at: 7. PStricks as a mean of project management, however I think it doesn't support GANTT chart building.
>

How to add (.srt , .sub) subtitles to .flv flash movie video on Linux

Friday, April 15th, 2011

how-to-add-srt-subtitles-to-flv-flash-movie-video-on-linux
If you're on Linux the questions like, how can I convert between video and audio formats, how to do photo editing etc. etc. have always been a taugh question as with it's diversity Linux often allows too many ways to do the same things.

In the spirit of questioning I have been recently curious, how can a subtitles be added to a flash video (.flv) video?

After some research online I've come up with the below suggested solution which uses mplayer to do the flash inclusion of the subtitles file.

mplayer your_flash_movie.flv -fs -subfont-text-scale 3

While including the subtitles to the .flv file, it's best to close up all the active browsers and if running something else on the desktop close it up.
Note that above's mplayer example for (.srt and .sub) subtitle files example is only appropriate for a .flv movie files which already has a third party published subtitle files.

What is interesting is that often if you want to make custom subtitles to let's say a video downloaded from Youtube on Linux the mplayer way pointed above will be useless. Why?

Well the Linux programs that allows a user to add custom subtitles to a movie does not support the flv (flash video) file format.

My idea on how to create custom subtitles and embed them into a flv movie file is very simple and it goes like this:

1. Convert the .flv file format to let's say .avi or .mpeg
2. Use gnome-subitles or subtitleeditor to create the subtitles for the .avi or .mpeg file
3. Convert back the .avi/.mpeg file with included subtitles to .flv (flash video format)

This methodology is really long and time consuming, but pitily as far as my understanding goes it's the only way to do that on your Linux until now.

To make the conversations between .flv and .avi format you will need to use the ffmpeg – (FFMpeg command line tool video converter), here is how:

– Convert .flv to .avi

debian:~# /usr/bin/ffmpeg -i input_flvfilename.flv output_avifilename.avi

– Convert .avi file to .flv

debian:~# /usr/bin/ffmpeg -y -i /path/to/your/avi/input_avifilename.avi -acodec mp3 -ar 22050 -f flv
/path/to/your/flv/output_flvfilename.flv

The required overall tools which you will have to have installed on your Debian or Ubuntu Linux are:

1. ffmpeg
2. gnome-subtitles
3. subtitleeditor
4. mplayer

You will also have to spend some time to get to know gnome-subtitles or subtitleeditor, but it won't be that long until you get the idea on how to use them.

Speeding up Apache through apache2-mpm-worker and php5-cgi on Debian / How to improve Apache performance and decrease server memory consumption

Friday, March 18th, 2011

speeding up apache through apache2-mpm-worker and php5-cgi on Debian Linux / how to improve apache performance and decrease server responce time
By default most Apache running Linux servers on the Internet are configured to use with the mpm prefork apache module
Historically prefork apache module is the predecessor of the worker module therefore it's believed to be a way more tested and reliable, if you need a critical reliable webserver configuration.

However from my experience by so far with the Apache MPM Worker I can boldly say that many of the rumors concerning the unreliabity of apache2-mpm-worker are just myths.

The old way Apache handles connections e.g. the mod prefork is the well known way that high amount of the daemons on Linux and BSD are still realying on.
When prefork is a used by Apache, every new TCP/IP connection arriving at your Linux server on the Apache configured port let's say on port 80 is being served by Apache in a way that the Apache process (mother process) parent does fork a new Apache parent copy in order to serve the new request.
Thus by using the prefork Apache needs to fork new process (if it doesn't have already an empty forked one waiting for connections) and serve the HTTP request of the new client, after the request of the client is completed the newly forked Apache usually dies (even though it again depends on the way the Apache server is configured via the Apache configuration – apache2.conf / httpd.conf etc.).

Now you can imagine how slow and memory consuming it is that all the time the parent Apache process spawns new processes, kills old ones etc. in order to fulfill the client requests.

Now just to compare the Apace mpm prefork does not use the old forking way, but relies on a few Apache processes which handles all the requests without constantly being destroyed and recreated like with the prefork module.
This saves operations and system resources, threaded programming has already been proven to be more efficient way to handle tasks and is heavily adopted in GUI programming for instance in Microsoft Windows, Mac OS X, Linux Gnome, KDE etc.

There is plenty of information and statistical data which compares Apache running with prefork and respectively worker modules online.
As the goal of this article is not to went in depths with this kind of information I would not say more on it but let you explore online a bit more about them in case if you're interested.

The purpose of this article is to explain in short how to substitute the Apache2-MPM-Prefork and how your server performance could benefit out of the use of Apache2-MPM-Worker.
On Debian the default Apache process serving module in Apache 1.3x,Apache 2.0x and 2.2x is prefork thus the installation of apache2-mpm-worker is not "a standard way" to install Apache

Deciding to swith from the default Debian apache-mpm-prefork to apache-mpm-worker is quite a serious and responsible decision and in some cases might cause troubles, if you have decided to follow my article be sure to consider all the possible negative consequences of switching to the apache worker !

Now after having said a bunch of info which might be not necessary with the experienced system admin I'll continue on with the steps to install the apache2-mpm-worker.

1. Install the apache2-mpm-worker

debian:~# apt-get install apache2-mpm-worker php5-cgi
Reading state information... Done
The following packages were automatically installed and are no longer required:
The following packages will be REMOVED apache2-mpm-prefork libapache2-mod-php5
The following NEW packages will be installed apache2-mpm-worker
0 upgraded, 1 newly installed, 2 to remove and 46 not upgraded.
Need to get 0B/259kB of archives.After this operation, 6193kB disk space will be freed.

As you can notice in below's text confirmation which will appear you will have to remove the apache2-mpm-prefork and the apache2-mpm-worker modules before you can proceed to install the apache2-mpm-prefork.

You might ask yourself if I remove my installed libphp how would I be able to use my Apache with my PHP based websites? And why does the apt package manager requires the libapache2-mod-php5 to get removed.
The explanation is simple apache2-mpm-worker is not thread safe, in other words scripts which does use the php fork(); function would not work correctly with the Apache worker module and will probably be leading to PHP and Apache crashes.
Therefore in order to install the apache mod worker it's necessary that no libapache2-mod-php5 is existent on the system.
In order to have a PHP installed on the server again you will have to use the php5-cgi deb package, this is the reason in the above apt-get command I'm also requesting apt to install the php5-cgi package next to apache2-mpm-worker.

2. Enable the cgi and cgid apache modules

debian:~# a2enmod cgi
debian:~# a2enmod cgid

3. Activate the mod_actions apache modules

debian:~# cd /etc/apache2/mods-enabled
debian:~# ln -sf ../mods-available/actions.load
debian:~# ln -sf ../mods-available/actions.conf

4. Add configuration options in order to enable mod worker to use the newly installed php5-cgi

Edit /etc/apache2/mods-available/actions.conf vim, mcedit or nano (e.g. your editor of choice and add inside:

&ltIfModule mod_actions.c>
Action application/x-httpd-php /cgi-bin/php5
</IfModule>

After completing all the above instructions, you might also need to edit your /etc/apache2/apache2.conf to tune up, how your Apache mpm worker will serve client requests.
Configuring the <IfModule mpm_worker_module> in apache2.conf is necessary to optimize your newly installed mpm_worker module for performance.

5. Configure the mod_worker_module in apache2.conf One example configuration for the mod worker is:

<IfModule mpm_worker_module>
StartServers 2
MaxClients 150
MinSpareThreads 25
MaxSpareThreads 75
ThreadsPerChild 25
MaxRequestsPerChild 0
</IfModule>

Consider the fact that this configuration is just a sample and it's in no means configured for serving Apache requests for high load Apache servers and you need to further play with the values to have a good results on your server.

6. Check that all is fine with your Apache configurations and no syntax errors are encountered

debian:~# /usr/sbin/apache2ctl -t
Syntax OK

If you get something different from Syntax OK track the error and fix it before you're ready to restart the Apache server.

7. Now restart the Apache server

debian:~# /etc/init.d/apache2 restart

All should run fine and hopefully your PHP scripts should be interpreted just fine through the php5-cgi instead of the libapache2-mod-php5.
Using the /usr/bin/php5-cgi will increase with some percentage your server CPU load but on other hand will drasticly decrease the Webserver memory consumption.
That's quite logical because the libapache2-mod-hp5 is loaded once during apache server whether a new instance of /usr/bin/php5-cgi is invoked during each of Apache requests via the mod worker.

There is one serious security flow coming with php5-cgi, DoS against a server processing scripts through php5-cgi is much easier to be achieved.
An example for a denial attack which could affect a website running with mod worker and php5-cgi, could be simulated from a simple user with a web browser which holds up the f5 or ctrl + r browser page refresh buttons.
In that case whenever php5-cgi is used the CPU load would rise drastic, one possible solution to this denial of service issues is by installing and using libapache2-mod-evasive like so:

8. Install libapache2-mod-evasive

debian:~# apt-get install libapache2-mod-evasive
The Apache mod evasive module is a nice apache module to minimize HTTP DoS and brute force attacks.
Now with mod worker through the php5-cgi, your apache should start serving requests more efficiently than before.
For some performance reasons some might even want to try out the fastcgi with the worker to boost the Apache performance but as I have never tried that I can't say how reliable a a mod worker with a fastcgi would be.

N.B. ! If you have some specific php configurations within /etc/php5/apache2/php.ini you will have to set them also in /etc/php5/cgi/php.ini before you proceed with the above instructions to install Apache otherwise your PHP scripts might not work as expected.

Mod worker is also capable to work with the standard mod php5 Apache module, but if you decide to go this route you will have to recompile your PHP lib manually from source as in Debian this option is not possible with the default php library.
This installation worked fine on Debian Lenny but suppose the same installation should work fine on Debian Squeeze as well as Debian testing/unstable.
Feedback on the afore-described mod worker installation is very welcome!

Frogatto & Friends – One of the TOP 10 Arcade Free Software & Open Source Games for GNU / Linux and FreeBSD

Friday, December 16th, 2011

Frogatto old-school 2d jump and run free software game for GNU / Linux and FreeBSD
1. Frogatto & Friends – Is an Indian Free Software (Open Source) game in the spirit of old-school jump’en runs like Commander Keen, Prehistoric, Jazz Jack Rabbit

The game is really entertaining, the graphics looks approximately nice, the music is awesome, the gamelplay is good even though after some point in the game the moment with “where should I go now, I can’t find exit” comes through and it gets boring.

Generally if you compare with all the existing jump and run arcade games free software games available for Linux and FreeBSD the game will definetely arrange itself in the list of TOP 10 free software Arcade Games
and therefore its my own believe that Frogatto is a game that every GNU / Linux and FreeBSD desktop should have in Application -> Games GNOME menu.

Frogatto is rich of levels, enemies obstacles objects, places to visit (which puts it ahead of many of the linux arcade games which often miss enough game levels, has a too short game plots, or simply miss overall game diversity).

Frogatto linux freebsd game bombing airplaine

The game’s general look & feel is like a professional game and not just some tiny free software arcade, made by its authors for the sake to learn some programming, graphics or music creation.
Frogatto door leading to Grotto

Frogatto Free Software game wood screenshot

Besides that Frogatto & Friends is multi-platform supporting all the major operating systems.
Game supports:
 

  • Windows
  • Mac
  • iPhone
  • Debian GNU / Linux
  • FreeBSD

The game source code is also available on Frogatto.com – The Game’s Official website

The game is available as a deb package in Debian and Ubuntu GNU / Linuxes so to install on those deb based distributions, simply use apt:

debian:~# apt-get install frogatto
...

The above command will install two packages frogatto (containing the game’s main executable binary) and frogatto-data containinng all the game textures, levels, graphics, music etc.

BTW the package saparation on a gamename and gamename-data in Debian (for all those who have not still noticed), can be seen on most of the games with a game data that takes more disk space.

After the game is installed the only way to start the game is to run it manually through pressing ALT+F2 in GNOME or running the progrtam through gnome-terminal with cmd:

debian:~$ frogatto

Here are few more Frogatto gameplay screenshots:

Frogatto free open source game screenshot a game bad guy

Frogatto different level screenshot

I’ve noticed Frogatto is also available as an RPM package for Fedora Linux, as well as has a FreeBSD port in the /usr/ports/games/frogatto and this makes it easy to install on most free software OSes in the wild.

While checking frogatto.com , I found an interesting link to a website offering free graphics (pictures), textures and sounds for free and open source games for all those who hold interest into the development of Free Software & Open Source Games make sure you check OpenGameArt.org

OpenGameArt.org looks like a great initiative and will definitely be highly beneficial to the development of more and better FSOS Games so I wish them God speed with this noble initiative.

Frogatto is very suitable for growing kids since it doesn’t contain no violence and every now and then the main game actor the Frogatto Frog leads few lines English dialogues with some of the characters found in the quest.
For none speaking English countries, the game can help the kids to learn some basic english words and thus can help develop kids intellect and knowledge
And oh yeah one more criticism towards the game is the Enlish structure, it seems people who wrote the plot can work this out in the time to come. Many of the English sentences during dialogues the frog leads with the cranks he met does not sound like a common and sometimes even correct english / phrases.

Besides those little game “defect”, the game is pretty awesome and worthy to kill some time and relax from a long stressy day.

How to take multiple screenshots with scrot and ImageMagick import commands in terminal on GNU / Linux and FreeBSD

Friday, January 13th, 2012

scrot and import are two commands, which can be used to take screenshot in terminal on Linux and FreeBSD:

To use scrot cmd to take screenshots on Ubuntu and Debian the scrot package has to be installed:

noah:~# apt-get install scrot
...

scrot should also be available on most other Linux distributions in the main repositories, I'll be glad to hear if someone has used it on Fedora, SUSE etc.

On FreeBSD, there is a port called scrot , to install on FreeBSD:

freebsd# cd /usr/ports/graphics/scrot
freebsd# make install clean
...

Scrot has plenty of nice arguments one can use to make a screenshot. Maybe the most handy one in my view is after a preliminary set delay before screenshot is taken.

To take screenshot with it after lets say 5 seconds delay before the screenshot:

hipo@noah:~/Desktop$ scrot -t 20 -d 5

Screenshot scrot my debian Linux gnome-termina

To put an year, month and day and year followed by screen resolution with scrot :

hipo@noah:~$ scrot '%Y-%m-%d_$wx$h.png'

Another way to take a screenshot of screen with command is by using ImageMagick'simport image manipulation package.
To take screenshot of the current screen via terminal using import , type in xterm, gnome-termina or Gnome's Run Application (ALT+F2)

hipo@noah:~$ import -window root ScreenShot.png

To make import command to save the taken screenshot in a format (minute:hour:day:month:year)i :

hipo@noah:~$ import -window root $screenshot_dir/screenshot-$(date +%M_%k_%d_%m_%Y|sed -e 's/^ *//').png

Taking a delayed screenshot is also possible via The GIMP via menus File -> Create -> Screenshot

GIMP Screenshot 15 seconds delay GIMP window screenshot

Now here is an interesting question, what if I would like to take periodic screenshots of what I do on my Desktop to take random movie scenes from a movie I watch with totem or vlc??

This task is quite easily achiavable with a little bash shell script, I wrote:

screenshot_dir='Screenshots';
seconds='60';
if [ ! -d "$screenshot_dir" ]; then
mkdir $screenshot_dir;
fi
while [ 1 ]; do
sleep $seconds;
(import -window root $screenshot_dir/screenshot-$(date +%M_%k_%d_%m_%Y|sed -e 's/^ *//').png) &
done

This script will take screenshot automatically to Screenshots/ directory every (1 min – 60 seconds)
You can also my downloads take_screenshot_every_60_secs_import.sh here

To use take_screenshot_every_60_secs_import.sh just issue the script inside xterm or gnome-terminal, after that simply use your computer as you normally would.
The script will take snapshots every minute and store all taken screenshots in Screenshots dir.

If you prefer to use scrot to take automatically the screenshots every lets say 5 minutes, you can use a script like:

screenshot_dir='Screenshots';
# 300 secs (5 mins)seconds='300';
if [ ! -d "$screenshot_dir" ]; then
mkdir $screenshot_dir;
fi
while [ 1 ]; do
sleep $seconds;
(scrot $screenshot_dir/'%Y-%m-%d_$wx$h.png') &
done

You can fetch take_screenshot_every_60_secs_scrot.sh here

The script using scrot is better in terms of efficiency, the system load scrot will put on your machine will be less.
Using some of this scripts will be handy if you need screenshots to Movies, Programs and favourite Free Software games.
Hope this is educative to someone 😉