Archive for the ‘Linux and FreeBSD Desktop’ Category

Howto Upgrade IBM Spectrum Protect Backup Client TSM 7.X to 8.1.8, Update Tivoli 8.1.8 to 8.1.11 on CentOS and Redhat Linux

Thursday, December 3rd, 2020


IBM-spectrum-protect-backup-logo-tivoli-tsm-logo

Having another day of a system administrator boredom, we had a task to upgrade some Tivoli TSM Backup clients running on a 20+ machines powered by CentOS and RHEL Linux to prepare the systems to be on the latest patched IBM Spectrum Backup client version available from IBM. For the task of patching I've used a central server where, I've initially downloaded the provided TSM client binaries archives. From this machine, we have copied TivSM*.tar to each and every system that needs to be patched and then patched. The task is not too complex as the running TSM in the machines are all at the same version and all running a recent patched version of Linux. Hence to make sure all works as expected we have tested TSM is upgraded from 7.X.X to 8.X.X on one machine and then test 8.1.8 to 8.1.11 upgrade on another one. Once having confirmed that Backups works as expected after upgrade. We have proceeded to do it massively on each of the rest 20+ hosts.
Below article's goal is to help some lazy sysadmin with the task to prepare an TSM Backup upgrade procedure to standartize TSM Upgrade, which as many of the IBM's softwares is very specific and its upgrade requires, a bit of manual work and extra cautious as there seems to be no easy way (or at least I don't know it), to do the upgrade by simply adding an RPM repository and doing, something like yum install tivsm*.


0. Check if there is at least 2G free of space

According to documentation the minimum space you need to a functional install without having it half installed or filling up your filesystem is 2 Gigabytes of Free Memory on a filesystem where the .tar and rpms will be living.

Thus check what is the situation with your filesystem where you wills store the .tar archice and extract .RPM files / install the RPM files.

# df -h

1. Download the correct tarball with 8.1 Client

On one central machine you would need to download the Tivoli you can do that via wget / curl / lynx whatever is at hand on the Linux server.

As of time of writting this article TSM's 8.1.11 location is at
URL:

http://public.dhe.ibm.com/storage/tivoli-storage-management/maintenance/client/v8r1/Linux/LinuxX86/BA/v8111/

I've made a local download mirror of Tivoli TSM 8.1.11 here.
In case you need to install IBM Spectrum Backup Client to a PCI secured environment to a DMZ-ed LAN network from a work PC you can Download it first from your local PC and via Citrix client upload program or WinSCP upload it to a central replication host from where you will later copy to each of the other server nodes that needs to be upgraded.

Lets Copy archive to all Server hosts where you want it later installed, using a small hack

Assuming you already have an Excel document or a Plain text document with all the IPs of the affected hosts where you will need to get TSM upgraded. Extract this data and from it create a plain text file /home/user/hosts.txt containing all the machine IPs lined up separated with carriage return separations (\n), so you can loop over each one and use scp to send the files.

– Replicate Tivoli tar to all machine hosts where you want to get IBM Spectrum installed or upgraded.
Do it with a loop like this:

# for i in $(cat hosts.txt); do scp 8.1.11.0-TIV-TSMBAC-LinuxX86.tar user@$i:/home/user/; done

 Copy to a Copy buffer temporary your server password assuming all your passwords to each machine are identical and paste your login user pass for each host to initiate transfer
 

2. SSH to each of the Machine hosts IPs

Once you login to the host you want to upgrade
Go to your user $HOME /home/user and create files where we'll temporary store Tivoli archive files and extract RPMs

[root@linux-server user]# mkdir -p ~/tsm/TSM_BCK/
[root@linux-server user]# mv 8.1.11.0-TIV-TSMBAC-LinuxX86.tar ~/tsm
[root@linux-server user]# cd tsm
[root@linux-server user]# tar -xvvf 8.1.11.0-TIV-TSMBAC-LinuxX86.tar
gskcrypt64-8.0.55.17.linux.x86_64.rpm
GSKit.pub.pgp
gskssl64-8.0.55.17.linux.x86_64.rpm
README_api.htm
README.htm
RPM-GPG-KEY-ibmpkg
TIVsm-API64.x86_64.rpm
TIVsm-APIcit.x86_64.rpm
TIVsm-BAcit.x86_64.rpm
TIVsm-BAhdw.x86_64.rpm
TIVsm-BA.x86_64.rpm
TIVsm-filepath-source.tar.gz
TIVsm-JBB.x86_64.rpm
TIVsm-WEBGUI.x86_64.rpm
update.txt

3. Create backup of old backup files

It is always a good idea to keep old backup files

[root@linux-server tsm]# cp -av /opt/tivoli/tsm/client/ba/bin/dsm.opt ~/tsm/TSM_BCK/dsm.opt_bak_$(date +'%Y_%M_%H')
[root@linux-server tsm]# cp -av /opt/tivoli/tsm/client/ba/bin/dsm.sys ~/tsm/TSM_BCK/dsm.sys_bak_$(date +'%Y_%M_%H')

[root@linux-server tsm]# [[ -f /etc/adsm/TSM.PWD ]] && cp -av /etc/adsm/TSM.PWD ~/TSM_BCK/ || echo 'file doesnt exist'

/etc/adsm/TSM.PWD this file is only there as legacy for TSM it contained encrypted passwords inver 7 for updates. In TSM v.8 encryption file is not there as new mechanism for sensitive data was introduced.
Be aware that from Tivoli 8.X it will return error
exist'

!! Note – if dsm.opt , dsm.sys files are on different locations – please use correct full path locations !!

4. Stop  dsmcad – TSM Service daemon

[root@linux-server tsm]# systemctl stop dsmcad

5. Locate and deinstall all old Clients

Depending on the version to upgrade if you're upgrading from TSM version 7 to 8, you will get output like.

[root@linux-server tsm]# rpm -qa | grep 'TIVsm-'
TIVsm-BA-7.1.6-2.x86_64
TIVsm-API64-7.1.6-2.x86_64

If you're one of this paranoid admins you can remove TIVsm packs  one by one.

[root@linux-server tsm]# rpm -e TIVsm-BA-7.1.6-2.x86_64
[root@linux-server tsm]# rpm -e TIVsm-API64-7.1.6-2.x86_64

Instead if upgrading from version 8.1.8 to 8.1.11 due to the Security CVE advisory recently published by IBM e.g. (IBM Runtime Vulnerability affects IBM Spectrum Backup archive Client) and  vulnerability in Apache Commons Log4J affecting IBM Spectrum Protect Backup Archive Client.

[root@linux-server tsm]# rpm -qa | grep 'TIVsm-'
TIVsm-API64-8.1.8-0.x86_64
TIVsm-BA-8.1.8-0.x86_64

Assuming you're not scared of a bit automation you can straight do it with below one liner too 🙂

# rpm -e $(rpm -qa | grep TIVsm)

[root@linux-server tsm]# rpm -qa | grep gsk
[root@linux-server tsm]# rpm -e gskcrypt64 gskssl64

6. Check uninstallation success:

[root@linux-server tsm]# rpm -qa | grep TIVsm
[root@linux-server tsm]# rpm -qa | grep gsk

Here you should an Empty output, if packages are not on the system, e.g. Empty output is good output ! 🙂

7. Install new client IBM Spectrum Client (Tivoli Storage Manager) and lib dependencies

[root@linux-server tsm]# rpm -ivh gskcrypt64-8.0.55.4.linux.x86_64.rpm
[root@linux-server tsm]# rpm -ivh gskssl64-8.0.55.4.linux.x86_64.rpm

 If you're lazy to type you can do as well

[root@linux-server tsm]# rpm -Uvh gsk*

Next step is to install main Tivoli SM components the the API files and BA (The Backup Archive Client)

[root@linux-server tsm]# rpm -ivh TIVsm-API64.x86_64.rpm
[root@linux-server tsm]# rpm -ivh TIVsm-BA.x86_64.rpm

If you have to do it on multiple servers and you do it manually following a guide like this, you might instead want to install them with one liner.

[root@linux-server tsm]# rpm -ivh TIVsm-API64.x86_64.rpm TIVsm-BA.x86_64.rpm

There are some Not mandatory "Common Inventory Technology" components (at some cases if you're using the API install it we did not need that), just for the sake if you need them on your servers due to backup architecture, install also below commented rpm files.

## rpm -ivh TIVsm-APIcit.x86_64.rpm

## rpm -ivh TIVsm-BAcit.x86_64.rpm

These packages not needed only for operation WebGUI TSM GUI management, (JBB) Journal Based Backup, BAhdw (the ONTAP library)


— TIVsm-WEBGUI.x86_64.rpm
— TIVsm-JBB.x86_64.rpm
— TIVsm-BAhdw.x86_64.rpm

8. Start and enable dsmcad service

[root@linux-server tsm]# systemctl stop dsmcad

You will get

##Warning: dsmcad.service changed on disk. Run 'systemctl daemon-reload' to reload units.

[root@linux-server tsm]# systemctl daemon-reload

[root@linux-server tsm]# systemctl start dsmcad


## enable dsmcad – it is disabled by default after install

[root@linux-server ~]# systemctl enable dsmcad

[root@linux-server tsm]# systemctl status dsmcad

9. Check dmscad service is really running

Once enabled IBM TSM will spawn a process in the bacground dmscad if it started properly you should have the process backgrounded.

[root@linux-server tsm]# ps -ef|grep -i dsm|grep -v grep
root      2881     1  0 18:05 ?        00:00:01 /usr/bin/dsmcad

If process is not there there might be some library or something not at place preventing the process to start …

10. Check DSMCAD /var/tsm logs for errors

After having dsmcad process enabled and running in background

[root@linux-server tsm]# grep -i Version /var/tsm/sched.log|tail -1
12/03/2020 18:06:29   Server Version 8, Release 1, Level 10.000


[root@linux-server tsm]# cat /var/tsm/dsmerror.log

To see the current TSM configuration files we can  grep out comments *

[root@linux-server tsm]# grep -v '*' /opt/tivoli/tsm/client/ba/bin/dsm.sys

Example Configuration of the agent:
—————————————————-
   *TSM SERVER NODE Location
   Servername           tsm_server
   COMMmethod           TCPip
   TCPPort              1400
   TCPServeraddress     tsmserver2.backuphost.com
   NodeName             NODE.SERVER-TO-BACKUP-HOSTNAME.COM
   Passwordaccess       generate
   SCHEDLOGNAME         /var/tsm/sched.log
   SCHEDLOGRETENTION    21 D
   SCHEDMODE            POLLING
   MANAGEDServices      schedule
   ERRORLOGNAME         /var/tsm/dsmerror.log
   ERRORLOGRETENTION    30 D
   INCLEXCL             /opt/tivoli/tsm/client/ba/bin/inclexcl.tsm

11. Remove tsm install directory tar ball and rpms to save space on system

The current version of Tivoli service manager is 586 Megabytes.

[root@linux-server tsm]# du -hsc 8.1.11.0-TIV-TSMBAC-LinuxX86.tar
586M    8.1.11.0-TIV-TSMBAC-LinuxX86.tar

Some systems are on purpose configured to have less space under their /home directory,
hence it is a good idea to clear up unnecessery files after completion.

Lets get rid of all the IBM Spectrum archive source files and the rest of RPMs used for installation.

[root@linux-server tsm]# rm -rf ~/tsm/{*.tar,*.rpm,*.gpg,*.htm,*.txt}

12. Check backups are really created on the configured remote Central backup server

To make sure after the upgrade the backups are continuously created and properly stored on the IBM Tivoly remote central backup server, either manually initiate a backup or wait for lets say a day and run dsmc client to show all created backups from previous day. To make sure you'll not get empty output you can on purpose modify some file by simply opening it and writting over without chaning anything e.g. modify your ~/.bashrc or ~/.bash_profile

## List all backups for '/' root directory from -fromdate='DD/MM/YY'

[root@linux-server tsm]# dsmc
Protect>
IBM Spectrum Protect
Command Line Backup-Archive Client Interface
  Client Version 8, Release 1, Level 11.0
  Client date/time: 12/03/2020 18:14:03
(c) Copyright by IBM Corporation and other(s) 1990, 2020. All Rights Reserved.

Node Name: NODE.SERVER-TO-BACKUP-HOSTNAME.COM
Session established with server TSM2_SERVER: AIX
  Server Version 8, Release 1, Level 10.000
  Server date/time: 12/03/2020 18:14:04  Last access: 12/03/2020 18:06:29
 
Protect> query backup -subdir=yes "/" -fromdate=12/3/2020
           Size        Backup Date                Mgmt Class           A/I File
           —-        ———–                ———-           — —-
         6,776  B  12/03/2020 01:26:53             DEFAULT              A  /etc/freshclam.conf
         6,685  B  12/03/2020 01:26:53             DEFAULT              A  /etc/freshclam.conf-2020-12-02
         5,602  B  12/03/2020 01:26:53             DEFAULT              A  /etc/hosts
         5,506  B  12/03/2020 01:26:53             DEFAULT              A  /etc/hosts-2020-12-02
           398  B  12/03/2020 01:26:53             DEFAULT              A  /opt/tivoli/tsm/client/ba/bin/tsmstats.ini
       114,328  B  12/03/2020 01:26:53             DEFAULT              A  /root/.bash_history
           403  B  12/03/2020 01:26:53             DEFAULT              A  /root/.lesshst

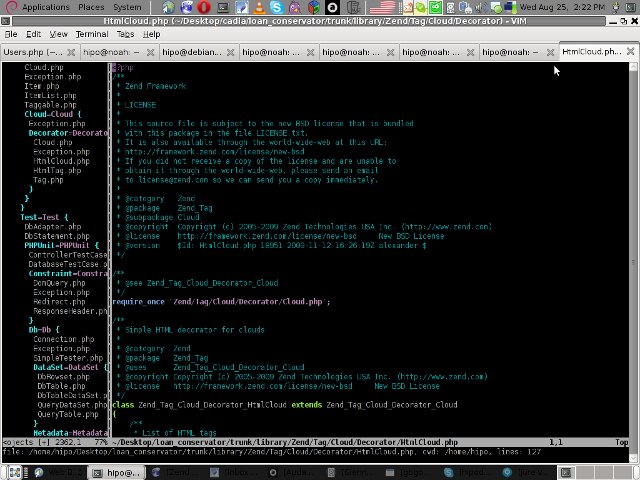
VIM Project (VI Improvied IDE Editor extension to facilitate web development with vi enhanced editor

Wednesday, August 25th, 2010

I use VIM as an editor of choice for many years already.
Yet it's until recently I use it for a PHP ZF (Zend Framework) web development.

Few days ago I've blogged How to configure vimrc for a php syntax highlightning (A Nicely pre-configured vimrc to imrpove the daily text editing experience

This enhancements significantly improves the overall PHP code editing with VIM. However I felt something is yet missing because I didn't have the power and functunality of a complete IDE like for instance The Eclipse IDE

I was pretty sure that VIM has to have a way to be used in a similar fashion to a fully functional IDE and looked around the net to find for any VIM plugins that will add vim an IDE like coding interface.

I then come accross a vim plugin called VIM Prokject : Organize/Navigate projects of files (like IDE/buffer explorer)

The latest VIM Project as of time of writting is 1.4.1 and I've mirrored it here

The installation of the VIM Project VIM extension is pretty straight forward to install it and start using it on your PC issue commands:

1. Install the project VIM add-on

debian:~$ wget https://www.pc-freak.net/files/project-1.4.1.tar.gz
debian:~$ mv project-1.4.1.tar.gz ~/.vim/
debian:~$ cd ~/.vim/
debian:~$ tar -zxvvf project-1.4.1.tar.gz

2. Load the plugin

Launch your vim editor and type : Project(without the space between : and P)
You will further see a screen like:

vim project entry screen

3. You will have to press C within the Project window to load a new project

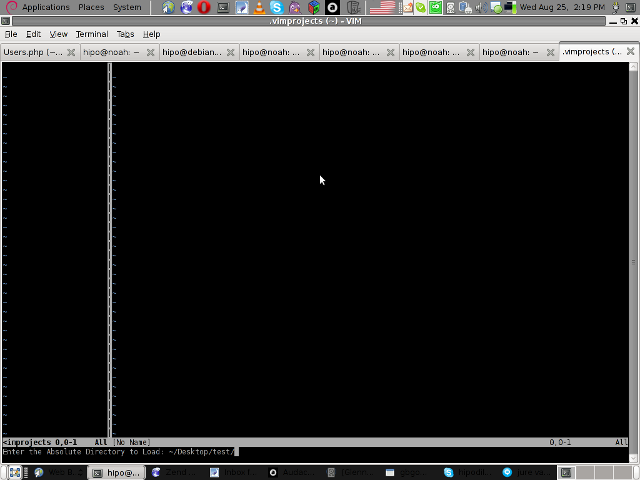
Then you will have to type a directory to use to load a project sources files from:

vim project enter file source directory screen

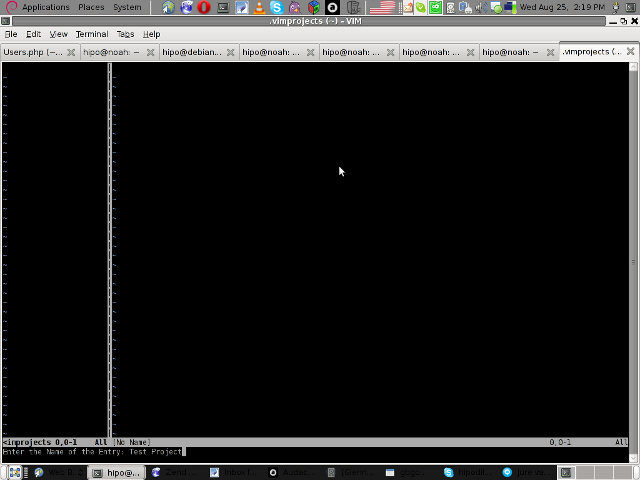
You will be prompted with to type a project name like in the screenshot below:

vim project load test project

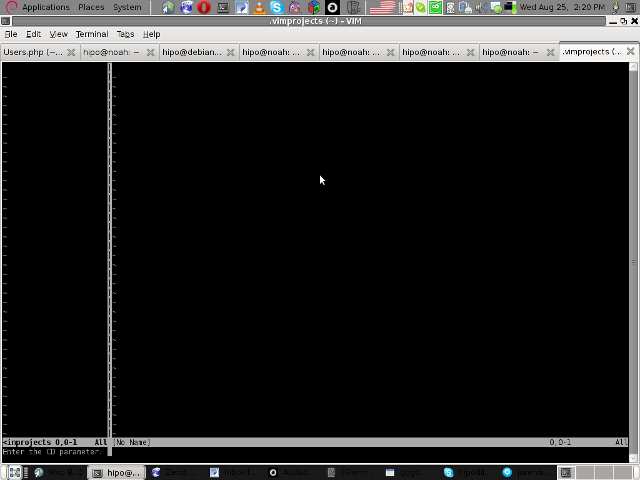
4. Next you will have to type a CD (Current Dir) parameter
To see more about the CD parameter consult vim project documentation by typing in main vim pane :help project

The appearing screen will be something like:

vim project extension cd parameter screen

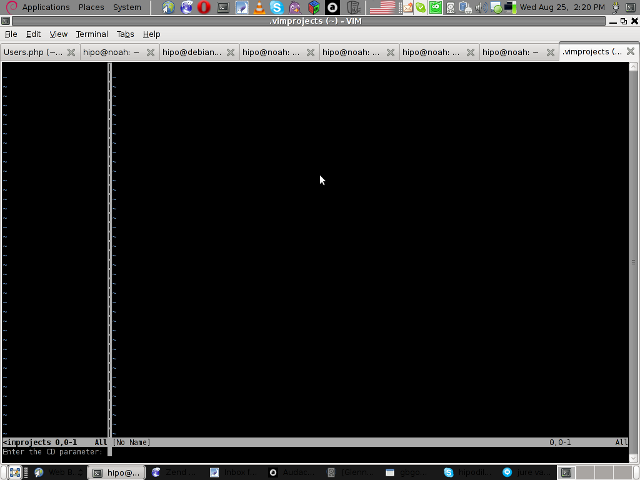
5. Thereafter you will have to type a file filter

File filter is necessary and will instruct the vim project plugin to load all files with the specified extension within vim project pane window

You will experience a screen like:


vim project plugin file filter screen

Following will be a short interval in which all specified files by the filter type will get loaded in VIM project pane and your Zend Framework, PHP or any other source files will be listed in a directory tree structure like in the picture shown below:

vim project successful loaded project screen

6. Saving loaded project hierarchy state

In order to save a state of a loaded project within the VIM project window pane you will have to type in vim, let's say:

:saveas .projects/someproject

Later on to load back the saved project state you will have to type in vim :r .projects/someproject

You will now have almost fully functional development IDE on top of your simple vim text editor.

You can navigate within the Project files loaded with the Project extension pane easily and select a file you would like to open up, whenever a source file is opened and you work on it to switch in between the Project file listing pane and the opened source code file you will have to type twice CTRL+w or in vim language C-w

To even further sophisticate your web development in PHP with vim you can add within your ~/.vimrc file the following two lines:

" run file with PHP CLI (CTRL-M)
:autocmd FileType php noremap <C-M> :w!<CR>:!/usr/bin/php %<CR>
" PHP parser check (CTRL-L)
:autocmd FileType php noremap <C-L> :!/usr/bin/php -l %>CR>

In the above vim configuration directovies the " character is a comment line and the autocmd is actually vim declarations.
The first :autocmd … declaration will instruct vim to execute your current opened php source file with the php cli interpreter whenever a key press of CTRL+M (C-m) occurs.

The second :autocmd … will add to your vim a shortcut, so whenever a CTRL+L (C-l) key combination is pressed VIM editor will check your current edited source file for syntax errors.
Therefore this will enable you to very easily periodically check if your file syntax is correct.

Well this things were really helpful to me, so I hope they will be profitable for you as well.
Cheers 🙂

Set all logs to log to to physical console /dev/tty12 (tty12) on Linux

Wednesday, August 12th, 2020

tty linux-logo how to log everything to last console terminal tty12

Those who administer servers from the days of birth of Linux and who used actively GNU / Linux over the years or any other UNIX knows how practical could be to configure logging of all running services / kernel messages / errors and warnings on a physical console.

Traditionally from the days I was learning Linux basics I was shown how to do this on an old Debian Sarge 3.0 Linux without systemd and on all Linux distributions Redhat 9.0 / Calderas and Mandrakes I've used either as a home systems or for servers. I've always configured output of all messages to go to the last easy to access console /dev/tty12 (for those who never use it console switching under Linux plain text console mode is done with key combination of CTRL + ALT + F1 .. F12.

In recent times however with the introduction of systemd pretty much things changed as messages to console are not handled by /etc/inittab which was used to add and refresh physical consoles tty1, tty2 … tty7 (the default added one on Linux were usually 7), but I had to manually include more respawn lines for each console in /etc/inittab.
Nowadays as of year 2020 Linux distros /etc/inittab is no longer there being obsoleted and console print out of INPUT / OUTPUT messages are handled by systemd.
 

1. Enable Physical TTYs from TTY8 till TTY12 etc.


The number of default consoles existing in most Linux distributions I've seen is still from tty1 to tty7. Hence to add more tty consoles and be ready to be able to switch out  not only towards tty7 but towards tty12 once you're connected to the server via a remote ILO (Integrated Lights Out) / IdRAC (Dell Remote Access Controller) / IPMI / IMM (Imtegrated Management Module), you have to do it by telling systemd issuing below systemctl commands:


 # systemctl enable getty@tty8.service Created symlink /etc/systemd/system/getty.target.wants/getty@tty8.service -> /lib/systemd/system/getty@.service.

systemctl enable getty@tty9.service

Created symlink /etc/systemd/system/getty.target.wants/getty@tty9.service -> /lib/systemd/system/getty@.service.

systemctl enable getty@tty10.service

Created symlink /etc/systemd/system/getty.target.wants/getty@tty10.service -> /lib/systemd/system/getty@.service.

systemctl enable getty@tty11.service

Created symlink /etc/systemd/system/getty.target.wants/getty@tty11.service -> /lib/systemd/system/getty@.service.

systemctl enable getty@tty12.service

Created symlink /etc/systemd/system/getty.target.wants/getty@tty12.service -> /lib/systemd/system/getty@.service.


Once the TTYS tty7 to tty12 are enabled you will be able to switch to this consoles either if you have a physical LCD / CRT monitor or KVM switch connected to the machine mounted on the Rack shelf once you're in the Data Center or will be able to see it once connected remotely via the Management IP Interface (ILO) remote console.
 

2. Taking screenshot of the physical console TTY with fbcat


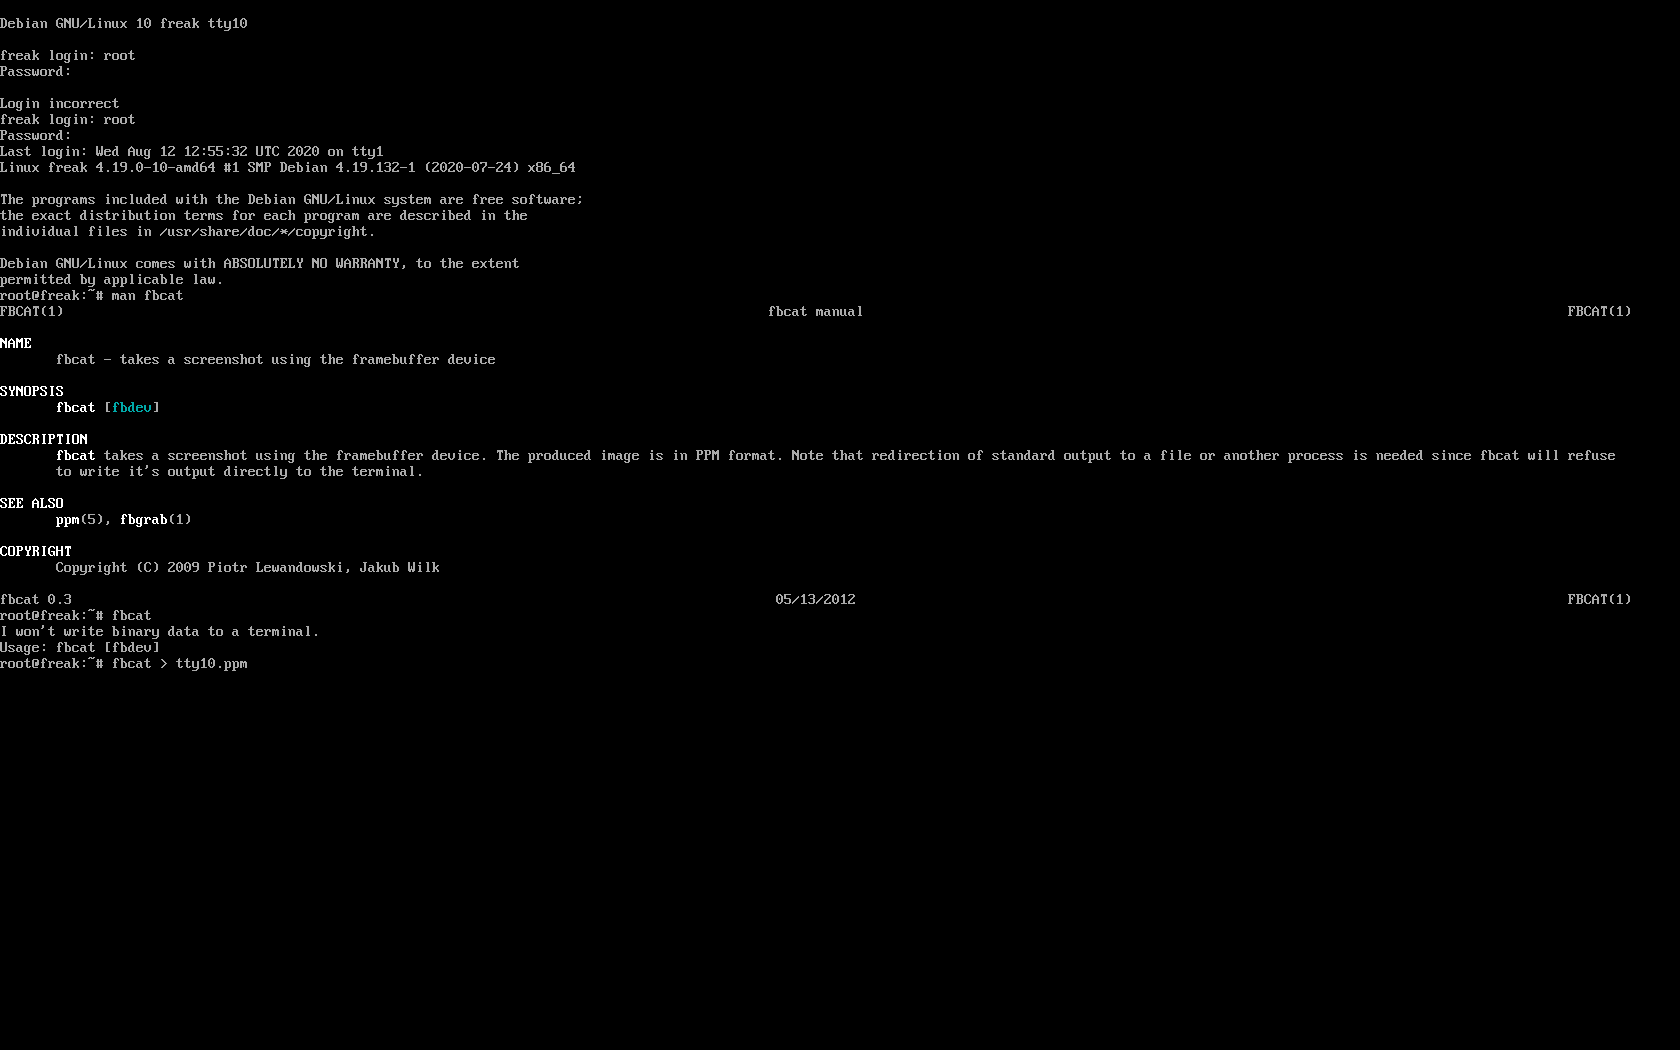
For example below is a screenshot of the 10th enabled tty10:

tty10-linux-screenshot-fbcat-how-to-screenshot-console

As you can in the screenshot I've used the nice tool fbcat that can be used to make a screenshot of remote console. This is very useful especially if remote access via a SSH client such as PuTTY / MobaXterm is not there but you have only a physical attached monitor access on a DCs that are under a heavy firewall that is preventing anyone to get to the system remotely. For example screenshotting the physical console in case if there is a major hardware failure occurs and you need to dump a hardware error message to a flash drive that will be used to later be handled to technicians to analyize it and exchange the broken server hardware part.

Screenshots of the CLI with fbcat is possible across most Linux distributions where as usual.

In Debian you have to first instal the tool via :
 

# apt install –yes fbcat


and on RedHats / CentOS / Fedoras

# yum install -y fbcat


Taking screenshot once tool is on the server of whatever you have printed on console is as easy as

# fbcat > tty_name.ppm


Note that you might want to convert the .ppm created picture to png with any converter such as imagemagick's convert command or if you have a GUI perhaps with GNU Image Manipulation Tool (GIMP).

3. Enabling every rsyslog handled message to log to Physical TTY12


To make everything such as errors, notices, debug, warning messages  become instantly logging towards above added new /dev/tty12.

Open /etc/rsyslog.conf and to the end of the file append below line :
 

daemon,mail.*;\
   news.=crit;news.=err;news.=notice;\
   *.=debug;*.=info;\
   *.=notice;*.=warn   /dev/tty12


To make rsyslog load its new config restart it:


# systemctl status rsyslog


rsyslog.service – System Logging Service
   Loaded: loaded (/lib/systemd/system/rsyslog.service; enabled; vendor preset: enabled)
   Active: active (running) since Mon 2020-08-10 04:09:36 EEST; 2 days ago
     Docs: man:rsyslogd(8)
           https://www.rsyslog.com/doc/
 Main PID: 671 (rsyslogd)
    Tasks: 4 (limit: 4915)
   Memory: 12.5M
   CGroup: /system.slice/rsyslog.service
           └─671 /usr/sbin/rsyslogd -n -iNONE


авг 12 00:00:05 pcfreak rsyslogd[671]:  [origin software="rsyslogd" swVersion="8.1901.0" x-pid="671" x-info="https://www.rsyslo
Warning: Journal has been rotated since unit was started. Log output is incomplete or unavailable.


systemctl restart rsyslog


That's all folks navigate by pressing simultaneously CTRL + ALT + F12 to get to TTY12 or use ALT + LEFT / ALT + RIGHT ARROW (console switch commands) till you get to the console where everything should be now logged.

Enjoy and if you like this article share to tell your sysadmin friends about this nice hack  ! 🙂


Linux Send Monitoring Alert Emails without Mail Server via relay SMTP with ssmtp / msmtp

Friday, July 10th, 2020

ssmtp-linux-server-sending-email-without-a-local-mail-server-mta-relay-howto

If you have to setup a new Linux server where you need to do a certain local running daemons monitoring with a custom scripts on the local machine Nagios / Zabbix / Graphana etc. that should notify about local running custom programs or services in case of a certain criteria is matched or you simply want your local existing UNIX accounts to be able to send outbound Emails to the Internet.

Then usually you need to install a fully functional SMTP Email server that was Sendmail or QMAIL in old times in early 21st century andusually postfix or Exim in recent days and configure it to use as as a Relay mail server some Kind of SMTP.

The common Relay smtp setting would be such as Google's smtp.gmail.com, Yahoo!'s  smtp.mail.yahoo.com relay host, mail.com or External configured MTA Physical server with proper PTR / MX records or a SMTP hosted on a virtual machine living in Amazon's AWS or m$ Azure that is capable to delivere EMails to the Internet.

Configuring the local installed Mail Transport Agent (MTA) as a relay server is a relatively easy task to do but of course why should you have a fully stacked MTA service with a number of unnecessery services such as Email Queue, Local created mailboxes, Firewall rules, DNS records, SMTP Auth, DKIM keys etc. and even the ability to acccept any emails back in case if you just want to simply careless send and forget with a confirmation that remote email was send successfully?

This is often the case for some machines and especially with the inclusion of technologies such as Kubernettes / Clustered environments / VirtualMachines small proggies such as ssmtp / msmtp that could send mail without a Fully functional mail server installed on localhost ( 127.0.0.1 ) is true jams.

ssmtp program is Simple Send-only sendMail emulator  has been around in Debian GNU / Linux, Ubuntu, CentOS and mostly all Linuxes for quite some a time but recently the Debian package has been orphaned so to install it on a deb based server host you need to use instead msmtp.
 

1. Install ssmtp on CentOS / Fedora / RHEL Linux

In RPM distributions you can't install until epel-release repository is enabled.

[root@centos:~]# yum –enablerepo=extras install epel-release

[root@centos:~]# yum install ssmtp


2. Install ssmp / msmtp Debian / Ubuntu Linux

If you run older version of Debian based distribution the package to install is ssmtp, e.g.:

root@debian:~# apt-get install –yes ssmtp


On Newer Debians as of Debian 10.0 Buster onwards install instead

root@debian:~# apt install –yes msmtp-mta

can save you a lot of effort to keep an eye on a separately MTA hanging around and running as a local service eating up resources that could be spared.
 

3. Configure Relay host for ssmtp


A simple configuration to make ssmtp use gmail.com SMTP servers as a relay host below:

linux:~# cat << EOF > /etc/ssmtp/ssmtp.conf
# /etc/ssmtp/ssmtp.conf
# The user that gets all the mails (UID < 1000, usually the admin)
root=user@host.name
# The full hostname.  Must be correctly formed, fully qualified domain name or GMail will reject connection.
hostname=host.name
# The mail server (where the mail is sent to), both port 465 or 587 should be acceptable
# See also https://support.google.com/mail/answer/78799
mailhub=smtp.gmail.com:587
#mailhub=smtp.host.name:465

# The address where the mail appears to come from for user authentication.
rewriteDomain=gmail.com
# Email 'From header's can override the default domain?

FromLineOverride=YES

# Username/Password
AuthUser=username@gmail.com
AuthPass=password
AuthMethod=LOGIN
# Use SSL/TLS before starting negotiation
UseTLS=YES
UseTLS=Yes
UseSTARTTLS=Yes
logfile        ~/.msmtp.log

EOF

This configuration is very basic and it is useful only if you don't want to get delivered mails back as this functionality is also supported even though rarely used by most.

One downside of ssmtp is mail password will be plain text, so make sure you set proper permissions to /etc/ssmtp/ssmtp.conf
 

– If your Gmail account is secured with two-factor authentication, you need to generate a unique App Password to use in ssmtp.conf. You can do so on your App Passwords page. Use Gmail username (not the App Name) in the AuthUser line and use the generated 16-character password in the AuthPass line, spaces in the password can be omitted.

– If you do not use two-factor authentication, you need to allow access to unsecure apps.
 

4. Configuring different msmtp for separate user profiles


SSMTP is capable of respecting multiple relays for different local UNIX users assuming each of whom has a separate home under /home/your-username

To set a certain user lets say georgi to relay smtp sent emails with mail or mailx command create ~/.msmtprc


linux:~# vim ~/.msmtprc


Append configuration like:

# Set default values for all following accounts.
defaults
port 587
tls on
tls_trust_file /etc/ssl/certs/ca-certificates.crt
account gmail
host smtp.gmail.com
from <user>@gmail.com
auth on
user <user>
passwordeval gpg –no-tty -q -d ~/.msmtp-gmail.gpg
# Set a default account

account default : gmail


To add it for any different user modify the respective fields and set the different Mail hostname etc.
 

5. Using mail address aliases


msmtp also supports mail aliases, to make them work you will need to have file /etc/msmptrc with
 

aliases               /etc/aliases


Standard aliasses them should work 

linux:~# cat /etc/aliases
# Example aliases file
     
# Send root to Joe and Jane
root: georgi_georgiev@example.com, georgi@example.com
   
# Send everything else to admin
default: admin@domain.example


6. Get updated when your Debian servers have new packages to update 

msmpt can be used for multiple stuff one example use would be to use it together with cron to get daily updates if there are new debian issued security or errata update pending packages, to do so you can use the apticron shell script.

To use it on debian install the apticron pack:
 

root@debian:~# apt-get install –yes apticron

apticron has the capability to:

 * send daily emails about pending upgrades in your system;
 * give you the choice of receiving only those upgrades not previously notified;
 * automatically integrate to apt-listchanges in order to give you by email the
   new changes of the pending upgrade packages;
 * handle and warn you about packages put on hold via aptitude/dselect,
   avoiding unexpected package upgrades (see #137771);
 * give you all these stuff in a simple default installation;


To configure it you have to place a config copy the one from /usr/lib/apticron/apticron.conf to /etc/apticron/apticron.conf

The only important value to modify in the config is the email address to which an apt-listchanges info for new installable debs from the apt-get dist-upgrade command. Output from them will be be send to the configured EMAIL field  in apticron.conf.
 

EMAIL="<your-user@email-addr-domain.com>"


The timing at which the offered new pending package update reminder will be sent is controlled by /etc/cron.d/apticron
 

debian:~# cat /etc/cron.d/apticron
# cron entry for apticron

48 * * * * root if test -x /usr/sbin/apticron; then /usr/sbin/apticron –cron; else true; fi

apticron will use the local previous ssmtp / msmpt program to deliver to configured mailbox.
To manually trigger apticron run:
 

root@debian:~# if test -x /usr/sbin/apticron; then /usr/sbin/apticron –cron; else true; fi


7. Test whether local mail send works to the Internet

To test mail sent we can use either mail / mailx or sendmail command or some more advanced mailer as alpine or mutt.

Below is few examples.

linux:~$ echo -e "Subject: this is the subject\n\nthis is the body" | mail user@your-recipient-domain.com

To test attachments to mail also works run:

linux:~$ mail -s "Subject" recipient-email@domain.com < mail-content-to-attach.txt

or

Prepare the mail you want to send and send it with sendmail

linux:~$ vim test-mail.txt
To:username@example.com
From:youraccount@gmail.com
Subject: Test Email
This is a test mail.

linux:~$ sendmail -t < test-mail.txt

Sending encoded atacchments with uuencode is also possible but you will need sharutils Deb / RPM package installed.

To attach lets say 2 simple text files uuencoded:

linux:~$ uuencode file.txt myfile.txt | sendmail user@example.com

echo "

To: username@domain.com From: username@gmail.com Subject: A test Hello there." > test.mail

linux:~$ cat test.mail | msmtp -a default <username>@domain.com


That's all folks, hope you learned something, if you know of some better stuff like ssmtp please shar e it.

Stop SSH Bruteforce authentication attempt Attacks with fail2ban

Monday, July 6th, 2020

Fail2ban stop restrict ssh bruteforce authentication attempt attacks

Most of webmasters today have some kind of SSH console remote access to the server and the OpenSSH Secure Shell service is usually not filtered for specific Networks but fully accessbible on the internet. This is especially true for home brew Linux Web servers as well as small to mid sized websites and blogs hosted on a cheap dedicated servers hosted in UK2 / Contabo RackSpace etc.

Brute force password guess attack tools such as Hydra and a distributed password dictionary files have been circulating quite for a while and if the attacker has enough time as well as a solid dictionary base, as well as some kind of relatively weak password you can expect that sooner or later some of the local UNIX accounts can be breaked and the script kiddie can get access to your server and make quickly a havoc, if he is lucky enough to be able to exploit some local vulnerability and get root access …

If you're a sysadmin that has to manage the Linux server and you do a routine log reading on the machine, you will soon get annoyed of the ever growing amount of different users, that are trying to login unsucessfully to the SSH (TCP port 22) service filling up the logs with junk and filling up disk space for nothing as well as consuming some CPU and Memory resources for nothing, you will need some easy  solution to make brute force attacks from an IP get filtered after few unsuccessful login attempts.
 

The common way to protect SSH would then be to ban an IP address from logging in if there are too many failed login attempts based on an automatic firewall inclusion of any IP that tried to unsuccessfully login lets say 5 or 10 reoccuring times.

In Linux there is a toll called “fail2ban” (F2B) used to limit brute force authentication attempts.

F2B works with minimal configuration and besides being capable of protecting the SSH service, it can be set to protect a lot of other Server applications like;

 Apache / NGINX Web Servers with PHP / Mail Servers (Exim, Postfix, Qmail, Sendmail), POP3 IMAP / AUTH services (Dovecot, Courier, Cyrus), DNS Bind servers, MySQL DBs, Monitoring tools such as Nagios, FTP servers (ProFTPD / PureFTP), Proxy servers (Squid), WordPress sites (wp-login) brute force attacks, Web Mail services (Horde / Roundcube / OpenWebmail), jabber servers etc.

To get a better overview below is F2B package description:
 

linux:~# apt-cache show fail2ban|grep -i description-en -A 21
Description-en: ban hosts that cause multiple authentication errors
 Fail2ban monitors log files (e.g. /var/log/auth.log,
 /var/log/apache/access.log) and temporarily or persistently bans
 failure-prone addresses by updating existing firewall rules.  Fail2ban
 allows easy specification of different actions to be taken such as to ban
 an IP using iptables or hostsdeny rules, or simply to send a notification
 email.
 .
 By default, it comes with filter expressions for various services
 (sshd, apache, qmail, proftpd, sasl etc.) but configuration can be
 easily extended for monitoring any other text file.  All filters and
 actions are given in the config files, thus fail2ban can be adopted
 to be used with a variety of files and firewalls.  Following recommends
 are listed:
 .
  – iptables/nftables — default installation uses iptables for banning.
    nftables is also suported. You most probably need it
  – whois — used by a number of *mail-whois* actions to send notification
    emails with whois information about attacker hosts. Unless you will use
    those you don't need whois
  – python3-pyinotify — unless you monitor services logs via systemd, you
    need pyinotify for efficient monitoring for log files changes


Using fail2ban is easy as there is a multitude of preexisting filters and actions (that gets triggered on a filter match) already written by different people usually found in /etc/fail2ban/filter.d an /etc/fail2ban/action.d.
as well as custom action / filter / jails is easy to do.
Fail2ban is available as a standard distro RPM / DEB package
on most modern versions of Ubuntu (16.04 and later), Debian, Mint and CentOS 7, OpenSuSE, Fedora etc.
 

1. Install Fail2ban package


– On Deb based distros do the usual:


linux:~# apt update
linux:~# apt install –yes fail2ban


On RPM distros Fedora / CentOS / SuSE etc.
 

linux:~# sudo yum -y install epel-release
linux:~# sudo yum -y install fail2ban


2. Enable fail2ban ban rules for SSH failed authentication filtering


Create the file /etc/fail2ban/jail.local :
 

# cat > /etc/fail2ban/jail.local


Paste below content:
 

[DEFAULT]
# Ban hosts for one hour:
bantime = 360
# Override /etc/fail2ban/jail.d/00-firewalld.conf:
banaction = iptables-multiport


[sshd]
enabled = true
maxretry = 10
findtime = 43200
# ban for 1 day
bantime = 3600
# ban for 1 day
#bantime = 86400


This config will ban for 1 day any IP that tries to access more than 10 unsuccesful times sshd daemon.
This works through IPTABLES indicated by config banaction = iptables-multiport config making fail2ban to automatically add a new iptables block rule valid for 1 day.

To close the file press CTRL + D simulanesly

  • maxretry controls the maximum number of allowed retries.
  • findtime specifies the time window (in seconds) which should be considered for banning an IP. (43200 seconds is 12 hours)
  • bantime specifies the time window (in seconds) for which the IP address will be banned (86400 seconds is 24 hours).

If SSH listens to a different port from 22 on the machine, you can specify the port number with  port = <port_number>  in this file.


3. Start fail2ban service


Either use the /etc/init.d/fail2ban start script or systemd systemctl
 

linux:~# systemctl enable fail2ban
linux:~# systemctl restart fail2ban


4. Fail2ban operational principle in short


Fail2ban uses Filters, Actions And Jails:

Filtersspecify certain patterns of text that Fail2ban should recognize in log files.
Actionsare things Fail2ban can do once a filter is matched.
Jailstell Fail2ban to match a filter on some logs. When the number of matches goes beyond a certain limit specified in the jail, Fail2ban takes an action specified in the jail.

If still wonder what is Fail2ban jail? Each configured jail tells fail2ban to look at system logs and take actions against attacks on a configured service, in our case OpenSSH service.
 

5. Blocking repeated unsuccessful password authentication attempts for longer periods


If more than number of failed ssh logins happen to occur (lets say 35 reoccuring ones in /var/log/auth.log (the debian failed ssh login file) or /var/log/secure (redhat distros failed ssh log file).
You will perhaps want to permanently block this IP for 3 days or so, here is how:
 

banaction = iptables-multiport
maxretry  = 35
findtime  = 259200
bantime   = 608400
enabled   = true
filter    = sshd


Add this to [sshlongterm] section to make it finally look like this:
 

[sshlongterm]
port      = ssh
logpath   = %(sshd_log)s
banaction = iptables-multiport
maxretry  = 35
findtime  = 259200
bantime   = 608400
enabled   = true
filter    = sshd


Of course to load new config restart fail2ban
 

# /etc/init.d/fail2ban restart


Default jail as well as the sshlongterm jail should now work together. Short term attacks will be handled by the default jail under [sshd], and the long term attacks handled by our own second jail [sshlongterm].
 

6. Checking which intruders were blocked by fail2ban


Fail2ban creates a separate chain f2b-sshd to which it adds each blocked IP for the period of time preset in the config, to list it:

linux:~# /sbin/iptables -L f2b-sshd
Chain f2b-sshd (1 references)
target     prot opt source               destination         
REJECT     all  —  165.22.2.95          anywhere             reject-with icmp-port-unreachable
REJECT     all  —  ec2-13-250-58-46.ap-southeast-1.compute.amazonaws.com  anywhere             reject-with icmp-port-unreachable
REJECT     all  —  cable200-116-3-133.epm.net.co  anywhere             reject-with icmp-port-unreachable
REJECT     all  —  mail.antracite.org   anywhere             reject-with icmp-port-unreachable
REJECT     all  —  139.59.57.2          anywhere             reject-with icmp-port-unreachable
REJECT     all  —  111.68.98.152.pern.pk  anywhere             reject-with icmp-port-unreachable
REJECT     all  —  216.126.59.61        anywhere             reject-with icmp-port-unreachable
REJECT     all  —  104.248.4.138        anywhere             reject-with icmp-port-unreachable
REJECT     all  —  210.211.119.10       anywhere             reject-with icmp-port-unreachable
REJECT     all  —  85.204.118.13        anywhere             reject-with icmp-port-unreachable
REJECT     all  —  broadband.actcorp.in  anywhere             reject-with icmp-port-unreachable
REJECT     all  —  104.236.33.155       anywhere             reject-with icmp-port-unreachable
REJECT     all  —  114.ip-167-114-114.net  anywhere             reject-with icmp-port-unreachable
REJECT     all  —  142.162.194.168.rfc6598.dynamic.copelfibra.com.br  anywhere             reject-with icmp-port-unreachable
REJECT     all  —  server.domain.cl     anywhere             reject-with icmp-port-unreachable
REJECT     all  —  ip202.ip-51-68-251.eu  anywhere             reject-with icmp-port-unreachable
REJECT     all  —  188.166.185.157      anywhere             reject-with icmp-port-unreachable
REJECT     all  —  93.49.11.206         anywhere             reject-with icmp-port-unreachable
RETURN     all  —  anywhere             anywhere            


Conclusion


What we have seen here is how to make fail2ban protect Internet firewall unrestricted SSHD Service to filter out 1337 skript kiddie 'hackers' out of your machine. With a bit of tuning could not only break the occasional SSH Brute Force bot scanners that craw the new but could even mitigate massive big botnet initiated brute force attacks to servers.
Of course fail2ban is not a panacea and to make sure you won't get hacked one days better make sure to only allow access to SSH service only for a certain IP addresses or IP address ranges that are of your own PCs.

Make Laptop Sleep on LID (Monitor) close in Linux Debian and Ubuntu systemd Linux

Monday, June 22nd, 2020

make-laptop-auto-sleep-on-lid-close-in-Linux-Ubuntu-Debian-Linux


I need to make my laptop automatically sleep on LID Screen close but it doesn't why?

If have used your laptop for long years with Windows or any Windows user is used to the default beavrior of Windows to automatically sleep the computer on PC close. This default behavior of automatically sleep on LID Close has been Windows standard for many years
and the reason behind that usually laptop is used for mobility and working on a discharging battery so a LID screen close puts the laptop in (SLEEP) BATTERY SUSPEND MODE aiming to make the charged battery last longer. However often for Desktop use in the Office LID close 
trigger of laptop sleep mode is annoying and undesired I've blogged earlier on that issue and how to make laptop not to sleep on LID close on M$ Windows 10 here.

This bahavior was copied and was working in many of the Linux distributions for years however in Debian GNU / Linux and Ubuntu 16.X this feature is often not properly working due to a systemd bug. Of course closing the notebook LID screen without putting
the PC in sleep mode is not a bug but a very useful feature for those who use their laptop as a Desktop machine that is non-stop running, however for most ppl default behavior to auto-suspend the computer on Laptop Monitor close is desired.

Here is how to  force the close of the laptop lid to go to suspend/sleep mode and when open the lid, it wake it up.


1. First requirement is to make sure the laptop has installed the package pm-utils, if it is not there install it with:


# apt-get install –yes pm-utils


2. Next we need to edit logind.conf and append 3 variables


# vim /etc/systemd/logind.conf


Normally the file should have a bit of commented informative lines as well as a commented variables that could be enabled like so:


[Login]
#NAutoVTs=6
#ReserveVT=6
#KillUserProcesses=no
#KillOnlyUsers=
#KillExcludeUsers=root
#InhibitDelayMaxSec=5
#HandlePowerKey=poweroff
#HandleSuspendKey=suspend
#HandleHibernateKey=hibernate
#HandleLidSwitch=suspend
#HandleLidSwitchExternalPower=suspend
#HandleLidSwitchDocked=ignore
#PowerKeyIgnoreInhibited=no
#SuspendKeyIgnoreInhibited=no
#HibernateKeyIgnoreInhibited=no
#LidSwitchIgnoreInhibited=yes
#HoldoffTimeoutSec=30s
#IdleAction=ignore
#IdleActionSec=30min
#RuntimeDirectorySize=10%
#RemoveIPC=yes
#InhibitorsMax=8192
#SessionsMax=8192


These entries are usually the files that are used by default as a systemd settings.
Before starting make a copy just you happen to mess systemd.conf, e.g.:


cp -rpf /etc/systemd/logind.conf /etc/systemd/logind.conf_bak


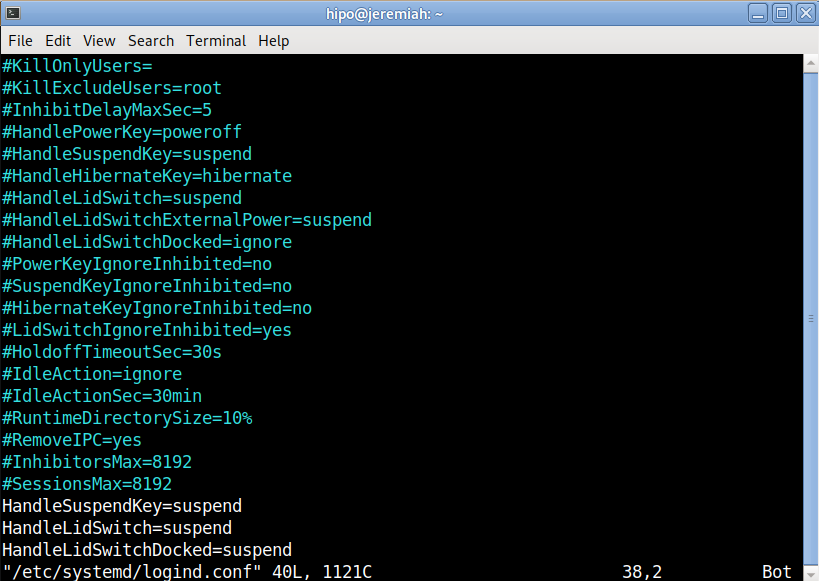
To make the PC LID close active append in the end of file below 3 lines:


HandleSuspendKey=suspend
HandleLidSwitch=suspend
HandleLidSwitchDocked=suspend


systemd-logind-conf-enable-suspend-sleep-on-laptop-lid-screen-close-linux

Save the file and to make systemd daemon reload restart the PC, even though theoretically systemd can be reloaded to digest its new /etc/systemd/logind.conf with:


# systemctl daemon-reexec


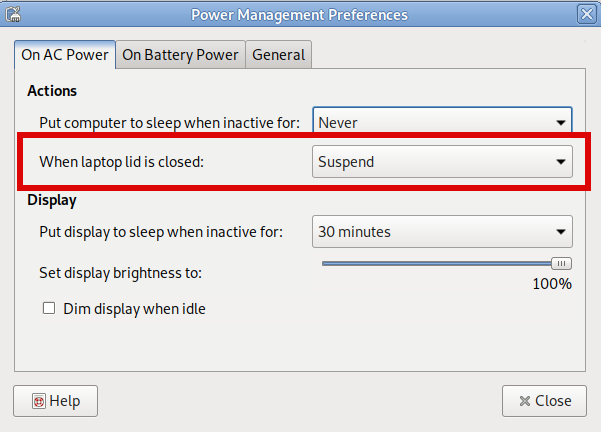
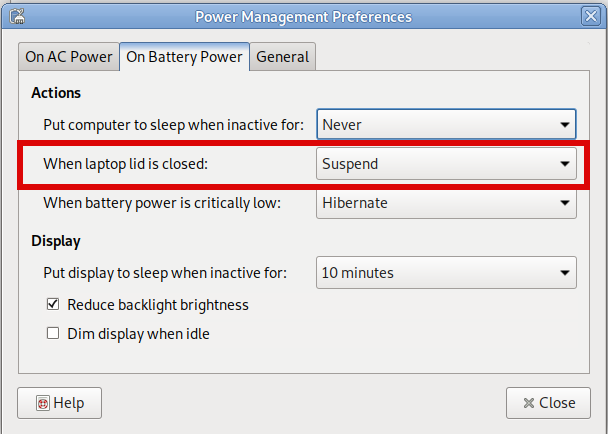
3. Assure yourself the Power Management LID setting of the Desktop Graphical User Interface are set to SUSPEND on close


I use MATE Desktop environment as it is simplistic and quite stable fork of GNOME 2.0, anyway depending on the GUI used on the Linux powered laptop e.g. GNOME / KDE Plasma / XFce etc. make sure the respective
 

Control Panel -> Power Management


settings are set to Force the Laptop Screen LID SUSPEND on Close.

Below is how this is done on MATE:

power-management-preferences-when-lid-is-closed-MATE-on-AC-power

power-management-preferences-when-lid-closed-on-battery-suspend

That's all folks, now close your Laptop and enjoy it going to sleep, open it up and get it awaked 🙂 Cheers ! 


Sysadmin tip: How to force a new Linux user account password change after logging to improve security

Thursday, June 18th, 2020

chage-linux-force-password-expiry-check-user-password-expiry-setting

Have you logged in through SSH to remote servers with the brand new given UNIX account in your company just to be prompted for your current Password immediately after logging and forced to change your password?
The smart sysadmins or security officers use this trick for many years to make sure the default set password for new user is set to a smarter user to prevent default password leaks which might later impose a severe security risk for a company Demiliterized networks confidential data etc.

If you haven't seen it yet and you're in the beautiful world of UNIX / Linux as a developer qa tester or sysadmin sooner or later you will face it.
Here of course I'm talking about plain password local account authentication using user / pass credentials stored in /etc/passwd or /etc/shadow.

Lets Say hello to the main command chage that is used to do this sysadmin trick.
chage command is used to change user password expiry information and  set and alter password aging parameters on user accounts.


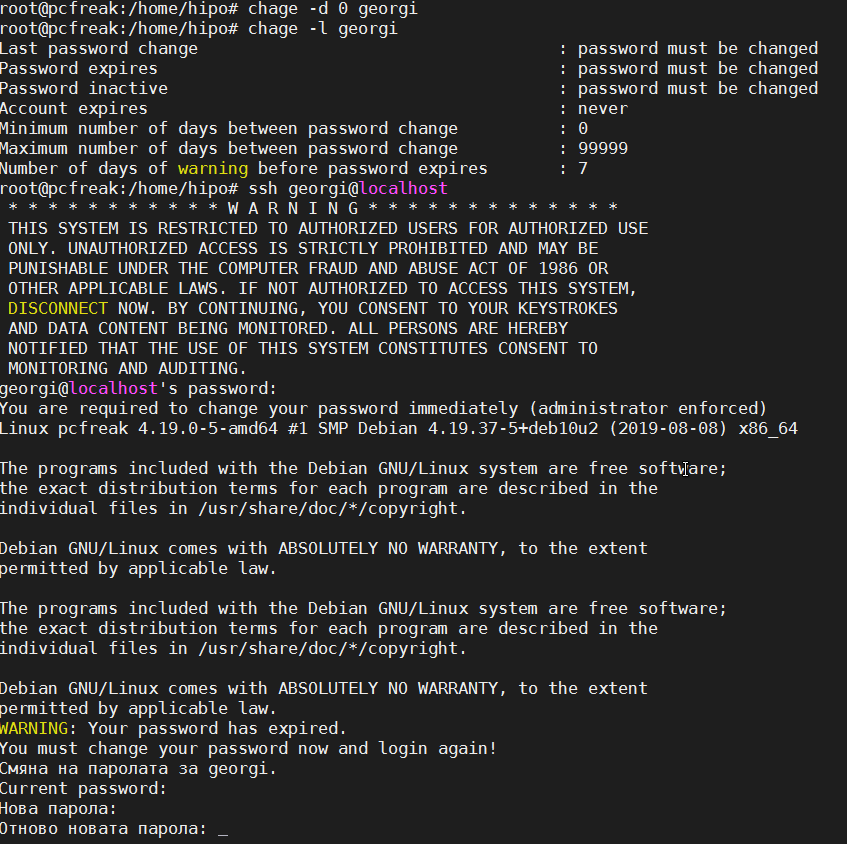
1. Force chage to make password expire on next user login for a new created user
 

# chage -d 0 {user-name} 


Below is a real life example
 

chage-force-user-account-password-expiry-linux


2. Get information on when account expires


[hipo@linux ~]$ chage -l hipo
Last password change                                    : Apr 03, 2020
Password expires                                        : Jul 08, 2020
Password inactive                                       : never
Account expires                                         : never
Minimum number of days between password change          : 0
Maximum number of days between password change          : 90
Number of days of warning before password expires       : 14


3. Use chage to set user account password expiration

The most straight forward way to set an expiration date for an active user acct is with:


# chage -E 2020-08-16 username


To make the account get locked automatically if the password has expired and the user did not logged in to it for 2 days after its expiration.

# chage -I 2 username


– Set Password expire with Minimum days 7 (-n mindays 7), (-x maxdays 28) and (-w warndays 5)

# passwd -n 7 -x 28 -w 5 username

To check the passwod expiration settings use list command:

# chage -l username
Last password change                                    : юни 18, 2020
Password expires                                        : юли 16, 2020
Password inactive                                       : never
Account expires                                         : never
Minimum number of days between password change          : 7
Maximum number of days between password change          : 28
Number of days of warning before password expires       : 5


chage is a command is essential sysadmin command that is mentioned in every Learn Linux book out there, however due to its often rare used many people and sysadmins either, don't know it or learn of it only once it is needed. 
A note to make here is some sysadmins prefer to use usermod to set a password expire instead of chage.

usermod -e 2020-10-14 username


For those who wonder how to set password expiry on FreeBSD and other BSD-es is done, there it is done via the pw system user management tool as chage is not present there.


A note to make here is chage usually does not provide information for Linux user accounts that are stored in LDAP. To get information of such you can use ldapsearch with a query to the LDAP domain store with something like.
 

ldapsearch -x -ZZ -LLL -b dc=domain.com,dc=com objectClass=*


It is worthy to mention also another useful command when managing users this is getent used to get entries from Name Service Switch libraries. 
getent is useful to get various information from basic /etc/ stored db files such as /etc/services /etc/shadow, /etc/group, /etc/aliases, /etc/hosts and even do some simple rpc queries.

Linux: Compress website images for better responsiveness with Trimage Graphical tool

Tuesday, March 10th, 2020

trimage-compress-reduce-lossless-encoding-of-pictures-for-seo-linux-screenshot0

If you run a Website or a Blog with images sooner or later you will end up with in looking for better ways to optimize the SEO of the website. I had a small discussion today with a friend of mine Mitko Ivanov who is working as SEO consultant expert,  we had a small discussion on the good practice of optimizing website pictures to reduce the website opening time. Ingeral part of Website responsiveness is the time the Browser needs to fetch all the page Images. Thus if your site is with multiple images, like this blog here, picture comperssion is definitely something that could make miracles in how website visualize for end user and increase rank in Search Engines. The easiest way to compress images of an amateur website of course is to use external picture compression service such as tinypng.com, this requires no knowledge at any computer technology and you can do it easy, but the problem is it shares your image to the remote website used for conversion and I personally think this is not the best idea.
For WordPress website owners of course there is plenty of plugins such as eWWW Image Optimizer that does realtime reduce of size of picture by chunking out the unnecessery bits.
Alternative to especially for people who have a little bit of technical knowledge is is to use some command line tool as optipng together with some kind of shell for loopfor details see my previous article Optimize PNG images by compressing on GNU / Linux, FreeBSD server to Improve Website overall Performance.
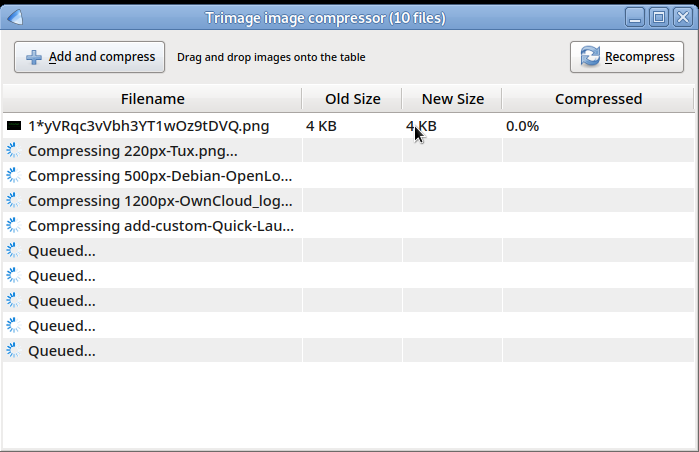
But for Many of Webmaster site owners this solution takes too much time as well many people just don't have even basic command line knowledge / are kinda of scared from the console but need to do image compression in a simple GUI way for those the good news are there is  Graphical cross-platform tool for losslessly optimizing PNG and JPG files for web. Trimage.
To use it it even unexperienced non enthusiast could simply roll out a new Virtual Machine on top of some VM Host machine such as Virtual Box and roll out some kind of Linux distribution via a graphical installer which is mega easy well guided and takes 15-20 minutes time.

Once machine is set-up either the Graphical Distribution tool for page management or via apt you can fetch Trimage. It is now existing in most Linux distributions so, to install it on any deb based distribution Debian / Mint / Ubuntu etc. do the usual:

# apt-get install –yes trimage


trimage-compress-reduce-lossless-encoding-of-pictures-for-seo-linux-screenshot1

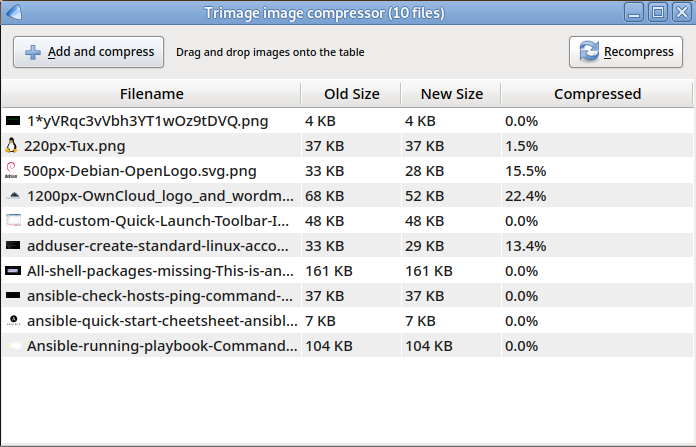
Once you have it, just move the pictures you want to compress for losslessly optimizing from your website to your Computer with Linux. Trimage GUI on the background will run commands optipng, pngcrush, advpng or jpegoptim, imageoptim and depending on the filetype remove the unnecessery file data that are appended by the program with which image was produced Gimp / Photoshop / Camera software etc. All image files are losslessy compressed on the highest available compression levels, and EXIF and other metadata is removed so you just have to recopy ( upload ) the optimized images back to the website.

trimage-compress-reduce-lossless-encoding-of-pictures-for-seo-linux-screenshot2

That's all folks Enjoy ! 🙂


Changing ’33 days has gone without being checked’ automated fsck filesystem check on Debian Linux Desktops – Reduce FS check waiting on Linux notebooks

Saturday, November 17th, 2012

Increasing default setting of automatic disk scheck on Debian Linux to get rid of annoying fsck waiting on boot / Less boot waiting by disabling automated fsck root FS checks

The periodic scheduled file system check that is set as a default behavior in Debian GNU / Linux is something very wise in terms of data security. However in terms of Desktop usability (especially for highly mobile users wtih notebooks like me) it's very inconvenient.

If you're a Linux laptop user with Debian GNU / Linux or other Linux distro, you certainly many times have experienced the long waiting on boot because of the routine scheduled fsck check:

/dev/sda5 has gone 33 days without being checked, check forced
/dev/sda5 |====== .....

In this little article, I will explain how to change the 33 mount times automated fsck filesystem  check on Debian GNU / Linux to avoid frequent fsck waitings. As long as I know this behaviour is better tailored on Ubuntu as Ubuntu developers, make Ubuntu to be targeting users and they have realized the 33 mounts auto check is quite low for 'em.

1. Getting information about current file system partitions with fdisk and mount

a) First it is good practice to check out all present system mountable ex3 / reiserfs file systems, just to give you an idea what you're doing:

noah:~#  fdisk -l

Disk /dev/sda: 160.0 GB, 160041885696 bytes
255 heads, 63 sectors/track, 19457 cylinders
Units = cylinders of 16065 * 512 = 8225280 bytes
Sector size (logical/physical): 512 bytes / 512 bytes
I/O size (minimum/optimal): 512 bytes / 512 bytes
Disk identifier: 0x2d92834c

   Device Boot      Start         End      Blocks   Id  System
/dev/sda1               1         721     5786624   27  Unknown
Partition 1 does not end on cylinder boundary.
/dev/sda2   *         721        9839    73237024    7  HPFS/NTFS
/dev/sda3            9839       19457    77263200    5  Extended
/dev/sda5            9839       12474    21167968+  83  Linux
/dev/sda6           12474       16407    31593208+  83  Linux
/dev/sda7           16407       16650     1950448+  82  Linux swap / Solaris
/dev/sda8           16650       19457    22551448+  83  Linux


Second, find out which one is your primary root filesystem, and  whether the system is partitioned to have /usr , /var and /home in separate partitions or not.

b) finding the root directory mount point ( / ):

noah:~ # mount |head -n 1
/dev/sda8 on / type ext3 (rw,errors=remount-ro)

c) looking up if /usr /var and /home in separate partitions exist or all is on the / partition

noah:~# mount |grep -i -E '/usr|/var/|/home'
/dev/sda5 on /home type ext3 (rw,errors=remount-ro)

2. Getting information about Linux mounted partitions filesystem parameters ( tune2fs )
 

noah:~# /sbin/tune2fs -l /dev/sda8

tune2fs 1.41.12 (17-May-2010)
Filesystem volume name:   <none>
Last mounted on:          <not available>
Filesystem UUID:          8e0901b1-d569-45b2-902d-e159b104e330
Filesystem magic number:  0xEF53
Filesystem revision #:    1 (dynamic)
Filesystem features:      has_journal ext_attr resize_inode dir_index filetype needs_recovery sparse_super large_file
Filesystem flags:         signed_directory_hash
Default mount options:    (none)
Filesystem state:         clean
Errors behavior:          Continue
Filesystem OS type:       Linux
Inode count:              1411680
Block count:              5637862
Reserved block count:     281893
Free blocks:              578570
Free inodes:              700567
First block:              0
Block size:               4096
Fragment size:            4096
Reserved GDT blocks:      1022
Blocks per group:         32768
Fragments per group:      32768
Inodes per group:         8160
Inode blocks per group:   510
Filesystem created:       Sun Jun 22 16:47:48 2008
Last mount time:          Thu Nov 15 14:13:10 2012
Last write time:          Tue Nov 13 13:39:56 2012
Mount count:              6
Maximum mount count:      33
Last checked:             Tue Nov 13 13:39:56 2012
Check interval:           15552000 (6 months)
Next check after:         Sun May 12 14:39:56 2013
Reserved blocks uid:      0 (user root)
Reserved blocks gid:      0 (group root)
First inode:              11
Inode size:              256
Journal inode:            8
First orphan inode:       595996
Default directory hash:   tea
Directory Hash Seed:      2f96db3d-9134-492b-a361-a873a0c8c3c4
Journal backup:           inode blocks


noah:~# /sbin/tune2fs /dev/sda5

tune2fs 1.41.12 (17-May-2010)
Filesystem volume name:   <none>
Last mounted on:          <not available>
Filesystem UUID:          26aa6017-e675-4029-af28-7d346a7b6b00
Filesystem magic number:  0xEF53
Filesystem revision #:    1 (dynamic)
Filesystem features:      has_journal ext_attr resize_inode dir_index filetype needs_recovery sparse_super large_file
Filesystem flags:         signed_directory_hash
Default mount options:    (none)
Filesystem state:         clean
Errors behavior:          Continue
Filesystem OS type:       Linux
Inode count:              1324512
Block count:              5291992
Reserved block count:     264599
Free blocks:              412853
Free inodes:              1247498
First block:              0
Block size:               4096
Fragment size:            4096
Reserved GDT blocks:      1022
Blocks per group:         32768
Fragments per group:      32768
Inodes per group:         8176
Inode blocks per group:   511
Filesystem created:       Thu Jul 15 18:46:03 2010
Last mount time:          Thu Nov 15 14:13:12 2012
Last write time:          Thu Nov 15 14:13:12 2012
Mount count:              12
Maximum mount count:      27
Last checked:             Sat Nov 10 22:43:33 2012
Check interval:           15552000 (6 months)
Next check after:         Thu May  9 23:43:33 2013
Reserved blocks uid:      0 (user root)
Reserved blocks gid:      0 (group root)
First inode:              11
Inode size:              256
Required extra isize:     28
Desired extra isize:      28
Journal inode:            8
First orphan inode:       1032306
Default directory hash:   half_md4
Directory Hash Seed:      8ef0fe5a-43e3-42bf-a1b9-ae6e1606ecd4
Journal backup:           inode blocks
 

As you see from above paste from my notebook, there is a plenty of options you can tweak in a filesystem.. However as the aim of my article is not to be a FS tweaking guide I will stick only to the important for me  which is Mount Count:

noah:~#  tune2fs -l /dev/sda5|grep -i -E 'mount count|Last checked'
Mount count:              12
Maximum mount count:      27
Last checked:             Sat Nov 10 22:43:33 2012

As you see 'Mount Count: 12', indicates there are 12 mounts of filesystem /dev/sda5 since the last time it was fsck-ed.
'Maximum mount count: 27' set for this filesystem indicates that after 27 times mount is done more than 27 times, a fsck check has to be issued. In other words after 27 mounts or re-mounts of /dev/sda5 which mostly occur after system reboot on system boot time.

Restarting system is not a common on servers but with the increased number of mobile devices like notebooks Android tablets whatever 27 restarts until fsck is too low. On the other hand filesystem check every now and then is a necessity as mobility increases the possibility for a physical damage of the Hard Disk Drive.

Thus my person view is increasing 'Maximum mount count:' 27 to 80 is much better for people who move a lot and restart laptop at least few times a day. Increasing to 80 or 100 times, means you will not have to wait for a file system fsck every week (6, 7 days),. for about at 8-10 minutes (whether on newer hard disks notebooks with 500 GB space and more), it might even take 15 – 20 minutes.
I switch on and off my computer 2 to 3 times a day, because I move from location to location. Whether maximum mount count is 80, this means a FSCK will be ensued every 40/2 = 40 days or so which is quite a normal timing for a Scheduled filesystem integrity check.

noah:~# tune2fs -c 80 -i 80 /dev/sda8
tune2fs 1.41.12 (17-May-2010)
Setting maximal mount count to 80
Setting interval between checks to 6912000 seconds
 

-c argument sets (-c max-mount-counts)

-i sets interval betweenchecks (-i  interval-between-checks[d|m|w] - days, months, weeks)

You can consequentially, check approximately, when the next ext3 FS check will happen with:

noah:~# tune2fs -l /dev/sda8 |grep -i 'check'
Last checked:             Tue Nov 13 13:39:56 2012
Check interval:           6912000 (2 months, 2 weeks, 6 days)
Next check after:         Fri Feb  1 13:39:56 2013
 

For people, who want to completely disable periodic Linux FSCK chcks and already use some kind of Backup automated solution (Dropbox, Ubuntu One …), that makes a backup copy of their data on a Cluster / Cloud – as Clusters are fuzzy called nowadays):

noah:~# tune2fs -c 0 -i 0 /dev/sda8
tune2fs 1.41.12 (17-May-2010)
Setting maximal mount count to -1
Setting interval between checks to 0 seconds

Again if you don't do a regular backup of your filesystem NEVER EVER do this BEWARE !

To be 100% sure, /dev/sda8 periodic filesystem will not happen again issue:

tune2fs -l /dev/sda8 |grep -i -E 'mount|check'
Last mounted on:          <not available>
Default mount options:    (none)
Last mount time:          Thu Nov 15 14:13:10 2012
Mount count:              6
Maximum mount count:      -1
Last checked:             Tue Nov 13 13:39:56 2012
Check interval:           0 (<none>)
 

By the way it is intestesting to mention Mount Count and Maximum Mount Count FS variables are set during initial creation of the filesystem with mkfs.ext3, in Debian and derivative distros this is done by the Debian Installer program. On Fedora and CentOS and most of other RPM based distros except SuSE by Anaconda Installer prog.

As of time of writing this article, for custom created filesystems with mkfs.ext3 Maximum mount count is     27.

BTW on CentOS, developers has by default set the Maximum mount count to beset to infinitive value:

/sbin/tune2fs -l /dev/sda1|grep -i 'mount count'
Mount count:              39

Maximum mount count:      -1
The same 'deskop wise' behavior of Maximum mount count: -1 is set by default also on Fedora and RHEL. Meaning RPM distro users are free of this annoyance.

3. Remove fsck filesystem check on boot in /etc/fstab
 

Usually Desktop and laptop Linux users, would not need do that but it is a good information to know.

/etc/fstab by default sets  the filesystems to be checked for bad blocks in case  if the system was shutdown due to electricity failure or hang-up, left without proper un-mounting. Though, sometimes this is very helpful as it fixes improperly complete writing on the HDD, those who administrate servers knows how annoying it is to be asked for a root password input on the physical console, whether the system fails to boot waiting for password input.
In remotely administrated servers it makes things even worser as you have to bother a tech support guy to go to the system and input the root password and type fsck /dev/whatever command manually. With notebooks and other Desktops like my case it is not such a problem to just enter root password but it still takes time. Thus it is much better to just make this fsck test filesystem on errors to be automatically invoked on filesystem errors.

A standard default records in /etc/fstab concerning root filesystem and others is best to be something like this:

/dev/sda8       /               ext3    errors=remount-ro 0       1
UUID=26aa6017-e675-4029-af28-7d346a7b6b00       /home           ext3    errors=remount-ro 0     1

The 1's in the end of each line instruct filesystems to be automatically checked with no need for user interaction in case of FS mount errors.

Some might want to completely disable, remount read only and drop into single user mode though this is usually not a good idea, to do so:

/dev/sda8       /               ext3    errors=remount-ro 0       0
UUID=26aa6017-e675-4029-af28-7d346a7b6b00       /home           ext3    errors=remount-ro 0     0


4. Forcing check on next reboot in case you suspect (bad blocks) or inode problems with filesystem

If you're on Linux hosts which for some reason you have disabled routine fsck it is useful to know about the existence of:

 /forcefcsk file

Scheduling a reboot nomatter, what settings you have for FS can be achieved by simply creating forcefsck in / i.e.:

noah:~# touch /forcefsck


5. Force the server to not fsck on next reboot

noah:~# /sbin/shutdown -rf now

The -f flag  tells to skip the fsck for all file systems defined in /etc/fstab during the next reboot.Unlike using tune2fs to set permanent reboot behavior it only takes effect during next boot. 

Saving multiple passwords in Linux with Revelation and Keepass2 – Keeping track of multiple passwords

Thursday, October 17th, 2013

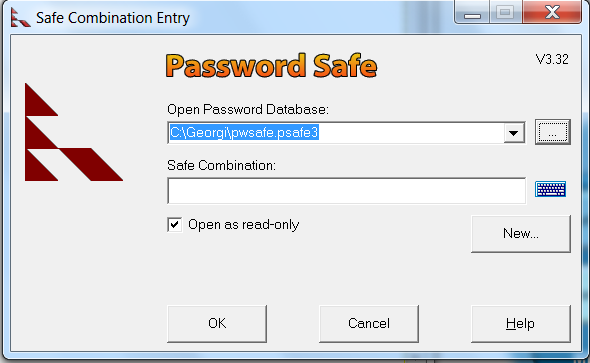
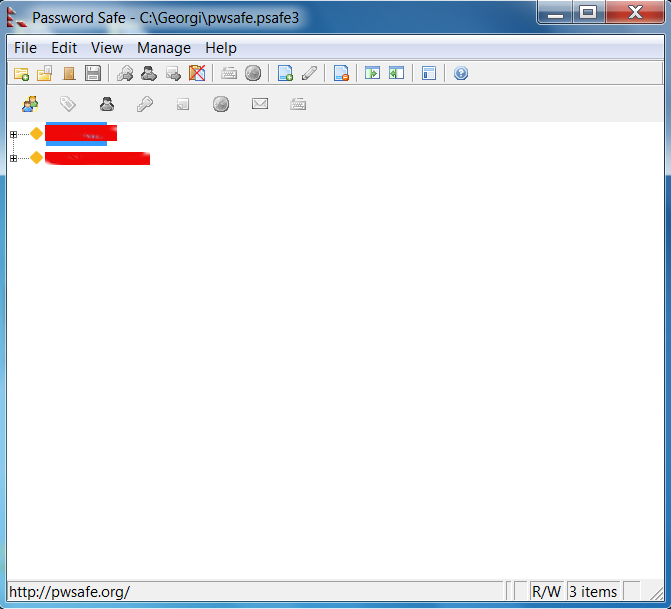
System Administrators who use MS Windows to access multiple hosts in big companies like HP or IBM certainly use some kind of multiple password manager like PasswordSafe.

Keep multiple passwords safe in Microsoft Windows 7 passwordsafe with masterpassword

When number of passwords you have to keep in mind grows significantly using something like PasswordSafe becomes mandatory. Same is valid also for valid for system administrators who use GNU / Linux as a Desktop environment to administer thousands or hundreds of servers. I'm one of those admins who for years use Linux and until recently I kept logging all my passwords in separate directory full with text files created with vim (text editor). As the number of passwords and accesses to servers and web interfaces grow up dramatically as well as my requirement for security raised up I wanted to have my passwords secured being kept encrypted on my hard drive. For those who never use PasswordSafe the idea of program is to store all passwords you have in encrypted database which can be only opened through PasswordSafe by providing a master password.

passwordsafe on microsoft windows keep in order multiple passwords manager

Of course having one master password imposes other security risks as someone who knows the MasterPass can easily access all your passwords anyways for now such level of security perfectly fits my needs.

PasswordSafe is since recently Open Source so there is a Linux port, but the port is still in beta and though I tried hard to install it using provided .deb binaries as well as compile from source, I finally give it up. And decided to review what kind of password managers are available in Debian Wheezy's ports.

Here are those I found with;

apt-cache search password|grep -i manager

cpm – Curses based password manager using PGP-encryption
fpm2 – password manager with GTK+ 2.x GUI
gringotts – secure password and data storage manager
kedpm – KED Password Manager
kedpm-gtk – KED Password Manager
keepass2 – Password manager
keepassx – Cross Platform Password Manager
kwalletmanager – secure password wallet manager
password-gorilla – cross-platform password manager
revelation – GNOME2 Password manager

I didn't have the time to test each one of them, so I installed and checked only those which seemed more reliable, i.e.:
keepass2 and revelation

# apt-get install –yes fpm2 keepass2 revelation

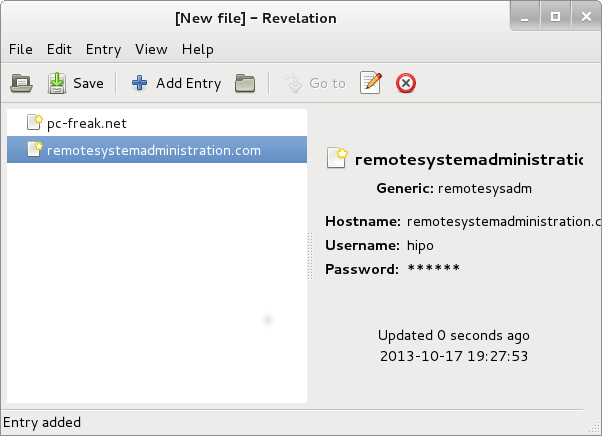
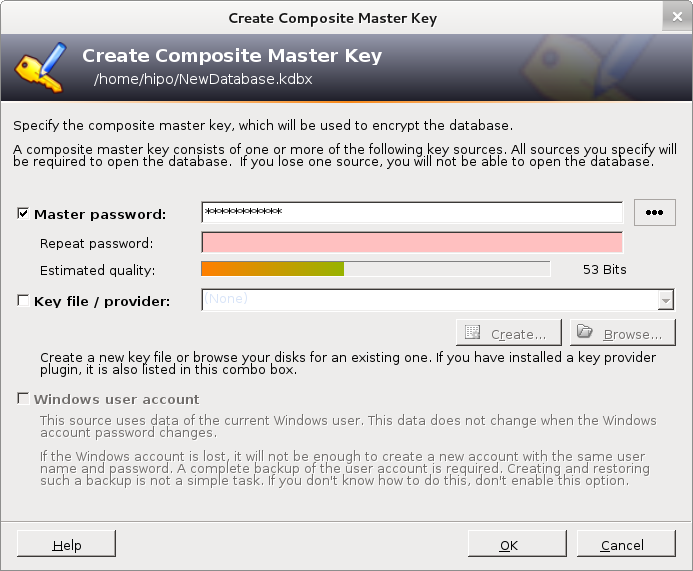
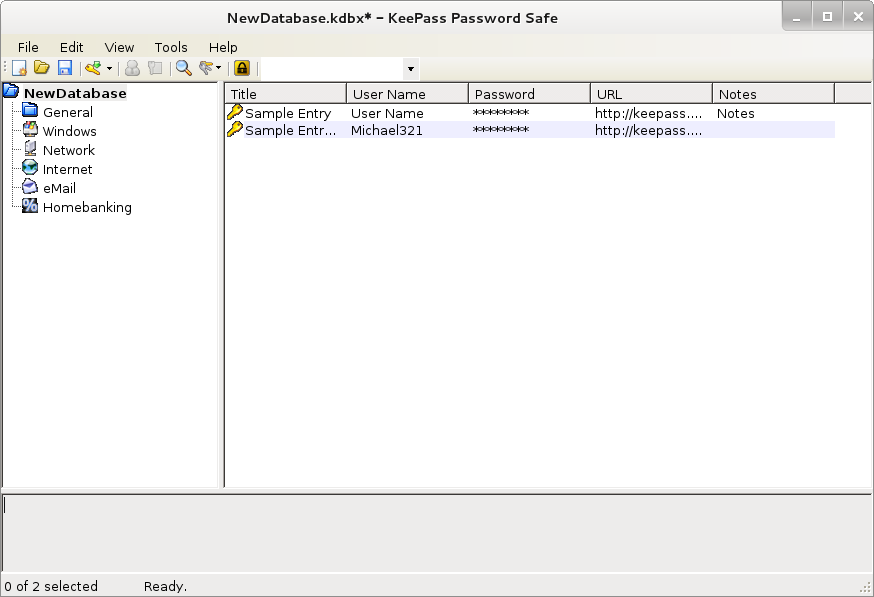
Below is screenshot of each one of managers:

Revelation Linux Gnome graphic password manager program

Revelation – GNOME Password Manager

keepass2 Linux gui password manager screenshot Debian - graphic manager for storing passwords

kde password safe gui program Linux Debian screenshot

KDE QT Interface Linux GUI Password Manager (KeePass2)

With one of this tools admin's life is much easier as you don't have to get crazy and remember thousands of passwords.
Hope this helps some admin out there! Enjoy ! 🙂