Posts Tagged ‘com’

Weblogic – How to change / remove IP/hostname quick and dirty howto

Wednesday, March 11th, 2015

Oracle-Weblogic-Server-logo-how-to-change-ip-hostname-weblogic-quick-and-dirty-howto

This is just quick & dirty doc on how to change/remove IP/host on Oracle WebLogic Application server

– In logs the Error message will be message like:


<Oct 21, 2013 1:06:51 AM SGT> <Warning> <Security> <BEA-090504> <Certificate chain received from cluster2.yourdomain.com – 192.168.1.41 failed hostname verification check. Certificate contained cluster1.yourdomain.com but check expected cluster2.yourdomain.com>


Solution:

On web console – change/remove IP/hostname


As root / admin supersuser:


– Stop Weblogic Webserver 

As this is RHEL Linux, to stop WLS use standard init script start / stop service command


service wls stop


– As Application user create directory where new key will be created


mkdir /home/uwls11pp/tmp_key
cd /home/uwls11pp/tmp_key


– Make backup of current JKS (Keystore File)


cp /WLS/app/oracle/wls1036/wlserver_10.3/server/lib/DemoIdentity.jks /WLS/app/oracle/wls1036/wlserver_10.3/server/lib/DemoIdentity.jks_11032015


– Execute set env . script


/WLS/app/oracle/wls1036/wlserver_10.3/server/bin/setWLSEnv.sh


– Copy & paste output from script above and export variables


export CLASSPATH;
export PATH;


– Check old certificate in keystore


/WLS/app/oracle/jdk1.7.0_25/bin/keytool -list -v -keystore /WLS/app/oracle/wls1036/wlserver_10.3/server/lib/DemoIdentity.jks  -storepass DemoIdentityKeyStorePassPhrase


– Delete old Weblogic keystore JKS file


/WLS/app/oracle/jdk1.7.0_25/bin/keytool -delete -alias demoidentity -keystore /WLS/app/oracle/wls1036/wlserver_10.3/server/lib/DemoIdentity.jks -storepass DemoIdentityKeyStorePassPhrase


– Check wether proper Java version is used


java -version


– Get hostname from hosts file


cat /etc/hosts


#Replace weblogic1 with your FQDN (Fully Qualified Domain Name) – this step will create new certificate with new hostname


java utils.CertGen -cn weblogic1 -keyfilepass DemoIdentityPassPhrase -certfile newcert -keyfile newkey


#Import certificate to “official” keystore


java utils.ImportPrivateKey -keystore /WLS/app/oracle/wls1036/wlserver_10.3/server/lib/DemoIdentity.jks -storepass DemoIdentityKeyStorePassPhrase -keyfile newkey.pem -keyfilepass DemoIdentityPassPhrase -certfile newcert.pem -alias demoidentity


#Recheck once again if correct certificate is in use


/WLS/app/oracle/jdk1.7.0_25/bin/keytool -list -v -keystore /WLS/app/oracle/wls1036/wlserver_10.3/server/lib/DemoIdentity.jks  -storepass DemoIdentityKeyStorePassPhrase


– Finally issue as root user restart Weblogic server again


service wls start

How to install nginx webserver from source on Debian Linux / Install Latest Nginx on Debian

Wednesday, March 23rd, 2011

Nginx install server logo
If you're running a large website consisting of a mixture of php scripts, images and html. You probably have noticed that using just one Apache server to serve all the content is not that efficient

Each Apache child (I assume you're using Apache mpm prefork consumes approximately (20MB), this means that each client connection would consume 20 mb of your server memory.
This as you can imagine is truly a suicide in terms of memory. Each request for a picture, css or simple html file would ask Apache to fork another process and will consume (20mb of extra memory form your server mem capacity)!.

Taking in consideration all this notes and the need for some efficiency here, the administrator should normally think about dividing the processing of the so called static content from the dynamic content served on the server.

Apache is really a nice webserver software but with all the loaded modules to serve dynamic content, for instance php, cgi, python etc., it's becoming not the best solution for handling a (css, javascript, html, flv, avi, mov etc. files).

Even a plain Apache server installation without (libphp, mod_rewrite mod deflate etc.) is still not dealing efficiently enough with the aforementioned static files content

Here comes the question if Apache is not that quick and efficient in serving static files, what then? The answer is caching webserver! By caching the regular static content files, your website visitors will benefit by experiencing shorter webserver responce files in downloading static contents and therefore will generally hasten your website and improve the end user's experience.

There are plenty of caching servers out there, some are a proprietary software and some are free software.

However the three most popular servers out there for static file content serving are:

  • Squid,
  • Varnish
  • Nginx

In this article as you should have already found out by the article title I'll discuss Nginx

You might ask why exactly Nginx and not some of the other twos, well simply cause Squid is too complicated to configure and on the other hand does provide lower performance than Nginx. On the other hand Varnish is also a good solution for static file webserver, but I believe it is not tested enough. However I should mention that my experience with testing varnish on my own home router is quite good by so far.

If you're further interested into varhisn cache I would suggest you checkout www.varhisn-cache.org .

Now as I have said a few words about squid and varhisn let's proceed to the essence of the article and say few words about nginx

Here is a quote describing nginx in a short and good manner directly extracted from nginx.com

nginx [engine x] is a HTTP and reverse proxy server, as well as a mail proxy server written by Igor Sysoev. It has been running for more than five years on many heavily loaded Russian sites including Rambler (RamblerMedia.com). According to Netcraft nginx served or proxied 4.70% busiest sites in April 2010. Here are some of success stories: FastMail.FM, WordPress.com.

By default nginx is available ready to be installed in Debian via apt-get, however sadly enough the version available for install is pretty much outdated as of time of writting the nginx debian version in lenny's deb package repositories is 0.6.32-3+lenny3

This version was release about 2 years ago and is currently completely outdated, therefore I found it is not a good idea to use this old and probably slower release of nginx and I jumped further to install my nginx from source:
Nginx source installation actually is very simple on Linux platforms.

1. As a first step in order to be able to succeed with the install from source make sure your system you have installed the packages:

debian:~# apt-get install libpcre3 libpcre3-dev libpcrecpp0 libssl-dev zlib1g-dev build-essential

2. Secondly download latest nginx source code tarball

Check out on http://nginx.com/download the latest stable release of nginx and further issue the commands below:

debian:~# cd /usr/local/src
debian:/usr/local/src# wget http://nginx.org/download/nginx-0.9.6.tar.gz

3.Unarchive nginx source code

debian:/usr/local/src#tar -zxvvf nginx-0.9.6.tar.gz
...

The nginx server requirements for me wasn't any special so I proceeded and used the nginx ./configure script which is found in nginx-0.9.6

4. Compline nginx server

debian:/usr/local/src# cd nginx-0.9.6
debian:/usr/local/src/nginx-0.9.6# ./configure && make && make install
+ Linux 2.6.26-2-amd64 x86_64
checking for C compiler ... found
+ using GNU C compiler
+ gcc version: 4.3.2 (Debian 4.3.2-1.1)
checking for gcc -pipe switch ... found
...
...

The last lines printed by the nginx configure script are actually the major interesting ones for administration purposes the default complation options in my case were:

Configuration summary
+ using system PCRE library
+ OpenSSL library is not used
+ md5: using system crypto library
+ sha1 library is not used
+ using system zlib library

nginx path prefix: "/usr/local/nginx"
nginx binary file: "/usr/local/nginx/sbin/nginx"
nginx configuration prefix: "/usr/local/nginx/conf"
nginx configuration file: "/usr/local/nginx/conf/nginx.conf"
nginx pid file: "/usr/local/nginx/logs/nginx.pid"
nginx error log file: "/usr/local/nginx/logs/error.log"
nginx http access log file: "/usr/local/nginx/logs/access.log"
nginx http client request body temporary files: "client_body_temp"
nginx http proxy temporary files: "proxy_temp"
nginx http fastcgi temporary files: "fastcgi_temp"
nginx http uwsgi temporary files: "uwsgi_temp"
nginx http scgi temporary files: "scgi_temp"

If you want to setup nginx server to support ssl (https) and for instance install nginx to a different server path you can use some ./configure configuration options, for instance:

./configure –sbin-path=/usr/local/sbin –with-http_ssl_module

Now before you can start the nginx server, you should also set up the nginx init script;

5. Download and set a ready to use script with cmd:

debian:~# cd /etc/init.d
debian:/etc/init.d# wget https://www.pc-freak.net/files/nginx-init-script
debian:/etc/init.d# mv nginx-init-script nginx
debian:/etc/init.d# chmod +x nginx

6. Configure Nginx

Nginx is a really easy and simple server, just like the Russians, Simple but good!
By the way it's interesting to mention nginx has been coded by a Russian, so it's robust and hard as a rock as all the other Russian creations 🙂
Nginx configuration files in a default install as the one in my case are to be found in /usr/local/nginx/conf

In the nginx/conf directory you're about to find the following list of files which concern nginx server configurations:

deiban:/usr/local/nginx:~# ls -1
fastcgi.conf
fastcgi.conf.default
fastcgi_params
fastcgi_params.default
koi-utf
koi-win
mime.types
mime.types.default
nginx.conf
nginx.conf.default
scgi_params
scgi_params.default
uwsgi_params
uwsgi_params.default
win-utf

The .default files are just a copy of the ones without the .default extension and contain the default respective file directives.

In my case I'm not using fastcgi to serve perl or php scripts via nginx so I don't need to configure the fastcgi.conf and fastcgi_params files, the scgi_params and uwsgi_params conf files are actually files which contain nginx configuration directives concerning the use of nginx to process SSI (Server Side Include) scripts and therefore I skip configuring the SSI conf files.
koi-utf and koi-win are two files which usually you don't need to configure and aims the nginx server to support the UTF-8 character encoding and the mime.types conf is a file which has a number of mime types the nginx server will know how to handle.

Therefore after all being said the only file which needs to configured is nginx.conf

7. Edit /usr/local/nginx/conf/nginx.conf

debian:/usr/local/nginx:# vim /usr/local/nginx/conf/nginx.conf

Therein you will find the following default configuration:

#gzip on;

server {
listen 80;
server_name localhost;

#charset koi8-r;

#access_log logs/host.access.log main;

location / {
root html;
index index.html index.htm;
}
#error_page 404 /404.html;

# redirect server error pages to the static page /50x.html
#
error_page 500 502 503 504 /50x.html;
location = /50x.html {
root html;
}

In the default configuration above you need to modify only the above block of code as follows:

server {
listen 80;
server_name yoursitedomain.com;

#charset koi8-r;

#access_log logs/access.log main;

location / {
root /var/www/yoursitedomain.com/html;
index index.html index.htm;
}

Change the yoursitedomain.com and /var/www/yoursitedomain.com/html with your directory and website destinations.

8. Start nginx server with nginx init script

debian:/usr/local/nginx:# /etc/init.d/nginx start
Starting nginx:

This should bring up the nginx server, if something is miss configured you will notice also some error messages, as you can see in my case in above init script output, thanksfully there are no error messages.
Note that you can also start nginx directly via invoking /usr/local/nginx/sbin/nginx binary

To check if the nginx server has properly started from the command line type:

debian:/usr/local/nginx:~# ps ax|grep -i nginx|grep -v grep
9424 ? Ss 0:00 nginx: master process /usr/local/nginx/sbin/nginx
9425 ? S 0:00 nginx: worker process

Another way to check if the web browser is ready to serve your website file conten,t you can directly access your website by pointing your browser to with http://yoursitedomain.com/, you should get your either your custom index.html file or the default nginx greeting Welcome to nginx

9. Add nginx server to start up during system boot up

debian:/usr/local/nginx:# /usr/sbin/update-rc.d -f nginx defaults

That's all now you have up and running nginx and your static file serving will require you much less system resources, than with Apache.
Hope this article was helpful to somebody, feedback on it is very welcome!

Websites I view per daily basis

Friday, January 11th, 2008

milw0rm.com linux-bg.org packetstormsecurity.nl securityfocus.com debian-administration.org sciencedaily.com httpd.apache.org lwn.net php.net freebsd.org news.bg That’s most of which I can think right now ..END—–

What causes the “nRRPResponseCode 531” error, A fix to the nasty “nRRPResponseCode 531” error during domain name DNS change

Tuesday, March 16th, 2010

For two days now, I’m trying to set a custom DNS server for a (.net) domain purchased by gigaspark.com . Every time I try to change the nameservers for the (.net) domain an irritating error pops up, the error reads “nRRPResponseCode 531” and I cannot set my custom configured Bind DNS server for the (.net) domain. I believe the same problem happens also with (.com) domains.

In this relation, I tried googling online searching and searching what might be the stupid cause of the “nRRPResponseCode 531” error that prevents me from setting my custom configured Bind domain name servers to mydomain.net . I also contacted the support team from gigaspark multiply until I found out what is the trouble cause.
In short the “nRRPresponseCode 531” is an error that indicates your .net or .com domain is not figuring in VeriSign’s GRS domain database .
The Verisign GRS domain database contains a list of DNS servers that are correctly configured and trustworthy enough. I’ve seen many people online suffering from the same terrible error,
who pointed out that the error is caused by misconfigurations in the Bind DNS server or the zone file for the problematic domain name, though I’ve looked through multiple times to possibly track the problem in both my major named.conf and the rest of bind’s configuration files as well as in the domain name I had registered mydomain.net ,there was nothing misconfigured or unusual.
I have to admit, this problem is really odd, because I was able to successfully set the same custom configured Bind DNS server for mydomain.info and mydomain.biz but, yet whenever trying to set the same Bind DNS for mydomain.net I came across the shitty nrRRPResponseCode 531 .
Thanks to the kind help of Gigaspark’s tech support together with some google posts on the matter I figured out Gigaspark are using ENOM – a major domain name registrar offering easy ways for an end domain providers to become their resellers.
It seems ENOM’s policy is enforces you as a domain name customer to register your full DNS domain name let’s say (ns1.mydns.com) in Verisign’s GRS domain database otherwise they refuse you the right to set yourself your ns1.mydns.com for your domain, because if the DNS domain name is not figuring in that database it’s not trust worthy!
I believe many people would agree with me this is a real shit! You pay for your domain and you should have the full rights over it.
I mean you should be allowed to set whatever DNS domain name even, if it’s not an existing one and they shouldn’t bother you with stupid DNS domain name registrations in stupid Verisign GRS databases and so on!
Now you probably wonder what is the required steps to take to be able to register the domain in that Verisign GRS database in order to be able to set your ns1.mydomain.com as a default DNS server for your mydomainname.com .
Well you have to contact your domain registrar, let’s say gigaspark.com .
You log to your account on tucowsdomains for your domain mydomain.com … then you find something similar to: “register a nameserver” among the overall menus options.
Then you have to register your nameserver ns1.mydomain.com. Then you wait between 24 up to 48h and then you have to test if your NS has already properly entered the Verisign GRS database you have to visit on Verisign GRS Whois .
Hopefully the guys from Verisign GRS would approve your DNS host to enter there database and then at last you might be able to set in your DNS host as a preferred DNS for your (.net) / (.com?) domain name.
So go back to gigaspark’s slovenian interface and try changing the DNSes once again! If you’re lucky with God’s help (for sure), you would be at last be successful in setting your BIND name server as a primary DNS.

Updating Flash Player on Debian GNU / Linux / Keeping Flash player up-to-date with update-flashplugin-nonfree

Saturday, November 10th, 2012


Update flash player on Debian GNU / Linux update-flashplugin-nonfree macromedia flash logo

Assuming you have previously installed and running Adobe Flash Player – package flashplugin-nonfree i.e.:

debian:~# dpkg -l |grep -i flashplugin-nonfree
ii flashplugin-nonfree 1:2.8.3 Adobe Flash Player - browser plugin

and you want to Update flash player to the latest provided version for Linux, there is an update script part of flashplugin-nonfree, package /usr/sbin/update-flashplugin-nonfree. The script updates flash player to latest Linux version avaiable fetching the version from macromedia's website in a .tar.gz and untarring it substituting the old flash library.

To update your Debian FlashPlayer, launch as superuser:

debian:~# update-flashplugin-nonfree --install
--2012-11-10 00:51:48-- http://fpdownload.macromedia.com/get/flashplayer/pdc/11.2.202.251/install_flash_player_11_linux_x86_64.tar.gz Resolving fpdownload.macromedia.com... 92.123.98.70 Connecting to fpdownload.macromedia.com|92.123.98.70|:80... connected. HTTP request sent, awaiting response... 200 OK Length: 7228964 (6.9M) [application/x-gzip] Saving to: “./install_flash_player_11_linux_x86_64.tar.gz”

0K .......... .......... .......... ..........
.......... 0% 69.5K 1m41s 50K .......... .......... .......... ..........
.......... 1% 91.1K 88s 100K .......... .......... .......... ..........
.......... 2% 70.8K 91s ........
..........

After a while (usually up to a minute), update will be completed. Restart your browser of use IceWeasel, Epiphany, Opera, Chrome etc. and test it with About Flash Player Page and / or youtube. You should be with latest Flash Linux version now.

It might be a good idea to automate future flash player updates via a cron job, I think launching the update script every two weeks is a good timing;

To do so add to root user cron like so:

10,27 * * * * /usr/sbin/update-flashplugin-nonfree –install -q 2>&1 >/dev/null

If you still haven't configured your pulseaudio to play multiple sound streams do that too.

I've seen also on Debian's Wiki FlashPlayer page, mentioning that on some systems after update to Flash Player 11 there might be laggy performance issues, due to disabled hardware acceleration in Flash Player > v. 10. If that's the case with you you might also need to put a mss.cfg like this one to /etc/adobe/mss.cfg

# wget -q https://www.pc-freak.net/files/adobe-flash-player-config-for-hardware-acceleration-mms.cfg
# mv adobe-flash-player-config-for-hardware-acceleration-mms.cfg /etc/adobe/mms.cfg

Finally if you experience, some flash video lagging issues, you could try experimenting with OverrideGPUValidation=true flash setting which in some cases improves Linux flash video performance

Firefox users might be also interested to check out www.mozilla.org/en-US/plugincheck – the URL provides information on essential Firefox video plugins and whether plugins installed are up2date or prone to remote web exploitation vulnerability.

Frogatto & Friends – One of the TOP 10 Arcade Free Software & Open Source Games for GNU / Linux and FreeBSD

Friday, December 16th, 2011

Frogatto old-school 2d jump and run free software game for GNU / Linux and FreeBSD
1. Frogatto & Friends – Is an Indian Free Software (Open Source) game in the spirit of old-school jump’en runs like Commander Keen, Prehistoric, Jazz Jack Rabbit

The game is really entertaining, the graphics looks approximately nice, the music is awesome, the gamelplay is good even though after some point in the game the moment with “where should I go now, I can’t find exit” comes through and it gets boring.

Generally if you compare with all the existing jump and run arcade games free software games available for Linux and FreeBSD the game will definetely arrange itself in the list of TOP 10 free software Arcade Games
and therefore its my own believe that Frogatto is a game that every GNU / Linux and FreeBSD desktop should have in Application -> Games GNOME menu.

Frogatto is rich of levels, enemies obstacles objects, places to visit (which puts it ahead of many of the linux arcade games which often miss enough game levels, has a too short game plots, or simply miss overall game diversity).

Frogatto linux freebsd game bombing airplaine

The game’s general look & feel is like a professional game and not just some tiny free software arcade, made by its authors for the sake to learn some programming, graphics or music creation.
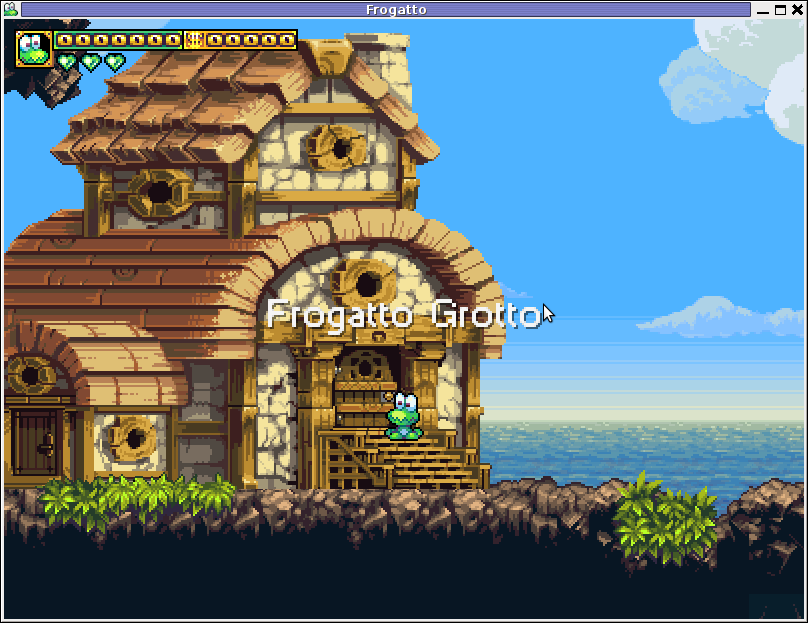
Frogatto door leading to Grotto

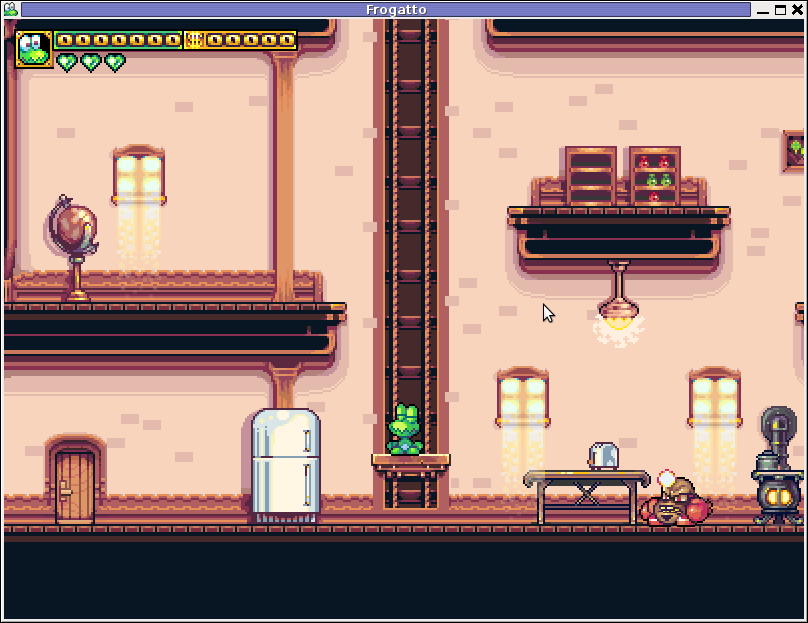
Frogatto Free Software game wood screenshot

Besides that Frogatto & Friends is multi-platform supporting all the major operating systems.
Game supports:
 

  • Windows
  • Mac
  • iPhone
  • Debian GNU / Linux
  • FreeBSD

The game source code is also available on Frogatto.com – The Game’s Official website

The game is available as a deb package in Debian and Ubuntu GNU / Linuxes so to install on those deb based distributions, simply use apt:

debian:~# apt-get install frogatto
...

The above command will install two packages frogatto (containing the game’s main executable binary) and frogatto-data containinng all the game textures, levels, graphics, music etc.

BTW the package saparation on a gamename and gamename-data in Debian (for all those who have not still noticed), can be seen on most of the games with a game data that takes more disk space.

After the game is installed the only way to start the game is to run it manually through pressing ALT+F2 in GNOME or running the progrtam through gnome-terminal with cmd:

debian:~$ frogatto

Here are few more Frogatto gameplay screenshots:

Frogatto free open source game screenshot a game bad guy

Frogatto different level screenshot

I’ve noticed Frogatto is also available as an RPM package for Fedora Linux, as well as has a FreeBSD port in the /usr/ports/games/frogatto and this makes it easy to install on most free software OSes in the wild.

While checking frogatto.com , I found an interesting link to a website offering free graphics (pictures), textures and sounds for free and open source games for all those who hold interest into the development of Free Software & Open Source Games make sure you check OpenGameArt.org

OpenGameArt.org looks like a great initiative and will definitely be highly beneficial to the development of more and better FSOS Games so I wish them God speed with this noble initiative.

Frogatto is very suitable for growing kids since it doesn’t contain no violence and every now and then the main game actor the Frogatto Frog leads few lines English dialogues with some of the characters found in the quest.
For none speaking English countries, the game can help the kids to learn some basic english words and thus can help develop kids intellect and knowledge
And oh yeah one more criticism towards the game is the Enlish structure, it seems people who wrote the plot can work this out in the time to come. Many of the English sentences during dialogues the frog leads with the cranks he met does not sound like a common and sometimes even correct english / phrases.

Besides those little game “defect”, the game is pretty awesome and worthy to kill some time and relax from a long stressy day.

12 must have Joomla extension plugins / Essential modules for new Joomla CMS install

Thursday, June 16th, 2011

Joomla bundle of must have extensions picture

These days very often I have to install, plain new Joomla based websites. I’ve realized that since there is no structured guide to follow describing the most essential plugins that every new fresh new joomla installation is required to have.
Thus I took the time and wrote this post, as it will be useful to myself in my future new joomla based websites establishment, I also believe these guide will be useful to other Joomla enthusiasts or administrators in their daily work.

Below I will describe in short the installation, configuration and oddities I’ve faced during installment of the above described bundle of plugins on a plan Joomla 1.5 install.These article will walk through 12 joomla essential plugins that I believe every fresh Joomla installation should be equipped with.
Hope this guide will be helpful to you. Now let’s start it up:

1. JoomlaXplorer – A sophisticated web file explorer for Joomla

One of the basic modules, beneficial with a new joomla CMS install is Joomla Xptplorer . This module enables the joomla admin to browse files in a web file explorer, on the server where the joomla CMS is installed. Below you see how handy the joomla web explorer provided by the plugin is:
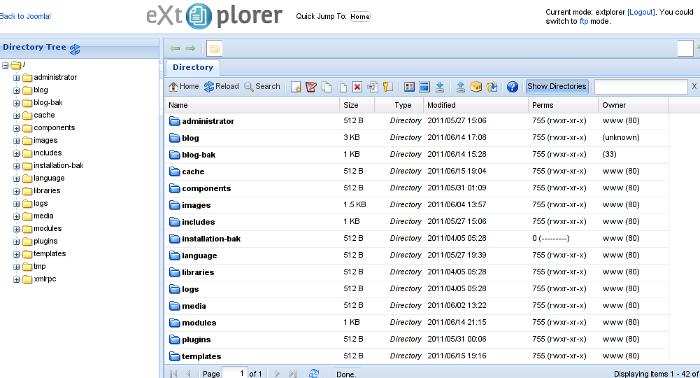
Joomla file explorer extplorer module

Installing and using the plugin is a piece of cake. To install the plugin:

a. download Joomla file Xplorer from here or from the official plugin website.

b. Install the plugin through the admin joomla menu:

Extensions -> Install/Uninstall

c. Start using the newly installed plugin by following to menus:

Components -> eXtplorer

2. JCrawler Generate easily sitemap.xml to aim the overall Joomla website SEO optimization

JCrawler logo plugin joomla

I have previously written a very through tutorial on how to install configure and generate website sitemap with Jcrawler module, You can read my article titled: How to build website sitemap.xml in Joomla here

3. sh404SEF – Make your Joomla links and content more user friendly

sh404sef Joomla Search Engine Optimization plugin

sh404SEF is a great Joomla plugin, which will seriously improve SEO and could contribute well for a website to be better indexed with major search engines.

I have previously written an article describing thoroughfully the install and use procedures for the module.
You can read the article Making your Joomla URLS Google friendly with sh404sef plugin / Simple Joomla link SEO here

4. Akeeba Backup Joomla solution

Akeeba backup Joomla Module

Installing a joomla backup solution is very essential if you does take care about your data, it often happens that server hard disk got crashes or a RAID massives got corrupted or some kind of other unexpected disaster hits the server. In these terrible times, having a website backup will save you nerves and data recovery funds, not to mention that in many cases data recovery is impossible.

Joomla has a very easy to use software for creating full website backup called Akeeba Backup

To start using the software one must:

a. Download Akeeba Backup and install it via:

Extensions -> Install/Uninstall

After the Akeeba Backup installation is over, to create your first backup, one needs to navigate to:

Components -> Akeeba Backup -> Backup Now

Each Akeeba backup (a version of the website’s files data and sql info) will be created in an archive file with the extension .jpa
The backup files are created under joomla’s website (main) root directory in directory location administrator/components/com_akeeba/backup

The Akeeba plugin also has capabilities to recover a (.jpa) backup restore point easily.
To recover a backup with the Akeeba plugin one needs to do it once again, via the plugin joomla web interface.
5. Google Analytics (place easy tracking code) in Joomla

Google Analytics Tracking Module for Joomla

a. Download the Google Analytics Tracking Module
The module is available from Joomla Extensions on joomla.org

At the current time of writting you need to download the analytics_tracking15,zip file

b. Install the Google Analytics Tracking Module;
Login as joomla admin and navigate to;

Extensions -> Install

Place the analytics_tracking15.zip url to the Install URL: field.
Again as of time of writting you need to place https://www.pc-freak.net/files/analytics_tracking15.zip;

c. Open the Module Manager

Extensions -> Module Manager

d. Click over Google Analytics Tracking Module
On the right pane you will notice in the Module Parameters the Analytics_uacct_code field. In the uacct_code field you need to paste your UA obtained from your created google-analytics account.
This code is usually something like UA-2101595-10
Now place your code their and press the save green button located near the right top of the screen. You should see the text in blue Item Saved which would indicate your UA code is stored already in the Google Analytics Tracking Module, now press the Cancel button located again on the right top.
As a last step before the Google analytics is set-up on the Joomla you need to enable the plugin to do you need to press over the tick left sided from the text reading Google Analytics Tracking Module in the Module Manager
e. Click over the Enabled button in Module Manager;
Google Analytics Tracking Module -> Enabled

6. Itprism (Facebook, Twitter etc.) Social Network share buttons Joomla plugin

ITPShare Large Social Buttons Joomla

a. to add the itpsocialbuttons to joomla Download the Itpsocialbuttons latest module files from http://itprism.com/free-joomla-extensions/social-buttons-plugin or use my mirrored module files below:

Download mod_itpsocialbuttons .zip file
Download plg_itpsocialbuttons .zip

After having the two files necessery to be installed to make the ITPSocialButtons appear on website, installation is done like with any other installation:

Extensions -> Install/Uninstall -> Upload Package File (Choose File)

Next its necessery to configure the plugin to do so, follow to menus:

Extensions -> Module Manager -> Share

You will notice the Share dialog in the list of Module Name column in Module Manager

Here is a screenshot on how the settings options for ITpsocialbuttons will look like:
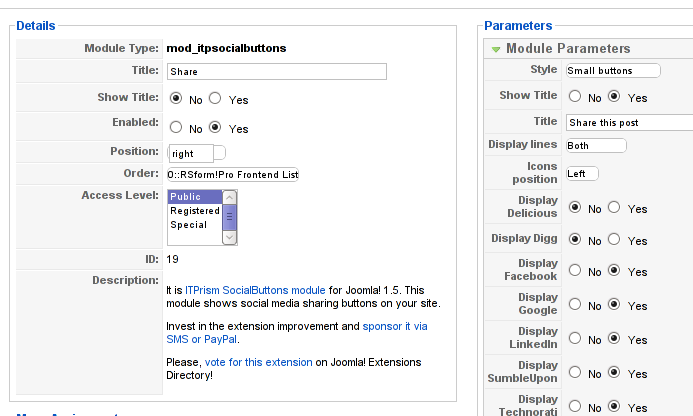
Mod ITpSocialButtons settings screen

The options which I personally changed was:

Show Title – I set this one to No as I wanted to omit the plugin title text to appear on my website.
Further on I’ve set the Enabled option to Yes to enable the plugin and choose the buttons Style option to be of a Small buttons type.
I’ve also found that the most suitable position for the Social Share buttons were to be of a right – Position .

Here is how the social network itprism share buttons looks like:

ITprism Joomla Social Share Plugin various button types

The plugin supports sharing of joomla pages to the following list of social networks:
 

  • Delicios.com
  • Digg.com
  • Facebook
  • Google Bookmarks
  • StumbleUpon
  • Technorati
  • Twitter
  • LinkedIn

The module configuration, also allows the user to configure the type of social network buttons, one wants to display on the website.

7. Joomla JCE Content Editor

This content editor is really awesome compared to the default editor TinyMCE. If you want to have an options rich content editor for Joomla, then this is the one for you 🙂
download JCE Content Editor here

After installing the JCE Joomla content editor in order to enable it as a default editor you need to go to the following location:

Site -> Global Configuration -> Default WYSIWYG Editor

There place on Editor TinyMCE and change it with Editor – JCE

Now go to edit some article, and you will see the difference in the editor 🙂

8. Add gallery Joomla capabilities with sigplus (Image Gallery Plus) and Very Simple Image Gallery

Image Gallery Plus sigplus Joomla Screenshot

Image Gallery Plus plugin (sigplus) gallery review screenshot

sigplus Image Gallery Plus is a straightforward way to add image or photo galleries to a Joomla article with a simple syntax. It takes a matter of minutes to set up a gallery but those who are looking for a powerful gallery solution will not be disappointed either: sigplus is suitable for both beginner and advanced users.

Download Sigplus Joomla Image Gallery plugin here
Using sigllus is quite easy all one has to do is use Joomla Media Manager from links:

Site -> Media Manager

Create new folder in the stories folder, let’s say New Pictures and further on use Media Manager to upload all desired pictures to be later displayed.

Being done with uploading the images you want to display, go to Article Manager :

Content -> Article Manager

From there choose your article where new uploaded pictures you want to display and type in the article:

{gallery}New Pictures{/gallery}.

Note that New Pictures is the directory just recently created as stated below, it’s important that there is no spacing between {gallery}and New Pictures, if one tries {gallery} New Pictures {/gallery} instead of {gallery}New Pictures{/gallery} an error will occur instead of the pictures being displayed in a scrolled gallery.

Sigplus Image Gallery has also a number of configuration options, which might make it look a bit more decent.
I have to say in my view the default way sigplus displays pictures is awful!

Another alternative if you don’t like Sigplus ‘s way of creating new galleries is to use Very Simple Image Gallery
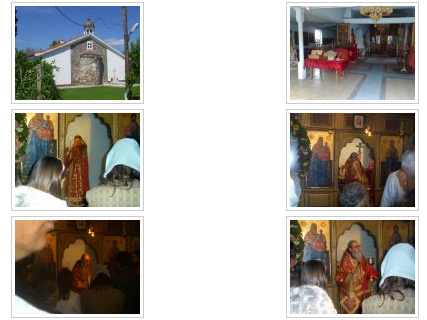
Very Simple Image Gallery joomla screenshot

Here is a screenshot on a sample gallery created with Very Simple Image Gallery Joomla Plugin

You can download Very simple image gallery here

After installing the plugin. It’s use is analogous to the Sigplus . To use it likewise sigplus create new directory through Media Manager and in stories and upload your files in let’s say New Pictures1 . Later on in your article place, the code

{vsig}New Pictures1{/vsig}

Gallery will be generated automatically by the plugin. I think Simple Image Gallery is a bit more advanced and gives a better outlook to Galleries, though it’s configuration settings are much less than with SigPlus image gallery.

To add pictures comments e.g. img link alt=” and title=” tib you need to place a code within the Article manager similar to:

{vsig_c}0|Picture_1.JPG|Some sample text|Some other text{/vsig_c}
{vsig_c}0|Picture_2.JPG|Some example text|Some text{/vsig_c}
etc. ..

Note that the 0 in above example specifies the gallery number if you for instance are using a couple of galleries with Simple Image Gallery , the first one you used would be call 0 . The text specified as comments to the picture will also appear after you preview the gallery right below the picture when clicked on as a picture description in a really nice way.
9. Install Google maps plugin for Joomla
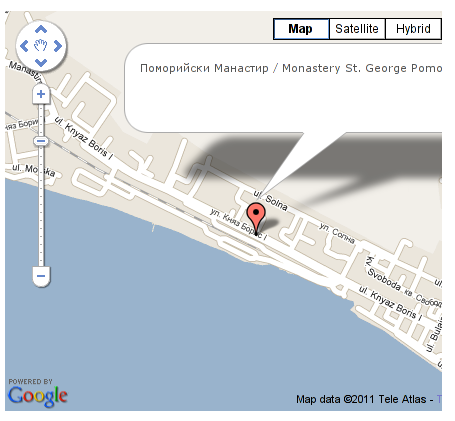
Google Maps plugin for Joomla screenshot

It’s a wise idea that every website has a location map on it’s website, for that reason Google maps is just great.
To install Google maps capability to joomla one can use a plugin called Google Maps .

You can straighly download Joomla’s Googlemap plugin from here

Afterwards use Extension Manager to install the plugin e.g. follow:

Extensions -&gr; Install/Uninstall (Choose File)

and click on Upload File & Install button.

To further enable and configure the Joomla Googlemap plugin you will have to go to the location:

Extensions -> Plugin Manager

Therein you will have to find and enable the Google Maps plugin which is to be found in the column named Plugin Manager
On my Joomla installation the plugin was located in the second page with modules, so if you don’t find the module on the listing with modules on the first page, make sure you scroll to the bottom of the page and click on Next button.

Therein in the list you will most likely notice Google Maps use the Enable button to enable it.

Next step is to configure the plugin, to do so press on the plugin name Google Maps
All configuration necessery here is to place Googlemaps API Key in the respective field (you will see it among config options).

Issuing a new Google Maps api key takes just few seconds, if you already have a gmail account just go to http://code.google.com/apis/maps/signup.html and take few seconds to issue the key.

You will get the key right on your gmail account after being issued (to repeat myself issuing takes few seconds so no worrier here).

One moreOnce having the key place it in the Googlemaps API Key field and configuring Address (which is one of the list of many options the plugin provides) you will be done with configuration.

To display a google map the location you just configured go to the Article Manager , select the article where you want the google maps location picture of your address to appear and type in the Article:

{mosmap|text='Exact street address location'|zoom='15'|zoomType='Large'|zoomNew='0'}

After you save the article a very nice Google map showing you the location’s streets will appear.
You can further conifgure a number of things related to the google map to appear, one thing you might want to play with is the zoom option which as you see in below’s code is equal to 15, e.g. zoom=’15’
Set it to another one if you want to regulate your googlemaps zoom level. For more thoroughful options take a look at the extensive plugin documentation.

10. Joomla Xmap (generating static HTML sitemap) Download Xmap from here , install it the usual plugin way.

Right after installation on the plugin succesful install screen you will notice the link component menu .
Clicking on the component menu you will be leaded to a page showing you few links Sitemap’s URL :
 

  • XML Sitemap:
  • HTML Sitemap:
  • News Sitemap:
  • Images Sitemap:

11. Add Joomla donate Paypal capabilities with Joomla PAYPAL DONATION MODULE

Paypal Donation Module Joomla Screenshot

Just recently I’ve written a a post on how to add a paypal donation capabilities to joomla, you can read my previous post here

12. Install Joomla RSForms Module (Advanced Joomla Forms Support)
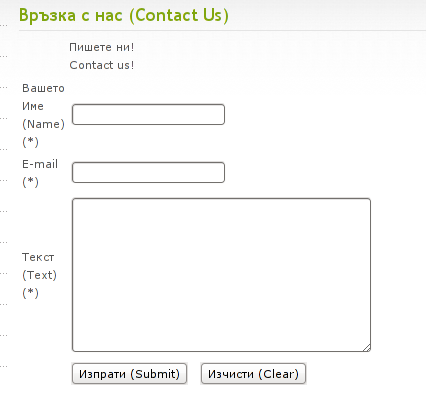
Simple Joomla RsForm contact form

If you’re planning to add a complicated form support for Joomla, there are plenty of plugins, however one that was suggested by a friend of mine which is deep in Joomla world and moreover works good on my joomla installations is RSForms

Joomla – RSForms! is free to download and has great and easy interface to create new joomla forms.

At the time of writting I use these three RSForms components on new Joomla installations:

RSform Pro 1.1.0 com
Mod RsForm for Joomla 1.5
Mod Rsform list for Joomla

For latest release of RSForms! use the link http://www.rsjoomla.com/joomla-components/rsform.html

Installation is like any other module and is done through Extensions -> Install/Uninstall menu.

After installation, setting up a new form is available from the Joomla Menus:

Components -> RSform!Pro -> Manage Forms

I would not enter in details on how to edit the default RSForms or create a new RSForm. Just take some time and learn it by trying 😉

After the rsform is ready, to enable the new form, navigate to Joomla menus:

Menus -> Main Menu

Press the New button located in the buttons bar nearby the page header in the list of options in Select Menu item Type you will notice the RSForm!Pro as an option, press on it to establish the new form in the menus.

A follow up window will appear where one can set a Title: and Alias: for the new form as well as few other options.
After finalizing the settings press on Apply button to save the settings and the new form should appear in Joomla.

Probably there are many more handy plugins, which I’m missing here thus I’ll be glad if readers suggest some more helpful essential (must have plugins) for Joomla.
Feedback on this tutorial is very welcome!
Looking forward to hear for your opinions if my article was helpful to you 😉