Posts Tagged ‘terminal’

BB – A must see ASCII Art Audio / Video portable demo for Linux, FreeBSD, UNIX and DOS

Thursday, May 24th, 2012

bb Audio Visual ASCII art Linux FreeBSD demonstration old school demo logo

I know and I have enjoyed BB – Portable Demo for already a decade.
I'm sure many newbies to the Free And Open Source (FOSS) realm don't know or heard of bb's existence as nowdays ASCII art is not so well known among youngsters. Hence this short post aims to raise some awareness of the existence of this already OLD but GOLD – awesome! text console / terminal demonstation BB 🙂

bb is pretty much in the spirit of Oldschool Assembly DOS demo scene dominating the geeks dome in the late 80's and yearly 90's.

Historically bb used to be one of the main stunning things one could show to a fellow GNU / Linux new comer.

For the year 2000, seeing all this awesome ASCII video demo running on free Operating System like GNU / Linux was a big think.
The fact that such an advanced ASCII art was distributed freely for an OS which used to exist since only (6 / 7 years) was really outstanding of its time.

BB text ascii art Linux demo entry screen characters matrix

I still remember how much I was amazed seeing a plain ascii video stream was possible only Linux. Moreover the minimal requirements of bb were quite low for its time – it worked on mostly all PCs one can find at the time.

BB's minimum requirements to work with no chops is just an old 486/66 DX2 CPU Mhz with few megas of memory (32MB of memory was more than enough to run it)

BB text sacii art Linux demo entry screen char matrix

A very unique feature of bb was it was the first Linux demo that succesfully run simultaneously playing on two monitor screens as one can read on the project website.
Unfortunately I didn't owned two monitors back in the day so never ever had the opportunity to see it running on two screens.
Anyhow I've seen it runnign somewhere on some of the Linux install fests visited some years ago…

The demo was developed by 4 man group ppl – the AA group the same digital artists are also the guys behind the AA Project.

AA Lib mascot logo :)

The main aim of AA-lib was to make possible (Doom, Second Reality, X windows) to run rendered in plain ASCII art text.

The project succeeded in a lot of his goals already as there is already existent such an ascii art ports of large games like QUAKE! Be sure to check this awesome project too AAquake ascii quake page is here
, as well as video and pictures could be viewed under a plain console Linux tty or in terminal (via SSH 🙂 )

Thanks to AA-Lib even text mode doom exists.

bb as well as aa-lib has ports for most modern Linux distros in that number one can easily get rpm or deb packages for most of distros.
On Slackware Linux you should compile it from source. Though compilation should be a straightfoward process, not that i tried it myself but I remember a close friend of mine (a great Slackware devotee) who was the one to show me the demo for a first time on his Slackware box.

1. Installing bb on Debian Linux

Debian Linux users like me are privileged as for already many years a Debian package of bb is maintaned thanks to Uwe Herman

Hence for anyone willing to enjoy bb install it by running:

debian:~# apt-get --yes install bb
....
ho@debian:~$ bb

If you're running a X server the aa-lib will immediately run with its X server compiled support:

Running BB Music Screesnhot

2. Installing BB demo on FreeBSD

On FreeBSD, bb demo has a port to install it run:

freebsd# cd /usr/ports/misc/bb freebsd# make install clean ...

Here is good time to say that even though in most of the machines, I've tested the demo I had on some of the hosts problems with sound due to buggy sound drivers.
As of time of writting hopefully on most machines there will be no troubles as most of the Linux sb drivers are better supported by ALSA.

Everyone interested in both Free Software and ASCII art knows well how big in significance is the AA-lib project for the historical development and attraction for new hackers to the Linux dome.
In that sense AAlib head developer Jan HubickaBy the way Jan Hubicka is also the author of another Linux tool called xaos. Xaos is a tool to deal with some kind of advanced higher mathematics stuff called fractals.

XAOS Screenshot Debian Squeeze Linux

Unfortunately I don't know a bit for fractal maths and what the purpose of the tool is but as you can see on the shot it looks nice running 🙂

Here are also, lot of the major BB parts in shots:

Running bb music screen screenshot Linux Debian 6 Squeeze

BB AScii fire Linux shot

bb demo ascii art fractals

BB demo ascii art back head and description of the dev

bb demo ascii zebra Linux screenshot

bb demo cannon gun shot

BB demo ring screenshot

BB demo spots Debian shot

BB developer head shot 2

BB developer profile shot

bb game ascii invaders demo

Linux extremist BB demo

BB demo zoomed text ascii art text

BB Demo thanks for watching screen

For those on MS-Windows OS platform, here is the demo 🙂

BB ASCII Demo standard size running in Linux (With sound)

Enjoy ! 🙂

AEWAN – a nice advanced GNU / Linux console ASCII art text editor

Saturday, May 19th, 2012

I'm a guy fascinated by ASCII art, since the very early days I saw a piece of this awesome digital art.

As time passed and computers went to be used mostly  graphics resolution, ASCII art loose its huge popularity from the early DOS and BBS (internet primordial days).

However, this kind  of art is still higly valued by true computer geeks.
In that manner of thoughts, lately I'm researching widely on ASCII art tools and ASCII art open source tools available for Linux.
Last time I check what is available for 'ASCII job' was before 5 years time. Recently I decided to review once again and see if there are new software for doing ascii manipulations on Linux and this is how this article got born.

My attention was caught by aewan (ASCII-art Editor Without A Name), while searching for ASCII keyword description packages with:

apt-cache search ascii

Aewan project official website is on sourceforge check it out here

Here is the complete description of the Debian package:

hipo@noah:~$ apt-cache show aewan|grep -i description -A 5
Description: ASCII-art Editor Without A Name
aewan is an ASCII art editor with support for multiple layers that can be
edited individually, colors, rectangular copy and paste, and intelligent
horizontal and vertical flipping (converts '\' to '/', etc). It produces
both stand-alone art files and an easy-to-parse format for integration
into your terminal applications.

I installed it to give it a try:

noah:~# apt-get --yes install aewan
Selecting previously deselected package aewan.
(Reading database ... 388522 files and directories currently installed.)
Unpacking aewan (from .../aewan_1.0.01-3_amd64.deb) ...
Processing triggers for man-db ...
Setting up aewan (1.0.01-3) ...

aewan package provides three executable binaries:

noah:~# dpkg -L aewan|grep -i /bin/ /usr/bin/aecat
/usr/bin/aewan
/usr/bin/aemakeflic

1. aewan binary is the ascii-art editor itself

2. aecat is utility to display an aewan documents (aewan format saved files)3. aemakeflictool to produce an animation from an aewan document

Next I ran it in plain console tty  to check how it is like:

hipo@noah:~$ aewan

Below are screenshots to give you an idea how powerful aewan ASCII art editor is:

AEWAN ASCII art editor entry information screen Debian GNU / Linux shot

Aewan immediate entry screen after start up

Aewan ASCII art editor Linux showing the major functionality of aewan on Debian GNU / Linux Squeeze

Aewan ASCII art editor – all of the supported tool functions

As you can see from the shot the editor is very feature rich. I was stunned to find out it even supports layers (in ASCII!!) (w0w!). 
It even has a Layers Manager (like GIMP) 🙂

To create my first ASCII art I used the:

New

menu.

This however didn't immediately show the prompt, where I can type  the ascii characters to draw my picture. In order to be able to draw inside the editor, its necessary to open at least one layer, through using the menu:

Add Layer (defaults)

then the interactive ASCII art editor appeared.

While an ASCII art is created with the editor you can select the color of the input characters by using Drawing Color menu seen in the above screenshot.

aewan drawing color choose color Linux shot

I've played few minutes and created a sample ascii art, just to test the color and editor "look & feel", my conclusions are the editor chars drawing is awesome.

Aewan ascii art produced on my Debian GNU / Linux host

All the commands available via menus are also accessible via a shortcut key combinations:

Aewan Linux Ascii art editor quick key shortcut commands

aewan controls are just great and definitely over-shadows every other text editor I used to draw an ASCII art so far.
Once saved the ASCII art, are by default saved in a plain gzipped ascii text. You can therefore simply zcat the the saves;
Don't expect zcat to show you the ascii as they're displayed in aewan, zcat-ing it will instead  display just the stored meta data; the meta data is interpreted and displayed properly only with aecat command.

aewan aecat displaying properly previously saved ascii art picture

I've checked online for rpm builds too and such are available, so installing on Fedora, CentOS, SuSE etc. is up to downloading the right distro / hardware architecture rpm package and running:

# rpm -ivh aewan*.rpm

On the official website, there are also instructions to compile from source, Slackware users and users of other distros which doesn't have a package build should compile manually with the usual:

$ tar -zxf aewan-1.0.01.tar.gz
$ cd aewan-1.0.01
$ ./configure
$ make
$ su -c "make install"

For those inrested to make animations with aemakeflic you need to first save a multiple layers of pictures. The idea of creating ASCII art video is pretty much like the old school way to make animation "draw every scene" and movie it. Once all different scene layers of the ASCII art animation are prepared one could use  aemakeflic to export all the ASCII layers as common video.

aemakeflic has the ability to export the ASCII animation in a runnable shell script to display the animation. The other way aemakeflic can be used is to produce a picture in kind of text format showing the video whether seen with  less cmd.
Making ASCII animation takes a lot of time and effort. Since i'm too lazy and I lack the time I haven't tested this functionality. Anyways I've seen some ascii videos on telnet  to remote hosts (some past time); therefore I guess they were made using aewan and later animated with aemakeflic.

I will close this post with a nice colorful ASCII art, made with aewan (picture is taken from the project page):

Aewan Flipping Selection Screenshot
 

Viewing JPEG,GIF and PNG in ASCII with cacaview on GNU / Linux – Review on caca-utils text mode graphics utilities

Thursday, May 17th, 2012

Stitch 80x45 libcaca mascot cacaview viewing JPG, PNG, GIF images as ASCII on Linux libcaca

Probably, many don't know that it is possible to view normal graphical pictures (JPG, PNG, GIF, BMP) etc. in plain console tty.

Being able to view pictures in ASCII is something really nice especially for console geeks like me.
The images produced sometimes are a bit unreadable, if compared to the original graphics, but anyways most of the pictures looks pretty decent 🙂

Viewing in console / terminal images on GNU / Linux is possible thanks to a library called libcaca, caca labs libcaca project official website here.
Below is a shot description of libcaca:
hipo@noah:~$ apt-cache show libcaca0|grep 'Description' -A 4
Description: colour ASCII art library
libcaca is the Colour AsCii Art library. It provides high level functions
for colour text drawing, simple primitives for line, polygon and ellipse
drawing, as well as powerful image to text conversion routines.

In Debian, Ubuntu and other deb Linux distros viewing GUI images with no need for Xserver or any kind of window manager in plain ASCII is possible with cacaview.

cacaview is part of a package called caca-utils. caca-utils is providing few other great utilities for ASCII freaks 🙂 along with cacaview console ascii viewer prog.
The package> is available for Debian distributins since many years, so even on a very old Debians like Debian – (Potato, Woody, Sarge) the package is available in default free package repositories ready to install via apt

To install apt-get it as usual:

noah:~# apt-get --yes install caca-utils

Here is a list of the binaries the package provides:

hipo@noah:~$ dpkg -L caca-utils|grep -i /usr/bin/
/usr/bin/cacaserver
/usr/bin/cacaplay
/usr/bin/cacafire
/usr/bin/cacademo
/usr/bin/cacaview
/usr/bin/img2txt

1. cacaserver a tiny program allowing network streaming of applications written in caca

Belkow is a chop, from man cacaserver
 

cacaserver reads libcaca animation files in its standard input and
serves them as ANSI art on network port 51914. These animations can be
created by any libcaca program by setting the CACA_DRIVER environment
variable to raw and piping the program's standard output to cacaserver.

Clients can then connect to port 51914 using telnet or netcat to see
the output.

The example section of the manual points 1 example use of cacaserver to stream the console output from cacademo.
cacademo binary is a short presentation ASCII DEMO in the spirit of the old school assembly demos (demoscene) .
To run it to bind on port 51914 one has to type in bash shell:
hipo@noah:~$ CACA_DRIVER=raw cacademo | cacaserver
initialised network, listening on port 51914

Then to check out how the demo looks, open telnet connection to the cacaserver host; In my case the cacaserver is binded and streamed over IP 192.168.0.2:

hipo@debian:~$ telnet 192.168.0.2 51914

Immediately you got the demo shining; Below are two screenshots of the demo played after succesful telnet connection:

Cacaserver - caca for the network screenshot Matrix cacademo

cacademo running over telnet network connection – Matrix

cacaserver running on Debian GNU / Linux drug addict like spots streamed via telnet

Blur spots cacademo shot of cacademo streamed via network

You see the demo looks quite awesome 🙂

2. Running cacafire to stream over network

Another possible example use of cacaserver is in conjunction with cacafire libcaca test application:

noah:~# CACA_DRIVER=raw cacafire | cacaserver
initialised network, listening on port 51914
cacafire is a short application written to render ASCII via libcaca and is just displaying a screen with ASCII (moving) burning fire.
It is quite spectacular if you, ask an unexpecting friend to connect to your host to 51914 🙂

Cacafire Screenshot Debian GNU / Linux cacaserver streaming ASCII demo via network port 51914

Besides that bored sys admins, could run cacafire in console to hypnotize themselves watching dumb the burning fire screen for few hoursor just use it as a screensaver 😉

3. cacaview a program to display a graphic images in console using ASCII art

cacaview takes just one argument – the picture to be displayed.

Below is a screenshot of cacaview ran from my gnome-terminal displaying a ASCII text version of the MySQL server logo

hipo@noah:~$ cd /disk/pictures
hipo@noah:/disk/pictures$ cacaview mysql_logo.png


cacaview displaying MySQL database logo in ASCII using caca for X

Whether cacaview is invoked in GUI, the libcaca X support is used, so the text image is visualized in new window with graphics, if however it is invoked in plain let's say tty1 libcaca displays the graphics pictures drawing it with only text characters.

Here is also a screenshot, I've made while viewing a GIF website logo in ASCII in plain tty console:

hipo@noah:~$ cacaview /disk/pictures/logo.gif

cacaview plain tty console screenshot of a website logo graphics pictures 17-05-2012

The logo is in cyrillic, so for latin speaking people some of the characters in the two words seen will be unreadable 🙂

cacaview even supports viewing, the next and previous picture in line, like in any modern graphics image viewer program.
To view a bunch of graphic pictures in ASCII with cacaview pass it *.*:

hipo@noah:~$ cacaview /disk/pictures/*.*

For simplicity the common unix * is also supported, so I find it quicker to do:

hipo@noah:~$ cacaview /disk/pictures/*

Showing pictures forward and backward (Previous / Next) picture is done with n and p kbd keys, whether;
n - next;
p - previous

cacaview doesn't crash or stop but skip unknown file formats – if for instance encounters filenames which are not images; lets say you have *.rar archive files along with other pictures.

The complete list of keys cacaview supports are:
br />

KEYS
? show the help screen

n, p switch to next image, previous image

Left, Right, Up, Down or h, l, k, j
scroll the image around

+, – zoom in and out

z reset the zoom level to normal

f switch fullscreen mode (hide/show menu and status bars)

d toggle the dithering mode (no dithering, 4×4 ordered dithering, 8×8 ordered dithering and random dithering)

q exit the program

4. Converting graphics images to ASCII art like (plain text pictures)

The tool that does "the trick" is img2txt. img2txt has a bit more options while compared to the rest of the aforementioned tools.The following list of arguments are recognized:

  • the size (font, height)
  • brightness
  • contrast
  • gamma and dither
  • format type of out the output pic

Anyways I found that the basic just in / out arguments passed are enough to produce pretty good results:

hipo@noah:~$ img2txt hipo_avatar.gif >hipo_avatar_pic.txt

The original hipo_avatar.gif file looks like so:

hipo avatar gif picture before img2txt convertion to text

After above img2txt command is run and hipo_avatar_pic.txt to see the colorful output ASCII art img2txt produces, cat it:

hipo@noah:~$ cat hipo_avatar_pic.txt

The image result if screenshot looks quite beautiful and even, can be considered or used as an ART effect image (filter) 🙂

Console Screenshot hipo avatar pic ASCII img2txt output picture

The picture colors are plain ANSI color, so in order to display properly the picture with colors on another computers or Operating System you will need at least basic support for ANSI colors.

Plenty of output file formats are supported by img2txt

Here is the complete list of supported output formats:
 

ansi : coloured ANSI
caca : internal libcaca format
utf8 : UTF8 with CR
utf8 : UTF8 with CRLF (MS Windows)
html : HTML with CSS and DIV support
html3 : Pure HTML3 with tables
irc : IRC with ctrl-k codes
bbfr : BBCode (French)
ps : Postscript
svg : Scalable Vector Graphics
tga : Targa Image

libcaca is available for FreeBSD too, but the caca-utils is not available as a port yet, though probably the deb or rpm packages can easily be ported to BSD.

Well that's all, Enjoy.

How to disable PC Spaker on Debian and Ubuntu Linux

Sunday, May 13th, 2012


How to disable pc-speaker on Linux / PC-Speaker Old Desktop Computer picture

A PC Speaker is helpful as it could be used as a tool for diagnosing system hardware failures (different systems produce different beep sequences depending on the machine BIOS type).
Using the instructions for the respective BIOS vendor and version one could determine the type of problem experienced by a machine based on the sequence and frequency of sounds produced by the SPEAKER.
Lets say a hardware component on a server is down with no need for a monitor or screen to be attached you can say precisely if it is the hard drive, memory or fan malfunctioning…

Generally speaking historically embedded PC Speaker was inseparatable part of the Personal Computers, preceding the soundblasters, now this is changing but for compitability sake many comp equipment vendors still produce machines with pc-speaker in.
Some newer machines (mostly laptops) are factory produced with no PC-SPEAKER component anymore.
For those who don't know what is PC SPEAKER, it is a hardware device capable of emitting very simple short beep sounds at certain system occasions.

Talking about PC-Speaker, it reminds me of the old computer days, where we used pc-speakers to play music in DOS quite frequently.
It was wide practice across my friends and myself to use the pc-speaker to play Axel Folly and other mod files because we couldn't afford to pay 150$ for a sound cards. Playing a song over pc-speaker is quite a nice thing and it will be a nice thing if someone writes a program to be able to play songs on Linux via the pc-speaker for the sake of experiment.

As of time of writting, I don't know of any application capable of playing music files via the pc-speaker if one knows of something like this please, drop me a comment..

As long as it is used for hardware failure diagnosis the speaker is useful, however there are too many occasions where its just creating useless annoying sounds.
For instance whether one uses a GUI terminal or console typing commands and hits multiple times backspace to delete a mistyped command. The result is just irritating beeps, which could be quite disturbing for other people in the room (for example if you use Linux as Desktop in heterogeneous OS office).
When this "unplanned" glitchering beeps are experienced 100+ times a day you really want to break the computer, as well as your collegues are starting to get mad (if not using their headphones) 🙂

Hence you need sometimes to turn off the pc-speaker to save some nerves.

Here is how this is done on major Linux distros.

On Debian and most other distros, the PC SPEAKER is controlled by a kernel module, so to disable communication with the speaker you have to remove the kernel module.

On Debian and Fedora disabling pcspeaker is done with:

# modprobe -r pcspkr

Then to permanently disable load of the pcspkr module on system boot:

debian:~# echo 'blacklist pcspkr' >> /etc/modprobe.d/blacklist.conf

On Ubuntu to disable load on boot /etc/modprobe.d/blacklist, file should be used:

ubuntu:~# echo 'blacklist pcspkr' >> /etc/modprobe.d/blacklist
Well that's all folks …

How to check the IP address of Skype (user / Contacts) on GNU / Linux with netstat and whois

Thursday, May 3rd, 2012

netstat check skype contact IP info with netstat Linux xterm Debian Linux

Before I explain how netstat and whois commands can be used to check information about a remote skype user – e.g. (skype msg is send or receved) in Skype. I will say in a a few words ( abstract level ), how skype P2P protocol is designed.
Many hard core hackers, certainly know how skype operates, so if this is the case just skip the boring few lines of explanation on how skype proto works.

In short skype transfers its message data as most people know in Peer-to-Peer "mode" (P2P)  – p2p is unique with this that it doesn't require a a server to transfer data from one peer to another. Most classical use of p2p networks in the free software realm are the bittorrents.

Skype way of connecting to peer client to other peer client is done via a so called "transport points". To make a P-to-P connection skype wents through a number of middle point destinations. This transport points (peers) are actually other users logged in Skype and the data between point A and point B is transferred via this other logged users in encrypted form. If a skype messages has to be transferred  from Peer A (point A) to Peer B (Point B) or (the other way around), the data flows in a way similar to:

 A -> D -> F -> B

or

B -> F -> D -> A

(where D and F are simply other people running skype on their PCs).
The communication from a person A to person B chat in Skype hence, always passes by at least few other IP addresses which are owned by some skype users who happen to be located in the middle geographically between the real geographic location of A (the skype peer sender) and B (The skype peer receiver)..

The exact way skypes communicate is way more complex, this basics however should be enough to grasp the basic skype proto concept for most ppl …

In order to find the IP address to a certain skype contact – one needs to check all ESTABLISHED connections of type skype protocol with netsat within the kernel network stack (connection) queue.

netstat displays few IPs, when skype proto established connections are grepped:

noah:~# netstat -tupan|grep -i skype | grep -i established| grep -v '0.0.0.0'
tcp 0 0 192.168.2.134:59677 212.72.192.8:58401 ESTABLISHED 3606/skype
tcp 0 0 192.168.2.134:49096 213.199.179.161:40029 ESTABLISHED 3606/skype
tcp 0 0 192.168.2.134:57896 87.120.255.10:57063 ESTABLISHED 3606/skype

Now, as few IPs are displayed, one needs to find out which exactly from the list of the ESTABLISHED IPs is the the Skype Contact from whom are received or to whom are sent the messages in question.

The blue colored IP address:port is the local IP address of my host running the Skype client. The red one is the IP address of the remote skype host (Skype Name) to which messages are transferred (in the the exact time the netstat command was ran.

The easiest way to find exactly which, from all the listed IP is the IP address of the remote person is to send multiple messages in a low time interval (let's say 10 secs / 10 messages to the remote Skype contact).

It is a hard task to write 10 msgs for 10 seconds and run 10 times a netstat in separate terminal (simultaneously). Therefore it is a good practice instead of trying your reflex, to run a tiny loop to delay 1 sec its execution and run the prior netstat cmd.

To do so open a new terminal window and type:

noah:~# for i in $(seq 1 10); do \
sleep 1; echo '-------'; \
netstat -tupan|grep -i skype | grep -i established| grep -v '0.0.0.0'; \
done

-------
tcp 0 0 192.168.2.134:55119 87.126.71.94:26309 ESTABLISHED 3606/skype
-------
tcp 0 0 192.168.2.134:49096 213.199.179.161:40029 ESTABLISHED 3606/skype
tcp 0 0 192.168.2.134:55119 87.126.71.94:26309 ESTABLISHED 3606/skype
-------
tcp 0 0 192.168.2.134:49096 213.199.179.161:40029 ESTABLISHED 3606/skype
tcp 0 0 192.168.2.134:55119 87.126.71.94:26309 ESTABLISHED 3606/skype
...

You see on the first netstat (sequence) exec, there is only 1 IP address to which a skype connection is established, once I sent some new messages to my remote skype friend, another IP immediatelly appeared. This other IP is actually the IP of the person to whom, I'm sending the "probe" skype messages.
Hence, its most likely the skype chat at hand is with a person who has an IP address of the newly appeared 213.199.179.161

Later to get exact information on who owns 213.199.179.161 and administrative contact info as well as address of the ISP or person owning the IP, do a RIPE  whois

noah:~# whois 213.199.179.161
% This is the RIPE Database query service.
% The objects are in RPSL format.
%
% The RIPE Database is subject to Terms and Conditions.
% See http://www.ripe.net/db/support/db-terms-conditions.pdf

% Note: this output has been filtered.
% To receive output for a database update, use the "-B" flag.
% Information related to '87.126.0.0 - 87.126.127.255'
inetnum: 87.126.0.0 - 87.126.127.255
netname: BTC-BROADBAND-NET-2
descr: BTC Broadband Service
country: BG
admin-c: LG700-RIPE
tech-c: LG700-RIPE
tech-c: SS4127-RIPE
status: ASSIGNED PA
mnt-by: BT95-ADM
mnt-domains: BT95-ADM
mnt-lower: BT95-ADM
source: RIPE # Filteredperson: Lyubomir Georgiev
.....

Note that this method of finding out the remote Skype Name IP to whom a skype chat is running is not always precise.

If for instance you tend to chat to many people simultaneously in skype, finding the exact IPs of each of the multiple Skype contacts will be a very hard not to say impossible task.
Often also by using netstat to capture a Skype Name you're in chat with, there might be plenty of "false positive" IPs..
For instance, Skype might show a remote Skype contact IP correct but still this might not be the IP from which the remote skype user is chatting, as the remote skype side might not have a unique assigned internet IP address but might use his NET connection over a NAT or DMZ.

The remote skype user might be hard or impossible to track also if skype client is run over skype tor proxy for the sake of anonymity
Though it can't be taken as granted that the IP address obtained would be 100% correct with the netstat + whois method, in most cases it is enough to give (at least approximate) info on a Country and City origin of the person you're skyping with.
 

How to make screenshot in /dev/tty console on GNU / Linux – Taking picture JPEG / PNG snapshot of text console in systems without graphical environment

Monday, April 30th, 2012

I'm used to making picture screenshots in GNOME desktop environment. As I've said in my prior posts, I'm starting to return to my old habits of using console ttys for regular daily jobs in order to increase my work efficiency. In that manner of thoughts sometimes I need to take a screenshot of what I'm seeing in my physical (TTY consoles) to be able to later reuse this. I did some experimenting and this is how this article got born.

In this post, I will shortly explain how a picture of a command running in console or terminal in GNU / Linux can be made

Before proceeding to the core of the article, I will say few words on ttys as I believe they might be helpful someone.
The abbreviation of tty comes after TeleTYpewritter phrase and is dating back somewhere near the 1960s. The TTY was invented to help people with impaired eyesight or hearing to use a telephone like typing interface.

In Unix / Linux / BSD ttys are the physical consoles, where one logs in (typing in his user/password). There are physical ttys and virtual vtys in today *nixes. Today ttys, are used everywhere in a modern Unixes or Unix like operating system with or without graphical environments.
Various Linux distributions have different number of physical consoles (TTYs) (terminals connected to standard output) and this depends mostly on the distro major contributors, developers or surrounding OS community philosophy.
Most modern Linux distributions have at least 5 to 7 physical ttys. Some Linux distributions like Debian for instance as of time of writting this, had 7 active by default physical consoles.
Adding 3 more ttys in Debian / Ubuntu Linux is done by adding the following lines in /etc/inittab:
 

7:23:respawn:/sbin/getty 38400 tty7
8:23:respawn:/sbin/getty 38400 tty8
9:23:respawn:/sbin/getty 38400 tty9

On some Linux distributions like Fedora version 9 and newer ones, new ttys can no longer be added via /etc/inittab,as the RedHat guys changed it for some weird reason, but I guess this is too broad issue to discuss ….

In graphical environments ttys are called methaphorically "virtual". For instance in gnome-terminal or while connecting to a remote SSH server, a common tty naming would be /dev/pts/8 etc.

tty command in Linux and BSDs can be used to learn which tty, one is operating in.

Here is output from my tty command, issued on 3rd TTY (ALT+F3) on my notebook:
 

noah:~# tty
/dev/tty3

A tty cmd output from mlterm GUI terminal is like so:
 

hipo@noah:~$ tty/dev/pts/9

Now as mentioned few basic things on ttys I will proceed further to explain how I managed to:

a) Take screenshot of a plain text tty screen into .txt file format
b) take a (picture) JPG / PNG screenshot of my Linux TTY consoles content

1. Take screenshot of plain text tty screen into a plain (ASCII) .txt file:

To take a screenshot of tty1, tty2 and tty3 text consoles in a txt plain text format, cat + a standard UNIX redirect is all necessery:
 

noah:~# cat /dev/vcs1 > /home/hipo/tty1_text_screenshot.txt
noah:~# cat /dev/vcs2 > /home/hipo/tty2_text_screenshot.txt
noah:~# cat /dev/vcs3 > /home/hipo/tty3_text_screenshot.txt

This will dump the text content of the console into the respective files, if however you try to dump an ncurses library like text interactive interfaces you will end up with a bunch of unreadable mess.
In order to read the produced text 'shots' onwards less command can be used …
 

noah:~# less /home/hipo/tty1_text_screenshot.txt
noah:~# less /home/hipo/tty2_text_screenshot.txt
noah:~# less /home/hipo/tty3_text_screenshot.txt

2. Take picture JPG / PNG snapshot of Linux TTY console content

To take a screenshot of my notebook tty consoles I had to first install a "third party program" snapscreenshot . There is no deb / rpm package available as of time of writting this post for the 4 major desktop linux distributions Ubuntu, Debian, Fedora and Slackware.
Hence to install snapscreenshot,I had to manually download the latest program tar ball source and compile e.g.:
 

noah:~# cd /usr/local/src
noah:/usr/local/src# wget -q http://bisqwit.iki.fi/src/arch/snapscreenshot-1.0.14.3.tar.bz2
noah:/usr/local/src# tar -jxvvvf snapscreenshot-1.0.14.3.tar.bz2

noah:/usr/local/src# cd snapscreenshot-1.0.14.3
noah:/usr/local/src/snapscreenshot-1.0.14# ./configure && make && make install
Configuring…
Fine. Done. make.
make: Nothing to be done for `all'.
if [ ! "/usr/local/bin" = "" ]; then mkdir –parents /usr/local/bin 2>/dev/null; mkdir /usr/local/bin 2>/dev/null; \
for s in snapscreenshot ""; do if [ ! "$s" = "" ]; then \
install -c -s -o bin -g bin -m 755 "$s" /usr/local/bin/"$s";fi;\
done; \
fi; \
if [ ! "/usr/local/man" = "" ]; then mkdir –parents /usr/local/man 2>/dev/null; mkdir /usr/local/man 2>/dev/null; \
for s in snapscreenshot.1 ""; do if [ ! "$s" = "" ]; then \
install -m 644 "$s" /usr/local/man/man"`echo "$s"|sed 's/.*\.//'`"/"$s";fi;\
done; \
fi

By default snapscreenshot command is made to take screenshot in a tga image format, this format is readable by most picture viewing programs available today, however it is not too common and not so standartized for the web as the JPEG and PNG.
Therefore to make the text console tty snapshot taken in PNG or JPEG one needs to use ImageMagick's convert tool. The convert example is also shown in snapscreenshot manual page Example section.

To take a .png image format screenshot of lets say Midnight Commander interactive console file manager running in console tty1, I used the command:
 

noah:/home/hipo# snapscreenshot -c1 -x1 > ~/console-screenshot.tga && convert ~/console-screenshot.tga console-screenshot.png

Linux text console tty mc screenshot with snapscreenshot terminal / console snapshotting program

Note that you need to have read/write permissions to the /dev/vcs* otherwise the snapscreenshot will be unable to read the tty and produce an error:
 

hipo@noah:~/Desktop$ snapscreenshot -c2 -x1 > snap.tga && convert snap.tga snap.pngGeometry will be: 1x2Reading font…/dev/console: Permission denied

To take simultaneous picture screenshot of everything contained in all text consoles, ranging from tty1 to tty5, issue:
 

noah:/home/hipo# snapscreenshot -c5 -x1 > ~/console-screenshot.tga && convert ~/console-screenshot.tga console-screenshot.png

Here is a resized 480×320 pixels version of the original screenshot the command produces:

All text Consoles tty1 to tty5 merged screenshot png image with snapscreenshot taken on Debian GNU / Linux

Storing a picture shot of the text (console) screen in JPEG (JPG) format is done analogously just the convert command output extension has to be changed to jpeg i.e.:
 

noah:/home/hipo# snapscreenshot -c5 -x1 > ~/console-screenshot.tga && convert ~/console-screenshot.tga console-screenshot.jpeg

I've also written a tiny wrapper shell script, to facilitate myself picture picture taking as I didn't like to type each time I want to take a screenshot of a tty the above long line.

Here is the wrapper script I wrote:
 

#!/bin/sh
### Config
# .tga produced file name
output_f_name='console-screenshot.tga';
# gets current date
cur_date=$(date +%d_%m_%Y|sed -e 's/^ *//');
# png output f name
png_f_name="console-screenshot-$cur_date.png";
### END Config
snapscreenshot -c$arg1 -x1 > $output_f_name && convert $output_f_name $png_f_name;
echo "Output png screenshot from tty1 console produced in";
echo "$PWD/$png_f_name";
/bin/rm -f $output_f_name;

You can also download my console-screenshot.sh snapscreenshot wrapper script here

The script is quite simplistic to use, it takes just one argument which is the number of the tty you would like to screenshot.
To use my script download it in /usr/local/bin and set it executable flag:
 

noah:~# cd /usr/local/bin
noah:/usr/local/bin# wget -q https://www.pc-freak.net/~bshscr/console-screenshot.sh
noah:/usr/local/bin# chmod +x console-screenshot.sh

Onwards to use the script to snapshot console terminal (tty1) type:
 

noan:~# console-screenshot.sh

I've made also mirror of latest version of snapscreenshot-1.0.14.3.tar.bz2 here just in case this nice little program disappears from the net in future times.


How to quickly check unread Gmail emails on GNU / Linux – one liner script

Monday, April 2nd, 2012

I've hit an interesting article explaining how to check unread gmail email messages in Linux terminal. The original article is here

Being able to read your latest gmail emails in terminal/console is great thing, especially for console geeks like me.
Here is the one liner script:

curl -u GMAIL-USERNAME@gmail.com:SECRET-PASSWORD \
--silent "https://mail.google.com/mail/feed/atom" | tr -d '\n' \
| awk -F '' '{for (i=2; i<=NF; i++) {print $i}}' \
| sed -n "s/

Linux Users Group M. – [7] discussions, [10] comments and [2] jobs on LinkedIn
Twitter – Lynn Serafinn (@LynnSerafinn) has sent you a direct message on Twitter!
Facebook – Sys, you have notifications pending
Twitter – Email Marketing (@optinlists) is now following you on Twitter!
Twitter – Lynn Serafinn (@LynnSerafinn) is now following you on Twitter!
NutshellMail – 32 New Messages for Sat 3/31 12:00 PM
Linux Users Group M. – [10] discussions, [5] comments and [8] jobs on LinkedIn
eBay – Deals up to 60% OFF + A Sweepstakes!
LinkedIn Today – Top news today: The Magic of Doing One Thing at a Time
NutshellMail – 29 New Messages for Fri 3/30 12:00 PM
Linux Users Group M. – [16] discussions, [8] comments and [8] jobs on LinkedIn
Ervan Faizal Rizki . – Join my network on LinkedIn
Twitter – LEXO (@LEXOmx) retweeted one of your Tweets!
NutshellMail – 24 New Messages for Thu 3/29 12:00 PM
Facebook – Your Weekly Facebook Page Update
Linux Users Group M. – [11] discussions, [9] comments and [16] jobs on LinkedIn

As you see this one liner uses curl to fetch the information from mail.google.com's atom feed and then uses awk and sed to parse the returned content and make it suitable for display.

If you want to use the script every now and then on a Linux server or your Linux desktop you can download the above code in a script file -quick_gmail_new_mail_check.sh here

Here is a screenshot of script's returned output:

Quick Gmail New Mail Check bash script screenshot

A good use of a modified version of the script is in conjunction with a 15 minutes cron job to launch for new gmail mails and launch your favourite desktop mail client.
This method is useful if you don't want a constant hanging Thunderbird or Evolution, pop3 / imap client on your system to just take up memory or dangle down the window list.
I've done a little modification to the script to simply, launch a predefined email reader program, if gmail atom feed returns new unread mails are available, check or download my check_gmail_unread_mail.sh here
Bear in mind, on occasions of errors with incorrect username or password, the script will not return any errors. The script is missing a properer error handling.Therefore, before you use the script make sure:

gmail_username='YOUR-USERNAME';
gmail_password='YOUR-PASSWORD';

are 100% correct.

To launch the script on 15 minutes cronjob, put it somewhere and place a cron in (non-root) user:

# crontab -u root -e
...
*/15 * * * * /path/to/check_gmail_unread_mail.sh

Once you read your new emails in lets say Thunderbird, close it and on the next delivered unread gmail mails, your mail client will pop up by itself again. Once the mail client is closed the script execution will be terminated.
Consised that if you get too frequently gmail emails, using the script might be annoying as every 15 minutes your mail client will be re-opened.

If you use any of the shell scripts, make sure there are well secured (make it owned only by you). The gmail username and pass are in plain text, so someone can steal your password, very easily. For a one user Linux desktops systems as my case, security is not such a big concern, putting my user only readable script permissions (e.g. chmod 0700)is enough.

How to delete million of files on busy Linux servers (Work out Argument list too long)

Tuesday, March 20th, 2012

How to Delete million or many thousands of files in the same directory on GNU / Linux and FreeBSD

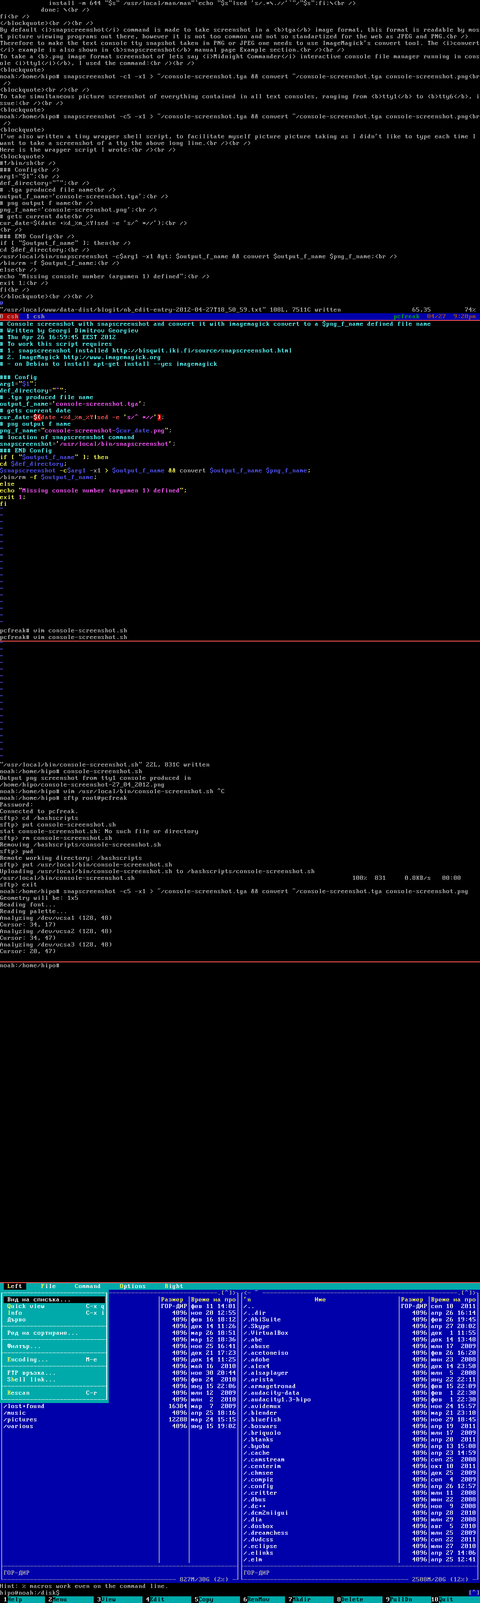
If you try to delete more than 131072 of files on Linux with rm -f *, where the files are all stored in the same directory, you will get an error:

/bin/rm: Argument list too long.

I've earlier blogged on deleting multiple files on Linux and FreeBSD and this is not my first time facing this error.
Anyways, as time passed, I've found few other new ways to delete large multitudes of files from a server.

In this article, I will explain shortly few approaches to delete few million of obsolete files to clean some space on your server.
Here are 3 methods to use to clean your tons of junk files.

1. Using Linux find command to wipe out millions of files

a.) Finding and deleting files using find's -exec switch:

# find . -type f -exec rm -fv {} \;

This method works fine but it has 1 downside, file deletion is too slow as for each found file external rm command is invoked.

For half a million of files or more, using this method will take "long". However from a server hard disk stressing point of view it is not so bad as, the files deletion is not putting too much strain on the server hard disk.
b.) Finding and deleting big number of files with find's -delete argument:

Luckily, there is a better way to delete the files, by using find's command embedded -delete argument:

# find . -type f -print -delete

c.) Deleting and printing out deleted files with find's -print arg

If you would like to output on your terminal, what files find is deleting in "real time" add -print:

# find . -type f -print -delete

To prevent your server hard disk from being stressed and hence save your self from server normal operation "outages", it is good to combine find command with ionice, e.g.:

# ionice -c 3 find . -type f -print -delete

Just note, that ionice cannot guarantee find's opeartions will not affect severely hard disk i/o requests. On  heavily busy servers with high amounts of disk i/o writes still applying the ionice will not prevent the server from being hanged! Be sure to always keep an eye on the server, while deleting the files nomatter with or without ionice. if throughout find execution, the server gets lagged in serving its ordinary client requests or whatever, stop the execution of the cmd immediately by killing it from another ssh session or tty (if physically on the server).

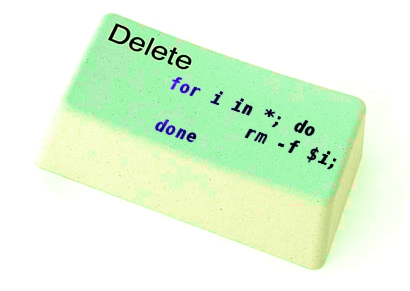
2. Using a simple bash loop with rm command to delete "tons" of files

An alternative way is to use a bash loop, to print each of the files in the directory and issue /bin/rm on each of the loop elements (files) like so:

for i in *; do
rm -f $i;
done

If you'd like to print what you will be deleting add an echo to the loop:

# for i in $(echo *); do \
echo "Deleting : $i"; rm -f $i; \

The bash loop, worked like a charm in my case so I really warmly recommend this method, whenever you need to delete more than 500 000+ files in a directory.

3. Deleting multiple files with perl

Deleting multiple files with perl is not a bad idea at all.
Here is a perl one liner, to delete all files contained within a directory:

# perl -e 'for(<*>){((stat)[9]<(unlink))}'

If you prefer to use more human readable perl script to delete a multitide of files use delete_multple_files_in_dir_perl.pl

Using perl interpreter to delete thousand of files is quick, really, really quick.
I did not benchmark it on the server, how quick exactly is it, but I guess the delete rate should be similar to find command. Its possible even in some cases the perl loop is  quicker …

4. Using PHP script to delete a multiple files

Using a short php script to delete files file by file in a loop similar to above bash script is another option.
To do deletion  with PHP, use this little PHP script:

<?php
$dir = "/path/to/dir/with/files";
$dh = opendir( $dir);
$i = 0;
while (($file = readdir($dh)) !== false) {
$file = "$dir/$file";
if (is_file( $file)) {
unlink( $file);
if (!(++$i % 1000)) {
echo "$i files removed\n";
}
}
}
?>

As you see the script reads the $dir defined directory and loops through it, opening file by file and doing a delete for each of its loop elements.
You should already know PHP is slow, so this method is only useful if you have to delete many thousands of files on a shared hosting server with no (ssh) shell access.

This php script is taken from Steve Kamerman's blog . I would like also to express my big gratitude to Steve for writting such a wonderful post. His post actually become  inspiration for this article to become reality.

You can also download the php delete million of files script sample here

To use it rename delete_millioon_of_files_in_a_dir.php.txt to delete_millioon_of_files_in_a_dir.php and run it through a browser .

Note that you might need to run it multiple times, cause many shared hosting servers are configured to exit a php script which keeps running for too long.
Alternatively the script can be run through shell with PHP cli:

php -l delete_millioon_of_files_in_a_dir.php.txt.

5. So What is the "best" way to delete million of files on Linux?

In order to find out which method is quicker in terms of execution time I did a home brew benchmarking on my thinkpad notebook.

a) Creating 509072 of sample files.

Again, I used bash loop to create many thousands of files in order to benchmark.
I didn't wanted to put this load on a productive server and hence I used my own notebook to conduct the benchmarks. As my notebook is not a server the benchmarks might be partially incorrect, however I believe still .they're pretty good indicator on which deletion method would be better.

hipo@noah:~$ mkdir /tmp/test
hipo@noah:~$ cd /tmp/test;
hiponoah:/tmp/test$ for i in $(seq 1 509072); do echo aaaa >> $i.txt; done

I had to wait few minutes until I have at hand 509072  of files created. Each of the files as you can read is containing the sample "aaaa" string.

b) Calculating the number of files in the directory

Once the command was completed to make sure all the 509072 were existing, I used a find + wc cmd to calculate the directory contained number of files:

hipo@noah:/tmp/test$ find . -maxdepth 1 -type f |wc -l
509072

real 0m1.886s
user 0m0.440s
sys 0m1.332s

Its intesrsting, using an ls command to calculate the files is less efficient than using find:

hipo@noah:/tmp/test$ time ls -1 |wc -l
509072

real 0m3.355s
user 0m2.696s
sys 0m0.528s

c) benchmarking the different file deleting methods with time

– Testing delete speed of find

hipo@noah:/tmp/test$ time find . -maxdepth 1 -type f -delete
real 15m40.853s
user 0m0.908s
sys 0m22.357s

You see, using find to delete the files is not either too slow nor light quick.

– How fast is perl loop in multitude file deletion ?

hipo@noah:/tmp/test$ time perl -e 'for(<*>){((stat)[9]<(unlink))}'real 6m24.669suser 0m2.980ssys 0m22.673s

Deleting my sample 509072 took 6 mins and 24 secs. This is about 3 times faster than find! GO-GO perl 🙂
As you can see from the results, perl is a great and time saving, way to delete 500 000 files.

– The approximate speed deletion rate of of for + rm bash loop

hipo@noah:/tmp/test$ time for i in *; do rm -f $i; done

real 206m15.081s
user 2m38.954s
sys 195m38.182s

You see the execution took 195m en 38 secs = 3 HOURS and 43 MINUTES!!!! This is extremely slow ! But works like a charm as the running of deletion didn't impacted my normal laptop browsing. While the script was running I was mostly browsing through few not so heavy (non flash) websites and doing some other stuff in gnome-terminal) 🙂

As you can imagine running a bash loop is a bit CPU intensive, but puts less stress on the hard disk read/write operations. Therefore its clear using it is always a good practice when deletion of many files on a dedi servers is required.

b) my production server file deleting experience

On a production server I only tested two of all the listed methods to delete my files. The production server, where I tested is running Debian GNU / Linux Squeeze 6.0.3. There I had a task to delete few million of files.
The tested methods tried on the server were:

– The find . type -f -delete method.

– for i in *; do rm -f $i; done

The results from using find -delete method was quite sad, as the server almost hanged under the heavy hard disk load the command produced.

With the for script all went smoothly. The files were deleted for a long long time (like few hours), but while it was running, the server continued with no interruptions..

While the bash loop was running, the server load avarage kept at steady 4
Taking my experience in mind, If you're running a production, server and you're still wondering which delete method to use to wipe some multitude of files, I would recommend you go  the bash for loop + /bin/rm way. Yes, it is extremely slow, expect it run for some half an hour or so but puts not too much extra load on the server..

Using the PHP script will probably be slow and inefficient, if compared to both find and the a bash loop.. I didn't give it a try yet, but suppose it will be either equal in time or at least few times slower than bash.

If you have tried the php script and you have some observations, please drop some comment to tell me how it performs.

To sum it up;

Even though there are "hacks" to clean up some messy parsing directory full of few million of junk files, having such a directory should never exist on the first place.

Frankly, keeping millions of files within the same directory is very stupid idea.
Doing so will have a severe negative impact on a directory listing performance of your filesystem in the long term.

If you know better (more efficient) ways to delete a multitude of files in a dir please share in comments.

The last two weeks

Saturday, December 16th, 2006

Heya. Few weeks I can’t take the courage to write on the blog. But today I’m spiritually (Praise be to God!). So I was able to write that. The day passed away in a very traditional way. I went to the collage in 10:15 instead of 08:15 again I was not able to stand up from the bed. We had some International Law lectures up to 11:30, after that we drank coffee with Nomen. Smoked few cigarettes. Later on I had a Deutsch 12:30 to 15:45. We made a test the time between 14:15 – 15:45 ( I was not ready for that test ofcourse :] ). No matter price be to God I succeded to write stuff in the test. After that I spoke fo 1.5 h with the College Sys Admin we discussed mine idea to migrate some Windows 98 boxes to just dumb terminals connecting to a central Terminal Server. In monday maybe we’ll start doing the terminal server. Other things I saw Nomen and Habib in 17:10 in the college. Mitko give a promise to Malin to check something on his computer, so we had to go Malin’s home. So we went there nothing special their we put Habib in front of the Malin’s home door and he rang we with mitko hide and watched. Dori (The woman of Malin), went out looking shocked at Habib, she was possible wondering who is that strange (nigga like guy). Habib said: “Malin, Vkyshti” :]. Dori said: “Malin ne vkyshti” then we showed ourself and laughed;] We tried to fix the malin’s problem with the Audio Drivers but was not able the problem seemed to be a hardware one. After that we went to Mino’s coffee we saw Miro and Gosho with Zuio Kiro and Maya. We drinked some beer and went our homes. End of story. The last days were hard for me. I really have no idea where my life is going into nomatter I hope God will think about me a good way the best way. I had a big spiritual pain over the last days, and I said to God a lot of times I hope he will take me away, from this hellish earth. But I guess his plan is another for me. Will live and will see. Now God Even now you see me. Please help me fix the mess I am into and forgive me for all my awful deeds. Will go now. Blessings in the name of Jesus Christ.