Posts Tagged ‘BSD’

How to disable ACPI (power saving) support in FreeBSD / Disable acpi on BSD kernel boot time

Tuesday, May 15th, 2012

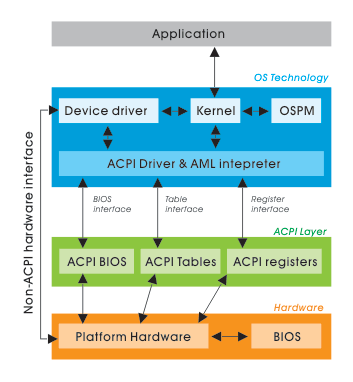
FreeBSD disable ACPI how ACPI Basic works basic diagram

On FreeBSD the default kernel is compiled to support ACPI. Most of the modern PCs has already embedded support for ACPI power saving instructions.
Therefore a default installed FreeBSD is trying to take advantage of this at cases and is trying to save energy.
This is not too useful on servers, because saving energy could have at times a bad impact on server performance if the server is heavy loaded at times and not so loaded at other times of the day.

Besides that on servers saving energy shouldn't be the main motivator but server stability and productivity is. Therefore in my personal view on FreeBSD used on servers it is better to disable complete the ACPI in order to disable CPU fan control to change rotation speeds all the time from low to high rotation cycles and vice versa at times of low / high server load.

Another benefit of removing the ACPI support on a server is this would probably increase the CPU fan life span and possibly prevent the CPU to be severely heated at times.

Moreover, some piece of hardware might have troubles in properly supporting ACPI specifications and thus ACPI could be a reason for unexpected machine hang ups.

With all said I would recommend to anyone willing to use BSD for a server to disable the ACPI (Advanced Configuration and Power Interface), just like I did.

Here is how;

1. Quick review on how ACPI is handled on FreeBSD

acpi support is being handled on FreeBSD by a number of loadable kernel modules, here is a complete list of all the kernel modules dealins with acpi:

freebsd# cd /boot
freebsd# find . -iname '*acpi*.ko'
./kernel/acpi.ko
./kernel/acpi_aiboost.ko
./kernel/acpi_asus.ko
./kernel/acpi_fujitsu.ko
./kernel/acpi_ibm.ko
./kernel/acpi_panasonic.ko
./kernel/acpi_sony.ko
./kernel/acpi_toshiba.ko
./kernel/acpi_video.ko
./kernel/acpi_dock.ko

By default on FreeBSD, if hardware has some support for ACPI the acpi gets activated by acpi.ko kernel module. The specific type of vendors specific ACPI like IBM, ASUS, Fujitsu are controlled by the respective kernel module from the list …

Hence, to control if ACPI is loaded or not on a FreeBSD system with no need to reboot one can use kldload, kldunload module management BSD cmds.

a) Check if acpi is loaded on a BSD

freebsd# kldstatkldstat | grep -i acpi
9 1 0xc9260000 57000 acpi.ko

b) unload kernel enabled ACPI support

freebsd# kldunload acpi

c) Load acpi support (not the case with me but someone might need it, if for instance BSD is running on laptop)

freebsd# kldload acpi

2. Disabling ACPI to load on bootup on BSD

a) In /boot/loader.conf add the following variables:

hint.acpi.0.disabled="1"
hint.p4tcc.0.disabled=1
hint.acpi_throttle.0.disabled=1


b) in /boot/device.hints add:

hint.acpi.0.disabled="1"

c) in /boot/defaults/loader.conf make sure:

##############################################################
### ACPI settings ##########################################
##############################################################
acpi_dsdt_load="NO" # DSDT Overriding
acpi_dsdt_type="acpi_dsdt" # Don't change this
acpi_dsdt_name="/boot/acpi_dsdt.aml"
# Override DSDT in BIOS by this file
acpi_video_load="NO" # Load the ACPI video extension driver

d) disable ACPI thermal monitoring

It is generally a good idea to disable the ACPI thermal monitoring, as many machines hardware does not support it.

To do so in /boot/loader.conf add

debug.acpi.disabled="thermal"

If you want to learn more on on how ACPI is being handled on BDSs check out:

freebsd# man acpi

Other alternative method to permanently wipe out ACPI support is by not compiling ACPI support in the kernel.
If that's the case in /usr/obj/usr/src/sys/GENERIC make sure device acpi is commented, e.g.:

##device acpi


How to convert FLV to AVI and AVI to FLV Videos on Linux and BSD with avidemux and ffmpeg – Simple video editting with LiVES

Tuesday, May 8th, 2012

I'm starting to learn some video editing, as I need it sometimes for building client websites.
As a Linux user I needed to have some kind of software for amateur video editing.
For Microsoft Windows OS, there are tons of video editor programs both free and proprietary (paid).
Windows users can for instance use the free software program VirtualDub (licensed under GPL license) to easily cut movie scenes from a video.

Unfortunately VirtualDub didn't have a Linux or BSD version so in my case I had to look for another soft.

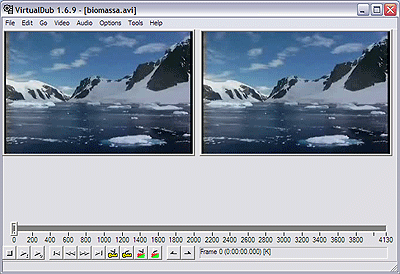
VirtualDub running on Microsoft Windows XP Screenshot (Biomassa)

I consulted a friend of mine who recommended a video editor program called LiVES.

If you haven't done any video editing previously on Linux (like my case was), you will certainly be happy to try LiVES

Debian GNU / Linux LiVES video editor logo bootscreen shot

LiVES can extract only sound from videos, cut selected parts (frames) from videos and do plenty of other nice stuff. It is just great piece of software for anyone, who needs to do simply (newbie) video editting.

With LiVES even an amateur video editor like me could, immediately learn how to chop a movie scenes

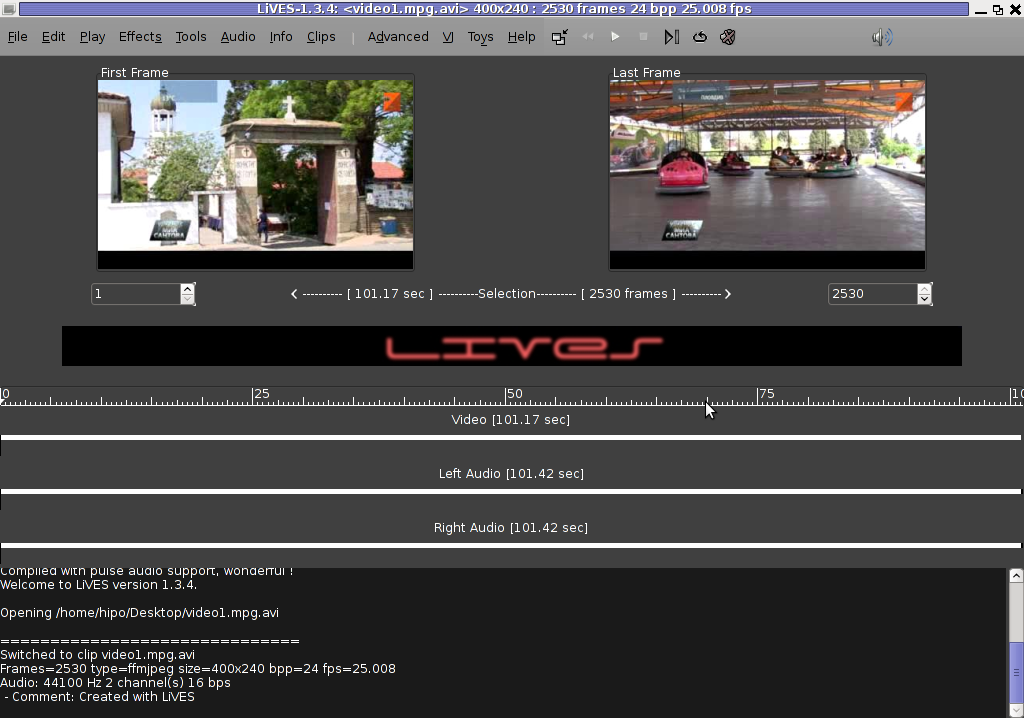
Screenshot opened video for editting with LiVES Linux movie editor Debian Squeeze Linux shot

To master the basics and edit one video in FLV format it took me about 1 hour of time, as in the beginning it was confusing to get confortable with the program scenes selector.

One downside of LiVES it failure to open a FLV file I wanted to edit.
In order to be able to edit the flv movie hence I first had to convert the FLV to AVI or MPEG, as this two (video multimedia formats) are supported by LiVES video editor.

After completing my video scenes chopping to the AVI file I had to convert back to FLV.

In order to complete the convertion between FLV to AVI format on my Debian Linux, I used a program called avidemux

Avidemux has a nice GUI interface and also like Lives has support for video editting, though I have never succesfully done any video edits with it.

Avidemux IMHO is user (completely intuitive). To convert the FLV to AVI, all I had to do was simply open the file FLV file, press (CTRL+S) select my FLV video file format and select the output file extension format to be AVI.

Further on, used LiVES to cut my desired parts from my video of choice. Once the cuts were complete I saved the new cutted version of video to AVI.
Then I needed the video again in FLV to upload it in Joomla, so used ffmpegcommand line tool to do the AVI to FLV file converstion, like so:

hipo@noah:~$ /usr/bin/ffmpeg -i my_media_file.avi my_video_file.flv

Hope this article helps someone aiming to do basic video editting on Linux with LiVES and just like needed FLV to AVI and AVI to FLV convertions.

How to make screenshot in /dev/tty console on GNU / Linux – Taking picture JPEG / PNG snapshot of text console in systems without graphical environment

Monday, April 30th, 2012

I'm used to making picture screenshots in GNOME desktop environment. As I've said in my prior posts, I'm starting to return to my old habits of using console ttys for regular daily jobs in order to increase my work efficiency. In that manner of thoughts sometimes I need to take a screenshot of what I'm seeing in my physical (TTY consoles) to be able to later reuse this. I did some experimenting and this is how this article got born.

In this post, I will shortly explain how a picture of a command running in console or terminal in GNU / Linux can be made

Before proceeding to the core of the article, I will say few words on ttys as I believe they might be helpful someone.
The abbreviation of tty comes after TeleTYpewritter phrase and is dating back somewhere near the 1960s. The TTY was invented to help people with impaired eyesight or hearing to use a telephone like typing interface.

In Unix / Linux / BSD ttys are the physical consoles, where one logs in (typing in his user/password). There are physical ttys and virtual vtys in today *nixes. Today ttys, are used everywhere in a modern Unixes or Unix like operating system with or without graphical environments.
Various Linux distributions have different number of physical consoles (TTYs) (terminals connected to standard output) and this depends mostly on the distro major contributors, developers or surrounding OS community philosophy.
Most modern Linux distributions have at least 5 to 7 physical ttys. Some Linux distributions like Debian for instance as of time of writting this, had 7 active by default physical consoles.
Adding 3 more ttys in Debian / Ubuntu Linux is done by adding the following lines in /etc/inittab:
 

7:23:respawn:/sbin/getty 38400 tty7
8:23:respawn:/sbin/getty 38400 tty8
9:23:respawn:/sbin/getty 38400 tty9

On some Linux distributions like Fedora version 9 and newer ones, new ttys can no longer be added via /etc/inittab,as the RedHat guys changed it for some weird reason, but I guess this is too broad issue to discuss ….

In graphical environments ttys are called methaphorically "virtual". For instance in gnome-terminal or while connecting to a remote SSH server, a common tty naming would be /dev/pts/8 etc.

tty command in Linux and BSDs can be used to learn which tty, one is operating in.

Here is output from my tty command, issued on 3rd TTY (ALT+F3) on my notebook:
 

noah:~# tty
/dev/tty3

A tty cmd output from mlterm GUI terminal is like so:
 

hipo@noah:~$ tty/dev/pts/9

Now as mentioned few basic things on ttys I will proceed further to explain how I managed to:

a) Take screenshot of a plain text tty screen into .txt file format
b) take a (picture) JPG / PNG screenshot of my Linux TTY consoles content

1. Take screenshot of plain text tty screen into a plain (ASCII) .txt file:

To take a screenshot of tty1, tty2 and tty3 text consoles in a txt plain text format, cat + a standard UNIX redirect is all necessery:
 

noah:~# cat /dev/vcs1 > /home/hipo/tty1_text_screenshot.txt
noah:~# cat /dev/vcs2 > /home/hipo/tty2_text_screenshot.txt
noah:~# cat /dev/vcs3 > /home/hipo/tty3_text_screenshot.txt

This will dump the text content of the console into the respective files, if however you try to dump an ncurses library like text interactive interfaces you will end up with a bunch of unreadable mess.
In order to read the produced text 'shots' onwards less command can be used …
 

noah:~# less /home/hipo/tty1_text_screenshot.txt
noah:~# less /home/hipo/tty2_text_screenshot.txt
noah:~# less /home/hipo/tty3_text_screenshot.txt

2. Take picture JPG / PNG snapshot of Linux TTY console content

To take a screenshot of my notebook tty consoles I had to first install a "third party program" snapscreenshot . There is no deb / rpm package available as of time of writting this post for the 4 major desktop linux distributions Ubuntu, Debian, Fedora and Slackware.
Hence to install snapscreenshot,I had to manually download the latest program tar ball source and compile e.g.:
 

noah:~# cd /usr/local/src
noah:/usr/local/src# wget -q http://bisqwit.iki.fi/src/arch/snapscreenshot-1.0.14.3.tar.bz2
noah:/usr/local/src# tar -jxvvvf snapscreenshot-1.0.14.3.tar.bz2

noah:/usr/local/src# cd snapscreenshot-1.0.14.3
noah:/usr/local/src/snapscreenshot-1.0.14# ./configure && make && make install
Configuring…
Fine. Done. make.
make: Nothing to be done for `all'.
if [ ! "/usr/local/bin" = "" ]; then mkdir –parents /usr/local/bin 2>/dev/null; mkdir /usr/local/bin 2>/dev/null; \
for s in snapscreenshot ""; do if [ ! "$s" = "" ]; then \
install -c -s -o bin -g bin -m 755 "$s" /usr/local/bin/"$s";fi;\
done; \
fi; \
if [ ! "/usr/local/man" = "" ]; then mkdir –parents /usr/local/man 2>/dev/null; mkdir /usr/local/man 2>/dev/null; \
for s in snapscreenshot.1 ""; do if [ ! "$s" = "" ]; then \
install -m 644 "$s" /usr/local/man/man"`echo "$s"|sed 's/.*\.//'`"/"$s";fi;\
done; \
fi

By default snapscreenshot command is made to take screenshot in a tga image format, this format is readable by most picture viewing programs available today, however it is not too common and not so standartized for the web as the JPEG and PNG.
Therefore to make the text console tty snapshot taken in PNG or JPEG one needs to use ImageMagick's convert tool. The convert example is also shown in snapscreenshot manual page Example section.

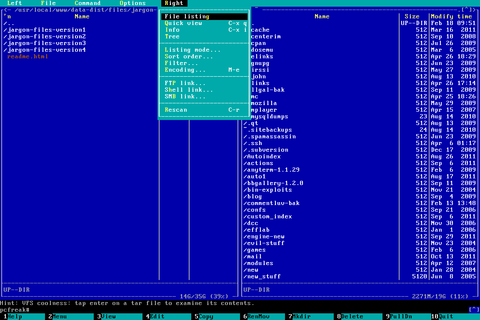
To take a .png image format screenshot of lets say Midnight Commander interactive console file manager running in console tty1, I used the command:
 

noah:/home/hipo# snapscreenshot -c1 -x1 > ~/console-screenshot.tga && convert ~/console-screenshot.tga console-screenshot.png

Linux text console tty mc screenshot with snapscreenshot terminal / console snapshotting program

Note that you need to have read/write permissions to the /dev/vcs* otherwise the snapscreenshot will be unable to read the tty and produce an error:
 

hipo@noah:~/Desktop$ snapscreenshot -c2 -x1 > snap.tga && convert snap.tga snap.pngGeometry will be: 1x2Reading font…/dev/console: Permission denied

To take simultaneous picture screenshot of everything contained in all text consoles, ranging from tty1 to tty5, issue:
 

noah:/home/hipo# snapscreenshot -c5 -x1 > ~/console-screenshot.tga && convert ~/console-screenshot.tga console-screenshot.png

Here is a resized 480×320 pixels version of the original screenshot the command produces:

All text Consoles tty1 to tty5 merged screenshot png image with snapscreenshot taken on Debian GNU / Linux

Storing a picture shot of the text (console) screen in JPEG (JPG) format is done analogously just the convert command output extension has to be changed to jpeg i.e.:
 

noah:/home/hipo# snapscreenshot -c5 -x1 > ~/console-screenshot.tga && convert ~/console-screenshot.tga console-screenshot.jpeg

I've also written a tiny wrapper shell script, to facilitate myself picture picture taking as I didn't like to type each time I want to take a screenshot of a tty the above long line.

Here is the wrapper script I wrote:
 

#!/bin/sh
### Config
# .tga produced file name
output_f_name='console-screenshot.tga';
# gets current date
cur_date=$(date +%d_%m_%Y|sed -e 's/^ *//');
# png output f name
png_f_name="console-screenshot-$cur_date.png";
### END Config
snapscreenshot -c$arg1 -x1 > $output_f_name && convert $output_f_name $png_f_name;
echo "Output png screenshot from tty1 console produced in";
echo "$PWD/$png_f_name";
/bin/rm -f $output_f_name;

You can also download my console-screenshot.sh snapscreenshot wrapper script here

The script is quite simplistic to use, it takes just one argument which is the number of the tty you would like to screenshot.
To use my script download it in /usr/local/bin and set it executable flag:
 

noah:~# cd /usr/local/bin
noah:/usr/local/bin# wget -q https://www.pc-freak.net/~bshscr/console-screenshot.sh
noah:/usr/local/bin# chmod +x console-screenshot.sh

Onwards to use the script to snapshot console terminal (tty1) type:
 

noan:~# console-screenshot.sh

I've made also mirror of latest version of snapscreenshot-1.0.14.3.tar.bz2 here just in case this nice little program disappears from the net in future times.


Editting binary files in console and GUI on FreeBSD and Linux

Thursday, April 26th, 2012

I’ve recently wanted to edit one binary file because there was compiled in the binary a text string with a word I didn’t liked and therefore I wanted to delete. I know I can dig in the source of the proggie with grep and directly substitute my “unwatned text” there but I wanted to experiment, and see what kind of hex binary text editors are for Free OSes.
All those who lived the DOS OS computer era should certainly remember the DOS hex editors was very enjoyable. It was not rare case, where in this good old days, one could simply use the hex editor to “hack” the game and add extra player lives or modify some vital game parameter like put himself first in the top scores list. I even remember some DOS programs and games was possible to be cracked with a text editor … Well it was times, now back to current situation as a Free Software user for the last 12 years it was interesting to see what is the DOS hexeditor like alternatives for FreeBSD and Linux and hence in this article I will present my findings:

A quick search in FreeBSD ports tree and Debian installable packages list, I’ve found a number of programs allowing one to edit in console and GUI binary files.

Here is a list of the hex editors I will in short review in this article:

  • hexedit
  • dhex
  • chexedit
  • hte
  • hexer
  • hexcurse
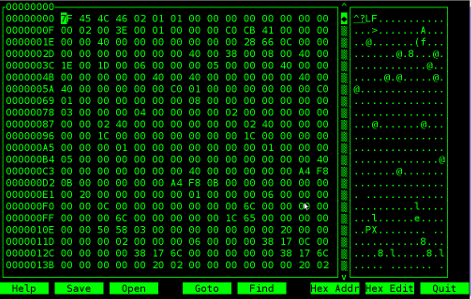
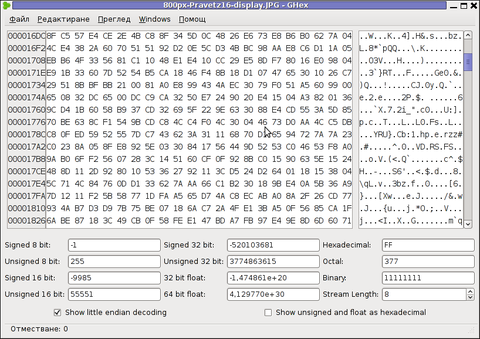
  • ghex
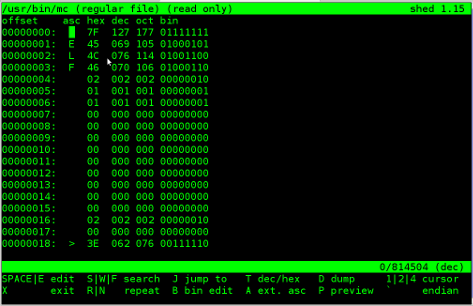
  • shed
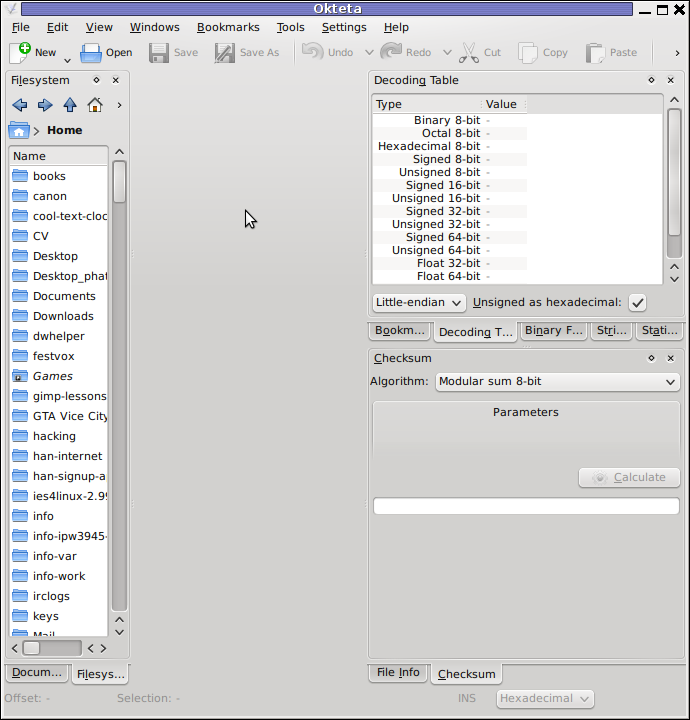
  • okteta
  • bless
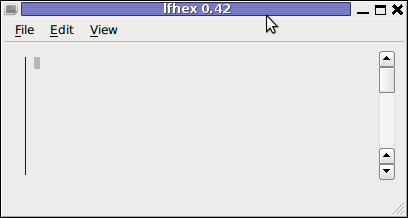
  • lfhex

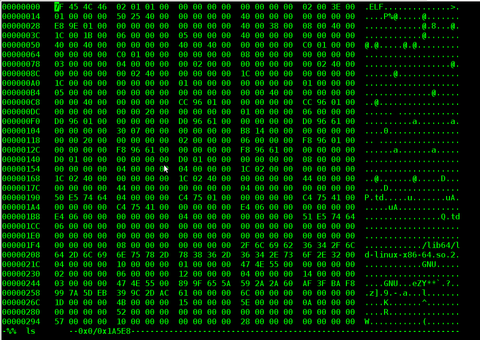
1. hexedit on Linux and BSD – basic hex editor

I’ve used hexedit already on Linux so I’ve used it some long time ago.

My previou experience in using hexedit is not too pinky, I found it difficult to use on Redhat and Debian Linux back in the day. hexedit is definitely not a choice of people who are not “initiated” with hex editting.
Anyways if you want to give it a try you can install it on FreeBSD with:

freebsd# cd /usr/ports/editors/hexedit
freebsd# make install clean

On Debian the hexedit, install package is named the same so installation is with apt:

debian:~# apt-get –yes install hexedit

hexedit screenshot Debian Linux Squeeze

2. Hex editting with chexedit

I’ve installed chexedit the usual way from ports:

freebsd# cd /usr/ports/editors/chexedit
freebsd# make install clean

chexedit is using the ncurses text console library, so the interface is very similar to midnight commander (mc) as you see from below’s screenshot:

Chexeditor FreeBSD 7.2 OS Screenshot

Editting the binary compiled in string was an easy task with chexedit as most of the commands are clearly visible, anyways changing a certain text string contained within the binary file with some other is not easy with chexedit as you need to know the corresponding binary binary value representing each text string character.
I’m not a low level programmer, so I don’t know the binary values of each keyboard character and hence my competence came to the point where I can substitute the text string I wanted with some unreadable characters by simply filling all my text string with AA AA AA AA values…

chexedit on Debian is packaged under a deb ncurses-hexedit. Hence to install it on Deb run:

debian:~# apt-get –yes install ncurses-hexedit

Further on the binary to run chexedit on binary contained within ncurses-hexedit is:

debian:~# hexeeditor

3. Hex Editting on BSD and Linux with hte

Just after trying out chexedit, I’ve found about the existence of one even more sophisticated hexeditor console program available across both FreeBSD and Linux.
The program is called hte (sounds to me a bit like the Indian word for Elephant “Hatti” :))

hte is installable on Debian with cmd:

debian:~# apt-get install ht

On FreeBSD the port name is identical, so to install it I execed:

freebsd# cd /usr/ports/editors/hte
freebsd# make install clean

hte is started on Debian Linux (and presumably other Linux distros) with:

$ hte

On FreeBSD you need to run it with ht command:

freebsd# ht

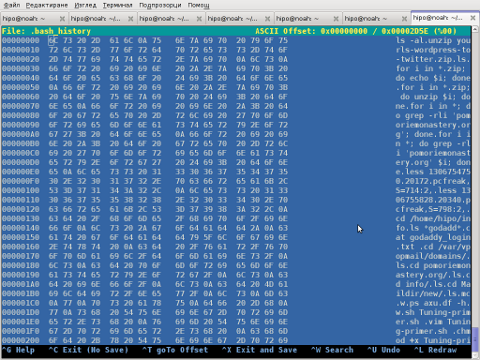
You see how hte looks like in below screenshot:

ht has the look & feel like midnight commander and I found it easier to use than chexedit and hexeditor
4. hexer VI like interface for Linux

As I was looking through the available packages ready to install, I’ve tried hexer

debian:~# apt-get install –yes hexer

hexer does follow the same standard commands like VIM, e.g. i for insert, a for append etc.

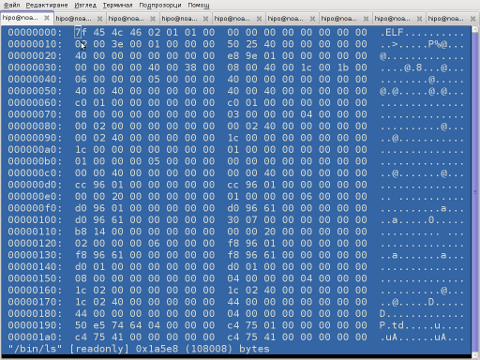
Hexer Debian Linux vim like binary editor screenshot

It was interesting to find out hexer was written by a Bulgarian fellow Petar Penchev 🙂
(Proud to be Bulgarian)

http://people.freebsd.org/~roam/ – Petar Penchev has his own page on FreeBSD.org

As a vim user I really liked the idea, the only thing I didn’t liked is there is no easy way to just substitute a string within the binary with another string.

5. hexcurse another ncurses library based hex editor

On Deb install and run via:

debian:~# apt-get –yes install hexcurse
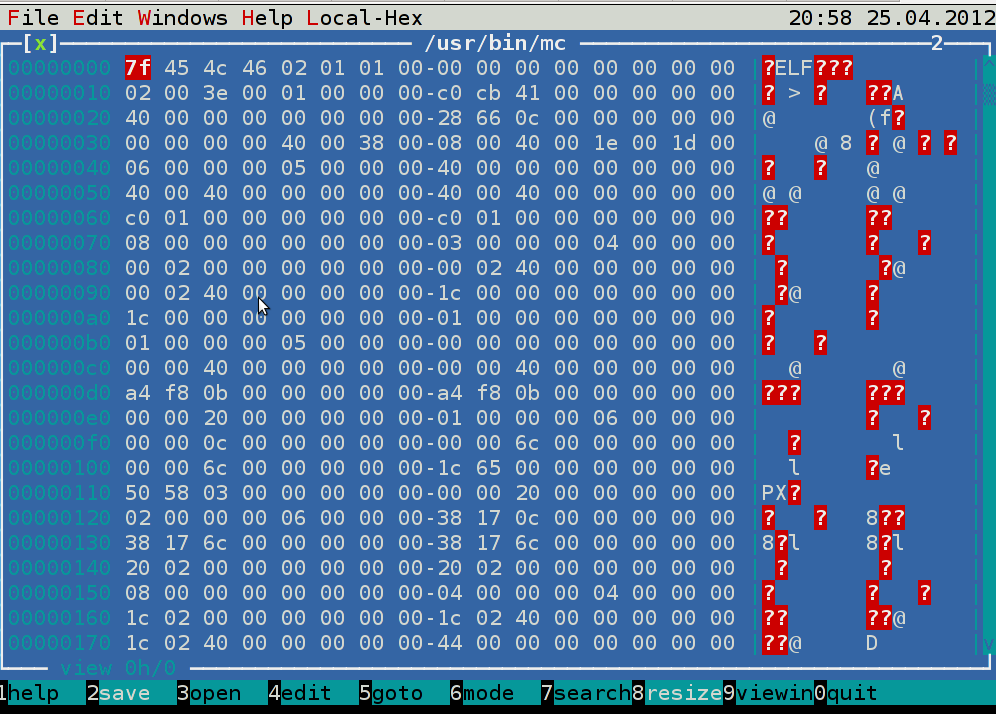
debian:~# hexcurse /usr/bin/mc

Hexcurse Debian Linux text binary editor screenshot

hexcurse is also available on FreeBSD to install it use cmd:

freebsd# cd /usr/ports/editors/hexcurse
freebsd# make install clean
….

To access the editor functions press CTRL+the first letter of the word in the bottom menu, CTRL+H, CTRL+S etc.
Something I disliked about it is the program search is always in hex, so I cannot look for a text string within the binaries with it.

6. ghex – Editting binary files in graphical environment

If you’re running a graphical environment, take a look at ghex. ghex is a gnome (graphical hex) editor.Installing ghex on Debian is with:

debian:~# apt-get –yes install ghex
….

To run ghex from terminal type:

debian:~# ghex2

GHex2 GNOME hex binary editor screenshot

To install ghex on FreeBSD (and I assume other BSDs), install via port:

freebsd# cd /usr/ports/editors/ghex
freebsd# make install clean

Gnome hex editor have plenty of tools, useful for developers to debug binary files.

Some nice tools one can find are under the the menus:

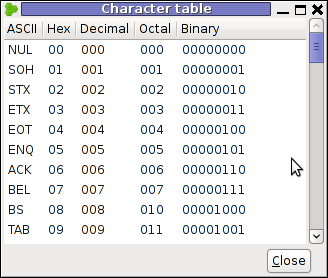
Windows -> Character Table

This will show a complete list of each keyboard sent character in ASCII, Hex, Decimal, Octal and Binary

Screenshot ghex Character table Debian Linux

Another useful embedded tool in ghex is:

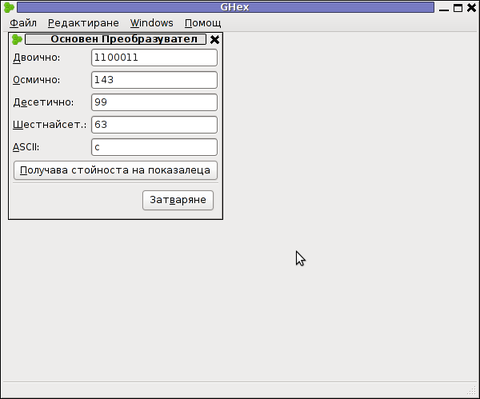
Windows -> Type Convertion Dialog

Ghex type convertion dialog screenshot

Note that if you want to use the Type Convertion Dialog tool to find the representing binary values of a text string you will have to type in the letters one by one and save the output within a text file and later you can go and use the same editor to edit the text string within the binary file you like.

I’m not a programmer but surely for programmers or people who want to learn some binary counting, this 2 ghex edmebbed tools are surely valuable.

To conclude even though there are plenty of softwares for hex editting in Linux and BSD, none of them is not so easy to use as the old DOS hexdedit tool, maybe it will be a nice idea if someone actually rewrites the DOS tool and they package it for various free operating systems, I’m sure many people will find it helpful to have a 1:1 equivalent to the DOS tool.

7. Shed pico like interfaced hex editor

For people, who use pico / nano as a default text editor in Linux shed will probably be the editor of choice as it follows the command shortcuts of picoOn Deb based distros to install it run:

debian:~# apt-get install –yes shed

shed pico like hex binary editor Linux

Shed has no BSD port as of time of writting.8. Okteta a KDE GUI hex editor

For KDE users, I found a program called okteta. It is available for Deb based Linuxes as deb to install it:

debian:~# apt-get –yes install okteta

Screenshot Okteta Debian GNU / Linux Squeeze

As of time of writting this article there is no okteta port for BSDs.
Okteta has plenty of functions and even has more of a functions than ghexedit. Something distinctive for it is it supports opening multiple files in tabs.

9. lfhex a large file text editor

lfhex is said to be a large (binary) file text editor, I have not tested it myself but just run it to see how it looks like. I don’t have a need to edit large binary files too, but I guess there are people with such requirements too 🙂

lfhex - Linux The Large file hex editor

To install lfhex on Debian:

debian:~# apt-get install –yes lfhex

lfhex has also a FreeBSD port installable via:

freebsd# cd /usr/ports/editors/lfhex
freebsd# make install clean

10. Bless a GUI tool for editting large hex (binary) files

Here is the description directly taken from the BSD port /usr/ports/editors/bless

Bless is a binary (hex) editor, a program that enables you to edit files asa sequence of bytes. It is written in C# and uses the Gtk# bindings for theGTK+ toolkit.

To install and use ot on deb based Linuxes:

debian:~# apt-get install –yes bless
….

On BSD installation is again from port:

freebsd# cd /usr/ports/editors/bless
freebsd# make install clean
….

Something that makes bless, maybe more desirable choice for GUI users than ghex is its availability of tabs. Opening multiple binaries in tabs will be useful only to few heavy debuggers.

Bless GUI hex editor Debian Linux tabs opened screenshot

11. Ghextris – an ultra hard hacker tetris game 🙂

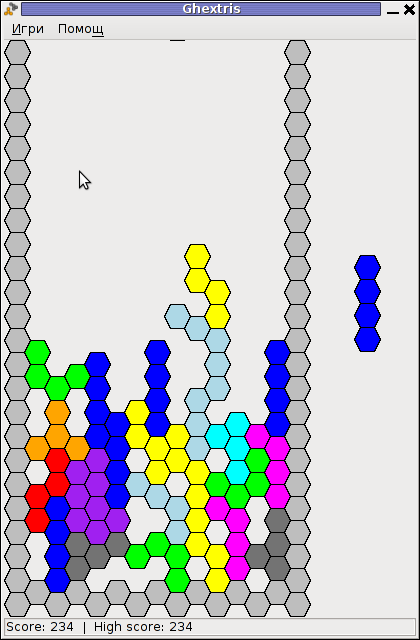
For absolute, hacker / (geeks), there is a tetris game called ghextris. The game is the hardest tetris game I ever played in my life. It requires more than regular IQ and a lot of practice if you want to become really good in this game.

To enjoy it:

debian:~# apt-get –yes install ghextris

Ultra hrad hardcore hackers game ghextris screenshot

Unfortunately there is no native port of ghextris for BSD (yet). Anyhow, it can be probably run using the Linux emulation or even compiled from source.
Well that’s all I found for hexedit-ing, I’ll be happy to hear if someone can give me some feedback on his favourite editor.

How to take area screenshots in GNOME – Take quick area selection screenshots in G* / Linux and BSD

Thursday, March 15th, 2012

Quick Area screenshot in GNOME how to make quick area selection screenshots in Linux and FreeBSD gnome-screenshot shot

Often when, you do something on your PC, you need to make a quick screenshot of a screen area.. Yes GNOME's feature to take complete screenshots of Screen with Print Screen SysRQ and consequential picture edit with GIMP is one way, but this is far away from quick. This method to chop out of a complete display screenshot usually takes from 40 secs to 1 minute to properly cut and save a selection of the whole picture.
Another common use, that I love in GNOME is the ALT + Print Screen SysRQ key combination. alt+ print scr sysrq is handy while taking a single window screenshot is desired. Anyways often you only need to make a screenshot of a tiny area of the screen. Many people might think this is not possible currently in GNOME, but they will be wrong as there are no impossible but hard things to achieve on Linux / FreeBSD 😉

There are at least two ways using a predefined command for taking quick area screen snapshot.

1. Taking quick area screenshot by using ImageMagick's import command

To use import you will need to have installed ImageMagickswiss army knife of command line image manipulation 😉
For area screenshot with import, press ALT+F2 and type inside Run Application box:
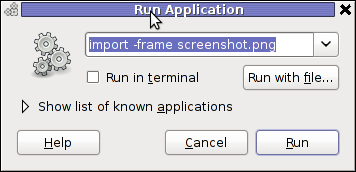
Screenshot GNOME run application GNU / Linux Debian ImageMagick import area screenshot

import -frame screenshot.png

Now make the selection of the exact screen area you would like to screeshot in file screenshot.png
Note that screenshot.png file will be saved by default in your home directory as it is read from $HOME shell variable:

hipo@noah:~$ echo $HOME/home/hipo
hipo@noah:~$ ls -al screenshot.png
-rw-r--r-- 1 hipo hipo 4950 Mar 14 21:11 screenshot.png

You see my $HOME equals /home/hipo, therefore screenshot.png just grabbed is saved in there.

One downside of taking the screenshot with import is that picture snapshot is not further edittable, if it has to be further processed with GIMP or some other graphic editor program.

In the screenshot, below I show you one screen area of my XMMS taken with import -frame screenshot.png cmd:
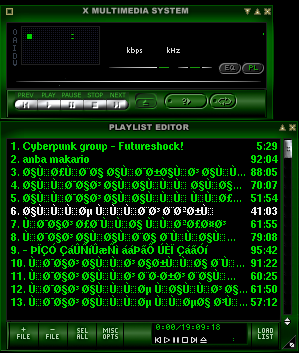
XMMS Screen Area Screenshot import screenshot

Trying to open the screenshot.png, file with GIMP displays the following error in GIMP:
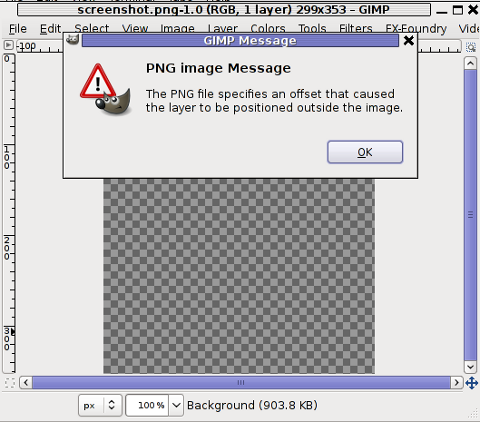
PNG image message PNG the file specifies offset that caused the layer to be positioned outiside image GIMP screenshot

Not all area snapshots taken with import -frame, create this issue sometimes screenshots are opening in GIMP but only area of the screenshot.png is visible in gimp.

Thanksfull, there is work around to this issue by converting the import generated PNG format picture to JPEG with ImageMagick's convert and then edit the .JPEG with GIMP etc.:

hipo@noah:~$ convert screenshot.png screenshot.jpg

Hence to permanently work around it, in case you intend to apply (GIMP modifications), once area snapshot is made instruct import to save its output picture in .jpeg, e.g.:

hipo@noah:~$ import -frame screenshot.jpeg

2. Taking quick area screenshot using gnome-screenshot cmd

Once again invoke the GNOME command Launcher by pressing Alt+F2 (holding alt and pressing F2) and type in the launch box:

gnome-screenshot -a
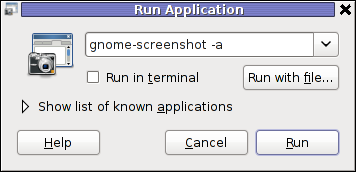
gnome-screenshot Run Application in GNOME 2.30 on Debian GNU / Linux

Below is a small area from my desktop, chopped with gnome-screenshot 🙂

GNOME desktop area chop screenshot with gnome-screenshot on my home Debian Linux

You see on above screenshot a tiny (picture) icon one of the greatest, if not the greatest bulgarian saint – saint John of Rila. St. John's lived as hermit for many years in Rila mountain and by God's grace possessed incorruptable body. His incorruptable body is still kept and can be venerated in Rila Monastery. The monastery is located 160 km from Bulgaria's capital city Sofia

St. Johns first Bulgarian established monastery Rila Monastery is currently the biggest functioing monastery in Bulgaria. The saints monastery is considered one of the most holy places in Bulgaria. If you have a travel or plan a holiday in Bulgaria, I warmly recommend you go there and venerate the saint incorruptable relics.

3. Binding keys to allow quick area screenshot taking with gnome-screenshot in GNOME

This configuration is for GNOME 2.x and is tested to work on my Debian (Squeeze 6.0), GNOME ver. 2.30.2, it should work in earlier Ubuntu versions shipped with GNOME 2.2.xx too. As I've red on the Internet it works well with Ubuntu 10.10Binding a key for screenshot area grab, should be working properly also on any GNOME 2.2.x supporting OS, including the BSD family OSes (FreeBSD, OpenBSD, NetBSD)

a) setting gnome-screenshot key binding for interactive screenshot area grab

Navigate the mouse cursor to GNOME main menus panel in left top, where you see (Applications, Places, System).
Therein use menus:

System -> Preferences -> Keybord Shortcuts -> Add ->

Alternatively if you prefer you can directly invoke the Keyboard Shortcuts configuration with command:

hipo@noah:~$ gnome-keybinding-properties

Further on, assign a shortcut by filling in something like:

name: grab-screen-area
command: gnome-screenshot -i -a
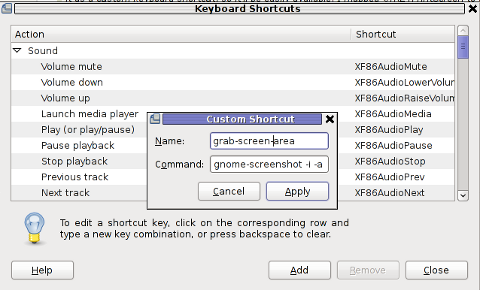
GNOME add keyboard shortcut map key for area interactive screenshot

press Apply and next map a key to the new defined key binding:
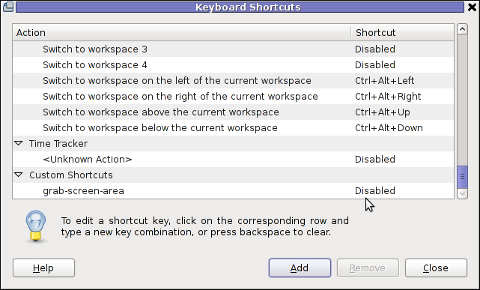
GNOME add keyboard shortcut map key

Under the Shortcut column click on Disabled and assign some key combination to invoke the cmd for example Ctrl+F4

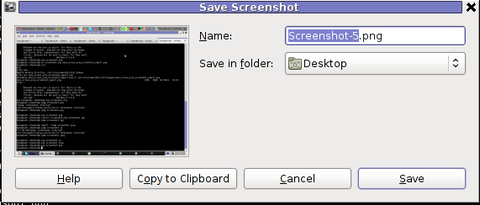
The command gnome-screenshot -i makes gnome-screenshot, show interactive make screenshot dialog like the one in below screenshot.
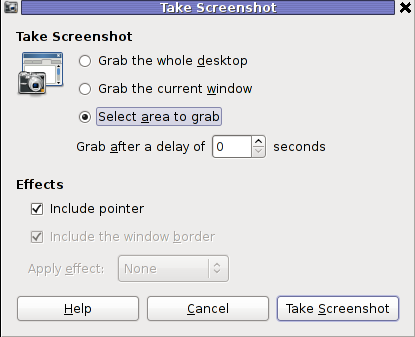
GNOME screenshot interactive screenshot select area grab shot

b) creating gnome-screenshot -a area screenshot key binding for quick area screenshots "on the fly"

The procedure is precisely the same as with adding interactive screenshot; Under Keyboard Shortcuts GNOME config assign new key binding by pressing Add button and adding:

name: grab-screen-area1
command: gnome-screenshot -a

Once again in Shortcut column in line starting with grab-screen-area1 add your desired key switch. I personally like Ctrl+Print Screen SysRQ as it is close to the default GNOME key combination assigned for taking screenshot for a Windows Alt+Print SysRq

It was logical, that this key binding should work and a direct selection mouse cursor to appear once Alt+Print SysRQ is pressed, however for some reason this is not working (hmm, maybe due to bug) ??

Thanksfully it is always possible to substitute the just assigned gnome-screenshot -a key binding with import -frame /home/hipo/Desktop/screenshot.png

If you have followed literally my article so far and you did tried to place a bind for gnome-screenshot -a, modifty grab-screen-area1 to be something like:

name: grab-screen-area1
command: import -frame /home/hipo/Desktop/screenshot.png

Where modify the path /home/hipo/Desktop/screenshot.png, to wherever you prefer the region screep capture to be stored.

c) bind keys for delayed screenshot

This also a handy binding, especially if you every now and then need to make screenshots of screen with a few secs interval.
Add one more keyboard shortcut;

name: grab-screen-area2
command: gnome-screenshot -d 5

Assign a key to make a screenshot of the active display after a delay of 5 seconds. I prefer Ctrl+F5

Onwards every time you would like to make an area screenshot, just use the defined keys:

Ctrl+F4 - will prompt you interactively for the precise type of screenshot you would like to take
Ctrl+Print SysRQ - will prompt you for a direct area to select and once selected will immediately screenshot it
Ctrl+F5 - would do delayed screenshot of entire screen after a delay of 5 seconds

4. Adding border and drop shadow effects with gnome-screenshot Actually, there is plenty of interesting things to do with Screenshots which I never thought were possible.
While reading gnome-screenshot's man page, I've stumbled to an interesting argument:

-e, --effect=EFFECT,
Add an effect to the outside of the screenshot border. EFFECT can be ``shadow'' (adding drop shadow), ``border'' (adding
rectangular space around the screenshot) or ``none'' (no effect). Default is ``none''.

This would have been a nice feature but as of time of writting this article, untofrtunately it is not working in GNOME 2.30.2. I'm not sure if this is a local Debian bug, however I suspect on other Linux distributions with different GNOME build configuration, this features might be working well. My guess here is drop shadow effect and border effect are not working because, gnome-screenshot was compiled without (support for ImageMagick?).
Anyways the way the feature is supposed to be work is by invoking commands:
:

hipo@noah:~$ gnome-screenshot --border-effect=shadow
hipo@noah:~$ nome-screenshot --border-effect=border

The same basic effects, are also available through GIMP's menus:

Image -> Effects

5. Setting default behaviour of gnome-screenshot in gconf-editor GConf (Gnome config registry db)

Experienced, GNOME users should already know about the existence of gconf-editor and the gnome registry database. For those who have don't, coming from MS-Windows background gconf-editor is GNOME (graphical environment) equivalent to Microsoft Windows registry regedit command

gconf-editor can be used to atune the way the screenshots are taken by default. To do so, launch gconf-editor cmd and follow to sub-structure:

/ -> apps -> gnome-screenshot
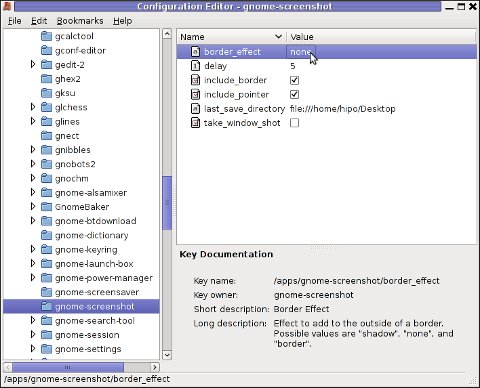
gconf-editor GNOME screenshot border effect none default gnome-screenshot gnome behaviour

The settings in above screenshot are configurations which are used by default by gnome-screenshot, right after install.
You can play with the options to change the default way PrintScreen SysRQ key press will take screenshots.
Here is one example for changing the gnome-screenshot default GNOME behaviour:
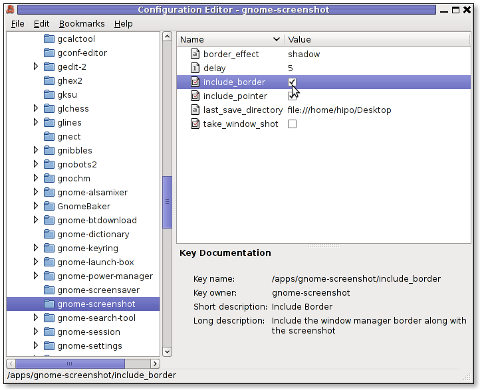
GConf Editor GNOME screenshot, border effect drop shadow and include border option set on Linux Debian

As you can see in above screenshot, I've changed my default gnome-screenshot snap taking to include a drop shadow effect:
Name | Value
border_effect | shadow include_border | (tick on)
last_save_directory | file://home/hipo/Desktop

As you see you can also control, where by default gnome-screenshot will save its screenshots, by default, its saved in $HOME/Desktop
. If you prefer some custom directory to only contain Screenshots taken for instance $HOME/Screenshots, create the directory:
hipo@noah:~$ mkdir ~/Screenshots

and then change the value for last_save_directory gconf var:

last_save_directory | file://home/hipo/Screenshots

Once settings are applied screenshots with Print Screen SysRQ key will be made with Shadow Border effect and saved in /home/hipo/Screenshots

Strangely enough, changing gnome-screenshot default screenshotting values to include screenshot effects like drop shadow or screenshot border effect works just fine.
Even though gnome-screenshot –border-effect=shadow and gnome-screenshot –border-effect=border doesn't directly affect the current screenshot to be made, I've later noticed writting this two commands in the gnome-terminal, does change the border settings for gconf-editor screenshot border.

If you enjoyed, this article and you intend to become "a professional screnshotter" :), you might also enjoy my two other articles:

Happy screenshotting 😉
FreeBSD Jumbo Frames network configuration short how to

Wednesday, March 14th, 2012

FreeBSD Jumbo Frames Howto configure FreeBSD

Recently I wrote a post on how to enable Jumbo Frames on GNU / Linux , therefore I thought it will be useful to write how Jumbo Frames network boost can be achieved on FreeBSD too.

I will skip the details of what is Jumbo Frames, as in the previous article I have thoroughfully explained. Just in short to remind you what is Jumbo Frames and why you might need it? – it is a way to increase network MTU transfer frames from the MTU 1500 to MTU of 9000 bytes

It is interesting to mention that according to specifications, the maximum Jumbo Frames MTU possible for assignment are of MTU=16128
Just like on Linux to be able to take advantage of the bigger Jumbo Frames increase in network thoroughput, you need to have a gigabyt NIC card/s on the router / server.

1. Increasing MTU to 9000 to enable Jumbo Frames "manually"

Just like on Linux, the network tool to use is ifconfig. For those who don't know ifconfig on Linux is part of the net-tools package and rewritten from scratch especially for GNU / Linux OS, whether BSD's ifconfig is based on source code taken from 4.2BSD UNIX

As you know, network interface naming on FreeBSD is different, as there is no strict naming like on Linux (eth0, eth1, eth2), rather the interfaces are named after the name of the NIC card vendor for instance (Intel(R) PRO/1000 NIC is em0), RealTek is rl0 etc.

To set Jumbro Frames Maximum Transmission Units of 9000 on FreeBSD host with a Realtek and Intel gigabyt ethernet cards use: freebsd# /sbin/ifconfig em0 192.168.1.2 mtu 9000
freebsd# /sbin/ifconfig rl0 192.168.2.2 mtu 9000

!! Be very cautious here, as if you're connected to the system remotely over ssh you might loose connection to it because of broken routing.

To prevent routing loss problems, if you're executing the above two commands remotely, you better run them in GNU screen session:

freebsd# screen
freebsd# /sbin/ifconfig em0 192.168.1.2 mtu 9000; /sbin/ifconfig rl0 192.168.1.2 mtu 9000; \
/etc/rc.d/netif restart; /etc/rc.d/routed restart

2. Check MTU settings are set to 9000

If everything is fine the commands will return empty output, to check further the MTU is properly set to 9000 issue:

freebsd# /sbin/ifconfig -a|grep -i em0em0: flags=8843<UP,BROADCAST,RUNNING,SIMPLEX,MULTICAST> metric 0 mtu 9000freebsd# /sbin/ifconfig -a|grep -i rl0
rl0: flags=8843<UP,BROADCAST,RUNNING,SIMPLEX,MULTICAST> metric 0 mtu 9000

3. Reset routing for default gateway

If you have some kind of routing assigned for em0 and rl0, network interfaces they will be affected by the MTU change and the routing will be gone. To reset the routing to the previously properly assigned routing, you have to restart the BSD init script taking care for assigning routing on system boot time:

freebsd# /etc/rc.d/routing restart
default 192.168.1.1 done
add net default: gateway 192.168.1.1
Additional routing options: IP gateway=YES.

4. Change MTU settings for NIC card with route command

There is also a way to assign higher MTU without "breaking" the working routing, e.g. avoiding network downtime with bsd route command:

freebsd# grep -i defaultrouter /etc/rc.conf
defaultrouter="192.168.1.1"
freebsd# /sbin/route change 192.168.1.1 -mtu 9000
change host 192.168.1.1

5. Finding the new MTU NIC settings on the FreeBSD host

freebsd# /sbin/route -n get 192.168.1.1
route to: 192.168.1.1
destination: 192.168.1.1
interface: em0
flags: <UP,HOST,DONE,LLINFO,WASCLONED>
recvpipe sendpipe ssthresh rtt,msec rttvar hopcount mtu expire
0 0 0 0 0 0 9000 1009

6. Set Jumbo Frames to load automatically on system load

To make the increased MTU to 9000 for Jumbo Frames support permanent on a FreeBSD system the /etc/rc.conf file is used:

The variable for em0 and rl0 NICs are ifconfig_em0 and ifconfig_rl0.
The lines to place in /etc/rc.conf should be similar to:

ifconfig_em0="inet 192.168.1.1 netmask 255.255.255.0 media 1000baseTX mediaopt half-duplex mtu 9000"

Change in the above lines the gateway address 192.168.1.1 and the netmask 255.255.255.0 to yours corresponding gw and netmask.
Also in the above example you see the half-duplex ifconfig option is set insetad of full-duplex in order to prevent some duplex mismatches. A full-duplex could be used instead, if you're completely sure on the other side of the host is configured to support full-duplex connections. Otherwise if you try to set full-duplex with other side set to half-duplex or auto-duplex a duplex mismatch will occur. If this happens insetad of taking the advantage of the Increase Jumbo Frames MTU the network connection could become slower than originally with standard ethernet MTU of 1500. One other bad side if you end up with duplex-mismatch could be a high number of loss packets and degraded thoroughout …

7. Setting Jumbo Frames for interfaces assigning dynamic IP via DHCP

If you need to assign an MTU of 9000 for a gigabyt network interfaces, which are receiving its TCP/IP network configuration over DHCP server.
First, tell em0 and rl0 network interfaces to dynamically assign IP addresses via DHCP proto by adding in /etc/rc.conf:

ifconfig_em0="DHCP"
ifconfig_rl0="DHCP"

Secondly make two files /etc/start_if.em0 and /etc/start_if.rl0 and include in each file:

ifconfig em0 media 1000baseTX mediaopt full-duplex mtu 9000
ifconfig rl0 media 1000baseTX mediaopt full-duplex mtu 9000

Copy / paste in root console:

echo 'ifconfig em0 media 1000baseTX mediaopt full-duplex mtu 9000' >> /etc/start_if.em0
echo 'ifconfig rl0 media 1000baseTX mediaopt full-duplex mtu 9000' >> /etc/start_if.rl0

Finally, to load the new MTU for both interfaces, reload the IPs with the increased MTUs:

freebsd# /etc/rc.d/routing restart
default 192.168.1.1 done
add net default: gateway 192.168.1.1

8. Testing if Jumbo Frames is working correctly

To test if an MTU packs are transferred correctly through the network you can use ping or tcpdumpa.) Testing Jumbo Frames enabled packet transfers with tcpdump

freebsd# tcpdump -vvn | grep -i 'length 9000'

You should get output like:

16:40:07.432370 IP (tos 0x0, ttl 50, id 63903, offset 0, flags [DF], proto TCP (6), length 9000) 192.168.1.2.80 > 192.168.1.1.60213: . 85825:87285(1460) ack 668 win 14343
16:40:07.432588 IP (tos 0x0, ttl 50, id 63904, offset 0, flags [DF], proto TCP (6), length 9000) 192.168.1.2.80 > 192.168.1.1.60213: . 87285:88745(1460) ack 668 win 14343
16:40:07.433091 IP (tos 0x0, ttl 50, id 63905, offset 0, flags [DF], proto TCP (6), length 9000) 192.168.1.2.80 > 192.168.1.1.60213: . 23153:24613(1460) ack 668 win 14343
16:40:07.568388 IP (tos 0x0, ttl 50, id 63907, offset 0, flags [DF], proto TCP (6), length 9000) 192.168.1.2.80 > 192.168.1.1.60213: . 88745:90205(1460) ack 668 win 14343
16:40:07.568636 IP (tos 0x0, ttl 50, id 63908, offset 0, flags [DF], proto TCP (6), length 9000) 192.168.1.2.80 > 192.168.1.1.60213: . 90205:91665(1460) ack 668 win 14343
16:40:07.569012 IP (tos 0x0, ttl 50, id 63909, offset 0, flags [DF], proto TCP (6), length 9000) 192.168.1.2.80 > 192.168.1.1.60213: . 91665:93125(1460) ack 668 win 14343
16:40:07.569888 IP (tos 0x0, ttl 50, id 63910, offset 0, flags [DF], proto TCP (6), length 9000) 192.168.1.2.80 > 192.168.1.1.60213: . 93125:94585(1460) ack 668 win 14343

b.) Testing if Jumbo Frames are enabled with ping

Testing Jumbo Frames with ping command on Linux

linux:~# ping 192.168.1.1 -M do -s 8972
PING 192.168.1.1 (192.168.1.1) 8972(9000) bytes of data.
9000 bytes from 192.168.1.1: icmp_req=1 ttl=52 time=43.7 ms
9000 bytes from 192.168.1.1: icmp_req=2 ttl=52 time=43.3 ms
9000 bytes from 192.168.1.1: icmp_req=3 ttl=52 time=43.5 ms
9000 bytes from 192.168.1.1: icmp_req=4 ttl=52 time=44.6 ms
--- 192.168.0.1 ping statistics ---
4 packets transmitted, 4 received, 0% packet loss, time 3003ms
rtt min/avg/max/mdev = 2.397/2.841/4.066/0.708 ms

If you get insetad an an output like:

From 192.168.1.2 icmp_seq=1 Frag needed and DF set (mtu = 1500)

--- 192.168.1.1 ping statistics ---
0 packets transmitted, 0 received, +4 errors

This means a packets with maximum MTU of 1500 could be transmitted and hence something is not okay with the Jumbo Frames config.
Another helpful command in debugging MTU and showing which host in a hop queue support jumbo frames is Linux's traceroute

To debug a path between host and target, you can use:

linux:~# traceroute --mtu www.google.com
...

If you want to test the Jumbo Frames configuration from a Windows host use ms-windows ping command like so:

C:\>ping 192.168.1.2 -f -l 8972
Pinging 192.168.1.2 with 8972 bytes of data:
Reply from 192.168.1.2: bytes=8972 time=2ms TTL=255
Ping statistics for 192.168.1.2:
Packets: Sent = 4, Received = 4, Lost = 0 (0% loss),
Approximate round trip times in milli-seconds:
Minimum = 2ms, Maximum = 2ms, Average = 2ms

Here -l 8972 value is actually equal to 9000. 8972 = 9000 – 20 (20 byte IP header) – 8 (ICMP header)

How to debug mod_rewrite .htaccess problems with RewriteLog / Solve mod_rewrite broken redirects

Friday, September 30th, 2011

Its common thing that CMS systems and many developers custom .htaccess cause issues where websites depending on mod_rewrite fails to work properly. Most common issues are broken redirects or mod_rewrite rules, which behave differently among the different mod_rewrite versions which comes with different versions of Apache.

Everytime there are such problems its necessery that mod_rewrite’s RewriteLog functionality is used.
Even though the RewriteLog mod_rewrite config variable is well described on httpd.apache.org , I decided to drop a little post here as I’m pretty sure many novice admins might not know about RewriteLog config var and might benefit of this small article.
Enabling mod_rewrite requests logging of requests to the webserver and process via mod_rewrite rules is being done either via the specific website .htaccess (located in the site’s root directory) or via httpd.conf, apache2.conf etc. depending on the Linux / BSD linux distribution Apache config file naming is used.

To enable RewriteLog near the end of the Apache configuration file its necessery to place the variables in apache conf:

1. Edit RewriteLog and place following variables:

RewriteLogLevel 9
RewriteLog /var/log/rewrite.log

RewriteLogLevel does define the level of logging that should get logged in /var/log/rewrite.log
The higher the RewriteLogLevel number defined the more debugging related to mod_rewrite requests processing gets logged.
RewriteLogLevel 9 is actually the highest loglevel that can be. Setting the RewriteLogLevel to 0 will instruct mod_rewrite to stop logging. In many cases a RewriteLogLevel of 3 is also enough to debug most of the redirect issues, however I prefer to see more, so almost always I use RewriteLogLevel of 9.

2. Create /var/log/rewrite.log and set writtable permissions

a. Create /var/log/rewrite.log

freebsd# touch /var/log/rewrite.log

b. Set writtable permissons

Either chown the file to the user with which the Apache server is running, or chmod it to permissions of 777.

On FreeBSD, chown permissions to allow webserver to write in file, should be:

freebsd# chown www:www /var/log/rewrite.log

On Debian and alike distros:

debian:~# chown www-data:www-data /var/log/rewrite.log

On CentOS, Fedora etc.:

[root@centos ~]# chown httpd:httpd /var/log/rewrite.log

On any other distribution, you don’t want to bother to check the uid:gid, the permissions can be set with chmod 777, e.g.:

linux# chmod 777 /var/log/rewrite.log

Next after RewriteLog is in conf to make configs active the usual webserver restart is required.

To restart Apache On FreeBSD:

freebsd# /usr/local/etc/rc.d/apache2 restart
...

To restart Apache on Debian and derivatives:

debian:~# /etc/init.d/apache2 restart
...

On Fedora and derivive distros:

[root@fedora ~]# /etc/init.d/httpd restart
...

Its common error to forget to set proper permissions to /var/log/rewrite.log this has puzzled me many times, when enabling RewriteLog’s logging.

Another important note is when debugging for mod_rewrite is enabled, one forgets to disable logging and after a while if the /var/log partition is placed on a small partition or is on an old server with less space often the RewriteLog fills in the disk quickly and might create website downtimes. Hence always make sure RewriteLog is disabled after work rewrite debugging is no longer needed.

The way I use to disable it is by commenting it in conf like so:

#RewriteLogLevel 9
#RewriteLog /var/log/rewrite.log

Finally to check, what the mod_rewrite processor is doing on the fly its handy to use the well known tail -f

linux# tail -f /var/log/rewrite.log

A bunch of time in watching the requests, should be enough to point to the exact problem causing broken redirects or general website malfunction.
Cheers 😉
Poderosa a tabbed Terminal Emulator (PuTTY Windows Alternative)

Tuesday, December 6th, 2011

Even though, I rarely use Windows to connect to remote servers using SSH or Telnet protocols in some cases I’m forced to do that (in cases I’m away from my Linux notebook). I’m doing my best to keep away from logging anywhere via SSH using Windows as when using Windows you never know what kind of spyware, malware or Viruses is already on the system, not to mention Microsoft are sniffing a lot if not everything which is typed on the keyboard… Anyways, usually I use Putty as a quick way to access a remote SSH, however pitily PuTTY lacks an embedded functionality for Tabs and each new connection to a server I had to run a new instance of PuTTY. This is okay if you need to access a single server but in some cases where access to multple servers is necessery lacking the tab functionality and starting 10 times putty is really irritating and one forgets what kind of connection is present on which PuTTY instance.

Earlier on, I’ve blogged about the existence of PuTTY Connection Manager PuTTY add-on program which is a PuTTY wrapper which enables PuTTY to be used with Connection Tabs feature, however installing two programs is quite inconvenient, especially if you have to do this every few days (in case if travelling a lot).

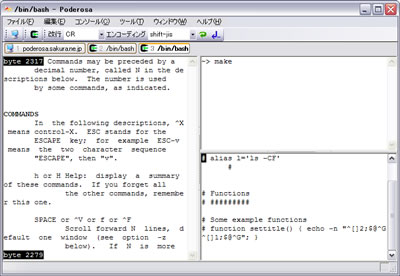
Luckily there is another terminal emulator free program for Windows called PodeRoSA which natively supports a tabbed Secure Shell connections.
If you want to get some experience with it check out Poderosa’s website , here is also a screenshot of the program running few ssh encrypted connections in tabs on a Windows host.

Poderosa Windows ssh / telnet tabs terminal emulator screenshot
Another good reason that one might consider using Poderosa instead of PuTTY is the Apache License under which Poderosa is developed. Currently the Apache License is compatible with GPL free software license which makes the program fully free software. The PuTTY license is under BSD and MIT and some other weird custom license not 100% compatible with GPL and hence PuTTY can be considered less free software in terms of freedom.

How to mount ISO image files in Graphical Environment (GUI) on Ubuntu and Debian GNU/Linux

Saturday, January 14th, 2012

Mounting ISO files in Linux is easy with mount cmd, however remembering the exact command one has to issue is a hard task because mounting ISO files is not a common task.

Mounting ISO files directly by clicking on the ISO file is very nice, especially for lazy people uninitiated with the command line 😉

Besides that I'm sure many Windows users are curious if there is an equivallent program to DaemonTools for Linux / BSD*?

The answer to this question is YES!
There are two major programs which can be used as a DaemonTools substitute on Linux:

These are FuriousISOMount and AcetoneISO
AcetoneISO is more known and I've used it some long time ago and if I'm correct it used to be one of the first ISO Mount GUI programs for Linux. There is a project called GMount-ISO / (GMountISO) which of the time of writting this article seems to be dead (at least I couldn't find the source code).

Luckily FuriousISOMount and AcetoneISO are pretty easy to install and either one of the two is nowdays existing in most Linux distributions.
Probably the programs can also be easily run on BSD platform also quite easily using bsd linux emulation.
If someone has tried something to mount GUIs in Free/Net/OpenBSD, I'll be interesting to hear how?

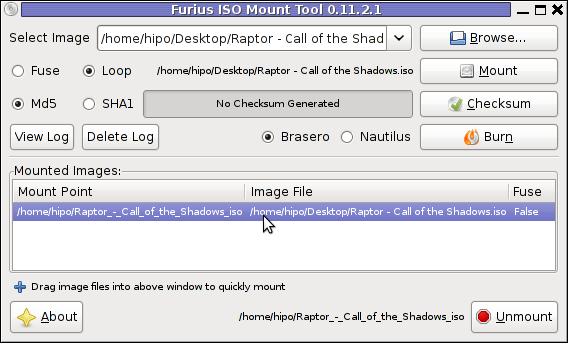
1. Mount ISO files GUI in GNOME with Furius ISO Mount

FuriousISOMount is a simple Gtk+ interface to mount -t iso9660 -o loop command.

To start using the program on Debian / Ubuntu install with apt;

debian:~# apt-get install furiusisomount
The following extra packages will be installed:
fuseiso fuseiso9660 libumlib0
The following NEW packages will be installed:
furiusisomount fuseiso fuseiso9660 libumlib0

To access the program in GNOME after install use;

Applications -> Accessories -> Furious ISO Mount

Screenshot ISO Mount Tool Debian GNU/Linux Screenshot
 

When mounting it is important to choose Loop option to mount the iso instead of Fuse

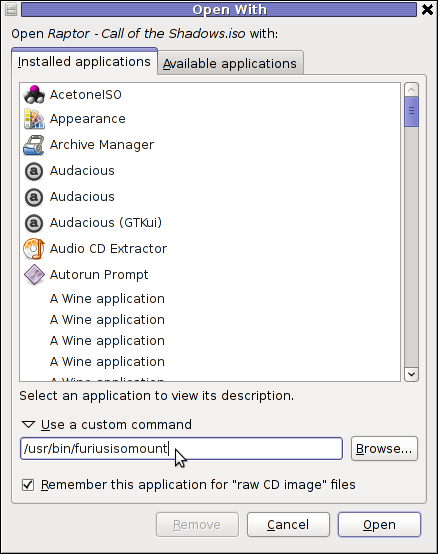
After the program is installed to associate the (.iso) ISO files, to permanently be opened with furiusisomount roll over the .iso file and choose Open With -> Other Application -> (Use a custom command) -> furiusisomount

GNOME Open with menu Debian GNU / Linux

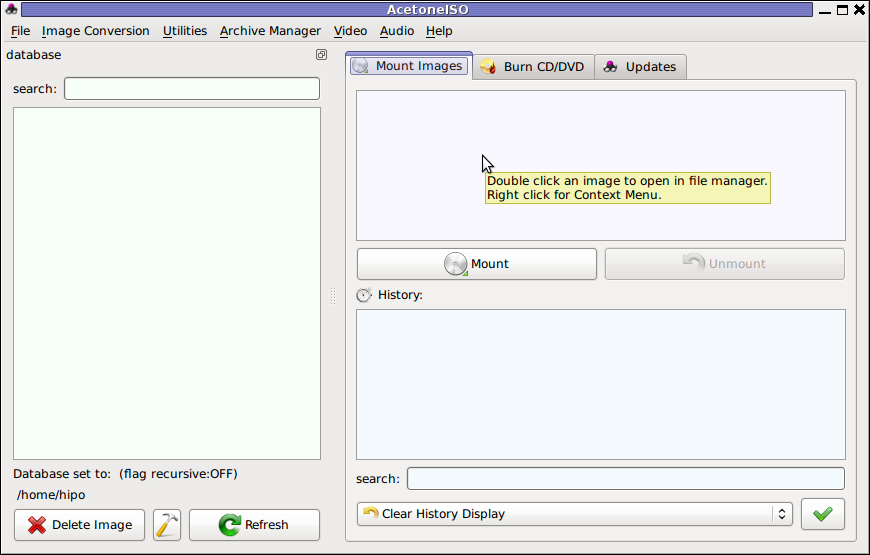
2. Mount ISO Files in KDE Graphical Environment with AcetoneISO

AcetoneISO is build on top of KDE's QT library and isway more feature rich than furiousisomount.
Installing AcetoneISO Ubuntu and Debian is done with:

debian:~# apt-get install acetoneiso
The following NEW packages will be installed:
acetoneiso gnupg-agent gnupg2 libksba8 pinentry-gtk2 pinentry-qt4
0 upgraded, 6 newly installed, 0 to remove and 35 not upgraded.
Need to get 3,963 kB of archives.
After this operation, 8,974 kB of additional disk space will be used.
...

Screenshot Furius ISO Mount Tool Debian GNU/Linux ScreenShot

AcetoneISO supports:
 

  • conversion between different ISO formats
  • burn images to disc
  • split ISO image volumes
  • encrypt images
  • extract password protected files

Complete list of the rich functionality AcetoneISO offers is to be found on http://www.acetoneteam.org/viewpage.php?page_id=6
To start the program via the GNOME menus use;

Applications -> Accessories -> Sound & Video -> AcetoneISO

I personally don't like AcetoneISO as I'm not a KDE user and I see the functionality this program offers as to rich and mostly unnecessery for the simple purpose of mounting an ISO.

3. Mount ISO image files using the mount command

If you're a console guy and still prefer mounting ISO with the mount command instead of using fancy gui stuff use:

# mount -t iso9660 -o loop /home/binary/someiso.iso /home/username/Iso_Directory_Name