Posts Tagged ‘course’
Sunday, June 15th, 2008 At Saturday I had my first driving license. The instructor let me drive on the road for Balchik. Happily the driving went smoothly of course I made a lot of mistakes which is pretty normal for a first time driving. In the afternoon we went out for a walk with Niki. We just went out when Vlado (Hellpain) called, he came back to Dobrich for a day, we met for a coffee after which we stayed for 2 hours in the central park. Today as usual I attended the liturgy at the orthodox Church. Today it’s a big Christian Orthodox holiday, it’s the day in which the Our Lord Jesus Christ send the Holy Spirit to the early Church fathers (the apostles). The apostles heard a great noise and they see the Holy Spirit descending from heaven in a form of burning tongues, each tongue coming above the head of each of the apostles and the rest of the first believers in our Lord and Saviour Jesus. I’m still in doubt should I decide to go or not to the Netherlands. I applied for a room there through http://vivare.nl yesterday. But still haven’t received a confirmation for approval and I haven’t send a deposit for a room. I made research about the Arnhem Business School (ABS) and talked and I’m talking with a friend who went to study in Holland the last year. In the afternoon I watched an old russian movie which is marked as a SCI-FI genre (Kin Dza Dza), I got the title from the top 20 in IMDB. Yeah I can say that the movie was pretty freaky :). Vladi did call me again and said one of the servers in the office had crashed I spoke with of my colleagues with a request to go to the office and restart the box but it seems the box isn’t booting. Tomorrow I’ll catch an early bus for Varna and went to the office to see what’s wrong with the machine (hope it’s not a serious hardware problem). That’s most of it. To be honest although God grants me a lot of his divine grace I still feel a bit of lost and pathless and struggle to fight my lack of faith, and bad habits. I’m praying everyday for a physical healing but I still haven’t completely recovered from my sickness. I have sinned badly in my past and I deserve to have that sickness but still I honestly I’m repenting day after day for my bad life in the past and the near present … Another think I should say is that a friend of mine has died I saw his obituary hanging on a tree 🙁 , His name was Alexander (Sashe) known among us by the nickname (Saketo), he was a drug addict and that killed him I hope he is with God know peace be upon him. END—–
Tags: Apostles, arnhem business school, balchik, Business, central park, colleagues, confirmation, course, deposit, divine grace, driving, Dza, form, freaky, genre, hardware problem, HEAD, Hellpain, holland, holy spirit, IMDB, instructor, Kin, liturgy, lord jesus christ, niki, orthodox church, request, saviour jesus, School, sci fi, time, tomorrow, tongue, tongues, varna, vivare, year
Posted in Everyday Life | No Comments »
Thursday, December 2nd, 2010 It’s actually very easy in order to enable this authentication via your website VirtualHost find the;
<Directory /var/www/yourwebsite>

....

</Directory>
Substitute the /var/www/yourwebsite with your correct website location in between the opening and closing Directory apache directive place something similar to the following lines:
AllowOverride All
AuthName “Add your login message here.”
AuthType Basic
AuthUserFile /etc/apache2/.htpasswd
AuthGroupFile /dev/null
require user name-of-user
Eventually your Directory directive in your let’s say /etc/apache2/apache2.conf should look something like the example in below
<Directory /var/www/yourwebsite>

AllowOverride All

AuthName "Add your login message here."

AuthType Basic

AuthUserFile /etc/apache2/.htpasswd

AuthGroupFile /dev/null

require user name-of-user

</Directory>
Of course in this example you need to set the name-of-user to an actual user name let’s say you want your login user to be admin, then substitute the name-of-user with admin
Of course set the desirable location for your .htpasswd in the AuthUserFile. Just in case if you decide to keep the same location as in my example you will further need to create the /etc/apache2/.htpasswd file.
Note here that in the above exapmle the AllowOverride All could also be substituted for AllowOverride AuthConfig , you might need to put this one if you don’t want that all .htaccess directives are recognized by Apache.
To create the .htpasswd issue the command:
debian~:# htpasswd -c /etc/apache2/.htpasswd admin

New password:

Re-type new password:
In the passwords prompts just type in your password of choice. Now we’re almost ready to have the website apache authentication working, only thing left is to reastart Apache.
I’m using Debian so restarting my apache is done via:
debian:~# /etc/init.d/apache2 restart
In other Linux distributions exec the respective script for Apache restart.
Now access your website and the password protection dialog asking for your credentials to login should popup.
Tags: Allowoverride, apache authentication, apache configuration, AuthConfig, AuthType, AuthUserFile, course, desirable location, directive, file, How to secure site with htpassword using Apache configuration instead of through external .htaccess file, htpasswd, init, Linux, location, login, login user, lt, opening, password, passwords, place, protection, quot, script, something, type, Virtualhost, website location, working
Posted in Linux, System Administration, Web and CMS | No Comments »
Tuesday, January 4th, 2011 If you experience problems with making your CentoOS 5.5 work with active ftp connections , e.g. every connection you make to the FTP needs to be in a passive mode or the file transfer or FTP directory listing doesn’t initialize at all, here is how you can solve it:
Edit the file /etc/sysconfig/iptables-config and change their the line:
IPTABLES_MODULES="ip_conntrack_netbios_ns"
to look like:
IPTABLES_MODULES=”ip_conntrack_netbios_ns ip_nat_ftp ip_conntrack_ftp”
Adding the two modules ip_nat_ftp and ip_conntrack_ftp will instruct the CentOS’s /etc/init.d/iptables firewall rules to initialize the kernel modules ip_nat_ftp and ip_conntrack_ftp
This modules solves problems with Active FTP not working caused by a host running behind a firewall router or behind a NAT.
This will hopefully resolve your issues with Active FTP not working on CentOS.
If loading this two kernel modules doesn’t solve the issues and you’re running vsftpd FTP server, then it’s likely that the Active FTP non-working problems are caused by your VSFTPD configuration.
If that’s the case something that might help is setting in /etc/vsftpd/vsftpd.conf the following variables:
pasv_enable=NO

pasv_promiscuous=YES
Of course as a final step you will need to restart the iptables firewall:
[root@centos: ~]# /etc/init.d/iptables restart

Flushing firewall rules: [ OK ]

Setting chains to policy ACCEPT: filter [ OK ]

Unloading iptables modules: [ OK ]

Applying iptables firewall rules: [ OK ]

Loading additional iptables modules: ip_conntrack_netbios_ns

ip_nat_ftp ip_conntrack_ftp [ OK ]
As you can see the two modules ip_nat_ftp and ip_conntrack_ftp are now loaded as additional modules.
Moreover if you have also modified your vsftpd.conf you need to restart the vsftpd via the init script:
[root@centos: ~]# /etc/init.d/vsftpd restart

Shutting down vsftpd: [ OK ]

Starting vsftpd for vsftpd: [ OK ]
If adding this two modules and adding this two extra variables in vsftpd configuration doesn’t help with making your FTP server to work in Active FTP mode , it’s very likely that the whole troubles comes from the firewall configuration, so an edit of /etc/sysconfig/iptables would be necessary;
To find out if the firewall is the source of the FTP not able to enter active mode, stop your firewall for a while by issuing the cmd:
[root@centos:~]# /etc/init.d/iptables stop
If iptables is the source of thepassive ftp troubles, an iptables rules similar to this should make your firewall allow active ftp connections;
*filter :INPUT ACCEPT [0:0]
:FORWARD ACCEPT [0:0]
:OUTPUT ACCEPT
[0:0] -A INPUT -i lo -j ACCEPT -A INPUT -d 127.0.0.0/255.0.0.0 -i ! lo -j REJECT –reject-with icmp-port-unreachable
-A INPUT -m state –state RELATED,ESTABLISHED -j ACCEPT
-A INPUT -p tcp -m tcp –dport 80 -j ACCEPT
-A INPUT -p tcp -m state –state NEW -m tcp –dport 44444 -j ACCEPT
-A INPUT -p tcp -m state –state NEW -m tcp –dport 21 -j ACCEPT -A INPUT -p icmp -m icmp –icmp-type 8 -j ACCEPT
-A INPUT -j REJECT –reject-with icmp-port-unreachable -A FORWARD -j REJECT –reject-with icmp-port-unreachable
-A OUTPUT -j ACCEPT -A OUTPUT -p tcp -m tcp –dport 21 -m state –state ESTABLISHED,RELATED -j ACCEPT
Tags: CentoOS, CentOS, chains, connection, course, directory listing, doesn, dport, Enabling Active FTP connections on CentOS 5.5, ESTABLISHED, file, file transfer, firewall router, firewall rules, Forward, ftp ip, help, ICMP, init script, Initialize, INPUT, ip nat, iptables firewall, kernel modules, nbsp, netbios, passive mode, promiscuous, quot, RELATED, root, something, variables, work, YES
Posted in Linux, System Administration | 1 Comment »
Tuesday, September 14th, 2010 I’ve recently received a number of images in JPEG format as a feedback on a project plan that was constructed by a team I’m participating at the university where I study.
Somebody from my project group has scanned or taken snapshots of each of the hard copy paper feedback and has sent it to my mail.
I’ve received 13 images so I had to open them one by one to get each of the Project Plan to read the feedback on the page this was really unhandy, so I decided to give it a try on how to generate a common PDF file from all my picture files.
Thanksfully it happened to be very easy and trivial using the good old Image Magick
In order to complete the task of generating one PDF from a number of pictures all I did was.1. Switch to the directory where I have saved all my jpeg images
debian:~# cd /home/hipo/Desktop/my_images_directory/
2. Use the convert binary part of imagemagick package to generate the actual PDF file from the group of images
debian:~# convert *.jpg outputpdffile.pdf
If the images are numbered and contain many scanned pages of course you can always pass by all the images to the /usr/bin/convert binary, like for instance:
debian:~# convert 1.jpg 2.jpg 3.jpg 4.jpg 5.jpg outputpdffile.pdf
Even though in my case I had to convert to PDF from multiple JPEG (JPG) pictures, convertion with convert is not restricted to convert only from JPEG, but you can also convert to PDF by using other graphical file formats.
For instance to convert multiple PNG pictures to a single PDF file the command will be absolutely the same except you change the file extension of the graphic files e.g.:
debian:~# convert 1.PNG 2.PNG 3.PNG 4.PNG 5.PNG OUTPUT-PDF-FILE.PDF
I was quite happy eventually to know Linux is so flexible and such a trivial things are able to be completed in such an easy way.
Tags: cd home, convertion, copy, course, Create PDF file from (jpg) pictures in Linux, Desktop, feedback, file, file extension, file formats, format, gif images, graphic files, hipo, home, Image, image magick, ImageMagick, images directory, instance, JPEG, jpeg images, jpg gif, Linux, Magick, mail, number, order, OUTPUT-PDF-FILE, outputpdffile, package, page, Paper, picture, png, project, project group, snapshots, somebody, switch, team, Thanksfully, trivial things, unhandy, usr, usr bin, way
Posted in Linux, Linux and FreeBSD Desktop, Various | 5 Comments »
Tuesday, February 14th, 2012 
I had to setup a QMAIL auto reply (Out of the Office) message on 5 email addresses and since I haven't done it for a long time it took me a couple 20 minutes to consult Qmail (Life With Qmail http://lifewithqmail.org (great website!) documentation and read a couple of online forum threads until I finally remembered, how I used to be setting up a vacation message manually via qmail's .qmail file.
Of course Setting qmail auto reply can always be done via QmailAdmin or VQadmin .. – Qmail Vpopmail web frontends however on many Qmail mail servers Qmailadmin or/and VQadmin is absent due to some reason or even on a big mail servers the server doesn't run Apache at all. Hence it is good to know how to set qmail vacation message directly via plain SSH terminal connection and this is why how this article got born.
So here is how I enable qmail auto reply "manually", through .qmail for my email address info@my-email-domain.com:
1. Set a /var/vpopmail/domains/my-email-domain.com/info/.qmail file with the following content:
| /usr/bin/autorespond 86400 3 /home/vpopmail/domains/my-email-domain.com/info/vacation/message /home/vpopmail/domains/my-email-domain.com/info/vacation
2. Create /home/vpopmail/domains/my-email-domain.com/info/vacation directory
linux:~# mkdir -p /home/vpopmail/domains/my-email-domain.com/info/vacation/
3. Create /home/vpopmail/domains/my-email-domain.com/info/vacation/message file with auto reply message
First create the message file with touch command:
linux:~# touch /home/vpopmail/domains/my-email-domain.com/info/vacation/message
Then put with vim or mcedit etc. an auto-reply vacation message similar to the sample below:
From: info@cadiainsurance.com
Subject: We have received your message. Thank you!
 Dear Customer, we thank you for the interest in our services.

A member of our team will reply promptly to your enquiry shortly.
4. Set proper permissions for vacation/message and .qmail files
/home/vpopmail/domains/my-email-domain.com/info/vacation/message and /home/vpopmail/domains/my-email-domain.com/info/.qmail files has to be owned by user/group vpopmail:vchkpw, e.g.:
linux:~# chown -R vpopmail:vchkpw /home/vpopmail/domains/my-email-domain.com/info/vacation

linux:~# chown vpopmail:vchkpw /home/vpopmail/domains/my-email-domain.com/info/.qmail
If you are a qmail administration with the requirement to create auto reply message for employees going on a holiday often (in a middle sized company office), setting up the out of the office auto reply manually one by one is a time consuming, annoying task and "crazy" task. Therefore some time ago while still I was employed in a Bulgarian mid-sized company called Design.BG, I've written a tiny shell script which creates qmail email users vacation messages by passing few arguments.
Here is my create_vpopmail_vacation.sh shell script
Note that this script might have a lot of bugs and is not much tested, so read it carefully and test it before you put it for daily use 😉
Happy Hacking! 😉
Tags: address info, apache, auto reply, autorespond, com, connection, content, course, dear customer, doesn, email addresses, email domain, enquiry, file, forum threads, info, life, long time, mail servers, mcedit, message file, message home, office message, processing, proper permissions, qmailadmin, quot, reason, reply message, script, Set, Shell, terminal, terminal connection, time, vacation directory, vacation message, vim, vqadmin, website documentation
Posted in FreeBSD, Linux, Qmail, System Administration | 1 Comment »
Wednesday, December 14th, 2011 
While looking over the installable packages in System -> Administration -> Software Center on my my Debian powered notebook, I’ve accidently rolled over a game called Abe’s Amazing Adventure , as a big oldschool arcade game fan, I’ve immediately clicked on Install being impatient to see the overall game atmosphere and gameplay as well as storyline.
Abe’s Amazing Adventure is available under the debian package name abe and can be installed by issuing:
debian:~# apt-get install abe
I was pleasently surprised to find out the gameplay and the overall game feels like the golden classical arcade game Dangerous Dave
For youngsters who never played the amazing absolute killing arcade ! as well as for people who feel nostalgic about Dangerous Dave 2 here is a nice gameplay screenshot:

Here is also a screenshot of Abe’s Amazing Adventure gameplay:

You can see the great resemblense between the two games even by the screenshot; In both games you have to collect keys to open doors and diamonds which gives you points. Of course there are some differences as you can see Abe’s Amazing Adventure ‘s graphics has some additional items like Baloons with which your main character can fly over distances (for a limited time). There is also more diversity in the enemy types you face on the road to unlock the different doors. The game has also a red stars which while taken saves the game so if you quit the game on next game load up starting the game automatically starts you from the last save point.

The ( 6 ) baloons seen in the screenshot on the left upper corner can be used occasionally to fly some distance by pressing Enter .
There are health recovery kits one can take to recover, some health damaged by hitting obstacles on the way.
The game story is short but entertaining, just like the general game feel:
 The game music is relaxing and more or less in the spirit of arcade games, the keyboard interactivety is pretty good as well.One thing I see can be improved to make the game better are the graphics, they’re a bit childish and too cubical, where sometimes some more general characters and obstacles animation will give the game a better look. Anyways for the year 2003 and for a free software arcade the game is not bad. For children and growing kids the game is just perfect, even for big kids like me its good to spend an hour of jump and run fun 😉
Tags: Administration, Amazing, animation, arcade game, atmosphere, baloons, center, character, course, dangerous dave, debian package, distance, fan, freebsd, fun, game, game atmosphere, game fan, game load, game story, gnu linux, gt software, health, health recovery, img, Install, interactivety, jump, left, linux freebsd, name, oldschool, package, quot, red stars, resemblense, road, s graphics, screenshot, software, software center, story, storyline, substitute, system, time, two games, way, year, youngsters
Posted in Entertainment, Games Linux, Linux, Linux and FreeBSD Desktop | 1 Comment »
Friday, December 9th, 2011 While reading some log files on one of the co-located servers at UK2.net , I’ve noticed dmesg log was filling in with tons of junk messages like:
[4288245.609762] IPv6 addrconf: prefix with wrong length 48

[4288445.984153] IPv6 addrconf: prefix with wrong length 48

[4288646.296110] IPv6 addrconf: prefix with wrong length 48

[4288846.609119] IPv6 addrconf: prefix with wrong length 48

[4289046.922604] IPv6 addrconf: prefix with wrong length 48

[4289247.267273] IPv6 addrconf: prefix with wrong length 48

[4289447.545800] IPv6 addrconf: prefix with wrong length 48

[4289647.857789] IPv6 addrconf: prefix with wrong length 48

[4289848.169308] IPv6 addrconf: prefix with wrong length 48

[4290048.595104] IPv6 addrconf: prefix with wrong length 48

[4290248.808497] IPv6 addrconf: prefix with wrong length 48

[4290449.103503] IPv6 addrconf: prefix with wrong length 48

[4290649.418747] IPv6 addrconf: prefix with wrong length 48

[4290849.742731] IPv6 addrconf: prefix with wrong length 48
After checking the message to make sure it would not suddeny lead to server hang ups I figured out the message is not dangerous but just an annoying warning that some other (routing) host on the same network as mine is advertising something using IPv6, that doesn’t fit with my IPv6 server config.
Actually the server doesn’t use the IPv6 configuration at all, and the assigned configuration is just some kind of auto set IPv6 IP address.
The server, where this message appeared is powered by 64 bit Debian GNU / Linux Squeeze
To resolve the annoying message, 5 of the kernel sysctl settings needs to be modified with cmds:
debian:~# sysctl net.ipv6.conf.all.accept_ra=0

debian:~# sysctl net.ipv6.conf.all.autoconf=0

debian:~# sysctl net.ipv6.conf.lo.autoconf=0

debian:~# sysctl net.ipv6.conf.eth0.autoconf=0

debian:~# sysctl net.ipv6.conf.eth1.autoconf=0
Furthermore to prevent the IPv6 addrconf: prefix with wrong length 48 to re-appear after future server reboots / boots the two sysctl values of course needs to be included in /etc/sysctl.conf e.g.:
debian:~# echo 'net.ipv6.conf.all.accept_ra = 0' >> /etc/sysctl.conf

debian:~# echo 'net.ipv6.conf.all.autoconf = 0' >> /etc/sysctl.conf

echo 'net.ipv6.conf.lo.autoconf = 0' >> /etc/sysctl.conf

echo 'net.ipv6.conf.eth0.autoconf = 0' >> /etc/sysctl.conf

echo 'net.ipv6.conf.eth1.autoconf = 0' >> /etc/sysctl.conf
My server has 2 etherhet interfaces, eth0 and eth1 that’s the reason I had to set up autoconf kernel the two vars net.ipv6.conf.eth0.autoconf and net.ipv6.conf.eth1.autoconf , for more interfaces more kernel vars (eth2, eth3) etc. needs to be set to “0”
I’ve seen posts online of people complaining about a similar errors to IPv6 addrconf: prefix with wrong length 48, like:
IPv6 addrconf: prefix with wrong length 96

IPv6 addrconf: prefix with wrong length 128
The solution to this messages is also done by setting the above described sysctl kernel vars. Setting the vars will suppress the messages which by the way with time could take up A LOT of disk space and fills /var/log/dmesg with this useless message, hence applying the “fix” is a must 😉
Another thing, I’ve noticed while I was researching about the error and the respective fix is that people on other deb based distributions like Ubuntu as well as on Fedora GNU / Linux had also experienced the issue.
Tags: addrconf, annoying message, autoconf, bit, boots, confdebian, config, confMy, course, Disk, dmesg, doesn, eth, GNU, host, ipv6 configuration, junk messages, kernel, Linux, log, lot, prefix, quot, ra, reason, servers, something, squeeze, suddeny, time, Ubuntu, ups
Posted in Linux, System Administration | 1 Comment »
Thursday, December 8th, 2011 
I’m realizing the more I’m converting to a fully functional GUI user, the less I’m doing coding or any interesting stuff…
I remembered of the old glorious times, when I was full time console user and got a memory on a nifty trick I was so used to back in the day.
Back then I was quite often writing shell scripts which were fetching (html) webpages and converting the html content into a plain TEXT (TXT) files
In order to fetch a page back in the days I used lynx – (a very simple UNIX text browser, which by the way lacks support for any CSS or Javascipt) in combination with html2text – (an advanced HTML-to-text converter).
Let’s say I wanted to fetch a my personal home page https://www.pc-freak.net/, I did that via the command:
$ lynx -source https://www.pc-freak.net/ | html2text > pcfreak_page.txt
The content from www.pc-freak.net got spit by lynx as an html source and passed html2pdf wchich saves it in plain text file pcfreak_page.txt
The bit more advanced elinks – (lynx-like alternative character mode WWW browser) provides better support for HTML and even some CSS and Javascript so to properly save the content of many pages in plain html file its better to use it instead of lynx, the way to produce .txt using elinks files is identical, e.g.:
$ elinks -source https://www.pc-freak.net/blog/ | html2text > pcfreak_blog_page.txt
By the way back in the days I was used more to links , than the superior elinks , nowdays I have both of the text browsers installed and testing to fetch an html like in the upper example and pipe to html2text produced garbaged output.
Here is the time to tell its not even necessery to have a text browser installed in order to fetch a webpage and convert it to a plain text TXT!. wget file downloading tools supports source dump as well, for all those who did not (yet) tried it and want to test it:
$ wget -qO- https://www.pc-freak.net | html2text
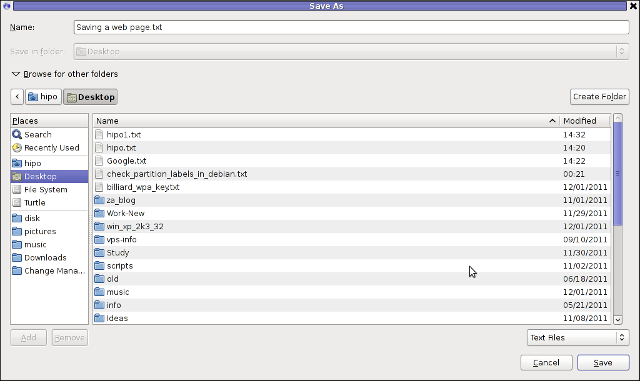
Anyways of course, some pages convertion of text inside HTML tags would not properly get saved with neither lynx or elinks cause some texts might be embedded in some elinks or lynx unsupported CSS or JavaScript. In those cases the GUI browser is useful. You can use any browser like Firefox, Epiphany or Opera ‘s File -> Save As (Text Files) embedded functionality, below is a screenshot showing an html page which I’m about to save as a plain Text File in Mozilla Firefox:
Besides being handy in conjunction with text browsers, html2text is also handy for converting .html pages already existing on the computer’s hard drive to a plain (.TXT) text format.
One might wonder, why would ever one would like to do that?? Well I personally prefer reading plain text documents instead of htmls 😉
Converting an html files already existing on hard drive with html2text is done with cmd:
$ html2text index.html >index.txt
To convert a whole directory full of .html (documentation) or whatever files to plain text .TXT , cd the directory with HTMLs and issue the one liner bash loop command:
$ cd html/

html$ for i in $(echo *.html); do html2text $i > $(echo $i | sed -e 's#.html#.txt#g'); done
Now lay off your back and enjoy reading the dox like in the good old hacker days when .TXT files were fashionable 😉
Tags: advanced html, character mode, command lynx, content, convertion, course, CSS, drive, file, freak, full time, glorious times, gnu linux, html pages, html source, HTML-to-text, html2text, index, interesting stuff, javascipt, Javascript, Lynx, necessery, nifty trick, page, page txt, pcfreak, PDF, personal home page, Shell, shell scripts, spit, support, terminal, text, text browser, text converter, time, trick, TXT, unix text, wget
Posted in Everyday Life, FreeBSD, Linux, Linux and FreeBSD Desktop, Various | 1 Comment »
Thursday, November 17th, 2011 
I was looking for a way to convert some Video and Sound files, downloaded from Youtube (mostly things dedicated to free software) and as far as I looked online unfortunately these pieces of nice music and tutorials are not available for download anywhere else or at least not available for download in some of the Open / Free Format (OGG Vorbis or OGV (OGG / Theora Video).
When it comes to convertion between different formats, always the first things that I think of is ffmpeg or mencoder , however I was not sure if some of this tools are doing the trick so I did a quick research online if there is some specialised console or GUI program that can do the convertions between MP4, FLV etc. to OGV.
In less than 10 minutes I found a threat mentioning about ffmpeg2theora – A Simple Convertor to create Ogg Theora files
As I’m running Debian GNU / Linux, I installed ffmpeg2theora straight via apt, according to some reports online ffmpeg2theora cmd convertion tool is also available straight from repositories on Ubuntu as well.
On FreeBSD there is a port /usr/ports/multimedia/ffmpeg2theora available for install. Of course FFmpeg2Theora can be installed from source on other Linux distributions that might be missing a pre-built binary.
Using ffmpeg2theora to convert some kind of non-free video format is very simple, though the tool provides quite a numerous options for all those who want to have some customization for the video to be converted.
To convert the flash file “The Gnu Song.flv” for example to The Gnu Song.flv , I invoked ffmpeg2theora like this:
debian:~# ffmpeg2theora "The Gnu Song.flv"

...
The conversion took few minutes of time, as my machine is not ultra powerful and apparently the conversion to OGV format is not too quick but the good news is it works.
After the conversion was completed I used ogginfo to check the information about the recent converted file The Gnu Song.flv , below you see the file info ogginfo returns
debian:~# ogginfo The Gnu Song.ogv

Processing file "The Gnu Song.ogv"...
New logical stream (#1, serial: 5d65413f): type skeleton
New logical stream (#2, serial: 0570412d): type theora
New logical stream (#3, serial: 7e679651): type vorbis
Theora headers parsed for stream 2, information follows…
Version: 3.2.1
Vendor: Xiph.Org libtheora 1.1 20090822 (Thusnelda)
Width: 320
Height: 240
Total image: 320 by 240, crop offset (0, 0)
Framerate 25/1 (25.00 fps)
Aspect ratio undefined
Colourspace: Rec. ITU-R BT.470-6 Systems B and G (PAL)
Pixel format 4:2:0
Target bitrate: 0 kbps
Nominal quality setting (0-63): 32
User comments section follows…
ENCODER=ffmpeg2theora-0.24
Vorbis headers parsed for stream 3, information follows…
Version: 0
Vendor: Xiph.Org libVorbis I 20101101 (Schaufenugget)
Channels: 1
Rate: 22050
Nominal bitrate: 30.444000 kb/s
Upper bitrate not set
Lower bitrate not set
User comments section follows…
ENCODER=ffmpeg2theora-0.24
Logical stream 1 ended
Theora stream 2:
Total data length: 1525324 bytes
Playback length: 2m:41.360s
Average bitrate: 75.623401 kb/s
Logical stream 2 ended
Vorbis stream 3:
Total data length: 646729 bytes
Playback length: 2m:41.384s
Average bitrate: 32.059041 kb/s
ogginfo is a part of a package installed under the name vorbis-tools, vorbis tools also contains a few other helpful tools, whether operations with OGV or OGG file formats are at hand, the complete binaries vorbis-tools contains on Debian as of time of writting this post is:
/usr/bin/ogg123

/usr/bin/oggenc

/usr/bin/oggdec

/usr/bin/ogginfo

/usr/bin/vcut

/usr/bin/vorbiscomment

/usr/bin/vorbistagedit
ogg123 is a player for ogg files, however as far as I’ve tested it it doesn’t work too well. And just to compare ogg audio files were played just nice using the play command.
oggenc is used to encode ogg audio file, based on a stream haneded to it from other audio encoded stream (let’s say mp3). Hence oggenc can be used to convert mp3 files to ogg audio files , like so:
debian:~# mpg321 input.mp3 -w - | oggenc -o output.ogg -
oggdec is used to convert to wav files or raw PCM audio, whether;
vcut is used to cut ogg video file on parts.
vorbiscomment and vorbistagedit is used to edit information on already existing ogg audio files
There is also a GUI programmer for people who doesn’t want to bother with writting on the command line called oggconvert . OggConvert is written for GNOME and uses GTK gnome library, here is how the program looks like:

Tags: Auto, conversion, convertion, convertions, convertor, course, customization, debian gnu, doesn, download, Draft, few minutes, file, flash file, flv, format, Free, freebsd, gnu linux, gnu song, information, linux distributions, mp4, nice music, ogv, Open, ports, quot, repositories, software, Song, Sound, sound files, Theora, threat, time, tool, trick, type, Ubuntu, User, version, video, youtube
Posted in FreeBSD, Linux, Linux Audio & Video, Various | No Comments »
Monday, November 7th, 2011 After upgrading my sis’s notebook from Ubuntu 11.04 to Ubuntu 11.10 on her Acer Aspire 5736Z the default gnome wireless network manager started behaving oddly.
The Network Manager did not show any networks, even though the network drivers showed that are loaded properly on the Linux host and using the normal commands like iwlist or iwconfig I could list and see the networks and even connect to a network.
As my sister is not a console geek like me it was necessery of course to have an easy way to connect herself to the Internet with nice GUI application. I personally love WICD Network Manager and as the default gnome manager was misbehaving I immediately installed her wicd.
With wicd , the wireless networks were properly listed and there was no connection issues to the wireless networks, however the wicd system tray was missing and hence everytime she wanted to connect to a wireless network, she had to keep wicd-client running active in the Dock or run it manually every time on connect, when she had to change her physical location and connect to another wireless network.
This of course is quite unhandy and gives her a bad image of Linux and I definitely want to make her love free software and GNU / Linux. Thus I want to give her a GNU / Linux she will be easy to use.
To make her more satisfied with her Ubuntu I googled around to see what causes the wicd systray to be missing after some research online I found out, its probably due to either wicd bug or some kind of interface changes in unity newer versions of Ubuntu. Some people online suggested a fix via changing values in gconf-editor but this work around by changing the values in gconf-editor:
'desktop' -> 'unity' -> 'panel'
I tried this suggested fix which was reported to work on Ubuntu 11.04 but the gconf registry suggested pathway was missing at all so this solution did not worked.
I further read some other suggested solution using wicd-client by invoking it with two args like so:
stanimira@ubuntu:~$ wicd-client -n &

...stanimira@ubuntu:~$ wicd-client -a &
This proposed solution did not worked either, then I found in one of the Ubuntu bugs reports, a little shell script (add-wicd-to-whitelist.sh) that changes some values in gconf so I proceeded downloaded and give it a try:
stanimira@ubuntu:~$ wget https://www.pc-freak.net/files/add-wicd-to-whitelist.sh

...

stanimira@ubuntu:~$ sh add-wicd-to-whitelist.sh

...
For my surprise running the script doesn’t immediately changed nothing and wicd wireless connectivity indicator was still missing from the tray.
I thought it might need to reload gnome so I give it a restart and HOORAY! after the restart the WICD connected wireless strength show up, like you can see in the screenshot below 😉

Now hope this fix will, help out there experiencing the same issues to work around his wireless network connectivity issues 😉 Cheers.
Tags: acer, connection, course, Desktop, doesn, everytime, free software, gconf, geek, Gnome, gnu linux, gui application, host, Image, interface changes, Linux, linux host, location, love, manager, necessery, network drivers, notebook, physical location, script, Shell, software, system tray, systray, time, Ubuntu, unity, wget, wicd, wireless networks, work
Posted in Everyday Life, Linux and FreeBSD Desktop, System Administration, Various | 11 Comments »


