I’m required to do some mail relaying on a Debian Linux host which should use a remote mail server to relay its mails. Until so far I’ve had not much experience with exim as I prefer using qmail, whever a mail server is needed. However since now only a relaying was necessery and exim is the default installed MTA on Debian, I’ve decided to use exim to take care of the SMTP mail relaying. After a bit of reading it happened configuring exim to relay via remote SMTP server is more than easy!
All I had to do is run the command:
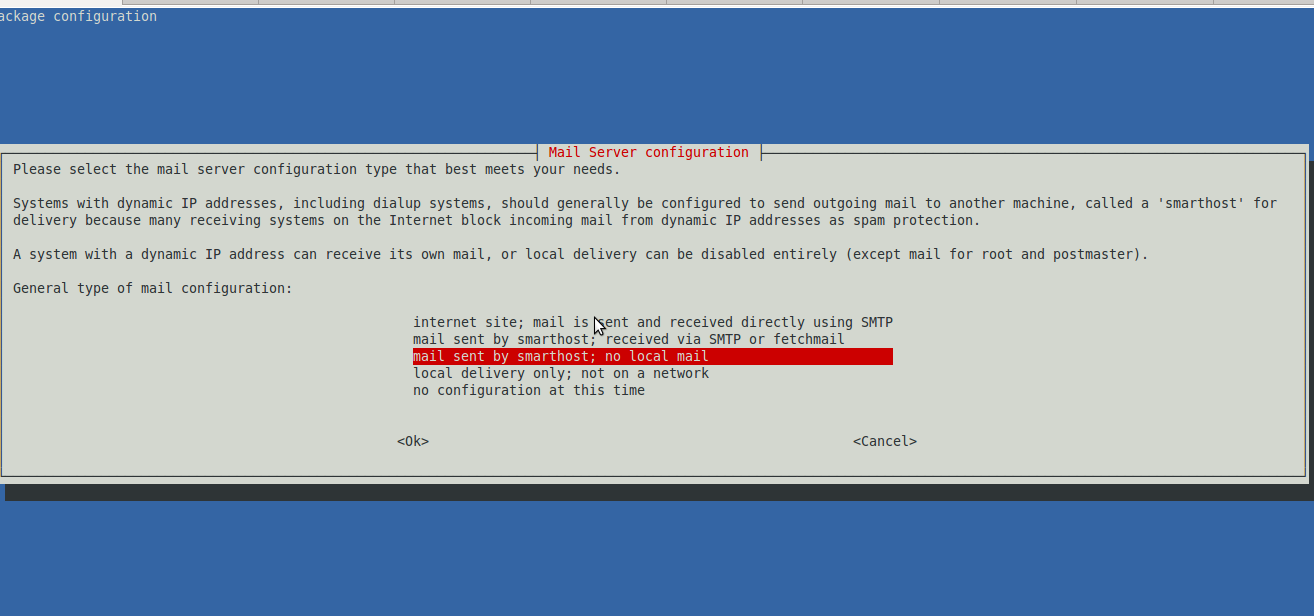
debian-relay:~# dpkg-reconfigure exim4-config
Next in the Ncruses interface to appear:
I had to choose the option:
mail sent by smarthost; no local mail
Next a dialog appears asking for: System mail name: Therein it’s necessery to type in the hostname of the remote SMTP to be used for mail relay. Next dialog asks for: IP-addresses to listen on for incoming SMTP connections: and I left it with 127.0.0.1 however if exim is supposed to be visible from external network one might decide to put in real IP address there.
Pressing OK leads to the next dialog: Other destinations for which mail is accepted: I decided to leave this blank as I don’t want to accept mail for any destinations. Next pane reads: Visible domain name for local users: I’ve typed inside my smtp relay server e.g.: smtp.myrelaymail.com
Further comes: IP address or host name of the outgoing smarthost: There once again I typed my mail relay host smtp.relaymail.com
The next config screen is: Keep number of DNS-queries minimal (Dial-on-Demand)? On any modern Linux host the default answer of No is fine. Following prompt asked if I want to: Split configuration into small files? I’ve decided not to tamper with it and choosed No Afterwards mail relaying works like a charm thx God 😉
Many admins might not know about smartmontools Linux package. It provides two useful tools smartctl and smard which use (Self Monitoring and Reporting Technology system) often abreviated as S.M.A.R.T.. SMART support is nowdays available across any modern ATA, SATA and SCSI hard disks. smartontools package is installable via default package repositories on virtually all different Linux distributions. Having smartmontools installed on all critical productive server is a must for the reason it serves as early notification system in case if hard disk is on the down-verge of break-up (i.e. physical media of hard disk storage starts getting damaged). Through the last 14 years I worked as Linux sysadmin. I've used smartmontools on hundreds of servers and on many times it save companies hundreds of dollars by simply reporting a system hdd is dying and by replacing the server or hard disk with identifically configured ones. smartmontools supports monitoring of single hard disks as well as ones configured on a hardware level to work in some RAID array. As of time of writing you can check list of smartmontools supported hardware RAID-Controllers here.
1. Installing smartmontools
a) To install smartmontools on Debian and Ubuntu and other .deb based servers:
b) On CentOS, Fedora,RHEL and other RPM based install with:
[root@centos ~]# yum --yes install smartmontools

.....
2. Configuring and Enabling smartd hard disk health monitoring
a) on Debian and derivatives
Edit /etc/default/smartmontools:
debian:~# vim /etc/default/smartmontools
By default file looks smth. like;
# Defaults for smartmontools initscript (/etc/init.d/smartmontools) # This is a POSIX shell fragment
# List of devices you want to explicitly enable S.M.A.R.T. for # Not needed (and not recommended) if the device is monitored by smartd #enable_smart="/dev/hda /dev/hdb" #enable_smart="/dev/hda" # uncomment to start smartd on system startup #start_smartd=yes
# uncomment to pass additional options to smartd on startup #smartd_opts="–interval=1800"
Config file should look something like;
# Defaults for smartmontools initscript (/etc/init.d/smartmontools) # This is a POSIX shell fragment
# List of devices you want to explicitly enable S.M.A.R.T. for # Not needed (and not recommended) if the device is monitored by smartd #enable_smart="/dev/hda /dev/hdb" enable_smart="/dev/sda" # uncomment to start smartd on system startup start_smartd=yes
# uncomment to pass additional options to smartd on startup #smartd_opts="–interval=1800"
b) on CentOS, RHEL, Fedora for smartd options
By default on RPM based distros there is no need for special configuration. However for some custom cases edit /etc/sysconfig/smartmontools and /etc/smartd.conf
c) Enabling smartmontools
[root@centos default]# /etc/init.d/smartd start

Starting smartd:           [  OK  ]
3. Checking hard disk failure status with smartctl
Checking whether a SMART hard disk consistency check Passes is done simplest with:
debian:~# /usr/sbin/smartctl -H /dev/sda
smartctl 5.40 2010-07-12 r3124 [x86_64-unknown-linux-gnu] (local build) Copyright (C) 2002-10 by Bruce Allen, http://smartmontools.sourceforge.net
SMART Health Status: OK
debian:~# /usr/sbin/smartctl -i /dev/sda1
smartctl version 5.38 [i686-redhat-linux-gnu] Copyright (C) 2002-8 Bruce Allen Home page is http://smartmontools.sourceforge.net/
=== START OF INFORMATION SECTION === Model Family: Seagate Barracuda 7200.7 and 7200.7 Plus family Device Model: ST340014AS Serial Number: 4MQ0LV3B Firmware Version: 3.43 User Capacity: 40,020,664,320 bytes Device is: In smartctl database [for details use: -P show] ATA Version is: 6 ATA Standard is: ATA/ATAPI-6 T13 1410D revision 2 Local Time is: Fri Mar 15 15:27:12 2013 EET SMART support is: Available – device has SMART capability. SMART support is: Enabled
To print as much information as possible for hard disk health status;
[root@centos default]# /usr/sbin/smartctl -a /dev/sda1
smartctl version 5.38 [i686-redhat-linux-gnu] Copyright (C) 2002-8 Bruce Allen Home page is http://smartmontools.sourceforge.net/
=== START OF INFORMATION SECTION === Model Family: Seagate Barracuda 7200.7 and 7200.7 Plus family Device Model: ST340014AS Serial Number: 4MQ0LV3B Firmware Version: 3.43 User Capacity: 40,020,664,320 bytes Device is: In smartctl database [for details use: -P show] ATA Version is: 6 ATA Standard is: ATA/ATAPI-6 T13 1410D revision 2 Local Time is: Fri Mar 15 15:14:53 2013 EET SMART support is: Available – device has SMART capability. SMART support is: Enabled
=== START OF READ SMART DATA SECTION === SMART overall-health self-assessment test result: PASSED
General SMART Values: Offline data collection status: (0x82) Offline data collection activity was completed without error. Auto Offline Data Collection: Enabled. Self-test execution status: ( 0) The previous self-test routine completed without error or no self-test has ever been run. Total time to complete Offline data collection: ( 423) seconds. Offline data collection capabilities: (0x5b) SMART execute Offline immediate. Auto Offline data collection on/off support. Suspend Offline collection upon new command. Offline surface scan supported. Self-test supported. No Conveyance Self-test supported. Selective Self-test supported. SMART capabilities: (0x0003) Saves SMART data before entering power-saving mode. Supports SMART auto save timer. Error logging capability: (0x01) Error logging supported. General Purpose Logging supported. Short self-test routine recommended polling time: ( 1) minutes. Extended self-test routine recommended polling time: ( 19) minutes.
SMART Error Log Version: 1 ATA Error Count: 33 (device log contains only the most recent five errors) CR = Command Register [HEX] FR = Features Register [HEX] SC = Sector Count Register [HEX] SN = Sector Number Register [HEX] CL = Cylinder Low Register [HEX] CH = Cylinder High Register [HEX] DH = Device/Head Register [HEX] DC = Device Command Register [HEX] ER = Error register [HEX] ST = Status register [HEX] Powered_Up_Time is measured from power on, and printed as DDd+hh:mm:SS.sss where DD=days, hh=hours, mm=minutes, SS=sec, and sss=millisec. It "wraps" after 49.710 days.
Error 33 occurred at disk power-on lifetime: 21588 hours (899 days + 12 hours) When the command that caused the error occurred, the device was active or idle.
After command completion occurred, registers were: ER ST SC SN CL CH DH — — — — — — — 40 51 00 77 c3 6a e0 Error: UNC at LBA = 0x006ac377 = 6996855
Commands leading to the command that caused the error were: CR FR SC SN CL CH DH DC Powered_Up_Time Command/Feature_Name — — — — — — — — —————- ——————– c8 00 08 77 c3 6a e0 00 14:07:39.385 READ DMA ec 00 00 00 00 00 a0 00 14:07:35.553 IDENTIFY DEVICE ef 03 45 00 00 00 a0 00 14:07:35.550 SET FEATURES [Set transfer mode] ec 00 00 00 00 00 a0 00 14:07:35.547 IDENTIFY DEVICE c8 00 08 77 c3 6a e0 00 14:07:35.543 READ DMA
Error 32 occurred at disk power-on lifetime: 21588 hours (899 days + 12 hours) When the command that caused the error occurred, the device was active or idle.
After command completion occurred, registers were: ER ST SC SN CL CH DH — — — — — — — 40 51 00 77 c3 6a e0 Error: UNC at LBA = 0x006ac377 = 6996855
Commands leading to the command that caused the error were: CR FR SC SN CL CH DH DC Powered_Up_Time Command/Feature_Name — — — — — — — — —————- ——————– c8 00 08 77 c3 6a e0 00 14:07:23.940 READ DMA ec 00 00 00 00 00 a0 00 14:07:35.553 IDENTIFY DEVICE ef 03 45 00 00 00 a0 00 14:07:35.550 SET FEATURES [Set transfer mode] ec 00 00 00 00 00 a0 00 14:07:35.547 IDENTIFY DEVICE c8 00 08 77 c3 6a e0 00 14:07:35.543 READ DMA
Error 31 occurred at disk power-on lifetime: 21588 hours (899 days + 12 hours) When the command that caused the error occurred, the device was active or idle.
After command completion occurred, registers were: ER ST SC SN CL CH DH — — — — — — — 40 51 00 77 c3 6a e0 Error: UNC at LBA = 0x006ac377 = 6996855
Commands leading to the command that caused the error were: CR FR SC SN CL CH DH DC Powered_Up_Time Command/Feature_Name — — — — — — — — —————- ——————– c8 00 08 77 c3 6a e0 00 14:07:23.940 READ DMA ec 00 00 00 00 00 a0 00 14:07:23.937 IDENTIFY DEVICE ef 03 45 00 00 00 a0 00 14:07:20.071 SET FEATURES [Set transfer mode] ec 00 00 00 00 00 a0 00 14:07:20.057 IDENTIFY DEVICE c8 00 08 77 c3 6a e0 00 14:07:20.044 READ DMA
Error 30 occurred at disk power-on lifetime: 21588 hours (899 days + 12 hours) When the command that caused the error occurred, the device was active or idle.
After command completion occurred, registers were: ER ST SC SN CL CH DH — — — — — — — 40 51 00 77 c3 6a e0 Error: UNC at LBA = 0x006ac377 = 6996855
Commands leading to the command that caused the error were: CR FR SC SN CL CH DH DC Powered_Up_Time Command/Feature_Name — — — — — — — — —————- ——————– c8 00 08 77 c3 6a e0 00 14:07:23.940 READ DMA ec 00 00 00 00 00 a0 00 14:07:23.937 IDENTIFY DEVICE ef 03 45 00 00 00 a0 00 14:07:20.071 SET FEATURES [Set transfer mode] ec 00 00 00 00 00 a0 00 14:07:20.057 IDENTIFY DEVICE c8 00 08 77 c3 6a e0 00 14:07:20.044 READ DMA
Error 29 occurred at disk power-on lifetime: 21588 hours (899 days + 12 hours) When the command that caused the error occurred, the device was active or idle.
After command completion occurred, registers were: ER ST SC SN CL CH DH — — — — — — — 40 51 00 77 c3 6a e0 Error: UNC at LBA = 0x006ac377 = 6996855
Commands leading to the command that caused the error were: CR FR SC SN CL CH DH DC Powered_Up_Time Command/Feature_Name — — — — — — — — —————- ——————– c8 00 08 77 c3 6a e0 00 14:07:23.940 READ DMA ec 00 00 00 00 00 a0 00 14:07:23.937 IDENTIFY DEVICE ef 03 45 00 00 00 a0 00 14:07:20.071 SET FEATURES [Set transfer mode] ec 00 00 00 00 00 a0 00 14:07:20.057 IDENTIFY DEVICE c8 00 08 77 c3 6a e0 00 14:07:20.044 READ DMA
SMART Self-test log structure revision number 1 Num Test_Description Status Remaining LifeTime(hours) LBA_of_first_error # 1 Extended offline Completed without error 00% 1 –
SMART Selective self-test log data structure revision number 1 SPAN MIN_LBA MAX_LBA CURRENT_TEST_STATUS 1 0 0 Not_testing 2 0 0 Not_testing 3 0 0 Not_testing 4 0 0 Not_testing 5 0 0 Not_testing Selective self-test flags (0x0): After scanning selected spans, do NOT read-scan remainder of disk. If Selective self-test is pending on power-up, resume after 0 minute delay.
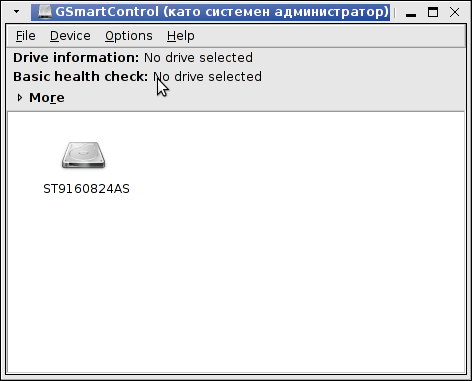
4. Visualizing smartd collected data in GUI with gsmartcontrol
For people who prefer to visualize things in Graphical environment smartd service hard disk health data can be viewed in nice graphical interface wthgsmartcontrol tool. Most Linux servers don't have graphical environment as having a X server with any graphics manager is a waste of system resources thus installing gsmartcontrol doesn't make much sense, however for monitoring and reporting for upcoming Hard Disk issues gsmartcontrol is a good one to have.
a) To install gsmartcontrol on Debian and Ubuntu Linux;
Below, are 2 screenshots of GSmartControl taken from my
If you get something different from Overall health self-assessment test PASSED, this means hard disk has a surface damage and needs to be replaced ASAP. If during hard disk normal operation HDD hits I/O errors and you can't afford to have a GUI environment just for gsmartcontrol, errors gets logged in dmesg hence dmesg could be useful to provide you with info of a failing hard drive.
If you never tried linphone I warmly recommend it. 2 days ago, with a friend of mine we tested a bunch of Linux softwares to find out what is the situation with possible alternatives to Skype to transmit Voice and Video. I've been interested into Skype Alternative programs since about 2 years, but so far I never found good and easy to set up working Linux alternative.
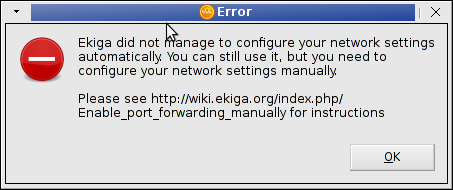
We first tried Ekiga. Though it is said to be a good Linux SKype alternative, my ekiga client running on Debian Linux stable Squeeze ver. 3.2.7.2 failed to connect to SIP account I've created on ekiga.net. I've tried hard to make ekiga connect to account SIP created from ekiga.net but all time I was getting an error on connect: Ekiga did not manage to configure your network settings automatically. You can still use it, but you need to configure your network settings manually.
Please see http://wiki.ekiga.org/index.php/Enable_port_forwarding_manually for instructions
After continously trying to follow instructions from above pointed URL and making proper settings on my DL-524 Wireless Router and all time ending up with the annoying error, we decided to finally completely abondoned it and try some other voice over IP clients. We tried Jitsi and few others which prooved to be unworking. Finally we give a try to Linphone which seemed to be promising. We tested it On Linux platform, where both of Linux installed OS-es where tested were running Debian Linux (one stable Debian Squeeze and one unstable Debian Blackstar). Linphone even with different versions on different Debian Linux OS-es worked fine Video conferences were crashing but voice over IP via SIP protocol works okay.
Setting up linphone to do speak (voice over IP) conference calls with friends is easy task, you need to have linphone package installed, i.e. run:
apt-get install –yes linphone
Then once installed launch it from terminal or GNOME menus with:
$ linphone-3
You will have to create account on linphone.org's website via Register a Linphone account. Once registered and confirmed the account, linphone sends you an email with credential info, through e-mail like:
Dear Linphone user, your account has been activated.
You can now use your linphone account with these parameters :
sip:hipo@sip.linphone.org hipo sip.linphone.org
Regards, The Linphone team.
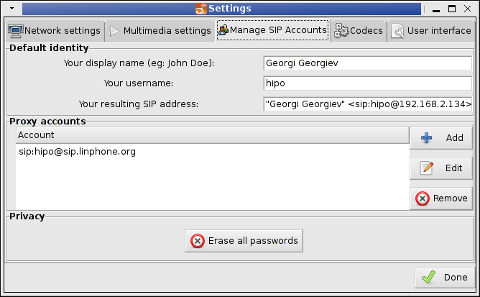
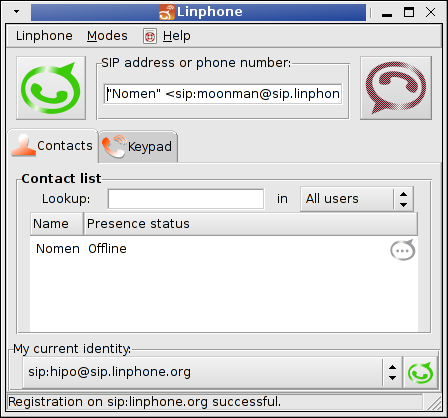
Then in linphone you should configure new created Linphone account via:
Linphone -> Preferences -> Manager SIP Account
Once account is added, calls via SIP protocol are ready to go. Probabl,y due to incompitability between versions of Debian stable Linux and unstable the user you will add and about to call is showing as offline, however calling between each other works perfect and voice quality is quite good.
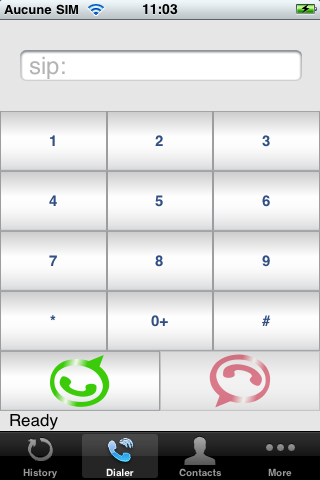
Linphone has a version for Windows as well as for AppleIphone mobile phone.
For console geeks, there is also a command line tool interface to linphone linbphonec;
 $ linphonec

Warning: Could not start UDP transport on port 5060, maybe this port is already used.

Ready

Warning: video is disabled in linphonec, use -V or -C or -D to enable.

linphonec>

linphonec> help

Commands are:

---------------------------

help Print commands help

call Call a SIP uri

chat Chat with a SIP uri

terminate Terminate the current call

answer Answer a call

autoanswer Show/set auto-answer mode

proxy Manage proxies

soundcard Manage soundcards

webcam Manage webcams

staticpic Manage static pictures when nowebcam

ipv6 Use IPV6

refer Refer the current call to the specified destination.

nat Set nat address

stun Set stun server address

firewall Set firewall policy

call-logs Calls history

friend Manage friends

play play from a wav file

record record to a wav file

quit Exit linphonec

register Register in one line to a proxy

unregister Unregister from default proxy

duration Print duration in seconds of the last call.

status Print various status information

ports Network ports configuration

speak Speak a sentence using espeak TTS engine

codec Audio codec configuration

vcodec Video codec configuration

ec Echo cancellation

mute Mute microphone and suspend voice transmission.

unmute Unmute microphone and resume voice

transmission.

nortp-on-a Set the rtp_no_xmit_on_audio_mute

configuration parameter

---------------------------

Type 'help ' for more details.

linphonec> quit
Another great thing about Linphone is it is licensed under free software license GPL2 – meaning source is publicly accessible – thus anyone with skills and desire to port it to any computer architecture can do it. I did not have time to test it throughfully with newer version of linphone to know if Video calls works fine – whether same program versions are used between both peer sides, nevertheless for anyone willing non M$ sniffed channel to do voice calls between Computers linphone is nice.
After migrating databases data from FreeBSD MySQL 5.0.83 server to a Debian Squeeze Linux MySQL version 5.1.61, below is a mysql –version issued on both the FreeBSD and the Debian servers
freebsd# mysql --version

mysql Ver 14.12 Distrib 5.0.83, for portbld-freebsd7.2 (i386) using 5.2
debian:~# mysql --version

mysql Ver 14.14 Distrib 5.1.61, for debian-linux-gnu (i486) using readline 6.1
The data SQL dump from the FreeBSD server was dumped with following command arguments:
Then I used sftp to transfer complete_db_dump.sql dump to the a brand new installed latest Debian Squeeze 6.0.2. The Debian server was installed using a "clean Debian install" without graphical environment with CD downloaded from debian.org's site.
On the Debian machine I imported the dump with command:
debian:~# mysq -u root -p < complete_db_dump.sql
Right After the dump was imported I re-started SQL server which was previously installed with:
debian:~# apt-get install mysql-server
The error I got after restarting the mysql server:
debian:~# #/etc/init.d/mysql restart
was:
 ERROR 1577 (HY000) at line 1: Cannot proceed because system tables used by Event Scheduler were found damaged at server start

ERROR 1547 (HY000) at line 1: Column count of mysql.proc is wrong. Expected 20, found 16. The table is probably corrupted
This error cost me a lot of nerves and searching in google to solve. It took me like half an hour of serious googling ,until I finally found the FIX!!!:
 debian:~# mysql_upgrade -u root -h localhost -p --verbose --force

Enter password:

Looking for 'mysql' as: mysql

Looking for 'mysqlcheck' as: mysqlcheck

Running 'mysqlcheck' with connection arguments: '--port=3306' '--socket=/var/run/mysqld/mysqld.sock' '--host=localhost'

Running 'mysqlcheck' with connection arguments: '--port=3306' '--socket=/var/run/mysqld/mysqld.sock' '--host=localhost'

bible.holy_bible OK

bible.holybible OK

bible.quotes_meta OK
Afterwards finally I had to restart the mysql server once again in order to finally get rid of the shitty:
ERROR 1547 (HY000) at line 1: Column count of mysql.proc is wrong. Expected 20, found 16. The table is probably corrupted error!
 debian:~# /etc/init.d/mysql restart

Stopping MySQL database server: mysqld.

Starting MySQL database server: mysqld.

Checking for corrupt, not cleanly closed and upgrade needing tables..
This solved the insane Column count of mysql.proc is wrong. Expected 20, found 16 once and for all!
Before I came with this fix I tried all kind of forum suggested fixes like:
 debian:~# mysql_upgrade -u root -p

Looking for 'mysql' as: mysql

Looking for 'mysqlcheck' as: mysqlcheck

This installation of MySQL is already upgraded to 5.1.61, use --force if you still need to run mysql_upgrade
 debian:~# mysql_upgrade -p

Looking for 'mysql' as: mysql

Looking for 'mysqlcheck' as: mysqlcheck

This installation of MySQL is already upgraded to 5.1.61, use --force if you still need to run mysql_upgrade
And few more, none of them worked the only one that worked was:
It seems, since Oracle bought the Community edition of MySQL thinks with this database server are getting more and more messy and backwards incompatible day by day. Lately, I'm experiencing too much hassles with MySQL version incompitabilities. Maybe I should think for migrating permanently to Postgre …
By the way the ERROR 1547 (HY000) at line 1: Column count of mysql.proc is wrong. is most probably caused of some kind of password hashing incompitability between the password hashing between the BSD and Debian SQL versions, as mysql -u root -p < dump.sql, does override default stored user passwords in the mysql database tables… Such password, hashing issues were common in prior MySQL 4 to MySQL 5 migrations I've done, however since MySQL 5+ is already storing its password strings encrypted with md5 encryption I wonder why on earth this mess happens ….
I'm still busy configuring the new Lenovo (Le-novo) 🙂 ThinkCenter server necessery for migration of old machines. I've done a lot yesterday but really moving all this stuff takes time …
I moved the SQL databases from the old MySQL server host to the new Debian Linux host.
In order to move databsaes, I did the usual SQL dump from current working host with:
After that did the standard move of dump.sql to the new host with sftp
mysql-new:~# sftp root@mysql-host

Connected to mysql-host.

sftp> get dump.sql

....

sftp> exit
and imported dump:
mysql-new:~# mysql -u root -p < dump.sql

Enter password:
Databases dump grow really a lot (7GB)!, so I had to wait for dump.sql to import about 20 minutes – (the host configuration is Dual core 6Ghz 3MB Cache CPU, 4GB DDR3 RAM, 7200 500 GB Hitachi ExcelStor Techno V32O HDD).
The dumps migration was between identical release Debian Linux – (Squeeze 6.0.5) servers running identical versions of MySQL.
mysql-new:~# mysql --version

mysql Ver 14.14 Distrib 5.1.63, for debian-linux-gnu (i486) using readline 6.1
Because of that the whole db import worked like a charm.
Once moved the SQL started re-started normally but there was an on screen warning:
ERROR 1045 (28000): Access denied for user

'debian-sys-maint'@'localhost' (using password: YES)"
The cause of this warning error is because of way /etc/init.d/mysql script is written and in particular the custom MySQL (Debian specific start-up philosophy).
/etc/init.d/mysql is written in a way that on every restart a check of Database consistency is done. There in the script the user debian-sys-maint (a user with mysql administrator root privileges) is used to do the quick consistency check. The debian-sys-maint password which is used on start-up is stored in /etc/mysql/debian.cnf:
mysql-new:~# less /etc/mysql/debian.cnf

# Automatically generated for Debian scripts. DO NOT TOUCH!

[client]

host = localhost

user = debian-sys-maint

password = pQFM9RetOHFjewwn

socket = /var/run/mysqld/mysqld.sock

[mysql_upgrade]

host = localhost

user = debian-sys-maint

password = pQFM9RetOHFjewwn

socket = /var/run/mysqld/mysqld.sock

basedir = /usr
The whole problem is that during, the old SQL import the password set for user debian-sys-maint is different and once SQL starts the init script reads this pass and fails to login to SQL server.
The warning (error):
ERROR 1045 (28000): Access denied for user

'debian-sys-maint'@'localhost' (using password: YES)
hence appears on every SQL start (including on every system boot). The err is generally harmless and SQL seems to work fine with or without it. However since the consistency check is not done at start up, if there are some CORRUPT tables not initiating the start up check is not a good idea.
There are two options to get rid of the warning one and better one is to check in /etc/mysql/debian.cnf for password string and change the pwd with mysql cli e.g.:
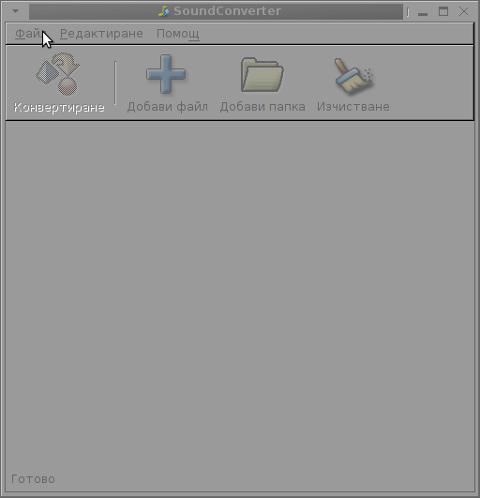
I’ve used K3B just recently to RIP an Audio CD with music to MP3. K3b has done a great job ripping the tracks, the only problem was By default k3b RIPs songs in OGG Vorbis (.ogg) and not mp3. I personally prefer OGG Vorbis as it is a free freedom respecting audio format, however the problem was the .ogg-s cannot be read on many of the audio players and it could be a problem reading the RIPped oggs on Windows. I’ve done the RIP not for myself but for a Belarusian gfriend of mine and she is completely computer illiterate and if I pass her the songs in .OGG, there is no chance she succed in listening the oggs. I’ve seen later k3b has an option to choose to convert directly to MP3 Using linux mp3 lame library this however is time consuming and I have to wait another 10 minutes or so for the songs to be ripped to shorten the time I decided to directly convert the existing .ogg files to .mp3 on my (Debian Linux). There are probably many ways to convert .ogg to mp3 on linux and likely many GUI frontends (like SoundConverter) to use in graphic env.
I however am a console freak so I preferred doing it from terminal. I’ve done quick research on the net and figured out the good old ffmpeg is capable of converting .oggs to .mp3s. To convert all mp3s just ripped in the separate directory I had to run ffmpeg in a tiny bash loop.
A short bash shell script 1 liner combined with ffmpeg does it, e.g.;
for f in *.ogg; do ffmpeg -i "$f" "`basename "$f" .ogg`.mp3"; done.....
The loop example is in bash so in order to make the code work on FreeBSD it is necessery it is run in a bash shell and not in BSDs so common csh or tcsh.
Well, that’s all oggs are in mp3; Hip-hip Hooray 😉
I'm a guy fascinated by ASCII art, since the very early days I saw a piece of this awesome digital art.
As time passed and computers went to be used mostly graphics resolution, ASCII art loose its huge popularity from the early DOS and BBS (internet primordial days).
However, this kind of art is still higly valued by true computer geeks. In that manner of thoughts, lately I'm researching widely on ASCII art tools and ASCII art open source tools available for Linux. Last time I check what is available for 'ASCII job' was before 5 years time. Recently I decided to review once again and see if there are new software for doing ascii manipulations on Linux and this is how this article got born.
My attention was caught by aewan (ASCII-art Editor Without A Name), while searching for ASCII keyword description packages with:
Here is the complete description of the Debian package:
hipo@noah:~$ apt-cache show aewan|grep -i description -A 5

Description: ASCII-art Editor Without A Name

aewan is an ASCII art editor with support for multiple layers that can be

edited individually, colors, rectangular copy and paste, and intelligent

horizontal and vertical flipping (converts '\' to '/', etc). It produces

both stand-alone art files and an easy-to-parse format for integration

into your terminal applications.
I installed it to give it a try:
noah:~# apt-get --yes install aewan

Selecting previously deselected package aewan.

(Reading database ... 388522 files and directories currently installed.)

Unpacking aewan (from .../aewan_1.0.01-3_amd64.deb) ...

Processing triggers for man-db ...

Setting up aewan (1.0.01-3) ...
2. aecat is utility to display an aewan documents (aewan format saved files)3. aemakeflic – tool to produce an animation from an aewan document
Next I ran it in plain console tty to check how it is like:
hipo@noah:~$ aewan
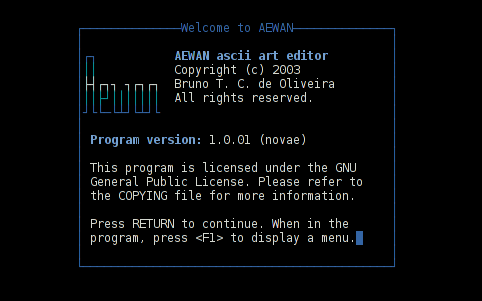
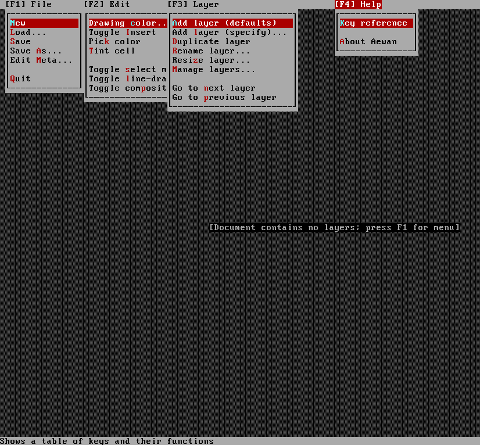
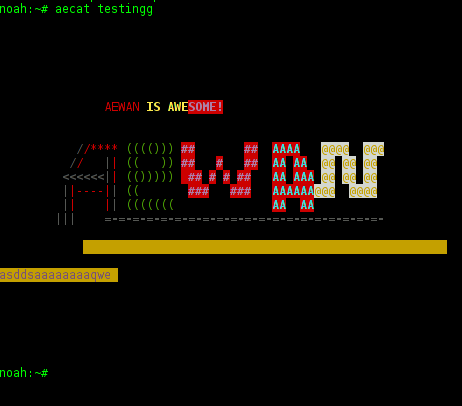
Below are screenshots to give you an idea how powerful aewan ASCII art editor is:
Aewan immediate entry screen after start up
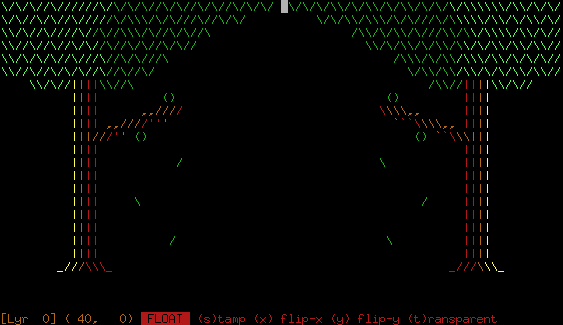
Aewan ASCII art editor – all of the supported tool functions
As you can see from the shot the editor is very feature rich. I was stunned to find out it even supports layers (in ASCII!!) (w0w!). It even has a Layers Manager (like GIMP) 🙂
To create my first ASCII art I used the:
New
menu.
This however didn't immediately show the prompt, where I can type the ascii characters to draw my picture. In order to be able to draw inside the editor, its necessary to open at least one layer, through using the menu:
Add Layer (defaults)
then the interactive ASCII art editor appeared.
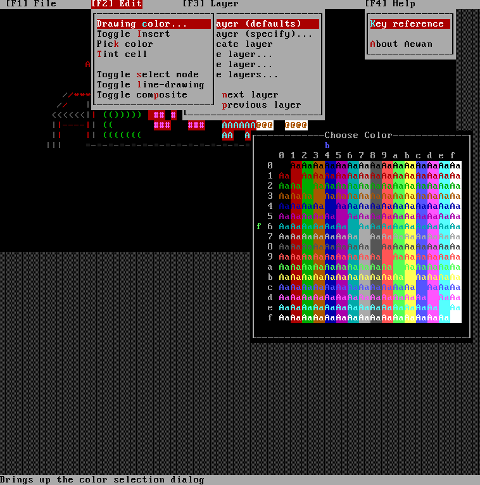
While an ASCII art is created with the editor you can select the color of the input characters by using Drawing Color menu seen in the above screenshot.
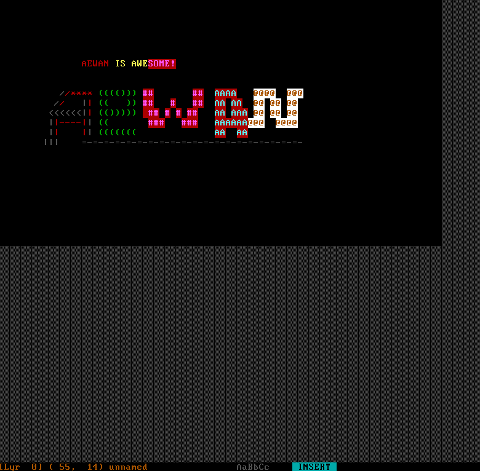
I've played few minutes and created a sample ascii art, just to test the color and editor "look & feel", my conclusions are the editor chars drawing is awesome.
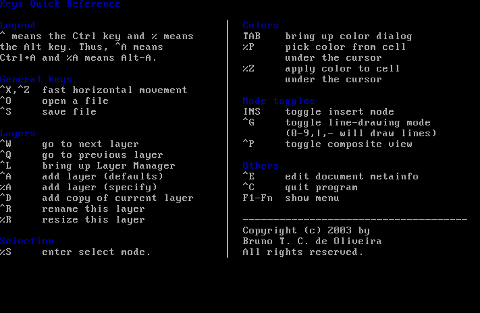
All the commands available via menus are also accessible via a shortcut key combinations:
aewan controls are just great and definitely over-shadows every other text editor I used to draw an ASCII art so far. Once saved the ASCII art, are by default saved in a plain gzipped ascii text. You can therefore simply zcat the the saves; Don't expect zcat to show you the ascii as they're displayed in aewan, zcat-ing it will instead display just the stored meta data; the meta data is interpreted and displayed properly only with aecat command.
I've checked online for rpm builds too and such are available, so installing on Fedora, CentOS, SuSE etc. is up to downloading the right distro / hardware architecture rpm package and running:
# rpm -ivh aewan*.rpm
On the official website, there are also instructions to compile from source, Slackware users and users of other distros which doesn't have a package build should compile manually with the usual:
$ tar -zxf aewan-1.0.01.tar.gz

$ cd aewan-1.0.01

$ ./configure

$ make

$ su -c "make install"
For those inrested to make animations with aemakeflic you need to first save a multiple layers of pictures. The idea of creating ASCII art video is pretty much like the old school way to make animation "draw every scene" and movie it. Once all different scene layers of the ASCII art animation are prepared one could use aemakeflic to export all the ASCII layers as common video.
aemakeflic has the ability to export the ASCII animation in a runnable shell script to display the animation. The other way aemakeflic can be used is to produce a picture in kind of text format showing the video whether seen with less cmd. Making ASCII animation takes a lot of time and effort. Since i'm too lazy and I lack the time I haven't tested this functionality. Anyways I've seen some ascii videos on telnet to remote hosts (some past time); therefore I guess they were made using aewan and later animated with aemakeflic.
I will close this post with a nice colorful ASCII art, made with aewan (picture is taken from the project page):
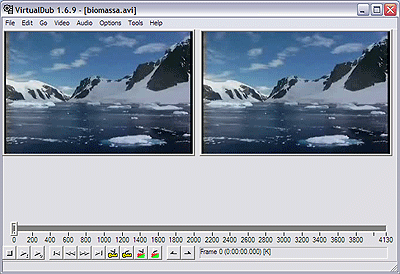
I'm starting to learn some video editing, as I need it sometimes for building client websites. As a Linux user I needed to have some kind of software for amateur video editing. For Microsoft Windows OS, there are tons of video editor programs both free and proprietary (paid). Windows users can for instance use the free software program VirtualDub (licensed under GPL license) to easily cut movie scenes from a video.
Unfortunately VirtualDub didn't have a Linux or BSD version so in my case I had to look for another soft.
I consulted a friend of mine who recommended a video editor program called LiVES.
If you haven't done any video editing previously on Linux (like my case was), you will certainly be happy to try LiVES
LiVES can extract only sound from videos, cut selected parts (frames) from videos and do plenty of other nice stuff. It is just great piece of software for anyone, who needs to do simply (newbie) video editting.
With LiVES even an amateur video editor like me could, immediately learn how to chop a movie scenes …
To master the basics and edit one video in FLV format it took me about 1 hour of time, as in the beginning it was confusing to get confortable with the program scenes selector.
One downside of LiVES it failure to open a FLV file I wanted to edit. In order to be able to edit the flv movie hence I first had to convert the FLV to AVI or MPEG, as this two (video multimedia formats) are supported by LiVES video editor.
After completing my video scenes chopping to the AVI file I had to convert back to FLV.
In order to complete the convertion between FLV to AVI format on my Debian Linux, I used a program called avidemux
Avidemux has a nice GUI interface and also like Lives has support for video editting, though I have never succesfully done any video edits with it.
Avidemux IMHO is user (completely intuitive). To convert the FLV to AVI, all I had to do was simply open the file FLV file, press (CTRL+S) select my FLV video file format and select the output file extension format to be AVI.
Further on, used LiVES to cut my desired parts from my video of choice. Once the cuts were complete I saved the new cutted version of video to AVI. Then I needed the video again in FLV to upload it in Joomla, so used ffmpeg – command line tool to do the AVI to FLV file converstion, like so:
The format of the produced packages.txt file will have only two columns, in column1 there will be the package (name) installed and in column 2, the status of the package e.g.: install or deinstall
Note that you can only use the –get-selections as root superuser, trying to run it with non-privileged user I got:
hipo@server1:~$ dpkg --set-selections > packages.txt

dpkg: operation requires read/write access to dpkg status area
2. Copy packages.txt file containing the installed deb packages from server1 to server2
There is many way to copy the packages.txt package description file, one can use ftp, sftp, scp, rsync … lftp or even copy it via wget if placed in some Apache directory on server1.
A quick and convenient way to copy the file from Debian server1 to server2 is with scp as it can also be used easily for an automated script to do the packages.txt file copying (if for instance you have to implement package cloning on multiple Debian Linux servers).
 root@debian-server1:~# scp ./packages.txt hipo@server-hostname2:~/packages.txt

The authenticity of host '83.170.97.153 (83.170.97.153)' can't be established. RSA key fingerprint is 38:da:2a:79:ad:38:5b:64:9e:8b:b4:81:09:cd:94:d4. Are you sure you want to continue connecting (yes/no)? yes Warning: Permanently added '83.170.97.153' (RSA) to the list of known hosts. hipo@83.170.97.153's password:

packages.txt
As this is the first time I make connection to server2 from server1, I'm prompted to accept the host RSA unique fingerprint.
3. Install the copied selection from server1 on server2 with apt-get or dselect
debian-server2:/home/hipo# apt-get update

...

debian-server2:/home/hipo# apt-get upgrade

Reading package lists... Done

Building dependency tree

Reading state information... Done

debian-server2:/home/hipo# dpkg --set-selections < packages.txt

debian-server2:/home/hipo# apt-get -u dselect-upgrade --yes
The first apt-get update command assures the server will have the latest version of the packages currently installed, this will save you from running an outdated versions of the installed packages on debian-server2
Bear in mind that using apt-get sometimes, might create dependency issues. This is depending on the exact package names, being replicated in between the servers
Therefore it is better to use another approach with bash for loop to "replicate" installed packages between two servers, like so:
debian-server2:/home/hipo# for i in $(cat packages.txt |awk '{ print $1 }'); do aptitude install $i; done
If you want to automate the questioning about aptitude operations pass on the -y
debian-server2:/home/hipo# for i in $(cat packages.txt |awk '{ print $1 }'); do aptitude -y install $i; done
Be cautious if the -y is passed as sometimes some packages might be removed from the server to resolve dependency issues, if you need this packages you will have to again install them manually.
4. Mirroring package selection from server1 to server2 using one liner
A quick one liner, that does replicate a set of preselected packages from server1 to server2 is also possible with either a combination of apt, ssh, awk and dpkg or with ssh + dpkg + dselect :
a) One-liner code with apt-get unifying the installed packages between 2 or more servers
If it is necessery to install on more than just debian-server2, copy paste the above code to all servers you want to have identical installed packages as with debian-server1 or use a shor for loop to run the commands for each and every host of multiple servers group.
In some cases it might be better to use dselect instead as in some situations using apt-get might not correctly solve the package dependencies, if encountering problems with dependencies better run:
As you can see using this second dselect installed "package" mirroring is also way easier to read and understand than the prior "cryptic" method with apt-get, hence I personally think using dselect method is a better.
Well that's basically it. If you need to synchronize also configurations, either an rsync/scp shell script, should be used with all defined server1 config files or in case if a cloning of packages between identical server machines is necessery dd or some other tool like Norton Ghost could be used. Hope this helps, someone.
In our TeamViewer download area you will now find TeamViewer 7 for Linux. The final version includes a selection of new features for Linux, e. g. an integrated screenshot feature and the possibility of saving individual connection settings per computer. You can now establish cross platform connections with other computers running version 7 and hold online meetings and presentations with up to 25 participants.
We wish you best continued success with TeamViewer!
Well, guys it was about time, even later than that… Until now I've so many times experienced troubles with Windows machines which I had to administrate remotely and they only had a TeamViewer 7 installed (a real, real pain in the ass).
The issue comes cause TeamViewer 6 is incompatible with 7 and just until very recently only TV 6 for Linux was available, so trying to access a 7 install directly from Linux was impossible. Hence to access TeamViewer 7 Windows install, I had to use either a fresh Windows copy with TeamViewer 7 installed or a Virtual Machine like (Qemu, VirtualBox) with Windows version installed in it. Often back then, when I had to fix remotely a Windows machine behind a firewall, I had to instruct the machine owners to replace the TeamViewer 7 with TeamViewer 6 in order to be able to easily access the remote host from my Debian Linux.
I still remember, it was quite a stuggle to find a link to a Windows .exe install file for TeamViewer 6.
One example, where old teamviewer release is useful is if you want to run teamviewer on older hardware or old OS (MS Windows 98 or old Linux distro).
I've made a mirror of teamviewer 6 for Debian / Ubuntu amd 32 and 64 bit versions along with all the OS available TeamViewer version 6 and 7, for the sake of preserving it if one day link to old versions of Teamviewer disappear from their website.
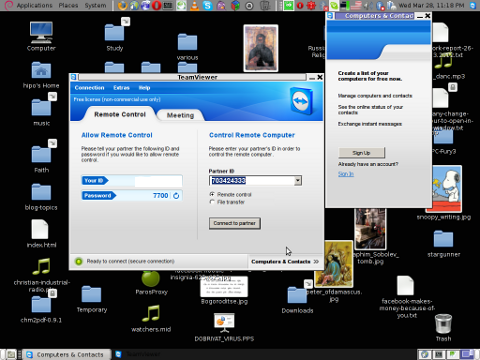
Below you see a screenshot of teamviewer 7 running on my Debian Squeeze 🙂
It is great teamviewer produced a Linux working application, however if you run it you realize just like the previous releases TeamViewer is not natively supposed (compiled) to run on GNU / Linux OS but uses wine (windows emulator) to launch through… Instead of porting the application to be natively for the Linux distros once again with this new release, teamviewer developers just "hacked" it to run on top of windows emulation. Though this is working its performance, is probably a bit degraded and it depends on having install on the Linux host a bunch of useless packages which wine depends on. Besides that even if it "works" on Linux , TeamViewer has still non-free software essense. I still use it because unfortunately, I don't know of a better remote access program capable to connect to servers behind NAT / machines located behind a tight firewalled routers. If only (I knew of?) a TeamViewer free software / open source equivalent … I will be glad to hear if someone know a (free software / open source) TeamViewer like program able to access remote hosts with no a real (public inet) IP address?P.S.: By similar TV program I don't mean VNC, UltraVNC and this kind of other VNC derivative programs but mean close TeamViewer alternative.