Posts Tagged ‘linux?’

How to Install and Play old Arcade Multiple Arcade Machine Emulator Games on Linux in 2021 with xmame and GXMame GUI Frontend

Friday, May 14th, 2021

mame-multiple-arcade-machine-emulator
I've earlier blogged on how to install and play old arcade games with xmame compiled from source on the now old Debian 7 Linux under the article Install xmame from source on Debian Linux 7.0 (Wheezy) to play for better MAME (Arcade Games Emulation)
as well article on using the newer version of MAME emulator instead of xmame under the article Playing Arcade old school games on Debian Linux as well as how to make the MAME emulator work with a joystick see my previous How to configure Joystick ( Gamepad ) on Debian, Ubuntu, Mint GNU / Linux easily.

Since I have preinstalled my notebook with fresh Debian 10 Buster, for a long time I did not have the time as well as desire to play my favourite games of the youth to name a few this is Xain'd Sleena / Cadillacs and Dinosaurs (1993) / the Punisher (1993) / Captain Commando (1991) / Super Mario / Contra / Final Fight etc. and rest of the the SEGA Mega Drive / GameBoy / Nintendo / Terminator game (fake clone of nintendo) and other killing Arcade Classics of the late 90s and early year 2000, which we played on a public houses on a game cabinets with a joysticks. 
Hence I tried to reproduce some of my articles just as of 2021 to see whether still we can get a nice playable MAME emulator on Linux with a Graphical GUI for Mate or GNOME. And it seems using a straight mame out of Debian standard repositories did not work with some of the more sophisticated ROM .zip files from the nices such as Punisher or XSLEENA.zip, this is how this article got born in an attempt to give a way for such old school game freaks as me to be able to play there favorite games of the youth.

Below is the few steps adapted mostly from above articles with some head banging and loosing multiple hours wondering until I finally got a working XMAME ROM emulator with the simple but working GXMAME graphical frontend for M.A.M.E..

To compile xmame with joystick support be it analog or whatever joystick you have to use a Makefile like below

https://www.pc-freak.net/files/xmame-0.103-Makefile-for-joystick

Copy it on your PC and remove it to Makefile in the xmame-0.103 source dir:

# cd /usr/local/src/xmame-0.103


I have to install all the necessery package dependencies development header files, some of which are mentioned in the beginning of post articles and some of which I had to install manually, such as the preset Debian meta-package build-essentials Things to install on newly installed GNU / Linux (My favourite must have Linux text and GUI programs missing in fresh Linux installs), just to mention a few I remember had to install based on some compilation errors:

# apt-get install build-essential
# apt-get install –yes zlib1g-dev

# apt-get install –yes libexpat1-dev
# apt-get install –yes libghc-x11-dev
# apt-get install –yes x11proto-video-dev
# apt-get install –yes libxv-dev
# apt-get install libxext6
# apt-get install libxext6-dev
# apt-get install libxext-dev
# apt-get install libjpeg62-turbo-dev
# apt-get install libxinerama-dev
# apt-get install libgtk-3-dev
# apt-get install syslog-ng-dev
# apt-get install libgtk2.0-dev


If I'm missing some package necessery here you will have to find it yourself based on the *.h file produced as error during compile you should look it up with a cmd like:

# apt-file search glib2.h


And install it further.

You will need to edit Makefile or take and straight use or if necessery adapt an already prepared Makefile for my purpose:
 

# wget https://www.pc-freak.net/files/xmame-0.103-Makefile-for-joystick;
# mv https://www.pc-freak.net/files/xmame-0.103-Makefile-for-joystick Makefile
# make && make install


Some .zip roms does not properly work with the newer mame you need to instead use xmame ..

Below is the version I use on Debian 10 as of May 2021 year.

hipo@jeremiah:/usr/local/src$ xmame –version
GLINFO: loaded OpenGL library libGL.so!
GLINFO: loaded GLU    library libGLU.so!
xmame (x11) version 0.103 (May 13 2021)


To make the joystick work in xmame you will need to have a preset of modules loaded on the Linux for my old Genius joystick this is what works.

hipo@jeremiah:~/Games$ cat /etc/modules
# /etc/modules: kernel modules to load at boot time.
#
# This file contains the names of kernel modules that should be loaded
# at boot time, one per line. Lines beginning with "#" are ignored.
snd-seq
3c59x
snd-emu10k1
snd-pcm-oss
snd-mixer-oss
snd-seq-oss
joydev
ns558
sidewinder
gameport
analog
adi
pcigame
iforce
evdev
usbhid


Fill in your joystick module there and make sure you manually load each one of the modules with modprobe command.
Next calibrate the joystick with some tool like jktest-gtk
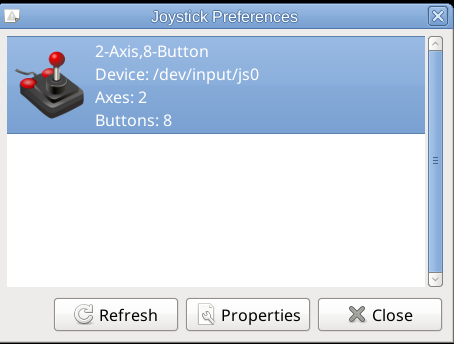
jktest-gtk-linux-screenshot
If you need a good frontend for MATE / GNOME for xmame try gxmame. It is a real pain in the ass to configure, note that the only working version of xmame with good configuration as well as gxmame with a game list that is prebuild.
If you need xmame-0.103.tar.bz2 exact xmame version I'm using thethe archive is on:

https://www.pc-freak.net/files/xmame-0.103.tar.bz2
An old bundle of both gxmame and xmamerc configs is here

https://www.pc-freak.net/files/xmame.tar.gz

https://www.pc-freak.net/files/xmame-config-for-joystick-hipo.tar.gz
For example my old working version of xmame ~/.xmame is here https://www.pc-freak.net/files/xmame-config-for-joystick-hipo.tar.gz

Configuration of gxmame (even though it has has a GUI for configuring is below:

https://www.pc-freak.net/files/gxmame.tar.gz

xmamerc sample working file is here

https://www.pc-freak.net/files/xmamerc

My newest current version as of Debian 10 Squeeze of xmame and gxmame is below:

https://www.pc-freak.net/files/gxmame-config-newest_may_2021.tar.gz

https://www.pc-freak.net/files/xmame-config-newest_may_2021.tar.gz

Note that my rom files and stuff is located and configured in neewst configs to be under /home/hipo/Games/roms/ if your location is others grep it in .xmame/* and .gxmame/* files and set the correct PATH locations.

A VERY IMPORTANT NOTE is not to use the stable version of GXMAME even though it worked in 2003 fine as the project is abandoned and unsupported as of 2021 the latest downloadable stable gxmame file on Sourceforge gxmame-0.34b website is not working correctly (even though it compiles fine).
You have to compile and use instead the newer version gxmame-0.35beta1.

If you want to use gxmame with a joystick you need to compile it with the respective option:
 

root@jeremiah:/usr/local/src/gxmame-0.35beta1# ./configure –enable-joystick


gxmame 0.35beta1

Print debugging messages…… : no
Joystick support………….. : yes

GXMame will be installed in /usr/local/bin.
Warning: You have an old copy of gxmame at /usr/local/bin/gxmame.


configure complete, now type 'make'

To install compiled binaries do the usual:
 

# make && make install

gxmame binary should be installed under /usr/local/bin/gxmame once launched you should get the shiny gxmame GUI.
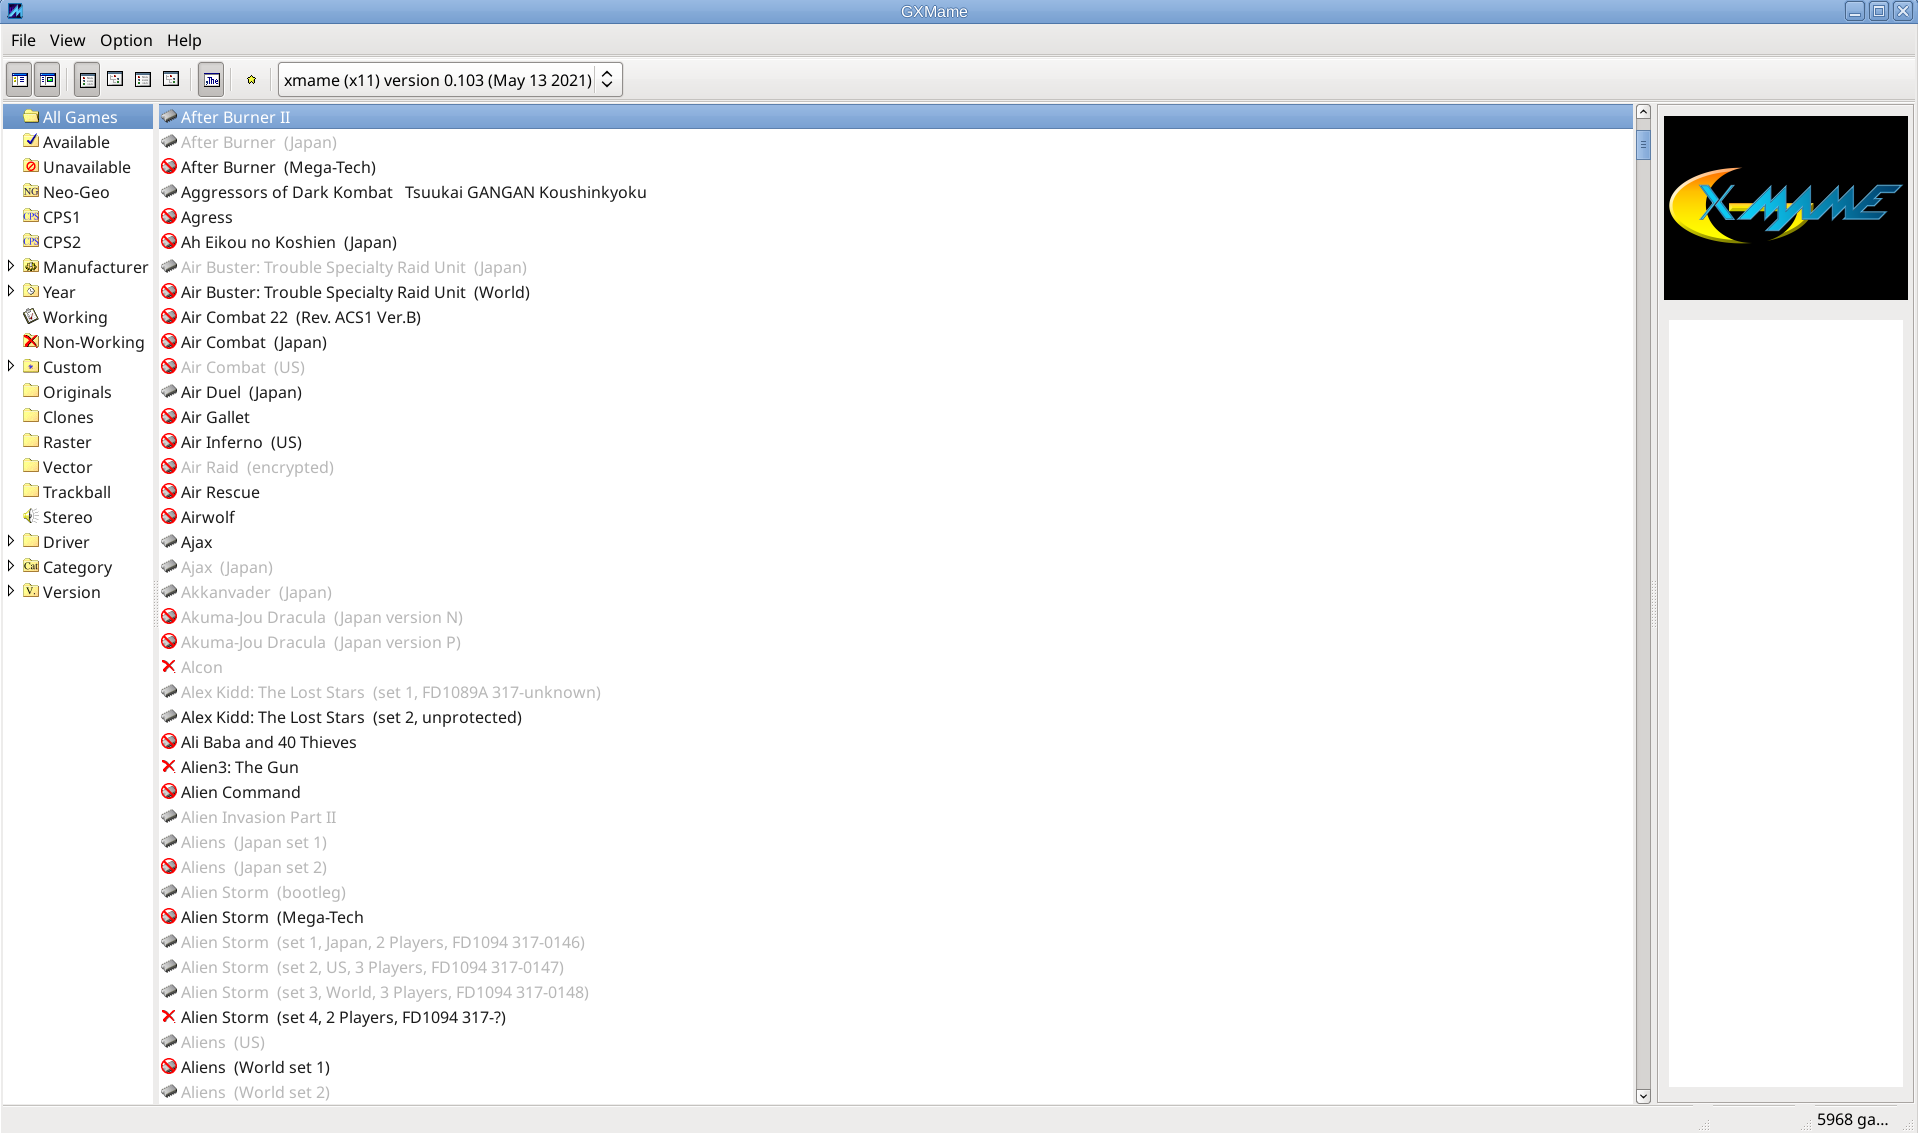
gxmame-screenshot-debian-10-gnu-linux-mate-desktop

Perhaps there was other stuff I've done in the process I forgot to document here, so if you try to follow my guide and something does not work please tell me what I'm missing and you can't handle it either contact me.

The guide is for Debian Linux but should work on other .Deb based Linux distros such as Ubuntu / Linux Mint etc.

To enjoy my 4GB present of ROM files containing many of best well known M.A.M.E. ARCADE GAMES check archive here. Note that this collection was downloaded on the Internet and I do not hold any responsibility of the archive. If it contains files with any copyright infringment this is to be on your own.
 

Fix “init: Id “ad” respawning too fast: disabled for 5 minutes” – Reload /etc/inittab changes in memory apply without rebooting Linux server

Thursday, April 15th, 2021

inittab-logo-reload-inittab-without-reboot

During my daily sysadmin tasks I've been contacted by a colleague, reporting issues with missing logs in rsyslog on a very old Redhat Server release 5.11.
Exact version is:

root@linux-server:~# cat /etc/redhat-release
Red Hat Enterprise Linux Server release 5.11 (Tikanga)

After checking the logs, I have confirmed his finding that in reality since about more than a year logs were not produced and al I could find multiple messages in /var/log/messages reading like:

init: Id "ad" respawning too fast: disabled for 5 minutes

I've checked the status of rsyslog which seemed to be fine

root@linux-server:~# /etc/init.d/rsyslog status
rsyslogd (pid  13709) is running…

The redhat version on the system was

root@linux-server:~# rpm -qa |grep -i rsyslog
rsyslog-3.22.1-7.el5


root@linux-server:~# tail -n 16 /var/log/messages
Apr 15 17:21:25 linux-server init: Id "ad" respawning too fast: disabled for 5 minutes
Apr 15 17:26:26 linux-server init: Id "ad" respawning too fast: disabled for 5 minutes
Apr 15 17:31:27 linux-server init: Id "ad" respawning too fast: disabled for 5 minutes
Apr 15 17:36:28 linux-server init: Id "ad" respawning too fast: disabled for 5 minutes
Apr 15 17:41:29 linux-server init: Id "ad" respawning too fast: disabled for 5 minutes
Apr 15 17:46:30 linux-server init: Id "ad" respawning too fast: disabled for 5 minutes
Apr 15 17:51:31 linux-server init: Id "ad" respawning too fast: disabled for 5 minutes
Apr 15 17:56:32 linux-server init: Id "ad" respawning too fast: disabled for 5 minutes
Apr 15 18:01:33 linux-server init: Id "ad" respawning too fast: disabled for 5 minutes
Apr 15 18:06:34 linux-server init: Id "ad" respawning too fast: disabled for 5 minutes
Apr 15 18:11:35 linux-server init: Id "ad" respawning too fast: disabled for 5 minutes
Apr 15 18:16:38 linux-server init: Id "ad" respawning too fast: disabled for 5 minutes
Apr 15 18:21:39 linux-server init: Id "ad" respawning too fast: disabled for 5 minutes


root@linux-server:~# /etc/init.d/rsyslog status
rsyslogd (pid  13709) is running…

Since the system is so old and I've seen this message and experienced this "respawning too fast: disabled for 5 minutes" myself in the past on some old Redhat 6.0 before RHEL was born as well as on Slackware Linux. The /etc/inittab which is nowadays obsoleted in newer Linux distributions was used to keep respawing a processes which have the chance to die out for some reason. 

For those unfamiliar with inittab there is a short extract from man inittab to get idea what it is.


NAME
       inittab  –  format of the inittab file used by the sysv-compatible init
       process

DESCRIPTION
       The inittab file describes which processes are started  at  bootup  and
       during  normal  operation  (e.g. /etc/init.d/boot, /etc/init.d/rc, get-
       tys…).  Init(8) distinguishes multiple runlevels, each of  which  can
       have  its  own  set of processes that are started.  Valid runlevels are
       0-6 plus A, B, and C for ondemand entries.  An  entry  in  the  inittab
       file has the following format:

              id:runlevels:action:process
 

So for example the use of /etc/inittab was very handy to configure a separate TTY12 (physical console) in the text environment of Linux to log all your messages. Another good use if you had a bash / perl / python script that you wanted to respawn (resurrect itself if it does out) on OS level without adding additional software like Dan Bernstein's all famous daemontools inittab was the right thing to use. It is a pity nowadays inittab is obsoleted in modern Linux OSes but the most likely reason to remove it is if you put some broken script that overeats CPU or memory if it runs multiple times you can easily get into a hung system.

Thus the logical thing to do is to check /etc/inittab content for any strange issues with less /etc/inittab and near the end of file found the problematic process which was triggering a never ending error messages to rsyslog and the module to protect from such messages in rsyslog by values $SystemLogRateLimitInterval and $SystemLogRateLimitBurst

# configure rsyslog rate limiting
# Rate-limiting
$SystemLogRateLimitInterval 5
$SystemLogRateLimitBurst 50000

The problem causing respawning too fast: disabled for 5 minutes

Was an old version of TivSM IBM Tivoli Service Manager /opt/tivoli/tsm/client/ba/bin/dsmc, set in the past in /etc/inittab it seems some colleague after updating to a more recent version has either changed the location of dsmc binary either the architecture of old tsm itself required a record in /etc/inittab in case if for some reasons or bugs the dsmc during backup creation was dying.

root@linux-server:~# tail -8 /etc/inittab
6:2345:respawn:/sbin/mingetty tty6

# Run xdm in runlevel 5
x:5:respawn:/etc/X11/prefdm -nodaemon

#ad:2345:respawn:/opt/tivoli/tsm/client/ba/bin/dsmc sched >/dev/null 2>&1

root@linux-server:~# rpm -qa |grep -i tivsm
TIVsm-API-5.3.4-0
TIVsm-stagent-5.3.4-0
TIVsm-BA-5.3.4-0
TIVsm-API64-5.3.4-0


The logical thing to do was to check whether this binary exist at all here is the result:

root@linux-server:~$ ls -al /opt/tivoli/tsm/client/ba/bin/dsmc
ls: /opt/tivoli/tsm/client/ba/bin/dsmc: No such file or directory

Obviously someone decided to comment out the inittab support for /opt/tivoli/tsm/client/ba/bin/dsmc as the binary was not present and the dsmc backup was executed via a separate one time cron job or the service itself was configured to run continue, but forgot to reread its configuration so in the kernel memory inittab was still having the instruction to loop over the dsmc binary, since the Linux machine was not rebooted ages (1472 days) or 4.8 years time.

root@linux-server:~#  uname -a; echo; uptime
Linux linux-server2.6.18-419.el5 #1 SMP Wed Feb 22 22:40:57 EST 2017 x86_64 x86_64 x86_64 GNU/Linux

 19:04:34 up 1472 days,  5:20,  1 user,  load average: 0.12, 0.07, 0.06


So what really happens is <b>inittab</b> is trying to kind of re-run all the time dsmc process in a similar way like it would in a bash never ending loop;


while [ 1 ]; do 
/opt/tivoli/tsm/client/ba/bin/dsmc sched
done

Since the $PATH location to the binary returns 'No such file or directory' message this message floods up the rsyslog every second which triggers the LimitBurst protection of rsyslog causing rsyslog to disable completely logging for 5 minutes. The next 5 minutes when the time expires for blocking out logging due to reached limit burst.
dsmc binary sends again few ten thousand of messages for few seconds which are already waiting in a queue of rsyslog and the LimitBurst anti DDoS protection activates again. The reason for the LimitBurst is simply because if it logging is not disabled quickly the repeating message is going to fill the hard drive of the system and noone will be able to login. So rsyslog activated the good protection.

It seems noone from support colleagues, never ever noticed this init: Id "ad" respawning too fast: disabled for 5 minutes in /var/log/messages. So since the syslog was continuesly blocked by overflow of non-sense messages, systems  normal logging was interruped and respectively prevented any other meaningful error messages and warnings from the system to get properly logged  and perhaps flooed the remote rsyslog logging servers @logging-servers:514 in /etc/rsyslog.conf


Fix to respawning too fast: disabled for 5 minutes

Very simply make /etc/inittab get reloaded in memory with:

root@linux-server:~# /sbin/init q

or with the linked telnet, which was so much used by us sys admins in the past

root@linux-server:~# /sbin/telinit q

To make the rsyslog suspension disabled of course we need to restart it again.

root@linux-server:~# /etc/init.d/rsyslog restart

root@linux-server:~# /etc/init.d/rsyslog status
rsyslogd (pid  13710) is running…

And Voila logs from services are being delivered normally via configured stuff in /etc/rsyslog.conf, to make sure this is so:

root@linux-server:~# tail -8 /var/log/messages
Apr 15 14:36:29 linux-serverinit: Id "ad" respawning too fast: disabled for 5 minutes
Apr 15 14:41:37 linux-serverinit: Id "ad" respawning too fast: disabled for 5 minutes
Apr 15 14:51:22 linux-serverinit: Id "ad" respawning too fast: disabled for 5 minutes
Apr 15 14:56:30 linux-serverinit: Id "ad" respawning too fast: disabled for 5 minutes
Apr 15 15:01:38 linux-serverinit: Id "ad" respawning too fast: disabled for 5 minutes
Apr 15 15:06:45 linux-serverinit: Id "ad" respawning too fast: disabled for 5 minutes
Apr 15 18:21:49 linux-server init: Re-reading inittab
Apr 15 18:21:54 linux-server kernel: imklog 3.22.1, log source = /proc/kmsg started.
Apr 15 18:21:54 linux-server rsyslogd: [origin software=”rsyslogd” swVersion=”3.22.1″ x-pid=”13709″ x-info=”http://www.rsyslog.com”] (re)start
Apr 15 18:41:54 linux-server rsyslogd: — MARK —
Apr 15 19:01:54 linux-server rsyslogd: — MARK —
Apr 15 19:21:54 linux-server rsyslogd: — MARK —
Apr 15 19:41:54 linux-server rsyslogd: — MARK —
Apr 15 20:01:54 linux-server rsyslogd: — MARK —

Update reverse sshd config with cronjob to revert if sshd reload issues

Friday, February 12th, 2021

Update-reverse-sshd-config-with-cronjob-to-revert-if-sshd-reload-issues

Say you're doing ssh hardening modifying /etc/ssh/sshd_config for better system security or just changing options in sshd due to some requirements. But you follow the wrong guide and you placed some ssh variable which is working normally on newer SSH versions ssh OpenSSH_8.0p1 / or 7 but the options are applied on older SSH server and due to that restarting sshd via /etc/init.d/… or systemctl restart sshd cuts your access to remote server located in a DC and not attached to Admin LAN port, and does not have a working ILO or IDRAC configured and you have to wait for a couple of hours for some Support to go to the server Room / Rack / line location to have access to a Linux physical tty console and fix it by reverting the last changes you made to sshd and restarting.

Thus logical question comes what can you do to assure yourself you would not cut your network access to remote machine after modifying OpenSSHD and normal SSHD restart?

There is an old trick, I'm using for years now but perhaps if you're just starting with Linux as a novice system administrator or a server support guy you would not know it, it is as simple as setting a cron job for some minutes to periodically overwrite the sshd configuration with a copy of the old working version of sshd before modification.

Here is this nice nify trick which saved me headache of call on technical support line to ValueWeb when I was administering some old Linux servers back in the 2000s

root@server:~# crontab -u root -e

# create /etc/ssh/sshd_config backup file
cp -rpf /etc/ssh/sshd_config /etc/ssh/sshd_config_$(date +%d-%m-%y)
# add to cronjob to execute every 15 minutes and ovewrite sshd with the working version just in case
*/15 * * * * /bin/cp -rpf /etc/ssh/sshd_config_$(date +%d-%m-%y) /etc/ssh/sshd_config && /bin/systemctl restart sshd
# restart sshd 
cp -rpf /etc/ssh/sshd_config_$(date +%d-%m-%y) /etc/ssh/sshd_config && /bin/systemctl restart sshd


Copy paste above cron definitions and leave them on for some time. Do the /etc/ssh/sshd_config modifications and once you're done restart sshd by lets say

root@server:~#  killall -HUP sshd 


If the ssh connectivity continues to work edit the cron job again and delete all lines and save again.
If you're not feeling confortable with vim as a text editor (in case you're a complete newbie and you don't know) how to get out of vim. Before doing all little steps you can do on the shell with  export EDITOR=nano or export EDITOR=mcedit cmds,this will change the default text editor on the shell. 

Hope this helps someone… Enjoy 🙂

How to configure static DNS and Search domain for Redhat / CentOS and Redhat Linux

Wednesday, February 3rd, 2021

Fedora-Red-Hat-and-CentOS-fix-DNS-resolv-conf-automatically-deleted-records
In latest Redhat based OS-es Fedora / CentOS / Redhat etc. just like on many other Linux distributions, we have /etc/resolv.conf being overwritten by NetworkManager and / or systemd configurations setup which since some time has been introduced to be a "more sophisticated" (default)  so the file is being written by Network Manager / dhcp or systemd config. Though the idea is good, having other programs modify /etc/resolv.conf is a real pain in the ass especially as you end up with an empty file because some service has overwritten what you have placed in the file and the DNS records and Search Domain is deleted forever. If you're not aware of this "new cool" linux feature you might first think that it was a bug that has ovewritten /etc/resolv.conf but ok guys as Bill Gates loved to say "this is not a bug it is a feature", so any attemps you make to manually change /etc/resolv.conf will be soon gone 🙂

This is pretty annoying for old school sysadmins which like to just set the necessery Domain name server resolving

search Subdomain.SearchDomain.Com
nameserver xxx.xxx.xxx.xxx
nameserver yyy.yyy.yyy.yyy


However as said Nowdays if you just place the desired config with in /etc/resolv.conf on next Server reboot or Network restart (or next fetch of DHCP if the ethernet interface IPs are being obtained via DHCP protocol) you will end up in a situation with an empty /etc/resolv.conf  with one commented line reading:

[root@redhat ~]# cat /etc/resolv.conf
# Generated by NetworkManager

To make the DNS and Search Domain be always presented on any network restart or reboot on the server hence you will need to define  DNS1 DNS2 DNS3 etc. and SEARCH variable inside the network configuration files for Bridge or Network interfaces located in /etc/sysconfig/network-scripts/ifcfg-br0 /etc/sysconfig/network-scripts/ifcfg-eno1np0 etc.  that will automatically append above search / nameserver fields in /etc/resolv.conf on any NetworkManager or system restart.
Below is example with the variables added to a Network bridge configuration on Redhat 8.3 (Ootpa):

[root@redhat ~]# cat /etc/sysconfig/network-scripts/ifcfg-br0
STP=yes
BRIDGING_OPTS=priority=32768
TYPE=Bridge
PROXY_METHOD=none
BROWSER_ONLY=no
BOOTPROTO=none
DEFROUTE=yes
IPV4_FAILURE_FATAL=no
IPV6INIT=yes
IPV6_AUTOCONF=yes
IPV6_DEFROUTE=yes
IPV6_FAILURE_FATAL=no
IPV6_ADDR_GEN_MODE=stable-privacy
NAME=br0
UUID=f87e54a8-0fc4-4197-8ccc-0d8a671f30d0
DEVICE=br0
ONBOOT=yes
IPADDR=10.10.51.16
PREFIX=26
GATEWAY=10.10.51.1

DNS1="172.80.11.2"
DNS2="172.80.11.3"
DNS3="172.80.11.4"
SEARCH="sub.search-domain.com"


To test the configuration does append proper records into /etc/resolv.conf on Network restart  or /sbin/reboot reload the network.

[root@redhat ~]# systemctl restart NetworkManager


The result is you should have a good looking resolv.conf as so

[root@redhat ~]#  cat /etc/resolv.conf
# Generated by NetworkManager
search sub.search-domain.com
nameserver 172.20.88.2
nameserver 172.20.88.3
nameserver 172.20.88.4


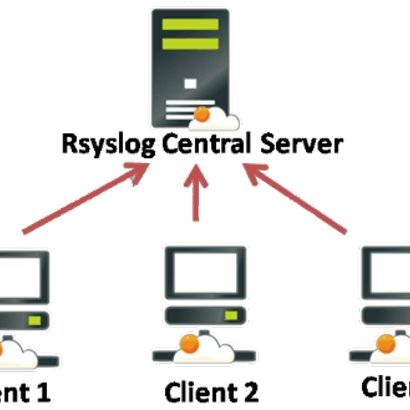
Configure rsyslog buffering on Linux to avoid message lost to Central Logging server

Wednesday, January 13th, 2021

rsyslog-Centralized-Logging-System-using-Rsyslog_logo

1. Rsyslog Buffering

One of the best practice about logs management is to send syslog to a central server. However, a logging system should be capable of avoiding message loss in situations where the server is not reachable. To do so, unsent data needs to be buffered at the client when central server is not available. You might have recently noticed that many servers forwarding logs messages to a central server do not have buffering functionalities activated. Thus I strongly advise you to have look to this documentation to know how to check your configuration: http://www.rsyslog.com/doc/rsyslog_reliable_forwarding.html

Rsyslog buffering with TCP/UDP configured

In rsyslog, every action runs on its own queue and each queue can be set to buffer data if the action is not ready. Of course, you must be able to detect that "the action is not ready", which means the remote server is offline. This can be detected with plain TCP syslog and RELP, but not with UDP. So you need to use either of the two. In this howto, we use plain TCP syslog.

– Version requirement

Please note that we are using rsyslog-specific features. The are required on the client, but not on the server. So the client system must run rsyslog (at least version 3.12.0), while on the server another syslogd may be running, as long as it supports plain tcp syslog.

How To Setup rsyslog buffering on Linux

First, you need to create a working directory for rsyslog. This is where it stores its queue files (should need arise). You may use any location on your local system. Next, you need to do is instruct rsyslog to use a disk queue and then configure your action. There is nothing else to do. With the following simple config file, you forward anything you receive to a remote server and have buffering applied automatically when it goes down. This must be done on the client machine.

# Example:
# $ModLoad imuxsock             # local message reception
# $WorkDirectory /rsyslog/work  # default location for work (spool) files
# $ActionQueueType LinkedList   # use asynchronous processing
# $ActionQueueFileName srvrfwd  # set file name, also enables disk mode
# $ActionResumeRetryCount -1    # infinite retries on insert failure
# $ActionQueueSaveOnShutdown on # save in-memory data if rsyslog shuts down
# *.*       @@server:port

Backup entire Live Linux Operating System bit by bit with dd, partimage, partclone clonezilla

Thursday, January 7th, 2021


dd-create-server-hard-drive-identical-mirror-data-copy-backups

This is an old stuff that we UNIX / Linux sysadmins use frequently when we need to migrate operating system from a certain older machine server to another newer one.
However I decided to blog it as it an interesting to know to a new grown junior sysadmins.

To Create a bit to bit data backup with dd command,
the following command is used to create a backup with dd, which takes the entire data content (including partition table etc.) with it:

dd if = / dev / [hard disk 1] of = / dev / [hard disk 2] bs = 512 conv = noerror, sync


For explanation:


"if" stands for the hard drive to be read from.
"of" stands for the hard drive to be written to.
Important! if and of must not be interchanged under any circumstances! In the worst case, the data on the disk to be read will otherwise be irrevocably overwritten!

"bs = 512" defines the block size. The value can be increased (which in turn increases the speed of the backup), but you should be sure that the file system to be backed up does not contain any errors. If you were to use block size 64k, for example, the speed of the backup is increased considerably – but if read errors occur within this block, the entire data block that dd has written contains unusable data. Therefore, when choosing the block size, you should always weigh data integrity and time against each other.
"noerror" tells dd to continue the backup in case of errors. Without this option, dd would stop the backup by default.
"sync" commands dd to replace the unreadable blocks with zeros in the event of errors in order to keep the data offset synchronous.
When performing a backup (as with other things that a longer period can take advantage of, it is always recommended (if you SSH is logged in and no direct access to a real Shell), the process either for CTRL + followed from bg to the background (can later be brought back to the foreground with fg ) or to use virtual session managers such as screen or byobu before executing the command.This prevents the process from dying if the SSH session is unintentionally terminated and you have to start over.

Of course there are plenty of other ways to make a mirror backup  cloneof a hard disk to lets say migrate to a new data center  using easier to use tools with (ncurses) Text menu interfaces to avoid bothering a complex typing on the console.
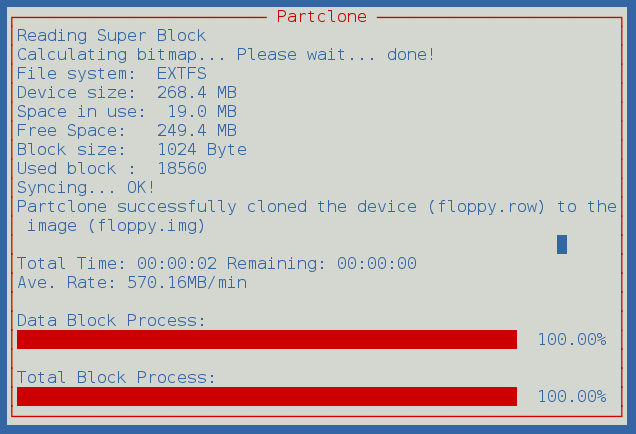
One such tool is Partclon:

Partclone-screenshot,_partclone-linux-create-mirror-disk-backups

PartClone cloning in action

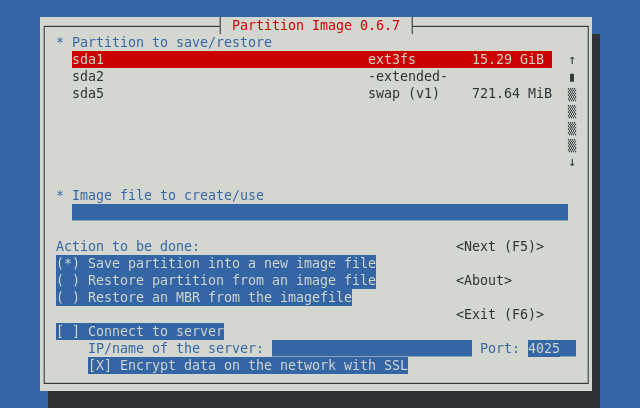
Another text menu interface data cloning Linux tool commonly used by sysadms is partimage

Partimage-linux-screenshot

Most sysadmins however prefer to use Clonezilla when something more cozy is required to do a bit to bit data copy.
Tthere is even a Live Linux CD distribution for that.

Clonezilla can mirror most types of filesystems and partiontions and could be used not only for UNIX / Linux / BSD filesystems Live OS data (backups) (EXT3 / EXT4 / XFS / ZFS etc)  migrations, but also for old NT4 Windows server partitions. One useful application of Clonezilla i can think of is if you want to configure or restore a whole office of Windows computers running on the same clean version of Windows and same hardware configurations PCs, after a Virus or trojan has striked it. By using it you can clone from a central well configured Windows release with the surrounding applications to all machines for up to an hour with Clonezilla and you can even do it over a network.

How to check Linux server power supply state is Okay / How to find out a Linux Power Supply is broken

Wednesday, January 6th, 2021

2U-power-supplies-get-status-if-Power-supply-broken-information-linux-ipmitool

If you're a sysadmin and managing remotely Linux servers, every now and then if a machine is hanging without a reason it useful to check the server Power Supply state. I say that because often if the machine is mysteriously hanging and a standard Root Cause Analysis (RCA) on /var/log/messages /var/log/dmesg /var/log/boot etc. did not bring you to any different conclusion. The next step after you send a technician to reboot the machine is to check on Linux OS level whether Power Supply Unit (PSU) hardware on the machine does not have some issues.
As blogged earlier on how to use ipmitool to manage remote ILO remote boards etc. the ipmitool can also be used to check status of Server PSUs.

Below is example output of 2 PSU server whose Power Supplies are functioning normally.
 

[root@linux-server ~]# ipmitool sdr type "Power Supply"

PS Heavy Load    | 2Bh | ok  | 19.1 | State Deasserted
Power Supply 1   | 70h | ok  | 10.1 | Presence detected
Power Supply 2   | 71h | ok  | 10.2 | Presence detected
PS Configuration | 72h | ok  | 19.1 |
PS 1 Therm Fault | 75h | ok  | 10.1 | Transition to OK
PS 2 Therm Fault | 76h | ok  | 10.2 | Transition to OK
PS1 12V OV Fault | 77h | ok  | 10.1 | Transition to OK
PS2 12V OV Fault | 78h | ok  | 10.2 | Transition to OK
PS1 12V UV Fault | 79h | ok  | 10.1 | Transition to OK
PS2 12V UV Fault | 7Ah | ok  | 10.2 | Transition to OK
PS1 12V OC Fault | 7Bh | ok  | 10.1 | Transition to OK
PS2 12V OC Fault | 7Ch | ok  | 10.2 | Transition to OK
PS1 12Vaux Fault | 7Dh | ok  | 10.1 | Transition to OK
PS2 12Vaux Fault | 7Eh | ok  | 10.2 | Transition to OK
Power Unit       | 7Fh | ok  | 19.1 | Fully Redundant

Now if you have a server lets say on an old ProLiant DL360e Gen8 whose Power Supply is damaged, you will get an from ipmitool similar to:

[root@linux-server  systemd]# ipmitool sdr type "Power Supply"
Power Supply 1   | 30h | ok  | 10.1 | 100 Watts, Presence detected
Power Supply 2   | 31h | ok  | 10.2 | 0 Watts, Presence detected, Failure detected, Power Supply AC lost
Power Supplies   | 33h | ok  | 10.3 | Redundancy Lost


If you don't have ipmitool installed due to security or whatever but you have the hardware detection software dmidecode you can use it too to get the Power Supply state

[root@linux-server  systemd]# dmidecode -t chassis
# dmidecode 3.2
Getting SMBIOS data from sysfs.
SMBIOS 2.8 present.


Handle 0x0300, DMI type 3, 21 bytes
Chassis Information
        Manufacturer: HP
        Type: Rack Mount Chassis
        Lock: Not Present
        Version: Not Specified
        Serial Number: CZJ38201ZH
        Asset Tag:
        Boot-up State: Critical
        Power Supply State: Critical

        Thermal State: Safe
        Security Status: Unknown
        OEM Information: 0x00000000
        Height: 1 U
        Number Of Power Cords: 2
        Contained Elements: 0

To find only Power Supply info status on a server with dmideode.

# dmidecode –type 39

monitoring-power-supply-hardware-information-linux-ipmitool

Plug between the power supply and the mainboard voltage / coms ATX specification

This can also be used on a normal Linux desktop PCs which usually have only 1U (one power supply) on many of Ubuntus and Linux desktops where lshw (list hardaware information) is installed to get the machine PSUs status with lshw 

 root@ubuntu:~# lshw -c power
  *-battery               
       product: 45N1111
       vendor: SONY
       physical id: 1
       slot: Front
       capacity: 23200mWh
       configuration: voltage=11.1V
        Thermal State: Safe
        Security Status: Unknown
        OEM Information: 0x00000000
        Height: 1 U
        Number Of Power Cords: 2
        Contained Elements: 0


Finally to get an extensive information on the voltages of the Power Supply you can use the good old lm_sensors.

# apt-get install lm-sensors
# sensors-detect 
# service kmod start

# sensors
# watch sensors


As manually monitoring Power Supplies and other various data is dubious, finally you might want to use some centralized monitoring. For one example on that you might want to check my prior Zabbix to Monitor Hardware Hard Drive / Temperature and Disk with lm_sensors / smartd on Linux with Zabbix.

Deny DHCP Address by MAC on Linux

Thursday, October 8th, 2020

Deny DHCP addresses by MAC ignore MAC to not be DHCPD leased on GNU / Linux howto

I have not blogged for a long time due to being on a few weeks vacation and being in home with a small cute baby. However as a hardcore and a bit of dumb System administrator, I have spend some of my vacation and   worked on bringing up the the www.pc-freak.net and the other Websites hosted as a high availvailability ones living on a 2 Webservers running on a Master to Master MySQL Replication backend database, this is oll hosted on  servers, set to run as a round robin DNS hosts on 2 servers one old Lenove ThinkCentre Edge71 as well as a brand new real Lenovo server Lenovo ThinkServer SD350 with 24 CPUs and a 32 GB of RAM
To assure Internet Connectivity is having a good degree of connectivity and ensure websites hosted on both machines is not going to die if one of the 2 pair configured Fiber Optics Internet Providers Bergon.NET has some Issues, I've rented another Internet Provider Line is set bought from the VIVACOM Mobile Fiber Internet provider – that is a 1 Gigabit Fiber Optics Line.
Next to that to guarantee there is no Database, Webserver, MailServer, Memcached and other running services did not hit downtimes due to Electricity power outage, two Powerful Uninterruptable Power Supplies (UPS)  FPS Fortron devices are connected to the servers each of which that could keep the machine and the connected switches and Servers for up to 1 Hour.

The machines are configured to use dhcpd to distributed IP addresses and the Main Node is set to distribute IPs, however as there is a local LAN network with more of a personal Work PCs, Wireless Devices and Testing Computers and few Virtual machines in the Network and the IPs are being distributed in a consequential manner via a ISC DHCP server.

As always to make everything work properly hence, I had again some a bit weird non-standard requirement to make some of the computers within the Network with Static IP addresses and the others to have their IPs received via the DHCP (Dynamic Host Configuration Protocol) and add some filter for some of the Machine MAC Addresses which are configured to have a static IP addresses to prevent the DHCP (daemon) server to automatically reassign IPs to this machines.

After a bit of googling and pondering I've done it and some of the machines, therefore to save others the efforts to look around How to set Certain Computers / Servers Network Card MAC (Interfaces) MAC Addresses  configured on the LAN network to use Static IPs and instruct the DHCP server to ingnore any broadcast IP addresses leases – if they're to be destined to a set of IGNORED MAcs, I came up with this small article.

Here is the DHCP server /etc/dhcpd/dhcpd.conf from my Debian GNU / Linux (Buster) 10.4


option domain-name "pcfreak.lan";
option domain-name-servers 8.8.8.8, 8.8.4.4, 208.67.222.222, 208.67.220.220;
max-lease-time 891200;
authoritative;
class "black-hole" {
    match substring (hardware, 1, 6);
    ignore booting;
}
subclass "black-hole" 18:45:91:c3:d9:00;
subclass "black-hole" 70:e2:81:13:44:11;
subclass "black-hole" 70:e2:81:13:44:12;
subclass "black-hole" 00:16:3f:53:5d:11;
subclass "black-hole" 18:45:9b:c6:d9:00;
subclass "black-hole" 16:45:93:c3:d9:09;
subclass "black-hole" 16:45:94:c3:d9:0d;/etc/dhcpd/dhcpd.conf
subclass "black-hole" 60:67:21:3c:20:ec;
subclass "black-hole" 60:67:20:5c:20:ed;
subclass "black-hole" 00:16:3e:0f:48:04;
subclass "black-hole" 00:16:3e:3a:f4:fc;
subclass "black-hole" 50:d4:f5:13:e8:ba;
subclass "black-hole" 50:d4:f5:13:e8:bb;
subnet 192.168.0.0 netmask 255.255.255.0 {
        option routers                  192.168.0.1;
        option subnet-mask              255.255.255.0;
}
host think-server {
        hardware ethernet 70:e2:85:13:44:12;
        fixed-address 192.168.0.200;
}
default-lease-time 691200;
max-lease-time 891200;
log-facility local7;

To spend you copy paste efforts a file with Deny DHCP Address by Mac Linux configuration is here
/home/hipo/info
Of course I have dumped the MAC Addresses to omit a data leaking but I guess the idea behind the MAC ADDR ignore is quite clear

The main configuration doing the trick to ignore a certain MAC ALenovo ThinkServer SD350ddresses that are reachable on the Connected hardware switch on the device is like so:

class "black-hole" {
    match substring (hardware, 1, 6);
    ignore booting;
}
subclass "black-hole" 18:45:91:c3:d9:00;


The Deny DHCP Address by MAC is described on isc.org distribution lists here but it seems the documentation on the topic on how to Deny / IGNORE DHCP Addresses by MAC Address on Linux has been quite obscure and limited online.

As you can see in above config the time via which an IP is freed up and a new IP lease is done from the server is severely maximized as often DHCP servers do use a max-lease-time like 1 hour (3600) seconds:, the reason for increasing the lease time to be to like 10 days time is that the IPs in my network change very rarely so it is a waste of CPU cycles to do a frequent lease.

default-lease-time 691200;
max-lease-time 891200;


As you see to Guarantee resolving works always as expected I have configured – Google Public DNS and OpenDNS IPs

option domain-name-servers 8.8.8.8, 8.8.4.4, 208.67.222.222, 208.67.220.220;


One hint to make is, after setting up all my desired config in the standard config location /etc/dhcp/dhcpd.conf it is always good idea to test configuration before reloading the running dhcpd process.


root@pcfreak: ~# /usr/sbin/dhcpd -t
Internet Systems Consortium DHCP Server 4.4.1
Copyright 2004-2018 Internet Systems Consortium.
All rights reserved.
For info, please visit https://www.isc.org/software/dhcp/
Config file: /etc/dhcp/dhcpd.conf
Database file: /va/home/hipo/infor/lib/dhcp/dhcpd.leases
PID file: /var/run/dhcpd.pid
 

That's all folks with this sample config the IPs under subclass "black-hole", which are a local LAN Static IP Addresses will never be offered leasess anymore from the ISC DHCP.
Hope this stuff helps someone, enjoy and in case if you need a colocation of a server or a website hosting for a really cheap price on this new set High Availlability up described machines open an inquiry on https://web.www.pc-freak.net.


Set all logs to log to to physical console /dev/tty12 (tty12) on Linux

Wednesday, August 12th, 2020

tty linux-logo how to log everything to last console terminal tty12

Those who administer servers from the days of birth of Linux and who used actively GNU / Linux over the years or any other UNIX knows how practical could be to configure logging of all running services / kernel messages / errors and warnings on a physical console.

Traditionally from the days I was learning Linux basics I was shown how to do this on an old Debian Sarge 3.0 Linux without systemd and on all Linux distributions Redhat 9.0 / Calderas and Mandrakes I've used either as a home systems or for servers. I've always configured output of all messages to go to the last easy to access console /dev/tty12 (for those who never use it console switching under Linux plain text console mode is done with key combination of CTRL + ALT + F1 .. F12.

In recent times however with the introduction of systemd pretty much things changed as messages to console are not handled by /etc/inittab which was used to add and refresh physical consoles tty1, tty2 … tty7 (the default added one on Linux were usually 7), but I had to manually include more respawn lines for each console in /etc/inittab.
Nowadays as of year 2020 Linux distros /etc/inittab is no longer there being obsoleted and console print out of INPUT / OUTPUT messages are handled by systemd.
 

1. Enable Physical TTYs from TTY8 till TTY12 etc.


The number of default consoles existing in most Linux distributions I've seen is still from tty1 to tty7. Hence to add more tty consoles and be ready to be able to switch out  not only towards tty7 but towards tty12 once you're connected to the server via a remote ILO (Integrated Lights Out) / IdRAC (Dell Remote Access Controller) / IPMI / IMM (Imtegrated Management Module), you have to do it by telling systemd issuing below systemctl commands:


 # systemctl enable getty@tty8.service Created symlink /etc/systemd/system/getty.target.wants/getty@tty8.service -> /lib/systemd/system/getty@.service.

systemctl enable getty@tty9.service

Created symlink /etc/systemd/system/getty.target.wants/getty@tty9.service -> /lib/systemd/system/getty@.service.

systemctl enable getty@tty10.service

Created symlink /etc/systemd/system/getty.target.wants/getty@tty10.service -> /lib/systemd/system/getty@.service.

systemctl enable getty@tty11.service

Created symlink /etc/systemd/system/getty.target.wants/getty@tty11.service -> /lib/systemd/system/getty@.service.

systemctl enable getty@tty12.service

Created symlink /etc/systemd/system/getty.target.wants/getty@tty12.service -> /lib/systemd/system/getty@.service.


Once the TTYS tty7 to tty12 are enabled you will be able to switch to this consoles either if you have a physical LCD / CRT monitor or KVM switch connected to the machine mounted on the Rack shelf once you're in the Data Center or will be able to see it once connected remotely via the Management IP Interface (ILO) remote console.
 

2. Taking screenshot of the physical console TTY with fbcat


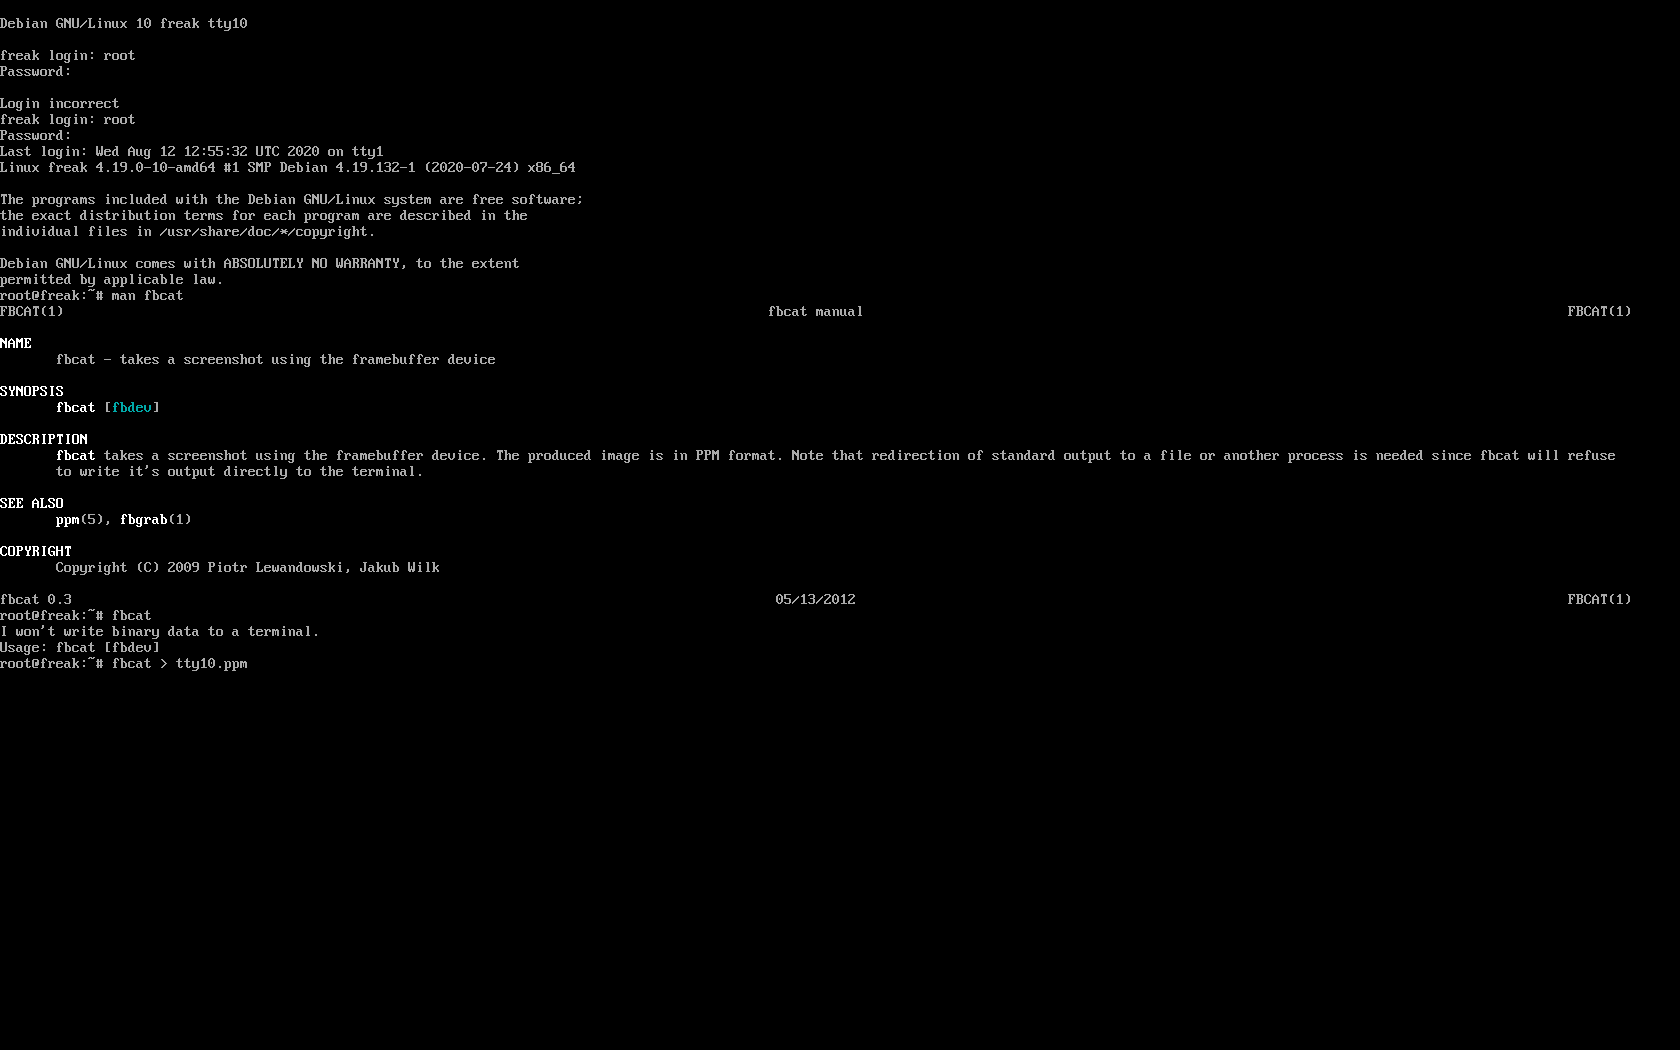
For example below is a screenshot of the 10th enabled tty10:

tty10-linux-screenshot-fbcat-how-to-screenshot-console

As you can in the screenshot I've used the nice tool fbcat that can be used to make a screenshot of remote console. This is very useful especially if remote access via a SSH client such as PuTTY / MobaXterm is not there but you have only a physical attached monitor access on a DCs that are under a heavy firewall that is preventing anyone to get to the system remotely. For example screenshotting the physical console in case if there is a major hardware failure occurs and you need to dump a hardware error message to a flash drive that will be used to later be handled to technicians to analyize it and exchange the broken server hardware part.

Screenshots of the CLI with fbcat is possible across most Linux distributions where as usual.

In Debian you have to first instal the tool via :
 

# apt install –yes fbcat


and on RedHats / CentOS / Fedoras

# yum install -y fbcat


Taking screenshot once tool is on the server of whatever you have printed on console is as easy as

# fbcat > tty_name.ppm


Note that you might want to convert the .ppm created picture to png with any converter such as imagemagick's convert command or if you have a GUI perhaps with GNU Image Manipulation Tool (GIMP).

3. Enabling every rsyslog handled message to log to Physical TTY12


To make everything such as errors, notices, debug, warning messages  become instantly logging towards above added new /dev/tty12.

Open /etc/rsyslog.conf and to the end of the file append below line :
 

daemon,mail.*;\
   news.=crit;news.=err;news.=notice;\
   *.=debug;*.=info;\
   *.=notice;*.=warn   /dev/tty12


To make rsyslog load its new config restart it:


# systemctl status rsyslog


rsyslog.service – System Logging Service
   Loaded: loaded (/lib/systemd/system/rsyslog.service; enabled; vendor preset: enabled)
   Active: active (running) since Mon 2020-08-10 04:09:36 EEST; 2 days ago
     Docs: man:rsyslogd(8)
           https://www.rsyslog.com/doc/
 Main PID: 671 (rsyslogd)
    Tasks: 4 (limit: 4915)
   Memory: 12.5M
   CGroup: /system.slice/rsyslog.service
           └─671 /usr/sbin/rsyslogd -n -iNONE


авг 12 00:00:05 pcfreak rsyslogd[671]:  [origin software="rsyslogd" swVersion="8.1901.0" x-pid="671" x-info="https://www.rsyslo
Warning: Journal has been rotated since unit was started. Log output is incomplete or unavailable.


systemctl restart rsyslog


That's all folks navigate by pressing simultaneously CTRL + ALT + F12 to get to TTY12 or use ALT + LEFT / ALT + RIGHT ARROW (console switch commands) till you get to the console where everything should be now logged.

Enjoy and if you like this article share to tell your sysadmin friends about this nice hack  ! 🙂


Check server Internet connectivity Speedtest from Linux terminal CLI

Friday, August 7th, 2020

check-server-console-speedtest

If you are a system administrator of a dedicated server and you have no access to Xserver Graphical GNOME / KDE etc. environment and you wonder how you can track the bandwidth connectivity speed of remote system to the internet and you happen to have a modern Linux distribution, here is few ways to do a speedtest.
 

1. Use speedtest-cli command line tool to test connectivity


speedtest-cli is a tiny tool written in python, to use it hence you need to have python installed on the server.
It is available both for Redhat Linux distros and Debians / Ubuntus etc. in the list of standard installable packages.

a) Install speedtest-cli on Fedora / CentOS / RHEL
 

On CentOS / RHEL / Scientific Linux lower than ver 8:


$ sudo yum install python

On CentOS 8 / RHEL 8 user type the following command to install Python 3 or 2:


$sudo yum install python3
$ sudo yum install python2


On Fedora Linux version 22+


$ sudo dnf install python
$ sudo dnf install pytho3


Once python is at place download speedtest.py or in case if link is not reachable download mirrored version of speedtest.py on www.pc-freak.net here


$ wget -O speedtest-cli https://raw.githubusercontent.com/sivel/speedtest-cli/master/speedtest.py
$ chmod +x speedtest-cli


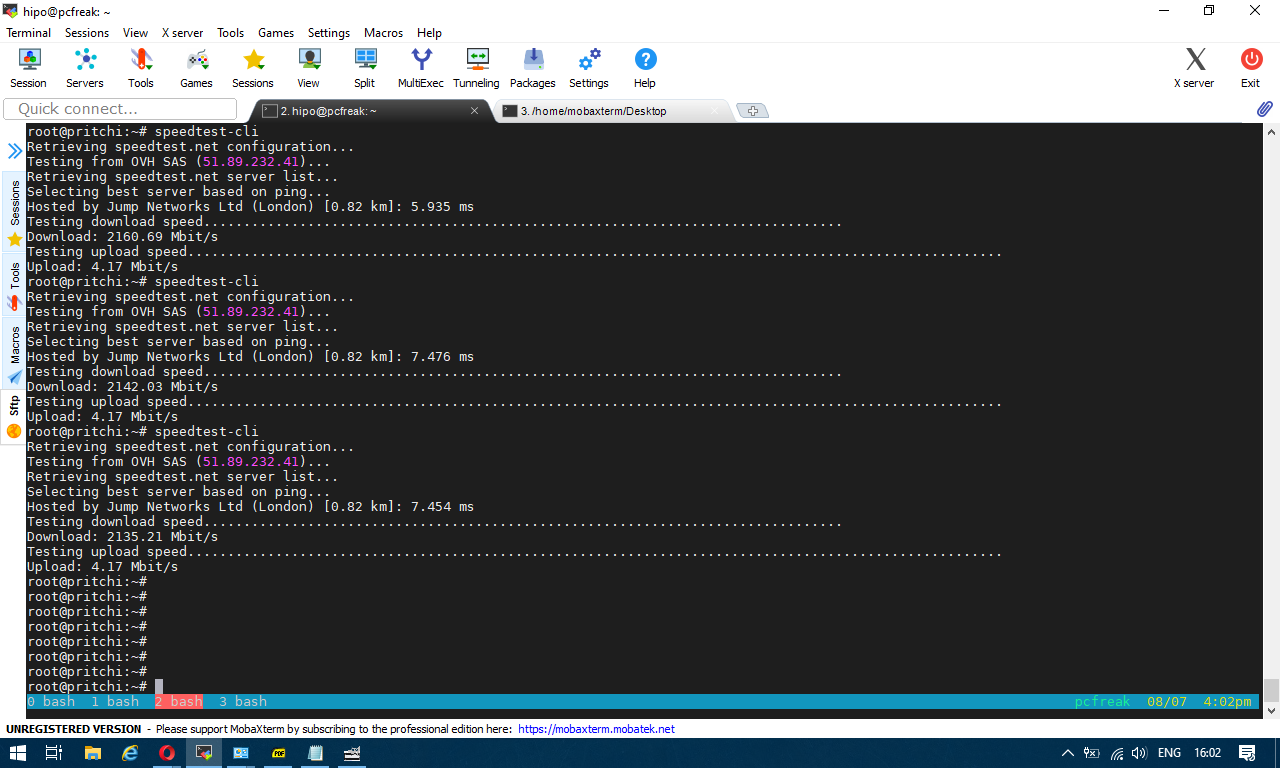
Then it is time to run script speedtest-screenshot-linux-terminal-console-cli-cmd
To test enabled Bandwidth on the server


$ python speedtest-cli


b) Install speedtest-cli on Debian

On Latest Debian 10 Buster speedtest is available out of the box in regular .deb repositories, so fetch it with apt


# apt install –yes speedtest-cli


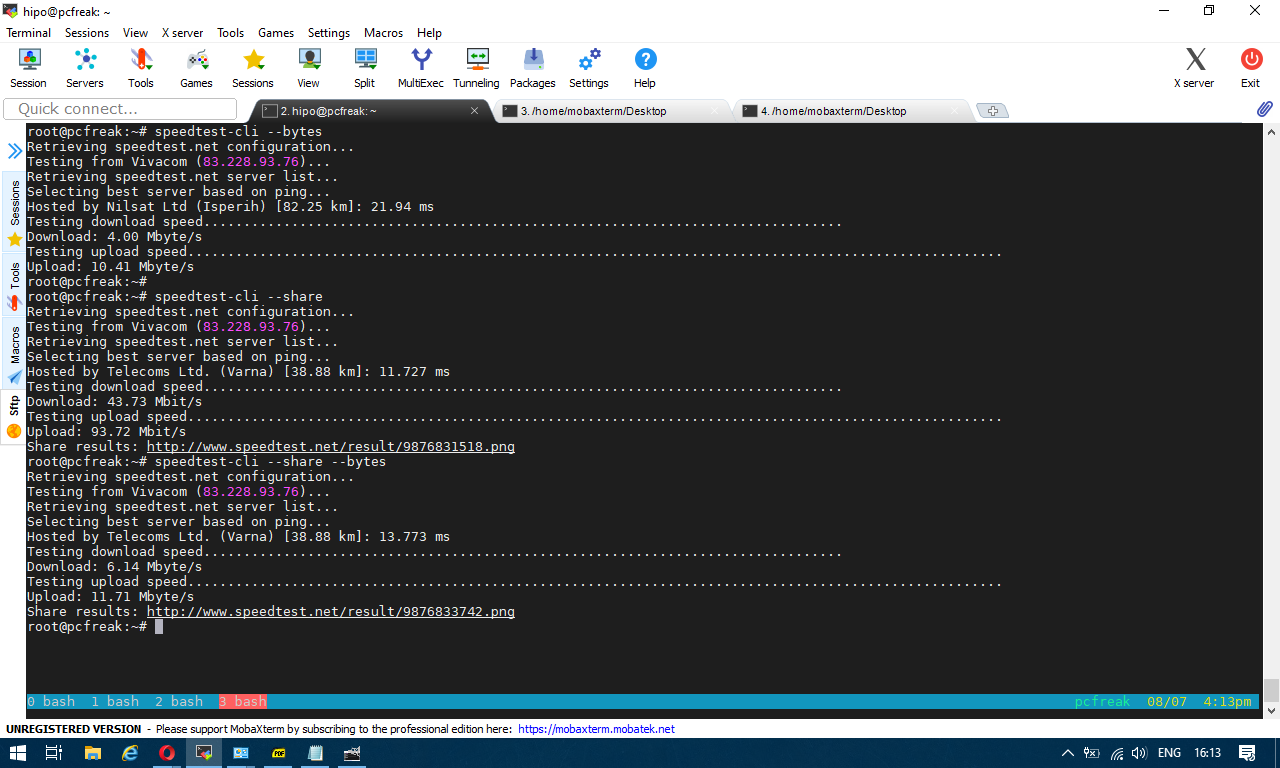
You can give now speedtest-cli a try with –bytes arguments to get speed values in bytes instead of bits or if you want to generate an image with test results in picture just like it will appear if you use speedtest.net inside a gui browser, use the –share option

speedtest-screenshot-linux-terminal-console-cli-cmd-options


2. Getting connectivity results of all defined speedtest test City Locations


Speedtest has a list of servers through which a Upload and Download speed is tested, to run speedtest-cli to test with each and every server and get a better picture on what kind of connectivity to expect from your server towards the closest region capital cities, fetch speedtest-servers.php list and use a small shell loop below is how:


root@pcfreak:~#  wget http://www.speedtest.net/speedtest-servers.php
–2020-08-07 16:31:34–  http://www.speedtest.net/speedtest-servers.php
Преобразувам www.speedtest.net (www.speedtest.net)… 151.101.2.219, 151.101.66.219, 151.101.130.219, …
Connecting to www.speedtest.net (www.speedtest.net)|151.101.2.219|:80… успешно свързване.
HTTP изпратено искане, чакам отговор… 301 Moved Permanently
Адрес: https://www.speedtest.net/speedtest-servers.php [следва]
–2020-08-07 16:31:34–  https://www.speedtest.net/speedtest-servers.php
Connecting to www.speedtest.net (www.speedtest.net)|151.101.2.219|:443… успешно свързване.
HTTP изпратено искане, чакам отговор… 307 Temporary Redirect
Адрес: https://c.speedtest.net/speedtest-servers-static.php [следва]
–2020-08-07 16:31:35–  https://c.speedtest.net/speedtest-servers-static.php
Преобразувам c.speedtest.net (c.speedtest.net)… 151.101.242.219
Connecting to c.speedtest.net (c.speedtest.net)|151.101.242.219|:443… успешно свързване.
HTTP изпратено искане, чакам отговор… 200 OK
Дължина: 211695 (207K) [text/xml]
Saving to: ‘speedtest-servers.php’
speedtest-servers.php                  100%[==========================================================================>] 206,73K  –.-KB/s    in 0,1s
2020-08-07 16:31:35 (1,75 MB/s) – ‘speedtest-servers.php’ saved [211695/211695]

Once file is there with below loop we extract all file defined servers id="" 's 
 

root@pcfreak:~# for i in $(cat speedtest-servers.php | egrep -Eo 'id="[0-9]{4}"' |sed -e 's#id="##' -e 's#"##g'); do speedtest-cli  –server $i; done
Retrieving speedtest.net configuration…
Testing from Vivacom (83.228.93.76)…
Retrieving speedtest.net server list…
Retrieving information for the selected server…
Hosted by Telecoms Ltd. (Varna) [38.88 km]: 25.947 ms
Testing download speed……………………………………………………………………..
Download: 57.71 Mbit/s
Testing upload speed…………………………………………………………………………………………
Upload: 93.85 Mbit/s
Retrieving speedtest.net configuration…
Testing from Vivacom (83.228.93.76)…
Retrieving speedtest.net server list…
Retrieving information for the selected server…
Hosted by GMB Computers (Constanta) [94.03 km]: 80.247 ms
Testing download speed……………………………………………………………………..
Download: 35.86 Mbit/s
Testing upload speed…………………………………………………………………………………………
Upload: 80.15 Mbit/s
Retrieving speedtest.net configuration…
Testing from Vivacom (83.228.93.76)…

…..


etc.

For better readability you might want to add the ouput to a file or even put it to run periodically on a cron if you have some suspcion that your server Internet dedicated lines dies out to some general locations sometimes.
 

3. Testing UPlink speed with Download some big file from source location


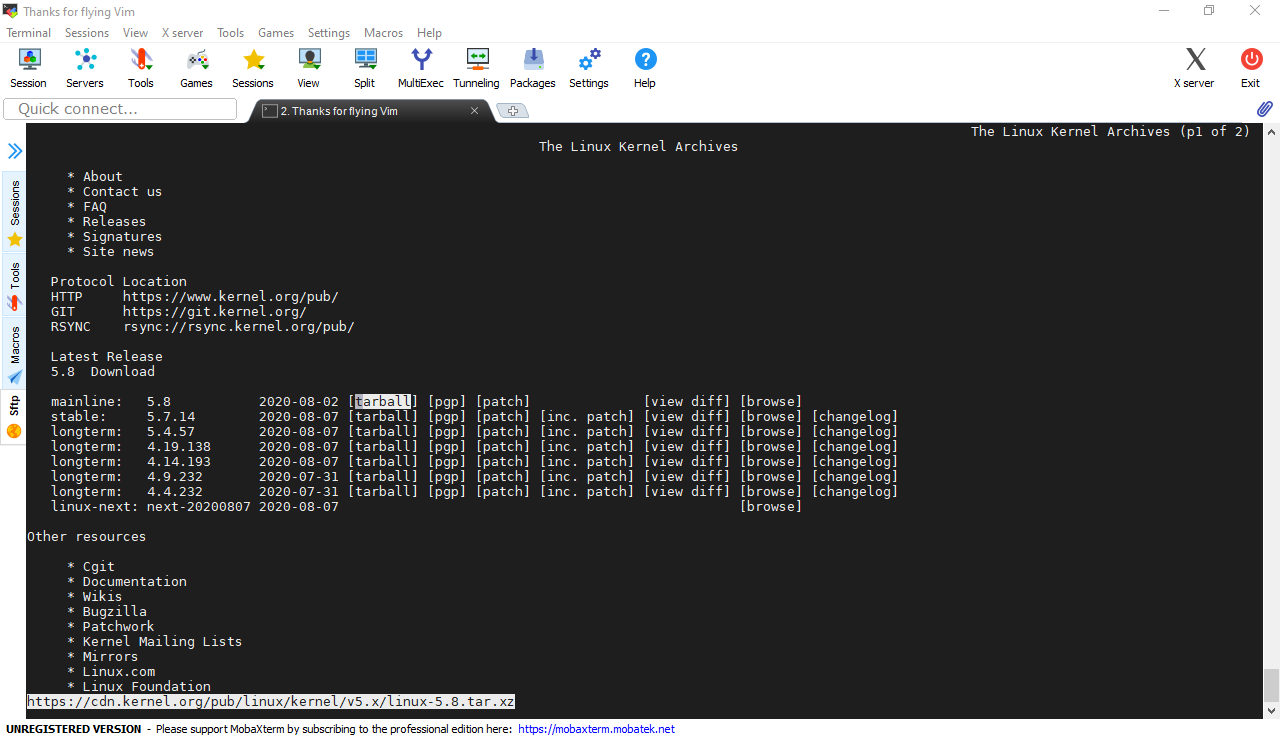
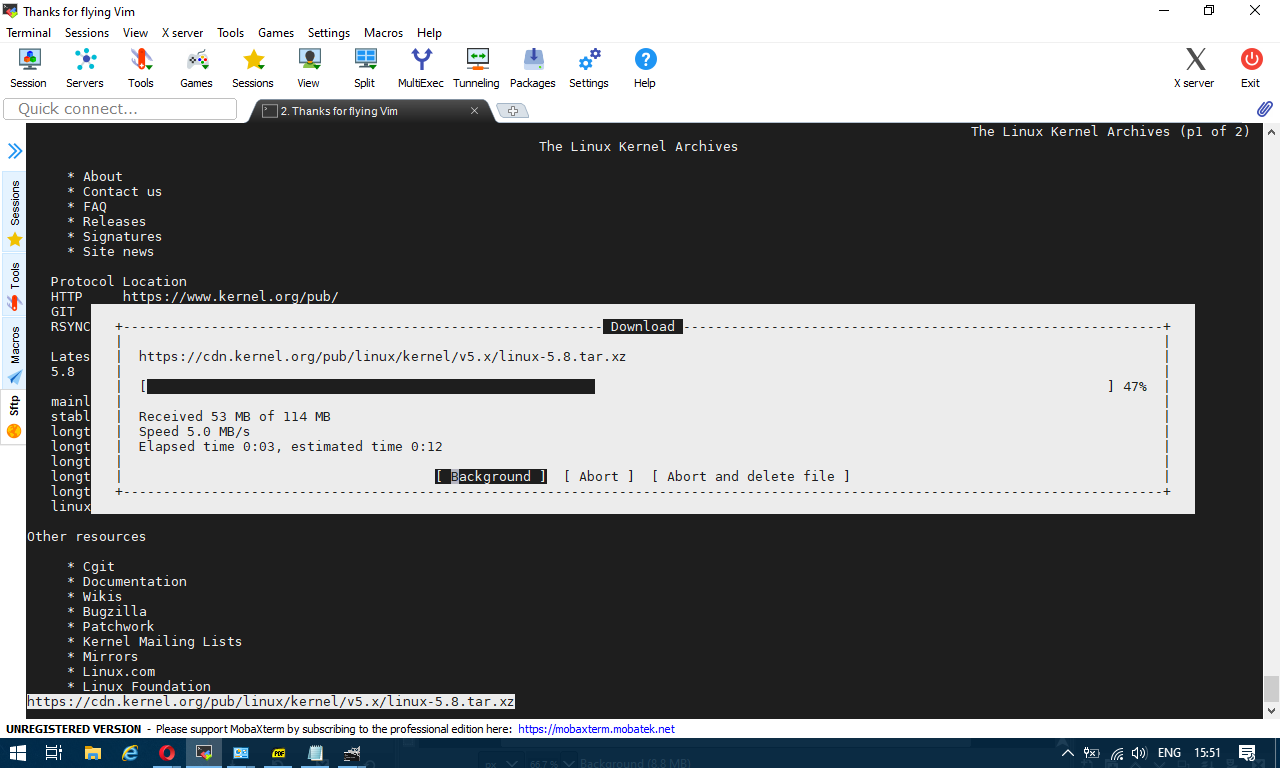
In the past a classical way to test the bandwidth connectivity of your Internet Service Provider was to fetch some big file, Linux guys should remember it was almost a standard to roll a download of Linux kernel source .tar file with some test browser as elinks / lynx / w3c.
speedtest-screenshot-kernel-org-shot1 speedtest-screenshot-kernel-org-shot2
or if those are not at hand test connectivity on remote free shell servers whatever file downloader as wget or curl was used.
Analogical method is still possible, for example to use wget to get an idea about bandwidtch connectivity, let it roll below 500 mb from speedtest.wdc01.softlayer.com to /dev/null few times:


$ wget –output-document=/dev/null http://speedtest.wdc01.softlayer.com/downloads/test500.zip

$ wget –output-document=/dev/null http://speedtest.wdc01.softlayer.com/downloads/test500.zip

$ wget –output-document=/dev/null http://speedtest.wdc01.softlayer.com/downloads/test500.zip


# wget -O /dev/null –progress=dot:mega http://cachefly.cachefly.net/10mb.test ; date
–2020-08-07 13:56:49–  http://cachefly.cachefly.net/10mb.test
Resolving cachefly.cachefly.net (cachefly.cachefly.net)… 205.234.175.175
Connecting to cachefly.cachefly.net (cachefly.cachefly.net)|205.234.175.175|:80… connected.
HTTP request sent, awaiting response… 200 OK
Length: 10485760 (10M) [application/octet-stream]
Saving to: ‘/dev/null’

     0K …….. …….. …….. …….. …….. …….. 30%  142M 0s
  3072K …….. …….. …….. …….. …….. …….. 60%  179M 0s
  6144K …….. …….. …….. …….. …….. …….. 90%  204M 0s
  9216K …….. ……..                                    100%  197M=0.06s

2020-08-07 13:56:50 (173 MB/s) – ‘/dev/null’ saved [10485760/10485760]

Fri 07 Aug 2020 01:56:50 PM UTC


To be sure you have a real picture on remote machine Internet speed it is always a good idea to run download of random big files on a certain locations that are well known to have a very stable Internet bandwidth to the Internet backbone routers.

4. Using Simple shell script to test Internet speed


Fetch and use speedtest.sh


wget https://raw.github.com/blackdotsh/curl-speedtest/master/speedtest.sh && chmod u+x speedtest.sh && bash speedtest.sh


5. Using iperf to test connectivity between two servers 


iperf is another good tool worthy to mention that can be used to test the speed between client and server.

To use iperf install it with apt and do on the server machine to which bandwidth will be tested:


# iperf -s 


On the client machine do:


# iperf -c 192.168.1.1 


where 192.168.1.1 is the IP of the server where iperf was spawned to listen.

6. Using Netflix fast to determine Internet connection speed on host


Fast

fast is a service provided by Netflix. Its web interface is located at Fast.com and it has a command-line interface available through npm (npm is a package manager for nodejs) so if you don't have it you will have to install it first with:

# apt install –yes npm


Note that if you run on Debian this will install you some 249 new nodejs packages which you might not want to have on the system, so this is useful only for machines that has already use of nodejs.


$ fast


     82 Mbps ↓


The command returns your Internet download speed. To get your upload speed, use the -u flag:


$ fast -u


   ⠧ 80 Mbps ↓ / 8.2 Mbps ↑


7. Use speedometer / iftop to measure incoming and outgoing traffic on interface


If you're measuring connectivity on a live production server system, then you might consider that the measurement output might not be exactly correct especially if you're measuring the Uplink / Downlink on a Heavy loaded webserver / Mail Server / Samba or DNS server.
If this is the case a very useful tools to consider to extract the already taken traffic used on your Incoming and Outgoing ( TX / RX ) Network interfaces
are speedometer and iftop, they're present and installable depending on the OS via yum / apt or the respective package manager.


To install on Debian server:


# apt install –yes iftop speedometer


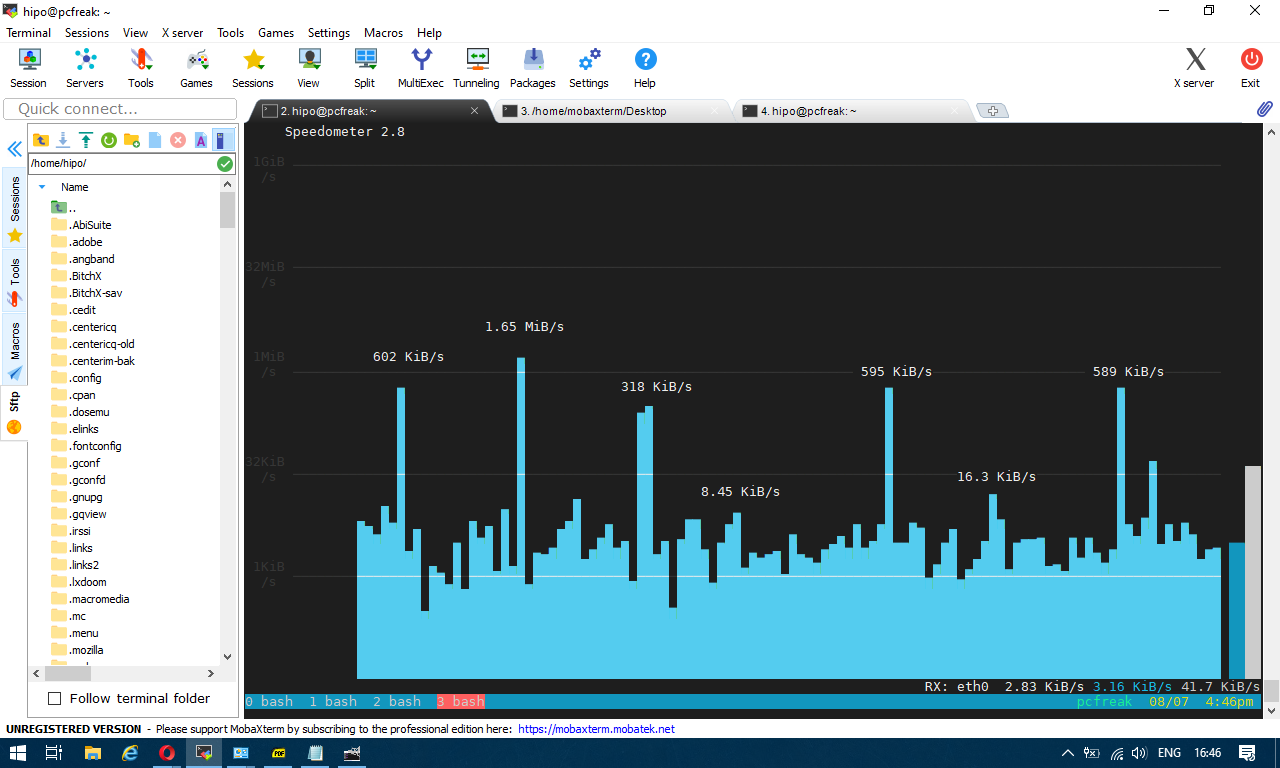
The most basic use to check the live received traffic in a nice Ncurses like text graphic is with: 


# speedometer -r 


speedometer-check-received-transmitted-network-traffic-on-linux1

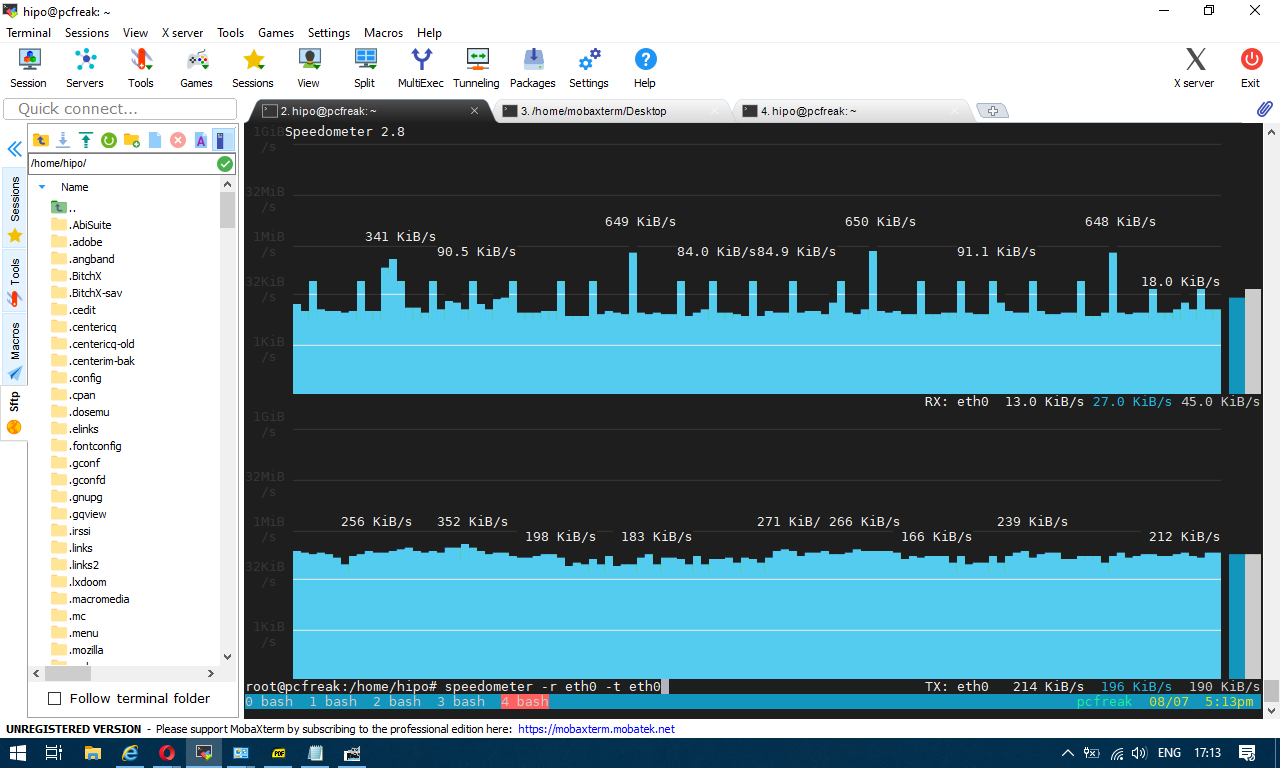
To generate real time ASCII art graph on RX / TX traffic do:


# speedometer -r eth0 -t eth0


speedometer-check-received-transmitted-network-traffic-on-linux


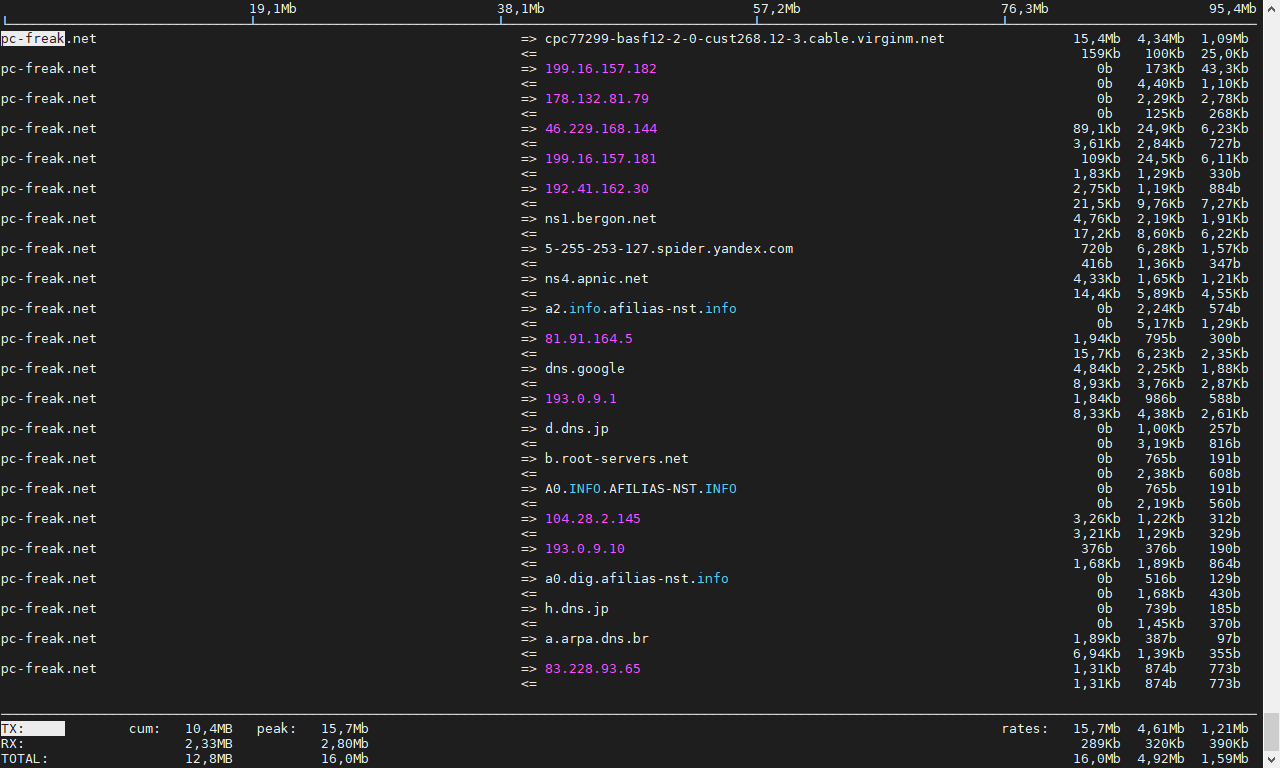
# iftop -P -i eth0


iftop-show-statistics-on-connections-screenshot-pcfreak