Posts Tagged ‘long time’

How to reduce spam in PHPBB based internet forum on Debian GNU / Linux

Monday, March 26th, 2012

phpbb reduce spam bot registrations on Debian Linux tiny script

I had to install two PHPBB based internet forums, some long time ago. Since long time passed and I haven't checked what's happening with them I just noticed. They start filling up spam threads. The phpbb installations are done using the standard shipped deb packages in Debian Linux Lenny.

After checking online, I found one smart solution to . The idea is very simple most spam bots are written in a way that they don't have a properly set timezone. Therefore the quickest way to get rid of spam bots which try to auto register and put spam content inside the a forum category or post is to add a simple if condition in php to check the browser set timezone:

The file to add the php if condition is ucp_register.phpThe phpbb package install places default phpbb path on Debian is /usr/share/phpbb3/ and hence the file I had to modify is located in:

/usr/share/phpbb3/www/includes/ucp/ucp_register.php

To make the TZ check one needs to modify ../www/includes/ucp/ucp_register.php and look for php array definition:

$data = array(
'username' => utf8_normalize_nfc(request_var('username', '', true)),
'new_password' => request_var('new_password', '', true),
'password_confirm' => request_var('password_confirm', '', true),
'email' => strtolower(request_var('email', '')),
'email_confirm' => strtolower(request_var('email_confirm', '')),
'confirm_code' => request_var('confirm_code', ''),
'lang' => basename(request_var('lang', $user->lang_name)),
'tz' => request_var('tz', (float) $timezone),
);

Right after this chunk of code add the if condition code which is like so:

if ($data['tz'] == '-12.00')
{
die('Die, bot! Die.');
}

From now onwards, any attempt for new user registration with an incorrect timezone of -12.00 will be immediately stopped while the forum spammer bot will be offered an empty page 🙂

Another good practice is to disable Birthday Listing from phpbb Admin Control panel (ACP). Go to menus:

ACP -> General -> Board Settings -> Enable Birthday listing: (No)

Enable birthday listing phpbb forum screenshot

I like disabling birthday listing, as when it is enabled and you have some spammer registrations, which even though didn't succeeded to contaminate your forum content has specified a birthday and therefore there profiles gets popping up each different day on the main page of the forum.
This will not eradicate all spammer bots, but at least will significantly decrease spammer bot registrations.

The Notebook a nice romance movie worthy to see

Thursday, November 10th, 2011

The Notebook a great Romance Movie worthy to be seen

As I a person who values highly love between man and woman and believes in true love between man and woman under God’s providence I really enjoyed The Notebook and I recommend it to everyone out there looking for true love.
The movie gives a good example that one can experience great love. This is a fresh breath for me as I’m surrounded by dozens of people who does concentrate too much about the fleshly pleasure and forget that the essence of love is not in the flesh but in the love between man and woman’s spirit and soul.
The Notebook is a record of one true love story between a man and wife who went through love, hate long time separation, regret broken heart, loss of path in life, fading love and then after a long time of being away of each other burning love again.
It tells the story of a man and wife who loved so much that they get old together a story of true dedication and lasting love. Watch the movie you will certainly not regret it.

How to make screenshots on Slackware Linux with XFCE graphical environment

Thursday, February 23rd, 2012

1. Install the slackware binary package xfce4-screenshooter.

For the latest Slackware Linux release which as of time of writting is 13.37 xfce4-screenshooter-1.7.9-i486-3sl.txz can be download from here

Install of xfce4-screenshooter-1.7.9-i486-3sl.txz is done with slackware's usual installpkg package manager command:

bash-4.1# /sbin/installpkg xfce4-screenshooter-1.7.9-i486-3sl.txz

By the way, I haven't used slackware for a long time so in the mean time since Slackware 13, the default slackware packages format .tgz is now substituted with the newer .txz (better compressed .txz). The old .tgz was simply a tar archive with DEFLATE gzip. The newer .txz packages bundled with newer slackware releases are using the LZMA2 (XZ) chain algorithm for compression. LZMA implies higher compression than even bzip2 and this is the reason why Patrick Volkerding – the one man army man behind Slackware decided to use it.
The reason Vollerding choose using .txz is slackware network distribution will load up less the networks and will take less time for downloading extra slackware packages via the internet. The .txz also reduces slackware main CD size so more packages can be contained in the same 700MB sized slack install CD.

Anyways now back to the installation of xfce-screenshooter.

Once installed to runit use the Xfce menus:

Xfce Menu -> Accesories -> Screenshot

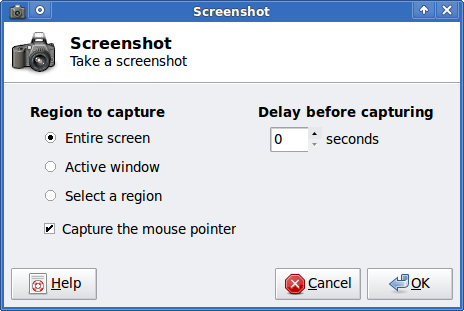
Next you will see the xfce-screenshooter program to pop-up:

To take a snapshot of the screen use:

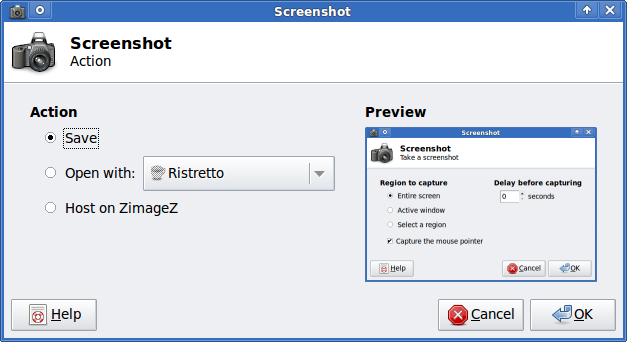
Entire Screen -> Save

XFCE screenshooter Slackware Linux take a screenshot dialog

XFCE screenshooter Slackware Linux action Save
 

How to mount ISO image files in Graphical Environment (GUI) on Ubuntu and Debian GNU/Linux

Saturday, January 14th, 2012

Mounting ISO files in Linux is easy with mount cmd, however remembering the exact command one has to issue is a hard task because mounting ISO files is not a common task.

Mounting ISO files directly by clicking on the ISO file is very nice, especially for lazy people uninitiated with the command line 😉

Besides that I'm sure many Windows users are curious if there is an equivallent program to DaemonTools for Linux / BSD*?

The answer to this question is YES!
There are two major programs which can be used as a DaemonTools substitute on Linux:

These are FuriousISOMount and AcetoneISO
AcetoneISO is more known and I've used it some long time ago and if I'm correct it used to be one of the first ISO Mount GUI programs for Linux. There is a project called GMount-ISO / (GMountISO) which of the time of writting this article seems to be dead (at least I couldn't find the source code).

Luckily FuriousISOMount and AcetoneISO are pretty easy to install and either one of the two is nowdays existing in most Linux distributions.
Probably the programs can also be easily run on BSD platform also quite easily using bsd linux emulation.
If someone has tried something to mount GUIs in Free/Net/OpenBSD, I'll be interesting to hear how?

1. Mount ISO files GUI in GNOME with Furius ISO Mount

FuriousISOMount is a simple Gtk+ interface to mount -t iso9660 -o loop command.

To start using the program on Debian / Ubuntu install with apt;

debian:~# apt-get install furiusisomount
The following extra packages will be installed:
fuseiso fuseiso9660 libumlib0
The following NEW packages will be installed:
furiusisomount fuseiso fuseiso9660 libumlib0

To access the program in GNOME after install use;

Applications -> Accessories -> Furious ISO Mount

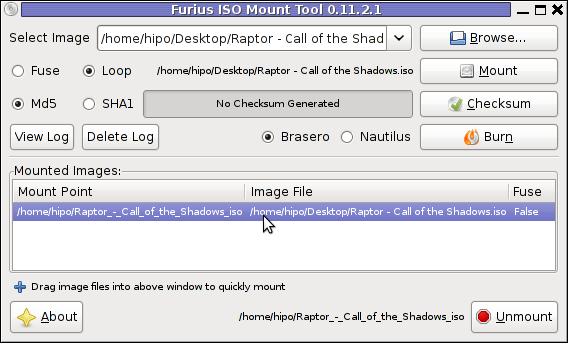
Screenshot ISO Mount Tool Debian GNU/Linux Screenshot
 

When mounting it is important to choose Loop option to mount the iso instead of Fuse

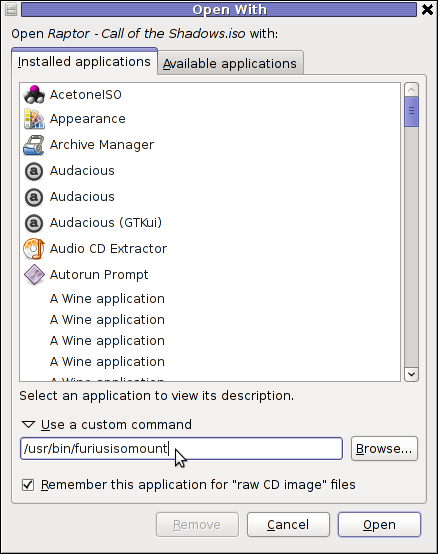
After the program is installed to associate the (.iso) ISO files, to permanently be opened with furiusisomount roll over the .iso file and choose Open With -> Other Application -> (Use a custom command) -> furiusisomount

GNOME Open with menu Debian GNU / Linux

2. Mount ISO Files in KDE Graphical Environment with AcetoneISO

AcetoneISO is build on top of KDE's QT library and isway more feature rich than furiousisomount.
Installing AcetoneISO Ubuntu and Debian is done with:

debian:~# apt-get install acetoneiso
The following NEW packages will be installed:
acetoneiso gnupg-agent gnupg2 libksba8 pinentry-gtk2 pinentry-qt4
0 upgraded, 6 newly installed, 0 to remove and 35 not upgraded.
Need to get 3,963 kB of archives.
After this operation, 8,974 kB of additional disk space will be used.
...

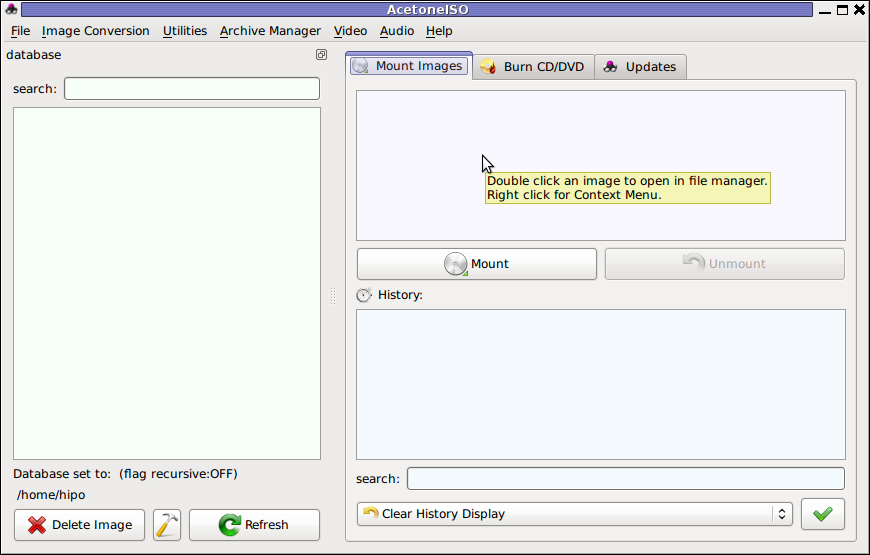
Screenshot Furius ISO Mount Tool Debian GNU/Linux ScreenShot

AcetoneISO supports:
 

  • conversion between different ISO formats
  • burn images to disc
  • split ISO image volumes
  • encrypt images
  • extract password protected files

Complete list of the rich functionality AcetoneISO offers is to be found on http://www.acetoneteam.org/viewpage.php?page_id=6
To start the program via the GNOME menus use;

Applications -> Accessories -> Sound & Video -> AcetoneISO

I personally don't like AcetoneISO as I'm not a KDE user and I see the functionality this program offers as to rich and mostly unnecessery for the simple purpose of mounting an ISO.

3. Mount ISO image files using the mount command

If you're a console guy and still prefer mounting ISO with the mount command instead of using fancy gui stuff use:

# mount -t iso9660 -o loop /home/binary/someiso.iso /home/username/Iso_Directory_Name


How to set up Qmail auto reply (Out of the Office), vacation message manually using .qmail message processing file

Tuesday, February 14th, 2012

Qmail Logo Auto reply message / how to setup qmail auto reply out of the office vacation message

I had to setup a QMAIL auto reply (Out of the Office) message on 5 email addresses and since I haven't done it for a long time it took me a couple 20 minutes to consult Qmail (Life With Qmail http://lifewithqmail.org (great website!) documentation and read a couple of online forum threads until I finally remembered, how I used to be setting up a vacation message manually via qmail's .qmail file.

Of course Setting qmail auto reply can always be done via QmailAdmin or VQadmin ..Qmail Vpopmail web frontends however on many Qmail mail servers Qmailadmin or/and VQadmin is absent due to some reason or even on a big mail servers the server doesn't run Apache at all. Hence it is good to know how to set qmail vacation message directly via plain SSH terminal connection and this is why how this article got born.

So here is how I enable qmail auto reply "manually", through .qmail for my email address info@my-email-domain.com:

1. Set a /var/vpopmail/domains/my-email-domain.com/info/.qmail file with the following content:

| /usr/bin/autorespond 86400 3 /home/vpopmail/domains/my-email-domain.com/info/vacation/message /home/vpopmail/domains/my-email-domain.com/info/vacation

2. Create /home/vpopmail/domains/my-email-domain.com/info/vacation directory

linux:~# mkdir -p /home/vpopmail/domains/my-email-domain.com/info/vacation/

3. Create /home/vpopmail/domains/my-email-domain.com/info/vacation/message file with auto reply message

First create the message file with touch command:

linux:~# touch /home/vpopmail/domains/my-email-domain.com/info/vacation/message

Then put with vim or mcedit etc. an auto-reply vacation message similar to the sample below:

From: info@cadiainsurance.com
Subject: We have received your message. Thank you!

Dear Customer, we thank you for the interest in our services.
A member of our team will reply promptly to your enquiry shortly.

4. Set proper permissions for vacation/message and .qmail files

/home/vpopmail/domains/my-email-domain.com/info/vacation/message and /home/vpopmail/domains/my-email-domain.com/info/.qmail files has to be owned by user/group vpopmail:vchkpw, e.g.:

linux:~# chown -R vpopmail:vchkpw /home/vpopmail/domains/my-email-domain.com/info/vacation
linux:~# chown vpopmail:vchkpw /home/vpopmail/domains/my-email-domain.com/info/.qmail

If you are a qmail administration with the requirement to create auto reply message for employees going on a holiday often (in a middle sized company office), setting up the out of the office auto reply manually one by one is a time consuming, annoying task and "crazy" task. Therefore some time ago while still I was employed in a Bulgarian mid-sized company called Design.BG, I've written a tiny shell script which creates qmail email users vacation messages by passing few arguments.

Here is my create_vpopmail_vacation.sh shell script
Note that this script might have a lot of bugs and is not much tested, so read it carefully and test it before you put it for daily use 😉
Happy Hacking! 😉

Install jwchat web chat jabber interface to work with Debian ejabberd jabber server

Wednesday, January 4th, 2012

JWChat ejabber jabber Ajax / HTML based client logo
 

I have recently blogged how I've installed & configured ejabberd (jabber server) on Debian .
Today I decided to further extend, my previous jabberd installation by installing JWChat a web chat interface frontend to ejabberd (a good substitute for a desktop app like pidgin which allows you to access a jabber server from anywhere)

Anyways for a base of installing JWChat , I used the previously installed debian deb version of ejabberd from the repositories.

I had a lot of troubles until I actually make it work because of some very minor mistakes in following the official described tutorial ejabberd website jwchat install tutorual

The only way I can make jwchat work was by using the install jwchat with ejabberd's HTTP-Bind and file server method

Actually for quite a long time I was not realizing that, there are two ways to install JWChat , so by mistake I was trying to mix up some install instructions from both jwchat HTTP-Bind file server method and JWchat Apache install method

I've seen many people complaining on the page of Install JWChat using Apache method which seemed to be experiencing a lot of strangle troubles just like the mines when I mixed up the jwchat php scripts install using instructions from both install methods. Therefore my guess is people who had troubles in installing using the Apache method and got the blank page issues while accessing http://jabber.servername.com:5280/http-poll/ as well as various XML Parsing Error: no element found errors on – http://ejabberd.oac.com:5280/http-poll/ is most probably caused by the same install instructions trap I was diluted in.

The steps to make JWChat install using the HTTP-Bind and file server method, if followed should be followed absolutely precisely or otherwise THEY WILL NOT WORK!!!

This are the exact steps I followed to make ejabberd work using the HTTP-Bind file server method :

1. Create directory to store the jwchat Ajax / htmls

debian:~# mkdir /var/lib/ejabberd/www
debian:~# chmod +x /var/lib/ejabberd
debian:~# chmod +x /var/lib/ejabberd/www

2. Modify /etc/ejabberd/ejabberd.cfg and include the following configs

While editting the conf find the section:

{listen,
[


Scrolling down you will fine some commented code marked with %% that will read:

{5269, ejabberd_s2s_in, [
{shaper, s2s_shaper},
{max_stanza_size, 131072}
]},

Right after it leave one new line and place the code:

{5280, ejabberd_http, [
{request_handlers, [
{["web"], mod_http_fileserver}
]},

http_bind,
http_poll,
web_admin
]}
]}.

Scrolling a bit down the file, there is a section which says:

%%% =======
%%% MODULES

%%
%% Modules enabled in all ejabberd virtual hosts.
%%

The section below the comments will look like so:

{modules, [ {mod_adhoc, []},
{mod_announce, [{access, announce}]}, % requires mod_adhoc
{mod_caps, []},
{mod_configure,[]}, % requires mod_adhoc
{mod_ctlextra, []},
{mod_disco, []},
%%{mod_echo, [{host, "echo.localhost"}]},
{mod_irc, []},
{mod_last, []},

After the {mod_last, … the following lines should be added:

{mod_http_bind, []},
{mod_http_fileserver, [
{docroot, "/var/lib/ejabberd/www"},
{accesslog, "/var/log/ejabberd/webaccess.log"}
]},

3. Download and extract latest version of jwchat

Of the time of writting the latest version of jwchat is jwchat-1.0 I have mirrored it on pc-freak for convenience:

debian:~# wget https://www.pc-freak.net/files/jwchat-1.0.tar.gz
….

debian:~# cd /var/lib/ejabberd/www
debian:/var/lib/ejabberd/www# tar -xzvf jwchat-1.0.tar.gz
...
debian:/var/lib/ejabberd/www# mv jwchat-1.0 jwchat
debian:/var/lib/ejabberd/www# cd jwchat

4. Choose the language in which you will prefer jwchat web interface to appear

I prefer english as most people would I suppose:

debian:/var/lib/ejabberd/www/jwchat# for a in $(ls *.en); do b=${a%.en}; cp $a $b; done

For other languages change in the small one liner shell script b=${a%.en} (en) to whatever language you will prefer to make primary.After selecting the correct langauge a rm cmd should be issued to get rid of the .js.* and .html.* in other language files which are no longer needed:

debian:/var/lib/ejabberd/www/jwchat# rm *.html.* *.js.*

5. Configure JWChat config.js

Edit /var/lib/ejabberd/www/jwchat/config.js , its necessery to have inside code definitions like:

/* If your Jabber server is jabber.example.org, set this: */
var SITENAME = "jabber.example.org";

/* If HTTP-Bind works correctly, you may want do remove HTTP-Poll here */
var BACKENDS =
[
{
name:"Native Binding",
description:"Ejabberd's native HTTP Binding backend",
httpbase:"/http-bind/",
type:"binding",
servers_allowed:[SITENAME]
}
];

6. Restart EJabberd server to load the new config settings

debian:~# /etc/init.d/ejabberd restart
Restarting jabber server: ejabberd..

7. Test JWChat HTTP-Bind and file server backend

I used elinksand my beloved Epiphany (default gnome browser) which by the way is the browser I use daily to test that the JWChat works fine with the ejabberd.
To test the newly installed HTTP-Bind ejabberd server backend on port 5280 I used URL:

http://jabber.mydomain.com:5280/web/jwchat/I had quite a struggles with 404 not found errors, which I couldn't explain for half an hour. After a thorough examination, I've figured out the reasons for the 404 errors was my stupidity …
The URL http://jabber.mydomain.com:5280/web/jwchat/ was incorrect because I fogrot to move jwchat-1.0 to jwchat e.g. (mv jwchat-1.0 jwchat) earlier explained in that article was a step I missed. Hence to access the web interface of the ejabberd without the 404 error I had to access it via:

http://jabber.mydomain.com:5280/web/jwchat-1.0
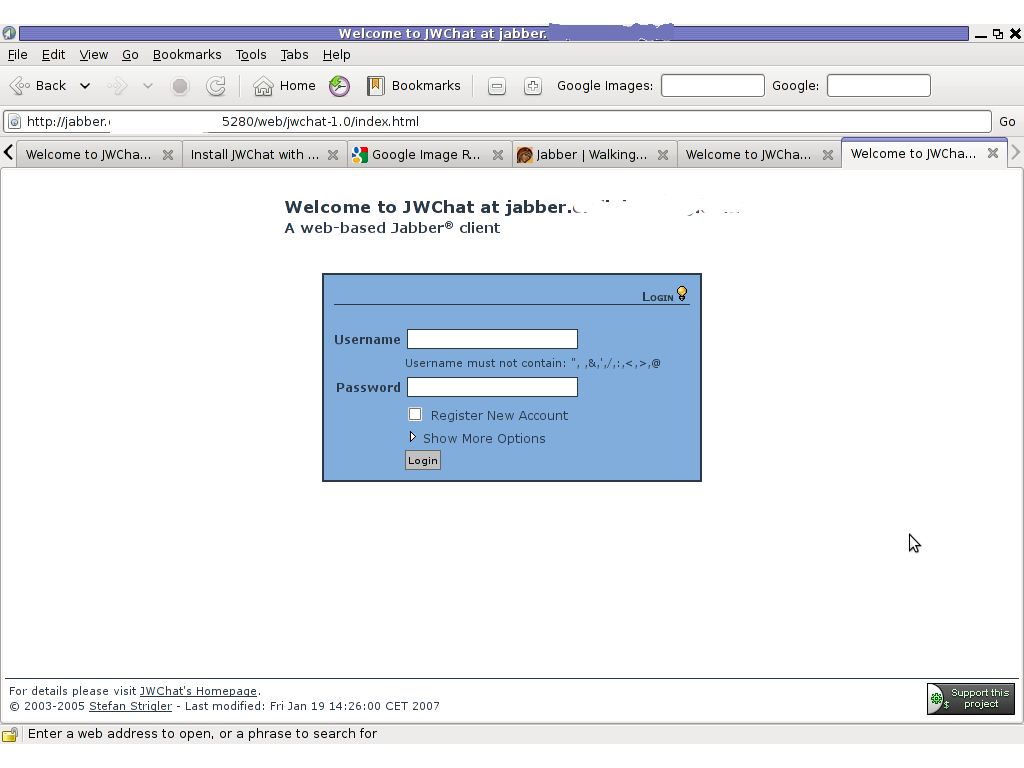
JWChat Ejabber webchat Epiphany Linux screenshot

Finally it is handy to add a small index.php redirect to redirect to http://jabber.mydomain.com:5280/web/jwchat-1.0/

The php should like so:


<?
php
header( 'Location: http://jabber.mydomain.com:5280/web/jwchat-1.0' ) ;
?>

Upgrade Ubuntu from 9.04 to latest Ubuntu

Friday, April 1st, 2011

Updating a version of Ubuntu version 9.04 to the latest stable release is actually very simple and BORING.

It takes some long time and a lot of clicking, however eventually, the upgrade to the latest Ubuntu will be at hand.
The whole upgrade philosophy to Upgrade an outdated Ubuntu distribution to the newest supported stable Ubuntu release is in a consequentual number of release to release upgrades.

Let’s say you’re running Ubuntu 9.04 (Jaunty Jackalope and) you want to upgrade to Ubuntu 11.10 TLS
then you will have to to the following step by step upgrades;

Upgrade Ubuntu from;

  • Ubuntu 9.04 to Ubuntu 9.10
  • Ubuntu 9.10 to Ubuntu 10.04
  • Ubuntu 10.04 to Ubuntu 10.10
  • Ubuntu 10.10 to Ubuntu 11.04
  • Ubuntu 11.04 to Ubuntu 11.11

Now let’s start upgrading …
1. Upgrade Ubuntu 9.04 to Ubuntu 9.10

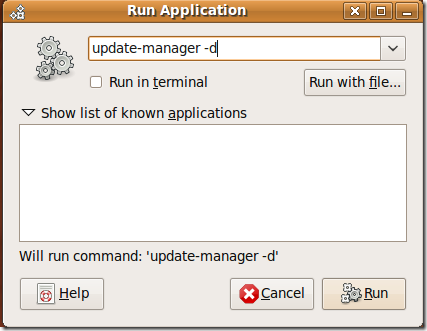
Press Alt+F2 and type:

update-manager -d

Update Manager Ubuntu

Press the Run Button afterwards to launch the command.
You will be prompted for your Linux administrator password, so type it in.

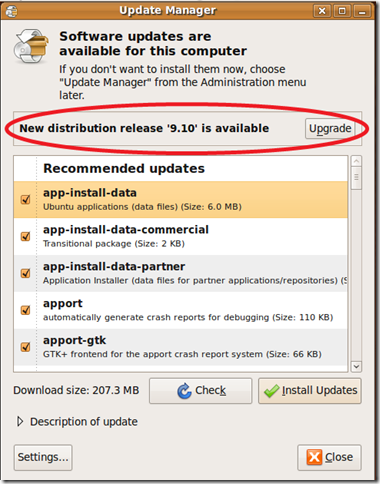
Next the command will launch the Update Manager . The update manager will show you all the available updates.

The Update Manager will show you the update options, it should say something like:

New distribution release ‘9.10’ is available

update manager ubuntu 9.10

Click Over the Update button and wait.

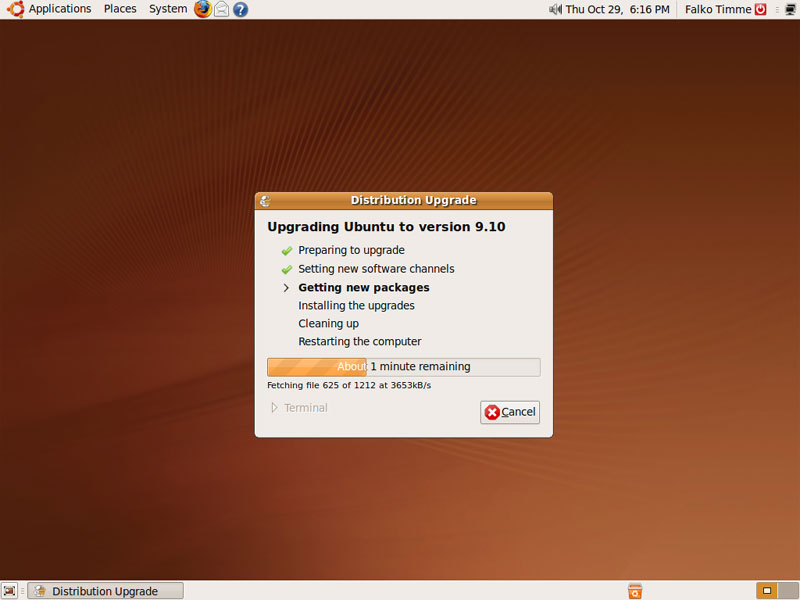
The Ubuntu update will went by by few steps:

1. Preparing Updates
2. Setting new software channels
3. Getting new packages
4. Installing the updates
5. Cleaning up
6. Restarting the computer

You will see further on a screen reading “Support for some applications ended”, on that screen simply press the Close button.

Further on you will be prompted with a windows reading:

Do you want to start the upgrade? You have to click over Start Upgrade button to finally begin with the upgrade process.
Getting new packages screen Ubuntu Update procedure

Now a prompt window will appearing asking you to reboot the system, when the prompt appears click over:

Restart Now

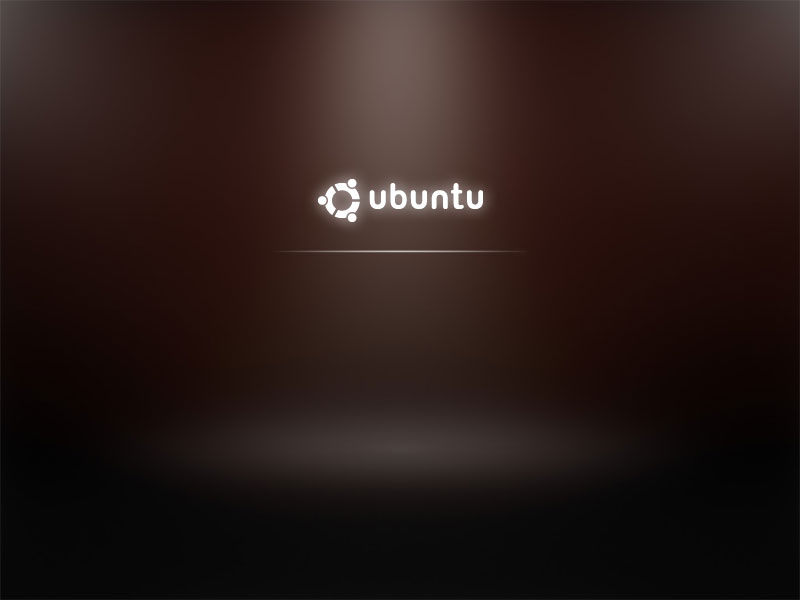
After the upgrade the new release of Ubuntu 9.10 will start booting up, and you will see a screen similar to the picture below:

Ubuntu 9.10 boot screen

Now as you have updated from Ubuntu 9.04 next step is to upgrade to Ubuntu 10.04

Now guess what you will have to upgrade the trivial quick update procedures once again.

Once again launch the Ubuntu Update Manager

System -> Administration -> Update Manager Now as you have updated from Ubuntu 9.04 next step is to upgrade to Ubuntu 10.04 (LTS – Lucid Lynx)

Now guess what you will have to upgrade the trivial quick update procedures once again.

Once again launch the Ubuntu Update Manager

System -> Administration -> Update Manager

Now follow the above described procedure with update-manager -d

After repeating the few trivial steps you will have Ubuntu 10.04 LTS on your Desktop

Further on complete the trivial update steps with the update-manager to update to Ubuntu release 10.10 (Maverick Meerkat).

After having succesfully upgraded to version 10.10, now repeat the boring update procedures described in the beginning of the article to update to Ubuntu 11.04

Now as you should be with Ubuntu 11.04, upgrade once again with update-manager to Ubuntu 11.04 (Natty Narwhal).

And ast a last, once again with the update-manager -d update following the instructions to Ubuntu 11.10.

I’m pretty sure this is one of my most boring articles ever …
It’s interesting fact that I learn once from a friend of mine about the Ubuntu distribution. The Ubuntu distribution has it’s versioning based on months and year whether a version is out for instance Ubuntu 9.04 means this Ubuntu release is released on (Month 04 (April), year 2009)), Ubuntu 11.10 Means this distribution is released in (year 2011, month 10 (October)).