Posts Tagged ‘server’

MySQL: How to check user privileges and allowed hosts to connect with mysql cli

Wednesday, April 2nd, 2014

how-to-check-user-privileges-and-allowed-hosts-to-connect-with-mysql-cli

On a project there are some issues with root admin user unable to access the server from remote host and the most probable reason was there is no access to the server from that host thus it was necessary check mysql root user privilegse and allowed hosts to connect, here SQL query to do it:
 

mysql> select * from `user` where  user like 'root%';
+——————————–+——+——————————————-+————-+————-+————-+————-+————-+———–+————-+—————+————–+———–+————+—————–+————+————+————–+————+———————–+——————+————–+—————–+——————+——————+—————-+———————+——————–+——————+————+————–+———-+————+————-+————–+—————+————-+—————–+———————-+
| Host                           | User | Password                                  | Select_priv | Insert_priv | Update_priv | Delete_priv | Create_priv | Drop_priv | Reload_priv | Shutdown_priv | Process_priv | File_priv | Grant_priv | References_priv | Index_priv | Alter_priv | Show_db_priv | Super_priv | Create_tmp_table_priv | Lock_tables_priv | Execute_priv | Repl_slave_priv | Repl_client_priv | Create_view_priv | Show_view_priv | Create_routine_priv | Alter_routine_priv | Create_user_priv | Event_priv | Trigger_priv | ssl_type | ssl_cipher | x509_issuer | x509_subject | max_questions | max_updates | max_connections | max_user_connections |
+——————————–+——+——————————————-+————-+————-+————-+————-+————-+———–+————-+—————+————–+———–+————+—————–+————+————+————–+————+———————–+——————+————–+—————–+——————+——————+—————-+———————+——————–+——————+————+————–+———-+————+————-+————–+—————+————-+—————–+———————-+
| localhost                      | root | *5A07790DCF43AC89820F93CAF7B03DE3F43A10D9 | Y           | Y           | Y           | Y           | Y           | Y         | Y           | Y             | Y            | Y         | Y          | Y               | Y          | Y          | Y            | Y          | Y                     | Y                | Y            | Y               | Y                | Y                | Y              | Y                   | Y                  | Y                | Y          | Y            |          |            |             |              |             0 |           0 |               0 |                    0 |
| server737                        | root | *5A07790DCF43AC89820F93CAF7B03DE3F43A10D9 | Y           | Y           | Y           | Y           | Y           | Y         | Y           | Y             | Y            | Y         | Y          | Y               | Y          | Y          | Y            | Y          | Y                     | Y                | Y            | Y               | Y                | Y                | Y              | Y                   | Y                  | Y                | Y          | Y            |          |            |             |              |             0 |           0 |               0 |                    0 |
| 127.0.0.1                      | root | *5A07790DCF43AC89820F93CAF7B03DE3F43A10D9 | Y           | Y           | Y           | Y           | Y           | Y         | Y           | Y             | Y            | Y         | Y          | Y               | Y          | Y          | Y            | Y          | Y                     | Y                | Y            | Y               | Y                | Y                | Y              | Y                   | Y                  | Y                | Y          | Y            |          |            |             |              |             0 |           0 |               0 |                    0 |
| server737.server.myhost.net | root | *5A07790DCF43FC89820A93CAF7B03DE3F43A10D9 | Y           | Y           | Y           | Y           | Y           | Y         | Y           | Y             | Y            | Y         | Y          | Y               | Y          | Y          | Y            | Y          | Y                     | Y                | Y            | Y               | Y                | Y                | Y              | Y                   | Y                  | Y                | Y          | Y            |          |            |             |              |             0 |           0 |               0 |                    0 |
| server4586                        | root | *5A07790DCF43AC89820F93CAF7B03DE3F43A10D9 | N           | N           | N           | N           | N           | N         | N           | N             | N            | N         | N          | N               | N          | N          | N            | N          | N                     | N                | N            | N               | N                | N                | N              | N                   | N                  | N                | N          | N            |          |            |             |              |             0 |           0 |               0 |                    0 |
| server4586.myhost.net              | root | *5A07790DCF43AC89820F93CAF7B03DE3F43A10D9 | N           | N           | N           | N           | N           | N         | N           | N             | N            | N         | N          | N               | N          | N          | N            | N          | N                     | N                | N            | N               | N                | N                | N              | N                   | N                  | N                | N          | N            |          |            |             |              |             0 |           0 |               0 |                    0 |
+——————————–+——+——————————————-+————-+————-+————-+————-+————-+———–+————-+—————+————–+———–+————+—————–+————+————+————–+————+———————–+——————+————–+—————–+——————+——————+—————-+———————+——————–+——————+————+————–+———-+————+————-+————–+—————+————-+—————–+———————-+
6 rows in set (0.00 sec)

mysql> exit


Here is query explained:

select * from `user` where  user like 'root%'; query means:

select * – show all
from `user` – from user database
where user like 'root%' – where there is match in user column to any string starting with 'root*',
 

Fix “Approaching the limit on PV entries, consider increasing either the vm.pmap.shpgperproc or the vm.pmap.pv_entry_max tunable.” in FreeBSD

Monday, May 21st, 2012

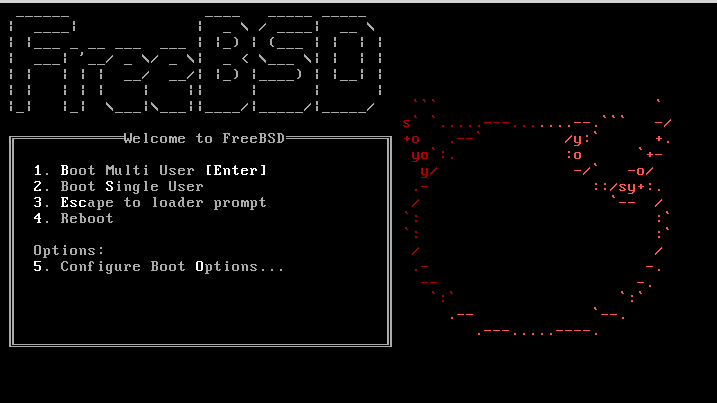
bsdinstall-newboot-loader-menu-pv_entries_consider_increasing_vm_pmap_shpgrepproc

I'm running FreeBSD with Apache and PHP on it and I got in dmesg (kernel log), following error:

freebsd# dmesg|grep -i vm.pmap.shpgperproc
Approaching the limit on PV entries, consider increasing either the vm.pmap.shpgperproc or the vm.pmap.pv_entry_max tunable.

The exact FreeBSD, Apache and php versions I have installed are:
 

freebsd# uname -a ; httpd -V ; php –version
FreeBSD pcfreak 7.2-RELEASE-p4 FreeBSD 7.2-RELEASE-p4 #0: Fri Oct 2 12:21:39 UTC 2009 root@i386-builder.daemonology.net:/usr/obj/usr/src/sys/GENERIC i386
Server version: Apache/2.0.64
Server built: Mar 13 2011 23:36:25Server's Module Magic Number: 20050127:14
Server loaded: APR 0.9.19, APR-UTIL 0.9.19
Compiled using: APR 0.9.19, APR-UTIL 0.9.19
Architecture: 32-bit
Server compiled with….
-D APACHE_MPM_DIR="server/mpm/prefork"
-D APR_HAS_SENDFILE
-D APR_HAS_MMAP
-D APR_HAVE_IPV6 (IPv4-mapped addresses enabled)
-D APR_USE_FLOCK_SERIALIZE
-D APR_USE_PTHREAD_SERIALIZE
-D SINGLE_LISTEN_UNSERIALIZED_ACCEPT
-D APR_HAS_OTHER_CHILD
-D AP_HAVE_RELIABLE_PIPED_LOGS
-D HTTPD_ROOT="/usr/local"
-D SUEXEC_BIN="/usr/local/bin/suexec"
-D DEFAULT_PIDLOG="/var/run/httpd.pid"
-D DEFAULT_SCOREBOARD="logs/apache_runtime_status"
-D DEFAULT_LOCKFILE="/var/run/accept.lock"
-D DEFAULT_ERRORLOG="logs/error_log"
-D AP_TYPES_CONFIG_FILE="etc/apache2/mime.types"
-D SERVER_CONFIG_FILE="etc/apache2/httpd.conf"
PHP 5.3.5 with Suhosin-Patch (cli) (built: Mar 14 2011 00:29:17)
Copyright (c) 1997-2009 The PHP Group
Zend Engine v2.3.0, Copyright (c) 1998-2010 Zend Technologies
with eAccelerator v0.9.6.1, Copyright (c) 2004-2010 eAccelerator, by eAccelerator

After a bunch of research a FreeBSD forums thread , I've found the fix suggested by a guy.

The solution suggested in the forum is to raise up vm.pmap.pv_entry_ma to vm.pmap.pv_entry_max=1743504, however I've noticed this value is read only and cannot be changed on the BSD running kernel;

freebsd# sysctl vm.pmap.pv_entry_max=1743504
sysctl: oid 'vm.pmap.pv_entry_max' is read only

Instead to solve the;

Approaching the limit on PV entries, consider increasing either the vm.pmap.shpgperproc or the vm.pmap.pv_entry_max tunable.
, I had to add in /boot/loader.conf

vm.pmap.pde.mappings=68
vm.pmap.shpgperproc=500
vm.pmap.pv_entry_max=1743504

Adding this values through /boot/loader.conf set them on kernel boot time. I've seen also in the threads the consider increasing either the vm.pmap.shpgperproc is also encountered on FreeBSD hosts running Squid, Dansguardion and other web proxy softwares on busy hosts.

This problems are not likely to happen for people who are running latest FreeBSD releases (>8.3, 9.x), I've read in same above post in newer BSD kernels the vm.pmap is no longer existing in newer kernels.

How to SSH client Login to server with password provided from command line as a script argument – Running same commands to many Linux servers

Friday, March 6th, 2015

ssh-how-to-login-with-password-provided-from-command-line-use-sshpass-to-run-same-command-to-forest-of-linux-servers

Usually admins like me who casuanlly need to administer "forests" (thousands of identicallyconfigured services Linux servers) are generating and using RSA / DSA key authentication for passwordless login, however this is not always possible as some client environments does prohibit the use of RSA / DSA non-pass authentication, thus in such environments to make routine server basic package rpm / deb upgrades or do other maintanance patching its necessery to use normal ssh user / pass login but as ssh client doesn't allow password to be provided from prompt for security reasons and therefore using some custom bash loop to issue single command to many servers (such as explained in my previous article) requires you to copy / paste password on password prompt multiple times. This works its pretty annoying so if you want to run single command on all your 500 servers with specifying the password from password prompt use sshpass tool (for non-interactive ssh password auth).

SSHPASS official site description:
 

sshpass is a utility designed for running ssh using the mode referred to as "keyboard-interactive" password authentication, but in non-interactive mode.


Install sshpass on Debian / Ubuntu (deb based) Linux

sshpass is installable right out of regular repositories so to install run:
 

apt-get install —yes sshpass


Install sshpass on CentOS / Fedora (RPM based) Linux


sshpass is available also across most RPM based distros too so just use yum package manager


yum -y install sshpass


If its not available across standard RPM distro provided repositories, there should be RPM on the net for distro just download latest one and use wget and rpm to install:

 wget -q http://dl.fedoraproject.org/pub/epel/6/x86_64/sshpass-1.05-1.el6.x86_64.rpm

 rpm -ivh sshpass-1.05-1.el6.x86_64.rpm


How Does SshPass Works?


Normally openssh (ssh) client binary uses direct TTY (/dev/tty)= an abbreviation for PhyTeleTYpewriter or (the admin jargon call Physical Console access)  instead of standard remotely defined /dev/ptsVirtual PTY.
To get around this Sshpass runs ssh in a dedicated TTY to emulate the password is indeed issues by interactive keyboard user thus  fooling remote sshd server to thinking password
is provided by interactive user.


SSHPass use

Very basic standard use which allows you to pass the password from command line is like this:
 

sshpass -p 'Your_Password_Goes_here123' ssh username@server.your-server.com


Note that the server you're working is shared with other developers they might be able to steal your username / password by using a simple process list command such as:
 

 ps auxwwef


In my case security is not a hot issue, as I'm the only user on the server (and only concern might be if someone hacks into the server 🙂 


Then assuming that you have a plain text file with all your administered servers, you can easily use sshpass in a Bash Script loop in order to run, lets say a package upgrade across all identical Linux version machines:
 

while read line; do
sshpass -p 'Your_Password_Goes_here123' ssh username@$line "apt-get update && apt-get upgrade && apt-get dist-upgrade" < /dev/null;
done < all_servers_list.txt

Change the command you like to issue across all machines with the string "apt-get …"
Above command can be used to keep up2date all Debian stable server packages. What you will do on servers is up to your imaginations, very common use of above line would be if you want to see uptime /netstat command output across all your network servers.


while read line; do
sshpass -p 'Your_Password_Goes_here123' ssh username@$line "uptime; who; netstat -tunlp; " < /dev/null;
done < all_servers_list.txt


As you can guess SshPass is swiss army knife tool for admins whoneed to automate things with scripts simultaneously across number of servers.
 

Happy SSH-ing 🙂


Substitute for Putty SSH client on Nokia 9300i

Sunday, May 30th, 2010

I’ve recently had issues with my Putty for S80 on my Nokia 9300i.
Though the port of Putty for Symbian is quite good looking it has many down falls. A major down side is it’s slowness, a connectionto an SSH server would take up like 5 to 7 minutes time.
As they say time and money and loosing time is annoyance and this is especially true if you have to quickly do something on a server via your mobile.

I looked online for good SSH clients that might be a substitute to the PuTTY SSH client In my search I came across this list of SSH clients compatible with the Symbian’s S80 phone architecture

Mocha Telnet client for Nokia 9300, 9300i and Nokia 9500

I haven’t tested all of the provided clients but I was blessed to find what I was looking for, I found the Mocha Telnet for Nokia 9300/9500 which is a really nice SSH and Telnet client. I had to acknowledge, it’s interface and it’s SSH session management interface is a way down uhandy but in general the Mocha Telnet is a quickly connection handler able to communicate with the remote SSH servers on Nokia 9300i.
Usually to establish an SSH connection to a server it tooks like 1 minute using the Mocha Telnet this is really quick compared to the 6 minutes waiting while using PuTTY.

Here is a list of the capabilities of the Mocha Telnet client for Nokia 9300 / 9500 (a quote from Mocha telnet’s website):

Mocha Telnet Features:

* VT220 emulation.
* SSH2
* Autologin with scripting parameter.
* User defined function keys.
* Screen mode 24*80.
* Online Help.
* Many trim parameters.
* Small and fast.
* Free upgrades to new versions of the product.

To download the Mocha Telnet SSH for your Nokia 9300i check here

The Mocha Telnet creators Mocha Sof provides also a nice vnc client for Nokia 9300i you can download the program from here

But wait there is even some more glad glad tidings about Mocha Telnet and the Vnc. It seems since the programs product cycle is over and there are no new versions of the programs developed for the Nokia 9300i and a few other old school Symbian powered Nokia phones, MochaSoft decided to liberate the applications as a freeware by providing a freeware registration codes for the programs to benefit from the codes and register both your Mocha Telnet you can use:

Freeware license key for mocha Telnet for Nokia 9300,9300i/9500:

License name: freeware
License key: A15761

The Freeware license key for mocha VNC for Nokia 9300,9300i/9500 is:

License name: freeware
License key: 142449

In case if you’re curious, how administration of a remote Windows server will look alike over a VNC client, here is also a nice screenshot of Mocha VNC for the Nokia 9300i mobile:
Mocha Vnc Nokia 9300, 9300i, 9500
There are a few other interesting applications for other mobile phones again by MochaSoft, check them here

how to archive with Windows default zip (compress) algorithm

Tuesday, April 1st, 2014

windows-sent-to-compressed-file
I'm working on a decomissioning project (for those who hear decomissioning for a first time – in corporate world this means removal of service/s or assigned resources of a server or a physical server hardware that is not to be used in future or is obsolete). The decomissioning includes removal of Apache Tomcat (Software Configuration Item CI – in HP terms) from Microsoft Windows 2007 – Service Pack 2.
Part of decomissioning is of course to create backup of Tomcat Application server and for that I needed to create compressed archive of Tomcat instances. Usually I do archives on Windows using Winrar or Winzip but this time as the server productive server has the minimum installed there was no any external vendor produced archiving software available.

My memories from past were that there is a native compressing program embedded into Windows as I've unzipped compressed archives on Win hosts with no need for external WinZip. However until so far I never did .ZIP archive with no available external uncompress software.

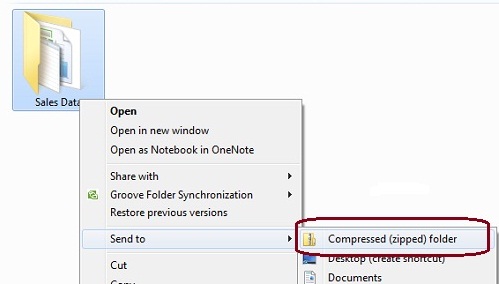
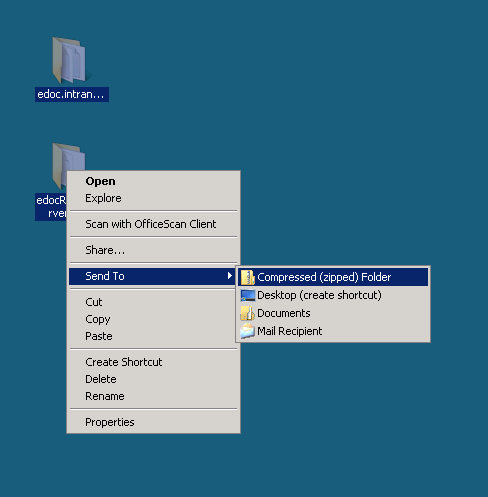
Using Winzip or Winrar so far to make archive from a number of files I used to select files to enter Archive press right mouse button and select Create Archive (Add To Archive) so I expected this will work whenever no Winrar, however there was no obvious button like this, so I googled a bit to find out how is that possible ending up on Article from Microsoft titled "Compress and uncompress files (zip files)", there is a dumb proof video teaching Compressing files with Microsoft default ZIP program is done by the the weird "Send To" menu 🙂 

Selecting files to enter Archive;
> (Click Right Mouse Button) -> (Send To Compressed Zipped Folder)

compress_zipped_folder_with_windows_default_archive_algorithm how to archive with windows default compress archive

Honestly If I didn't checked the net probably I will never think of looking it there.

Finding spam sending php scripts on multiple sites servers – Tracing and stopping spammer PHP scripts

Monday, April 14th, 2014

stop_php_mail-spam-find-spammer-and-stop-php-spammer-websites
Spam has become a severe issue for administrators, not only for mail server admins but also for webshosting adms. Even the most secure spam protected mail server can get affected by spam due to fact it is configured to relay mail from other servers acting as web hosting sites.

Webhosting companies almost always suffer seriously from spam issues and often their mail servers gets blocked (enter spam blacklists), because of their irresponsible clients uploading lets say old vulnerable Joomla, WordPress without Akismet or proper spam handling plugin,a CMS which is not frequently supported / updated or custom client insecure php code.

What I mean is Shared server A is often configured to sent mail via (mail) server B. And often some of the many websites / scripts hosted on server A gets hacked and a spam form is uploaded and tons of spam start being shipped via mail server B.

Of course on mail server level it is possible to configure delay between mail sent and adopt a couple of policies to reduce spam, but the spam protection issue can't be completely solved thus admin of such server is forced to periodically keep an eye on what mail is sent from hosting server to mail server.


If you happen to be one of those Linux (Unix) webhosting admins who find few thousand of spammer emails into mail server logs or your eMail server queue and you can't seem to find what is causing it, cause there are multiple websites shared hosting using mainly PHP + SQL and you can't identify what php script is spamming by reviewing  Apache log / PHP files. What you can do is get use of:

PHP mail.log directive

Precious tool in tracking spam issues is a PHP Mail.log parameter, mail log paramater is available since PHP version >= 5.3.0 and above.
PHP Mail.log parameter records all calls to the PHP mail() function including exact PHP headers, line numbers and path to script initiating mail sent.

Here is how it is used:
 

1. Create empty PHP Mail.log file

touch /var/log/phpmail.log

File has to be writtable to same user with which Apache is running in case of Apache with SuPHP running file has to be writtable by all users.

On Debian, Ubunut Linux:

chown www:data:www-data /var/log/phpmail.log

On CentOS, RHEL, SuSE phpmail.log has to be owned by httpd:

chown httpd:httpd /var/log/phpmail.log

On some other distros it might be chown nobody:nobody etc. depending on the user with which Apache server is running.


2. Add to php.ini configuration following lines

mail.add_x_header = On
mail.log = /var/log/phpmail.log

PHP directive instructs PHP to log complete outbund Mail header sent by mail() function, containing the UID of the web server or PHP process and the name of the script that sent the email;
 

(X-PHP-Originating-Script: 33:mailer.php)


i.e. it will make php start logging to phpmail.log stuff like:


mail() on [/var/www/pomoriemonasteryorg/components/com_xmap/2ktdz2.php:1]: To: info@globalremarketing.com.au — Headers: From: "Priority Mail" <status_93@pomoriemon
astery.org> X-Mailer: MailMagic2.0 Reply-To: "Priority Mail" <status_93@pomoriemonastery.com> Mime-Version: 1.0 Content-Type: multipart/alternative;boundary="——
—-13972215105347E886BADB5"
mail() on [/var/www/pomoriemonasteryorg/components/com_xmap/2ktdz2.php:1]: To: demil7167@yahoo.com — Headers: From: "One Day Shipping" <status_44@pomoriemonastery.
org> X-Mailer: CSMTPConnectionv1.3 Reply-To: "One Day Shipping" <status_44@pomoriemonastery.com> Mime-Version: 1.0 Content-Type: multipart/alternative;boundary="—
——-13972215105347E886BD344"
mail() on [/var/www/pomoriemonasteryorg/components/com_xmap/2ktdz2.php:1]: To: domainmanager@nadenranshepovser.biz — Headers: From: "Logistics Services" <customer.
id86@pomoriemonastery.com> X-Mailer: TheBat!(v3.99.27)UNREG Reply-To: "Logistics Services" <customer.id86@pomoriemonastery.com> Mime-Version: 1.0 Content-Type: mult
ipart/alternative;boundary="———-13972215105347E886BF43E"
mail() on [/var/www/pomoriemonasteryorg/components/com_xmap/2ktdz2.php:1]: To: bluesapphire89@yahoo.com — Headers: From: "Priority Mail" <status_73@pomoriemonaster
y.org> X-Mailer: FastMailer/Webmail(versionSM/1.2.6) Reply-To: "Priority Mail" <status_73@pomoriemonastery.com> Mime-Version: 1.0 Content-Type: multipart/alternativ
e;boundary="———-13972215105347E886C13F2"


On Debian / Ubuntu Linux to enable this logging, exec:

echo 'mail.add_x_header = On' >> /etc/php5/apache2/php.ini
echo 'mail.log = /var/log/phpmail.log' >> /etc/php5/apache2/php.ini


I find it useful to symlink /etc/php5/apache2/php.ini to /etc/php.ini its much easier to remember php location plus it is a standard location for many RPM based distros.

ln -sf /etc/php5/apache2/php.ini /etc/php.ini

Or another "Debian recommended way" to enable mail.add_x_header logging on Debian is via:

echo 'mail.add_x_header = On' >> /etc/php5/conf.d/mail.ini
echo 'mail.log = /var/log/phpmail.log' >> /etc/php5/conf.d/mail.ini

On Redhats (RHEL, CentOS, SuSE) Linux issue:

echo 'mail.add_x_header = On' >> /etc/php.ini
echo 'mail.log = /var/log/phpmail.log' >> /etc/php.ini

3. Restart Apache

On Debian / Ubuntu based linuces:

/etc/init.d/apache2 restart

P.S. Normally to restart Apache without interrupting client connections graceful option can be used, i.e. instead of restarting do:

/etc/init.d/apache2 graceful

On RPM baed CentOS, Fedora etc.:

/sbin/service httpd restart

or

apachectl graceful
 

4. Reading the log

To review in real time exact PHP scripts sending tons of spam tail it:

tail -f /var/log/phpmail.log


mail() on [/var/www/remote-admin/wp-includes/class-phpmailer.php:489]: To: theosfp813@hotmail.com — Headers: Date: Mon, 14 Apr 2014 03:27:23 +0000 Return-Path: wordpress@remotesystemadministration.com From: WordPress Message-ID: X-Priority: 3 X-Mailer: PHPMailer (phpmailer.sourceforge.net) [version 2.0.4] MIME-Version: 1.0 Content-Transfer-Encoding: 8bit Content-Type: text/plain; charset="UTF-8"
mail() on [/var/www/pomoriemonasteryorg/media/rsinstall_4de38d919da01/admin/js/tiny_mce/plugins/inlinepopups/skins/.3a1a1c.php:1]: To: 2070ccrabb@kiakom.net — Headers: From: "Manager Elijah Castillo" <elijah_castillo32@pomoriemonastery.com> X-Mailer: Mozilla/5.0 (Windows; U; Windows NT 5.0; es-ES; rv:1.9.1.7) Gecko/20100111 Thunderbird/3.0.1 Reply-To: "Manager Elijah Castillo" <elijah_castillo32@pomoriemonastery.com> Mime-Version: 1.0 Content-Type: multipart/alternative;boundary="———-1397463670534B9A76017CC"
mail() on [/var/www/pomoriemonasteryorg/media/rsinstall_4de38d919da01/admin/js/tiny_mce/plugins/inlinepopups/skins/.3a1a1c.php:1]: To: 20wmwebinfo@schools.bedfordshire.gov.uk — Headers: From: "Manager Justin Murphy" <justin_murphy16@pomoriemonastery.com> X-Mailer: Opera Mail/10.62 (Win32) Reply-To: "Manager Justin Murphy" <justin_murphy16@pomoriemonastery.com> Mime-Version: 1.0 Content-Type: multipart/alternative;boundary="———-1397463670534B9A7603ED6"
mail() on [/var/www/pomoriemonasteryorg/media/rsinstall_4de38d919da01/admin/js/tiny_mce/plugins/inlinepopups/skins/.3a1a1c.php:1]: To: tynyrilak@yahoo.com — Headers: From: "Manager Elijah Castillo" <elijah_castillo83@pomoriemonastery.com> X-Mailer: Mozilla/5.0 (Macintosh; U; Intel Mac OS X 10.5; pl; rv:1.9.1.9) Gecko/20100317 Thunderbird/3.0.4 Reply-To: "Manager Elijah Castillo" <elijah_castillo83@pomoriemonastery.com> Mime-Version: 1.0 Content-Type: multipart/alternative;boundary="———-1397463670534B9A7606308"
mail() on [/var/www/pomoriemonasteryorg/media/rsinstall_4de38d919da01/admin/js/tiny_mce/plugins/inlinepopups/skins/.3a1a1c.php:1]: To: 2112macdo1@armymail.mod.uk — Headers: From: "Manager Justin Murphy" <justin_murphy41@pomoriemonastery.com> X-Mailer: Mozilla/5.0 (Macintosh; U; Intel Mac OS X 10.5; pl; rv:1.9.1.9) Gecko/20100317 Thunderbird/3.0.4 Reply-To: "Manager Justin Murphy" <justin_murphy41@pomoriemonastery.com> Mime-Version: 1.0 Content-Type: multipart/alternative;boundary="———-1397463670534B9A76086D1"


As you can see there is a junky spam mails sent via some spammer script uploaded under name .3a1a1c.php, so to stop the dirty bastard, deleted the script:

rm -f /var/www/pomoriemonasteryorg/media/rsinstall_4de38d919da01/admin/js/tiny_mce/plugins/inlinepopups/skins/.3a1a1c.php

It is generally useful to also check (search) for all hidden .php files inside directoring storing multiple virtualhost websites, as often a weirdly named hidden .php is sure indicator of either a PHP Shell script kiddie tool or a spammer form.

Here is how to Find all Hidden Perl / PHP scripts inside /var/www:

find . -iname '.*.php'
./blog/wp-content/plugins/fckeditor-for-wordpress-plugin/ckeditor/plugins/selection/.0b1910.php
./blog/wp-content/plugins/fckeditor-for-wordpress-plugin/filemanager/browser/default/.497a0c.php
./blog/wp-content/plugins/__MACOSX/feedburner_feedsmith_plugin_2.3/._FeedBurner_FeedSmith_Plugin.php

find . -iname '.*.pl*'

….

Reviewing complete list of all hidden files is also often useful to determine shitty cracker stuff

 find . -iname ".*"

Debugging via  /var/log/phpmail.log enablement is useful but is more recommended on development and staging (QA) environments. Having it enable on productive server with high amounts of mail sent via PHP scripts or just on dedicated shared site server could cause both performance issues, hard disk could quickly get and most importantly could be a severe security hole as information from PHP scripts could be potentially exposed to external parties.

Use apt-get with Proxy howto – Set Proxy system-wide in Linux shell and Gnome

Friday, May 16th, 2014

linux-apt-get-configure-proxy-howto-set-proxy-systemwide-in-linux

I juset setup a VMWare Virtual Machine on my HP notebook and installed Debian 7.0 stable Wheezy. Though VMWare identified my Office Internet and configured automatically NAT, I couldn't access the internet from a browser until I remembered all HP traffic is going through a default set browser proxy.
After setting a proxy to Iceweasel, Internet pages started opening normally, however as every kind of traffic was also accessible via HP's proxy, package management with apt-get (apt-get update, apt-get install etc. were failing with errors):


# apt-get update

Ign cdrom://[Debian GNU/Linux 7.2.0 _Wheezy_ – Official i386 CD Binary-1 20131012-12:56] wheezy Release.gpg
Ign cdrom://[Debian GNU/Linux 7.2.0 _Wheezy_ – Official i386 CD Binary-1 20131012-12:56] wheezy Release
Ign cdrom://[Debian GNU/Linux 7.2.0 _Wheezy_ – Official i386 CD Binary-1 20131012-12:56] wheezy/main i386 Packages/DiffIndex
Ign cdrom://[Debian GNU/Linux 7.2.0 _Wheezy_ – Official i386 CD Binary-1 20131012-12:56] wheezy/main Translation-en_US
Err http://ftp.by.debian.org wheezy Release.gpg
  Could not connect to ftp.by.debian.org:80 (86.57.151.3). – connect (111: Connection refused)
Err http://ftp.by.debian.org wheezy-updates Release.gpg
  Unable to connect to ftp.by.debian.org:http:
Err http://security.debian.org wheezy/updates Release.gpg
  Cannot initiate the connection to security.debian.org:80 (2607:ea00:101:3c0b:207:e9ff:fe00:e595). – connect (101: Network is unreachable) [IP: 2607:ea00:101:3c0b:207:e9ff:fe00:e595 80]
Reading package lists…


This error is caused because apt-get is trying to directly access above http URLs and because port 80 is filtered out from HP Office, it fails in order to make it working I had to configure apt-get to use Proxy host – here is how:

a) Create /etc/apt/apt.conf.d/02proxy file (if not already existing)
and place inside:
 

Acquire::http::proxy::Proxy "https://web-proxy.cce.hp.com";
Acquire::ftp::proxy::Proxy "ftp://web-proxy.cce.hp.com";


To do it from console / gnome-terminal issue:
echo ''Acquire::http::Proxy "https://web-proxy.cce.hp.com:8088";' >> /etc/apt/apt.conf.d/02proxy
echo ''Acquire::ftp::Proxy "https://web-proxy.cce.hp.com:8088";' >> /etc/apt/apt.conf.d/02proxy

That's all now apt-get will tunnel all traffic via HTTP and FTP proxy host web-proxy.cce.hp.com and apt-get works again.

Talking about Proxyfing Linux's apt-get, its possible to also set proxy shell variables, which are red and understood by many console programs like Console browsers lynx, links, elinks  as well as wget and curl commands, e.g.:


export http_proxy=http://192.168.1.5:5187/
export https_proxy=$http_proxy
export ftp_proxy=$http_proxy
export rsync_proxy=$http_proxy
export no_proxy="localhost,127.0.0.1,localaddress,.localdomain.com"

For proxies protected with username and password export variables should look like so: echo -n "username:"
read -e username
echo -n "password:"
read -es password
export http_proxy="http://$username:$password@proxyserver:8080/"
export https_proxy=$http_proxy
export ftp_proxy=$http_proxy
export rsync_proxy=$http_proxy
export no_proxy="localhost,127.0.0.1,localaddress,.localdomain.com"

To make this Linux proxy settings system wide on Debian / Ubuntu there is the /etc/environment file add to it:
 

http_proxy=http://proxy.server.com:8080/
https_proxy=http://proxy.server.com:8080/
ftp_proxy=http://proxy.server.com:8080/
no_proxy="localhost,127.0.0.1,localaddress,.localdomain.com"
HTTP_PROXY=http://proxy.server.com:8080/
HTTPS_PROXY=http://proxy.server.com:8080/
FTP_PROXY=http://proxy.server.com:8080/
NO_PROXY="localhost,127.0.0.1,localaddress,.localdomain.com"


To make proxy global (systemwide) for most (non-Debian specific) Linux distributions shell environments create new file /etc/profile.d/proxy.sh and place something like:

function proxy(){
echo -n "username:"
read -e username
echo -n "password:"
read -es password
export http_proxy="http://$username:$password@proxyserver:8080/"
export https_proxy=$http_proxy
export ftp_proxy=$http_proxy
export rsync_proxy=$http_proxy
export no_proxy="localhost,127.0.0.1,localaddress,.localdomain.com"
echo -e "nProxy environment variable set."
}
function proxyoff(){
unset HTTP_PROXY
unset http_proxy
unset HTTPS_PROXY
unset https_proxy
unset FTP_PROXY
unset ftp_proxy
unset RSYNC_PROXY
unset rsync_proxy
echo -e "nProxy environment variable removed."
}

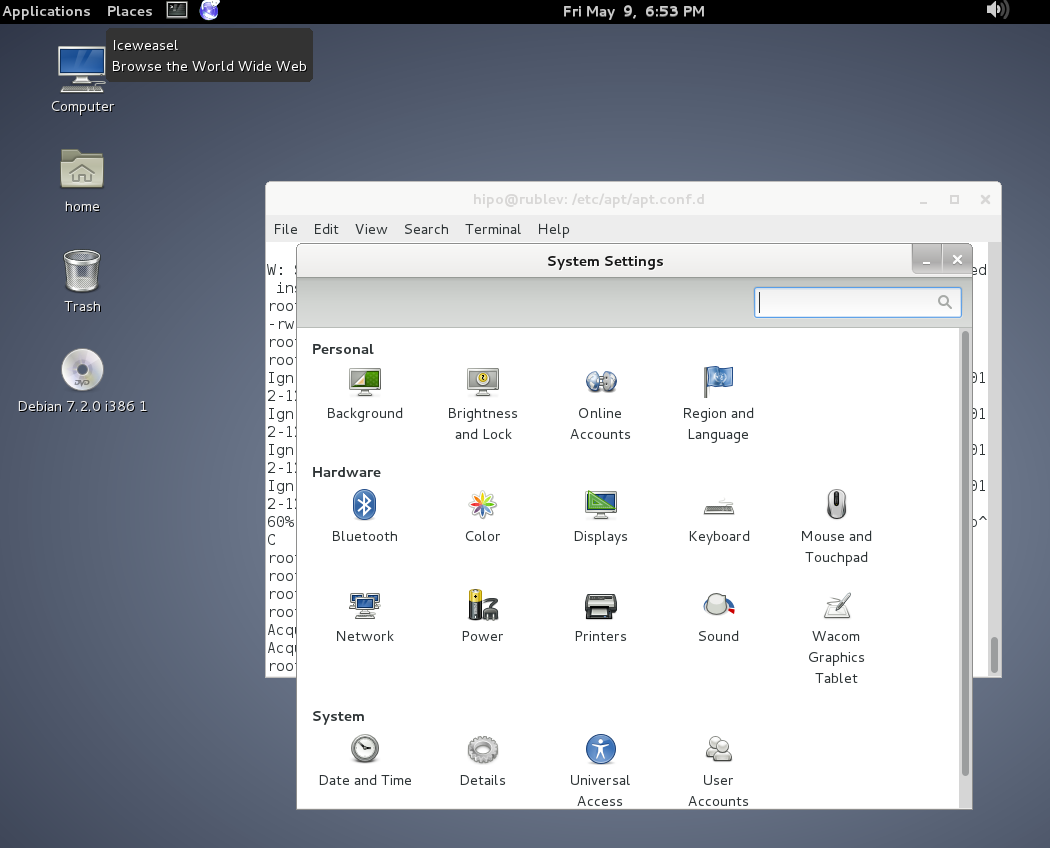
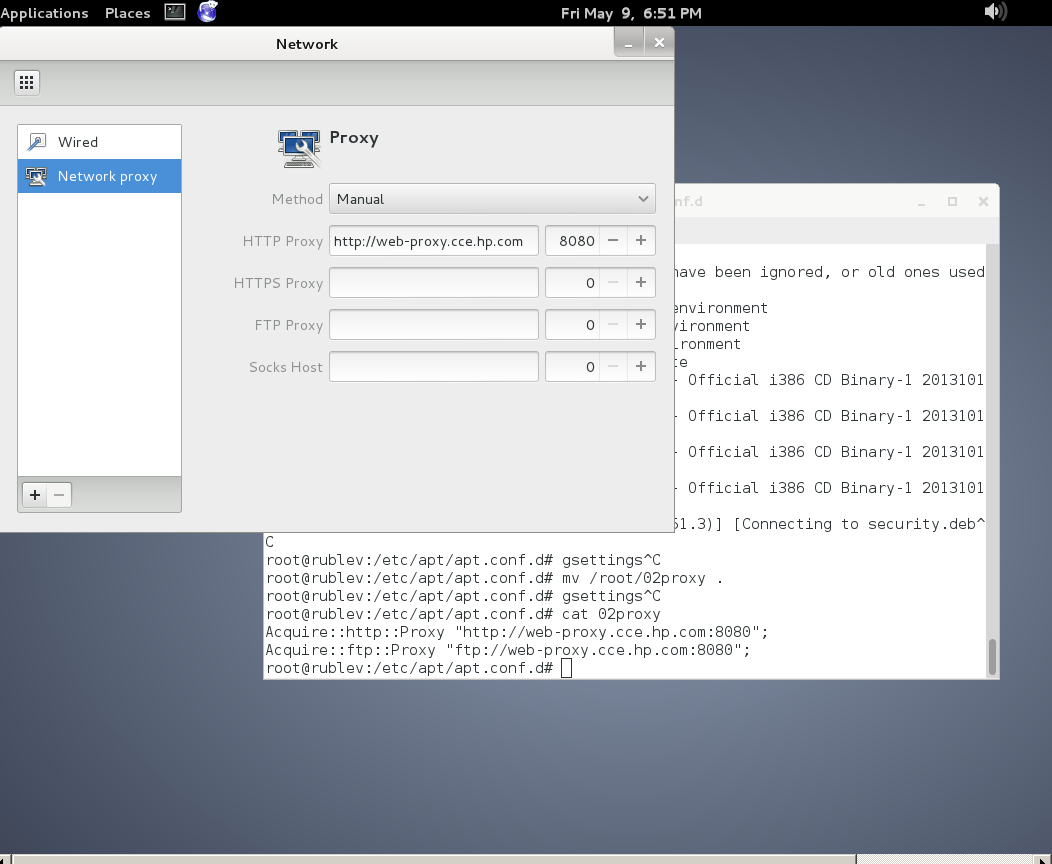
To set Global Proxy (make Proxy Systemwide) for a user in GNOME Desktop environment launch gnome-control-center

And go to Network -> Network Proxy

/images/gnome-configure-systemwide-proxy-howto-picture1

/images/gnome-configure-systemwide-proxy-howto-picture2

To make proxy settings also system wide for some GUI Gnome GTK3 applications

gsettings set org.gnome.system.proxy mode 'manual'
gsettings set org.gnome.system.proxy.http host 'your-proxy.server.com'
gsettings set org.gnome.system.proxy.http port 8080

How to check Microsoft Windows uptime – Check server uptime in Windows server

Wednesday, May 21st, 2014

how-to-check-windows-uptime-windows-server-uptime-logo
In Linux to check uptime there is the uptime command, so how is it possible to check your system uptime – e.g. check when was last time Windows host was rebooted?

Or in other words what is Windows server equivalent to Linux's uptime command?

To check uptime on Windows OS, there is the:

net statistics server

command a shorter reference to this command is net stats srv

To run it quickest way is to press Windows (button)+r type cmd.exe and exec command in Windows command prompt:


C:UsersGeorgi>net statistics server
Server Statistics for \SM07862

Statistics since 21.05.2014 09:55:21

Sessions accepted 1
Sessions timed-out 0
Sessions errored-out 0

Kilobytes sent 0
Kilobytes received 0

Mean response time (msec) 0

System errors 0
Permission violations 0
Password violations 0

Files accessed 0
Communication devices accessed 0
Print jobs spooled 0

Times buffers exhausted

Big buffers 0
Request buffers 0

The command completed successfully.

C:UsersGeorgi>

Statistics since 21.05.2014 09:55:21 – shows when system booted last time, so to check the difference between current time and when system booted last – you need to check current time with time command


C:UsersGeorgi>time
The current time is: 16:59:26,60
Enter the new time:

Alternative command to check when Windows system booted is:

C:UsersGeorgi>systeminfo|findstr "System Boot Time"
System Boot Time: 21.05.2014, 09:54:11
System Manufacturer: HP
System Model: ProLiant BL460c G7
System Type: x64-based PC
System Directory: C:Windowssystem32
Boot Device: DeviceHarddiskVolume1
System Locale: de;German (Germany)
Time Zone: (UTC+01:00) Amsterdam, Berlin, Bern, Rome, Stockholm, Vienna

C:UsersGeorgi>

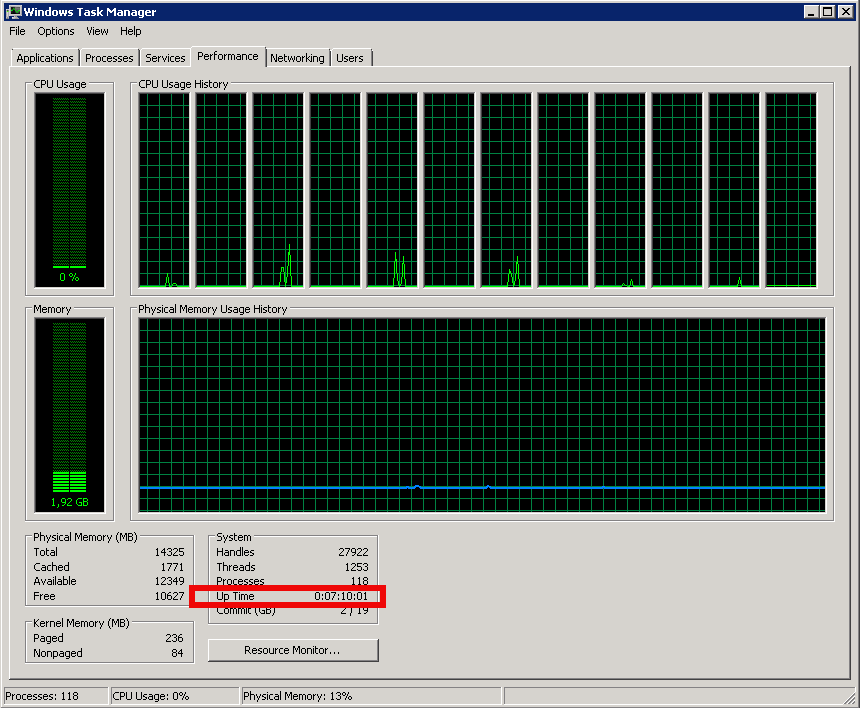
If you want to check Windows boot time "the Windows way" through the GUI, launch Windows Task Manager – run taskmgr command and go to Performance tab

images/check-windows-server-uptime-with-taskmanager-performance-tab-screenshot


What is Vertical scaling and Horizontal scaling – Vertical and Horizontal hardware / services scaling

Friday, June 13th, 2014

horizontal-vs-vertical-scaling-vertical-and-horizontal-scaling-explained-diagram

If you're coming from a small or middle-sized company to a corporations like HP or IBM probably you will not a clear defined idea on the 2 types (2 dimensions) of system Scaling (Horizontal and Vertical scaling). I know from my pesronal experience that in small companies – all needed is to guarantee a model for as less probels as possible without too much of defining things and with much less planning. Other thing is being a sysadmin in middle-sized companies, often doesn't give you opportunity to discuss issues to solve with other admins but you have to deal as "one man (machine) for all" and thus often to solve office server and services tasks you do some custom solution.
hence for novice system administrators probably it will be probably unclear what is the difference between Horizontal and Vertical Scaling?

horizontal-vertical-scaling-scale-up-and-scale-out-server-infrastructure-diagram


Vertical Scaling (scale vertically or scale up) :- adding more resources(CPU/RAM/DISK) to your server (database or application server is still remains one).
Vertical Scaling is much more used in small and middle-sized companies and in applications and products of middle-range. Very common example for Virtual Scaling nowdays is to buy an expensive hardware and use it as a Virtual Machine hypervisor (VMWare ESX). Where a database is involved using Vertical Scaling without use of multiple virtual machines might be not the best solution, as even though hardware might suffice (creation of database locks might impose problems). Reasons to scale vertically include increasing IOPS (Input / Ouput Operations), increasing CPU/RAM capacity, and increasing disk capacity.
Because Vertical Scaling usually means upgrade of server hardware – whenever an improved performance is targeted, even though if Virtualization is used, the risk for downtimes with it is much higher than whenever horizontal scaling.

Horizontal Scaling (scale horizontally or scale out):- adding more processing units (phyiscal machine) to your server (infrastructure be it application web/server or database).
Horizontal scaling, means increasing  the number of nodes in the cluster, reduces the responsibilities of each member node by spreading the keyspace wider and providing additional end-points for client connections. The capacity of each individual node does not change, but its load is decreased (because load is distributed between separate server nodes). Reasons to scale horizontally include increasing I/O concurrency, reducing the load on existing nodes, and increasing disk capacity.
Horizontal Scaling has been historically much more used for high level of computing and for application and services. The Internet and particular web services gave a boom of Horizontal Scaling use, most companies nowadays that provide well known web services like Google (Gmail, Youtube), Yahoo, Facebook, Ebay, Amazon etc. are using heavily horizontal scaling. Horizontal Scaling is a must use technology – whenever a high availability of (server) services are required.

Run native Internet Explorer 6 on latest Debian / Ubuntu Linux with IEs4Linux

Thursday, July 24th, 2014

Install-internet-explorer-on-debian-linux-IEs4Linux_logo.svg
If you're a GNU / Linux Desktop user like me and you have to administrate hybrid server environments running mixture of MS Windows with Microsoft IIS webserver running active server pages (.ASP) developed application or UNIX / GNU Linux servers web applications using Mono as a server-side language, often you need to have browser which properly supports  Internet Explorer Trident web (layout) renderer (also famous as MSHTML).

Having Internet Explorer on your Linux is very useful for web developers who want to test how their website works under IE.

Of course you can always install Windows in Virtualbox VM and do your testing in the Virtual Machine but this takes time to install and also puts a useless load to a PC ….

IES4 Linux is a Linux free (open source) shell script that lets you run Internet Explorer on your Linux desktop.

ies4linux scripts collection uses emulation with WINE (Wine is Not Emulator) emulator to run the native  Windows Internet Explorer thus before use it you have to install Wine.

There are plenty of tutorials online about ies4Linux, problem is as it is not updated and developed most tutorials doesn't work on Debian Wheezy / Ubuntu and rest of deb based linux distros.
This is why I decided to write just another ies4linux tutorial that actually works!

On Debian / Ubuntu / Mint Linux install via apt-get:

apt-get –yes install wine

Then with a non-root user download ies4linux-latest.tar.gz. Just in case ies4linux-latest.tar.gz disappears in future I've created also a ies4linux-latest.tar.gz mirror for download here

and unarchive tar archive:

wget http://www.tatanka.com.br/ies4linux/downloads/ies4linux-latest.tar.gz
tar -zxvf ies4linux-latest.tar.gz
cd ies4linux-*
./ies4linux

You will get:
 

IEs4Linux 2 is developed to be used with recent Wine versions (0.9.x). It seems that you are using an old version. It's recommended that you update your wine to the latest version (Go to: winehq.com).

You need to install cabextract first!
Download it here: http://www.kyz.uklinux.net/cabextract.php

To fulfill this requirement you will need to also cabetract package which is luckily part of Debian:
 

apt-get install –yes cabextract

On wine version 1.0 and onwards winprefixcreate has been changed to winecfg binary.
To prevent missing wineprefixcreate, errors during ies4linux installer run  its necessery to symlink as a workaround:
 

ln -sv /usr/bin/winecfg /usr/bin/wineprefixcreate


To continue with Internet Explorer ies4Linux installater run again:

./ies4linux

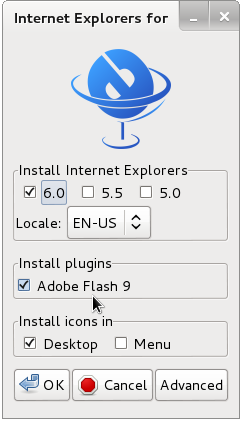
images/internet-explorer-for-linux-debian-gnu-linux-screenshot

/images/internet-explorer-4-linux-installer-debian-gnu-linu-screenshot

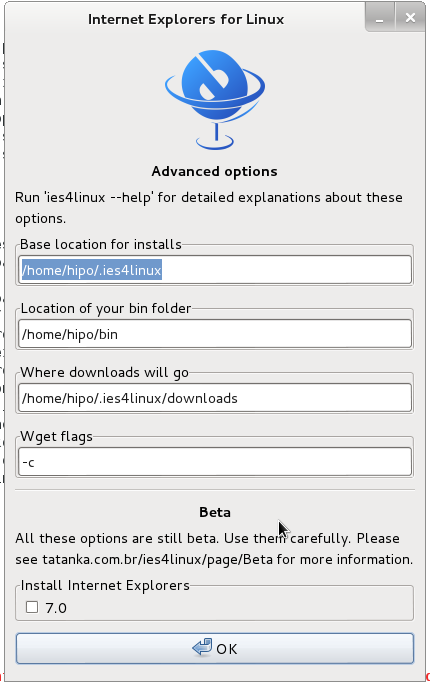
You will get the installer GUI window with selection option which Internet Explorer version you want. Choose between IE 5.0, IE 5.5 and IE 6. It is also possible to install IE 7 which is still considered beta version and is less tested and unstable, will probably lead to crashes. If you want to install also IE 7 check it as an option from Advanced menu.

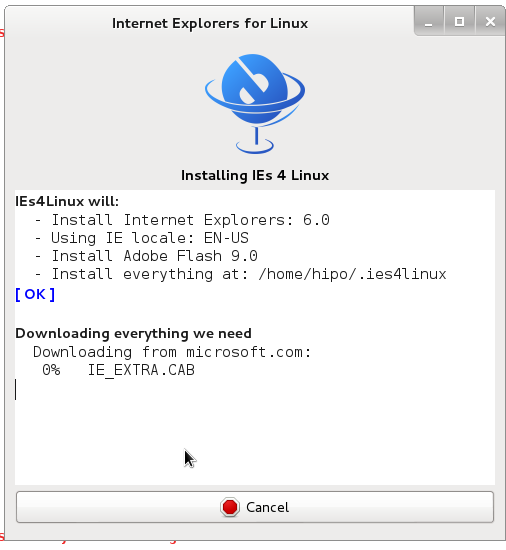
/images/ies4linux-internet-explorer-installer-debian-gnu-linux-screenshot

If you get permission errors after running ies4Linux gui installer to solve that chown recursively directory to the user with which you will be running it:
 

chown -R hipo:hipo ies4linux-2.99.0.1


Internet Explorer for Linux downloader, will connect Microsoft.com website and download DCOM, MCF and various IE required .CAB files.

If you get some ies4linux GUI installer unexpected crashes you can try to download all required IE binaries, surrounding files and flash player using no-gui installer with cmd:
 

./ies4linux –no-gui –install-corefonts

IEs4Linux 2 is developed to be used with recent Wine versions (0.9.x). It seems that you are using an old version. It's recommended that you update your wine to the latest version (Go to: winehq.com).

IEs4Linux will:
  – Install Internet Explorers: 6.0
  – Using IE locale: EN-US
  – Install Adobe Flash 9.0
  – Install MS Core Fonts
  – Install everything at: /home/hipo/.ies4linux
[ OK ]

Downloading everything we need
  Downloading from microsoft.com:
   DCOM98.EXE
   mfc42.cab
   249973USA8.exe
   ADVAUTH.CAB
   CRLUPD.CAB
   HHUPD.CAB
   IEDOM.CAB
   IE_EXTRA.CAB
   IE_S1.CAB
   IE_S2.CAB
   IE_S5.CAB
   IE_S4.CAB
   IE_S3.CAB
   IE_S6.CAB
   SETUPW95.CAB
   FONTCORE.CAB
   FONTSUP.CAB
   VGX.CAB
   SCR56EN.CAB

  Downloading from macromedia.com:
   100% swflash.cab

  Downloading from sourceforge.net
   0%   webdin32.exe[ OK ]bdin32.exe

Installing IE 6
  Initializing
  Creating Wine Prefix
Your wine does not have wineprefixcreate installed. Maybe you are running an old Wine version. Try to update it to the latest version.

To fix the error:

Your wine does not have wineprefixcreate installed. Maybe you are running an old Wine version. Try to update it to the latest version.

vim lib/functiions.sh

Go to line 36 (Type :36 in vim)

Line:

wine –version 2>&1 | grep -q "0.9." || warning $MSG_WARNING_OLDWINE

Has to be changed to:

wine –version 2>&1 | egrep -q "0.9.|-1." || warning $MSG_WARNING_OLDWINE


Also you need to substitute wineprefixcreate to wineboot (if you haven't already symlinked wineprefixcreate to winecfg – as pointed earlier in article.

To do so make following substitution in lib/install.sh and in lib/functions.sh

cp -rpf lib/install.sh lib/install.sh.bak; cat lib/install.sh |sed -e 's#wineprefixcreate#wineboot#g' > lib/install_new.sh; mv lib/install_new.sh lib/install.sh

cp -rpf lib/install.sh lib/functions.sh.bak; cat lib/functions.sh |sed -e 's#wineprefixcreate#wineboot#g' > lib/functions_new.sh; mv lib/functions_new.sh lib/functions.sh


Also it is necessery to change default corefonts download url which points to sourceforge but is failing. I've made mirror of corefonts files here
 

cp -rpf lib/install.sh lib/install.sh.bak; cat lib/install.sh |sed -e 's#http://internap.dl.sourceforge.net/sourceforge/corefonts/#www.pc-freak.net/files/corefonts/#g' > lib/install_new.sh; mv lib/install_new.sh lib/install.sh

Re-run the ies4linux console installer:
 

 ./ies4linux –no-gui –install-corefonts

….
Es4Linux installations finished!

On installation success you should get output like this
Hopefully you will see no errors like in my case, if you get the corefonts download error again re-run the installer and it should succesully download the files.

To then run ies4linux:

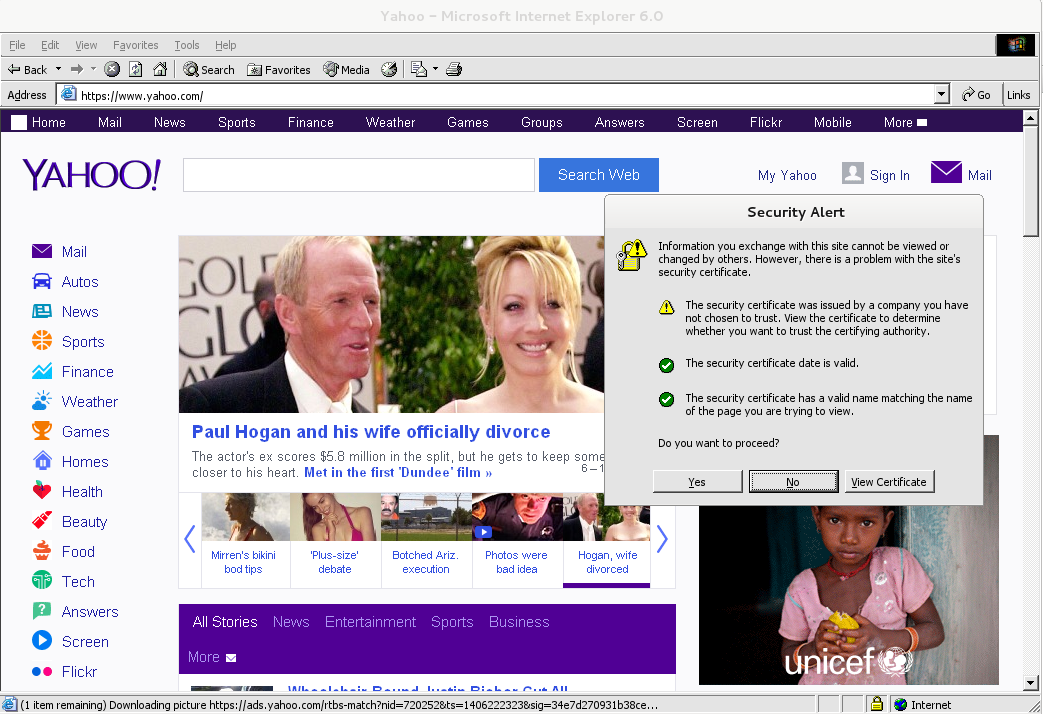
~/bin/ie6


internet-explorer-ies4linx-running-on-debian-gnu-linux-screenshot
Though Ies 4 Linux is good for basic testing it is not psosible to use the browser for normal browsing because its a bit buggy and slow.

By default Internet Explorer 6 behavior is to prompt security alert on various actions, though this might be useful for debugging it is really annoying so I personally disabled those by decreasing from:

Tools -> Internet Options -> Security -> (Security Level)
I've decreased it from Medium to Medium-Low

ies4Linux was not developed since 2008 and as of time of writting ies4linux official project website seems abandoned.