Posts Tagged ‘menu’
Saturday, April 9th, 2011 I have noticed that many blogs nowdays offer an email subscription box to simplify the subscription procedure for the blog readers.
My blog was lacking this feature so I took the time to find out how can I add an e-mail subscription box field on my blog.
My research has shown me that the easiest way to add the subscription box is by using Google’s Feedburner RSS service .
I’ve been using Google FeedBurner for quite some time and I’ve already 27 subscriptions with it.
Earlier when I added a FeedBurner subsciption to my blog I’ve blogged about it, so if you’re not acquainted on how to add FeedBurner service to your blog, you might want to read my previous article Adding RSS Feed to WordPress in conjunction with FeedBurner / WordPress add-to-any-subscribe plugin
In this article I will explain in short step by step, how to add the subscrpition email box to your wordpress I assume, that the reader has already enabled and configured registration with Feedburner, if you still haven’t just skip few lines above and check my previous article.
I would hereby skip the explanation of why feedburner as an RSS is so advantageous for every blog owner and readers and skip further to the email subscription procedure step by step instructions:
Step 1: Login to your FeedBurner Account
In my case my feedburner account url is accessed via the URL http://feeds.feedburner.com/WalkingInLightWithChrist-FaithComputingDiary
I have been properly logged in to my feedburner, so to view statistics of my current feeds subscription and to configure various variables of feedburner I had to access the URL address: http://feedburner.google.com/fb/a/myfeeds, a very quick shortcut to my feedburner account settings is also avaialable by simply accessing the URL: http://feedburner.com
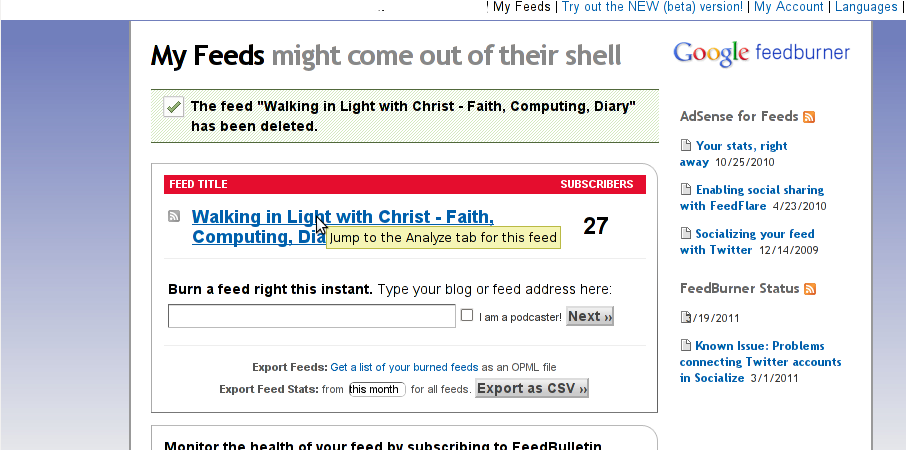
Step 2: Click on the link that says My Feeds
If you have configured feeds for your feedburner you will get the list of feedburner feeds, (one could have multiple feeds, let’s say if you have a couple of blogs or sites and you use one feedburner account to podcast your feeds for each of the separated blogs or sites.
Step 3: Click over the feed you want to have the feedburner email subscription box
Below you see the screenshot of my configured feedburner feed:
Right after clicking on your configured feed in my case Walking in Light With Christ – Faith, Computing, Diary you will see the screen:
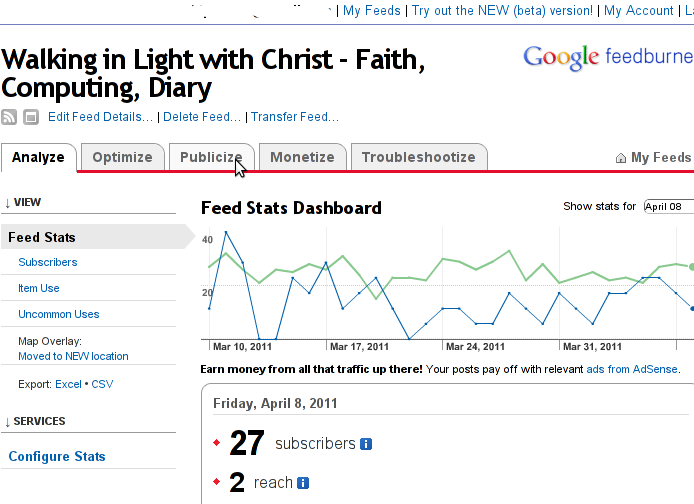
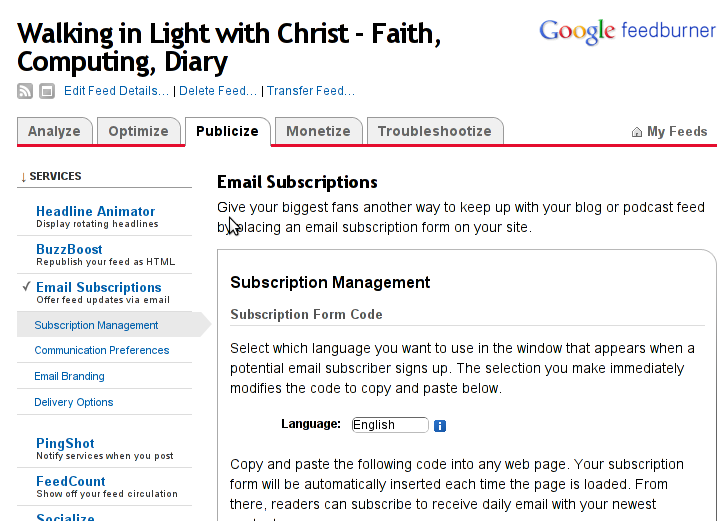
Step 4: Click on Publicize menu
You will see the following two screens while scrolling with your browser:
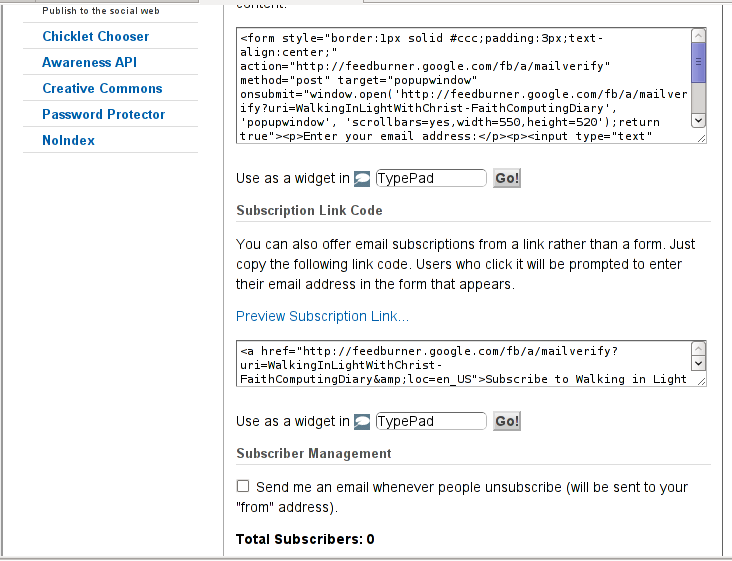
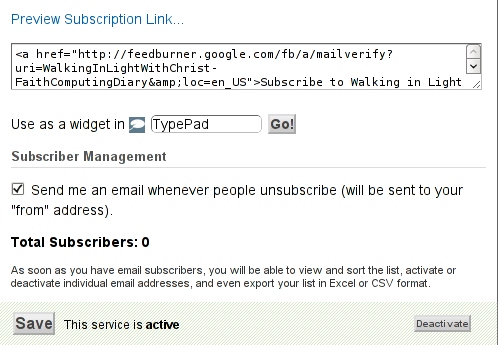
You see in the second screenshot above there is a textbox with a html form code, to set the feedburner subscription to appear on your blog you need to copy/paste this code and put it on your blog.
After copy/pasting the code, don’t forget to scroll down in your browser and save the email subscription generated form settings, (NB! if you don’t save it it want be working even if you install it on your blog).
Here is the Save button screenshot:
Step 5: Setting up feedburner email textbox to wordpress
In order to set up the just copied html and css form code you need to login to your wordpress blog admin and go to:
Appearance -> Widgets
Scroll over the Available Widgets list, find the Text Widget and press the Add button to include the Text Widget to your blog sidebar.
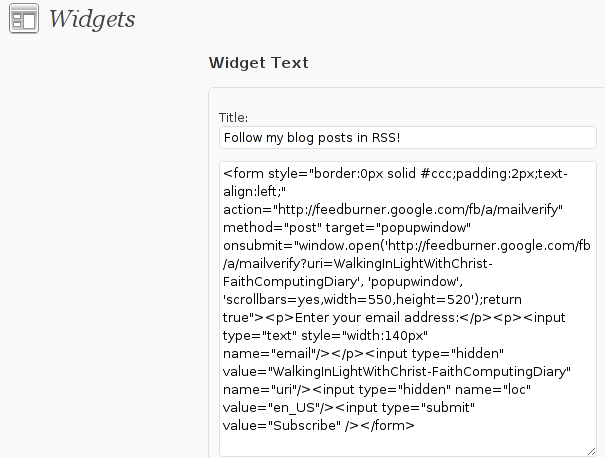
Further on the same Widgets page, go to the Sidebar menu find the just added Text Widget and click over the Edit link:

Here is my screenshot of the edit screen of the Text Widget:
Step 6. Add the feedburner email subscription box to single posts blog views
This step is not a requirement, but I found it for myself to be vital, as it might rise some more subscribers to my blog, if my blog readers finds individual indexed pages in Google.
This step is also highly dependant on the wordpress theme you use, I use the old wordpress default theme and it’s default behaviour is not to show up the wordpress sidebar, whether an individual wordpress post is clicked over, therefore to enable my feedburner subscription box for individual posts I also need to place the form code obtained from Feedburner.com’s to my templates single.php
If you’re using some kind of theme that doesn’t have the non-sidebar single post behaviour you might skip forward this step, otherwise just continue on reading.
To include the feedburner email form subscription to my single posts I edited blog/wp-content/themes/default/single.php
In the single.php file find the code:
<?php comments_template(); ?>
Immediately after the above code place your feedburner form code, like you see in below screenshot:

Step 7: Modify your form code css and javascript to make your feedburner more accustomed for your needs
Again this step is voluntary and is not necessery I’ve disliked the default way the form is formatted so I played a bit with few of it’s values to customize it to my likings, the things which I have changed a bit in the provided feedburner form code was:
- Remove the Delivered by Feedburner text from the form
-
>To do so in the issued feedburner form code below when you copy the code paste it to some text editor and remove from the code the text:<p>Delivered by <a href=”http://feedburner.google.com” target=”_blank”>FeedBurner</a></p>
- – Change the subsciption box width and height:
-
style=”width:140px”Changed that to:style=”width:120px”also I’ve changed:’scrollbars=yes,width=550,height=520’to:’scrollbars=yes,width=450,height=420’Another point of interest for adjustmnets in the feedburner for are in the form code:
- Remove feedburner subscription form default bordering
-
form style=”border:1px solid #ccc;padding:3px;text-align:center;”I’ve changed that to:form style=”border:0px solid #ccc;padding:2px;text-align:center;”By changing the css values border:1px to border:0px I have instructed the subscription box to show up without borders.
That’s all now refresh in your browser and check if the feedburner email subscription form is showing up properly to your wordpress.
To completely ensure yourself it works correctly try to subscribe yourself to the form and during your next blog post you should receive an email notifying you about the newly written article.
You can see, my blog feedburner subscription form on the blog right sidebar or on the below picture:
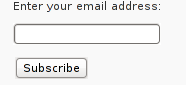
Hope that article will help somebody out there.
Tags: account settings, blogs, Button, Click, code, configure, conjunction, e mail, explanation, feature, Feed, Feedburner, form, google, mail subscription, menu, php, plugin, podcast, quite some time, screen, screenshot, scroll, sidebar, statistics, step 1, step 2, subsciption, subscription procedure, subscriptions, subscrpition, time, url, url address, variables, Wordpress
Posted in Various, Web and CMS, Wordpress | 7 Comments »
Monday, October 3rd, 2011 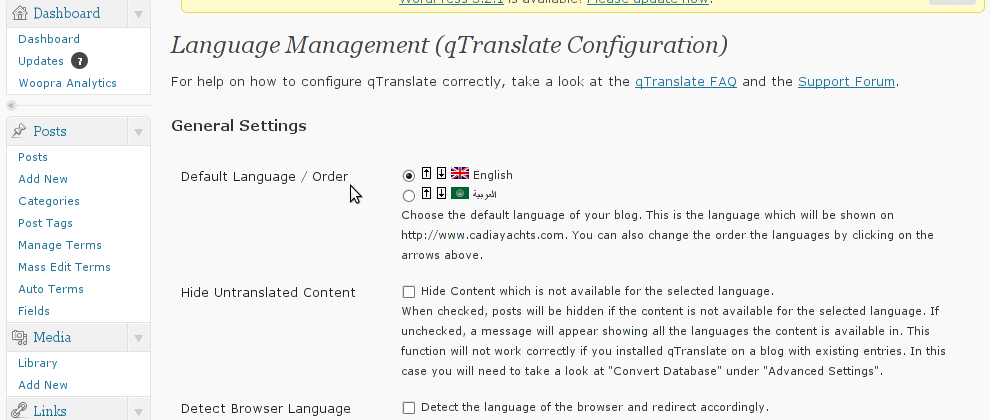
Lately, I have to deal with some wordpress based installs in big part of my working time. One of the wordpress sites needed to have added a multi language support.
My first research in Google pointed me to WPML Multilingual CMS The WordPress Multilingual Plugin
WPML Multilingual CMS looks nice and easy to use but unfortunately its paid, the company couldn’t afford to pay for the plugin so I looked forward online for a free alternative and stumbled upon QTranslate
QTranslate is free and very easy to install. Its installed the wordpress classic way and the installation went smoothly, e.g.:
1. Download and unzip QTranslate
# cd /var/www/blog/wp-content/plugins

/var/www/blog/wp-content/plugins# wget http://downloads.wordpress.org/plugin/qtranslate.2.5.24.zip

...

/var/www/blog/wp-content/plugins# unzip qtranslate.2.5.24.zip

...
Just for fun and in case the plugin disappears in future, a mirror of Qtranslate 2.5.24 is found here
2. Enable QTranslate from wordpress admin
Plugins -> Inactive -> qTranslate (Activate)
After activating the plugin, there is a Settings button from which qTranslate‘s various plugin parameteres can be tuned.
In my case my site had to support both English and Arabic, so from the settings I added support for Arabic translation to the wordpress install.
Adding Arabic is done in the following way:
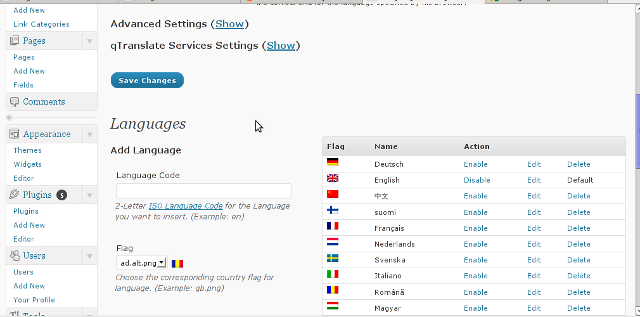
a. From the Language Management (qTranslate Configuration) from the Languages menu and the Languages (Add Languages) I had to choose a language code (in my case a language code of ar – for Arabic). Next I had to choose the Arabic flag from the follow up flag list.
In next text box Name , again I had to fill Arabic, for Locale en_US.UTF-8
The following Date Format and Time Format text boxes are optional so I left them blank.
To complete the process of adding the Arabic as a new language wordpress should support I pressed the Add Language button and the Arabic got added as a second language.
Afterwards the Arabic was added as second language, on the bottom of the left wordpress menu pane a button allowing a switch between English, Arabic appeared (see below screenshot):
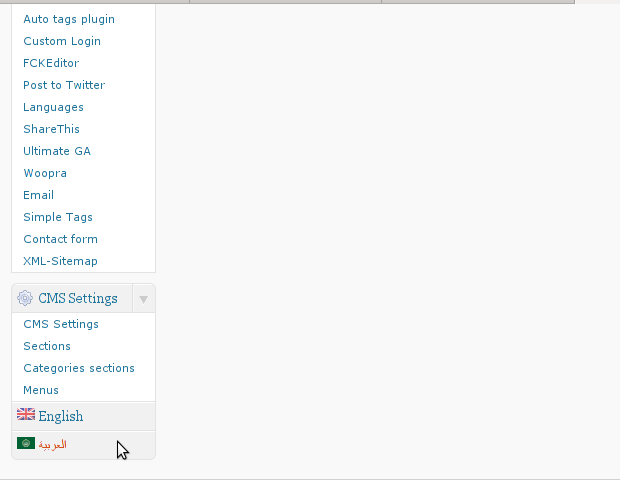
Finally to make Arabic appear as a second language of choice on the website I added it as a Widget in the Widgets menu from the AWidgets menu:
Appearance -> Widgets
In widgets I added qTranslate Language Chooser to the Sidebar without putting any kind of Title for qtranslate widget .
I found it most helpful to choose the Text and Image as an option on how to display the Language switching in the wp.
Tags: Activate, alternative, arabi, Arabic, arabic translation, Button, cms, code, company, Date, downloads, flag, flag list, format, fun, google, Inactive, installation, language button, language code, language management, language support, languages, menu, mirror, multilingual, new language, plugin, Plugins, screenshot, second language, settings button, support, text, text boxes, time, time format, time one, unzip, UTF, utf 8, wget, Wordpress, working time
Posted in Various, Web and CMS, Wordpress | 2 Comments »
Monday, February 13th, 2012 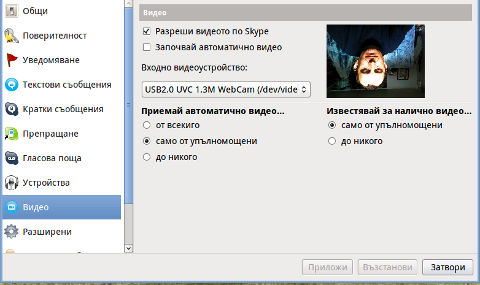
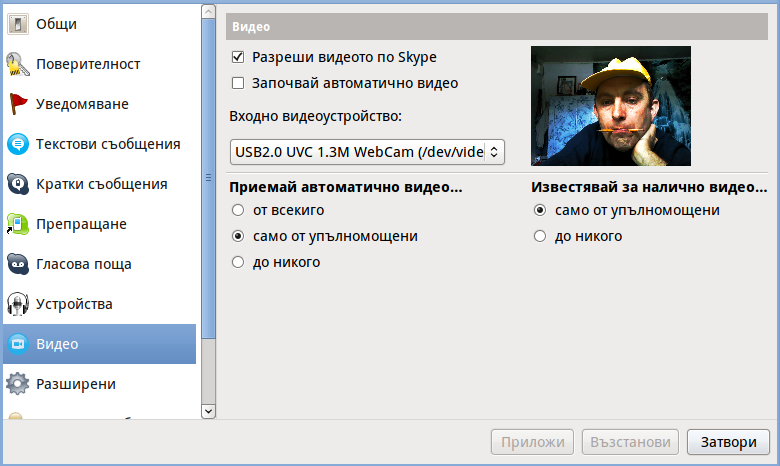
Does your camera show video correctly in cheese but shows captured video upside-down (inverted) in skype ?
This is an issue a friend of mine experienced on his Asus K51AC-SX037D laptop on both Ubuntu and Debian Linux.
As you can see in the picture above it is funny as with this bug the person looks like a batman 😉
As the webcam upside-down issue was present on both latest Ubuntu 11.10 and latest stable Debian Squeeze 6.02, my guess was other GNU / Linux rpm based distro like Fedora might have applied a fix to this weird Skype inverted video (bat human like) issue.
Unfortunately testing the webcam with Skype on latest both Fedora 16 and Linux Mint 12 appeared to produce the same webcam bug.
A bit of research for the issue online and try outs of a number of suggested methods to resolve the issue led finally to a work around, thanks to this post
Here is few steps to follow to make the webcam show video like it should:
1. Install libv4l-0 package
root@linux:~# apt-get --yes install libv4-0

...
Onwards to start skype directly from terminal and test the camera type:
hipo@linux:~$ LD_PRELOAD=/usr/lib/libv4l/v4l1compat.so skype
This is the work around for 32 bit Linux install, most people however will probably have installed 64 bit Linux, for 64bit Linux installs the above command should be little different:
hipo@linux:~$ LD_PRELOAD=/usr/lib32/libv4l/v4l1compat.so skype
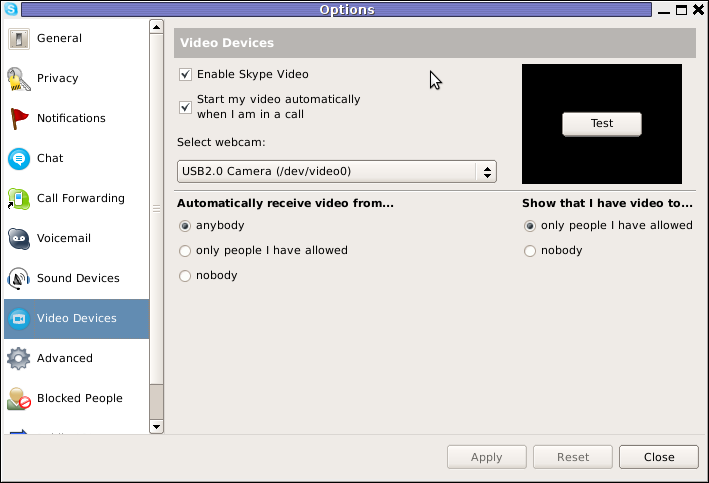
Once skype is launched test the camera and see if the camera capture is now uninverted, through menus:
S -> Options -> Video Devices -> Test
2. Create a skype Wrapper script Launcher
To make skype launch everytime with exported shell variable:
LD_PRELOAD=/usr/lib32/libv4l/v4l1compat.so
A new skype wrapper bash shell script should be created in /usr/local/bin/skype , the file should contain:
#!/bin/sh

LD_PRELOAD=/usr/lib32/libv4l/v4l1compat.so

/usr/bin/skype
To create the script with echo in a root terminal issue;
root@linux:~# echo '#!/bin/sh' >> /usr/local/bin/skype

root@linux:~# echo 'LD_PRELOAD=/usr/lib32/libv4l/v4l1compat.so' >> /usr/local/bin/skype

root@linux:~# echo '/usr/bin/skype' >> /usr/local/bin/skype

root@linux:~# chmod +x /usr/local/bin/skype
3. Edit the Skype gnome menu to substitute /usr/bin/skype Skype Launcher with /usr/local/bin/skype
Gnome 2 has a handy menu launcher, allowing to edit and add new menus and submenus (menus and items) to the Application menu, to launch the editor one has to click over Applications with last mouse button (right button) and choose Edit Menus
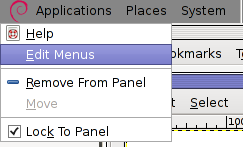
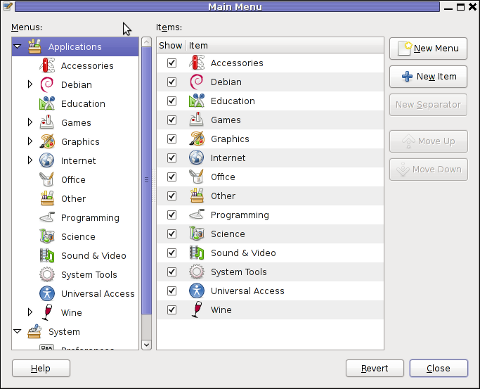
The menu editor like the one in the below screenshot will appear:
In the preceeding Launcher properties window, Command: skype has to be substituted with:
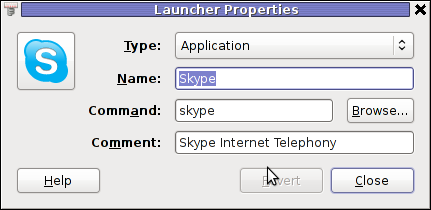
Command: /usr/local/bin/skype
For console freaks who doesn't want to bother in editting Skype Launcher via GUI /usr/share/applications/skype.desktop file can be editted in terminal. Inside skype.desktop substitute:
Exec=skype
with
Exec=/usr/local/bin/skype
As one can imagine the upside-down video image in Skype is not a problem because of Linux, but rather another bug in Skype (non-free) software program.
By the way everyone, who is using his computer with Free Software operating system FreeBSD, Linux etc. knows pretty well by experience, that Skype is a very problematic software; It is often a cause for system unexpected increased system loads, problems with (microphone not capturing), camera issues, issues with pulseaudio, problem with audio playbacks … Besides the long list of bugs there are unexpected display bugs in skype tray icon, bugs in skype messanger windows and at some rare occasions the program completely hangs and had to be killed with kill command and re-launched again.
Another worrying fact is Skype's versions available for GNU / Linux and BSD is completely out of date with its "competitor" operating systems MS Windows, MacOS X etc.
For people like me and my friend who want to use free operating system the latest available skype version is not even stable … current version fod download from skype's website is (Skype 2.2Beta)!
On FreeBSD the skype situation is even worser, freebsd have only option to run Skype ver 1.3 or v. 2.0 at best, as far as I know skype 2.2 and 2.2beta is not there.
Just as matter of comparison the latest Skype version on Windows is 5.x. Windows release is ages ahead its Linux and BSD ver. From a functional point of view the difference between Linux's 2.x and Windows 5.x is not that much different, what makes difference is is the amount of bugs which Linux and BSD skype versions contain…
Skype was about 6 months ago bought by Microsoft, therefore the prognosis for Skype Linux support in future is probably even darker. Microsoft will not probably bother to release new version of Skype for their competitor free as in freedom OSes.
I would like to thank my friend and brother in Christ Stelian for supplying me with the Skype screenshots, as well as for being kind to share how he fixed his camera with me.
Tags: Asus, Auto, bash shell script, batman, BSD, Button, camera capture, camera show, camera type, debian gnu, Desktop, distro, Draft, exec, fedora, file, gnu linux, gt options, hipo, laptop, launcher, ld, linux rpm, menu, Microsoft, person, PRELOAD, quot, root, root linux, rpm, Shell, show, Skype, software, squeeze, terminal, test, Ubuntu, ubuntu linux, video, video devices, web camera, webcam, work, wrapper script
Posted in Linux, Linux and FreeBSD Desktop, Skype on Linux | 29 Comments »
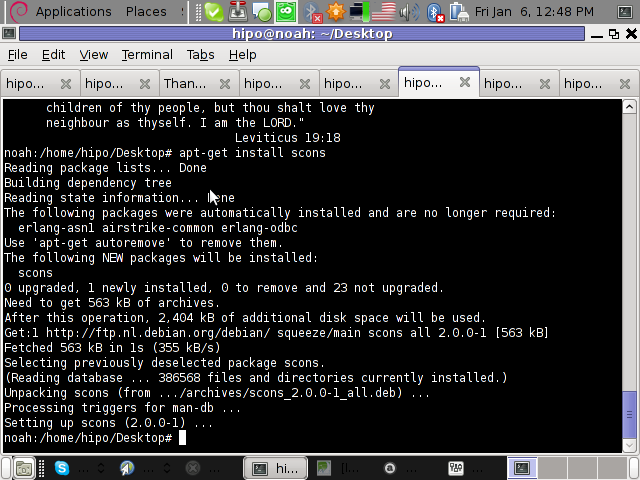
Saturday, January 28th, 2012 I've earlier blogged on playing Apogee's Raptor Shadows of Death arcade on GNU / Linux with dosbox
All the old school raptor addicts will be interested to hear Kazzmir (Jon Rafkind) a free software devotee developer has created a small game resembling many aspects of the original Raptor arcade game.
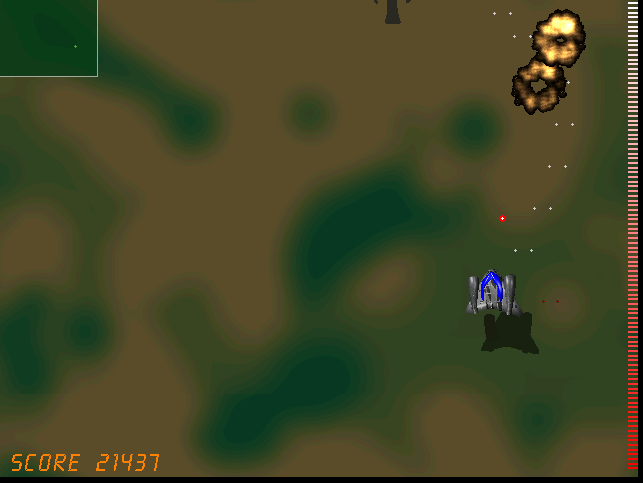
The game is called Rafkill and is aimed to be a sort of Raptor like fork/clone.
Originally the game was also named Raptor like the DOS game, however in year 2006 it was changed to current Rafkill in order to avoid legal issues with Apogee's Raptor.
The game is not anymore in active development, the latest Rafkill release is from January 2007, anyhow even for the 2012 it is pretty entertaining. The sound and music are on a good level for a Linux / BSD shoot'em'up free software game . The graphics are not of a top quality and are too childish, but this is normal, since the game is just one man masterpiece.
Rafkill is developed in C/C++ programming language, the game music engine it uses is called DUMB (Dynamic Universal Bibliotheque). By the way DUMB library is used for music engine in many Linux arcade games. DUMB allows the Linux game developer to develop his game and play a music files within different game levels in "tracked" formats like mod, s3m, xm etc.
The game is available in compiled form for almost all existent GNU/Linux distributions, as well as one can easily port it as it is open source.
To install Rafkill on Debian, Ubuntu, Xubuntu and Linux Mint en other Debian based distros
root@debian:~# apt-get install rafkill
Installing on Fedora and other rpm based is with yum
debian:~# apt-get install rafkill

...
Once rafkill is installed, in order to start it on Debian the only way is using the rafkill (/usr/bin/rafkill) command. It appears the deb package maintainer did not wrote a gnome launcher file like for example /usr/share/applications/rafkill.desktop
Just to explain for all the GNOME noobs, the .desktop files are a description file GNOME reads in order to understand where exactly to place certain application in the (Gnome Applications, Places, System …) menu panel.
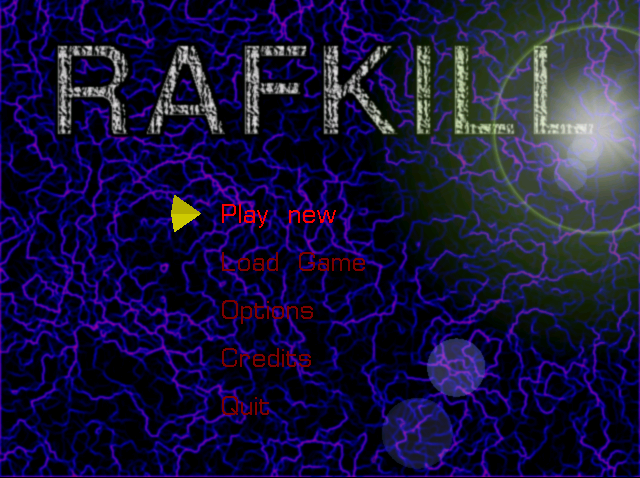
Even though it miss the .desktop, it is launchable via Applications menu under the Debian section e.g. to open it from the GNOME menus you will have to navigate to:
Applications -> Debian -> Games -> Action -> Rafkill
This "shortcut" to launch the game is quite long and hard to remember thus it is handy to directly launch it via xterm:
hipo@debian:~$ rafkill
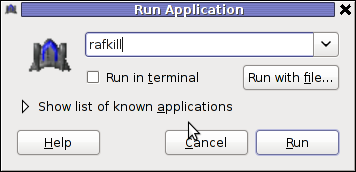
or by pressing ALT+F2 and typing rafkill :
Starting the game I got some really ugly choppy music / sound issues.
My guess was the fizzling sounds were caused by some bug with the sound portions streamed through pulseaudio sound system.
To test if my presume is correct, stopped pulseaudio and launched rafkill once again:
hipo@debian:~$ pulseaudio -k

hipo@debian:~$ rafkill
This way the game was counting on ALSA to process sound en the sound was playing perfectly fine.
I solved this problem through small wrapper shell script. The script did kill pulseaudio before launching rafkill and that way solve gchoppy sound issues, once the game execution is over the script starts pulseaudio again in order to prevent all other applications working with pulseaudio.
Finally, I've placed the executable script in /usr/bin/rafkill :
Here is the script:
#!/bin/bash

pulseaudio --kill

/usr/games/rafkill

pulseaudio --start
You can download rafkill.wrapper.sh here
Or write in root terminal:
debian:~# cd /usr/bin

debian:/usr/bin:# wget https://www.pc-freak.net/bshscr/rafkill.wrapper.sh

debian:/usr/bin:# mv https://www.pc-freak.net/bshscr/rafkill.wrapper.sh rafkill

debian:/usr/bin:# chmod +x rafkill
Interesting in Ubuntu Linux, rafkill music is okay and I suppose the bug is also solved in newer Linux distributions based on Ubuntu. Probably the Debian Squeeze pulseaudio (0.9.21-4) package version has a bug or smth..
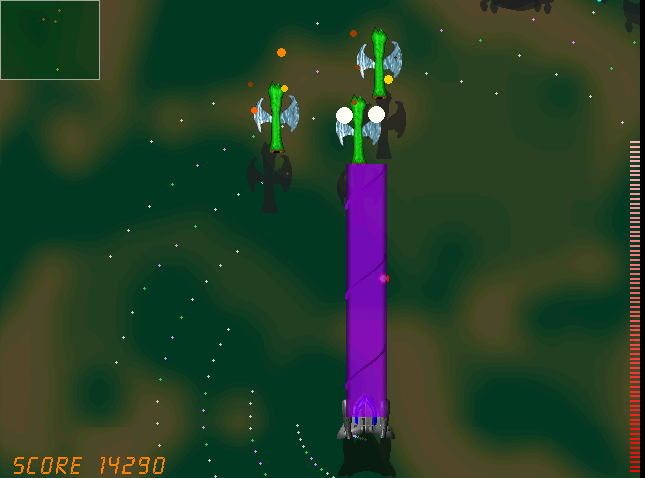
After the change the game music will be playing fine and the game experience is cooler. The game is hard to play. Its really nice the game has game Saves, so once you die you don't have to start from level 1.
I've seen rafkill rolling around on freebsd.org ftps under the ubuntu packages pool, which means rafkill could probably be played easily on FreeBSD and other BSDs.
Enjoy the cool game 😉
Tags: active development, arcade game, arcade games, Auto, BSD, c c programming language, c programming language, clone, deb package, Desktop, desktop files, different game, dos game, Draft, Engine, file, form, Free, game developer, game levels, game music, Gnome, hipo, level, Linux, linux distributions, linux game, menu, mod, music engine, Open, open source clone, package, package maintainer, pulseaudio, quot, script, shadows of death, share applications, small game, software, software game, software open source, Ubuntu, Universal, wrapper, year
Posted in Games Linux, Linux, Linux and FreeBSD Desktop | 1 Comment »
Friday, January 20th, 2012 Today I had a task to change an old CRT Monitor to LCD BENQ Model FP61E on a computer running Microsoft Windows XP SP3.
Changing phyiscally the monitors and restarting the computer to load with the new BENQ monitor ended up with the LCD Monitor showing a blank screen with error:
Out of Range
making the computer completely unusable.
Thanksfully in Windows Safe Mode the monitor was able to display the screen properly, so I had an option to operate somehow on the pc
My guess was that the Out of Range monitor problems were caused by an incorrect (monitor unsupported resolution).
Therefore what I tried as a fix to make it work was:
1. Enter Windows Safe Mode and change (lower the resolution) to 640×480, and restart the PC.
Unfortunately using this classical way to fix such issues failed… so I thought of some options.
2. Disable the video card NVIDIA Riva TNT2 Model 64 driver and check if this will make any difference.
I come up with the idea the Out of Range LCD issues might be caused by the Video card driver cause I've noticed in safe mode a standard VESA like VGA Driver shipped with Windows worked just fine.
To Disable the currently loaded NVIDIA Riva TNT2 Model 64/ Model 64Pro I used:
System -> Device Manager -> Hardware (Tab) -> Display Adapters
Clicking on Display Adapters the NVIDIA Riva TNT2 Model 64 appears using the option menu on it one can choose to disable the driver.
Further on restart Windows, to test if the XP will load properly with disabled NVidia video drivers.
Onwards it was clear the whole Out of Range issues were caused by some kind of conflict between the LCD BENQ FP61E Monitor and the NVIDIA Riva TNT2 Model 64
Often latest video drivers solves hardware incompitability issues and fix many bugs, upgrading the driver to latest is always a good idea.
3. Therefore I Upgraded the NVIDIA Riva TNT2 64 driver (using Safe Mode) to the latest available from Nvidia's official site.
Weirdly Upgrading NVidia Riva TNT2 drivers to the latest did not fix the Out of Range blank screen error.
After a bit of thinking on what to do to make the Monitor work fine with the Nvidia driver, I thought of completely uninstalling the Nvidia drivers and installing them again might be a fix.
In my previous experience with Windows at many occasions, uninstalling a driver failing to properly work and installing it again with a working version was a good fix.
4. Uninstall the NVIDIA Riva TNT2 Model and Install the latest driver.
Uninstalling and Installing the Video driver had to be done in Windows Safe Mode again, in normal mode the windows was not displaying anything.
After The driver installation program completes the installation it requires a restart. After the restart the Video driver gets loaded fine and Windows loaded up in Normal mode as usual 😉
Tags: Auto, blank screen, card, cause, change, CRT, device manager, Display, display adapters, Draft, hardware tab, Install, installation, manager gt, menu, microsoft windows, Model, monitor problems, nvidia, nvidia riva tnt2 64, nvidia riva tnt2 64 driver, nvidia riva tnt2 model 64, nvidia video drivers, Onwards, option, option menu, range resolution, resolution problems, riva tnt2 model 64, Safe, screen, tnt2 model 64 driver, Uninstalling, Upgraded, vesa, VGA, vga driver, video card driver, Weirdly, windows safe mode, work
Posted in Everyday Life, Windows | No Comments »
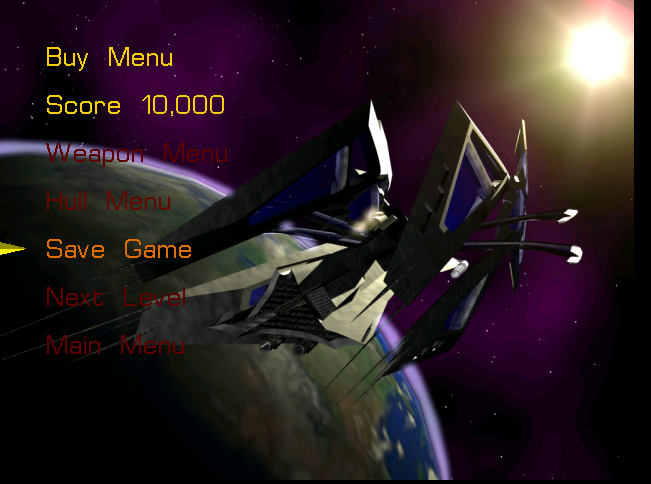
Friday, January 6th, 2012 I'm testing some old school arcade games, available from Debian's package repositories and quitting one of the games ended me up with a GNOME Screen Resolution of 640×480 pixels.
I wanted to revert back to the Classics resolution, so what I would normally do to do that is use >GNOME menus:
System -> Preferences -> Monitors
In that huge screen resolution on my 14 inch lenovo notebook screen, however the System menu cannot fit in 640×480 resolution. You can see the non-screen fitting System on the screenshot below:
Having this situation, I needed a way to change back to my normal daily used 1024x768px screen resolution to continue my daily work by some other way.
One possible solution I thought of was Logging Off Gnome and logging again. Loggig off and log on again would usually restart the initiated GNOME session and therefore will reset the screen resolution to my default 1024×768 / 32 bit color.
Having the unobservable System gnome panel menu on my screen however made using the usual Log off procedure via System -> Log Out myusername impossible…
Another possible way to actually restart my screen and hence revert back to my original resolution is achiavable using the classical restart X server key switch CTRL + ALT + backspace (bckspc) . Though this was a possible approach to the situation, I had a bunch of programs already running on my desktop and I did not wanted to interrupt my desktop session, what I was looking for is simply change the screen resolution size .
With all said I had to look up for alternative way (preferably easy) way, to revert back my screen resolution to my desired 1024×768.
As a console guy, I was interested if there is some kind of possibility to change my GNOME resolution directly using xterm or gnome-terminal , after a bit of check up online, I've found few threads started by people who were looking just like me for a way to change GNOME / KDE screen resolution size on various distributions Linux desktops as well on Free/Net/Open/BSDs. The answer to the question on few places was the command xrandr which I had used some few years ago to initiate remote X server connections via SSH
xrandr is actually a great tool part of the x11-xserver-utils
Actually xrandr is capable of doing a few things besides setting the screen resolution size, just to name a few it supports change the screen orientation, reflection of the output of the screen, adjust brightness, set color gamma etc. etc.
It is good to mention that xrandr changes the resolution not on a GNOME level but on Xorg server level.
Using xrandr to change the screen resolution appeared to be very easy.
1. First I issued xrandr to check all the supported xrandr resolutions by my X server
hipo@noah:~/Desktop$ xrandr Screen 0: minimum 320 x 200, current 1024 x 768, maximum 8192 x 8192VGA1 disconnected (normal left inverted right x axis y axis)LVDS1 connected 1024x768+0+0 (normal left inverted right x axis y axis) 304mm x 228mm 1024x768 60.0*+ 50.0 800x600 60.3 56.2 640x480 60.0 59.9 TV1 disconnected (normal left inverted right x axis y axis)hipo@noah:~/Desktop$
From the output you can see I have 3 basic resolutions configured in my Xorg, I can switch between.
2. To switch to my previous default screen resolution
hipo@noah:~/Desktop$ xrandr -s 1024x768
After using xrandr command to revert back to my default screen size, I realized there is two other (partially command line partially gui) way to change to 1024×768 pixels.3. Through launching gnome Control Center and searching for Monitors menu.
If one prefers this way he can;
i) press ALT+F2 to invoke Gnome's Run Application dialog
ii) issue gnome-control-center command:
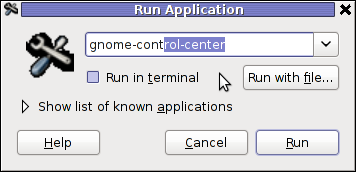
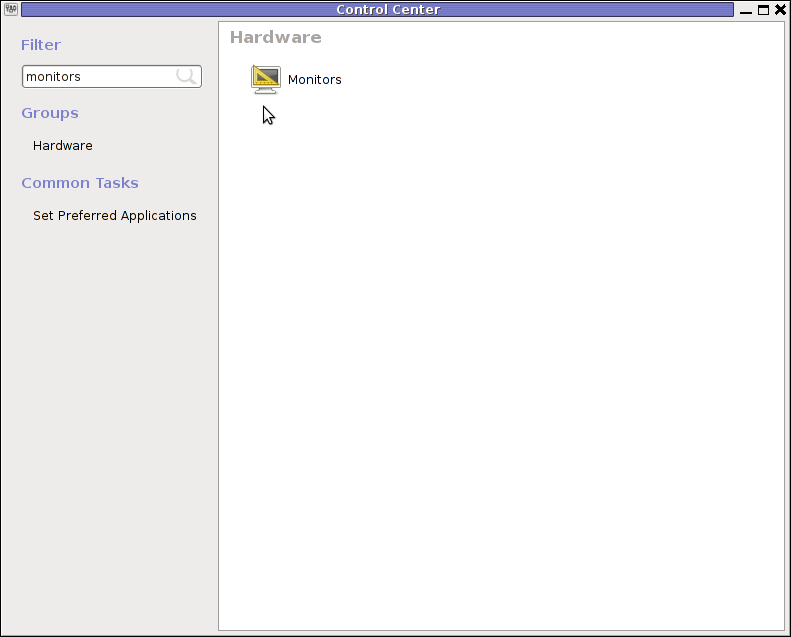
4. By invoking gnome's Control Panel -> Monitors settings window by a command
hipo@noah:~/Desktop$ gnome-display-properties
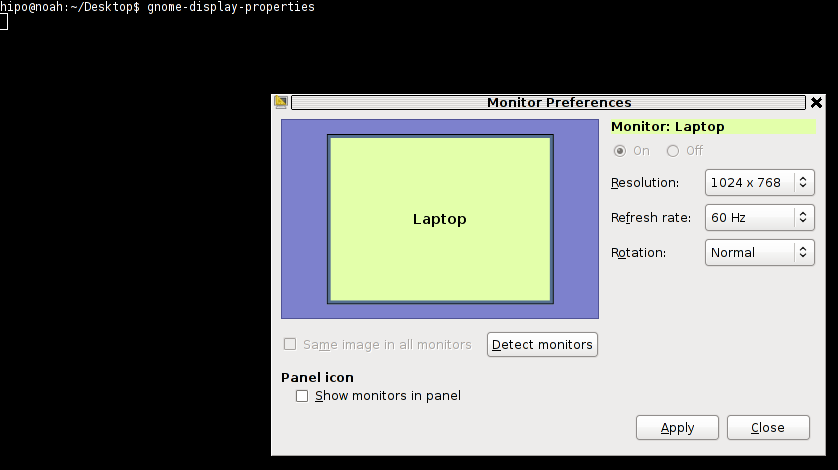
Tags: Alt, arcade games, Auto, bckspc, change, debian gnu, Desktop, Draft, freebsd, Gnome, gnome panel, gnome resolution, gnu linux, hipo, key switch, level, Linux, menu, menus, Monitors, noah, notebook, old school, package, panel menu, possibility, possible solution, repositories, resolution size, right, screen, screenshot, size, system menu, terminal, threads, work, x server, Xorg, xterm
Posted in FreeBSD, Linux and FreeBSD Desktop | 2 Comments »
Thursday, December 22nd, 2011 Do you remember the old arcade spaceship shooter Xenon 2 Megablast? I do 😉 For all those who are too young to remember, here are two screenshots:
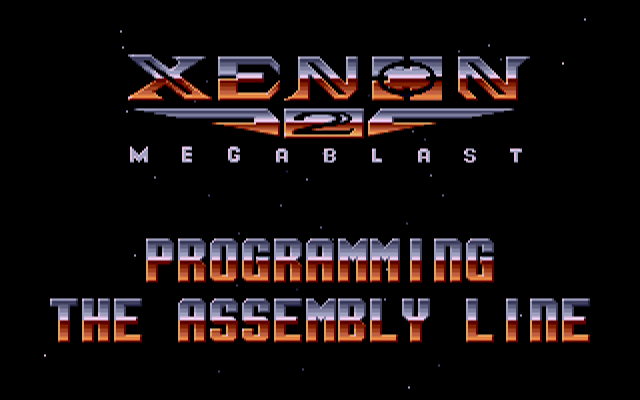
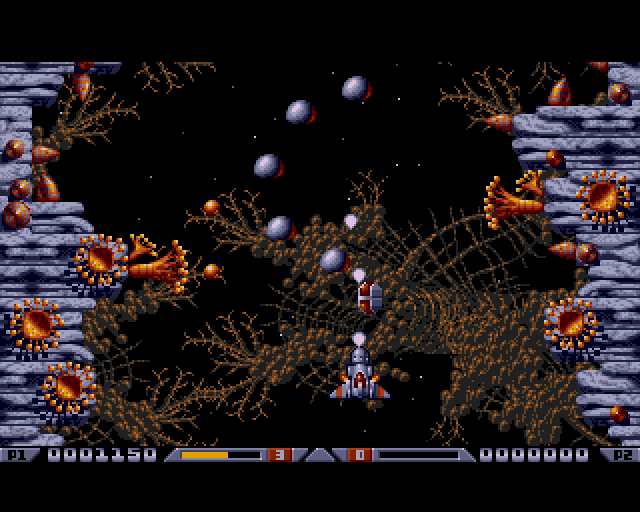
Even though Xenon 2 Megablast original can now be played using dosbox DOS emulator. Its interesting to mention I've found two Linux games that more or less can be qualitified to resemble Xenon 2.
The games are Native Free Software games and existing in package repositories of most Linux distributions and *BSD port trees.
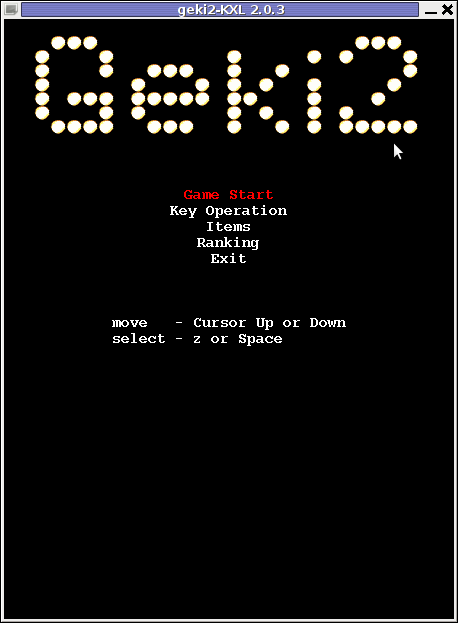
Geki 2 and Geki 3 are of a less quality to Xenon but still, the game experience is nice and is among the Arcade shooter games to bring you fun in the boring days if you're on GNU / Linux or FreeBSD Free OS platforms.
Installing Geki2 and Geki3 on Debian and Ubuntu Linux is standard with apt:
debian:~# apt-get install geki2 geki3

...
On Debian GNU / Linux , after installed the games would not create GNOME Applications -> Games -> game startup shortcuts, however the game startups will get added in GNOME Applications Menu under:
Applications -> Debian -> Games -> Action -> Geki 2

and

Applications -> Debian -> Games -> Action -> Geki 3
The games can be launched also manually with commands:
geki2
or
geki3
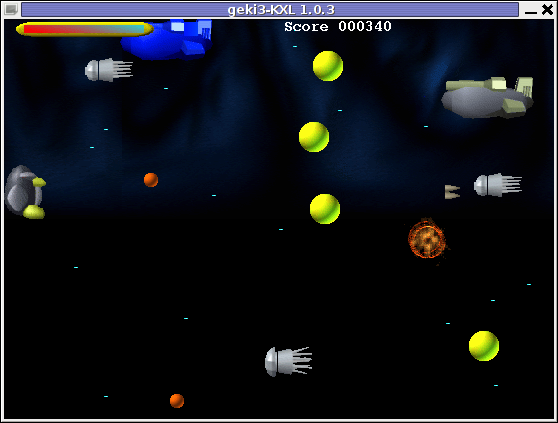
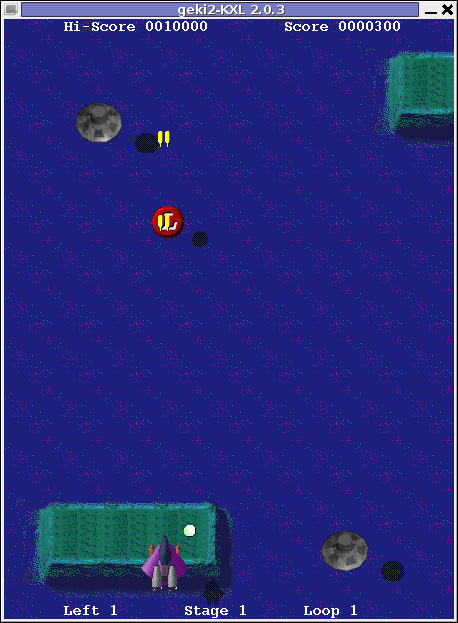
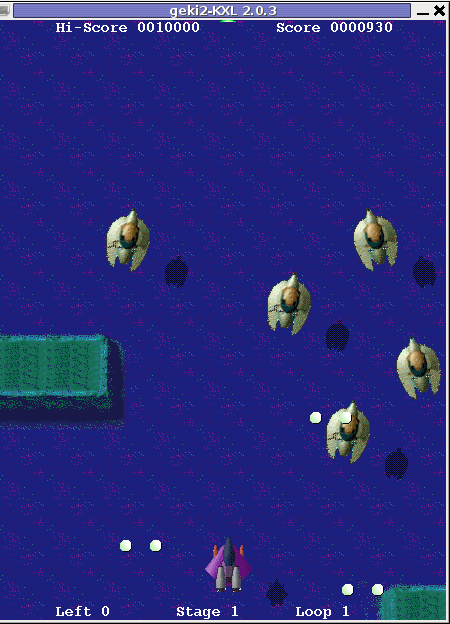
Geki 2 is a way closer to Xenon 2 as it has similar look and feel and the same vertical direction the spaceship is navigated.
In Geki 3 still the shoot 'em' up spaceship like arcade is present, however instead of penguin you have to fly a flying penguin, as well as the spaceship move direction is horizontal.
Both the games have the same sound and music effects. The game music and effects are not of top quality but are not bad. In general the games surely gives some of the arcade atmosphere.
Geki 2 Xenon 2 Megablast like on Debian Linux
In the tradition of the arcade games at the end of each level in both games you face the Level Boss Enemy, you should destroy.
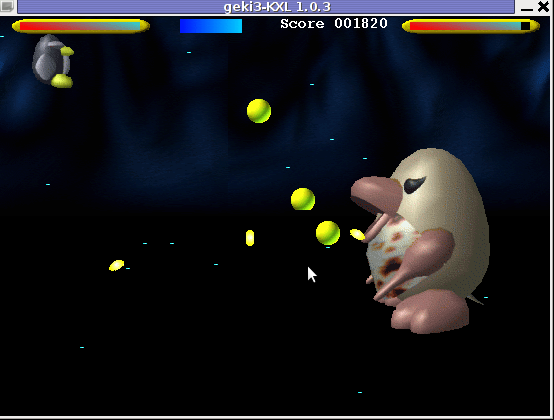
As you can see in below's screenshot the overall graphics of GEKI 3 is poorer while compared to GEKI 2
still GEKI 2 gampley is fun and addictive and I would say not less enjoyable than GEKI 2.
At times I even think that Geki 3 is more fun because it is more dynamic.
Maybe other reason, why I enjoyed more Geki 3 is also the fact that Geki 2 is a way harder to play. Dying only 3 times in the game you get GAME OVER and the next game you're started from the beginning of the same level you died in …
Something really annoying that affects both the games; there is no option to play them in Fullscreen mode! ARGH!
Game controls for Geki2 and Geki3 are identical as follows:
Up - Arrow up key

Down - Down arrow key

Right - Right arrow key

left - Left arrow key

Shoot - z or Space

Pause - s
Geki2 and Geki3 are fun and can kill some time, but definitely aren't that (professional) as other spaceship shoot'em'up arcades for Linux and BSD. Games like Starfighter , Critical Mass or powermanga .
Lest that they are two worthy to install and play on your Free Software OS.
Tags: action gt, arcade shooter, atmosphere, boring days, BSD, debian gnu, Dying, Free, free software games, fun, game experience, game music, game startup, Geki, Gnome, gnome applications, gnu linux, gt games, key, level, linux games, megablast, menu, most linux distributions, move, music effects, nbsp, option, os platforms, package, penguin, reason, screenshot, shooter, shooter games, software, something, Space, spaceship, startup, time, Ubuntu, ubuntu linux, vertical direction, xenon 2
Posted in Entertainment, Games Linux, Linux, Linux and FreeBSD Desktop | 1 Comment »
Wednesday, December 14th, 2011 
UNetbootin is a nice easy to use Free Software Universal mutli OS program that makes creation of Bootable USB Stick Linux, FreeBSD, NetBSD and other free operating systems a piece of cake
UNetbootin support the three major operating system architectures Windows, Mac OS X and GNU / Linux .
In Debian and Ubuntu based distributions Unetbootin is available as a deb binary package:
debian:~$ dpkg -l |grep -i 'usb' |grep -i 'install'

ii unetbootin 471-2

installer of Linux/BSD distributions to a partition or USB drive
To install it with apt:
debian:~# apt-get install unetbootin

...
debian:~# unetbootin
Alternatively for all those who prefer to run it via the GNOME Application menu follow to the menu path:
Applications -> System Tools -> Unetbootin
If the program is launched with non privileged account (like via GNOME Application menu), in order to to properly tamper with any connected USB Flash drive you will be asked about the super user password.
The shipped uniboot version in current Debian stable version Squeeze is 471-2 is a bit outdated. For everyone eager to use the latest version which as of time of writting is 565 check out UnetBootin’s Official Homepage on SourceForge
Installing the distributed binary of unetbootin downloadable from its website is a trivial one. Simply download the file from the Download (for Linux) link and run the binary unetbootin-linux-565:
debian:~$ ./unetbootin-linux-565
There is one annoying thing about the latest downloadable (static compiled) unetbootin version, it was built to run using KDE’s QT library and therefore the interface that poped up while trying it was KDE like, pitily did not take advantage of my native GNOME GTK2 library :
 Though this little note, unetbootin developers has done a truly great job! I tried unetbootin and was more than pleasently surprised that it prepares bootable USB sticks with only 4 mouse clicks!!! 😉
The program worked out of the box without any external or additional hacks like many of the programs I daily use it just worked 😉
UNetbootin has a thoroughful list of Free Software operating system distributions in the distributions list. Many of the offered Open Source & Free Software distributions has even possibility of installing a multiple versions of the respective distro.
Here is a complete list of all the Free & Open Source Operating Systems, unetbootin program can burn and make bootable on USB stick.
- 1. Ubuntu
- 2. Debian
- 3. Fedora
- 4. PCLinuxOS
- 5. Linux Mint
- 6. Sabayon Linux
- 7. Gentoo
- 8. OpenSUSE
- 9. MEPIS
- 10. Zenwalk
- 11. Arch Linux
- 12. Slax
- 13. Dream Linux
- 14. Damn Small Linux
- 15. SliTaz
- 16. Elive
- 17. CentOS
- 18. Puppy Linux
- 19. Mandriva
- 20. FreeBSD
- 21. LinuxConsole
- 22. Frugalware Linux
- 23. NetBSD
- 24. xPUD
- 25. gNewSense
- 26. GeeXboX
- 27. Gujin
- 28. Kaspersky Rescue Disc
- 29. NimbleX
- 30. Sabayon Linux
- 31. Puppy Linux
- 32. Mandriva
- 33. SuperOS
- 34. Xubuntu
- 35. Parted Magic
- 36. Super Grub Disk
- 37. Smart Boot Manager
- 38. 0phcrack
- 40. FreeNAS
- 41. NetBootCD
- 42. FreeDOS
- 43. Dr. Web Antivirus
- 44. CloneZilla
- 45. Kubutun
- 46. BackTrack
To burn and make bootable on the USB flash drive any of the listed distributions, choose the distribution name and version number as well as the Drive: (which usually will be selected by default to the first sticked USB drive let’s say /dev/sdb1).
Afterwards press on the OK button and that’s it, lay down your back and wait until the distribution is downloaded from the Internet, burned into the USB pendrive and made bootable.
I’ve tested Unetbootin with two distributions;
1. Xubuntu 10_04_live and;
2. Fedora 13
Both of the distributions got burned properly to the USB drive usng the CD images and booted fine on a Packard Bell notebook on.
Having an USB drive with LiveCD GNU / Linux or BSD everywhere with you is hand and is a sort of substitute to the old linux boot floopy disk of Tomsrtbt linux distribution, I used to keep everywhere with me . Now I can move to any PC installed with Windows and use my preferred Free Software OS using an USB Stick.
Besides that, there are laptops whose CD-ROM / DVD-ROM drive is broken and therefore if one wants to re-install an improperly working Windows XP / Vista / 7 and substitute with Free operating system this task is only possible using USB Flash Disk or NetBoot Install.
Installing using USB has its advantageous as you don’t depend on the network as well as the installation from USB is in most of the cases few times faster.
There are plenty of other USB Linux installer programs, most of them however are only available with a Windows version.
Here are few prgrams which can be used to burn a number of Linux and *BSD installations using Microsoft Windows to create Linux / BSD liveUSB:
- Universal USB Installer – http://live.learnfree.eu/download
- YUMI – Your Universal Multiboot Installer – http://www.pendrivelinux.com/yumi-multiboot-usb-creator/
- xBOOT – http://sites.google.com/site/shamurxboot/
I was happy to find out ’bout the existence of Universal USB Installer (this proggie written in Python) is made by a Bulgarian mate! Proud to be Bulgarian 😉 Universal USB Installer is actually multiplatform since written in Python and therefore can be used to burn a LiveUSB on GNU / Linux and (possibly on FreeBSD?)I would be glad to get feedback from other people who had experience with programs to prepare LiveUSB bootable sticks on Free Software OSes. Does anybody tried that on who *BSDs? Cheers 😉
Tags: annoying thing, application menu, binary package, BSD, bsd distributions, cake, debian gnu, Disk, distribution, dpkg, drive, drive memory, Free, free operating systems, Gnome, gnome application, gnu linux, liveUSB, mac os x, menu, menu path, nbsp, NetBSD, number, Open, os program, package, package debian, partition, password, piece, privileged account, qt library, software, sourceforge, stable version, substitute, support, system architectures, Ubuntu, UnetbootinIf, uniboot, Universal, usb flash drive
Posted in FreeBSD, Linux, Linux and FreeBSD Desktop, Linux Audio & Video, System Administration, Various | 2 Comments »
Monday, July 4th, 2011 If you’re administrating a Cpanel server and you come across an error message while trying to use cpanel’s domain addon menu and you want to fix that you will need to do the following logged in as root over an ssh connection:
1. Remove dns related stuff in /var/named and /var/named/cache
cpanel:~# rm -f /var/named/mydomain.com.dbcpanel:~# rm -f /var/named/cache/mydomain.com.db
2. Edit the current used httpd.conf on the server and remove all virtualhost domain definitions
cpanel:~# vim /etc/httpd/conf/httpd.conf

# find the mydomain.com Virtualhost definitions and completely remove them
3. Remove any domain occurance in /var/cpanel/users
cpanel:~# cd /var/cpanel/users/

cpanel:/var/cpanel/users# grep -rli 'mydomain.com' *

/var/cpanel/users/hipo

cpanel:~# vim /var/cpanel/users/hipo

# remove in above file any domain related entries
3. Remove anything related to mydomain.com in /etc/userdomains and /etc/localdomains
cpanel:~# vim /etc/userdomains

cpanel:~# vim /etc/localdomains

# again look inside the two files and remove the occuring entries
4. Edit /etc/named.conf and remove any definitions of mydomain.com
cpanel:~# vim /etc/named.conf

# in above file remove DNS configuration for mydomain.com
5. Run /scripts/updateuserdomains
cpanel:~# /scripts/updateuserdomains
6. Delete any valias configurations
cpanel:~# rm -f /etc/valiases/mydomain.com

cpanel:~# rm -f /etc/vdomainaliases/mydomain.com

cpanel:~# rm -f/etc/vfilters/mydomain.com
7. Remove any occurance of mydomain.com in the user directory which experiences the Error from park wrapper: error
Let’s say the user testuser is experiencing the error, in that case you will have to remove:
cpanel:~# rm -rf /home/testuser/public_html/mydomain.com
8. Restart Cpanel
This step is optional though I think it’s also a good practice as it will at least restart the Cpanel webserver (Apache or Litespeed depending on your conf)
cpanel:~# /etc/init.d/cpanel restart
Now try to add up the domain via the Cpanel domain addon interface, hopefully the issue should be fixed by now. If not you might also check if there is no some record about mydomain.com in the mysql server.
Cheers 😉
Tags: addon, apache, Cheers, com, comcpanel, connection, cpa, dbcpanel, Delete, DNS, domain definitions, error message, file, hipo, init, litespeed, menu, mydomain, occurance, occuring, Restart, rf, rli, root, scripts, ssh, ssh connection, testuser, userdomainscpanel, vim, wrapper
Posted in Linux, System Administration | No Comments »
Monday, June 20th, 2011 After my Debit VISA card has been declined by my Bank (had to issue a new one), which of course had a new card number and a new secret code.
Therefore to continue be able paying for domains in Godaddy I had to Update my Credit Card information in Godaddy‘s website.
Here is how I updated my Credit card details:
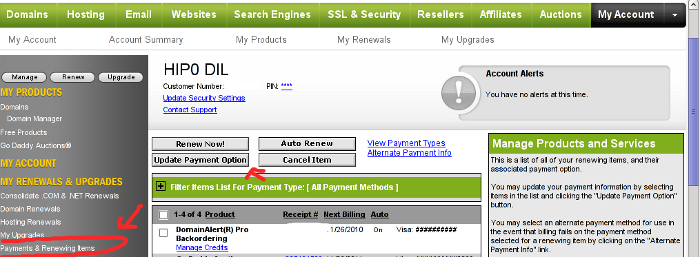
1. Login to Godaddy
My Account -> Payments and Renewing Items
2. Click on Update Payment Options
Here is a screenshot with pointers of where one should go to change the payment method or update number and type of his Debit/Credit card:
After clicking on Update Payment Options, on the right side a window pane will appear titled Change Payment Type
For a newly issued bank card, to update the recent input bank card credentials, one should click on the:
Add New Payment Type:.
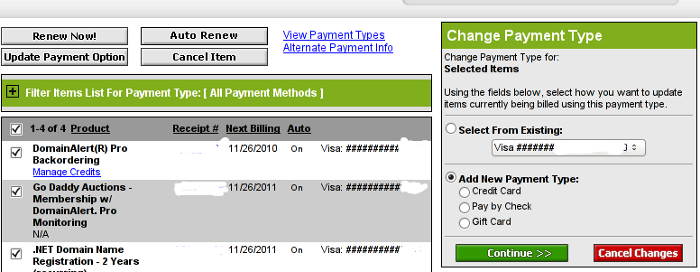
Change Payment Type Godaddy Menu
Further on in my case I had to select Credit Card , even though I’m using a VISA Debit card, as see in above’s screenshot, there is no option of Debit card visa :).
Filling in the data and saving the changes with Save Changes completes the new bank card inclusion, I can now use my new valid card with Godaddy once again.
Tags: Account, Bank, card visa, change, Click, course, credentials, Credit, credit card details, credit card information, debit credit card, debit visa card, godaddy, inclusion, information, login, menu, New, number, option, payment, payment options, pointers, Renewing, screenshot, side, type, update, VISA, visa debit card, website, window pane
Posted in Various | 1 Comment »


