Posts Tagged ‘screenshot’

Color Trick Microsoft and Google use to keep their users loyal and happy unwalfully

Tuesday, June 12th, 2012

Color mind influence has been longly researched. It is researched and there are some findingings on how we people react on colors. This researches are not much known and most of them are not put on the internet (??) One model claiming to have explained how colors influence is called HBDIHerrmann Brain Dominance Instruments.

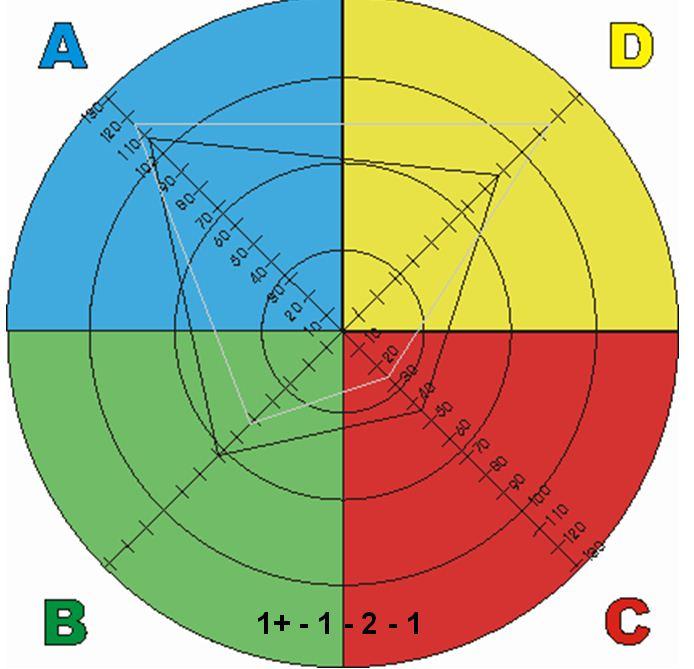
In the picture beginning of this post, I have presented a quick "Personal Profile" of HBDI on how one think in order to determine in "which colors" one tends to think more ___

In short HBDI model claims to explain how people think in another model.
My personal view of it is it is like most science nowdays more based on faith than on a clearly conducted scientific research and facts. We know pretty well many people tried to explain how brain operates and many people give models to explain it however none of the models could grasp in completeness the complexity of human brain. Hence Businessman people who use this model in their daily life and they push it to us has put the model in action not that they know it is working but rather they believe it does .., Saying this few words as introduction I will contninue onwards to explain you about HBDI as in the business world it is considered as a "Strategic Asset" for a company success. Hence the use of richest companies of the model has a serious impact on us the common people and unknowing (uninformed) computer users.

Some of the companies who integrated the HBDI to their models we all know are of course not strangely Microsoft and Google
;;;

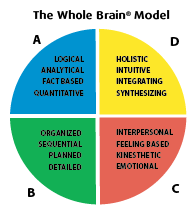
Below I present you a picture showing the HBDI The Whole Brain Model |||

HBDI The whole brain model

Next I show you Microsoft Windows OS worldly "infamous" flag |||

Microsoft Windows OS Flag

You can see for yourself the basic color from HBDI WHOLE brain model are integrated in the Microsoft flag, only the order of colors present and the color gamma is different;;;;

The basic colors in HBDI model to explain how human brain works is separated in 4 segments as you can see from above screenshot. There are a number of tests one can do to determine what is his exact HBDI profile, and in abstract terms in which kind of colors he prefers to think.

There are a whole "army" of people involved into this sect like philosophy (I call it philosophy as surely every model that tries to explain everything is doomed to fail it is the nature in which God created the universe so complex and he put us be part of it and not controllers of it that any Universal model trying to explain it has never succeeded so far. The HBDI has some fruits for the only reason it is believed to work well by the people with money.

As you see in the colors HBDI claims there are 4 segments corresponding to four basic colors

  • BLUE
  • YELLOW
  • GREEN
  • RED

Each of the colors is an indicator on how the person tends to think the BLUE people as HBDI practicioners (believers) calls them are —

Analytical, Fact Based, Logal, Quantitative

The YELLOW oriented people are claimed to be —

Holistic, Intuitive, Integrating, Synthesizing

The GREEN ones in model terms are interested in —

Organizing, Sequentiality, Planning, Detailizing facts

Finally the RED Ones are said to be —

Interpersonal, Feeling based, Kinesthetic, Emotional

Now as you can understand this model though it looks like promising is based on a philosophy which rejects the existing of spirit realm God Angels or good or evil. It claims everything we're are or we want to be can be achieved following the HBDI to develop your own brain.

This model as every human made model however does reject the fact that besides internal factors and brains we're put into external environment most of which we cannot control and therefore even if we try our best to have certain goals and complete them the external uncontrolled facts can be a reason to stop us to complete our goals.

Now back to my point, that Google, Microsoft and probably many other products and physical goods are heavily using the HBDI color scheme ;;;
Here is the Google Inc. Logo the color trait of HBDI is there:

Google Search Engine Logo and HBDI 4 colors embedded

For those doubting that Google Inc. and Microsoft Inc. are along the false believers of HBDI color scheme brain ideology I present below the Logo of Google Web Browser =- Google Chrome

Google Web Chrome Browser Logo 4 colors HBDI microsoft flag

It is evident 4 colors used as a main ones in the HBDI tool are present in Google Chrome just like in Microsoft Windows logo flag, the only difference is in the order of colors.
Also it is interesting the name Chrome that Google Chrome took is most likely taken from Aldous Huxley's – Brave New World (A book depicting a short future highly conditioned society) , the book story line goes around a society programmed to do the things they do.

I assume it is very likely that Google's founders Sergey Brin or some of their subordinate working for Google are very much into the idea of conditioning people just like in the book and this is most likely the reason they choose the Chrome as a title for Google's browser ,,,

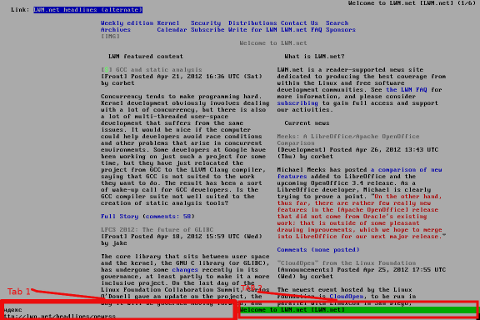
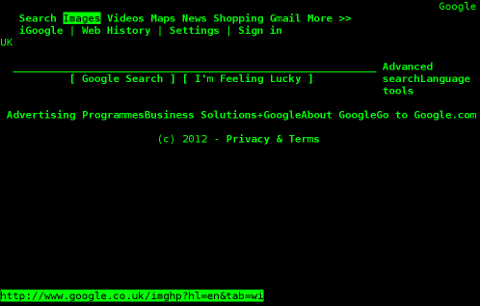
The 4 Colors from HBDI yellow, green, blue, red are embedded also in the google .ico file (the little icon showing in browser URL bar), below is a screenshot of a tab where google is opened showing the .ico image:

Google Icon 4 colors Linux Debian Epiphany Browser tab screenshot

Do you remember the good old Windows XP start button, have you noticed the Windows flag embedded in it, if not let me show you;;;

Microsoft Windows XP Start Button and HBDI 4 colors scheme

But wait the Windows flag placed on the left bottom of Ms Windows-es is not only on XP it is also on Windows 3.11 cover, Winblows 98, Vista, Windows 2003, Windows 2007 and actually all the M$ operating systems ever produced since the very early days M$ become a top OS producer :::

Windows 3.11 Operating system logo flag

Microsoft Windows 95 4 colors flag and blue sky

Here is also the 4 colored (a bit like Nazi like looking) flag on M$ Win-doze 7 |||

MS Windows 7 start Menu m$ windows well known flag

Also the Microsoft Flag is positioned on the bottom left screen on purpose. It is well known fact that most of the world (except Arabic) are used to read the text from Left to Right

, therefore it is natural for our eyesight to look for the text on the left side. I just wonder why they placed the START on the bottom and not on top. It is natural we read text and books from the most top to the most bottom ,,,.,

Even Apple Computers nowdays Macs has most likely used the HBDI as the main 4 colors and some gamma from rainbow colors are present on their Classical Apple Computer logo

Old Apple Computer/s logo colors of rainbow 4 hbdi colors are there

Makes me wonder if Jobs employed the HBDI model in his company. Well what is the reason for people loving so much this rainbow colors combination. If we think for a second outside of HBDI's brainwashing ideology for what each color would stand for. Well it is simple is comes from our young years most of the people between age 2 and 50 years has been more or less exposed to the so colorful Kids Cartoons, which are all so colorfully painted. Since our very early age we've placed in us a love for colorfulness outlook (well again not all of us for example I prefer less colors, I'm sure there are plenty of people who don't like the heavy colors we see in almost everywhere around us).

The problem with this 4 colors use on purpose and all this unnatural color placing everywhere is that it is unnatural and not in good synergy with our surrounding natural environment. Therefore I personally think using a colorful color paintings on everywhere in both computer programs and the physical world plays us a bad joke and is one of the reasons so many people are on the virge to get crazy nowdays and many have already had already cracked out.

It is my firm believe more and more people should be educated on the harm of HBDI and the fact that, we're forced to 'live it' unwilfully every day by using even as "simple things" as computers and daily technology or buying food in the super market ,,,

Converting JPEG Images to ASCII Art text (picture) in Microsoft Windows (2000 / XP / Vista / 7)

Friday, May 18th, 2012

A friend of mine, just mentioned about a program ASCIIPic – capable of converting graphic images in JPEG to plain text ASCII in Microsoft Windows OSes.
Yesterday I blogged about caca-utils (img2txt) – console tool to convert picture graphics to plain text ASCII , so knowing of the Windows freeware ASCIIPic existence catched my attention and I decided to give it a try to get idea what is situation with Images to ASCII text convertion in Windows? 🙂.

1. Generating ASCII from JPEG images with ASCII Pic

As I don't have a Microsoft Windows OS at hand, I downloaded it and run it on my Debian notebook with WINE (Wine Is Not an Emulator) MS-Windows emulator.

For my surprise the program run succesfuly its GUI interface and worked pretty smooth even emulated on Linux.

ASCII Pic 2.0 JPG PNG GIF to ASCII text MS Windows Convertor screenshot

As of time of writting, the latest version of the freeware program available is 2.0. You see in above screenshot the program is pretty intutive to use. You select an Input file, an Output file and you're ready to Process the image to TXT.
One small note to make here is the program couldn't recognize as Input files images in PNG or GIF formats, it seems the only image formats the program recognizes as input are JPEG and BMP.

ASCII Pic Windows image to ASCII program picture shot

The converted images to ASCII results are quite unsatisfactory, I tried converting few pictures originally in size 1024×768 but the produced ASCII was messy huge (the program didn't automatically set height / width dimensions to 60×80 and therefore, when I revied the produced pictures, they were very ugly and hardly readable. It could be the same image looks better if reviewed in MS-Windows Notepad but I seriously doubt that …

I thought some improvement to the produced ASCII image might be possible from the app options so I played around with the Zoom, Negation, Brightness and Monochrome options, none of them had a drastic change on the output. Using any of the program options didn't make the output TXT "image" to look closer riginal JPEGs..

ASCII Pic 2.0 Windows picture to ASCII Program options screenshot

ASCII Pic official website contains a number of other tiny tools, like WinKill and RemoteShut, however most of the tools are already too obslete and useless just like ASCII Pic

If I have to compare ASCIIPic produced ASCII Images to libcaca's Linux img2txt, asciipic's ASCII images are a piece of crap.

2. jp2a command line tool image to ASCII generator

As of time of writting a good alternative program I found for Windows is jp2a
jp2a is a free GPL-ed software available for all major operating system architectures Linux, BSD, Mac OS X, Windows.
jp2a is a command line tool and lacks any GUI interface but if compared to ASCII Pic the output ASCII image is awesome.

jp2a Windows binary can be downloaded from here , also I've made a mirror of windows jp2a bin in case if it disappears here

3. ASCII Generator 2 (asc2gen) – Windows GUI Images to ASCII generator

ASC 2 Gen is actually the best I can find program to convert images to ascii in Win as of time of writting.
Just like img2txt it generates pretty decent looking text images.

ASC2Gen failed to run emulated on my Linux host with wine version 1.0.1, hence to test it I used a a Windows host via teamviewer.

Below are few screenshots illustrating most of the options ASCII2GEN provides:

asc2gen Microsoft Windows image to ascii generator inverted penguins screenshot

asc2gen penguins in inverted color set (black color text background)

ASC2Gen backhead penguins ascii picture screenshot

ASC2GEN flipped backhed generated image to ASCII

ascii2gen generate images to ascii in colors Microsoft Windows shot

Picture to ASCII text converted with ASCII colors

Dithering Windows image to ascii text generated picture ASCII

ascii2gen dithering level option shot

asc2gen jpeg, png, gif to plain text ascii brightness contrast screenshot pic

asc2gen contrast / brigthness atune shot

ascii2gen penguins converted images to plain text inverted with capital letters for picture

asc2gen save as options shot

Something else nice is it supports a lot of image file formats as input including (BMP and GIF) images.
I've also made a mirror of asc2gen v. 2.0.0 here

While researching online, I found plenty of other Image to ASCII geneartors, however as I didn't tested them I can't say if they are  better ones.
Anyways I will be happy to hear if anyone knows other good ASCII generator alternative progs for Winblows?

Viewing JPEG,GIF and PNG in ASCII with cacaview on GNU / Linux – Review on caca-utils text mode graphics utilities

Thursday, May 17th, 2012

Stitch 80x45 libcaca mascot cacaview viewing JPG, PNG, GIF images as ASCII on Linux libcaca

Probably, many don't know that it is possible to view normal graphical pictures (JPG, PNG, GIF, BMP) etc. in plain console tty.

Being able to view pictures in ASCII is something really nice especially for console geeks like me.
The images produced sometimes are a bit unreadable, if compared to the original graphics, but anyways most of the pictures looks pretty decent 🙂

Viewing in console / terminal images on GNU / Linux is possible thanks to a library called libcaca, caca labs libcaca project official website here.
Below is a shot description of libcaca:
hipo@noah:~$ apt-cache show libcaca0|grep 'Description' -A 4
Description: colour ASCII art library
libcaca is the Colour AsCii Art library. It provides high level functions
for colour text drawing, simple primitives for line, polygon and ellipse
drawing, as well as powerful image to text conversion routines.

In Debian, Ubuntu and other deb Linux distros viewing GUI images with no need for Xserver or any kind of window manager in plain ASCII is possible with cacaview.

cacaview is part of a package called caca-utils. caca-utils is providing few other great utilities for ASCII freaks 🙂 along with cacaview console ascii viewer prog.
The package> is available for Debian distributins since many years, so even on a very old Debians like Debian – (Potato, Woody, Sarge) the package is available in default free package repositories ready to install via apt

To install apt-get it as usual:

noah:~# apt-get --yes install caca-utils

Here is a list of the binaries the package provides:

hipo@noah:~$ dpkg -L caca-utils|grep -i /usr/bin/
/usr/bin/cacaserver
/usr/bin/cacaplay
/usr/bin/cacafire
/usr/bin/cacademo
/usr/bin/cacaview
/usr/bin/img2txt

1. cacaserver a tiny program allowing network streaming of applications written in caca

Belkow is a chop, from man cacaserver
 

cacaserver reads libcaca animation files in its standard input and
serves them as ANSI art on network port 51914. These animations can be
created by any libcaca program by setting the CACA_DRIVER environment
variable to raw and piping the program's standard output to cacaserver.

Clients can then connect to port 51914 using telnet or netcat to see
the output.

The example section of the manual points 1 example use of cacaserver to stream the console output from cacademo.
cacademo binary is a short presentation ASCII DEMO in the spirit of the old school assembly demos (demoscene) .
To run it to bind on port 51914 one has to type in bash shell:
hipo@noah:~$ CACA_DRIVER=raw cacademo | cacaserver
initialised network, listening on port 51914

Then to check out how the demo looks, open telnet connection to the cacaserver host; In my case the cacaserver is binded and streamed over IP 192.168.0.2:

hipo@debian:~$ telnet 192.168.0.2 51914

Immediately you got the demo shining; Below are two screenshots of the demo played after succesful telnet connection:

Cacaserver - caca for the network screenshot Matrix cacademo

cacademo running over telnet network connection – Matrix

cacaserver running on Debian GNU / Linux drug addict like spots streamed via telnet

Blur spots cacademo shot of cacademo streamed via network

You see the demo looks quite awesome 🙂

2. Running cacafire to stream over network

Another possible example use of cacaserver is in conjunction with cacafire libcaca test application:

noah:~# CACA_DRIVER=raw cacafire | cacaserver
initialised network, listening on port 51914
cacafire is a short application written to render ASCII via libcaca and is just displaying a screen with ASCII (moving) burning fire.
It is quite spectacular if you, ask an unexpecting friend to connect to your host to 51914 🙂

Cacafire Screenshot Debian GNU / Linux cacaserver streaming ASCII demo via network port 51914

Besides that bored sys admins, could run cacafire in console to hypnotize themselves watching dumb the burning fire screen for few hoursor just use it as a screensaver 😉

3. cacaview a program to display a graphic images in console using ASCII art

cacaview takes just one argument – the picture to be displayed.

Below is a screenshot of cacaview ran from my gnome-terminal displaying a ASCII text version of the MySQL server logo

hipo@noah:~$ cd /disk/pictures
hipo@noah:/disk/pictures$ cacaview mysql_logo.png


cacaview displaying MySQL database logo in ASCII using caca for X

Whether cacaview is invoked in GUI, the libcaca X support is used, so the text image is visualized in new window with graphics, if however it is invoked in plain let's say tty1 libcaca displays the graphics pictures drawing it with only text characters.

Here is also a screenshot, I've made while viewing a GIF website logo in ASCII in plain tty console:

hipo@noah:~$ cacaview /disk/pictures/logo.gif

cacaview plain tty console screenshot of a website logo graphics pictures 17-05-2012

The logo is in cyrillic, so for latin speaking people some of the characters in the two words seen will be unreadable 🙂

cacaview even supports viewing, the next and previous picture in line, like in any modern graphics image viewer program.
To view a bunch of graphic pictures in ASCII with cacaview pass it *.*:

hipo@noah:~$ cacaview /disk/pictures/*.*

For simplicity the common unix * is also supported, so I find it quicker to do:

hipo@noah:~$ cacaview /disk/pictures/*

Showing pictures forward and backward (Previous / Next) picture is done with n and p kbd keys, whether;
n - next;
p - previous

cacaview doesn't crash or stop but skip unknown file formats – if for instance encounters filenames which are not images; lets say you have *.rar archive files along with other pictures.

The complete list of keys cacaview supports are:
br />

KEYS
? show the help screen

n, p switch to next image, previous image

Left, Right, Up, Down or h, l, k, j
scroll the image around

+, – zoom in and out

z reset the zoom level to normal

f switch fullscreen mode (hide/show menu and status bars)

d toggle the dithering mode (no dithering, 4×4 ordered dithering, 8×8 ordered dithering and random dithering)

q exit the program

4. Converting graphics images to ASCII art like (plain text pictures)

The tool that does "the trick" is img2txt. img2txt has a bit more options while compared to the rest of the aforementioned tools.The following list of arguments are recognized:

  • the size (font, height)
  • brightness
  • contrast
  • gamma and dither
  • format type of out the output pic

Anyways I found that the basic just in / out arguments passed are enough to produce pretty good results:

hipo@noah:~$ img2txt hipo_avatar.gif >hipo_avatar_pic.txt

The original hipo_avatar.gif file looks like so:

hipo avatar gif picture before img2txt convertion to text

After above img2txt command is run and hipo_avatar_pic.txt to see the colorful output ASCII art img2txt produces, cat it:

hipo@noah:~$ cat hipo_avatar_pic.txt

The image result if screenshot looks quite beautiful and even, can be considered or used as an ART effect image (filter) 🙂

Console Screenshot hipo avatar pic ASCII img2txt output picture

The picture colors are plain ANSI color, so in order to display properly the picture with colors on another computers or Operating System you will need at least basic support for ANSI colors.

Plenty of output file formats are supported by img2txt

Here is the complete list of supported output formats:
 

ansi : coloured ANSI
caca : internal libcaca format
utf8 : UTF8 with CR
utf8 : UTF8 with CRLF (MS Windows)
html : HTML with CSS and DIV support
html3 : Pure HTML3 with tables
irc : IRC with ctrl-k codes
bbfr : BBCode (French)
ps : Postscript
svg : Scalable Vector Graphics
tga : Targa Image

libcaca is available for FreeBSD too, but the caca-utils is not available as a port yet, though probably the deb or rpm packages can easily be ported to BSD.

Well that's all, Enjoy.

How to make screenshot in /dev/tty console on GNU / Linux – Taking picture JPEG / PNG snapshot of text console in systems without graphical environment

Monday, April 30th, 2012

I'm used to making picture screenshots in GNOME desktop environment. As I've said in my prior posts, I'm starting to return to my old habits of using console ttys for regular daily jobs in order to increase my work efficiency. In that manner of thoughts sometimes I need to take a screenshot of what I'm seeing in my physical (TTY consoles) to be able to later reuse this. I did some experimenting and this is how this article got born.

In this post, I will shortly explain how a picture of a command running in console or terminal in GNU / Linux can be made

Before proceeding to the core of the article, I will say few words on ttys as I believe they might be helpful someone.
The abbreviation of tty comes after TeleTYpewritter phrase and is dating back somewhere near the 1960s. The TTY was invented to help people with impaired eyesight or hearing to use a telephone like typing interface.

In Unix / Linux / BSD ttys are the physical consoles, where one logs in (typing in his user/password). There are physical ttys and virtual vtys in today *nixes. Today ttys, are used everywhere in a modern Unixes or Unix like operating system with or without graphical environments.
Various Linux distributions have different number of physical consoles (TTYs) (terminals connected to standard output) and this depends mostly on the distro major contributors, developers or surrounding OS community philosophy.
Most modern Linux distributions have at least 5 to 7 physical ttys. Some Linux distributions like Debian for instance as of time of writting this, had 7 active by default physical consoles.
Adding 3 more ttys in Debian / Ubuntu Linux is done by adding the following lines in /etc/inittab:
 

7:23:respawn:/sbin/getty 38400 tty7
8:23:respawn:/sbin/getty 38400 tty8
9:23:respawn:/sbin/getty 38400 tty9

On some Linux distributions like Fedora version 9 and newer ones, new ttys can no longer be added via /etc/inittab,as the RedHat guys changed it for some weird reason, but I guess this is too broad issue to discuss ….

In graphical environments ttys are called methaphorically "virtual". For instance in gnome-terminal or while connecting to a remote SSH server, a common tty naming would be /dev/pts/8 etc.

tty command in Linux and BSDs can be used to learn which tty, one is operating in.

Here is output from my tty command, issued on 3rd TTY (ALT+F3) on my notebook:
 

noah:~# tty
/dev/tty3

A tty cmd output from mlterm GUI terminal is like so:
 

hipo@noah:~$ tty/dev/pts/9

Now as mentioned few basic things on ttys I will proceed further to explain how I managed to:

a) Take screenshot of a plain text tty screen into .txt file format
b) take a (picture) JPG / PNG screenshot of my Linux TTY consoles content

1. Take screenshot of plain text tty screen into a plain (ASCII) .txt file:

To take a screenshot of tty1, tty2 and tty3 text consoles in a txt plain text format, cat + a standard UNIX redirect is all necessery:
 

noah:~# cat /dev/vcs1 > /home/hipo/tty1_text_screenshot.txt
noah:~# cat /dev/vcs2 > /home/hipo/tty2_text_screenshot.txt
noah:~# cat /dev/vcs3 > /home/hipo/tty3_text_screenshot.txt

This will dump the text content of the console into the respective files, if however you try to dump an ncurses library like text interactive interfaces you will end up with a bunch of unreadable mess.
In order to read the produced text 'shots' onwards less command can be used …
 

noah:~# less /home/hipo/tty1_text_screenshot.txt
noah:~# less /home/hipo/tty2_text_screenshot.txt
noah:~# less /home/hipo/tty3_text_screenshot.txt

2. Take picture JPG / PNG snapshot of Linux TTY console content

To take a screenshot of my notebook tty consoles I had to first install a "third party program" snapscreenshot . There is no deb / rpm package available as of time of writting this post for the 4 major desktop linux distributions Ubuntu, Debian, Fedora and Slackware.
Hence to install snapscreenshot,I had to manually download the latest program tar ball source and compile e.g.:
 

noah:~# cd /usr/local/src
noah:/usr/local/src# wget -q http://bisqwit.iki.fi/src/arch/snapscreenshot-1.0.14.3.tar.bz2
noah:/usr/local/src# tar -jxvvvf snapscreenshot-1.0.14.3.tar.bz2

noah:/usr/local/src# cd snapscreenshot-1.0.14.3
noah:/usr/local/src/snapscreenshot-1.0.14# ./configure && make && make install
Configuring…
Fine. Done. make.
make: Nothing to be done for `all'.
if [ ! "/usr/local/bin" = "" ]; then mkdir –parents /usr/local/bin 2>/dev/null; mkdir /usr/local/bin 2>/dev/null; \
for s in snapscreenshot ""; do if [ ! "$s" = "" ]; then \
install -c -s -o bin -g bin -m 755 "$s" /usr/local/bin/"$s";fi;\
done; \
fi; \
if [ ! "/usr/local/man" = "" ]; then mkdir –parents /usr/local/man 2>/dev/null; mkdir /usr/local/man 2>/dev/null; \
for s in snapscreenshot.1 ""; do if [ ! "$s" = "" ]; then \
install -m 644 "$s" /usr/local/man/man"`echo "$s"|sed 's/.*\.//'`"/"$s";fi;\
done; \
fi

By default snapscreenshot command is made to take screenshot in a tga image format, this format is readable by most picture viewing programs available today, however it is not too common and not so standartized for the web as the JPEG and PNG.
Therefore to make the text console tty snapshot taken in PNG or JPEG one needs to use ImageMagick's convert tool. The convert example is also shown in snapscreenshot manual page Example section.

To take a .png image format screenshot of lets say Midnight Commander interactive console file manager running in console tty1, I used the command:
 

noah:/home/hipo# snapscreenshot -c1 -x1 > ~/console-screenshot.tga && convert ~/console-screenshot.tga console-screenshot.png

Linux text console tty mc screenshot with snapscreenshot terminal / console snapshotting program

Note that you need to have read/write permissions to the /dev/vcs* otherwise the snapscreenshot will be unable to read the tty and produce an error:
 

hipo@noah:~/Desktop$ snapscreenshot -c2 -x1 > snap.tga && convert snap.tga snap.pngGeometry will be: 1x2Reading font…/dev/console: Permission denied

To take simultaneous picture screenshot of everything contained in all text consoles, ranging from tty1 to tty5, issue:
 

noah:/home/hipo# snapscreenshot -c5 -x1 > ~/console-screenshot.tga && convert ~/console-screenshot.tga console-screenshot.png

Here is a resized 480×320 pixels version of the original screenshot the command produces:

All text Consoles tty1 to tty5 merged screenshot png image with snapscreenshot taken on Debian GNU / Linux

Storing a picture shot of the text (console) screen in JPEG (JPG) format is done analogously just the convert command output extension has to be changed to jpeg i.e.:
 

noah:/home/hipo# snapscreenshot -c5 -x1 > ~/console-screenshot.tga && convert ~/console-screenshot.tga console-screenshot.jpeg

I've also written a tiny wrapper shell script, to facilitate myself picture picture taking as I didn't like to type each time I want to take a screenshot of a tty the above long line.

Here is the wrapper script I wrote:
 

#!/bin/sh
### Config
# .tga produced file name
output_f_name='console-screenshot.tga';
# gets current date
cur_date=$(date +%d_%m_%Y|sed -e 's/^ *//');
# png output f name
png_f_name="console-screenshot-$cur_date.png";
### END Config
snapscreenshot -c$arg1 -x1 > $output_f_name && convert $output_f_name $png_f_name;
echo "Output png screenshot from tty1 console produced in";
echo "$PWD/$png_f_name";
/bin/rm -f $output_f_name;

You can also download my console-screenshot.sh snapscreenshot wrapper script here

The script is quite simplistic to use, it takes just one argument which is the number of the tty you would like to screenshot.
To use my script download it in /usr/local/bin and set it executable flag:
 

noah:~# cd /usr/local/bin
noah:/usr/local/bin# wget -q https://www.pc-freak.net/~bshscr/console-screenshot.sh
noah:/usr/local/bin# chmod +x console-screenshot.sh

Onwards to use the script to snapshot console terminal (tty1) type:
 

noan:~# console-screenshot.sh

I've made also mirror of latest version of snapscreenshot-1.0.14.3.tar.bz2 here just in case this nice little program disappears from the net in future times.


Text mode (console) browsing with tabs with Elinks / Text browsers – (lynx, elinks, links and w3m) useful HTTP debugging tools for Linux and FreeBSD servers

Friday, April 27th, 2012

The last days, I'm starting to think the GUI use is making me brainless so I'm getting back to my old habits of using console.
I still remember with a grain of nostalgy how much more efficient I used to be when the way to interact with my computer was primary in text mode console.
Actually, I'm starting to get this idea the more new a software is the more inefficient it makes your use of computer, not to mention the hardware resources required by newer software is constantly increasing.

With this said, I started occasionally browsing again like in the old days by using links text browser.
In the old days I mostly used lynx and its more advanced "brother" text browser links.
The main difference between lynx and links is that lynx does not have any support for the terrible "javascript", whether links supports most of the Javascript ver 2.
Also links and has a midnight commander like pull down menus on the screen top, – handy for people who prefer some more interactivity.

In the past I remember I used also to browse graphically in normal consoles (ttys) with a hacked version of links calledTThere is also a variation of linksxlinks suitable for people who would like to have graphical browser in console (ttys).

I used xlinks quite heavily in the past, when I have slower computer P166Mhz with 64MB of memory 2.5 GB HDD (What a times boy what a times) .
Maybe when I have time I will install it on my PC and start using it again like in the old days to boost my computer use efficiency…
I remember the only major xlinks downside was it doesn't included support for Adobe flash (though this is due to the bad non-free software nature of Adobe lack of proper support for free software and not a failure of xlinks developers. Anyways for me this wasn't a big trouble since, ex Macromedia (Adobe) Flash support is not something essential for most of my work…

links2 is actually the naming of links version 2. elinks emerged later (if I remember correctly, as fork project of links).
elinks difference with links constitutes in this it supports tabbed browsing as well as colors (links browser displays results monochrome).

Having a tabbed browsing support in tty console is a great thing…
I personally belive text browsing if properly used can in many ways outbeat, graphic browsing in terms of performance and time spend to obtain data. I'm convinced text browsing is superior for two reasons:
1. with text there is way less elements to obstruct your attention.
– No graphical annoying flash banners, no annoying taking the attention pictures

2. Navigating in web pages using the keyboard is more efficient than mouse
– Using keyboard shorcuts is always quicker than mouse, generally keboard has always been a quicker way to access computer commands.

Another reason to use text browsing is, it is mostly the text part of a page that matters, most of the pages that provide images to better explain a topic are bloated (this is my personal view though, i'm sure designer guys will argue me :D).
Here is a screenshot of a my links text browser in action, I'm sorry the image is a bit unreadable, but after taking a screenshot of the console and resizing it with GIMP this is what I got …

Links text console browser screenshot with 2 tabs opened Debian GNU / Linux

For all those new to Linux who didn't tried text browsing yet and for those interested in computer history, I suggest you install and give a try to following text browsers:
 

  • lynx
  • (Supports colorful text console text browsing)
    lynx text console browser Debian Squeeze GNU / Linux Screenshot

  • links
  • Links www text console browser screenshot on Debian Linux

  • elinks
  • (Supports colors filled text browsing and tabs)
    elinks opened duckduckgo.com google alternative search engine in mlterm terminal Debian Linux

  • w3m
  • w3m one of the oldest text console browsers screenshot Debian Linux Squeeze 6.2

By the way having the 4 text browsers is very useful for debugging purposes for system administrators too, so in any case I think this 4 web browsers are absoutely required software for newly installed GNU / Linux or BSD* based servers.

For Debian and the derivatives Linux distributions, the 4 browsers are available as deb packages, so install them with following apt 1 liner:
 

debian:~# apt-get –yes install w3m elinks links lynx
….

FreeBSD users can install the browsers using, cmd:
 

freebsd# cd /usr/ports/www/w3mfreebsd# make install clean
….
freebsd# cd /usr/ports/www/elinksfreebsd# make install clean
….
freebsd# cd /usr/ports/www/linksfreebsd# make install clean
….
freebsd# cd /usr/ports/www/lynxfreebsd# make install clean
….

In links using the tabs functionality appeared, somewhere near the 2001 or 2000 (at least that was the first time I saw links with tabbed browsing enabled). My first time to saw links support opening multiple pages within the same screen under tabs was on Redhat Linux 9

Opening multiple pages in tabs in the text browser is done by pressing the t key and typing in the desired URL to open isnide.
For more than 2 tabs, again t has to be pressed and same procedure goes on and on.
It was pretty hard for me to figure out how I can do a text browsing with tabs, though I found a way to open new tabs it took me some 10 minutes in pondering how to switch between the new opened links browser tabs.

Hence, I thought it would be helpful to mention here how tabs can be switched in links text browser. Actually it turned it is pretty easy to Switch tabs tabs back and foward.

1 tab to move backwards is done with < (key), wheter switching one tab forward is done with the > key.

On UK and US qwerty keyboards alignment the movement a tab backward and forward is done with holding shift and pressing < onwards holding both keys simultaneously and analogously with pressing shift + >
 

Editting binary files in console and GUI on FreeBSD and Linux

Thursday, April 26th, 2012

I’ve recently wanted to edit one binary file because there was compiled in the binary a text string with a word I didn’t liked and therefore I wanted to delete. I know I can dig in the source of the proggie with grep and directly substitute my “unwatned text” there but I wanted to experiment, and see what kind of hex binary text editors are for Free OSes.
All those who lived the DOS OS computer era should certainly remember the DOS hex editors was very enjoyable. It was not rare case, where in this good old days, one could simply use the hex editor to “hack” the game and add extra player lives or modify some vital game parameter like put himself first in the top scores list. I even remember some DOS programs and games was possible to be cracked with a text editor … Well it was times, now back to current situation as a Free Software user for the last 12 years it was interesting to see what is the DOS hexeditor like alternatives for FreeBSD and Linux and hence in this article I will present my findings:

A quick search in FreeBSD ports tree and Debian installable packages list, I’ve found a number of programs allowing one to edit in console and GUI binary files.

Here is a list of the hex editors I will in short review in this article:

  • hexedit
  • dhex
  • chexedit
  • hte
  • hexer
  • hexcurse
  • ghex
  • shed
  • okteta
  • bless
  • lfhex

1. hexedit on Linux and BSD – basic hex editor

I’ve used hexedit already on Linux so I’ve used it some long time ago.

My previou experience in using hexedit is not too pinky, I found it difficult to use on Redhat and Debian Linux back in the day. hexedit is definitely not a choice of people who are not “initiated” with hex editting.
Anyways if you want to give it a try you can install it on FreeBSD with:

freebsd# cd /usr/ports/editors/hexedit
freebsd# make install clean

On Debian the hexedit, install package is named the same so installation is with apt:

debian:~# apt-get –yes install hexedit

hexedit screenshot Debian Linux Squeeze

2. Hex editting with chexedit

I’ve installed chexedit the usual way from ports:

freebsd# cd /usr/ports/editors/chexedit
freebsd# make install clean

chexedit is using the ncurses text console library, so the interface is very similar to midnight commander (mc) as you see from below’s screenshot:

Chexeditor FreeBSD 7.2 OS Screenshot

Editting the binary compiled in string was an easy task with chexedit as most of the commands are clearly visible, anyways changing a certain text string contained within the binary file with some other is not easy with chexedit as you need to know the corresponding binary binary value representing each text string character.
I’m not a low level programmer, so I don’t know the binary values of each keyboard character and hence my competence came to the point where I can substitute the text string I wanted with some unreadable characters by simply filling all my text string with AA AA AA AA values…

chexedit on Debian is packaged under a deb ncurses-hexedit. Hence to install it on Deb run:

debian:~# apt-get –yes install ncurses-hexedit

Further on the binary to run chexedit on binary contained within ncurses-hexedit is:

debian:~# hexeeditor

3. Hex Editting on BSD and Linux with hte

Just after trying out chexedit, I’ve found about the existence of one even more sophisticated hexeditor console program available across both FreeBSD and Linux.
The program is called hte (sounds to me a bit like the Indian word for Elephant “Hatti” :))

hte is installable on Debian with cmd:

debian:~# apt-get install ht

On FreeBSD the port name is identical, so to install it I execed:

freebsd# cd /usr/ports/editors/hte
freebsd# make install clean

hte is started on Debian Linux (and presumably other Linux distros) with:

$ hte

On FreeBSD you need to run it with ht command:

freebsd# ht

You see how hte looks like in below screenshot:

ht has the look & feel like midnight commander and I found it easier to use than chexedit and hexeditor
4. hexer VI like interface for Linux

As I was looking through the available packages ready to install, I’ve tried hexer

debian:~# apt-get install –yes hexer

hexer does follow the same standard commands like VIM, e.g. i for insert, a for append etc.

Hexer Debian Linux vim like binary editor screenshot

It was interesting to find out hexer was written by a Bulgarian fellow Petar Penchev 🙂
(Proud to be Bulgarian)

http://people.freebsd.org/~roam/ – Petar Penchev has his own page on FreeBSD.org

As a vim user I really liked the idea, the only thing I didn’t liked is there is no easy way to just substitute a string within the binary with another string.

5. hexcurse another ncurses library based hex editor

On Deb install and run via:

debian:~# apt-get –yes install hexcurse
debian:~# hexcurse /usr/bin/mc

Hexcurse Debian Linux text binary editor screenshot

hexcurse is also available on FreeBSD to install it use cmd:

freebsd# cd /usr/ports/editors/hexcurse
freebsd# make install clean
….

To access the editor functions press CTRL+the first letter of the word in the bottom menu, CTRL+H, CTRL+S etc.
Something I disliked about it is the program search is always in hex, so I cannot look for a text string within the binaries with it.

6. ghex – Editting binary files in graphical environment

If you’re running a graphical environment, take a look at ghex. ghex is a gnome (graphical hex) editor.Installing ghex on Debian is with:

debian:~# apt-get –yes install ghex
….

To run ghex from terminal type:

debian:~# ghex2

GHex2 GNOME hex binary editor screenshot

To install ghex on FreeBSD (and I assume other BSDs), install via port:

freebsd# cd /usr/ports/editors/ghex
freebsd# make install clean

Gnome hex editor have plenty of tools, useful for developers to debug binary files.

Some nice tools one can find are under the the menus:

Windows -> Character Table

This will show a complete list of each keyboard sent character in ASCII, Hex, Decimal, Octal and Binary

Screenshot ghex Character table Debian Linux

Another useful embedded tool in ghex is:

Windows -> Type Convertion Dialog

Ghex type convertion dialog screenshot

Note that if you want to use the Type Convertion Dialog tool to find the representing binary values of a text string you will have to type in the letters one by one and save the output within a text file and later you can go and use the same editor to edit the text string within the binary file you like.

I’m not a programmer but surely for programmers or people who want to learn some binary counting, this 2 ghex edmebbed tools are surely valuable.

To conclude even though there are plenty of softwares for hex editting in Linux and BSD, none of them is not so easy to use as the old DOS hexdedit tool, maybe it will be a nice idea if someone actually rewrites the DOS tool and they package it for various free operating systems, I’m sure many people will find it helpful to have a 1:1 equivalent to the DOS tool.

7. Shed pico like interfaced hex editor

For people, who use pico / nano as a default text editor in Linux shed will probably be the editor of choice as it follows the command shortcuts of picoOn Deb based distros to install it run:

debian:~# apt-get install –yes shed

shed pico like hex binary editor Linux

Shed has no BSD port as of time of writting.8. Okteta a KDE GUI hex editor

For KDE users, I found a program called okteta. It is available for Deb based Linuxes as deb to install it:

debian:~# apt-get –yes install okteta

Screenshot Okteta Debian GNU / Linux Squeeze

As of time of writting this article there is no okteta port for BSDs.
Okteta has plenty of functions and even has more of a functions than ghexedit. Something distinctive for it is it supports opening multiple files in tabs.

9. lfhex a large file text editor

lfhex is said to be a large (binary) file text editor, I have not tested it myself but just run it to see how it looks like. I don’t have a need to edit large binary files too, but I guess there are people with such requirements too 🙂

lfhex - Linux The Large file hex editor

To install lfhex on Debian:

debian:~# apt-get install –yes lfhex

lfhex has also a FreeBSD port installable via:

freebsd# cd /usr/ports/editors/lfhex
freebsd# make install clean

10. Bless a GUI tool for editting large hex (binary) files

Here is the description directly taken from the BSD port /usr/ports/editors/bless

Bless is a binary (hex) editor, a program that enables you to edit files asa sequence of bytes. It is written in C# and uses the Gtk# bindings for theGTK+ toolkit.

To install and use ot on deb based Linuxes:

debian:~# apt-get install –yes bless
….

On BSD installation is again from port:

freebsd# cd /usr/ports/editors/bless
freebsd# make install clean
….

Something that makes bless, maybe more desirable choice for GUI users than ghex is its availability of tabs. Opening multiple binaries in tabs will be useful only to few heavy debuggers.

Bless GUI hex editor Debian Linux tabs opened screenshot

11. Ghextris – an ultra hard hacker tetris game 🙂

For absolute, hacker / (geeks), there is a tetris game called ghextris. The game is the hardest tetris game I ever played in my life. It requires more than regular IQ and a lot of practice if you want to become really good in this game.

To enjoy it:

debian:~# apt-get –yes install ghextris

Ultra hrad hardcore hackers game ghextris screenshot

Unfortunately there is no native port of ghextris for BSD (yet). Anyhow, it can be probably run using the Linux emulation or even compiled from source.
Well that’s all I found for hexedit-ing, I’ll be happy to hear if someone can give me some feedback on his favourite editor.

Tools for finding files containing a string (recursively) in Graphical Enviroments (GNOME, KDE and XFCE) on GNU linux and FreeBSD

Monday, April 9th, 2012

1. Finding files containing a specific string with GNOME GUI tool gnome-search-tool

Default installation of GNOME version 2.x and 3.x is equipped with a tool called gnome-search-tool. The tool is used by default in the GNOME's file explorer program Nautilus. The quickest way to look for a certain text string across all the files located in a directory and show them is with nautilus's – find manager.

Below is a screenshot showing the gnome-search-tool embedded in nautilus Screenshot Search for pass string in GNOME nautilus File browser

Nautilus find uses gnome-search-tool program for its file search. Below is a screenshot showing the gnome-search-tool embedded in nautilus:

The gnome-search-tool can be also invoked through Gnome Run Application with ALT+F2 or directly run from terminal e.g.:

hipo@noah:~$ gnome-search-tool

gnome-search-tool screenshot find files by content recursively Debian GNU / Linux

As you can see in below screenshot, gnome-search-tool has many available filter file search criterias.

gnome-search-tool available options screenshot Debian Linux

You see I wanted to look for my project passwords so typed in pass in Contains the text: field and pressed enter to simply look for this text in all my files in the look in folder RichtooRich
Screenshot 3 files found gnome search tool Linux screenshot

Actually gnome-search-tool offers plenty of more options than one might look for. With it one can easily make a combination of complex search critea (filters) and hence a very versatile Desktop file saerch tool. From testing it I can say it for sure more powerful program than MS Windows default file searching program called Find It – this is the program with the ( "dumb dog holing a magnifier" 🙂

One can use the Add or Remove to Add single or various combination of filter criterias. For the sake of testing it, I've added a number of file search filters as you see in the shot below:

Linux graphical program for recursive file search gnome-search-tool - file search example screenshot

The search critias are not matched and therefore 0 files were found.
In case if you wonder how gnome-search-tool works? It is actually a GUI wrapper to Linux's Linux find command .

I wasn't complete sure if it uses find for the file search, so to check I run a one search and in in console ran:
 

hipo@noah:~$ ps axuwf|grep -i find
hipo 18213 2.0 0.0 25568 1276 ? S 23:55 0:00 find /home/hipo/Richtoorich ( -iname * -o -iname .* ) ! -type p -exec grep -i -I -c test {} ; -mtime -1 ( -size 102400 -o -size +102400 ) -user root ! -iname *bad\-name\-to\-omit* -print

You can see the filters set in gnome-search-tool are passed as command arguments to find.

2. Finding files containing a string recursively in KDE with kfind

For KDE users there is a handy little tool called Kfind. Kfind is less "search customizable" if it is compared to gnome-search-tool but it has advantage that its search options are way more "user friendly" / human readable 🙂

To use the tool to look in all files for explicit string fill in Look in: or browse to set the main directory where it will look for the string.

Screenshot find content in multiple files and folders recursively kfind kde program
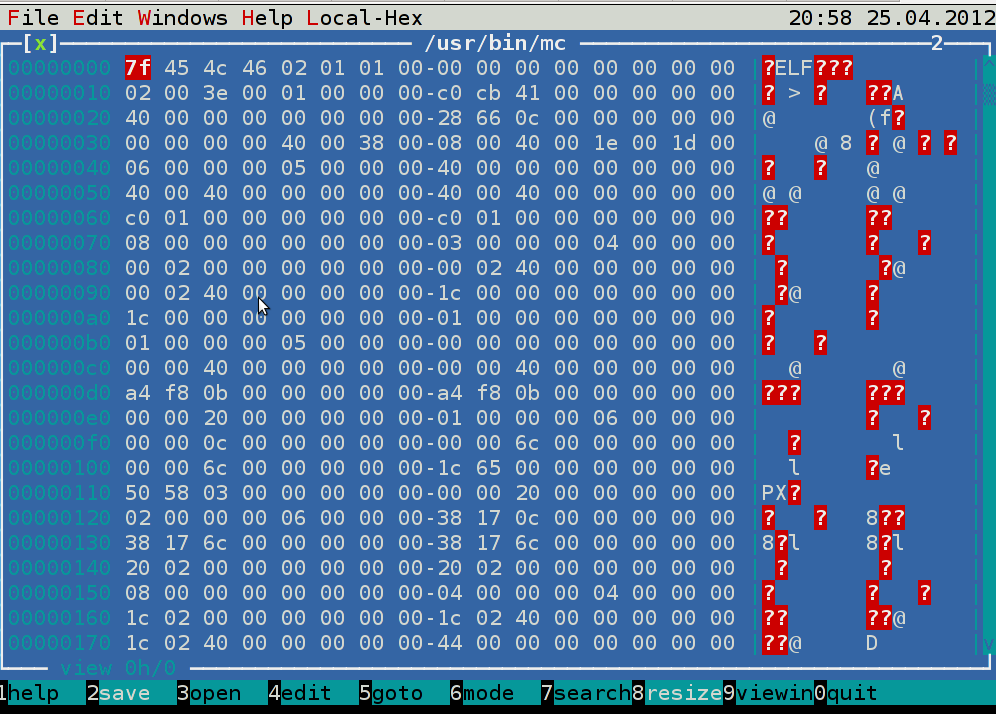
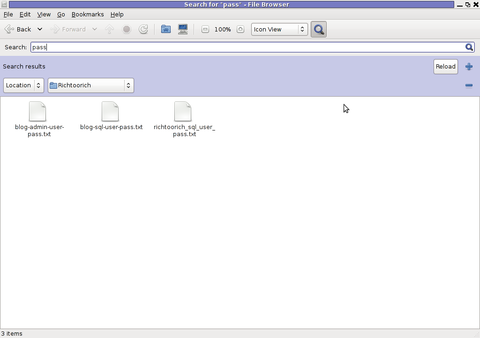
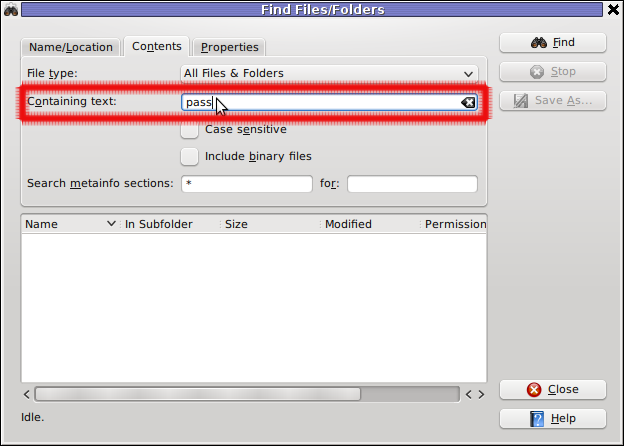
Then in the second Contents (tab) fill in the Containing Text: with the string to be looked for:

Kfind Recursive file search tool for Linux KDE graphic environment, input text field screenshot

Finally in the Names/Location tab, there are two other helpful search options – Show Hidden Files and Case Sensitive Search

Screenshot find content in multiple files and folders recursively kfind kde gui program

I'll be curious to hear if someone knows some other nice software easy and comprehensive to use for Linux / BSD. If you know a better file searcher for Linux than this kfind or gnome-search-tool please drop a comment.

Tiny PHP script to dump your browser set HTTP headers (useful in debugging)

Friday, March 30th, 2012

While browsing I stumbled upon a nice blog article

Dumping HTTP headers

The arcitle, points at few ways to DUMP the HTTP headers obtained from user browser.
As I'm not proficient with Ruby, Java and AOL Server what catched my attention is a tiny php for loop, which loops through all the HTTP_* browser set variables and prints them out. Here is the PHP script code:

<?php<br />
foreach($_SERVER as $h=>$v)<br />
if(ereg('HTTP_(.+)',$h,$hp))<br />
echo "<li>$h = $v</li>\n";<br />
header('Content-type: text/html');<br />
?>

The script is pretty easy to use, just place it in a directory on a WebServer capable of executing php and save it under a name like:
show_HTTP_headers.php

If you don't want to bother copy pasting above code, you can also download the dump_HTTP_headers.php script here , rename the dump_HTTP_headers.php.txt to dump_HTTP_headers.php and you're ready to go.

Follow to the respective url to exec the script. I've installed the script on my webserver, so if you are curious of the output the script will be returning check your own browser HTTP set values by clicking here.
PHP will produce output like the one in the screenshot you see below, the shot is taken from my Opera browser:

Screenshot show HTTP headers.php script Opera Debian Linux

Another sample of the text output the script produce whilst invoked in my Epiphany GNOME browser is:

HTTP_HOST = www.pc-freak.net
HTTP_USER_AGENT = Mozilla/5.0 (X11; U; Linux x86_64; en-us) AppleWebKit/531.2+ (KHTML, like Gecko) Version/5.0 Safari/531.2+ Debian/squeeze (2.30.6-1) Epiphany/2.30.6
HTTP_ACCEPT = application/xml,application/xhtml+xml,text/html;q=0.9,text/plain;q=0.8,image/png,*/*;q=0.5
HTTP_ACCEPT_ENCODING = gzip
HTTP_ACCEPT_LANGUAGE = en-us, en;q=0.90
HTTP_COOKIE = __qca=P0-2141911651-1294433424320;
__utma_a2a=8614995036.1305562814.1274005888.1319809825.1320152237.2021;wooMeta=MzMxJjMyOCY1NTcmODU1MDMmMTMwODQyNDA1MDUyNCYxMzI4MjcwNjk0ODc0JiYxMDAmJjImJiYm; 3ec0a0ded7adebfeauth=22770a75911b9fb92360ec8b9cf586c9;
__unam=56cea60-12ed86f16c4-3ee02a99-3019;
__utma=238407297.1677217909.1260789806.1333014220.1333023753.1606;
__utmb=238407297.1.10.1333023754; __utmc=238407297;
__utmz=238407297.1332444980.1586.413.utmcsr=www.pc-freak.net|utmccn=(referral)|utmcmd=referral|utmcct=/blog/

You see the script returns, plenty of useful information for debugging purposes:
HTTP_HOST – Virtual Host Webserver name
HTTP_USER_AGENT – The browser exact type useragent returnedHTTP_ACCEPT – the type of MIME applications accepted by the WebServerHTTP_ACCEPT_LANGUAGE – The language types the browser has support for
HTTP_ACCEPT_ENCODING – This PHP variable is usually set to gzip or deflate by the browser if the browser has support for webserver returned content gzipping.
If HTTP_ACCEPT_ENCODING is there, then this means remote webserver is configured to return its HTML and static files in gzipped form.
HTTP_COOKIE – Information about browser cookies, this info can be used for XSS attacks etc. 🙂
HTTP_COOKIE also contains the referrar which in the above case is:
__utmz=238407297.1332444980.1586.413.utmcsr=www.pc-freak.net|utmccn=(referral)
The Cookie information HTTP var also contains information of the exact link referrar:
|utmcmd=referral|utmcct=/blog/

For the sake of comparison show_HTTP_headers.php script output from elinks text browser is like so:

* HTTP_HOST = www.pc-freak.net
* HTTP_USER_AGENT = Links (2.3pre1; Linux 2.6.32-5-amd64 x86_64; 143x42)
* HTTP_ACCEPT = */*
* HTTP_ACCEPT_ENCODING = gzip,deflate * HTTP_ACCEPT_CHARSET = us-ascii, ISO-8859-1, ISO-8859-2, ISO-8859-3, ISO-8859-4, ISO-8859-5, ISO-8859-6, ISO-8859-7, ISO-8859-8, ISO-8859-9, ISO-8859-10, ISO-8859-13, ISO-8859-14, ISO-8859-15, ISO-8859-16, windows-1250, windows-1251, windows-1252, windows-1256,
windows-1257, cp437, cp737, cp850, cp852, cp866, x-cp866-u, x-mac, x-mac-ce, x-kam-cs, koi8-r, koi8-u, koi8-ru, TCVN-5712, VISCII,utf-8 * HTTP_ACCEPT_LANGUAGE = en,*;q=0.1
* HTTP_CONNECTION = keep-alive
One good reason, why it is good to give this script a run is cause it can help you reveal problems with HTTP headers impoperly set cookies, language encoding problems, security holes etc. Also the script is a good example, for starters in learning PHP programming.


Finally TeamViewer 7 release for GNU / Linux is available

Thursday, March 29th, 2012


TeamViewer 7 Debian GNU / Linux released, my desktop screenshot

After a long time of inavailability, finally TeamViewer 7 for GNU / Linux is out!

Here is the short TeamViewer 7 Linux release note :

In our TeamViewer download area you will now find TeamViewer 7 for Linux.
The final version includes a selection of new features for Linux, e. g. an integrated screenshot feature and the possibility of saving individual connection settings per computer.
You can now establish cross platform connections with other computers running version 7 and hold online meetings and presentations with up to 25 participants.

We wish you best continued success with TeamViewer!

Well, guys it was about time, even later than that… Until now I've so many times experienced troubles with Windows machines which I had to administrate remotely and they only had a TeamViewer 7 installed (a real, real pain in the ass).

The issue comes cause TeamViewer 6 is incompatible with 7 and just until very recently only TV 6 for Linux was available, so trying to access a 7 install directly from Linux was impossible.
Hence to access TeamViewer 7 Windows install, I had to use either a fresh Windows copy with TeamViewer 7 installed or a Virtual Machine like (Qemu, VirtualBox) with Windows version installed in it.
Often back then, when I had to fix remotely a Windows machine behind a firewall, I had to instruct the machine owners to replace the TeamViewer 7 with TeamViewer 6 in order to be able to easily access the remote host from my Debian Linux.

I still remember, it was quite a stuggle to find a link to a Windows .exe install file for TeamViewer 6.

Now thanksfully, TeamViewer guys are starting to make it easier for the user who would for some reason want to stick to older TV version.
I've noticed on TeamViewer's website there is already a new TeamViewer download page offering for download all the old teamviewer version – 1.x, 2.x, 3.x, 4.x, 5.x, 6.x

One example, where old teamviewer release is useful is if you want to run teamviewer on older hardware or old OS (MS Windows 98 or old Linux distro).

I've made a mirror of teamviewer 6 for Debian / Ubuntu amd 32 and 64 bit versions along with all the OS available TeamViewer version 6 and 7, for the sake of preserving it if one day link to old versions of Teamviewer disappear from their website.

Here are the TeamViewer mirrored files:

Below you see a screenshot of teamviewer 7 running on my Debian Squeeze 🙂

TeamViewer 7 Debian GNU / Linux released, my desktop screenshot

It is great teamviewer produced a Linux working application, however if you run it you realize just like the previous releases TeamViewer is not natively supposed (compiled) to run on GNU / Linux OS but uses wine (windows emulator) to launch through…
Instead of porting the application to be natively for the Linux distros once again with this new release, teamviewer developers just "hacked" it to run on top of windows emulation. Though this is working its performance, is probably a bit degraded and it depends on having install on the Linux host a bunch of useless packages which wine depends on.
Besides that even if it "works" on Linux , TeamViewer has still non-free software essense. I still use it because unfortunately, I don't know of a better remote access program capable to connect to servers behind NAT / machines located behind a tight firewalled routers.
If only (I knew of?) a TeamViewer free software / open source equivalent
I will be glad to hear if someone know a (free software / open source) TeamViewer like program able to access remote hosts with no a real (public inet) IP address?P.S.: By similar TV program I don't mean VNC, UltraVNC and this kind of other VNC derivative programs but mean close TeamViewer alternative.