![]()
Most of Linux / BSD user have probably used screen to detach processes to keep running interactive programs in the background.
If you're new to Linux and you haven't heard of or used SCREEN. This is a good time to learn about it, screen is – virtual terminal emulator (manager) with VT100/ANSI terminal emulation support.
I will not enter into details of screen use as this is not the accent of this little article, however if you haven't tried screen yet, give it a try. For more info on screen, check the man; man screen
Sometimes, its necessery to run screen after a change of user identity with su command, for the sake of doing some kind of routing administration, task or for putting screen in use through a simple, admin shell script; for instance:
server:~# su - hipo
hipo@server:~$ screen 'mc'
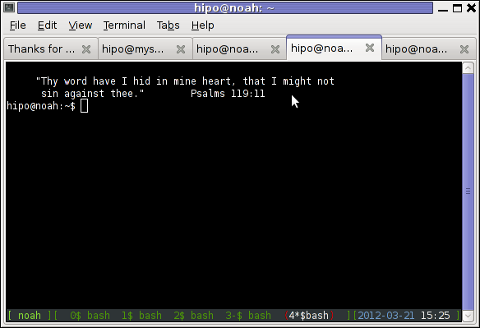
Cannot open your terminal '/dev/pts/0' - please check.
You see screen is unable to detach Midnight Commander (Interactive Virtual Shell program)
But instead, errs and exits with:
Cannot open your terminal '/dev/pts/0' – please check.
The error is quite explanatory, screen is unable to background mc due to inability to read /dev/pts/0
Checking /dev/pts/0 (virtual memory) located file, permissions shows:
hipo@server:~$ ls -al /dev/pts/0

crw--w---- 1 root tty 136, 0 2012-03-21 05:21 /dev/pts/0
Reviewing the permissions, shows /dev/pts/0 is owned by user (root) and belongs to group (tty).
For my user hipo I have no permissions to read or write into the file – (The file is not readable to any user except root and users who belong to the group tty).
To work around the error, its obvious my user needs to be granted permissions to be able to at least read /dev/pts/0 file, because screen needs to read my user /dev/pts/x tty login file.
hipo@server:~$ exit

server:~# chmod a+rw /dev/pts/0

server:~# su hipo -

hipo@server:~$ screen mc
This would give read/write permissions for my specific /dev/pts/0, however, if you don't know your exact /dev/pts/, better use the tty command:
hipo@server:~$ exit

server:~# chmod a+rw $(tty)

server:~# su hipo -c 'screen mc'
All tty command does is to return the current logged in user physical or virtual tty file.
/dev/pts/0 file is re-created dynamicly on each physical console tty or remote ssh user login and is calculated on the system in accordance with the number of logged in users. On Linux, different users gets assigned different ttys while a new interactive shell login is initiated.
If for instance on the server, there are 3 users logged in via
Based on the logged in tty, the error above screen produces could vary according to the user tty, for exmpl.:
Cannot open your terminal '/dev/pts/0' - please check.

Cannot open your terminal '/dev/pts/1' - please check.

Cannot open your terminal '/dev/pts/2' - please check.
etcetera, etcetera …
There are at least, two ways to get around the unreadable /dev/pts/0 file screen problem:
1. Add the user that will be issuing screen, after a su in /etc/group to the tty group:
To do so, open /etc/group and find the line:
tty:x:5:
in the end of the line add the username to be included in the tty group. For instance to add my user hipo, I have to modify the file like so:
tty:x:5:hipo
N. B.!!! Be sure, that the user that is added in tty group is really trusted and secured well! Being added to the tty group, the user has access to read all the logging in virtual and physical users on the system. He can even forward messages on each of the users ttys with simple echo command. If the user added to tty group is not trusted and (preferrably used only by the system administrator), he might flood other logged in users shell with junk messages, or any unwanted text with simply:
hipo@server:~$ echo -e 'Annoying messsage\n bla bla \n etc.' >> /dev/pts/0
Like in my case if I'm still logged in as root on /dev/pts/0 and my hipo user is issuing this commands, the messages will appear on my root shell prompt, like so:
server:~# Annoying messsage

bla bla

etc.
2. Change the permissions of /dev/pts/0 with chmod
This method, I've already earlier explained, just make all users to read/write the tty …
server:~# chmod a+rw $(tty)

server:~# su hipo

hipo@server:~$ screen 'mc'
Onwards press ctrl+A+D to detach the screen and consequently be sure to revert back the /dev/tty/0 permissions to be only readable for root:tty
hipo@server:~$ exit

server:~# chmod 0720 $(tty)
Bear in mind, that playing with the /dev/tty/x file permissions imposes a serious security risk, doing stuff like this should only be done as a last resort.
3. Solving Cannot open your terminal '/dev/pts/0' – please check to run scripts in SCREEN on server boot
A very classical situation, you might encounter:
Cannot open your terminal '/dev/pts/0' – please check is if you have a requirement to detach a script which needs some interactivity with screen.
Lets say for instance, you have a php, perl or bash which is written to require being run in interactive shell session. Then screen comes at play. The normal way one would do it, is to put:
# screen /path/to/script.pl; screen /path/to/php_script.php
/etc/rc.local, before the file exit 0 command.
This works fine, if the script is intended to run as root, but most of the scripts are intended to run through a su-ed user, like for example, lets say you have a PHP script which is supposed to run on a Debian, with Apache's default user, group permissions www-data:www-data
You might think of putting in /etr/rc.local a record like:
su - www-data -c "cd /path/to; screen '/path/to/script.sh"
This will not work, however cause of the su. To work around this you have two options:
a. Use a tiny "hack"
tty=$(tty); chmod a+rw $tty; su www-data -c 'cd /path/to; screen script.sh'; chmod 0720 $tty;
This one-liner will detach script.sh so it continues its interactive stuff in a screen and then revert back the permissions to /dev/tty*
so this doesn't later pose a security issue.
In order to connect to the detached screen, do again:
server:~# su www-data -

$ screen -r

Cannot open your terminal '/dev/pts/1' - please check.

$ exit

server:~# chmod a+rw /dev/pts/1; su - www-data

$ screen -r
Don't forget to:
# chmod 07200 /dev/pts/1
after the screen session is deteached 🙂
b. Using screen -d -m
su - www-data -c "screen -d -m 'screen.sh'"
Talking about screen all the way, I have to say the default screen view in Debian is not too much interactive. If you want to beautify, how screen will appear and add some colors use this nice screenrc . To use it with screen take it and put it in your user home to which it should apply.
The screenrc was taken was taken from an article, I've red on Redhat Magazine.
Onether beatifying screen behaviour .screenrc file which makes screen be in blue and red is here
By the way, just few months ago, I've found for another great program that is a virtual terminal emulator, like screen but it appears to be way more advanced. The screen alternative program is called byobu, you can check byobu official site here
byobu is available as a deb package and installable from default Debian latest stable repositories, so you can check it by a quick:
# apt-get --yes install byobu
Here is a screenshot of running byobu virtual manage:
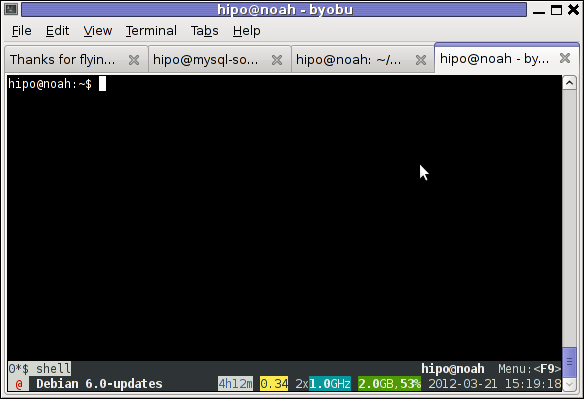
Note that, before you run byobu, make sure you don't have ~/.screenrc (laying in your home directory), otherwise byobu appearance will be exactly like screen.
Hope this helps someone, i will be happy to hear if there are better way to work around the "screen on start-up issue."?

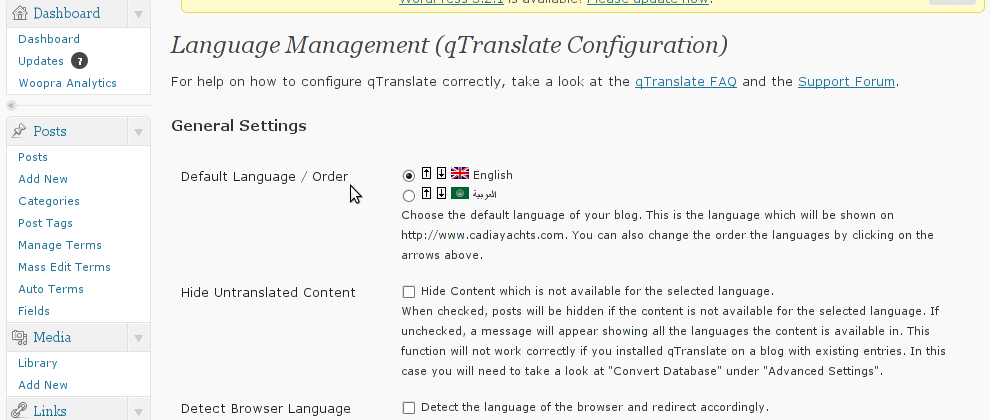
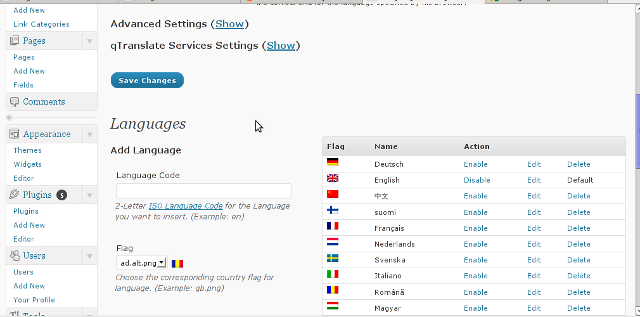
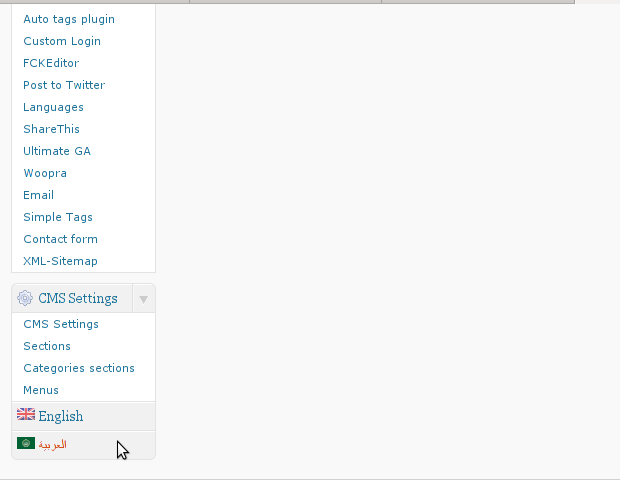
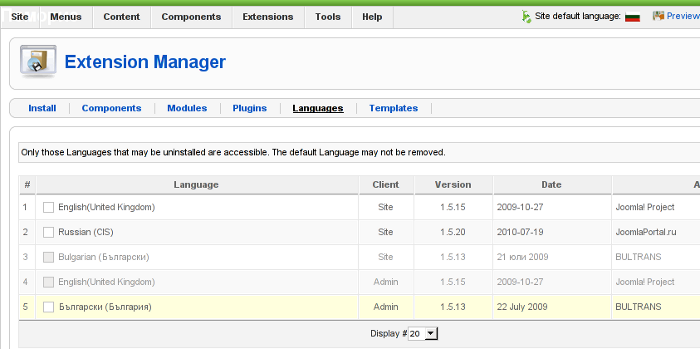 Screenshot of my installed list of Joomla Language Packs (Multi-Language setup)
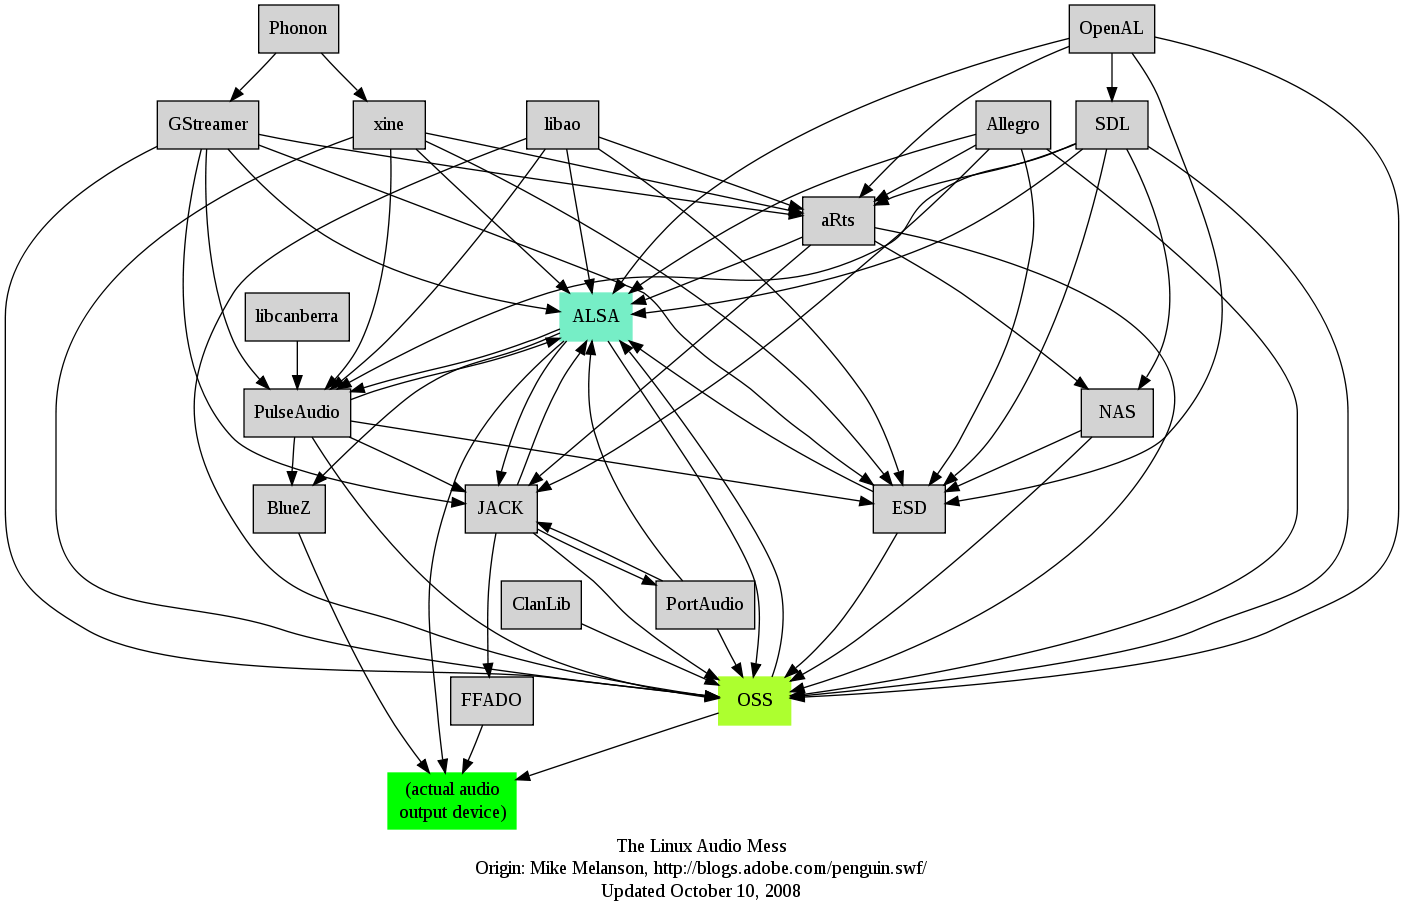 I remember GNU / Linux, 11 years from now, times when ALSA was not standardly shipped with Linux.


How to add OpenID functionality to WordPress Comments / What is OpenID?
Tuesday, February 14th, 2012I've recently decided to add Comment as OpenID functionality to my wordpress blog. The reasons to do that is that I myself have today created an OpenID account. Already million of people have OpenID account without even knowing. Most major search engines and social websites like Google, Yahoo, Live Journal, Hyves, Blogger, Flicker, MySpace automatically creates an OpenID account for newly registered users.
It is up to the user to check with each of the aforementioned providers what is the URL of their OpenID account.
Even though OpenID popularity is steadly rising, I'm sure there are still plenty of users who did not heard, used or noticed OpenID yet.
So What the heck is OpenID?
For all those who still haven't heard about it, OpenID is a universal web site login system With just one "unified" OpenID account the user can login to multiple websites with no need to create multiple accounts across each and every different website on the internet.
The only requirement for the user to be able to use OpenID is that the website in question to have (support) for OpenID credential and the user to have existing OpenID account.
Therefore using one single OpenID you can sign in as a certain user to multiple websites on the internet with no need for annoying registration process to each and every new website you encounter. Another benefit OpenID gives to the user is that you don't have to memorize or keep notes of a tens or thousands of different login accounts across the many different websites on the net.
Using OpenID also saves the user from troubles with forgotten password or username as just one OpenID login is used to login you everywhere.
For WordPress blogging platform the Russian Igor Korolev, has written a wordpress plugin – comments-to-wordpress . This plugin adds support for OpenID authentication in WordPress comments.
Here is how to OpenID to WordPress:
1. Download the comments-with-wordpress plugin and unzipAs of writting of this article latest comments-to-wordpress plugin is ver. 1.4.
Download the plugin to blog path directory lets say, /var/www/blog/wp-content/plugins/ and unzip:
# cd /var/www/blog/wp-content/plugins

# wget http://downloads.wordpress.org/plugin/comments-with-openid.zip

...

# unzip comments-with-openid.zip

...
I've also done a mirror for download of comments-with-openid 1.4 here
2. Enable Comments with OpenID wp plugin
Next the plugin has to be Enabled, just like any other wordpress plugin via admin menus:
Plugins -> Inactive -> Comments with OpenID (enable)
Once the plugin is enaabled it is necessery to add some code with a text editor in file /var/www/blog/wp-content/themes/default/comments.php
Small noet to make here: If you're not using the default WordPress theme (like I do), you will have to edit the /themes/your-theme-name/comments.php instead.
Inside the file look for the form input fields:
<p> <input type="text" name="author" ....

...

<p> <input type="text" name="email" id="email" ....

...

<p> <input type="text" name="url" id="url" ....

...
Before the html tags code:
Paste the following code:
<?php comments_with_openid(); ?>
Save the comments.php file and you Identification for new comments with OpenID will appear in your wordpress Comments form.
The OpenID plugin will add a number of service OpenIDs to choose between like you can see in my blog's plugin section or the screenshot below:
The URL https://www.google.com/accounts/o8/id is just a sample and showed because I clicked on the Google icon. If you have a Google profile you can check the exact ID and use it as URL there. Simply if your browser is logged in Gmail and you have Google profile. OpenID should work. As you can see the plugin supports a number of services which already support OpenID auth, the list of services can be easily extended by adding minor changes in …/plugins/comments-with-openid/comments-with-openid.php
There is also another wordpress plugin with the openid name – http://wordpress.org/extend/plugins/openid/
Downloading and enabling the other openid plugin also adds support for OpenID login in your http://your-url.com/wp-admin/ login page.
Installing the OpenID plugin is needed especially if you're a blogger blogging on 5 or 10 different topic oriented blogs, once downloading and installing the OpenID plugin will allow you to login across the blog ring without loosing time or bothering to remember different passwords across all the blogs. Here is a screenshot of the /wp-admin wordpress login page with the OpenID wp plugin enabled:
As of time of writting according to http://openid.net/get-an-openid/what-is-openid/'s website there are over 50000 major websites on the net already accepting OpenID login.
Of course as every technlogy OpenID is not perfect and along with its convenience in some cases it could impose security hole. OpenID opponents claim under some circumstances OpenID is prone to forgery, XSS (cross site scripting) and XSFR attacks. Everyone who is about to use OpenID should be also aware of the great security risk it impose if one OpenID account gets stolen through sniffing, this could mean multiple websites can be accesses with the one single OpenID by the malicious user and a lot of confidential data owned by the user can be revealed or deleted …
With this said I think OpenID is not a recommended login technology for Windows users, as windows is famous for being vulnerable to so many Viruses and Spyware/Malware etc..
With non-free software OSes like MS Windows, the user never cannot for sure if the system is infected, hence using OpenID to transfer credentials over the internet or store an OpenID SSL/(TLS) certificate to identify in websites is TOO DANGEROUS!
Hope this article was helpful. Cya
Tags: authentication, Auto, benefit, code, Comment, Draft, file, functionality, google, hyves, igor korolev, Journal, login, login accounts, major search engines, need, openid, password, php, platform, plugin, popularity, quot, Russian, Search, support, tens, text, type, universal web, url, username, wget, what the heck, Wordpress, writting, Yahoo
Posted in System Administration, Web and CMS, Wordpress | 2 Comments »