Posts Tagged ‘type’

12 must have Joomla extension plugins / Essential modules for new Joomla CMS install

Thursday, June 16th, 2011

Joomla bundle of must have extensions picture

These days very often I have to install, plain new Joomla based websites. I’ve realized that since there is no structured guide to follow describing the most essential plugins that every new fresh new joomla installation is required to have.
Thus I took the time and wrote this post, as it will be useful to myself in my future new joomla based websites establishment, I also believe these guide will be useful to other Joomla enthusiasts or administrators in their daily work.

Below I will describe in short the installation, configuration and oddities I’ve faced during installment of the above described bundle of plugins on a plan Joomla 1.5 install.These article will walk through 12 joomla essential plugins that I believe every fresh Joomla installation should be equipped with.
Hope this guide will be helpful to you. Now let’s start it up:

1. JoomlaXplorer – A sophisticated web file explorer for Joomla

One of the basic modules, beneficial with a new joomla CMS install is Joomla Xptplorer . This module enables the joomla admin to browse files in a web file explorer, on the server where the joomla CMS is installed. Below you see how handy the joomla web explorer provided by the plugin is:
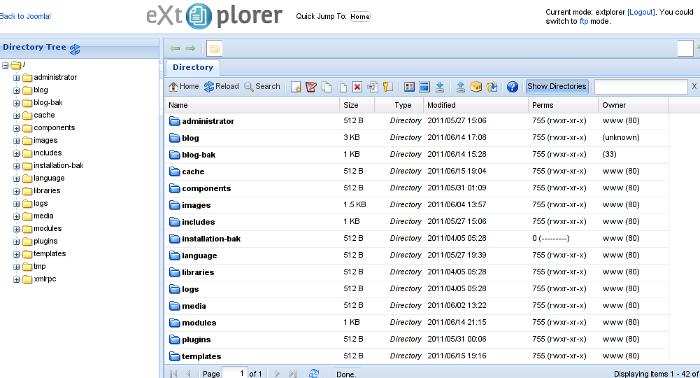
Joomla file explorer extplorer module

Installing and using the plugin is a piece of cake. To install the plugin:

a. download Joomla file Xplorer from here or from the official plugin website.

b. Install the plugin through the admin joomla menu:

Extensions -> Install/Uninstall

c. Start using the newly installed plugin by following to menus:

Components -> eXtplorer

2. JCrawler Generate easily sitemap.xml to aim the overall Joomla website SEO optimization

JCrawler logo plugin joomla

I have previously written a very through tutorial on how to install configure and generate website sitemap with Jcrawler module, You can read my article titled: How to build website sitemap.xml in Joomla here

3. sh404SEF – Make your Joomla links and content more user friendly

sh404sef Joomla Search Engine Optimization plugin

sh404SEF is a great Joomla plugin, which will seriously improve SEO and could contribute well for a website to be better indexed with major search engines.

I have previously written an article describing thoroughfully the install and use procedures for the module.
You can read the article Making your Joomla URLS Google friendly with sh404sef plugin / Simple Joomla link SEO here

4. Akeeba Backup Joomla solution

Akeeba backup Joomla Module

Installing a joomla backup solution is very essential if you does take care about your data, it often happens that server hard disk got crashes or a RAID massives got corrupted or some kind of other unexpected disaster hits the server. In these terrible times, having a website backup will save you nerves and data recovery funds, not to mention that in many cases data recovery is impossible.

Joomla has a very easy to use software for creating full website backup called Akeeba Backup

To start using the software one must:

a. Download Akeeba Backup and install it via:

Extensions -> Install/Uninstall

After the Akeeba Backup installation is over, to create your first backup, one needs to navigate to:

Components -> Akeeba Backup -> Backup Now

Each Akeeba backup (a version of the website’s files data and sql info) will be created in an archive file with the extension .jpa
The backup files are created under joomla’s website (main) root directory in directory location administrator/components/com_akeeba/backup

The Akeeba plugin also has capabilities to recover a (.jpa) backup restore point easily.
To recover a backup with the Akeeba plugin one needs to do it once again, via the plugin joomla web interface.
5. Google Analytics (place easy tracking code) in Joomla

Google Analytics Tracking Module for Joomla

a. Download the Google Analytics Tracking Module
The module is available from Joomla Extensions on joomla.org

At the current time of writting you need to download the analytics_tracking15,zip file

b. Install the Google Analytics Tracking Module;
Login as joomla admin and navigate to;

Extensions -> Install

Place the analytics_tracking15.zip url to the Install URL: field.
Again as of time of writting you need to place https://www.pc-freak.net/files/analytics_tracking15.zip;

c. Open the Module Manager

Extensions -> Module Manager

d. Click over Google Analytics Tracking Module
On the right pane you will notice in the Module Parameters the Analytics_uacct_code field. In the uacct_code field you need to paste your UA obtained from your created google-analytics account.
This code is usually something like UA-2101595-10
Now place your code their and press the save green button located near the right top of the screen. You should see the text in blue Item Saved which would indicate your UA code is stored already in the Google Analytics Tracking Module, now press the Cancel button located again on the right top.
As a last step before the Google analytics is set-up on the Joomla you need to enable the plugin to do you need to press over the tick left sided from the text reading Google Analytics Tracking Module in the Module Manager
e. Click over the Enabled button in Module Manager;
Google Analytics Tracking Module -> Enabled

6. Itprism (Facebook, Twitter etc.) Social Network share buttons Joomla plugin

ITPShare Large Social Buttons Joomla

a. to add the itpsocialbuttons to joomla Download the Itpsocialbuttons latest module files from http://itprism.com/free-joomla-extensions/social-buttons-plugin or use my mirrored module files below:

Download mod_itpsocialbuttons .zip file
Download plg_itpsocialbuttons .zip

After having the two files necessery to be installed to make the ITPSocialButtons appear on website, installation is done like with any other installation:

Extensions -> Install/Uninstall -> Upload Package File (Choose File)

Next its necessery to configure the plugin to do so, follow to menus:

Extensions -> Module Manager -> Share

You will notice the Share dialog in the list of Module Name column in Module Manager

Here is a screenshot on how the settings options for ITpsocialbuttons will look like:
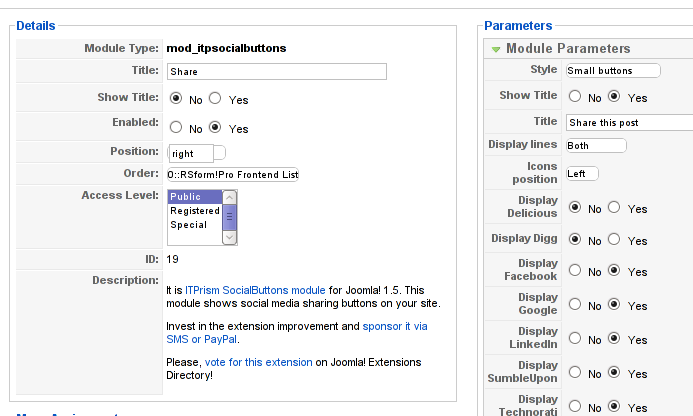
Mod ITpSocialButtons settings screen

The options which I personally changed was:

Show Title – I set this one to No as I wanted to omit the plugin title text to appear on my website.
Further on I’ve set the Enabled option to Yes to enable the plugin and choose the buttons Style option to be of a Small buttons type.
I’ve also found that the most suitable position for the Social Share buttons were to be of a right – Position .

Here is how the social network itprism share buttons looks like:

ITprism Joomla Social Share Plugin various button types

The plugin supports sharing of joomla pages to the following list of social networks:
 

  • Delicios.com
  • Digg.com
  • Facebook
  • Google Bookmarks
  • StumbleUpon
  • Technorati
  • Twitter
  • LinkedIn

The module configuration, also allows the user to configure the type of social network buttons, one wants to display on the website.

7. Joomla JCE Content Editor

This content editor is really awesome compared to the default editor TinyMCE. If you want to have an options rich content editor for Joomla, then this is the one for you 🙂
download JCE Content Editor here

After installing the JCE Joomla content editor in order to enable it as a default editor you need to go to the following location:

Site -> Global Configuration -> Default WYSIWYG Editor

There place on Editor TinyMCE and change it with Editor – JCE

Now go to edit some article, and you will see the difference in the editor 🙂

8. Add gallery Joomla capabilities with sigplus (Image Gallery Plus) and Very Simple Image Gallery

Image Gallery Plus sigplus Joomla Screenshot

Image Gallery Plus plugin (sigplus) gallery review screenshot

sigplus Image Gallery Plus is a straightforward way to add image or photo galleries to a Joomla article with a simple syntax. It takes a matter of minutes to set up a gallery but those who are looking for a powerful gallery solution will not be disappointed either: sigplus is suitable for both beginner and advanced users.

Download Sigplus Joomla Image Gallery plugin here
Using sigllus is quite easy all one has to do is use Joomla Media Manager from links:

Site -> Media Manager

Create new folder in the stories folder, let’s say New Pictures and further on use Media Manager to upload all desired pictures to be later displayed.

Being done with uploading the images you want to display, go to Article Manager :

Content -> Article Manager

From there choose your article where new uploaded pictures you want to display and type in the article:

{gallery}New Pictures{/gallery}.

Note that New Pictures is the directory just recently created as stated below, it’s important that there is no spacing between {gallery}and New Pictures, if one tries {gallery} New Pictures {/gallery} instead of {gallery}New Pictures{/gallery} an error will occur instead of the pictures being displayed in a scrolled gallery.

Sigplus Image Gallery has also a number of configuration options, which might make it look a bit more decent.
I have to say in my view the default way sigplus displays pictures is awful!

Another alternative if you don’t like Sigplus ‘s way of creating new galleries is to use Very Simple Image Gallery
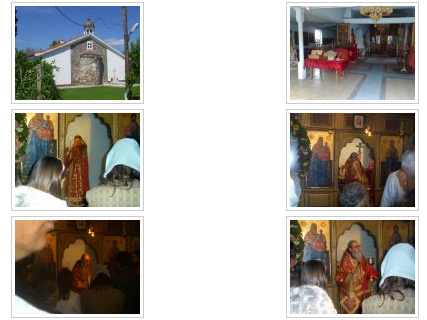
Very Simple Image Gallery joomla screenshot

Here is a screenshot on a sample gallery created with Very Simple Image Gallery Joomla Plugin

You can download Very simple image gallery here

After installing the plugin. It’s use is analogous to the Sigplus . To use it likewise sigplus create new directory through Media Manager and in stories and upload your files in let’s say New Pictures1 . Later on in your article place, the code

{vsig}New Pictures1{/vsig}

Gallery will be generated automatically by the plugin. I think Simple Image Gallery is a bit more advanced and gives a better outlook to Galleries, though it’s configuration settings are much less than with SigPlus image gallery.

To add pictures comments e.g. img link alt=” and title=” tib you need to place a code within the Article manager similar to:

{vsig_c}0|Picture_1.JPG|Some sample text|Some other text{/vsig_c}
{vsig_c}0|Picture_2.JPG|Some example text|Some text{/vsig_c}
etc. ..

Note that the 0 in above example specifies the gallery number if you for instance are using a couple of galleries with Simple Image Gallery , the first one you used would be call 0 . The text specified as comments to the picture will also appear after you preview the gallery right below the picture when clicked on as a picture description in a really nice way.
9. Install Google maps plugin for Joomla
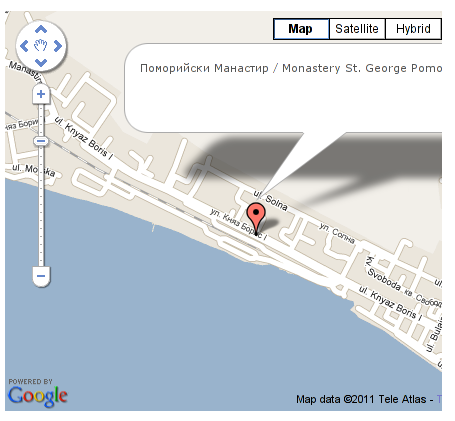
Google Maps plugin for Joomla screenshot

It’s a wise idea that every website has a location map on it’s website, for that reason Google maps is just great.
To install Google maps capability to joomla one can use a plugin called Google Maps .

You can straighly download Joomla’s Googlemap plugin from here

Afterwards use Extension Manager to install the plugin e.g. follow:

Extensions -&gr; Install/Uninstall (Choose File)

and click on Upload File & Install button.

To further enable and configure the Joomla Googlemap plugin you will have to go to the location:

Extensions -> Plugin Manager

Therein you will have to find and enable the Google Maps plugin which is to be found in the column named Plugin Manager
On my Joomla installation the plugin was located in the second page with modules, so if you don’t find the module on the listing with modules on the first page, make sure you scroll to the bottom of the page and click on Next button.

Therein in the list you will most likely notice Google Maps use the Enable button to enable it.

Next step is to configure the plugin, to do so press on the plugin name Google Maps
All configuration necessery here is to place Googlemaps API Key in the respective field (you will see it among config options).

Issuing a new Google Maps api key takes just few seconds, if you already have a gmail account just go to http://code.google.com/apis/maps/signup.html and take few seconds to issue the key.

You will get the key right on your gmail account after being issued (to repeat myself issuing takes few seconds so no worrier here).

One moreOnce having the key place it in the Googlemaps API Key field and configuring Address (which is one of the list of many options the plugin provides) you will be done with configuration.

To display a google map the location you just configured go to the Article Manager , select the article where you want the google maps location picture of your address to appear and type in the Article:

{mosmap|text='Exact street address location'|zoom='15'|zoomType='Large'|zoomNew='0'}

After you save the article a very nice Google map showing you the location’s streets will appear.
You can further conifgure a number of things related to the google map to appear, one thing you might want to play with is the zoom option which as you see in below’s code is equal to 15, e.g. zoom=’15’
Set it to another one if you want to regulate your googlemaps zoom level. For more thoroughful options take a look at the extensive plugin documentation.

10. Joomla Xmap (generating static HTML sitemap) Download Xmap from here , install it the usual plugin way.

Right after installation on the plugin succesful install screen you will notice the link component menu .
Clicking on the component menu you will be leaded to a page showing you few links Sitemap’s URL :
 

  • XML Sitemap:
  • HTML Sitemap:
  • News Sitemap:
  • Images Sitemap:

11. Add Joomla donate Paypal capabilities with Joomla PAYPAL DONATION MODULE

Paypal Donation Module Joomla Screenshot

Just recently I’ve written a a post on how to add a paypal donation capabilities to joomla, you can read my previous post here

12. Install Joomla RSForms Module (Advanced Joomla Forms Support)
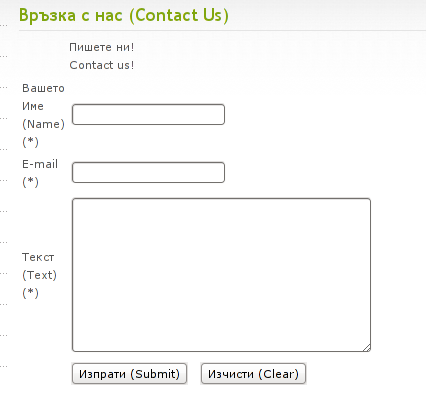
Simple Joomla RsForm contact form

If you’re planning to add a complicated form support for Joomla, there are plenty of plugins, however one that was suggested by a friend of mine which is deep in Joomla world and moreover works good on my joomla installations is RSForms

Joomla – RSForms! is free to download and has great and easy interface to create new joomla forms.

At the time of writting I use these three RSForms components on new Joomla installations:

RSform Pro 1.1.0 com
Mod RsForm for Joomla 1.5
Mod Rsform list for Joomla

For latest release of RSForms! use the link http://www.rsjoomla.com/joomla-components/rsform.html

Installation is like any other module and is done through Extensions -> Install/Uninstall menu.

After installation, setting up a new form is available from the Joomla Menus:

Components -> RSform!Pro -> Manage Forms

I would not enter in details on how to edit the default RSForms or create a new RSForm. Just take some time and learn it by trying 😉

After the rsform is ready, to enable the new form, navigate to Joomla menus:

Menus -> Main Menu

Press the New button located in the buttons bar nearby the page header in the list of options in Select Menu item Type you will notice the RSForm!Pro as an option, press on it to establish the new form in the menus.

A follow up window will appear where one can set a Title: and Alias: for the new form as well as few other options.
After finalizing the settings press on Apply button to save the settings and the new form should appear in Joomla.

Probably there are many more handy plugins, which I’m missing here thus I’ll be glad if readers suggest some more helpful essential (must have plugins) for Joomla.
Feedback on this tutorial is very welcome!
Looking forward to hear for your opinions if my article was helpful to you 😉

check your food content additives on your Mobile Phone with e-additives (Etata)

Friday, June 4th, 2010

E-Additives J2ME application check your food contamination

In the present age it’s really modern for companies to cut costs and increase a foodproduct durabity and endurance using addition of specially crafted chemical compontents.
Most of which are starting with E and followed by a number for example E328 .
Though this is generally profitable for companies and is prolonging the food durability it’smaking the food less nourishing and more harmful or even sometimes toxic for us humans.
A good friend of mine Necroleak or as earlier known Pro-XeX has created a nice J2MEapplication for mobiles that has a database of most groups of E food chemical additives and is able to tell youif a certain E type like E329 for instance is belonging to which chemical additive group.
This is quite handy especially when you go for grocery to the city market and you have to buy a can of milk or some type ofcanned food.
In the european Union as well as in America, New Zealand, Australia and Israel the E number of the additives are encountered on every non-biological food label.
Hence it’s really helpful when you launch the E-additives application whileyou’re selecting your food and check the food additives E E labelling and therefore know what type of chemical you might swallow while eating the purchased food.
This type of behaviour is really smart and could have a positive impact on your physical health in a long term and help you select a food which is less chemical contaminated.More about the ETATA / E-Additives can be read on it’s official page
Some of the benefits of E-Additives as an application that it is really multi-platform oriented and is supposed to run on most mobile phones which include the J2ME Java Virtual machine
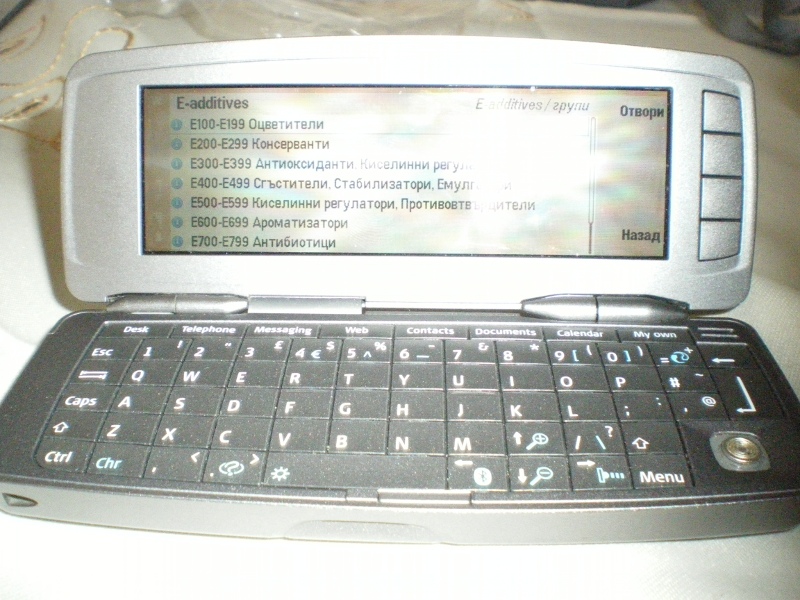
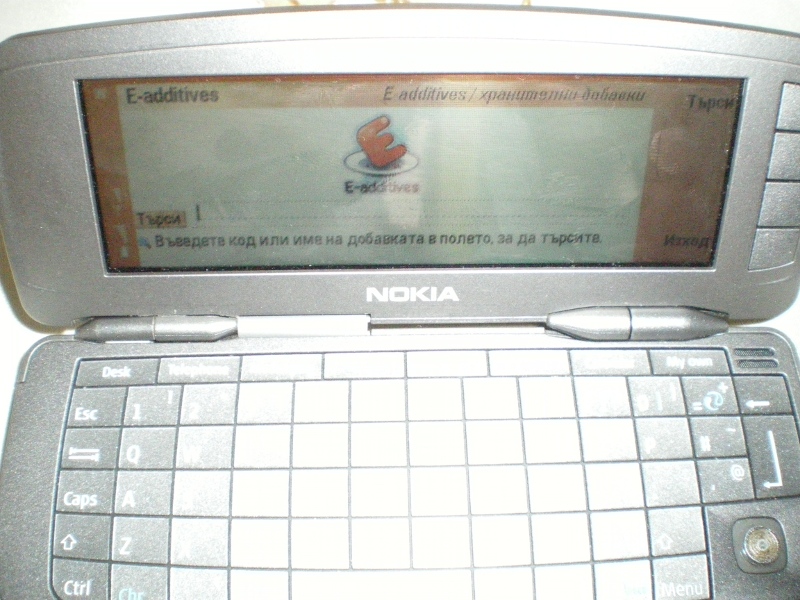
I decided to try the e-additives mobile software on my Nokia 9300i and I have to share the program installed and runs on the mobile quite nice, though the J2ME included with Nokia 9300i is currently quite outdated.

Here are some pictures of e-additives running my Nokia 9300i mobile:

E-additives logo screen Nokia 9300i
The only downside of th e-additives on my nokia is that some pictures shown on the e-additives website are not appearing on my phone.
However since I can search in E-additives – E database the application is performing it’s original intention through enabling me to check how actually contaminated with chemical additives (preservative food additions) are my daily meals.

Find all hidden files in Linux, Delete, Copy, Move all hidden files

Tuesday, April 15th, 2014

search-find-all-hidden-files-linux-delete-all-hidden-files
Listing hidden files is one of the common thing to do as sys admin. Doing manipulations with hidden files like copy / delete / move is very rare but still sometimes necessary here is how to do all this.

1. Find and show (only) all hidden files in current directory

find . -iname '.*' -maxdepth 1

maxdepth – makes files show only in 1 directory depth (only in current directory), for instance to list files in 2 subdirectories use -maxdepth 3 etc.

echo .*;

Yeah if you're Linux newbie it is useful to know echo command can be used instead of ls.
echo * command is very useful on systems with missing ls (for example if you mistakenly deleted it 🙂 )

2. Find and show (only) all hidden directories, sub-directories in current directory

To list all directories use cmd:

find /path/to/destination/ -iname ".*" -maxdepth 1 -type d

3. Log found hidden files / directories

find . -iname ".*" -maxdept 1 -type f | tee -a hidden_files.log

find . -iname ".*" -maxdepth 1 type d | tee -a hidden_directories.log
4. Delete all hidden files in current directory

cd /somedirectory
find . -iname ".*" -maxdepth 1 -type f -delete

5. Delete all hidden files in current directory

cd /somedirectory
find . -iname ".*" -maxdepth 1 -type d -delete

6. Copy all hidden files from current directory to other "backup" dir

find . -iname ".*" -maxdepth 1 -type f -exec cp -rpf '{}' directory-to-copy-to/ ;

7. Copy and move all hidden sub-directories from current directory to other "backup" dir

find . -iname ".*" -maxdepth 1 -type d -exec cp -rpf '{}' directory-to-copy-to/ ;

– Moving all hidden sub-directories from current directory to backup dir

find . -iname ".*" -maxdepth 1 -type d -exec mv '{}' directory-to-copy-to/ ;


Windows add command to PATH variable – Adding (Putty, VIM) new binaries folder to windows %PATH%

Friday, June 27th, 2014

windows-add-to-path-location-of-new-binaries-putty-vim-etc-system-properties-environment-variable-screenshot
I want to use vim (text editor) on my Windows 7 work computer and hence installed VIM (VI Improved) port for Windows GVim.
VIM works perfect on Windows and for those coming from UNIX background having it installed is a must, however vim doesn't include a PATH location to its (vim) executable in Windows %PATH%.
PATH command line variable stores path locations to all binaries that could be executed directly from cmd line with no need to type full directory path to binary.

To illustrate what PATH is lets say you want to make Putty accessible straight from Windows command line (cmd.exe), you can add Putty's installation Path Folder to global Windows %PATH%. On my 64-bit Windows PC Putty binary is installed in C:Program Files (x86)PuTTY.

echo %PATH%
 

C:Perl64sitebin;C:Perl64bin;C:Program FilesRA2HP;C:Windowssystem32;C:
Windows;C:WindowsSystem32Wbem;C:WindowsSystem32WindowsPowerShellv1.0;C:
Program FilesWIDCOMMBluetooth Software;C:Program FilesWIDCOMMBluetooth Sof
twaresyswow64;C:Program Files (x86)Hewlett-PackardHP ProtectTools Security M
anagerBin;C:Program FilesActivIdentityActivClient;C:Program Files (x86)A
ctivIdentityActivClient;C:Program Files (x86)QuickTimeQTSystem


To make Putty accessible only by typing Putty instead of typing C:Program Files (x86)PuTTYPutty.exe, it has to be included in PATH, normally from Win command line (cmd.exe). This is done with:


set PATH=%PATH%;C:Program Files (x86)PuTTY


echo %PATH%


C:Usersggeorgi7Desktop>echo %PATH%
C:Perl64sitebin;C:Perl64bin;C:Program FilesRA2HP;C:Windowssystem32;C:
Windows;C:WindowsSystem32Wbem;C:WindowsSystem32WindowsPowerShellv1.0;C:
Program FilesWIDCOMMBluetooth Software;C:Program FilesWIDCOMMBluetooth Sof
twaresyswow64;C:Program Files (x86)Hewlett-PackardHP ProtectTools Security M
anagerBin;C:Program FilesActivIdentityActivClient;C:Program Files (x86)A
ctivIdentityActivClient;C:Program Files (x86)QuickTimeQTSystem;C:Program
Files (x86)PuTTY

To check all the exported variables, use SET command, here is my default SET variables:

C:> SET
 

ALLUSERSPROFILE=C:ProgramData
APPDATA=C:UsersgeorgiAppDataRoaming
CLASSPATH=.;C:Program Files (x86)Javajre6libextQTJava.zip
CommonProgramFiles=C:Program FilesCommon Files
CommonProgramFiles(x86)=C:Program Files (x86)Common Files
CommonProgramW6432=C:Program FilesCommon Files
COMPUTERNAME=GEORGI
ComSpec=C:Windowssystem32cmd.exe
DEFLOGDIR=C:ProgramDataMcAfeeDesktopProtection
FP_NO_HOST_CHECK=NO
HOMEDRIVE=C:
HOMEPATH=Usersggeorgi7
LOCALAPPDATA=C:Usersggeorgi7AppDataLocal
LOGONSERVER=G1W4730
NUMBER_OF_PROCESSORS=4
OS=Windows_NT

To make inclusion of VIM, Putty or other binary directory) into PATH variable permanent:


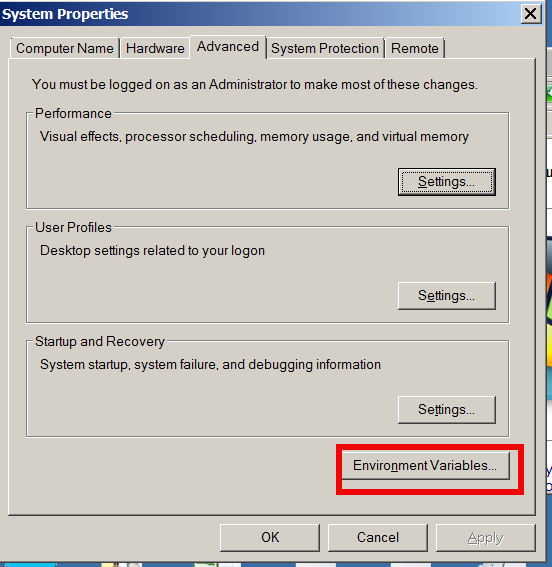
From Windows desktop, right-click My Computer and click Properties.
In the Advanced system settings click on Properties window, click on the Advanced tab.
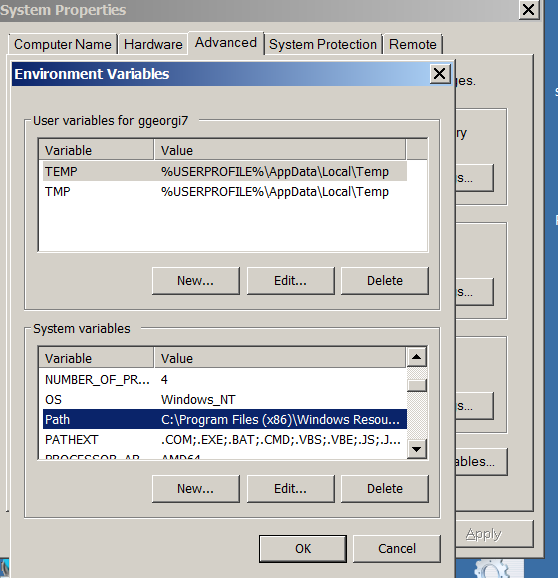
In the Advanced System section, click the Environment Variables button.


windows-add-command-to-path-variable-adding-new-folder-to-windows-path-add-putty-vim-to-easy-execute
Finally, in the Environment Variables window, search for the Path variable in Systems Variable section and click the Edit button.
Add or modify the path lines including the paths to binaries you wish to be easy access.
Note that each different directory should be separated with a semicolon (;), e.g.
 

C:Program Files;C:Winnt;C:WinntSystem32; C:Perl64bin


How to check Windows server installed Tomcat and Java version

Tuesday, August 19th, 2014

how-to-check-get-java_and-tomcat-version-on-windows-java-and-tomcat-logo
I'm filling up a TOP (Turn to Production) form for a project where my part as Web and Middleware Engineer included install of Tomcat 7 and Java 1.7 on Windows server 2008 R2 standard. TOP is required Excel sheet standard document used by many large companies to fill in together with Project Manager before the server is to be launched into Production mode.

Therefore I needed to find out previously installed Tomcat and Java version, here is how:

1. Go to Tomcat install directory and (click twice) run twice Tomcat7w

As tomcat is installed in Custom location in D:webdienste in this case I had to run:
 
D:webdiensteapplication-jsptomcatapplication-namecurrentbinTomcat7w.exe

I run it using command line (cmd.exe), however you can run it via Windows Explorer, if you're lazy typing.
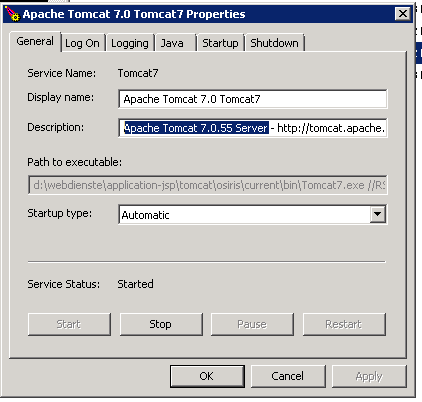
You will get a window pop up like on below screenshot:

In this case Installed Tomcat version was 7.0.55

If you need to check the version on older Tomcat application server install you can run instead Tomcat6w – whether its Tomcat version 6 or Tomcat5w – for Tomcat ver. 5

In order to Check the java version the quickest way is via command line, again run cmd.exe from

Start -> Run -> cmd.exe

how-to-see-find-get-check-tomcat-version-on-windows-server-install-screenshot

Then cd to whenever is Java VM installed the usual location where it gets installed for Java 1.7 on Windows is:

C:Program FilesJavajre7bin

Java 8 common location is:

C:Program FilesJavajre8bin

Java would automatically add PATH to Windows default PATH definitions during install, hence to find out exactly where java is installed on Windows server, type in cmd:

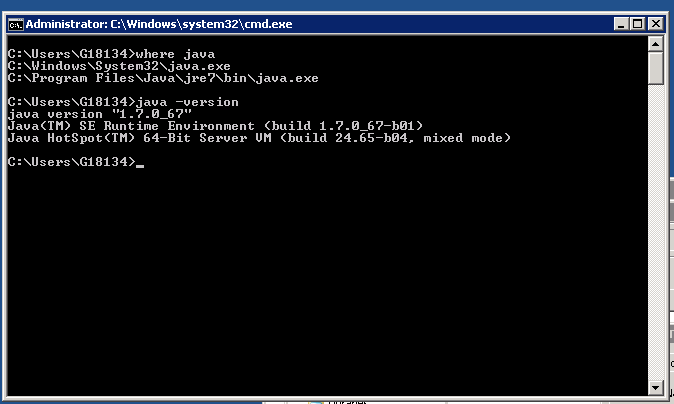
where java

Then to check the exact installed Java version on Win host is by invoking java (jre) cli with -version parameter:

java -version

how-to-check-get-java-version-info-on-windows-server-screenshot

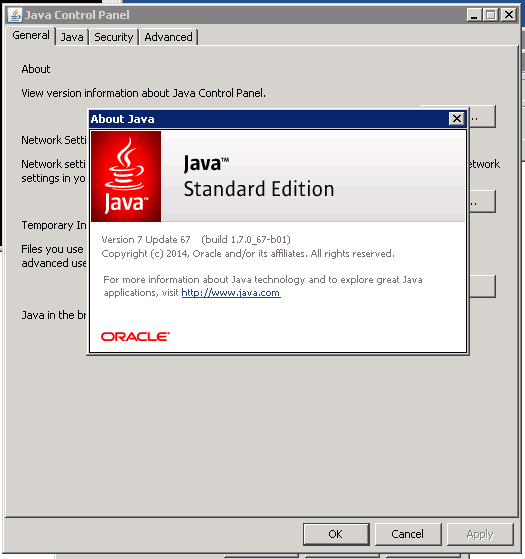
If you're lazy to type in commands, you can also check Java version in Windows from GUI by using:

Java Control Panel

To launch it in:

Start -> (Search Program and Files)

field type:

Java Conf and click on Java Control Panel

Then click on

General (tab) -> About

java-control-panel-gui-about-version-windows-server-screenshot


My cousin’s Marriage – Impressian from Burgas (Bulgaria) marriage and Kamenartzi herbal healer

Sunday, March 9th, 2008

kamenar-near-burgas-herbal-healing-bai-Dimitar-natural-healear-who-was-healing-cancer
We (Me and My Family) had to stand up early in the morning around 4:30 in Saturday and we traveled to Burgas. First we had to go to a herbman to prescribe me some Herbs. The herbamn is called “bai Dimitar” where bai is a bulgarian specific title for a man on age after the middle age he is located in Kamenartzi village (a small village near Bourgas). He is a sort of strange guy and is speaking very strange things. I hope this herbs will help me. I have to boil them and drink them five times a day. After that we went to Bourgas in my aunt Galia and uncle Galen’s apartment. Everything was a sort was going smooth, Gergana my cousin which was going to merry dressed with a bride dress and waited for his future man (son-in-law). The guy appeared with a limosine and an orchestra. Some ordinary Bulgarian rituals were followed after that the ceremony continued in the council house. Where they became man and wife officially (in front of Bulgaria). After that it followed a celebration in a Bourgas Hotel called “Bulgaria”. The celebration of the marriage included again different traditional Bulgarian dances, guest also danced and ofcourse the Bulgarian familiar horos. I did eat a lot of food and drinked a lot of the meaningless of marriage and all this vanity into celebrity and a lot of empty words spokened there I also convinced myself that I would NEVER EVER allow to have a marriage celebration like this. Some 20 or 30% of the music was Chalga which ofcourse drived me mad. In somewhere 05:00 in the morning we traveled back by car with my father driving. My father is driver from some few months and I definetely can’t say he is an experiencable type of driver which may allow himself to drive with speed higher than the maximum allowed, anywayz he did and I just tried to make him aware that he is braking the driver codex rules. He instead of taking my notes which I made with the idea that I would like to be home back ALIVE, nagged him and he started yelling at me and telling me to stop to complain. That ended in again making me hate him and regret I have parents like this which was a expected to happen since I was angry at all the stupidity and the low intelectual level of most of the ppl who were invited into the Marriage ceremony (although most of them were businessman and a ppl with a high degrees, education). The thing that irritated me the most that the had a marriage ceremony in a orthodox Church and they probably did this just because this is the ordinary way most ppl in Bulgaria does. PFF.. I have slept just for a hour or two today so I probably will go to sleep soon. But first I intend to go for a Liturgy in St. George’s orthodox church. This is after 20 minutes from now. Well thats most of how I spend my saturday on “nothing”. The good thing from all that was that Niki, a.k.a. Nomen’s brother has given me his PSP for the weekend. So I had the time to examine it and generally play with it. I even used a free wifi access in the restaurant where we were and did a bit of browsing :)END—–

How to count how many files are in a directory with find on Linux

Tuesday, February 21st, 2012

how to count how many directories are on your linux server

Did you ever needed to count, how many files in a directory are there?
Having the concrete number of files in a directory is not a seldom task but still very useful especially for scripts or simply for the sake of learning

The quickest and maybe the easiest way to count all files in a directory in Linux is with a combination of find and wc commands:

Here is how;

linux:~# cd ascii
linux:~/ascii# find . -type f -iname '*' -print |wc -l
407

This will find and list all matched files in any directory and subdirectories, print them out and count them with wc command.
The -type f argument instructs find to look only for files.

Other helpful variance of finding and listing all files in a directory and subdirectories is to list and count all the files with a certain file extension under a directory. For example, lets list all text files (.txt) contained in a directory and all level sub-directories:

linux:~/ascii# find . -type f -iname '*.txt' -print |wc -l
401

If you need to check the number of files in a directory for multiple directories on a server and you're aiming at doing it efficienly, issung above find .. | wc code will definitely be not a good choice. If used it will generate heavy load for the system and along with that will complete the execution in ages if issued on a large number of files containing dirs.

Thanksfully if efficiency is targetted, there is a command written in C called tree which is more efficient than find.
To count the number of files in dir but using tree :

linux:~# cd ascii
linux:/ascii# tree | tail -n 1
32 directories, 407 files

By default tree prints info for both the number of found files and directories.
To print out only the files matched, awk comes handy, e.g.:

linux:/ascii# tree |tail -n 1| awk '{ print $3 }'407

To list only the number of files in a directory without its existing sub-directories ls + wc use is also possible:

linux:~/ascii# ls -l | grep ^- | wc -l68

This result the above command would produce is +1 more than the real number of files, as it counts the directory ".." as one file (in UNIX / LINUX everything is file).

A short one liner script that can calculate all files correctly by substracting 1 is and hence present correct result on number of files is like so:

linux:~/ascii# var=$(ls -l | grep ^- | wc -l); var=$(($var - 1)); echo $var

ls can be used to calculate the number of 1-st level sub-directories under certain directory for instance:

linux:~/ascii# ls -l |grep ^d|wc -l
25

You see the ascii directory has 25 subdirectories in its 1st level.

To check symlinks under a directory with ls the command would be:

linux:~/ascii# ls -l | grep ^l | wc -l
0

Note above 3 ls | grep … examples, will not work properly if the directory contains files with SUID or some special properties set.
Hence to get the same 3 results for active files, directories and symbolic links, a one liner similar to the one below can be used instead:

linux:~/ascii# for t in files links directories; do echo `find . -type ${t:0:1} | wc -l` $t; done 2> /dev/null
407 files
0 links
33 directories

This will show statistics about all files, links and directories for all directory sub-levels.
Just in case if there is need to only count files, links and directories without directory recursion enabled, use:

linux:~/ascii# for t in files links directories; do echo `find . -maxdepth 1 -type ${t:0:1} | wc -l` $t; done 2> /dev/null
68 files
0 links
26 directories

Anyways the above bash loop will be slow, for directories containing thousands of files. For better performance the equivallent of above bash loop rewritten in perl would be:

linux:~/ascii# ls -l |perl -e 'while(<>){$h{substr($_,0,1)}+=1;} END {foreach(keys %h) {print "$_ $h{$_}\n";}}'
- 68
d 25
t 1
linux:~/ascii#
In any case the most preferrable and efficient way to count files en directories is by using tree command.
In my view using always tree command instead of code "hacks" is smart idea.

In Slackware tree command is part of the base install, on Debian and CentOS Linux, tree cmd is not part of the base system and requires install via apt / yum e.g.:

debian:~# apt-get --yes install tree
...

[root@centos:~ ]# yum --yes install tree

Happy counting 😉

How to configure Exim to relay mail to remote SMTP server on Debian and Ubuntu

Wednesday, August 24th, 2011

I’m required to do some mail relaying on a Debian Linux host which should use a remote mail server to relay its mails.
Until so far I’ve had not much experience with exim as I prefer using qmail, whever a mail server is needed. However since now only a relaying was necessery and exim is the default installed MTA on Debian, I’ve decided to use exim to take care of the SMTP mail relaying.
After a bit of reading it happened configuring exim to relay via remote SMTP server is more than easy!

All I had to do is run the command:

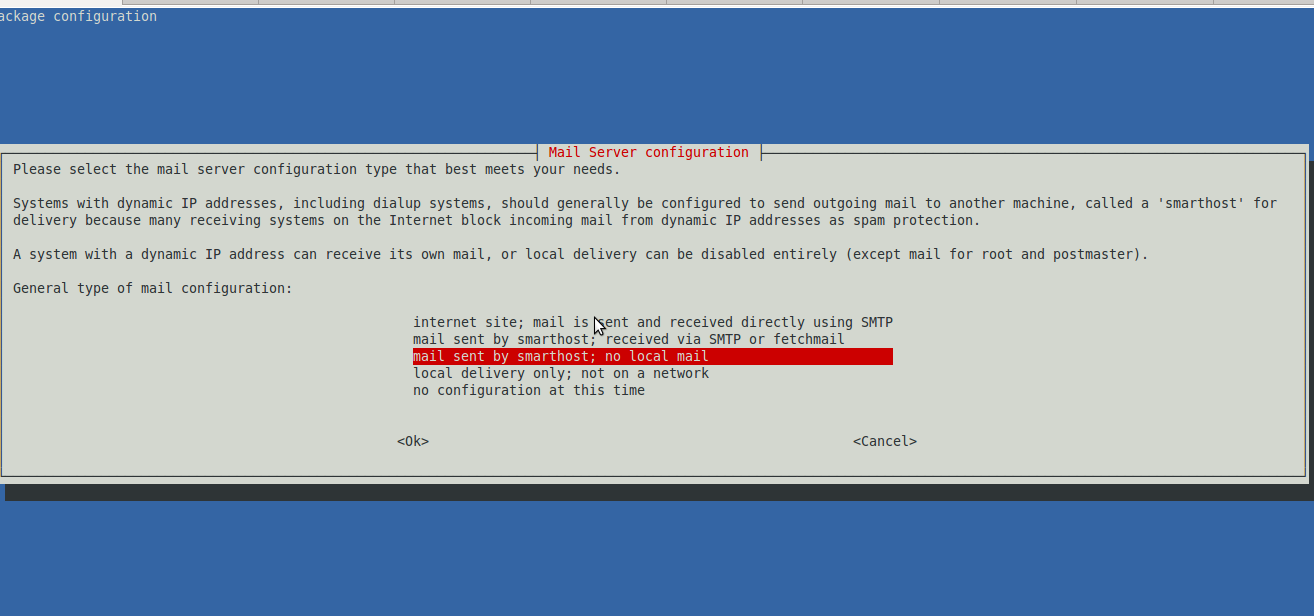
debian-relay:~# dpkg-reconfigure exim4-config

Next in the Ncruses interface to appear:

Debian Exim relay smtp config screenshot

I had to choose the option:

mail sent by smarthost; no local mail

Next a dialog appears asking for:
System mail name:
Therein it’s necessery to type in the hostname of the remote SMTP to be used for mail relay.
Next dialog asks for:
IP-addresses to listen on for incoming SMTP connections:
and I left it with 127.0.0.1 however if exim is supposed to be visible from external network one might decide to put in real IP address there.

Pressing OK leads to the next dialog:
 Other destinations for which mail is accepted: 
I decided to leave this blank as I don’t want to accept mail for any destinations.
Next pane reads:
Visible domain name for local users:
I’ve typed inside my smtp relay server e.g.:
smtp.myrelaymail.com

Further comes:
IP address or host name of the outgoing smarthost:
There once again I typed my mail relay host smtp.relaymail.com

The next config screen is:
Keep number of DNS-queries minimal (Dial-on-Demand)?
On any modern Linux host the default answer of No is fine.
Following prompt asked if I want to:
Split configuration into small files?
I’ve decided not to tamper with it and choosed No
Afterwards mail relaying works like a charm thx God 😉

How to make a mysql root user to login interactive with mysql cli passwordless

Wednesday, June 29th, 2011

MySQL Logo Passwordless root login .my.cnf

I’m using access to the mysql servers via localhost with mysql cli on daily basis.
With time I’ve figured out that it’s pretty unahandy to always login with my root mysql password, I mean each time to enter it, e.g.:

root@mysql-server:~# mysql -u root
Enter password:
...

Thus to make my life a way easier I decided to store my mysql root password in order to allow my root admin user to be able to login to my mysql server without asking for password. This saves time and nerves, as I’m not supposed to look up for the password file I store my server mysql root pass.

To allow my mysql cli interface, to login passwordless to the SQL server I had to create the file /root/.my.cnf readable only for my root user and store my MySQL username and password there.

Here is a sample /root/.my.cnf file:

root@mysql-server:~# cat /root/.my.cnf
[client]
user="root"
pass="mysecretMySQLPasswordgoeshere"

Now next time I use the mysql console interface to access my mysql server I don’t have to supply the password, here is how easier is the mysql login afterwards:

root@mysql-server:~# mysql -u root
Welcome to the MySQL monitor. Commands end with ; or g.
Your MySQL connection id is 3520
Server version: 5.0.77 Source distribution

Type ‘help;’ or ‘h’ for help. Type ‘c’ to clear the buffer.

mysql>

The only downside of using .my.cnf to store permanently the mysql server root and password is from security standpoint.
If for instance somebody roots my servers, where I have stored my root user/pwds in .my.cnf , he will be able immediately to get access to the MySQL server.

Another possible security flaw with using the mysql passwordless login “trick” is if somebody forgets to set proper file permissions to, .my.cnf

Once again the file should possess the permissons of:

root@mysql-server:~# ls -al /root/.my.cnf
-rw------- 1 root root 90 Apr 2 00:05 /root/.my.cnf

Any other permissons might allow non-privileged users to read the file and gain unathorized admin access to the SQL server.
 

How to change MySQL server root password

Friday, July 29th, 2011

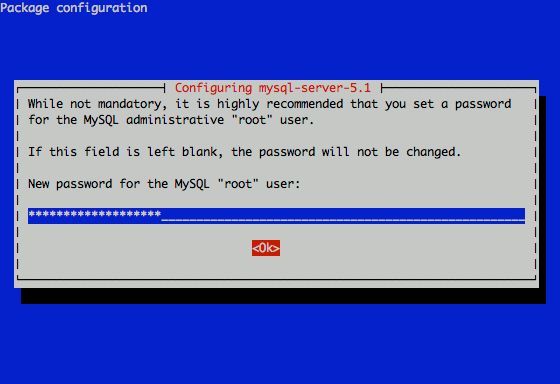
MySQL pass dialog Debian

I had to change my mysql root password for one of the servers since during the install I mispasted the password in the MySQL password prompt I needed the pwd to be changed.

Here is how I changed it to my desired one:

linux:~# /usr/bin/mysqladmin -u root -p'OLD_PASSWORD_STRING' password NEW_PASSWORD_STRING
linux:~#

The password gets changed immediately 😉

If a new password has to be set to a passwordless mysql server, the command to be issued is:

linux:~# /usr/bin/mysqladmin -u root password PASSWORD_STRING

Changing the MySQL password is also possible with mysql cli, after connecting to the sql server, though this method is a bit more time consuming. Here is how to do it from mysql console:

linux:~# mysql -u root -p
Server version: 5.1.49-3 (Debian)

Copyright (c) 2000, 2010, Oracle and/or its affiliates. All rights reserved.
This software comes with ABSOLUTELY NO WARRANTY. This is free software,
and you are welcome to modify and redistribute it under the GPL v2 license

Type ‘help;’ or ‘h’ for help. Type ‘c’ to clear the current input statement.
mysql> use mysql;
mysql> update user set password=PASSWORD(“NEW_PASSWORD”) where User=’root’;mysql> flush privileges;

Of course it’s possible to do change the root pass via phpmyadmin
Cheers 😉