Posts Tagged ‘version’

How to get a list and Backup (Save Enabled Plugins) / Restore Enabled (Active) plugins in WordPress site with SQL query

Wednesday, January 14th, 2015

get-list-and-backup-restore-enabled-active-plugins-only-in-wordpress-with-sql-mysql-query

Getting a snapshot of all active plugins and keeping it for future in case if you install some broken plugin and you have to renable all enabled plugins from scratch is precious thing in WordPress.

… It is really annoying when you decide to try to enable few new plugins and out of a sudden your WordPress site / blog starts hanging (when accessed in browser)…

To fix it you have to Disable All Plugins and Re-enable all that used to work. However if you don't keep a copy of the plugins which were previously working and you're like me and have 109 plugins installed of which only 50 are in (Active) state / used. It could take you a day or two until you come up with a similar list to the ones you previously used … Thanksfully there is some prevention you can take by dumping a list of all plugins that are currently active and in later time only enable those in the list.


# mysql -u root -p
Enter password:

mysql> USE blog_db;

Here is the output I get in the moment:
 

mysql> DESCRIBE wp_options;
+————–+———————+——+—–+———+—————-+
| Field        | Type                | Null | Key | Default | Extra          |
+————–+———————+——+—–+———+—————-+
| option_id    | bigint(20) unsigned | NO   | PRI | NULL    | auto_increment |
| option_name  | varchar(64)         | NO   | UNI |         |                |
| option_value | longtext            | NO   |     | NULL    |                |
| autoload     | varchar(20)         | NO   |     | yes     |                |
+————–+———————+——+—–+———+—————-+


mysql> SELECT * FROM wp_options WHERE option_name = 'active_plugins';

|        38 | active_plugins | a:50:{i:0;s:45:"add-to-any-subscribe/add-to-any-subscribe.php";i:1;s:19:"akismet/akismet.php";i:2;s:43:"all-in-one-seo-pack/all_in_one_seo_pack.php";i:3;s:66:"ambrosite-nextprevious-post-link-plus/ambrosite-post-link-plus.php";i:4;s:49:"automatic-tag-selector/automatic-tag-selector.php";i:5;s:27:"autoptimize/autoptimize.php";i:6;s:35:"bm-custom-login/bm-custom-login.php";i:7;s:45:"ckeditor-for-wordpress/ckeditor_wordpress.php";i:8;s:47:"comment-info-detector/comment-info-detector.php";i:9;s:27:"comments-statistics/dcs.php";i:10;s:31:"cyr2lat-slugs/cyr2lat-slugs.php";i:11;s:49:"delete-duplicate-posts/delete-duplicate-posts.php";i:12;s:45:"ewww-image-optimizer/ewww-image-optimizer.php";i:13;s:34:"feedburner-plugin/fdfeedburner.php";i:14;s:39:"feedburner-widget/widget-feedburner.php";i:15;s:63:"feedburner_feedsmith_plugin_2.3/FeedBurner_FeedSmith_Plugin.php";i:16;s:21:"feedlist/feedlist.php";i:17;s:39:"force-publish-schedule/forcepublish.php";i:18;s:50:"google-analytics-for-wordpress/googleanalytics.php";i:19;s:81:"google-sitemap-generator-ultimate-tag-warrior-tags-addon/UTWgoogleSitemaps2_1.php";i:20;s:36:"google-sitemap-generator/sitemap.php";i:21;s:24:"headspace2/headspace.php";i:22;s:29:"my-link-order/mylinkorder.php";i:23;s:27:"php-code-widget/execphp.php";i:24;s:43:"post-plugin-library/post-plugin-library.php";i:25;s:35:"post-to-twitter/post-to-twitter.php";i:26;s:28:"profile-pics/profile-pic.php";i:27;s:27:"redirection/redirection.php";i:28;s:42:"scripts-to-footerphp/scripts-to-footer.php";i:29;s:29:"sem-dofollow/sem-dofollow.php";i:30;s:33:"seo-automatic-links/seo-links.php";i:31;s:23:"seo-slugs/seo-slugs.php";i:32;s:41:"seo-super-comments/seo-super-comments.php";i:33;s:31:"similar-posts/similar-posts.php";i:34;s:21:"sociable/sociable.php";i:35;s:44:"strictly-autotags/strictlyautotags.class.php";i:36;s:16:"text-control.php";i:37;s:19:"tidy-up/tidy_up.php";i:38;s:37:"tinymce-advanced/tinymce-advanced.php";i:39;s:33:"tweet-old-post/tweet-old-post.php";i:40;s:33:"w3-total-cache/w3-total-cache.php";i:41;s:44:"widget-settings-importexport/widget-data.php";i:42;s:54:"wordpress-23-related-posts-plugin/wp_related_posts.php";i:43;s:23:"wp-minify/wp-minify.php";i:44;s:27:"wp-optimize/wp-optimize.php";i:45;s:33:"wp-post-to-pdf/wp-post-to-pdf.php";i:46;s:29:"wp-postviews/wp-postviews.php";i:47;s:55:"wp-simple-paypal-donation/wp-simple-paypal-donation.php";i:48;s:46:"wp-social-seo-booster/wpsocial-seo-booster.php";i:49;s:31:"wptouch-pro-3/wptouch-pro-3.php";} | yes      |

Copy and paste this CVS format data to a text file or a Word document for later reference ..

To restore back to normal only active WordPress plugins, first launch following SQL query to disable all enabled wordpress plugins:

UPDATE wp_options SET option_value = 'a:0:{}' WHERE option_name = 'active_plugins';

To restore above "backupped" list of active WP plugins you have to copy paste the saved content and paste it into above UPDATE query substituting option_value=' ' with the backupped string.

P.S. – This query should work on WordPress 3.x on older wordpress ver 2.x use instead:

UPDATE wp_options SET option_value = ' ' WHERE option_name = 'active_plugins';

Because pasting the backupped Active plugins list CSV is a messy and unreadable from command line it is recommended for clarity to use PHPMyAdmin frontend (whenever it is available) on server. This little hint is a real time-saver and saves a lot of headaches. Before proceeding to any Db UPDATE SQL queries always backup your Blog database, with time structure of WordPress data changes!, so in future releases this method might not be working, however if it helped you and works on your version please drop a comment with WordPress version on which this helped you.

Enjoy! 🙂


How to Turn Off, Suppress PHP Notices and Warnings – PHP error handling levels via php.ini and PHP source code

Friday, April 25th, 2014

php-logo-disable-warnings-and-notices-in-php-through-htaccess-php-ini-and-php-code

PHP Notices are common to occur after PHP version upgrades or where an obsolete PHP code is moved from Old version PHP to new version. This is common error in web software using Frameworks which have been abandoned by developers.

Having PHP Notices to appear on a webpage is pretty ugly and give a lot of information which might be used by malicious crackers to try to break your site thus it is always a good idea to disable PHP Notices. There are plenty of ways to disable PHP Notices

The easiest way to disable it is globally in all Webserver PHP library via php.ini (/etc/php.ini) open it and make sure display_errors is disabled:

display_errors = 0

or

display_errors = Off

Note that that some claim in PHP 5.3 setting display_errors to Off will not work as expected. Anyways to make sure where your loaded PHP Version display_errors is ON or OFF use phpinfo();

It is also possible to disable PHP Notices and error reporting straight from PHP code you need code like:


<?php
// Turn off all error reporting
error_reporting(0);
?>


or through code:


ini_set('display_errors',0);


PHP has different levels of error reporting, here is complete list of possible error handling variables:


<?php
// Report simple running errors

error_reporting(E_ERROR | E_WARNING | E_PARSE);

// Reporting E_NOTICE can be good too (to report uninitialized
// variables or catch variable name misspellings …)

error_reporting(E_ERROR | E_WARNING | E_PARSE | E_NOTICE);

// Report all errors except E_NOTICE
// This is the default value set in php.ini

error_reporting(E_ALL ^ E_NOTICE);
// Report all PHP errors (see changelog)

error_reporting(E_ALL);
// Report all PHP errors error_reporting(-1);
// Same as error_reporting(E_ALL);

ini_set('error_reporting', E_ALL); ?>

The level of logging could be tuned on Debian Linux via /etc/php5/apache2/php.ini or if necessary to set PHP log level in PHP CLI through /etc/php5/cli/php.ini with:

error_reporting = E_ALL & ~E_NOTICE


If you need to remove to remove exact warning or notices from PHP without changing the way  PHPLib behaves is to set @ infront of variable or function that is causing NOTICES or WARNING:
For example:
 

@yourFunctionHere();
@var = …;


Its also possible to Disable PHP Notices and Warnings using .htaccess file (useful in shared hosting where you don't have access to global php.ini), here is how:

# PHP error handling for development servers
php_flag display_startup_errors off
php_flag display_errors off
php_flag html_errors off
php_flag log_errors on
php_flag ignore_repeated_errors off
php_flag ignore_repeated_source off
php_flag report_memleaks on
php_flag track_errors on
php_value docref_root 0
php_value docref_ext 0
php_value error_log /home/path/public_html/domain/php_errors.log
php_value error_reporting -1
php_value log_errors_max_len 0

This way though PHP Notices and Warnings will be suppressed errors will get logged into php_error.log

Your Firefox profile cannot be loaded. It may be missing or inaccessible – Fix

Tuesday, May 27th, 2014


your-firefox-profile-cannot-be-loaded-it-may-be-missing-or-inaccessible

When I opened firefox I was offered that firefox cleans some data. Pressing on it took a long so I killed firefox process from Windows taskmanager (taskmgr).  . Next time Firefox was started I got the error (warning):
 

Your Firefox profile cannot be loaded. It may be missing or inaccessible"

Firefox version is 29.0.1.

Once the dialog, Firefox fails to further open. To fix Your Firefox profile cannot be loaded. It may be missing or inaccessible press windows-key+R to invoke <Open program prompt and type in:

%appdata%Mozilla

In explorer Window that will pop=up rename the folder labelled "Firefox" to something like old-Firefox.
On next start of firefox, you will be offered to recrate "the missiong profile and it will force Firefox to re-create profile.

If you want to import some of your old data into the new profile afterwards: Recovering important data from an old profile check Recovering important data from an old profile Another approach is to to go to Firefox profile folder and delete profiles.ini, this will also make firefox recreate the file on its next start. Enjoy ! 🙂


Install TorrentFlux Bit Torrent Web management interface on Debian / Ubuntu Linux

Tuesday, July 15th, 2014

torrent flux logo
Torrentflux
is web based, feature-rich BitTorrent download manager.
Torrentflux is a must have installed server software for anyone who does regular torrent downloads and want to access the downloads from anywhere on the internet.

TorrentFlux is a PHP based BitTorrent controller that runs on a web
 server. It can manage all of your BitTorrent downloads from anywhere
 through a convenient and easy-to-use web interface.
 .
 TorrentFlux uses a MySQL database to manage the downloads.

 TorrentFlux enables you to run BitTorrent downloads unattended on a monitor-less or remote server 24 hours a day, while still maintaining complete control from any web browser. Now you can control your  downloading on your firewall, or keep up with downloads while on  vacation. It uses the BitTornado client to download files, and also  requires a web server with PHP.
 
 Some of the Torrentflux features:

   * Upload Torrents via URL or File Upload
   * Start, Stop, and Delete Torrents with ease
   * Advanced Torrent start options (ports, speeds, etc.)
   * Multi-user interface
   * RSS Feeds, download Torrents files with a click
   * Run several torrents at once
   * View Download Progress of all torrents at a glance
   * View drive space at a glance
   * View Torrent file meta information
   * Built-in User management and Security
   * Private Messaging
   * Themes (selectable per user)
   * Upload History


Before installing Bittorrent you will need to have a running version of Debian, Ubuntu or any other debian derivative (though it can easily be run on any Linux distro). To install AMP (Apache MySQL Server, PHP) you can follow first part of my previous article Installing Usual PHP Apache MySQL for new Debian GNU / Linux installs.

So what for is TorrentFlux Useful?
Torrenflux is precious and must have if you have to access filtered torrent from outside of your homecountry and you have a running server already in your home country in that I was using TorrentFlux to access Bulgarian Zamunda.Net Torrent Tracker from Holland and was downloading first movies from the Bulgarian Torrent Tracker to my Fluxbox installed on my Dobrich home router and then used FTP to transfer movies to the Netherlands. Talking about many people choose to also install VSFTP and use it together with Torrentflux …

1. Install TorrentFlux and its dependencies (BitTornado, Bittorrent, Zip, Unzip, Bzip etc.) the "Debian Way"


On my Debian 7 Wheezy home machine  I run

apt-get install –yes bzip2 php5-gd php5-cli unrar-free grep python net-tools mawk wget unzip cksfv vlc-nox uudeview python-crypto libxml-simple-perl libxml-dom-perl libdbd-mysql-perl bittorrent bittornado


a) Install TorrentFlux the Debian Way

apt-get install –yes torrentflux


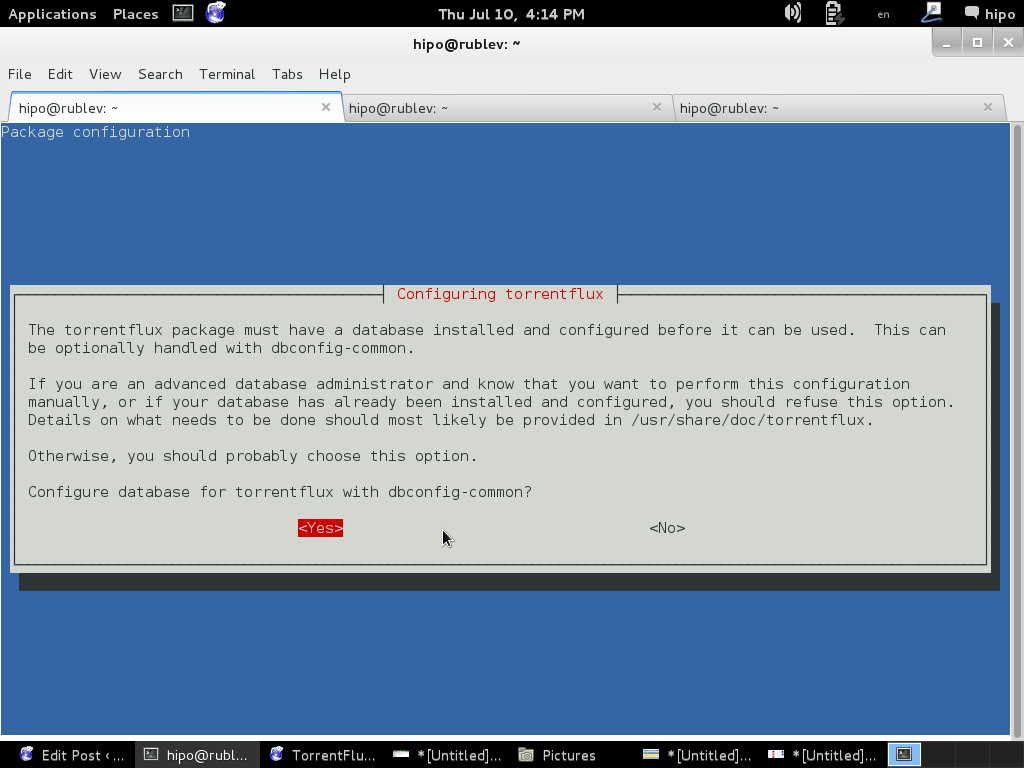
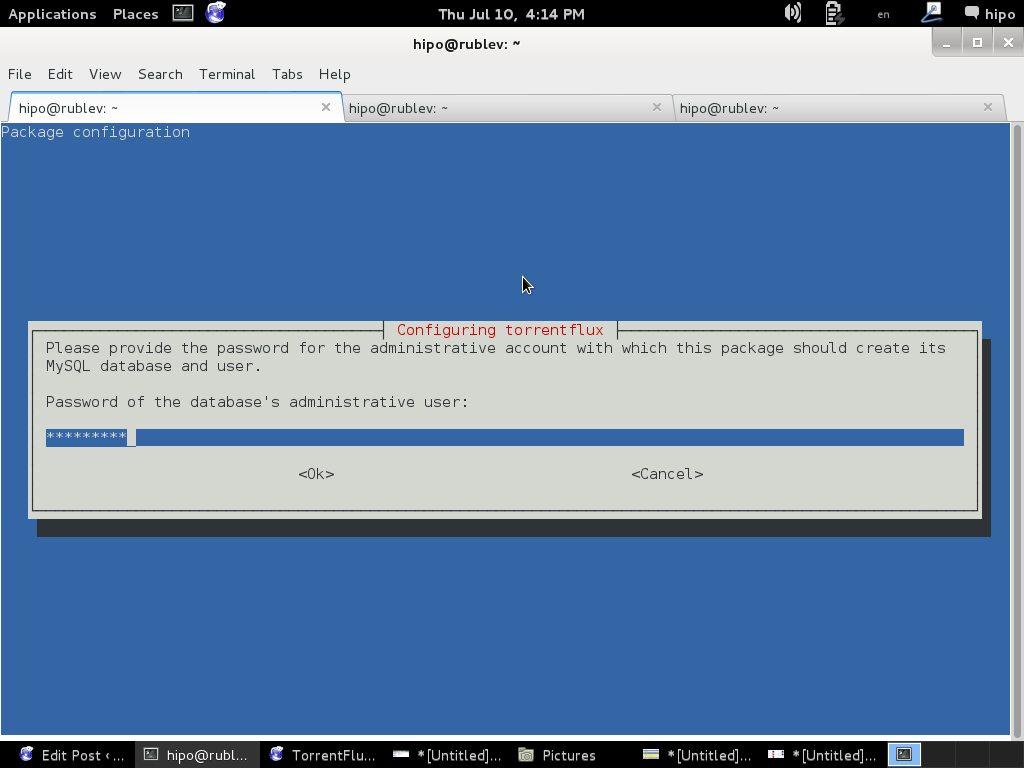
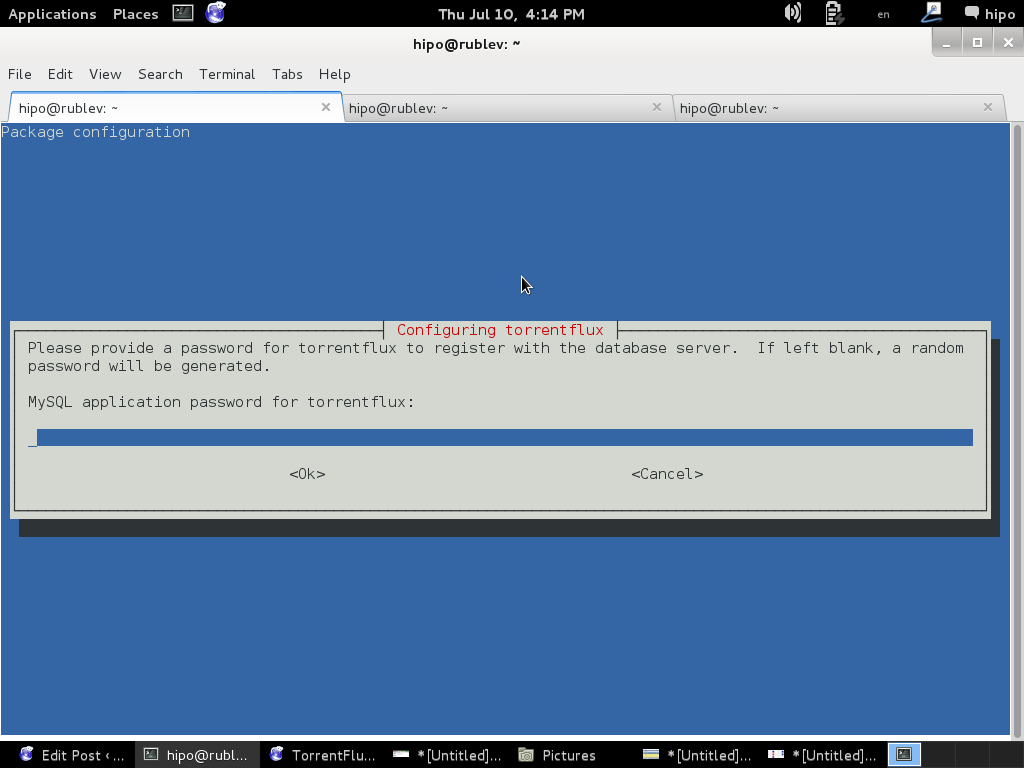
You will be prompted with a coule of screens, to set a new MySQL database user and password and SQL database, as well as offered to restart Apache to make Torrentflux accessible like as on below screenshots.

configuring-torrentflux-debian-linux-screenshot-2


configuring-torrentflux-debian-linux-screenshot 3

configuring-torrentflux-debian-linux-screenshot-4

To make new installed torrentflux accessible from web you will either have to configure it via some new Apache VirtualHost or make a symbolic link to /usr/share/torrentflux/www :
 

cd /var/www/
ln -sf /usr/share/torrentflux/www/ torrentflux


That's all you're all done to access torrentflux either access it via your default configured webserver domain name or via localhost if you're logged in to same pc where installing.

http://www.your-domain.com/torrentflux

or

http://127.0.0.1/torrentflux

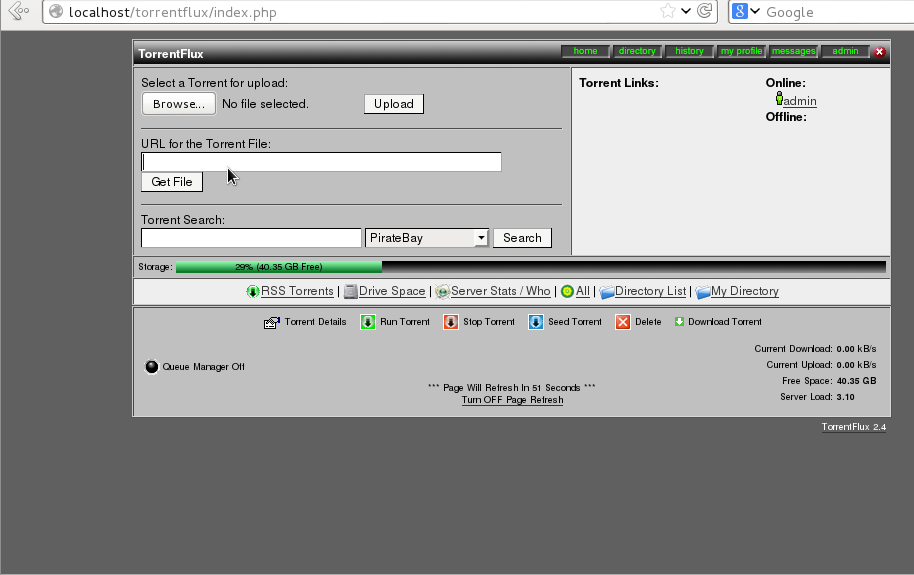
configuring-torrentflux-after-first-login-in-web-debian-linux

2. Install latest Torrentflux version from source

Alternatively if you want to have the latest version (because the Debian version is part of the stable distribution is a little bit outdated you will have to fetch Torrentflux-b4rt and unarchive it:

cd /tmp/
wget http://download.berlios.de/tf-b4rt/torrentflux-b4rt_1.0-beta2.tar.bz2

tar -xjf torrentflux-b4rt_1.0-beta2.tar.bz2

mv torrentflux-b4rt_1.0-beta2 /opt/torrentflux

Then to make torrentflux visible from web server I had to create a symbolic link to installation directory:
 

ln -sf /opt/torrentflux/html /var/www/torrentflux

For further initial configuration its necessery to make Torrentflux config writtable by www-data (the user with which Apache is running on Debian).


chown -R www-data:www-data /var/www/torrentflux/inc/config/


Next it its required to create somewhere download folder where TorrentFlux will keep downloaded Torrents

mkdir /var/lib/torrentflux


Apache HTTP server will have to have write ther:

chown -R www-data:www-data /var/lib/torrentflux


If you already haven't restarted Apache earlier in installing TorrentFlux pre-requirements, you will have to do it now:


/etc/init.d/apache2 restart


As TorrentFlux depends on its MySQL backend, we need to also create manually TorrentFlux database username and a password
 

export SQL_DB='torrentflux';
TFLUXSQL_USERNAME='torrentflux';
TFLUX_SQL_PWD='any-secret-password';

echo "CREATE DATABASE IF NOT EXISTS $SQL_DB DEFAULT CHARACTER SET utf8 DEFAULT COLLATE utf8_unicode_ci"
| mysql –user=root –password

echo "GRANT ALL PRIVILEGES ON $SQL_DB.*
TO $TFLUXSQL_USERNAME@localhost
IDENTIFIED BY $TFLUX_SQL_PWD;" | mysql –user=root –password


Substitute with your Database, Username and Password above shell variables – $SQL_DB, $TFLUX_USERNAME, $TFLUX_SQL_PWD

To configure TorrentFlux access it in browser:

http://your-domain.com/torrentflux
 

By accessing it for a first time, you will redirected to setup.php, in case something goes wrong and yuo're not redirected (probably some mod_rewrite issues add setup.php to url – e.g., acess –

http://your-domain.com/torrentflux/setup.php

I will not enter details, about Web config, because everything there is pretty clear.

Just in short – you will have to now choose:

Choose Database
Choose Database Information of database (put in the exact name of TorrentFlux databse previously created)
Uncheck the box for "Create new database"
Choose as a download location upper created directory – /var/lib/torrentflux

If you get an error on software dependencies screen for missing unrar – just install it
VLC may show an error as well, that's not a problem because VLC is probably not to be used.
Finally after completion of all, you will get an error that setup.php cannot be deleted.
 

To prevent, someone to re-configure it through http://your-domain/torrentflux/setup.php URL remove setup.php


rm /var/www/torrentflux/setup.php

To prevent someone rewrite anything in config file from web we have to revert back config/ folder not to be writable by Apache


chown -R root:root /var/www/torrentflux/inc/config/

Now in browser to access torrentflux type:


http://ipofyourbox/torrentflux

/torrentflux should redirect you to login.php if for some reason it doesn't type it manually in URL.

First account you will login is the super user account, you can allow multiple users to use it by adding multiple accounts.

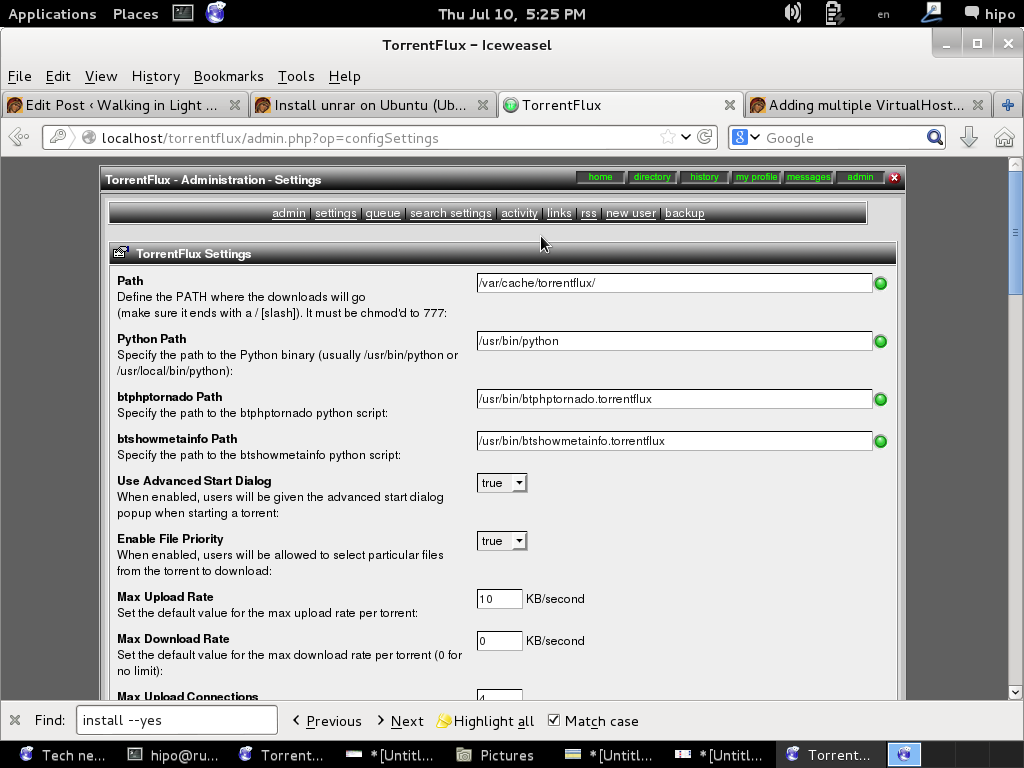
torrentflux-install-on-debian-ubuntu-gnu-linux-web-management-torrent-interface

As you will see there is plety of configuration options to play with.

You will definitely want to look in Server Page, some very important page to look is the Transfer Page – from there you can adjust the bandwidth of your connection on 100Mbit network this would be 12500 – to use the maximum possible connection provided by your ISP set the max bandwidth to 0. You have the option to also set a default bittorrent client, by default this will be bittornado.


If you have troubles downloading from TorrentTrackers make sure your router is configured to forward port 49160 to 49300

Now if you have a lot of storage create accounts also for your friends and enjoy torrentflux 🙂


How to check Windows server installed Tomcat and Java version

Tuesday, August 19th, 2014

how-to-check-get-java_and-tomcat-version-on-windows-java-and-tomcat-logo
I'm filling up a TOP (Turn to Production) form for a project where my part as Web and Middleware Engineer included install of Tomcat 7 and Java 1.7 on Windows server 2008 R2 standard. TOP is required Excel sheet standard document used by many large companies to fill in together with Project Manager before the server is to be launched into Production mode.

Therefore I needed to find out previously installed Tomcat and Java version, here is how:

1. Go to Tomcat install directory and (click twice) run twice Tomcat7w

As tomcat is installed in Custom location in D:webdienste in this case I had to run:
 
D:webdiensteapplication-jsptomcatapplication-namecurrentbinTomcat7w.exe

I run it using command line (cmd.exe), however you can run it via Windows Explorer, if you're lazy typing.
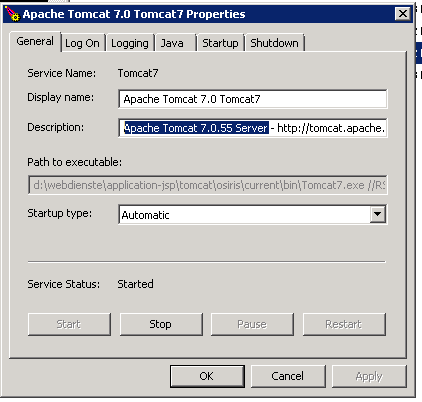
You will get a window pop up like on below screenshot:

In this case Installed Tomcat version was 7.0.55

If you need to check the version on older Tomcat application server install you can run instead Tomcat6w – whether its Tomcat version 6 or Tomcat5w – for Tomcat ver. 5

In order to Check the java version the quickest way is via command line, again run cmd.exe from

Start -> Run -> cmd.exe

how-to-see-find-get-check-tomcat-version-on-windows-server-install-screenshot

Then cd to whenever is Java VM installed the usual location where it gets installed for Java 1.7 on Windows is:

C:Program FilesJavajre7bin

Java 8 common location is:

C:Program FilesJavajre8bin

Java would automatically add PATH to Windows default PATH definitions during install, hence to find out exactly where java is installed on Windows server, type in cmd:

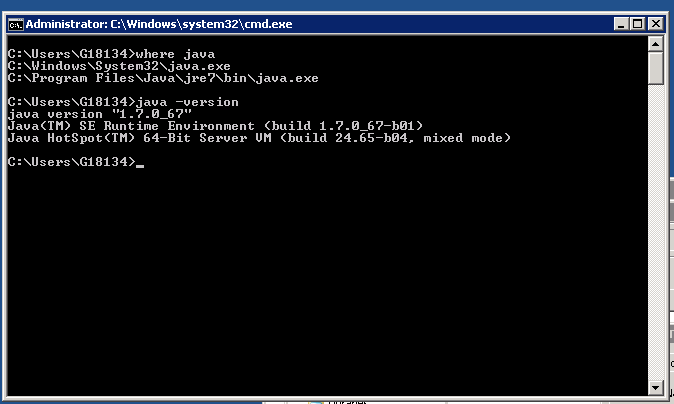
where java

Then to check the exact installed Java version on Win host is by invoking java (jre) cli with -version parameter:

java -version

how-to-check-get-java-version-info-on-windows-server-screenshot

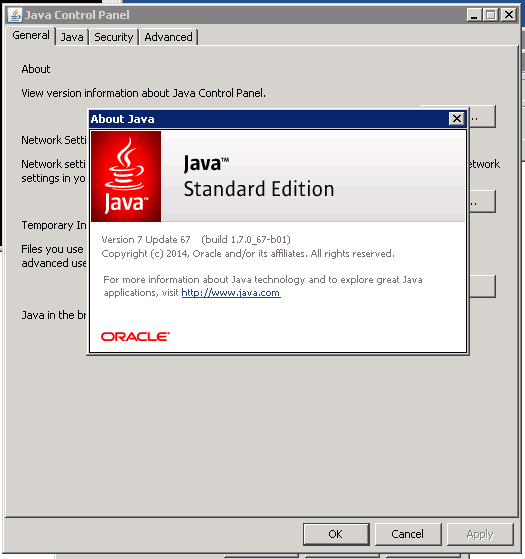
If you're lazy to type in commands, you can also check Java version in Windows from GUI by using:

Java Control Panel

To launch it in:

Start -> (Search Program and Files)

field type:

Java Conf and click on Java Control Panel

Then click on

General (tab) -> About

java-control-panel-gui-about-version-windows-server-screenshot


Gipsy (Romany) legends about the Crucifix of the Lord Jesus Christ

Friday, September 12th, 2014

Crucifixion_of_our_Lord_Jesus-Christ-the-gipsy-legends-about-the-nails-that-pierced-the-body-of-our-Lord-and-saviour

There are a couple of curious Gipsy legends regarding the Crucifixion of the Lord Jesus Christ.
One of the legend claims that the gypsies which were present on the Lord’s crucifix, tried stealing the nails because of Love for the Lord to prevent crucifixion and for this deed of them some legends say the Mother of God the Holy Virgin Mary blessed them to steal from all nations, also the legend said this give the Gipsys permissions to steal without breaking one of the 10th commandments “Thou shalt not steal“. Of course this legends are mainly circulating in gipsis communities mainly in Europe and we should consider and as every legend its probably just a myth, however I decided to place the legend here on my blog because while living in the Netherlands for 2.5 years I have been helped and had the opportunity to live among Bulgarian gipsy community and I was fascinated on the strongness of gipsies family relations – which in this time of family break up and lack of respect is quite of a blessing. It was also evident for me gipsies know how to keep together and support each other, something becoming more and more rare in the “highly civilized” but less and less mental / spiritual western world which in its intellectual revolution forgot how to live simple and free life which was originally given to us by God Almighty.

There are other variants of the legend also, some say it was a gipsy blacksmith which was ordered to prepare the nails for Jesus’s crucifix, other probably more modern Gipsy legends claim that a gipsy stole one of the 4 nails for the Crucifix and this is why the Lord was crucified with 3 nails (1 nail piercing both of his legs as Roman Catholic cross does) – however this legend is untrue because in the ancient Christian tradition it was 4 nails with which the Lord Jesus Christ was pierced on the cross. Another of the legends (probably not originating from Gipsys says), it was a gipsy blacksmith who made the nails to crucify Jesus Christ, beacuse of that the (Gipsys) were condemned to wander the earth and never settle.

Another version does not condemn blacksmiths. It says that the blacksmith was addressed by God in a dream, where he was told to make four nails, but only hand over three, as the fourth was intended to pierce the heart of Jesus. In return God gave his descendants the right to wander the earth (rather than cursing them to it) and also the right to steal from non-Romanies, without breaking the commandment Thou shalt not steal.

Improve Website Apache Webserver SEO without Website source code moficitations with Google PageSpeed module on Debian, Ubuntu, CentOS, Fedora and SuSE Linux

Thursday, December 18th, 2014

Improve-website-apache-webserver-seo-without-website-source-code-modifications-with-Google-PageSpeed-Apache-module

For hosting companies and even personal website speed performance becomes increasingly important factor that gives higher and higher weight on overall PageRank and is one of the key things for Successful Site Search Engine Optimization (positioning) in Search Engines of a not specially SEO friendly crafted website.

Virtually all Google / Yahoo / Bing,  Yahoo  etc. Search Engines give better pagerank to websites which load faster and has little or no downtimes, for the reason a faster loading time of a website pages means better user experience and is indicator that the website is well maintained. 

Often websites deployed written for purpose of a business-es or just community CMS / Blog Website Open Source systems such as Joomla, Drupal and WordPress by default are not made to provide fantastic speed right after deploy without install of custom plugins and website tuning, i.e.:

  • Content size optimization (gzipping)
  • More efficient way to deliver CSS / Javascript (MinifyJS / CSS files into single ones
  • HTML optimization
  • Stripping (useful) page Comments
  • Adding <head> if missing on pages etc.

. Therefore as I said in many of my previous LAMP Optimization articles page  (opening) speed could make really Bad Users / Clients experience when the site grows too big or is badly optimized it gives degraded page speed times (often page loads 20 / 30 seconds waiting for the page to load!). Having Pages lagging on big information sites or EShos has both Ruining Company's Image on the market and quickly convinces the user to use another service from the already thosands available and thus drives out (potential) customers.

As Programming code maintainance and improvement is usually very costly, companies that want to save money or can't afford it (because of the shrinking budgets dictacted by the global economic crisis), the best thing to do is to ask your sysadmin to Squeeze the Best out of the WebService and Servers without major (Backend Code) infrastructural changes.

To  Speed up Apache and create Proper Page Caching without installing on server external PHP Caching modules such as Eaccelerator  / PHP APC caching and without
extra CMS modules
such as lets say WordPress W3 Total Cache there is Google Develop Apache Webserver external module – PageSpeed.

Here is Google Pagespeed Module overview :
 

PageSpeed speeds up your site and reduces page load time. This open-source webserver module automatically applies web performance best practices to pages and associated assets (CSS, JavaScript, images) without requiring that you modify your existing content or workflow.


What does Apache Google PageSpeed actually does?
 

  • Automatic website and asset optimization
  • Latest web optimization techniques
  • 40+ configurable optimization filters
  • Free, open-source, and frequently updated
  • Deployed by individual sites, hosting providers, CDNs


1. Install PageSpeed on Debian / Ubuntu, deb derivatives) Linux

a) Download and install module 

On 64 bit deb based Linux:

cd /usr/local/src
wget https://dl-ssl.google.com/dl/linux/direct/mod-pagespeed-stable_current_amd64.deb 
dpkg -i mod-pagespeed-stable_current_amd64.deb
apt-get -f install


On 32 bit Linux:

cd /usr/local/src
wget https://dl-ssl.google.com/dl/linux/direct/mod-pagespeed-stable_current_i386.deb
dpkg -i 
direct/mod-pagespeed-stable_current_i386.deb
apt-get -f install


b) Restart Apache
 

sudo /etc/init.d/apache2 restart

Important files and folders placed on server by deb installer are:

/usr/bin/pagespeed_js_minify – binary that does Javascript minification
/etc/apache2/mods-available/pagespeed.conf – Pagespeed config
/etc/apache2/mods-available/pagespeed.load – Load module directives in Apache
/etc/cron.daily/mod-pagespeed – mod_pagespeed cron script for checking and installing latest updates.
/var/cache/mod_pagespeed – Mod Pagespeed cahing folder (useful to install memcached to increase even further caching performance)
/var/log/pagespeed – Directory to store pagespeed log files


2. Install PageSpeed on (RPM based CentOS, Fedora, RHEL / SuSE Linux)


RPM 64 bit package install:
 

rpm -Uvh https://dl-ssl.google.com/dl/linux/direct/mod-pagespeed-beta_current_x86_64.rpm


32 bit pack version:
 

rpm -Uvh https://dl-ssl.google.com/dl/linux/direct/mod-pagespeed-stable_current_i386.rpm


Modify pagespeed mod config 

Restart Apache

sudo /etc/init.d/httpd restart


Important config files and folders created during RPM install are:

  • /etc/cron.daily/mod-pagespeed : mod_pagespeed cron script for checking and installing latest updates.
  • /etc/httpd/conf.d/pagespeed.conf : The main configuration file for Apache.
  • /usr/lib/httpd/modules/mod_pagespeed.so : mod_pagespeed module for Apache.
  • /var/www/mod_pagespeed/cache : File caching direcotry for web sites.
  • /var/www/mod_pagespeed/files : File generate prefix for web sites.

3. Configuring Google PageSpeed module


To configure PageSpeed you can either edit the package installed bundled pagespeed.conf (/etc/apache2/mods-available/pagspeed.conf,  /etc/httpd/conf.d/pagespeed.conf) or insert configuration items inside Apache VirtualHosts config files or even if you need flexibility and you don't have straight access to Apache config files (on shared hosting servers where module is available) through .htaccess.
Anyways try to avoid adding pagespeed directives to .htaccess as it will be too slow and inefficient.

Configuration is managed by setting different so-called "Rewrite Levels". Default behavior is to use Level of "Corefilters.", a set of filters (module behavior configs) which according to Google is safe for use. PageSpeed Filters is a set of actions applied to Web Delivered files.

Default config setting is hence:
 

ModPagespeedRewriteLevel CoreFilters

Disabling default set of filters is done with:
 

ModPagespeedRewriteLevel PassThrough

"Corefilters" default filter set as of time of writting this article:
 

add_head
combine_css
convert_jpeg_to_progressive
convert_meta_tags
extend_cache
flatten_css_imports
inline_css
inline_import_to_link
inline_javascript
rewrite_css
rewrite_images
rewrite_javascript
rewrite_style_attributes_with_url

Complete documentation on Configuring PageSpeed Filters is here.

If caching is turned on, default PageSped caching is configured in /var/cache/mod_pagespeed/
Enabling someof the non-Corefilters that sometimes are useful for SEO (reduce of served / returned pagesize) are:
 

ModPagespeedEnableFilters pedantic,remove_comments

By default pagespeed does some things (such as inline_css, inline_javascript and rewrite_images (Optimize, removing Excess pixels).  My litle experience with pagespeed shows in some cases this could break websites), so I found for my case useful to disable some of the filters:


vim /etc/apache2/mods-available/pagespeed.conf


ModPagespeedDisableFilters rewrite_images,convert_jpeg_to_progressive,inline_css,inline_javascript


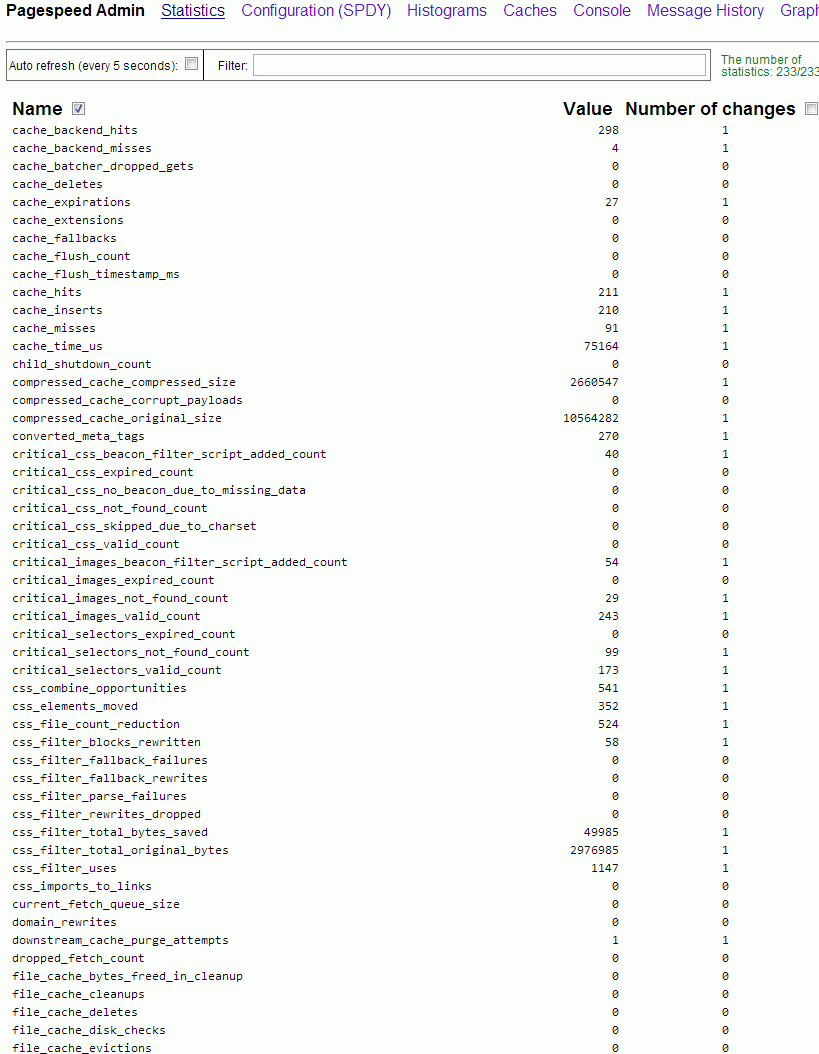
4. Testing if PageSpeed is Enabled pagespeed_admin

By default PageSpeed has Admin which by default is only allowed to be accessed from server localhost (127.0.0.1) to get basic statistics either install text browser like lynx / elinks or add more access IPs again in pagespeed config / vhosts pagespeed.conf include more Allow lines like below:


    <Location /pagespeed_admin>
        Order allow,deny
        Allow from localhost
        Allow from 127.0.0.1
        Allow from 192.168.1.1
        Allow from xxx.xxx.xxx.xxx

        #Allow from All
        SetHandler pagespeed_admin
    </Location>
    <Location /pagespeed_global_admin>
        Order allow,deny
        Allow from localhost
        Allow from 127.0.0.1

        Allow from 192.168.1.1
        Allow from xxx.xxx.xxx.xxx
        SetHandler pagespeed_global_admin
    </Location>


Once configured pagespeed_admin access it with favourite browser on:

http://127.0.0.1/pagespeed_admin
http://127.0.0.1/pagespeed_global_admin

improve-website-apache-webserver-seo-without-source-code-modifications-google-pagespeed_admin_panel

Other way to test it is enabled is by creating php file with good old <? phpinfo(); ?> – PHP stats enabled / disabled features code:

pagespeed-in-phpinfo-x-mod-pagespeed-output-screenshot-apache-webserver

I've also tested also pagespeed unstable release, but experienced some segmentation faults in both error.log and access.log so finally decided to keep using stable release.

PageSpeed is a great way to boost your server sites performance, however it comes on certain costs as expect your server CPU Load to jump drastically, (in my case it jumped more than twice), there are Linux servers where enabling the module could totally stone the servers, so before implementing the module on a Production system environment, always first test thouroughfully with loaded pagespeed on UAT (testing) environment with AB or Siege (Apache Benchmarking Tools).

How to disable IPv6 on Debian / Ubuntu / CentOS and RHEL Linux

Friday, December 9th, 2011

I have few servers, which have automatically enabled IPv6 protocols (IPv6 gets automatically enabled on Debian), as well as on most latest Linux distribituions nowdays.

Disabling IPv6 network protocol on Linux if not used has 2 reasons:

1. Security (It’s well known security practice to disable anything not used on a server)
Besides that IPv6 has been known for few criticil security vulnerabilities, which has historically affected the Linux kernel.
2. Performance (Sometimes disabling IPv6 could have positive impact on IPv4 especially on heavy traffic network servers).
I’ve red people claiming disabling IPv6 improves the DNS performance, however since this is not rumors and did not check it personally I cannot positively confirm this.

Disabling IPv6 on all GNU / Linuces can be achieved by changing the kernel sysctl settings net.ipv6.conf.all.disable_ipv6 by default net.ipv6.conf.all.disable_ipv6 equals 1 which means IPv6 is enabled, hence to disable IPv6 I issued:

server:~# sysctl net.ipv6.conf.all.disable_ipv6=0

To set it permanently on system boot I put the setting also in /etc/sysctl.conf :

server:~# echo 'net.ipv6.conf.all.disable = 1 >> /etc/sysctl.conf

The aforedescribed methods should be working on most Linux kernels version > 2.6.27 in that number it should work 100% on recent versions of Fedora, CentOS, Debian and Ubuntu.

To disable IPv6 protocol on Debian Lenny its necessery to blackist the ipv6 module in /etc/modprobe.d/blacklist by issuing:

echo 'blacklist ipv6' >> /etc/modprobe.d/blacklist

On Fedora / CentOS there is a another universal “Redhat” way disable IPv6.

On them disabling IPv6 is done by editting /etc/sysconfig/network and adding:

NETWORKING_IPV6=no
IPV6INIT=no

I would be happy to hear how people achieved disabling the IPv6, since on earlier and (various by distro) Linuxes the way to disable the IPv6 is probably different.
 

Alto to stop Iptables IPV6 on CentOS / Fedora and RHEL issue:

# service ip6tables stop

# service ip6tables off

Debian Linux: Installing and monitoring servers with Icanga (Nagios fork soft)

Monday, June 3rd, 2013

icinga-monitoring-processes-and-servers-linux-logo

There is plenty of software for monitoring how server performs and whether servers are correctly up and running. There is probably no Debian Linux admin who didn't already worked or at least tried Nagios and Mointor to monitor and notify whether server is unreachable or how server services operate. Nagios and Munin are play well together to prevent possible upcoming problems with Web / Db / E-mail services or get notify whether they are completely inaccessible. One similar "next-generation" and less known software is Icanga.
The reason, why to use Icinga  instead of Nagios is  more features a list of what does Icinga supports more than Nagios is on its site here
I recently heard of it and decided to try it myself. To try Icanga I followed Icanga's install tutorial on Wiki.Icanga.Org here
In Debian Wheezy, Icinga is already part of official repositories so installing it like in Squeeze and Lenny does not require use of external Debian BackPorts repositories.

1. Install Icinga pre-requirement packages

debian:# apt-get --yes install php5 php5-cli php-pear php5-xmlrpc php5-xsl php5-gd php5-ldap php5-mysql

2. Install Icanga-web package

debian:~# apt-get --yes install icinga-web

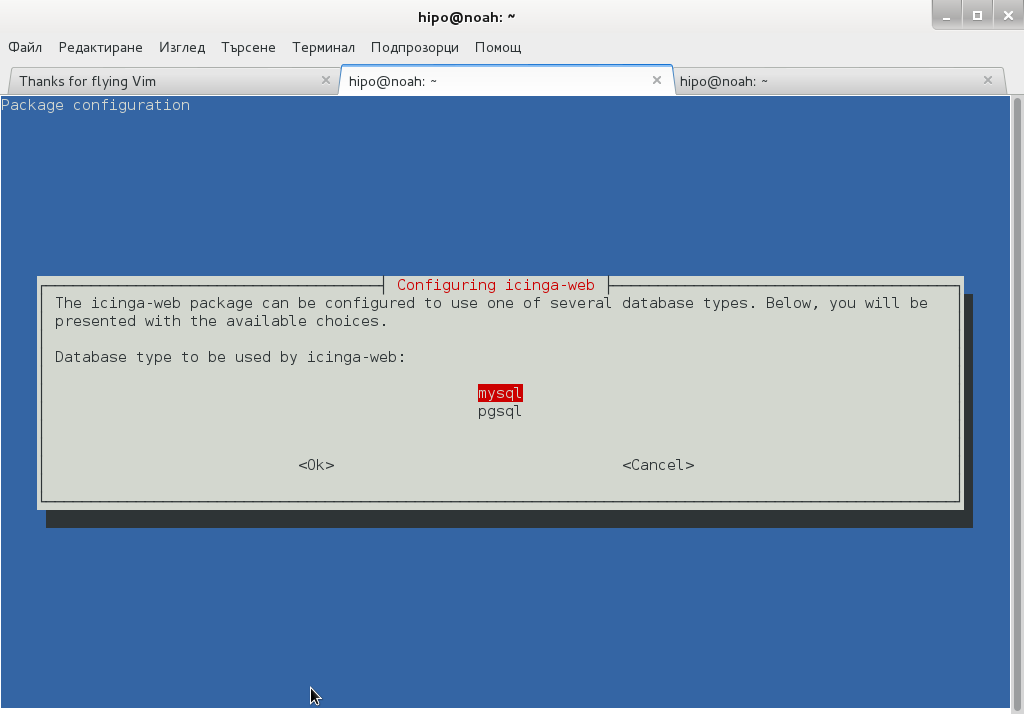
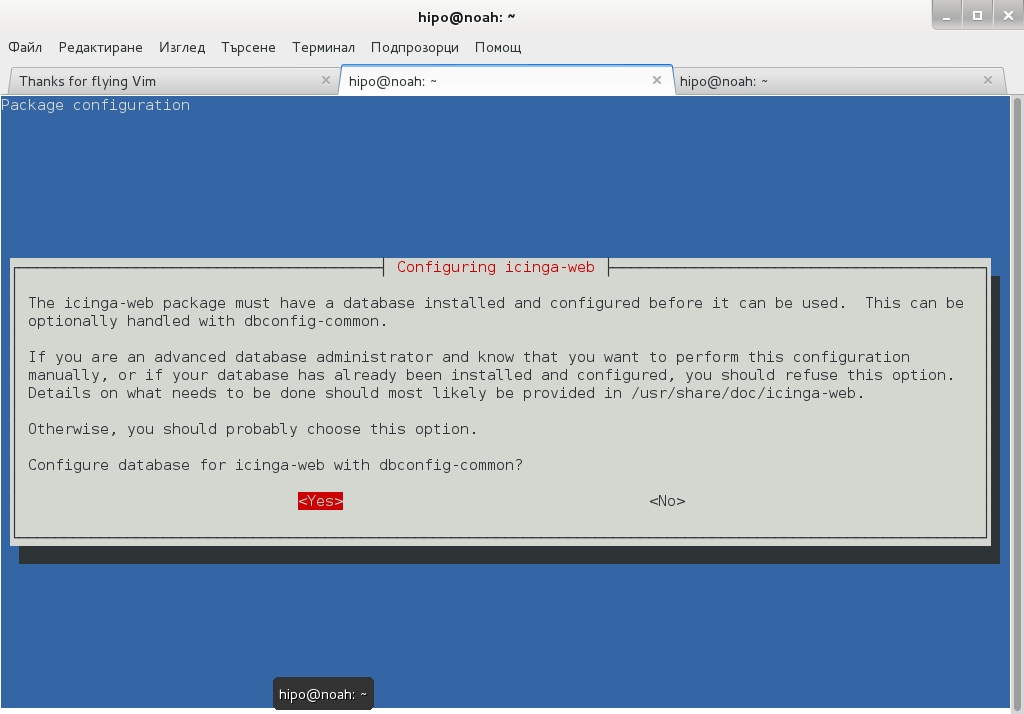
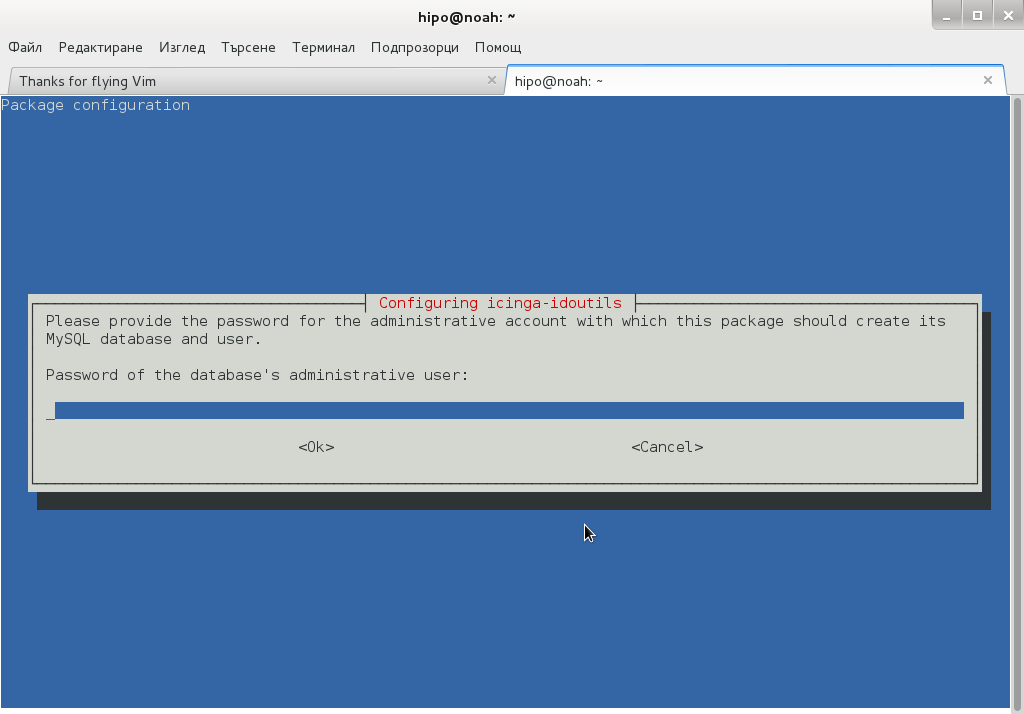
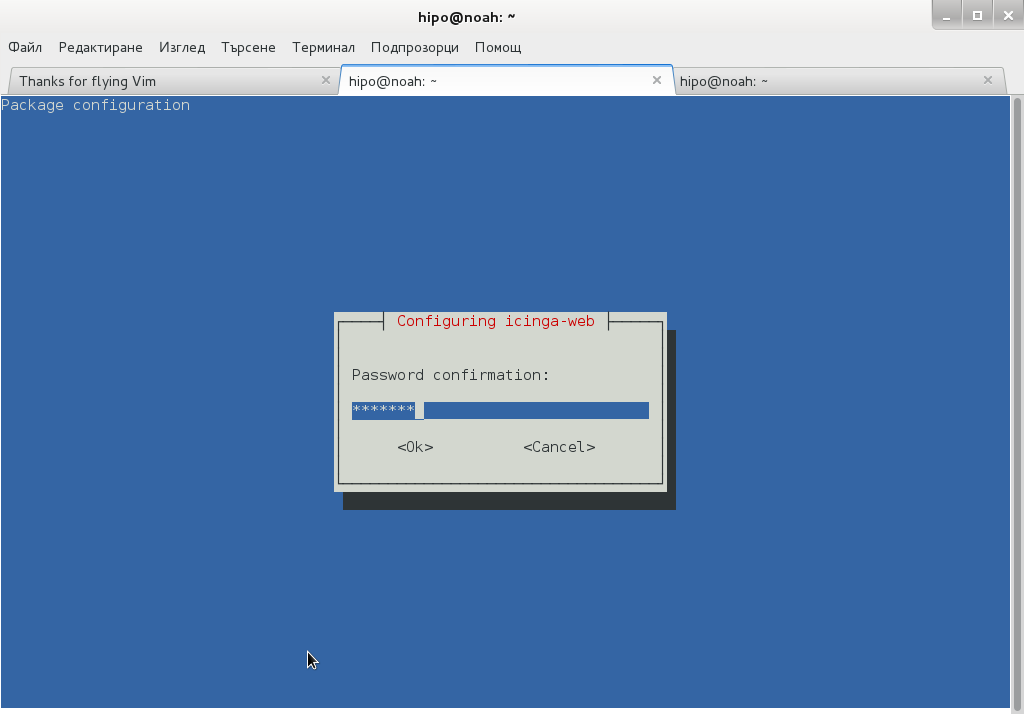
Here you will be prompted a number of times to answer few dialog questions important for security, as well as fill in MySQL server root user / password as well as SQL password that will icinga_web mySQL user use.

icinga-choosing-database-type

configuring-icinga-web-debian-linux-configuring-database-shot

debian-config-screenshot-configuring-icinga-idoutils

icinga-password-confirmation-debian-linux
….

Setting up icinga-idoutils (1.7.1-6) …
dbconfig-common: writing config to /etc/dbconfig-common/icinga-idoutils.conf
granting access to database icinga for icinga-idoutils@localhost: success.
verifying access for icinga-idoutils@localhost: success.
creating database icinga: success.
verifying database icinga exists: success.
populating database via sql…  done.
dbconfig-common: flushing administrative password
Setting up icinga-web (1.7.1+dfsg2-6) …
dbconfig-common: writing config to /etc/dbconfig-common/icinga-web.conf

Creating config file /etc/dbconfig-common/icinga-web.conf with new version
granting access to database icinga_web for icinga_web@localhost: success.
verifying access for icinga_web@localhost: success.
creating database icinga_web: success.
verifying database icinga_web exists: success.
populating database via sql…  done.
dbconfig-common: flushing administrative password

Creating config file /etc/icinga-web/conf.d/database-web.xml with new version
database config successful: /etc/icinga-web/conf.d/database-web.xml

Creating config file /etc/icinga-web/conf.d/database-ido.xml with new version
database config successful: /etc/icinga-web/conf.d/database-ido.xml
enabling config for webserver apache2…
Enabling module rewrite.
To activate the new configuration, you need to run:
  service apache2 restart
`/etc/apache2/conf.d/icinga-web.conf' -> `../../icinga-web/apache2.conf'
[ ok ] Reloading web server config: apache2 not running.
root password updates successfully!
Basedir: /usr Cachedir: /var/cache/icinga-web
Cache already purged!

3. Enable Apache mod_rewrite


debian:~# a2enmod rewrite
debian:~# /etc/init.d/apache2 restart


4. Icinga documentation files

Some key hints on Enabling some more nice Icinga features are mentioned in Icinga README files, check out, all docs files included with Icinga separate packs are into:
 

debian:~# ls -ld *icinga*/
drwxr-xr-x 3 root root 4096 Jun  3 10:48 icinga-common/
drwxr-xr-x 3 root root 4096 Jun  3 10:48 icinga-core/
drwxr-xr-x 3 root root 4096 Jun  3 10:48 icinga-idoutils/
drwxr-xr-x 2 root root 4096 Jun  3 10:48 icinga-web/

debian:~# less /usr/share/doc/icinga-web/README.Debian debian:~# less /usr/share/doc/icinga-idoutils/README.Debian

5. Configuring Icinga

Icinga configurations are separated in two directories:

debian:~# ls -ld *icinga*

drwxr-xr-x 4 root root 4096 Jun  3 10:50 icinga
drwxr-xr-x 3 root root 4096 Jun  3 11:07 icinga-web

>

etc/icinga/ – (contains configurations files for on exact icinga backend server behavior)


/etc/icinga-web – (contains all kind of Icinga Apache configurations)
Main configuration worthy to look in after install is /etc/icinga/icinga.cfg.

6. Accessing newly installed Icinga via web

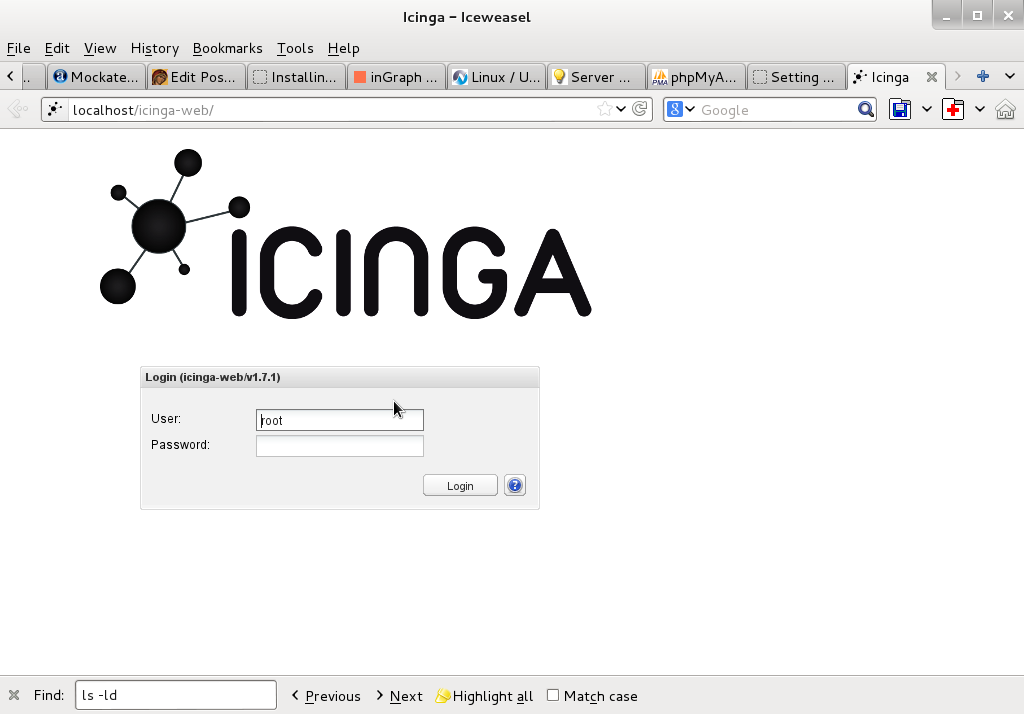
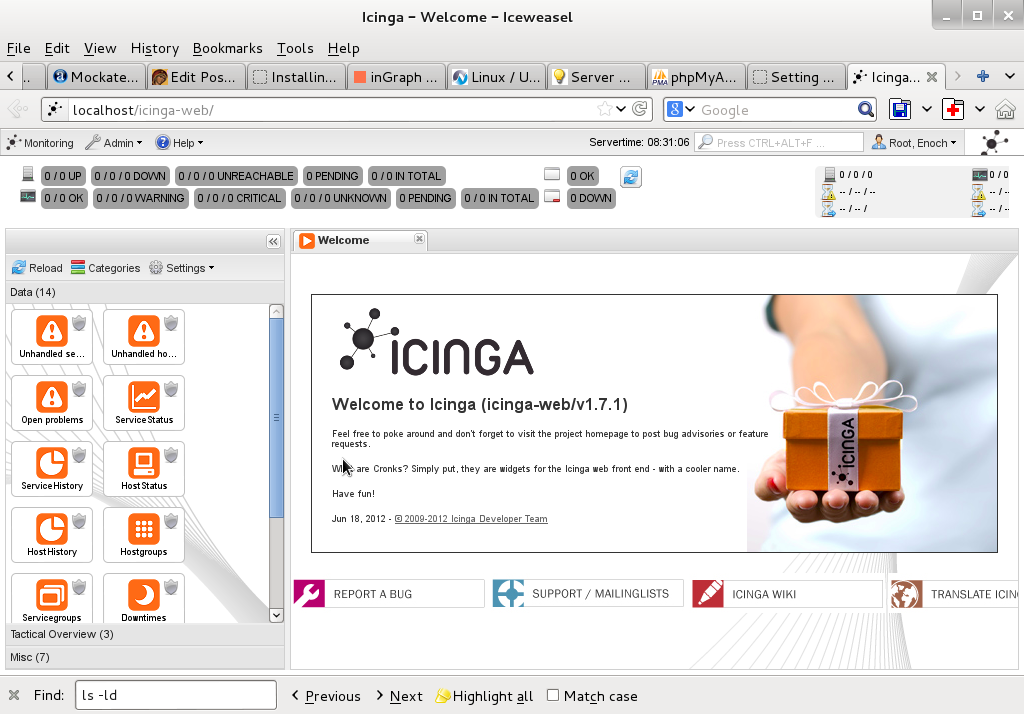
To access just installed Icinga, open in browser URL – htp://localhost/icinga-web

icinga web login screen in browser debian gnu linux

logged in inside Icinga / Icinga web view and control frontend


7. Monitoring host services with Icinga (NRPE)

As fork of Nagios. Icinga has similar modular architecture and uses number of external plugins to Monitor external host services list of existing plugins is on Icinga's wiki here.
Just like Nagios Icinga supports NRPE protocol (Nagios Remote Plugin Executor). To setup NRPE, nrpe plugin from nagios is used (nagios-nrpe-server). 

To install NRPE on any of the nodes to be tracked;
debian: ~# apt-get install –yes nagios-nrpe-server

 Then to configure NRPE edit /etc/nagios/nrpe_local.cfg


Once NRPE is supported in Icinga, you can install on Windows or Linux hosts NRPE clients like in Nagios to report on server processes state and easily monitor if server disk space / load or service is in critical state.

How to disable Debian GNU / Linux (Squeeze) Apache 2 version reporting to improve security – Hide Apache server version

Friday, October 5th, 2012

Debian GNU / Linux's Apache default behavior is to report Apache server name, version and Linux distribution version and codename.
This is shown as a minor security leak in many Security Scanner (audit) software like Nessus. It reveals a vital information which could help malicious attacker later to use exploit if the version number in question is vulnerable.

The quickest way to check, either Apache versioning and distro info is disabled is with telnet:

hipo@noah:~/Desktop$ telnet www.pc-freak.net 80
Trying 83.228.93.76…
Connected to www.pc-freak.net.
Escape character is '^]'.
HEAD / HTTP/1.0

Connection closed by foreign host.
hipo@noah:~/Desktop$ telnet www.pc-freak.net 80
Trying 83.228.93.76…
Connected to www.pc-freak.net.
Escape character is '^]'.
HEAD / HTTP/1.0

HTTP/1.1 200 OK
Date: Fri, 05 Oct 2012 10:48:36 GMT
Server: Apache/2.2.16 (Debian)
X-Powered-By: PHP/5.3.3-7+squeeze14
Vary: Accept-Encoding
Connection: close
Content-Type: text/html

Disabling this Distro version codename and version number reporting on Debian is done by changing in file /etc/apache2/conf.d/security directives:


ServerTokens OS
ServerSignature On

to


ServerSignature Off
ServerTokens ProductOnly

Here important note to make is if you try adding:

ServerSignature Off and ServerTokens Prod straight in Debian general config /etc/apache2/apache2.conf, but did not change the settings set for the vars through /etc/apache2/conf.d/security; settings from /etc/apache2/conf.d/security will overwrite ServerSignature / ServerTokens settings set in /etc/apache2/apache2.conf

I tried this myself (forgotting about /etc/apache2/conf.d/security) and adding both variables straight in apache2.conf. After Apache restart Apache version number and type of distribution continued be returned by the WebServer.
I thought something specific changed in Debian Squeeze – Apache/2.2.16 so this two variables are probably not working so I did a quick research online seing other people complaining also unable to disable Apache ver and Linux distro version and looking for a reason why. Well anyways if you happen to also ponder, why ServerSignature Off and ServerTokens ProductOnly does not take effect keep in mind it is due to overwritten settings via /etc/apache2/conf.d/security, changing the values there and restarting Apache and you're done 🙂

To make sure 100% Apache is no longer returning exact version number and host installed distro type, use telnet again:

hipo@noah:~/Desktop$ telnet www.pc-freak.net 80
Trying 83.228.93.76…
Connected to www.pc-freak.net.
Escape character is '^]'.
HEAD / HTTP/1.0

Connection closed by foreign host.