Posts Tagged ‘rpm’
Saturday, March 31st, 2012 I'm currently learning some basic graphic design – reading GIMP's documentation etc. While reading http://docs.gimp.org, I saw a reference to Gthumb and GQView picture viewing apps, so I thought of installing them on my Debian LinuxGQView has a lot of santimental value to me as it reminds me of the the old times when I used gqview as a default picture viewing program on a old machine running Debian Woody Linux with Window Maker as desktop environment.
I wanted to see how GQView looks nowdays so installed it:
noah:~# apt-get --yes install gqview
And onwards launch it:
hipo@noah:~/Desktop$ gqview

This is a compatibility alias for Geeqie!

Please use /usr/bin/geeqie instead!

Creating Geeqie dir:/home/hipo/.config/geeqie

Creating Geeqie dir:/home/hipo/.local/share/geeqie/collections

Creating Geeqie dir:/home/hipo/.cache/geeqie/thumbnails

Creating Geeqie dir:/home/hipo/.local/share/geeqie/metadata

What poped up instead of gqview is Geeqie – a picture viewer nowdays available on a default Slackware Linux install.
Fedora, CentOS users will have to build geekie from its source, as of time of writting there is no available rpm package.
It was new to me Gqview is no longer developed, its dev is forked (because its head developer is not reachable any more). Hence QGView continues to live on nowdays under the hood of Geekie
As you can see from the prior screenshot Geeqie has very similar interface to GQView. Going through the interface, I've found it has much more features than GQView. You see one of the many new nice features is the support for drawing Image Histograms.
There are few type of Histograms to display in Geekiq, available by navigating to:
View -> Image Overlay
Even if you're not familiar with Image histograms, probably you have seen them appear on a digital camera while browsing in menus. Its likely you didn't know what you saw a digital camera display is a histogram.
Anyways being not familiar with histograms is perfectly fine as for most of us (regular) users image historograms doesn't make much sense.
BTW Histograms are very useful for pro Photographers. Photographers can use them as an aid to show the distribution of picture "tones" captured, and whether image detail has been lost to blown-out highlights or blacked-out shadows.
Interesting fact concerning "reading" and understanding Histograms is on a Histogram for a very dark image the majority of data points are on the left side and center of the graph, whether histogram for a very bright image with few dark areas and/or shadows will have most of its data points located on the right side and center of the graph.
With this said in mind, you can see, the above Geeqie picture visibile histogram obviously has most of its data concentrated on the right and the center so this means the histogram belongs to a bright pic. Well, Actually you can see this without a histogram too 😉
Though Image Histograms might seem pretty useles they're very much needed in Professional Graphic Manipulation. For instance for correction of image color gamma or manually adjusting the brightness for each picture pixel brightness.
So Enough with histograms, I will switch now to a short review of Gthumb
Since I haven't used/seen Gthumb "for ages", I was also curious how the program looks nowdays. I did not needed to install gthumb, as I had it installed already on my notebook. I assume gthumb package was installed as some package dependency or I did it install some very long time ago and I forgot.
For people who didn't have it install do:
noah:~# apt-get --yes install gthumb

...
This installs a Gthumb version 2.12.2. The current latest stable Gthumb release is way ahead from the existing deb stable package, the latest available version on sourceforge is 2.7.4
Ubuntu gthumb latest packages would probably be newer than my debian installed one, so Ubuntu users can have the joy to use a newer version of gthumb…
gthumb is also installable for Fedora and CentOS users by default from default assigned package repos:
To install on RPM based Linux distro:
[root@centos:~ ]# yum -y install gthumb

...
Once installed, I ran it via a gnome run application shortcut ALT+F2 and typed:
gthumb
If you're more of a gui user than me you can run it also through GNOME menus:
Applications -> Graphics -> Gthumb Image Viewer
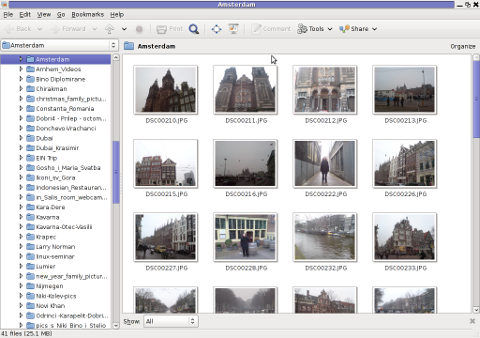
You see gthumb appears, quite similar in "look&feel" to Geeqie.
I went through the program options just for the sake to compare with Geeqie. Based on the fact Geeqie seems to have more functionality it is probably superior and better choice for people looking for professional image vieweing / editting.However there are some other aspects I've noticed, where it lacks behind Gthumb.
Gthumb has few great functionality which unfortunately as of time of writting are missing or hardly achievable in Geeqie
1. Bookmarking pictures.
This allows for your favourite pictures to be bookmarked in the same way as bookmarks work in a browser, really neat feature.
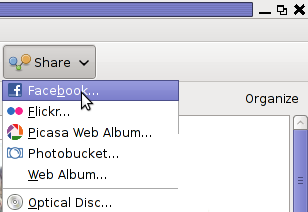
2. Share functionality
Share button is located on the rightest upper corner and makes sharing with major web storage places easy.
Through the Share button, you can export (share) your pictures directly in Picasa, Facebook,Flickr and Photobucket.

Through this share button it is also possible to "share your photos on a CD or DVD", – burn them on a CD/DVD directly from gthumb. This is doable via:
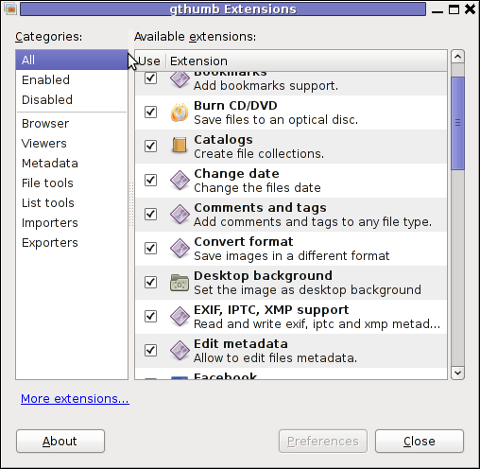
One other Gthumb advantagle is its extensibility. It has a powerful plugin system. Many of the features it has are already there thanks to its enabled extensions.
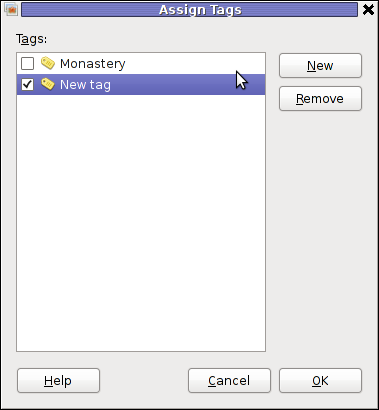
3. Photo Tagging
Nowdays tagging, photos has become so popular with the boom of facebook tagging. Gthumb has a relatively easy to use image tagging integrated.
tagging a picture is done by simply going through the picture and selecting it with the (rightest located mouse button).
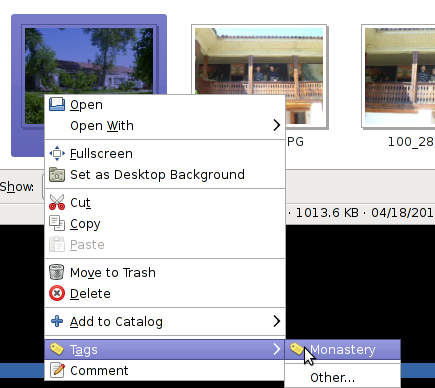
There is a list of few already predefined tags, which can be used to tag images.Assigning more tags is done via menu:
Tags -> Other
4. Organizing pictures
Through the Organize button located right below the Share button, one can easily organize his picture collections, based on few criterias.
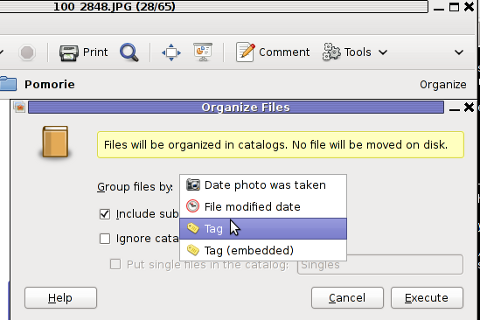
The organize easy feature is not so important for not people, who are not in depth in photographing but for professional photographers this is an absolute necessity. For people who are image freaks and store tens of thousands of pictures organizing pictures for easy later retrieval is really nice.
To sum it, up Geeqie and Gthumb are richer in functionality if compared to GNOME's default pic viewer (eye of the gnome) – eog.
Geeqie, as the name suggests is more for geek oriented and has a lot of great options which can serve well for advanced computer users. For an ordinary desktop user however it will probably be not easy to "digest". Gthumb on the other hand is ideal for anyone who prefers gui convenience. Gthumb is a good option for anyone looking for some similar to Picasa free software program that is feature rich and easy to use.For people who has to review a dozens of pictures daily, associating one of the two as a default picture viewer will probably be useful.
Tags: alias, alternative, Auto, center, CentOS, config, debian woody, default, design reading, Desktop, desktop environment, digital camera, Draft, fedora, geekie, GIMP, GNU, gnu linux, gqview, graphic design, head developer, hipo, histogram, histograms, image overlay, LinuxGQView, machine, meta package, metadata, noah, package, Photographers, picture, poped, quot, reading, rpm, screenshot, time, Ubuntu, value, window, woody linux, writting
Posted in Gnome, Linux and FreeBSD Desktop, News | No Comments »
Monday, February 13th, 2012 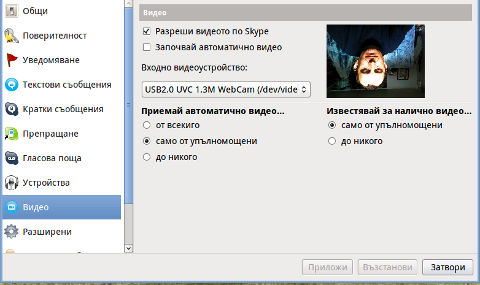
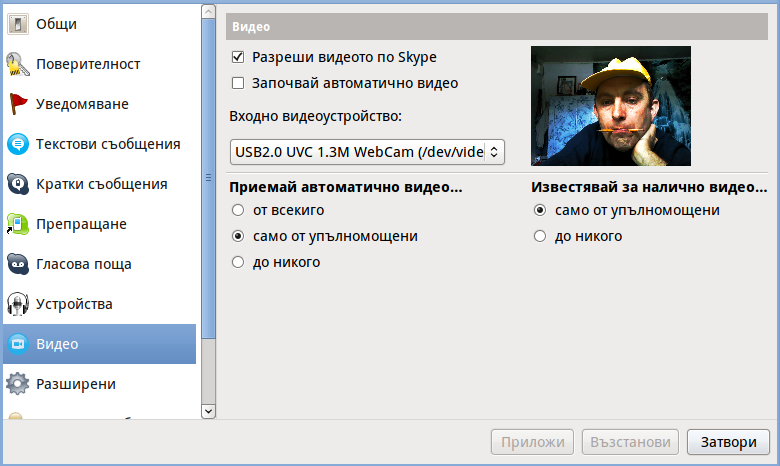
Does your camera show video correctly in cheese but shows captured video upside-down (inverted) in skype ?
This is an issue a friend of mine experienced on his Asus K51AC-SX037D laptop on both Ubuntu and Debian Linux.
As you can see in the picture above it is funny as with this bug the person looks like a batman 😉
As the webcam upside-down issue was present on both latest Ubuntu 11.10 and latest stable Debian Squeeze 6.02, my guess was other GNU / Linux rpm based distro like Fedora might have applied a fix to this weird Skype inverted video (bat human like) issue.
Unfortunately testing the webcam with Skype on latest both Fedora 16 and Linux Mint 12 appeared to produce the same webcam bug.
A bit of research for the issue online and try outs of a number of suggested methods to resolve the issue led finally to a work around, thanks to this post
Here is few steps to follow to make the webcam show video like it should:
1. Install libv4l-0 package
root@linux:~# apt-get --yes install libv4-0

...
Onwards to start skype directly from terminal and test the camera type:
hipo@linux:~$ LD_PRELOAD=/usr/lib/libv4l/v4l1compat.so skype
This is the work around for 32 bit Linux install, most people however will probably have installed 64 bit Linux, for 64bit Linux installs the above command should be little different:
hipo@linux:~$ LD_PRELOAD=/usr/lib32/libv4l/v4l1compat.so skype
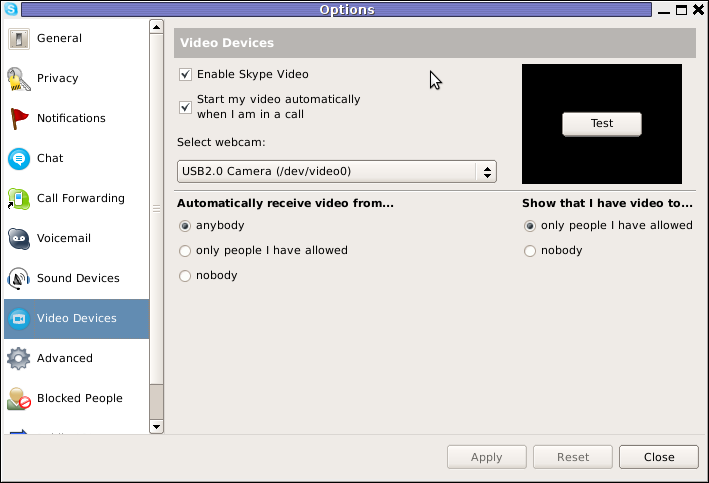
Once skype is launched test the camera and see if the camera capture is now uninverted, through menus:
S -> Options -> Video Devices -> Test
2. Create a skype Wrapper script Launcher
To make skype launch everytime with exported shell variable:
LD_PRELOAD=/usr/lib32/libv4l/v4l1compat.so
A new skype wrapper bash shell script should be created in /usr/local/bin/skype , the file should contain:
#!/bin/sh

LD_PRELOAD=/usr/lib32/libv4l/v4l1compat.so

/usr/bin/skype
To create the script with echo in a root terminal issue;
root@linux:~# echo '#!/bin/sh' >> /usr/local/bin/skype

root@linux:~# echo 'LD_PRELOAD=/usr/lib32/libv4l/v4l1compat.so' >> /usr/local/bin/skype

root@linux:~# echo '/usr/bin/skype' >> /usr/local/bin/skype

root@linux:~# chmod +x /usr/local/bin/skype
3. Edit the Skype gnome menu to substitute /usr/bin/skype Skype Launcher with /usr/local/bin/skype
Gnome 2 has a handy menu launcher, allowing to edit and add new menus and submenus (menus and items) to the Application menu, to launch the editor one has to click over Applications with last mouse button (right button) and choose Edit Menus
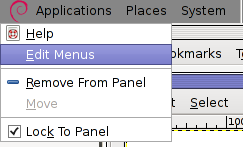
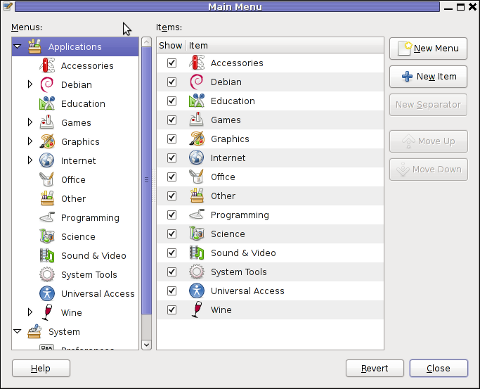
The menu editor like the one in the below screenshot will appear:
In the preceeding Launcher properties window, Command: skype has to be substituted with:
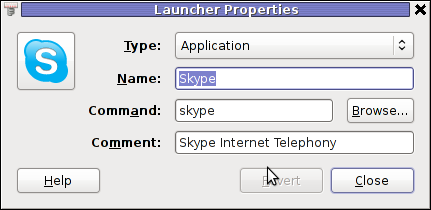
Command: /usr/local/bin/skype
For console freaks who doesn't want to bother in editting Skype Launcher via GUI /usr/share/applications/skype.desktop file can be editted in terminal. Inside skype.desktop substitute:
Exec=skype
with
Exec=/usr/local/bin/skype
As one can imagine the upside-down video image in Skype is not a problem because of Linux, but rather another bug in Skype (non-free) software program.
By the way everyone, who is using his computer with Free Software operating system FreeBSD, Linux etc. knows pretty well by experience, that Skype is a very problematic software; It is often a cause for system unexpected increased system loads, problems with (microphone not capturing), camera issues, issues with pulseaudio, problem with audio playbacks … Besides the long list of bugs there are unexpected display bugs in skype tray icon, bugs in skype messanger windows and at some rare occasions the program completely hangs and had to be killed with kill command and re-launched again.
Another worrying fact is Skype's versions available for GNU / Linux and BSD is completely out of date with its "competitor" operating systems MS Windows, MacOS X etc.
For people like me and my friend who want to use free operating system the latest available skype version is not even stable … current version fod download from skype's website is (Skype 2.2Beta)!
On FreeBSD the skype situation is even worser, freebsd have only option to run Skype ver 1.3 or v. 2.0 at best, as far as I know skype 2.2 and 2.2beta is not there.
Just as matter of comparison the latest Skype version on Windows is 5.x. Windows release is ages ahead its Linux and BSD ver. From a functional point of view the difference between Linux's 2.x and Windows 5.x is not that much different, what makes difference is is the amount of bugs which Linux and BSD skype versions contain…
Skype was about 6 months ago bought by Microsoft, therefore the prognosis for Skype Linux support in future is probably even darker. Microsoft will not probably bother to release new version of Skype for their competitor free as in freedom OSes.
I would like to thank my friend and brother in Christ Stelian for supplying me with the Skype screenshots, as well as for being kind to share how he fixed his camera with me.
Tags: Asus, Auto, bash shell script, batman, BSD, Button, camera capture, camera show, camera type, debian gnu, Desktop, distro, Draft, exec, fedora, file, gnu linux, gt options, hipo, laptop, launcher, ld, linux rpm, menu, Microsoft, person, PRELOAD, quot, root, root linux, rpm, Shell, show, Skype, software, squeeze, terminal, test, Ubuntu, ubuntu linux, video, video devices, web camera, webcam, work, wrapper script
Posted in Linux, Linux and FreeBSD Desktop, Skype on Linux | 29 Comments »
Thursday, February 9th, 2012 Every now and then I have to work on servers running CentOS or Fedora Linux. Very typical problem that I observe on many servers which I have to inherit is the previous administrator did not know about the existence of NTP (Network Time Protocol) or forgot to install the ntpd server. As a consequence the many installed server services did not have a correct clock and at some specific cases this caused issues for web applications running on the server or any CMS installed etc.
The NTP Daemon is existing in GNU / linux since the early days of Linux and it served quite well so far. The NTP protocol has been used since the early days of the internet and for centuries is a standard protocol for BSD UNIX.
ntp is available in I believe all Linux distributions directly as a precompiled binary and can be installed on Fedora, CentOS with:
[root@centos ~]# yum install ntp
ntpd synchronizes the server clock with one of the /etc/ntp.conf defined RedHat NTP list
server 0.rhel.pool.ntp.org

server 1.rhel.pool.ntp.org

server 2.rhel.pool.ntp.org
To Synchronize manually the server system clock the ntp CentOS rpm package contains a tool called ntpdate :
Hence its a good practice to use ntpdate to synchronize the local server time with a internet server, the way I prefer to do this is via a government owned ntp server time.nist.gov, e.g.
[root@centos ~]# ntpdate time.nist.gov

8 Feb 14:21:03 ntpdate[9855]: adjust time server 192.43.244.18 offset -0.003770 sec
Alternatively if you prefer to use one of the redhat servers use:
[root@centos ~]# ntpdate 0.rhel.pool.ntp.org

8 Feb 14:20:41 ntpdate[9841]: adjust time server 72.26.198.240 offset 0.005671 sec
Now as the system time is set to a correct time via the ntp server, the ntp server is to be launched:
[root@centos ~]# /etc/init.d/ntpd start

...
To permanently enable the ntpd service to start up in boot time issue also:
[root@centos ~]# chkconfig ntpd on
Using chkconfig and /etc/init.d/ntpd cmds, makes the ntp server to run permanently via the ntpd daemon:
[root@centos ~]# ps ax |grep -i ntp

29861 ? SLs 0:00 ntpd -u ntp:ntp -p /var/run/ntpd.pid -g
If you prefer to synchronize periodically the system clock instead of running permanently a network server listening (for increased security), you should omit the above chkconfig ntpd on and /etc/init.d/ntpd start commands and instead set in root crontab the time to get synchronize lets say every 30 minutes, like so:
[root@centos ~]# echo '30 * * * * root /sbin/ntpd -q -u ntp:ntp' > /etc/cron.d/ntpd
The time synchronization via crontab can be also done using the ntpdate cmd. For example if you want to synchronize the server system clock with a network server every 5 minutes:
[root@centos ~]# crontab -u root -e
And paste inside:
*/5 * * * * /sbin/ntpdate time.nist.gov 2>1 > /dev/null
ntp package is equipped with ntpq – Standard NTP Query Program. To get very basic stats for the running ntpd daemon use:
[root@centos ~]# ntpq -p

remote refid st t when poll reach delay offset jitter

======================================================

B1-66ER.matrix. 192.43.244.18 2 u 47 64 17 149.280 41.455 11.297

*ponderosa.piney 209.51.161.238 2 u 27 64 37 126.933 32.149 8.382

www2.bitvector. 132.163.4.103 2 u 1 64 37 202.433 12.994 13.999

LOCAL(0) .LOCL. 10 l 24 64 37 0.000 0.000 0.001
The remote field shows the servers to which currently the ntpd service is connected. This IPs are the servers which ntp uses to synchronize the local system server clock. when field shows when last the system was synchronized by the remote time server and the rest is statistical info about connection quality etc.
If the ntp server is to be run in daemon mode (ntpd to be running in the background). Its a good idea to allow ntp connections from the local network and filter incoming connections to port num 123 in /etc/sysconfig/iptables :
-A INPUT -s 192.168.1.0/24 -m state --state NEW -p udp --dport 123 -j ACCEPT

-A INPUT -s 127.0.0.1 -m state --state NEW -p udp --dport 123 -j ACCEPT

-A INPUT -s 0.0.0.0 -m state --state NEW -p udp --dport 123 -j DROP
Restrictions on which IPs can be connected to the ntp server can also be implied on a ntpd level through /etc/ntp.conf. For example if you would like to add the local network IPs range 192.168.0.1/24 to access ntpd, in ntpd.conf should be added policy:
# Hosts on local network are less restricted.

restrict 192.168.0.1 mask 255.255.255.0 nomodify notrap
To deny all access to any machine to the ntpd server add in /etc/ntp.conf:
restrict default ignore
After making any changes to ntp.conf , a server restart is required to load the new config settings, e.g.:
[root@centos ~]# /sbin/service ntpd restart
In most cases I think it is better to imply restrictions on a iptables (firewall) level instead of bothering change the default ntp.conf
Once ntpd is running as daemon, the server listens for UDP connections on udp port 123, to see it use:
[root@centos ~]# netstat -tulpn|grep -i ntp

udp 0 0 10.10.10.123:123 0.0.0.0:* 29861/ntpd

udp 0 0 80.95.28.179:123 0.0.0.0:* 29861/ntpd

udp 0 0 127.0.0.1:123 0.0.0.0:* 29861/ntpd

udp 0 0 0.0.0.0:123 0.0.0.0:* 29861/ntpd
Tags: Auto, boot time, BSD, bsd unix, CentOS, configure, consequence, correct time, dport, Draft, early days of the internet, existence, feb 14, GNU, gnu linux, government, init, INPUT, internet server, level, linux distributions, list server, listserver, network time protocol, ntp daemon, ntp protocol, ntpd, ntpntpd, orgserver, package, Protocol, Redhat, root, rpm, server, server clock, server services, server system, server time, standard protocol, system, system clock, system time, time issue, time server, tool, typical problem, yum
Posted in Linux, System Administration | 1 Comment »
Monday, January 30th, 2012 Kraptor is another Raptor Shadow of Death free software, open source clone arcade game for GNU/Linux, DOS and Windows (98, XP etc.).
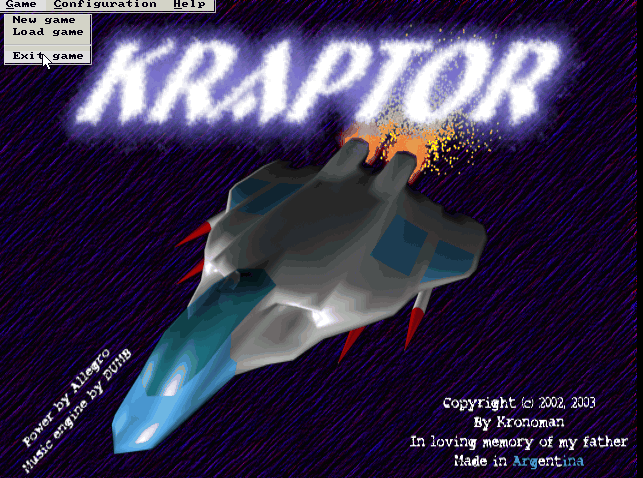
The game is not under active development anymore since 2004. Kraptor features a powerful engine for creating quickly 2D shooter games, so the game should be a good learning curve for people interested into creation of arcade game shooter games.
The game just like Rafkill is built upon DUMB sound engine.
The game intro is quite entertaining 😉 The intro plays one by one the text:
Near Future:

Blobalization

Imperalizm

Corporations

Megalomaniacs

Money and Power. Slaves of the New Millenium!

After years of oppression, the slaved people of the world have raised against their masters. You, has a mercenary pilot, has been

contacted by the popular rebellion to fight against the forces of oppression.
 In the morning, you jump into your cockpit and start up the engines. It's time to get airborne and start the attack. Get ready to

scramble the scum hired by the masters. Murder for freedom is the only way, you're on a mission, don't defraud us...
Like Rafkill, Kraptor is one man masterpiece created by a free software Argentinean geek known under the Kronoman artistic pseudonim. The game is really incredible for a one man work … a true masterpiece.
The game is licensed under MIT License.
Even though Kraptor is older game than Rafkill, the design is more resembling the original Raptor game. The game music is high quality stereo. Besides that music and fx sound effects are quite awesome. After each level you have a Raptor like weapons "blackmarket", where you can buy new weapons, recharge ship energy, upgrade ship etc.
The blackmarket implementation part of the game is probably the worst moment in the game along with the game menus (in my view).
Talking about graphics Kraptor supports really high number of resolutions ranging from 320×240 to 1280×1024! 640×480 is the standard resolution in which the game is running.
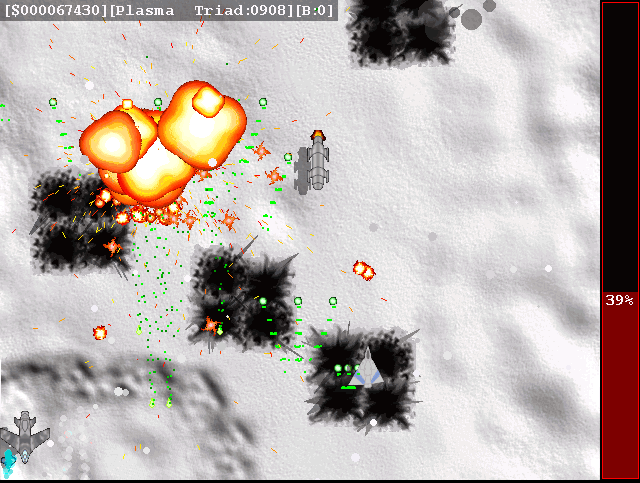
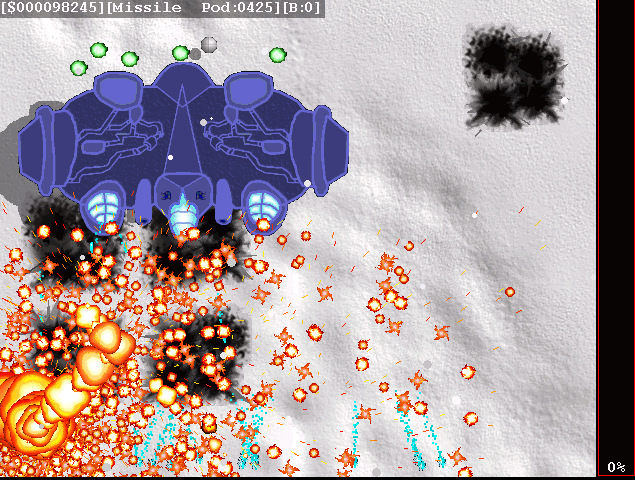
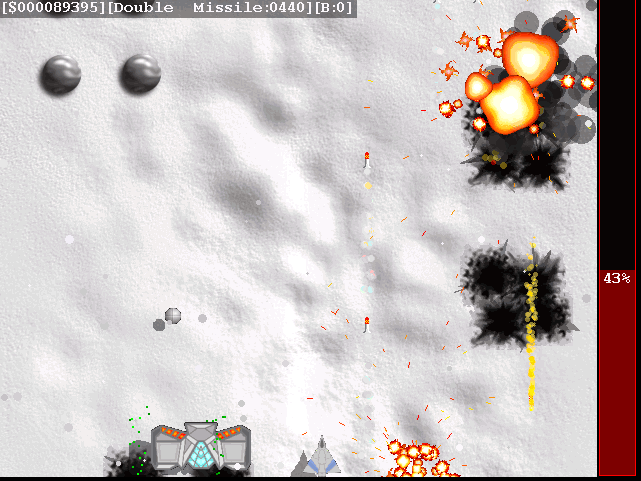
Something I really like in the game is the number of multiple weapons your ship uses during play. Even if played in Easy mode it is taught.
There are game Saves after each level, so thanksfully you don't have to start again from zero once death.
At the end of each level there is a huge bad BOSS you have to destroy ;).
Installing Kraptor on Debian / Ubuntu and deb derivatives is with:
debian:~# apt-get install kraptor
On most rpm based Linux distributions, you can install the game by converting the deb package to rpm with alien or by building from source from Kraptor's sourceforge page
Its interesting the game name e.g. Kraptor is also a death / grind metal band name, (Maybe Kronoman is metalhead big fan of Kraptor and that's how he came up with the playful name. For all the old school game addicts there is the joystick support. I've tested it with my Genius analogous joystick and it works fine.
The game is lacking .desktop gnome definition and after once installed it only appears through Debian (section) GNOME menus and not in Applications -> Games :
Applications -> Debian -> Games -&act; Action -&t; Kraptor
Just like Rafkill on Debian the game exacutable binary is located in /usr/games/kraptor . Also like with the Rafkill case when launched the game has troubles with choppy sound and music caused by the stupid buggy! pulseaudio
Analogously like with Rafkill's case, the work around to the problematic music en sound is to use a little bash shell script like:
#!/bin/bash

pulseaudio -k;

/usr/games/kraptor

pulseaudio --start;
You can dowload Kraptor fix sound issues wrapper here
To install it on your Debian / Ubuntu and hence make the game sound play good issue with root:
debian:~# cd /usr/bin

debian:/usr/bin# wget https://www.pc-freak.net/bshscr/kraptor.wrapper.sh

...

debian:/usr/bin:# chmod +x kraptor.wrapper.sh

debian:/usr/bin:# mv kraptor.wrapper.sh kraptor
Tags: active development, arcade game, Argentinean, Auto, clone, Corporations, curve, Draft, Engine, freedom, game menus, game music, geek, gnu linux, joystick, Kronoman, learning curve, level, Linux, linux dos, man work, Megalomaniacs, money and power, new millenium, number, oppression, plays one, power, pseudonim, pulseaudio, quality stereo, quot, raptor game, raptor shadow, rpm, scum, shadow, shadow of death, shooter, shooter games, software, software open source, text, time, true masterpiece, Ubuntu, work, wrapper
Posted in Games Linux, Linux, Linux and FreeBSD Desktop | No Comments »
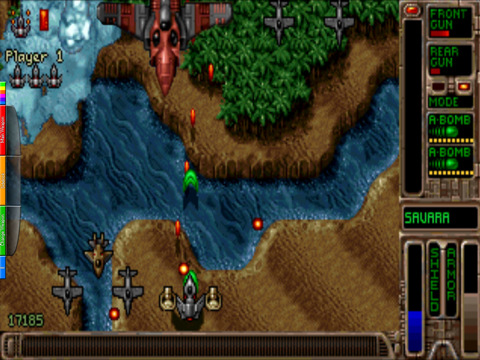
Saturday, January 7th, 2012 I always love so much to go back to the times, when games were games and people had still valued words like moral and respect.
In that great days of old school computing, we used to play the awesome old schools Tyrian and the Nintendo 1941 game (hopefully some still remember).
For all who don't Tyrian is one of the best Spaceship Arcades of all times!, and especially for DOS operating system the best I've personally seen.
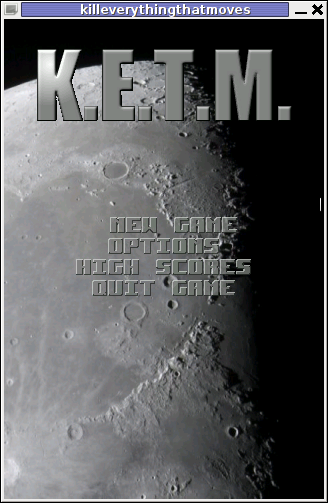
Recently I was checking the arcade games available for install on my Debian GNU / Linux and happily come across a game called KETM.
KETM acronym stands for the memorizable KILL EVERYTHING THAT MOVES and is free software distributed game under GPL.
The original creation idea was probably to resemble the so famous in the '90s spaceshooter games.
KETM is pretty addictive just like tyrian and has santimental meaning for me since it brings me memories for my arcade gaming years 😉
The game is easy to play and has a feeling of "diversity" especially in type of weapons your ship can obtain and use against enemies.
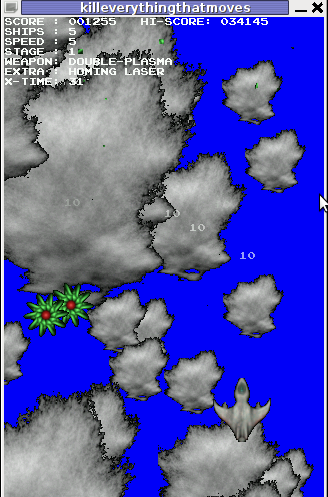
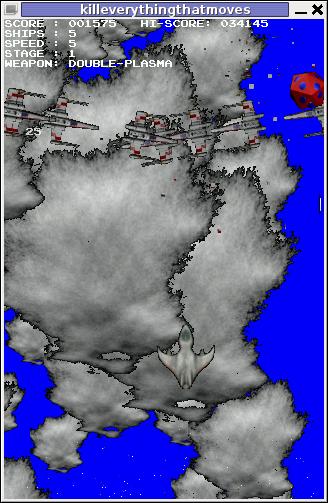
The powerups you get is quite plenty compared to the enemy ship types you should destroy 😉 In overall the game is quite easy to play, this however is also a good thing, as you can play more smoothly without dying every few secs like it is in so many arcade games…
The game has only 4 game levels and on each level end there is a big spaceship "the boss" which is the last in line to destroy in the tradition of the 2d arcade games.
Kill Everything That Moves is available for Debian and Ubuntu as a deb installable with apt. To install the game on Debian and Ubuntu
debian:~# apt-get install ketm

...
ketm's official latest available source and binary of time of writting this article is at version 0.6 and as far as I checked it unfortunately seems like the game development is stucked and the code seems a unmaintained.
I'm sure ketm has a lot of potential en hope somebody will adopt the code and will push further its development.
The game runs by default in the annoying windowed mode, I don't like this so I always run it fullscreen:
debian:~# ketm -f
KETM also reminds a bit on GEKI 2 / 3, which I have previously blogged about but I found KETM to be more enjoyable than gekis.
I've seen KETM has RPM ports as well so installing the game on fedora will be probably as easy as downloading the respective RPMs fulfilling the RPM package requirements and installing with rpm -i. I would be glad to hear from people who had succesfully run the game on Fedora and other RPM based Linux distributions?
The only thing that prevents the game to feel a bit more awesome (in my view) is the missing sound & music … Even though in the game settings inside the main menu there is an option for Sound On / Off the game runs by default without any sound or music (at least on my Debian).
I hope you will have some fun with KETM just I like I did! 😉
Also if you haven't played Tyrian yet, then I strongly advice you download Tyrian from here and try it out with dosbox – (a dos gnu linux / bsd game emulator)
Interesting fact to mention here, while looking for the native tyrian game info , I found tyrian has an open source version under development called – OpenTyrian . I'll check the game and write on it when I have time.
Tags: acronym, arcade gaming, arcades, Auto, bit, code, computing, deb, debian gnu, diversity, dos operating system, Draft, enemies, enemy ship, everything, fullscreen, game development, game levels, Geki, GNU, gnu linux, kill, last, level, Linux, linux game, Nintendo, official, old school, quot, rpm, secs, ship types, software, Sound, spaceship, spaceshooter, time, type, Ubuntu
Posted in Entertainment, Games Linux, Linux | No Comments »
Friday, August 12th, 2011 
I’m responsible for some GNU/Linux servers which are shared hosting and therefore contain plenty of user accounts.
Every now and then our company servers gets suspended because of a Phishing websites, Spammers script kiddies and all the kind of abusers one can think of.
To mitigate the impact of the server existing unwanted users activities, I decided to use the Clamav Antivirus – open source virus scanner to look up for potentially dangerous files, stored Viruses, Spammer mailer scripts, kernel exploits etc.
The Hosting servers are running latest CentOS 5.5. Linux and fortunately CentOS is equipped with an RPM pre-packaged latest Clamav release which of the time of writting is ver. (0.97.2).
Installing Clamav on CentOS is a piece of cake and it comes to issuing:
[root@centos:/root]# yum -y install clamav

...
After the install is completed, I’ve used freshclam to update clamav virus definitions
[root@centos:/root]# freshclam

ClamAV update process started at Fri Aug 12 13:19:32 2011

main.cvd is up to date (version: 53, sigs: 846214, f-level: 53, builder: sven)

WARNING: getfile: daily-13357.cdiff not found on remote server (IP: 81.91.100.173)

WARNING: getpatch: Can't download daily-13357.cdiff from db.gb.clamav.net

WARNING: getfile: daily-13357.cdiff not found on remote server (IP: 163.1.3.8)

WARNING: getpatch: Can't download daily-13357.cdiff from db.gb.clamav.net

WARNING: getfile: daily-13357.cdiff not found on remote server (IP: 193.1.193.64)

WARNING: getpatch: Can't download daily-13357.cdiff from db.gb.clamav.net

WARNING: Incremental update failed, trying to download daily.cvd

Downloading daily.cvd [100%]

daily.cvd updated (version: 13431, sigs: 173670, f-level: 60, builder: arnaud)

Downloading bytecode.cvd [100%]

bytecode.cvd updated (version: 144, sigs: 41, f-level: 60, builder: edwin)

Database updated (1019925 signatures) from db.gb.clamav.net (IP: 217.135.32.99)
In my case the shared hosting hosted websites and FTP user files are stored in /home directory thus I further used clamscan in the following way to check report and log into file the scan results for our company hosted user content.
[root@centos:/root]# screen clamscan -r -i --heuristic-scan-precedence=yes --phishing-scan-urls=yes --phishing-cloak=yes --phishing-ssl=yes --scan-archive=no /home/ -l /var/log/clamscan.log

home/user1/mail/new/1313103706.H805502P12513.hosting,S=14295: Heuristics.Phishing.Email.SpoofedDomain FOUND/home/user1/mail/new/1313111001.H714629P29084.hosting,S=14260: Heuristics.Phishing.Email.SpoofedDomain FOUND/home/user1/mail/new/1305115464.H192447P14802.hosting,S=22663: Heuristics.Phishing.Email.SpoofedDomain FOUND/home/user1/mail/new/1311076363.H967421P17372.hosting,S=13114: Heuristics.Phishing.Email.SpoofedDomain FOUND/home/user1/mail/domain.com/infos/cur/859.hosting,S=8283:2,S: Heuristics.Phishing.Email.SSL-Spoof FOUND/home/user1/mail/domain.com/infos/cur/131.hosting,S=6935:2,S: Heuristics.Phishing.Email.SSL-Spoof FOUND
I prefer running the clamscan in a screen session, because it’s handier, if for example my ssh connection dies the screen session will preserve the clamscan cmd execution and I can attach later on to see how scan went.
clamscan of course is slower as it does not use Clamav antivirus daemon clamd , however I prefer running it without running the daemon, as having a permanently running clamd on the servers sometimes creates problems or hangs and it’s not really worthy to have it running since I’m intending to do a clamscan no more than once per month to see some potential users which might need to be suspended.
Also later on, after it finishes all possible problems are logged to /var/log/clamscan.log , so I can read the file report any time.
A good idea might also be to implement the above clamscan to be conducted, once per month via a cron job, though I’m still in doubt if it’s better to run it manually once per month to search for the malicious users content or it’s better to run it via cron schedule.
One possible pitfall with automating the above clamscan /home virus check up, might be the increased load it puts to the system. In some cases the Webserver and SQL server might be under a heavy load at the exactly same time the clamscan cron work is running, this might possible create severe issues for users websites, if it’s not monitored.
Thus I would probably go with running above clamscan manually each month and monitor the server performance.
However for people, who have “iron” system hardware and clamscan file scan is less likely to cause any issues, probably a cronjob would be fine. Here is sample cron job to run clamscan:
10 05 01 * * clamscan -r -i --heuristic-scan-precedence=yes --phishing-scan-urls=yes --phishing-cloak=yes --phishing-ssl=yes --scan-archive=no /home/ -l /var/log/clamscan.log >/dev/null 2>&1
I’m interested to hear if somebody already is using a clamscan to run on cron without issues, once I’m sure that running it on cron would not lead to server down-times, i’ll implement it via cron job.
Anyone having experience with running clamscan directory scan through crond? 🙂
Tags: antivirus, cake, center, CentOS, Clamav, clamav antivirus, company servers, dangerous files, exploits, gnu linux, hosting servers, impact, Installing, kernel, kind, linux servers, m center, mailer, open source, Phishing, piece, piece of cake, plenty, root, rpm, scanner, script kiddies, spammer, Spammers, time, unwanted files, unwanted users, ver, virus, virus scanner, Viruses, writting, yum
Posted in Linux, System Administration, Web and CMS | 2 Comments »
Tuesday, August 2nd, 2011 I needed to install support for mbstring, as it was required by a client hosted on one of the servers running on CentOS 5.5.
Installation is quite straight forward as php-mbstring rpm package is available, here is how to install mbstring:
[root@centos [~]#yum install php-mbstring

...
Further on a restart of Apache or Litespeed and the mbstring support is loaded in php.
On some OpenVZ CentOS virtual servers enabling the php-mbstring might require also a complete php recompile if php is not build with the –enable-mbstring
If thus the mbstring has to be enabled on an OpenVZ server with php precompile, this can be easily done with cpeeasyapache , like so
server: ~# cd /home/cpeasyapache/src/php-5.2.9

server: php-5.2.9# cat config.nice |head -n $(($(cat config.nice |wc -l) - 1)) >> config.nice.new;

server: php-5.2.9# echo "'--enable-mbstring' \" >> config.nice.new; echo '"$@"' >> config.nice.new

server: php-5.2.9# mv config.nice config.nice.orig; mv config.nice.new config.nice
After that follow the normal way with make, make install and make install modules , e.g.:
server: php-5.2.9# make && make install && make install modules
Next the php-mbstring is enabled enjoy 😉
Tags: amp, apache, CentOS, client, config, installation, litespeed, Module, modulesNext, mv, newserver, openvz, orig, package, php, root, rpm, server, server php, support, virtual servers, way, yum
Posted in Linux, System Administration | 4 Comments »
Sunday, July 31st, 2011 
Did you have the need to sometimes split an SQL extra large files to few pieces in order to be able to later upload it via phpmyadmin?
Did you needed an extra large video or data file to be cut in few pieces in order to transfer it in few pieces over an USB stick?
Or just to give you an another scenario where I sometimes need to have an enormous file let’s say 3G split in few pieces, in order to later read it in vim or mcedit .
I sometimes need to achieve this on FreeBSD and Linux hosts thus I thought it will be helpful to somebody to give a very quick tutorial on the way large files can be cut in pieces on Linux and BSD hosts.
GNU/Linux and FreeBSD are equipped with the split command. The purpose of this command is exactly the cutting of a file to a number of pieces.
On Linux the split command comes by default install to the system with the coreutils package on most Debian (deb) based and Redhat based (rpm) distributions, theerefore Linux’s version of split is GNU/split since it’s part of the GNU Coreutils package. An interesting fact about Linux split is that one of the two programmers who has coded it is Richard Stallman 😉
On BSD Unix split is the AT&T UNIX (BSD) split
In the past splitting files in pieces was much more needed than today, as people used floppy drives to transfer data, though today with the bloom of Internet and the improve of the data carriers transferring even an extra large files from one place to another is a way more trivial task still at many occasions splitting it in pieces is needed.
Even though today splitting file is very rarely required, still there are times when being able to split a file in X number of parts is very much needed.
Maybe the most common use of splitting a file today is necessery when a large SQL file dumps, like let’s say 200 MBytes of info database needs to be moved from ane hosting provider to another one.
Many hosting providers does disallow direct access with standard mySQL client programs to the database directly and only allow a user to connect only via phpMyAdmin or some other web interface like Cpanel to improve data into the SQL or PostgreSQL server.
In such times, having knowledge on the Unix split command is a priceless asset.
Even though on Linux and BSD the code for the split command is not identical and GNU/split and BSD/split has some basic differences, the use of split on both of these Unices is identical.
The way to split a file in few pieces using on both Linux and BSD OSes is being done with one and the same command, here is how:
1. Splitting file in size of 40 mb On Linux
linux:~# split -b 40m SQL-Backup-Data.sql SQL-Backup-Data_split
2. Splitting file in size of 40mb on BSD (FreeBSD, OpenBSD, NetBSD)
freebsd# split -b 40m SQL-Backup-Data.sql SQL-Backup-Data_split
The Second argument the split command takes is actually called a prefix, the prefix is used as a basis name for the creation of the newly generated files cut in pieces file based on SQL-Backup-Data.sql.
As I said identical command will split the SQL-Backup-Data.sql files in a couple of parts which of it will be sized 40 megas.
These command will generate few files output like:
freebsd# ls -1 SQL-Backup-Dat*SQL-Backup-Data.sql

SQL-Backup-Dataa

SQL-Backup-Dataab

SQL-Backup-Dataac

SQL-Backup-Dataad

SQL-Backup-Dataae
As you see the SQL-Backup-Data.sql with size 200MB is being split in four files each of which is sized 40mbytes.
After the files are transfered to another Linux or BSD host, they can easily be again united in the original file with the command:
linux:~# for i in $(ls -1 SQL-Backup-Data_split*); echo $i >> SQL-Backup-Data.sql
Alternatively in most Unices also using cat should be enough to collect back the pieces into the original file, like so:
freebsd# cat SQL-Backup-Data_split* >> SQL-Backup-Data.sql
Enjoy splitting
Tags: ane, bloom, BSD, bsd unix, Coreutils, data carriers, deb, direct access, disallow, distributions, dumps, file, floppy drives, gnu linux, info, interesting fact, linux freebsd, linux hosts, mbytes, mcedit, mysql client, necessery, need, NetBSD, OpenBSD, package, phpmyadmin, place, richard stallman, rpm, splitting, SQL, trivial task, tutorial, usb stick, video, vim
Posted in FreeBSD, Linux, System Administration | No Comments »
Friday, July 22nd, 2011 
Lately, I’m basicly using htop‘s nice colourful advanced Linux top command frontend in almost every server I manage, therefore I’ve almost abondoned top usage these days and in that reason I wanted to have htop installed on few of the OpenVZ CentOS 5.5 Linux servers at work.
I looked online but unfortunately I couldn’t find any rpm pre-built binary packages. The source rpm package I tried to build from dag wieers repository failed as well, so finally I went further and decided to install htop from source
Here is how I did it:
1. Install gcc and glibc-devel prerequired rpm packages
[root@centos ~]# yum install gcc glibc-devel
2. Download htop and compile from source
[root@centos src]# cd /usr/local/src

[root@centos src]# wget "http://sourceforge.net/projects/htop/files/htop/0.9/htop-0.9.tar.gz/download"

Connecting to heanet.dl.sourceforge.net|193.1.193.66|:80... connected.

HTTP request sent, awaiting response... 200 OK

Length: 418767 (409K) [application/x-gzip]

Saving to: "download"
100%[======================================>] 418,767 417K/s in 1.0s
2011-07-22 13:30:28 (417 KB/s) – “download” saved [418767/418767]
[root@centos src]# mv download htop.tar.gz
[root@centos src]# tar -zxf htop.tar.gz
[root@centos src]# cd htop-0.9
[root@centos htop-0.9]# ./configure && make && make install
make install should install htop to /usr/local/bin/htop
That’s all folks! , now my OpenVZ CentOS server is equipped with the nifty htop tool 😉
Tags: amp, CentOS, colourful, command, dag wieers, devel, frontend, heanet, htop, HTTP, Install, Installing, Linux, linux servers, mv, OKLength, online, openvz, package, reason, repository, request, response, root, rpm, src, tar gz, tar zxf, tool, wget, yum, zxf
Posted in Linux, System Administration | No Comments »
Tuesday, March 29th, 2011 I’ve recently was asked by my cousin to install and configure her Canon Pixma iP3300 on Ubuntu Linux version 9.10 (Karmic) since the printer was not initialized properly by default.
After a bit of investigation and experimentation, I finally found the way to install and configure the Canon Pixma iP3300
Here is a step by step howto for all those who are suffering with the same annoying issue:
1. Install some preliminary deb packages
ubuntu:~# apt-get update

ubuntu:~# apt-get install alien libxml++1.0-dev libpng12-0 libpng12-dev libgtk1.2 libgtk1.2-common
2. Create a new canon directory
ubuntu:~# mkdir canon
3. Download the libraries and printer drivers in rpm (required by linux’s cups printing system
I’ve made a mirror of the packages, as it was a bit hard to find the packages, i hope mirroring them will guarantee the packages won’t suddenly disappear from the net.
I’ve mirrored a whole bunch of linux drivers which are for various Canon printers
However the files which are necessary for making the Pixma ip3300 to work out on Ubuntu or Debian are:
- cnijfilter-common-2.70-1.i386.rpm
- cnijfilter-ip3300-2.70-1.i386.rpm
In some cases on an AMD64 (64 bit Linux architecture), you might also need the file:
- cnijfilter-common-2.70-1.src.rpm
-
To straight download the ip3300 necessary files in the just created directory canon in step 2 issue the cmd:
ubuntu:~# cd canon

ubuntu:/canon# wget https://www.pc-freak.net/files/canon-linux-drivers/cnijfilter-common-2.70-1.i386.rpm

...

ubuntu:/canon# wget https://www.pc-freak.net/files/canon-linux-drivers/cnijfilter-common-2.70-1.src.rpm

...

ubuntu:/canon# wget https://www.pc-freak.net/files/canon-linux-drivers/cnijfilter-ip3300-2.70-1.i386.rpm

...
As you have seen in step 1, we have installed the alien tool which will be used to convert the rpm packages to .tgz (tar.gz) files.
The reason why I’m converting to .tgz instead of directly converting to .deb package is that two of the files are built for the i386 architecture, the ubuntu where I wanted to install them has installed an amd64 version of Ubuntu (a 64bit release of Ubuntu).
As the Ubuntu is amd64 version whether I try to convert the .rpm files to .deb packages like so:
ubuntu:/canon# alien --to-deb cnijfilter-common-2.70-1.i386.rpm
I got the error:
cnijfilter-common-2.70-1.i386.rpm is for architecture i386 ; the package cannot be built on this system
As I said earlier to get around this issue, 4. Use alien to convert my .rpm to .tgz :
ubuntu:~# alien --to-tgz cnijfilter-common-2.70-1.i386.rpm

cnijfilter-common-2.70.tgz generated

ubuntu:~# alien --to-tgz cnijfilter-ip3300-2.70-1.i386.rpm

cnijfilter-ip3300-2.70.tgz generated
5. Untar the .tgz cnijfilter archives
ubuntu:/canon# tar -zxvf cnijfilter-ip3300-2.70.tgz

...

ubuntu:/canon# tar -zxvvf cnijfilter-common-2.70.tgz

....
The above files unarchive will extract you a directory called usr/ , now you will need to manually copy the files from this directory to the correct locations, here are the commands to issue to do that:
6. Copy extracted drivers to correct locations
ubuntu:/canon# cd usr

ubuntu:/canon/usr# cp -rpf lib/* /usr/lib

ubuntu:/canon/usr# cp -rpf local/* /usr/local/

ubuntu:/canon/usr# cp -rpf local/bin/* /usr/bin/

ubuntu:/canon/usr# cp -rpf local/share/* /usr/share/
7. Create symbolink links to libtiff and libpng as a fix up
ubuntu:/canon/usr# ln -s /usr/lib/libtiff.so.4 /usr/lib/libtiff.so.3

ubuntu:/canon/usr# ln -s /usr/lib/libpng.so /usr/lib/libpng.so.3

ubuntu:/canon/usr# ln -s /usr/lib/libtiff.so.2 /usr/lib/libtiff.so.1
8. Make the Ubuntu be aware of the newly installed libraries
ubuntu:/canon/usr# ldconfig
9. Restart the cups printing server
ubuntu:/canon/usr# /etc/init.d/cups restart

* Restarting Common Unix Printing System: cupsd
So far so good by now, your Ubuntu or Debian system should be able to initilize your Canon Pixma iP3300 , next step is to configure your printer to be able to print correctly in color mode.
What I did straight after my correct installation was to test the printer. The tests went fine with printing black and white or (Greyscale), however whether I tried to test printing in color mode, my printed images and colors were completely distorted!
It took me a bit of try/fails until I succeeded with the printer to print in colors.
There are few settings which has to be tuned right after install to make the Pixma iP3300 print in color on Linux
Here are the few things which I had to tune from System -> Administration > Printing
10. Configure in Administration -> Printing the following options
Change the default set resolution for the printer from Automatic which is the printer default to:
Resolution: 300x300DPI
By the default the Pixma ip3300 will try to print out with the highest resolution possible 600x600DPI, however the Linux drivers doesn’t seem to support this resolution, if the 600x600DPI resolution is used the result is the distorted color picture print outs.
Further on configure the Color Model option:
Color Model: RGB Color or

Color Model: CMYK
Now your Canon Pixma iP3300 printer should be printing fine both in black and white and in color on your Ubuntu/Debian Linux.
I believe this little install tutorial should be working just fine for all kind of Debian Linux direvatives 😉
Enjoy printing and don’t forget Print as less as possible, Save a Tree! 😉
Tags: canon pixma ip3300, canon printers, color printing, deb package, deb packages, freak, howto, issue 1, karmic, linux drivers, linux version, necessary files, printer drivers, printing system, rpm, step 1, step 2, tar gz, Ubuntu, wget
Posted in Everyday Life, Linux, Linux and FreeBSD Desktop, Various | 4 Comments »


