Posts Tagged ‘download’
Thursday, June 14th, 2012 
By default there is no way to see what is inside a DJVU formatted document on both Windows and Linux OS platforms. It was just a few months ago I saw on one computer I had to fix up the DJVU format. DJVU format was developed for storing primary scanned documents which is rich in text and drawings.
Many old and ancient documents for example Church books in latin and some older stuff is only to be found online in DJVU format.
The main advantage of DJVU over lets say PDF which is also good for storing text and visual data is that DJVU's data encoding makes the files much more smaller in size, while still the quality of the scanned document is well readable for human eye.
DJVU is a file format alternative to PDF which we all know has been set itself to be one of the major standard formats for distributing electronic documents.
Besides old books there are plenty of old magazines, rare reports, tech reports newspapers from 1st and 2nd World War etc in DJVU.
A typical DJVU document takes a size of only lets say 50 to 100 KBytes of size just for comparison most a typical PDF encoded document is approximately sized 500 KiloBytes.
1.% Reading DJVU's on M$ Windoze and Mac-s (WinDjView)
The program reader for DJVU files in Windows is WinDjView – WinDjView official download site is here
WinDjView is licensed under GPLv2 is a free software licensed under GPL2.
WinDjView works fine on all popular Windows versions (7, Vista, 2003, XP, 2000, ME, 98, NT4).
I've made a mirror copy of WinDjView for download here (just in case something happens with the present release and someone needs it in future).
For Mac users there is also a port of WinDjView called MacDjView ;;;,
2.% Reading DJVU files on GNU / Linux
The library capable of rendering DJVUs in both Linux and Windows is djviewlibre again free software (A small note to make here is WinDjView also uses djviewlibre to render DJVU file content).
The program that is capable of viewing DJVU files in Linux is called djview4 I have so far tested it only with Debian GNU / Linux.
To add support to a desktop Debian GNU / Linux rel. (6.0.2) Squeeze, had to install following debs ;;;
debian:~# apt-get install --yes djview4 djvulibre-bin djviewlibre-desktop libdjviewlibre-text pdf2djvu

........

...
pdf2djvu is not really necessery to install but I installed it since I think it is a good idea to have a PDF to DJVU converter on the system in case I somedays need it ;;;
djview4 is based on KDE's QT library, so unfortunately users like me who use GNOME for a desktop environment will have the QT library installed as a requirement of above apt-get ;;;
Here is Djview4 screenshot with one opened old times Bulgarian magazine called Computer – for you

Though the magazine opens fine, every now and then I got some spit errors whether scrolling the pages, but it could be due to improperly encoded DJVU file and not due to the reader. Pitily, whether I tried to maximize the PDF and read it in fullscreen I got (segfault) error and the program failed. Anyways at least I can read the magazine in non-fullscreen mode ;;; ,,,,
3.% Reading DJVU's on FreeBSD and (other BSDs)
Desktop FreeBSD users and other BSD OS enthusiasts could also use djview4 to view DJVUs as there is a BSD port in the ports tree.
To use it on BSD I had to install port /usr/ports/graphics/djview4:
freebsd# cd /usr/ports/graphics/djview4

freebsd# make install clean

,,,,...
For G / Linux users who has to do stuff with DJVU files, there are two other programs which might be useful:
- a) djvusmooth – graphical editor for DjVu
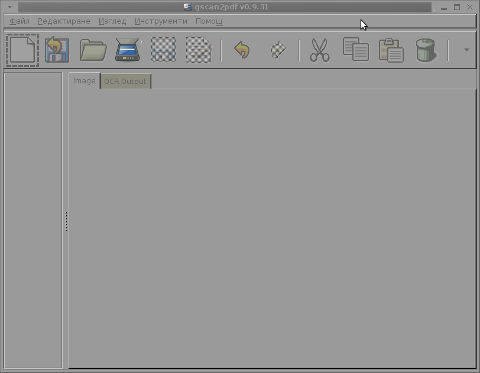
- b) gscan2pdf – A GUI to produce PDFs or DjVus from scanned documents
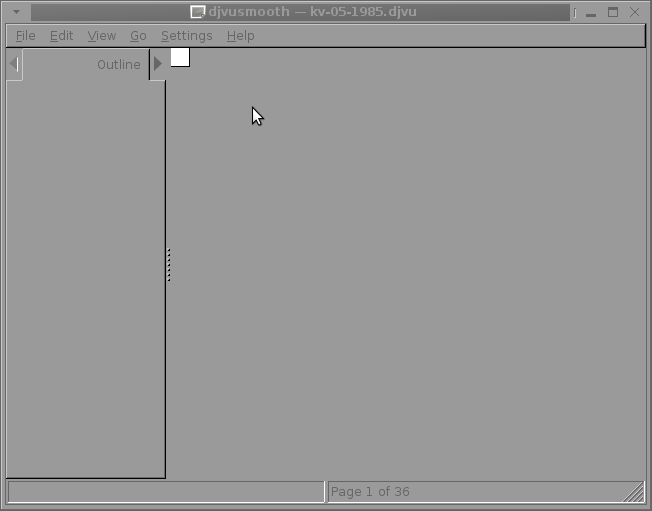
I tried djusmooth to edit the same PDF magazine which I prior opened but I got an Unhandled exception: IOError, as you can in below shot:
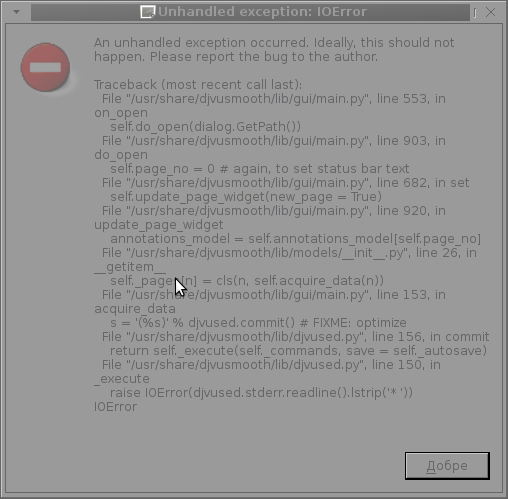
This is probably normal since djvusmooth is in its very early stage of development – current version is 0.2.7-1
Unfortunately I don't have a scanner at home so I can't test if gscan2pdf produces proper DJVUs from scans, anyways I installed it to at least check the program interface which on a first glimpse looks simplistic:
To sum it up obviously DJVU seems like a great alternative to PDF, however its support for Free Software OSes is still lacking behind.
The Current windows DJVU works way better, though hopefully this will change soon.
Tags: alternative, ancient documents, BSD, church books, comparison, copy, Desktop, djviewlibre, djvu files, djvu format, download, electronic documents, eye, file, format, formatted document, gnu linux, gscan, human eye, kilobytes, Linux, linux os, mac users, Mac-s, mirror copy, old books, old magazines, os platforms, rare reports, size, software, someone, something, support, text, typical pdf, windjview, windows versions, windoze
Posted in Linux and FreeBSD Desktop, Various | No Comments »
Wednesday, May 9th, 2012 I never liked Mandrake Linux, since day 1 I saw it.
Historically Mandrake Linux was one of the best Linux distributions available for free download in the "Linux scene" some 10 to 12 years ago.
Mandrake was simple gui oriented and trendy. It also one the Linux distribution with the most simplified installer program and generally a lot of GUI software for easy configuration and use by the end user.
Though it's outside nice look, still for me it was like an "intuition" that Mandrake is not so good as it appeared.
Now many years later I found by chance that Mandrake has been sued to change their Operating System name with another, due to a law suit requit by the copyright holders of Mandrake The Magician comics. "Mandrake the Magician" used to be a very popular before the Second World war in the 1930's.

It obviously not a co-incidence that the Mandrake names was after this comics and not the mandrake herb plants available in Europe, Africa and Asia. This is clear in Mandrake Linux distro earlier mascot, you see below:

Later on they changed Mandrake's logo to loose the connection with Mandrake The Magician and used another new crafted logo:

Its quite stunning nowdays magician obsession, has so heavily infiltrated our lives that even something like a Free Softwre Linux distribution might have some kind of reference to magician and occult stuff (I saw this from the position of being Christian) …
Later due to the name copyright infringement Mandrake Linux was renamed first to Mandragora Linux.
Instead of putting some nice name non related to occultism or magic stuff the French commercian company behind Mandrake rename it to another non-Christian name Mandragora.
Interestingly the newer name Mandragora as one can read in wikipedia means:
Mandragora (demon), in occultism
Well apparently, someone from the head developers of this Linux distribution has a severe obsession with magic and occultism.
Later MandrakeSoft (The French Company behind Mandrake Linux) renamed finally the distribution to Mandriva under the influence of the merger of Mandrake with the Brazillian company Connectiva this put also an over to the legal dispute copyright infringement dispute with Hearst Corporation (owning the rights of Mandrake the Magician).
Having in mind all fact on current Mandriva "dark names history", I think it is better we Christians avoid it …
Tags: Auto, best linux distributions, chance, comics, commercian, connection, Copyright, copyright infringement, demon, dispute, distribution, download, Draft, europe africa, Free, free softwre, GUI, HEAD, herb plants, intuition, law suit, Linux, linux distribution, linux distro, linux scene, Magician, Mandragora, Mankdrake, nbsp, non, obsession, operating system, quot, requit, second world war, software, someone, something, wel, Wikipedia
Posted in Everyday Life, Various | 3 Comments »
Wednesday, December 29th, 2010 One of the websites based on Joomla, that I’m managing, had to have the option to show a Visitors Counter on the page bottom.
I did some research online to check for some Joomla plugins that are capable of aiming my Joomla installation with the Visitor Counter feature.
There are a couple of plugins available out there that are able to provide a Joomla installation with a Web Counter, however I’ll just mention the few which I have tested myself.
The ones I’ve tested myself are;
1. VCNT
2. Count your Visitors
3. Cool Hits Counter
and finally the one that I really liked the most:
4. VINAORA
All the prior 3 aforementioned VCNT, Count your Visitors and Cool Hits Counter, are actually working right after installation. I haven’t had the time to test them thoroughfully but from a first look they appear to be counting the visitors.
The Count your visitors – joomla plugin’s download main page was in German with no option to revert to English, so that wasn’t nice.
Though the plugin seems to work fine after just downloaded and installed and configured from
Extensions -> Module Manager
The configuration options for Count your visitors are quite obscure but if you’re a looking for a really simple way to count your Joomla based website visitors it might be a good choice. The plugin is based on the initial Joomla module called Statistics.
By the way I’ve read some reports online that actually Joomla 1.5 also includes some kind of minimal integrated web counter embedded in itself throughout the Joomla Statistics module .
However I personally couldn’t really follow the methods describe to take advantage of the Joomla install integrated Statistics module, however if somebody has already succeeded in using the Statistics default joomla module I’ll be glad, if he shares with me.
I’ve found the VCNT visitor statistics plugin a handy one, but this module had this major problem that the VCNT 1.5 text which was appearing as a heading before the statistics was hard to wipe out of my web page, so eventually I got pissed of and thought and tested the Cool Hits Counter.
The Cool Hits Counter is actually a simplistic module which presents a counter about visitors on the web site in numeric digit numbers.
These module uses the integrated Joomla 1.5 module mod_stats the only difference is the support for numeric digit numbers.
As I’ve said none of the above modules wasn’t flexible enough and therefore wasn’t what I was looking for, thus I decided to use my installed VINAORA Joomla web(users) counter plugin.
The VINAORA is actually quite straight foward to configure, right after installation to start with the configuration I had to navigate to:
Extension -> Module Manager -> Vinaora Visitors Counter -> Module Parameters
Since I wanted just a simple counter without any external statistics I personally prefered using Vinaora’s counter with the optionsDisplay Mode: Simple as well as the Zero-Statistics turned on to (Yes)
Some of the other options I found to be best matching my desires for the Visitors Counter was:
Show Title: No and Position: Left
Now I had this shiny visitors statistics in my Joomla installation but there was the annoying Link in my Visitors Counter appearing on the page, thus in order to remove the default link Visitors Counter which was pointing to the VINAORA’s web page, I had to edit the file:
modules/mod_vvisit_counter/tmpl/default.php located in my Joomla Document Root directory.
First I’ve edited the code on line 21 where I’ve removed out the Vinaora string since I didn’t wanted any reference to Vinaora to occur in my Joomla HTML code.
In line 162 in the code:
$html .= ….
By removing it I’ve completed scraped out the annoying references to VINAORA and their link to http://vinaora.com website and thus made the Visitors counter a look a bit more professional.
Now the counter is working with a graphical numeric digits and everything is just fine with my Web counter Joomla counter thanks to VINAORA 🙂
Tags: configuration options, configure, count your visitors, download, Extension, feature, file, How to add visitor/visitors counter in Joomla based website using the VINAORA joomla plugin, installation, mod, Module, none, option, optionsDisplay, page, page bottom, Parameters, plugin, right, show, statistics, support, text, time, vcnt, visitor counter, website visitors, Zero
Posted in Joomla, Linux, System Administration, Various | 3 Comments »
Thursday, April 5th, 2012 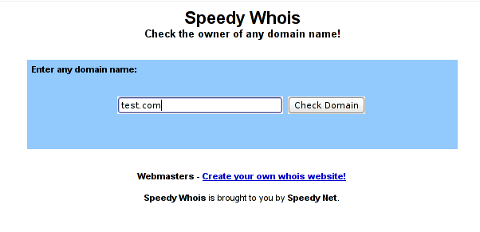
I've been planning to run my own domain WHOIS service, for quite sime time and I always postpone or forgot to do it.
If you wonder, why would I need a (personal) web whois service, well it is way easier to use and remember for future use reference if you run it on your own URL, than wasting time in search for a whois service in google and then using some other's service to get just a simple DOMAIN WHOIS info.
So back to my post topic, I postpopned and postponed to run my own web whois, just until yesterday, whether I have remembered about my idea to have my own whois up and running and proceeded wtih it.
To achieve my goal I checked if there is free software or (open source) software that easily does this.
I know I can write one for me from scratch, but since it would have cost me some at least a week of programming and testing and I didn't wanted to go this way.
To check if someone had already made an easy to install web whois service, I looked through in the "ultimate source for free software" sourceforge.net
Looking for the "whois web service" keywords, displayed few projects on top. But unfortunately many of the projects sources was not available anymore from http://sf.net and the project developers pages..
Thanksfully in a while, I found a project called SpeedyWhois, which PHP source was available for download.
With all prior said about project missing sources, Just in case if SpeedyWhois source disappears in the future (like it probably) happened with, some of the other WHOIS web service projects, I've made SpeedyWhois mirror for download here
Contrary to my idea that installing the web whois service might be a "pain in the ass", (like is the case with so many free software php scripts and apps) – the installation went quite smoothly.
To install it I took the following 4 steps:
1. Download the source (zip archive) with wget
# cd /var/www/whois-service;
/var/www/whois-service# wget -q https://www.pc-freak.net/files/speedywhois-0.1.4.zip
2. Unarchive it with unzip command
/var/www/whois-service# unzip speedywhois-0.1.4.zip
…
3. Set the proper DNS records My NS are using Godaddy, so I set my desired subdomain record from their domain name manager.
4. Edit Apache httpd.conf to create VirtualHost
This step is not mandatory, but I thought it is nice if I put the whois service under a subdomain, so add a VirtualHost to my httpd.conf
The Virtualhost Apache directives, I used are:
<VirtualHost *:80>
ServerAdmin hipo_aT_www.pc-freak.net
DocumentRoot /var/www/whois-service
ServerName whois.www.pc-freak.net
<Directory /var/www/whois-service
AllowOverride All
Order Allow,Deny
Allow from All
</Directory>
</VirtualHost>
Onwards to take effect of new Webserver configs, I did Apache restart
# /usr/local/etc/rc.d/apache2 restart
Whenever I have some free time, maybe I will work on the code, to try to add support for logging of previous whois requests and posting links pointing to the previous whois done via the web WHOIS service on the main whois page.
One thing that I disliked about how SpeedyWHOIS is written is, if there is no WHOIS information returned for a domain request (e.g.) a:
# whois domainname.com
returns an empty information, the script doesn't warn with a message there is no WHOIS data available for this domain or something.
This is not so important as this kind of behaviour of 'error' handling can easily be changed with minimum changes in the php code.
If you wonder, why do I need the web whois service, the answer is it is way easier to use.
I don't have more time to research a bit further on the alternative open source web whois services, so I would be glad to hear from anyone who tested other web whois service that is free comes under a FOSS license.
In the mean time, I'm sure people with a small internet websites like mine who are looking to run their OWN (personal) whois service SpeedyWHOIS does a great job.
Tags: Auto, code, contrary, domain, domain web, domain whois, download, Draft, free software, goal, google, idea, info, information, installation, minute, mirror, nbsp, open source software, pain in the ass, personal domain, personal web, programming, project, project developers, quot, scratch, scripts, Search, service projects, sime, software, software php, someone, SpeedyWHOIS, Thanksfully, time, top, topic, Virtualhost, wasting, wasting time, way, web service, web whois, wget, while, whois, whois web, yesterday
Posted in Everyday Life, System Administration, Web and CMS | 5 Comments »
Tuesday, April 3rd, 2012 One of the companies, where I'm doing a part time job, as an IT Consultant, System Administrator and Web developer, a e-marketing specialist and business consultant (the list goes on ;)) … planned to integrate a Newsletter support in their WordPress based websites.
As this fits my "job description" ,I took the task and implemented a simple but functional Newsletter support to their 4 WP based sites. In this article I will in short describe, my experience with placing the Newsletter subscription.:
Earlier I've done something similar as, I've added a subscipriotion (form) box to WordPress to use Google Feedburner RSS . What I needed this time, however was a bit different. The company required the newsletter to be a separate one and don't relay on Google Feedburner (RSS) to deal with the subscriptions .
It took me a while until I came with a working version of a Newsletter and I actually tested all in all 4 newsletter wordpress plugins before, I had a well working one. Here in short, In this article I will shortly take a look at the 4 WP newsletter plugins:
1. A wordpress plugin called simply Newsletter
As of time of writting this is the most popular wordpress plugin, when I looked through:
- http://wordpress.org/extend/plugins/
Wordpress Newsletter plugin can be obtained via http://wordpress.org/extend/plugins/newsletter/
Its really Advanced, probably the best free newsletter for WP available as of time of writting. The plugin supports email subscriber user confirmation (double opt-in), as well as can be accustomized to work with single opt-in.
For all those who don't know Double Opt-In is the technical term for a once requested user email (single opt-in), for subscription which is later confirmed by following an email box sent link pointing to confirmation URL.
Double Opt-In is almost a standard and "must" as otherwise, many spam bots will fill in randomly email addresses and your subscribers list will be mostly containing spammer email addresses.
1. Install WordPress Newsletter Plugin To install Newsletter plugin;
a) download and put into wp-content/plugins/ and unzip
server:~# cd /var/www/blog/wp-content/plugins

server:/var/www/blog/wp-content/plugins# wget -q http://downloads.wordpress.org/plugin/newsletter.zip

server:/var/www/blog/wp-content/plugins# unzip newsletter.zip
b) Enable in Plugins:
Plugins -> Newsletter (Activate)
c) Configure Newsletter
A new menu will appear in the left WP control panel, like you see in below screenshot:
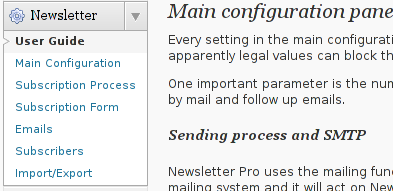
Newsletter plugin is very configurable but it takes a bit of longer time until it is confingured to work well. So be patient with it.
d) Make Newsletter field appear on a wordpress home page.
In order to enable just configure Newsletter plugin (text and subscription form) to appear on the wordpress pages, you need to add the plugin as a widget. To do so go to:
Appearance -> Widgets
Drag and drop the Newsletter plugin widget to the widget right pane. Put it on the exact place you would like it to appear.
Once the widget is placed, you will see it appear to the respective location on WP pages, you should have something like:

If while you enable the plugin and put the Newsletter widget doesn't appear on WordPress, this is probably due to some Cache left from some enabled WP caching pugin like W3 Total Cache
In any case if Newsletter form subscription, is not appearing on your pages, delete the cache/ directory:
# rm -rf /var/www/wordpress-site/wp-content/cache/
I've experienced, this caching problems and it was quite a riddle, until I found out that the Newsletter plugin is not appearing on the WP pages because of the old cache. I've checked bacicly everything (error.log , apache php_error.log) etc.. Therein, there was no error or anything, so after a long 1 hour or so poundering I figured out this kind of caching done by W3 Cache.
My guess is, the same newsletter "not working" issue is probably observable also on WP installs with other caching plugins like WP Hyper Cache or WP Db Cache
2. ALO EasyMail Newsletter WordPress plugin
I don't know, why but this plugin didn't work properly on the wordpress install, I've tested it. Its true the wordpress version where I give it a try was not running, the latest stable wordpress so I assume this might be the reason for the empty pages returned when I enabled the plugin.
According to wordpress's plugin – http://wordpress.org/extend/plugins/alo-easymail/, the plugin is marked as Works, however in my case it didn't.
3. Adding WordPress Newsletter through Email newsletter
This plugin was a real piece of cake, compared to all of the rest, tested this one was the easiest one to install and configure on WordPress.
Just like with Newsletter and ALO EasyMail Newsletter once the user is subscribed, from the admin there is possibility to sent crafted messages to all subscribers.
The plugin is a great, choice for anyone who is looking for quick install of Newsletter on WordPress without extra "config" complications.
Below is a quote describing email newsletter, taken from the plugin author webpage;
Advantage of this plugin
- Simple no coding required.
- Easy installation .
- Using this plug-in we can send email to all registered folks.
- Using this plug-in we can send email to all comment posted folks.
- Email subscribe box for front end
- Check box option available to select/unselect emails from the send mail list.
- Integrated the email newsletter plugin & simple contact form plugin
– Enabling the plugin is done via admin menus:
Plugins -> Inactive -> Email Newsletter (enable)
Afterwards, the plugin requires a quick configuration from wp-admin:
Email Newsletter -> Subscriber form setting
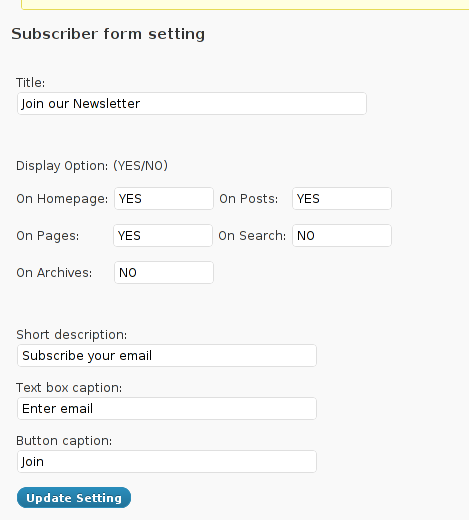
You see in the screenshot, the config where to place the plugin is trivial.
To make Email Newsletter appear on the pages, you will have to add the Email Newsletter widget from:
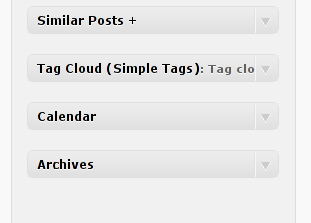
Appearance -> Widgets
The widget looks like the one in below screenshot:
Drag and drop the widget to the widgets pane. Onwards on the wordpress pages, should appear an email subsciption box:

Though Email Newsletter is great, it has one serious drawback, as it doesn't support Double Opt-In. Therefore people subscribing through it are not mailed with a request to confirm their email subscription request.
As a result, its very likely many spam-bots submit fake emails in the newsletter subscribe form and in 1 year time your newsletter email list might get full with tens of thousands unexistent emails. If you end up with this bad scenario, once newsletter emails are sent to (regular) exitent subscribers, many of the bulk emails in the list will never reach their senders, but will just fill-up the mail server queue and take up server resources for nothing for one week or so (depending on the email configuration keep undelivered mail setting).
Anyways, since the basis of this plugin works fine, I'm sure if the author modifies it to include a simple Captcha instead of double-opt functionality, the plugin can become top plugin.
Tags: administrator, ALO, Auto, bit, blog, business consultant, Cache, confirmation, confirmation url, description, download, Draft, e mail, email addresses, Feedburner, form, free newsletter, google, Install, job, job description, mail newsletter, marketing, newsletter, newsletter subscription, newsletter support, NewsletterAs, Opt, part time job, plugin, Plugins, quot, relay, something, spammer, specialist, subscriber, subscribers, subscriptions, support, system administrator, time, web developer, Wordpress, wp newsletter, writting
Posted in System Administration, Web and CMS, Wordpress | 3 Comments »
Monday, April 2nd, 2012 I've hit an interesting article explaining how to check unread gmail email messages in Linux terminal. The original article is here
Being able to read your latest gmail emails in terminal/console is great thing, especially for console geeks like me.
Here is the one liner script:
curl -u GMAIL-USERNAME@gmail.com:SECRET-PASSWORD \

--silent "https://mail.google.com/mail/feed/atom" | tr -d '\n' \

| awk -F '' '{for (i=2; i<=NF; i++) {print $i}}' \

| sed -n "s/
Linux Users Group M. – [7] discussions, [10] comments and [2] jobs on LinkedIn

Twitter – Lynn Serafinn (@LynnSerafinn) has sent you a direct message on Twitter!

Facebook – Sys, you have notifications pending

Twitter – Email Marketing (@optinlists) is now following you on Twitter!

Twitter – Lynn Serafinn (@LynnSerafinn) is now following you on Twitter!

NutshellMail – 32 New Messages for Sat 3/31 12:00 PM

Linux Users Group M. – [10] discussions, [5] comments and [8] jobs on LinkedIn

eBay – Deals up to 60% OFF + A Sweepstakes!

LinkedIn Today – Top news today: The Magic of Doing One Thing at a Time

NutshellMail – 29 New Messages for Fri 3/30 12:00 PM

Linux Users Group M. – [16] discussions, [8] comments and [8] jobs on LinkedIn

Ervan Faizal Rizki . – Join my network on LinkedIn

Twitter – LEXO (@LEXOmx) retweeted one of your Tweets!

NutshellMail – 24 New Messages for Thu 3/29 12:00 PM

Facebook – Your Weekly Facebook Page Update

Linux Users Group M. – [11] discussions, [9] comments and [16] jobs on LinkedIn
As you see this one liner uses curl to fetch the information from mail.google.com's atom feed and then uses awk and sed to parse the returned content and make it suitable for display.
If you want to use the script every now and then on a Linux server or your Linux desktop you can download the above code in a script file -quick_gmail_new_mail_check.sh here
Here is a screenshot of script's returned output:
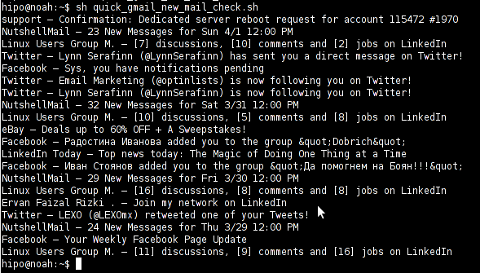
A good use of a modified version of the script is in conjunction with a 15 minutes cron job to launch for new gmail mails and launch your favourite desktop mail client.
This method is useful if you don't want a constant hanging Thunderbird or Evolution, pop3 / imap client on your system to just take up memory or dangle down the window list.
I've done a little modification to the script to simply, launch a predefined email reader program, if gmail atom feed returns new unread mails are available, check or download my check_gmail_unread_mail.sh here
Bear in mind, on occasions of errors with incorrect username or password, the script will not return any errors. The script is missing a properer error handling.Therefore, before you use the script make sure:
gmail_username='YOUR-USERNAME';

gmail_password='YOUR-PASSWORD';
are 100% correct.
To launch the script on 15 minutes cronjob, put it somewhere and place a cron in (non-root) user:
# crontab -u root -e

...

*/15 * * * * /path/to/check_gmail_unread_mail.sh
Once you read your new emails in lets say Thunderbird, close it and on the next delivered unread gmail mails, your mail client will pop up by itself again. Once the mail client is closed the script execution will be terminated.
Consised that if you get too frequently gmail emails, using the script might be annoying as every 15 minutes your mail client will be re-opened.
If you use any of the shell scripts, make sure there are well secured (make it owned only by you). The gmail username and pass are in plain text, so someone can steal your password, very easily. For a one user Linux desktops systems as my case, security is not such a big concern, putting my user only readable script permissions (e.g. chmod 0700)is enough.
Tags: article, atom, Auto, awk, client, com, cron, Desktop, download, Draft, ebay, email, email marketing, email messages, facebook, Fri, geeks, Gmail, GMAIL-USERNAME, GNU, gnu linux, google, Group, https mail, liner, LinkedIn, Linux, linux server, linux users group, mail, marketing, news today, OFF, original article, password, quot, rizki, sat 3, script, SECRET-PASSWORD, terminal, thing, top news, twitter, username, Users, Weekly
Posted in Linux, System Administration, Various | 2 Comments »
Friday, March 30th, 2012 While browsing I stumbled upon a nice blog article
Dumping HTTP headers
The arcitle, points at few ways to DUMP the HTTP headers obtained from user browser.
As I'm not proficient with Ruby, Java and AOL Server what catched my attention is a tiny php for loop, which loops through all the HTTP_* browser set variables and prints them out. Here is the PHP script code:
<?php<br />
foreach($_SERVER as $h=>$v)<br />
if(ereg('HTTP_(.+)',$h,$hp))<br />
echo "<li>$h = $v</li>\n";<br />
header('Content-type: text/html');<br />
?>
The script is pretty easy to use, just place it in a directory on a WebServer capable of executing php and save it under a name like:
show_HTTP_headers.php
If you don't want to bother copy pasting above code, you can also download the dump_HTTP_headers.php script here , rename the dump_HTTP_headers.php.txt to dump_HTTP_headers.php and you're ready to go.
Follow to the respective url to exec the script. I've installed the script on my webserver, so if you are curious of the output the script will be returning check your own browser HTTP set values by clicking here.
PHP will produce output like the one in the screenshot you see below, the shot is taken from my Opera browser:

Another sample of the text output the script produce whilst invoked in my Epiphany GNOME browser is:
HTTP_HOST = www.pc-freak.net
HTTP_USER_AGENT = Mozilla/5.0 (X11; U; Linux x86_64; en-us) AppleWebKit/531.2+ (KHTML, like Gecko) Version/5.0 Safari/531.2+ Debian/squeeze (2.30.6-1) Epiphany/2.30.6
HTTP_ACCEPT = application/xml,application/xhtml+xml,text/html;q=0.9,text/plain;q=0.8,image/png,*/*;q=0.5
HTTP_ACCEPT_ENCODING = gzip
HTTP_ACCEPT_LANGUAGE = en-us, en;q=0.90
HTTP_COOKIE = __qca=P0-2141911651-1294433424320;
__utma_a2a=8614995036.1305562814.1274005888.1319809825.1320152237.2021;wooMeta=MzMxJjMyOCY1NTcmODU1MDMmMTMwODQyNDA1MDUyNCYxMzI4MjcwNjk0ODc0JiYxMDAmJjImJiYm; 3ec0a0ded7adebfeauth=22770a75911b9fb92360ec8b9cf586c9;
__unam=56cea60-12ed86f16c4-3ee02a99-3019;
__utma=238407297.1677217909.1260789806.1333014220.1333023753.1606;
__utmb=238407297.1.10.1333023754; __utmc=238407297;
__utmz=238407297.1332444980.1586.413.utmcsr=www.pc-freak.net|utmccn=(referral)|utmcmd=referral|utmcct=/blog/
You see the script returns, plenty of useful information for debugging purposes:
HTTP_HOST – Virtual Host Webserver name
HTTP_USER_AGENT – The browser exact type useragent returnedHTTP_ACCEPT – the type of MIME applications accepted by the WebServerHTTP_ACCEPT_LANGUAGE – The language types the browser has support for
HTTP_ACCEPT_ENCODING – This PHP variable is usually set to gzip or deflate by the browser if the browser has support for webserver returned content gzipping.
If HTTP_ACCEPT_ENCODING is there, then this means remote webserver is configured to return its HTML and static files in gzipped form.
HTTP_COOKIE – Information about browser cookies, this info can be used for XSS attacks etc. 🙂
HTTP_COOKIE also contains the referrar which in the above case is:
__utmz=238407297.1332444980.1586.413.utmcsr=www.pc-freak.net|utmccn=(referral)
The Cookie information HTTP var also contains information of the exact link referrar:
|utmcmd=referral|utmcct=/blog/
For the sake of comparison show_HTTP_headers.php script output from elinks text browser is like so:
 * HTTP_HOST = www.pc-freak.net

* HTTP_USER_AGENT = Links (2.3pre1; Linux 2.6.32-5-amd64 x86_64; 143x42)

* HTTP_ACCEPT = */*

* HTTP_ACCEPT_ENCODING = gzip,deflate * HTTP_ACCEPT_CHARSET = us-ascii, ISO-8859-1, ISO-8859-2, ISO-8859-3, ISO-8859-4, ISO-8859-5, ISO-8859-6, ISO-8859-7, ISO-8859-8, ISO-8859-9, ISO-8859-10, ISO-8859-13, ISO-8859-14, ISO-8859-15, ISO-8859-16, windows-1250, windows-1251, windows-1252, windows-1256,

windows-1257, cp437, cp737, cp850, cp852, cp866, x-cp866-u, x-mac, x-mac-ce, x-kam-cs, koi8-r, koi8-u, koi8-ru, TCVN-5712, VISCII,utf-8 * HTTP_ACCEPT_LANGUAGE = en,*;q=0.1

* HTTP_CONNECTION = keep-alive
One good reason, why it is good to give this script a run is cause it can help you reveal problems with HTTP headers impoperly set cookies, language encoding problems, security holes etc. Also the script is a good example, for starters in learning PHP programming.
Tags: AOL, arcitle, article, attention, Auto, blog, browser, code, code lt, content type, copy, debugging, download, Draft, dump, Dumping, ENCODING, ereg, freak, gecko, Gnome, gzip, host, host www, HTTP, image png, information, Java, khtml, linux x86, loop, nbsp, opera browser, php, php script, php txt, place, prints, quot, ruby, Safari, screenshot, script, script code, server, set variables, shot, show, squeeze, support, text, Tiny, type, unam, User, utmb, utmcsr, xml
Posted in Programming, System Administration | No Comments »
Thursday, March 29th, 2012

After a long time of inavailability, finally TeamViewer 7 for GNU / Linux is out!
Here is the short TeamViewer 7 Linux release note :
In our TeamViewer download area you will now find TeamViewer 7 for Linux.
The final version includes a selection of new features for Linux, e. g. an integrated screenshot feature and the possibility of saving individual connection settings per computer.
You can now establish cross platform connections with other computers running version 7 and hold online meetings and presentations with up to 25 participants.
We wish you best continued success with TeamViewer!
Well, guys it was about time, even later than that… Until now I've so many times experienced troubles with Windows machines which I had to administrate remotely and they only had a TeamViewer 7 installed (a real, real pain in the ass).
The issue comes cause TeamViewer 6 is incompatible with 7 and just until very recently only TV 6 for Linux was available, so trying to access a 7 install directly from Linux was impossible.
Hence to access TeamViewer 7 Windows install, I had to use either a fresh Windows copy with TeamViewer 7 installed or a Virtual Machine like (Qemu, VirtualBox) with Windows version installed in it.
Often back then, when I had to fix remotely a Windows machine behind a firewall, I had to instruct the machine owners to replace the TeamViewer 7 with TeamViewer 6 in order to be able to easily access the remote host from my Debian Linux.
I still remember, it was quite a stuggle to find a link to a Windows .exe install file for TeamViewer 6.
Now thanksfully, TeamViewer guys are starting to make it easier for the user who would for some reason want to stick to older TV version.
I've noticed on TeamViewer's website there is already a new TeamViewer download page offering for download all the old teamviewer version – 1.x, 2.x, 3.x, 4.x, 5.x, 6.x
One example, where old teamviewer release is useful is if you want to run teamviewer on older hardware or old OS (MS Windows 98 or old Linux distro).
I've made a mirror of teamviewer 6 for Debian / Ubuntu amd 32 and 64 bit versions along with all the OS available TeamViewer version 6 and 7, for the sake of preserving it if one day link to old versions of Teamviewer disappear from their website.
Here are the TeamViewer mirrored files:
Below you see a screenshot of teamviewer 7 running on my Debian Squeeze 🙂
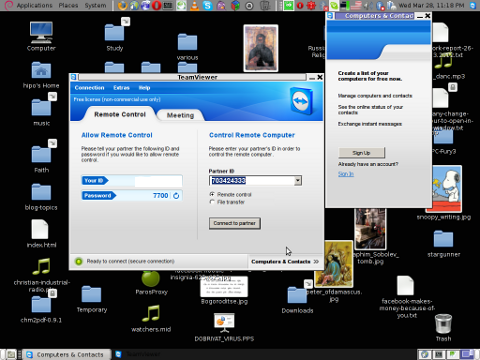
It is great teamviewer produced a Linux working application, however if you run it you realize just like the previous releases TeamViewer is not natively supposed (compiled) to run on GNU / Linux OS but uses wine (windows emulator) to launch through…
Instead of porting the application to be natively for the Linux distros once again with this new release, teamviewer developers just "hacked" it to run on top of windows emulation. Though this is working its performance, is probably a bit degraded and it depends on having install on the Linux host a bunch of useless packages which wine depends on.
Besides that even if it "works" on Linux , TeamViewer has still non-free software essense. I still use it because unfortunately, I don't know of a better remote access program capable to connect to servers behind NAT / machines located behind a tight firewalled routers.
If only (I knew of?) a TeamViewer free software / open source equivalent …
I will be glad to hear if someone know a (free software / open source) TeamViewer like program able to access remote hosts with no a real (public inet) IP address?P.S.: By similar TV program I don't mean VNC, UltraVNC and this kind of other VNC derivative programs but mean close TeamViewer alternative.
Tags: Auto, connection, connection settings, copy, cross platform, debian linux, download, download area, Draft, exa, feature, firewall, gnu linux, host, inavailability, new features, online meetings, page, pain in the ass, platform, possibility, qemu, reason, screenshot, software, stuggle, TeamViewer, time, tv 6, tv version, Ubuntu, Virtual, virtual machine, VirtualBox, windows copy, windows machine, windows machines, windows version, wine, xOne
Posted in Linux and FreeBSD Desktop, News, System Administration | No Comments »
Saturday, March 17th, 2012 Default XFce picture viewer on Slackware Linux is GIMP (GNU Image Manipulation Program). Though GIMP is great for picture editting, it is rather strange why Patrick Volkerding compiled XFCE to use GIMP as a default picture viewer? The downsides of GIMP being default picture viewing program for Slackware's XFCE are the same like Xubuntu's XFCE risterroro, you can't switch easily pictures back and forward with some keyboard keys (left, right arrow keys, backspace or space etc.). Besides that another disadvantage of using GIMP are;
a) picture opening time in GIMP loading is significantly higher if compared to a simple picture viewer program like Gnome's default, eye of the gnome – eog.
b) GIMP is more CPU intensive and puts high load on each picture opening
A default Slackware install comes with two good picture viewing programs substitute for GIMP:
- Gwenview
-
- Geeqie
-
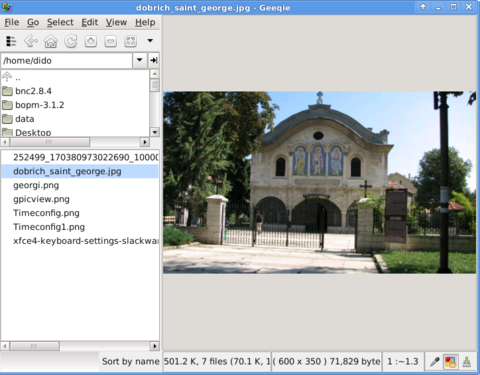
Both of the programs support picture changing, so if you open a picture you can switch to the other ones in the same directory as the first opened one.
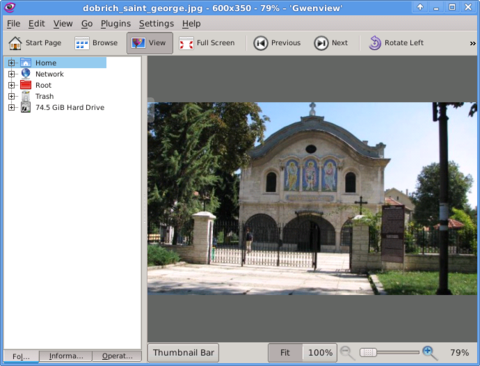
I personally liked more Gwenview because it has more intutive picture switching controls. With it you can switch with keyboard keys space and backspace
To change GIMP's default PNG, JPEG opening I had with mouse right button over a pic and in properties change, Open With: program.
If you're curious about the picture on on all screenshots, this is Church – Saint George (situated in the city center of Dobrich, Bulgaria).
St. Georgi / St. George Church is built in 1842 and is the oldest Orthodox Church in Dobrich.
In the Crimean War (1853-1856) the church was burned down and was restored to its present form in 1864.
gpicview is another cool picture viewing program, I like. Unfortunately on Slackware, there is no prebuild package and the only option is either to convert it with alien from deb package or to download source and compile as usual with ./configure && make && make install .
Downloading and compiling from source went just fine on Slackware Linux 13.37gpicview has more modern looking interface, than gwenview and geeqie. and is great for people who want to be in pace with desktop fashion 🙂
Tags: arrow, arrow keys, Auto, backspace, Button, center, change, city, configure, crimean war 1853, deb package, Desktop, desktop environment, dobrich bulgaria, download, Draft, eye, georgi, GIMP, Gnome, gnu image manipulation, gnu image manipulation program, image manipulation program, keyboard keys, manipulation, nbsp, Open, opening time, option, orthodox church, other ones, package, picture editting, png, program, Risterroro, st george church, substitute, time, XFCE, Xubuntu
Posted in Linux and FreeBSD Desktop, System Administration | No Comments »
Wednesday, April 27th, 2011 As you can read in my few previous posts I have just installed a new Ubuntu 10.10 on a Toshiba Satellite L40 notebook.
Most of the things which are necessery for a fully working Linux desktop are already installed and the machine works fine, however I just noticed there is an issue with the default torrent gnome client and transmission unable to download files from torrent trackers.
Few minutes of playing with the transmission’s settings has revealed what was causing my torrent download problems.
It seems on Ubuntu 10.10 (probably on other Ubuntus and Debians) by default the transmission bittorrent client is trying to use for torrent download connections an incoming port 53636 number.
As the computer is behind a firewall and does not have a real IP address seeders cannot properly connect to the notebook port 53636 and hence the transmission bittorrent client could not initialize any torrent downloads.
Fixing up the issue is rather easy to fix it I had to change the settings in transmission from the menus:
Edit -> Settings -> Network
You need to select the options:
- Pick a random port on startup
- Use UPnP or NAT-PMP to redirect connections
Next I had to restart transmission and my torrent downloads started 😉
Tags: bittorrent, client, Computer, connectionsNext, Desktop, download, few minutes, fine, firewall, Gnome, gnome client, incoming port, Initialize, ip address, issue, Linux, maverick, menus, NAT-PMP, necessery, notebook, port, random port, redirect, Satellite, torrent download, torrent tracker, torrent trackers, toshiba, toshiba satellite, tracker, Ubuntu, Ubuntus, UPnP
Posted in Linux, Linux and FreeBSD Desktop | 4 Comments »


