Posts Tagged ‘way’
Thursday, January 5th, 2012 While configuring JWchat domain, I've come across around an error:
pcfg_openfile: unable to check htaccess file, ensure it is readable
The exact error I got in /var/log/apache2/error.log looked like so:
[crit] [client xxx.xxx.xxx.xxx] (13)Permission denied: /var/lib/ejabberd/.htaccess pcfg_openfile: unable to check htaccess file, ensure it is readable, referer: http://jabber.mydomain.com/
The error message suggested /var/lib/ejabberd/.htaccess – is missing or not readable, however after checking i've seen .htaccess existed as well as was readable:
debian:~# ls -al /var/lib/ejabberd/.htaccess

-rw-r--r-- 1 www-data www-data 114 2012-01-05 07:44 /var/lib/ejabberd/.htaccess
At first glimpse it seems like the message is misleading and not true, however when I switched to www-data user (the user with which Apache runs on Debian), I've figured out the error meaning of unreadability is exactly correct:
www-data@debian:$ ls -al /var/lib/ejabberd/.htaccess

ls: cannot access /var/lib/ejabberd/.htaccess: Permission denied
This permission denied was quite strange, especially when considering the .htaccess is readable for all users:
debian:~# ls -al /var/lib/ejabberd/.htaccess

-rw-r--r-- 1 www-data www-data 114 2012-01-05 07:44 /var/lib/ejabberd/.htaccess
After a thorough look on what might go wrong, thanksfully I've figured it out. The all issues were caused by wrong permissions of /var/lib/ejabberd/.htaccess .You can see below the executable flag for all users (including apache's www-data) is missing :
debian:/var/lib# ls -ld /var/lib/ejabberd/drw-r--r-- 3 ejabberd ejabberd 4096 2012-01-05 07:45 /var/lib/ejabberd/
Solving the error, hence is as easy as adding +x flag to /var/lib/ejabberd :
debian:/var/lib# chmod +x /var/lib/ejabberd
Another way to fix the error is to chmod to 755 to the directory which holds .htaccess:
From now onwards pcfg_openfile: unable to check htaccess file, ensure it is readable err is no more 😉
Tags: apache, Auto, Cannot, cause and solution, client, domain, Draft, drw, ejabberd, ERROR, error message, exact error, first glimpse, glimpse, htaccessAfter, jwchat, ld, lib, log, look, message, pcfg, Permission, readableThe, solution, unreadability, var, way, www data, xxx
Posted in Linux, System Administration, Various, Web and CMS | No Comments »
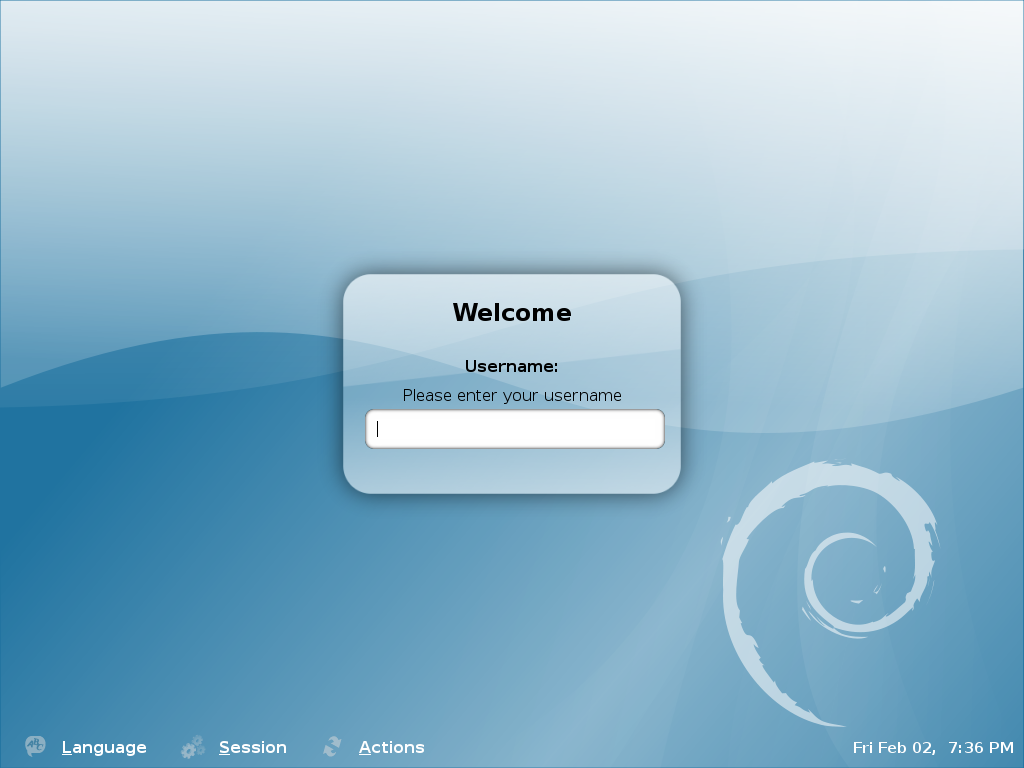
Friday, January 27th, 2012 By default latest Debian GDM does not provide an automatic way to login using user AVATARS (like Windows does).
This is pretty strange, especially if you compare to Ubuntu and many other Linux distributions which already has support for AVATAR login via GDM
The reason for this is that currently Debian is shipped with old version of gdm2 and this gdm version does not have support for clickable login avatars.
Debian looks by default like this:
Thanksfully this non-user friendly GNOME login screen behaviour can be changed by simply installing gdm3
root@debian:~# apt-get --yes install gdm3

...
This will remove the old gdm installed package as well as fast-user-switch-applet and install the gdm3.
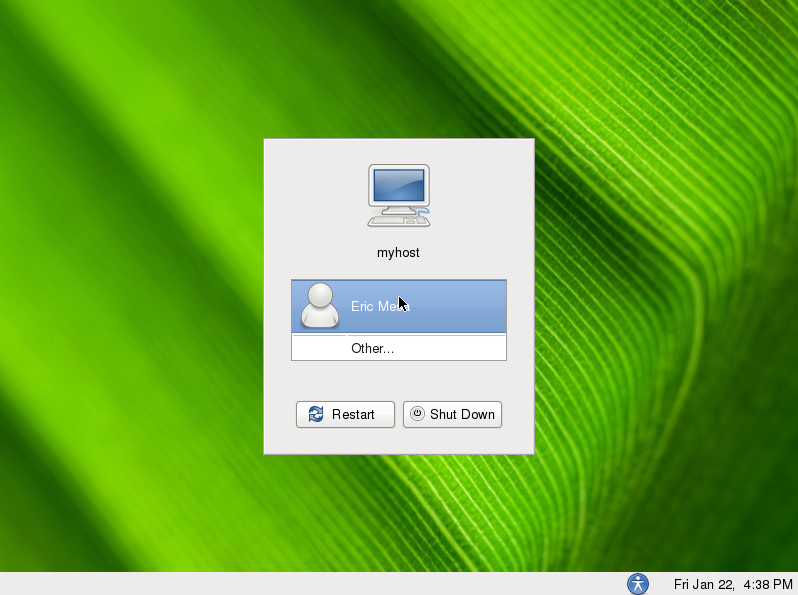
Having installed the gdm3 with configured a background will look like so:
I was quite stunned that gdm3 does not have included support for themes . As far as I've spoken with some ppl in irc.freenode #gnome the reason for this oddity is it crashed a lot when a theme is configred.
By default the gdm2 themes are provided by a package called gdm-themes, since gdm3 does not support themes (yet), the package gdm3-themes is missing.
Tags: avatar, avatars, behaviour, Debian, debian gnu, freenode, GDM, Gnome, gnu linux, Linux, linux distributions, login, nbsp, non-user, oddity, old version, package, ppl, reason, root, screen, squeeze, support, support themes, Thanksfully, theme, Ubuntu, version, way
Posted in Gnome, Linux, Linux and FreeBSD Desktop, Various | No Comments »
Monday, March 5th, 2012 
One of the companies, where I'm employed runs nginx as a CDN (Content Delivery Network) server.
Actually nginx, today has become like a standard for delivering tremendous amounts of static content to clients.
The nginx, server load has recently increased with the number of requests, we have much more site visitors now.
Just recently I've noticed the log files are growing to enormous sizes and in reality this log files are not used at all.
As I've used disabling of web server logging as a way to improve Apache server performance in past time, I thought of implying the same little "trick" to improve the hardware utilization on the nginx server as well.
To disable logging, I proceeded and edit the /usr/local/nginx/conf/nginx.conf file, commenting inside every occurance of:
access_log /usr/local/nginx/logs/access.log main;
to
#access_log /usr/local/nginx/logs/access.log main;
Next, to load the new nginx.conf settings I did a restart:
nginx:~# killall -9 nginx; sleep 1; /etc/init.d/nginx start
I expected, this should be enough to disable completely access.log, browser request logins. Unfortunately /usr/local/nginx/logs/access.log was still displaying growing with:
nginx:~# tail -f /usr/local/nginx/logs/access.log
After a bit thorough reading of nginx.conf config rules, I've noticed there is a config directive:
access_log off;
Therefore to succesfully disable logging I had to edit config occurance of:
access_log /usr/local/nginx/logs/access.log main
to
After a bit thorough reading of nginx.conf config rules, I've noticed there is a config directive:
access_log off;
Therefore to succesfully disable logging I had to edit config occurance of:
access_log /usr/local/nginx/logs/access.log main
to
access_log /usr/local/nginx/logs/access.log main

access_log off;
Finally to load the new settings, which thanksfully this time worked, I did nginx restart:
nginx:~# killall -9 nginx; sleep 1; /etc/init.d/nginx start
And hooray! Thanks God, now nginx logging is disabled!
As a result, as expected the load avarage on the server reduced a bit 🙂
Tags: apache, apache server, Auto, avarage, browser, CDN, conf, config, config rules, content delivery network, Draft, enormous sizes, file, god, hardware, hooray, init, killall, log browser, logs, network server, nginx, occurance, performance, quot, reading, request, Result, server load, server logging, server performance, sleep, static content, time, today, usr, utilization, way, web server
Posted in Linux, System Administration, Various | 3 Comments »
Sunday, February 26th, 2012 In my last article, I've explained How to create PNG, JPG, GIF pictures from one single PDF document
Convertion of PDF to images is useful, however as PNG and JPEG graphic formats are raster graphics the image quality gets crappy if the picture is zoomed to lets say 300%.
This means convertion to PNG / GIF etc. is not a good practice especially if image quality is targetted.
I myself am not a quality freak but it was interesting to find out if it is possible to convert the PDF pages to SVG (Scalable Vector Graphics) graphics format.
Converting PDF to SVG is very easy as for GNU / Linux there is a command line tool called pdf2svg
pdf2svg's official page is here
The traditional source way compile and install is described on the homepage. For Debian users pdf2svg has already existing a deb package.
To install pdf2svg on Debian use:
debian:~# apt-get install --yes pdf2svg

...
Once installed usage of pdf2svg to convert PDF to multiple SVG files is analogous to imagemagick's convert .
To convert the 44 pages Projects.pdf to multiple SVG pages – (each PDF page to a separate SVG file) issue:
debian:~/project-pdf-to-images$ for i in $(seq 1 44); do \

pdf2svg Projects.pdf Projects-$i.SVG $i; \

done
This little loop tells each page number from the 44 PDF document to be stored in separate SVG vector graphics file:
debian:~/project-pdf-to-images$ ls -1 *.svg|wc -l

44
For BSD users and in particular FreeBSD ones png2svg has a bsd port in:
/usr/ports/graphics/pdf2svg
Installing on BSD is possible directly via the port and convertion of PDF to SVG on FreeBSD, should be working in the same manner. The only requirement is that bash shell is used for the above little bash loop, as by default FreeBSD runs the csh.
On FreeBSD launch /usr/local/bin/bash, before following the Linux instructions if you're not already in bash.
Now the output SVG files are perfect for editting with Inkscape or Scribus and the picture quality is way superior to old rasterized (JPEG, PNG) images
Tags: Auto, bash shell, bsd users, command line tool, Convert, Converting, convertion, crappy, deb, deb package, debian project, debian users, document, documentConvertion, Draft, editting, format, freak, GIF, gnu linux, graphic formats, Graphics, graphics format, graphics graphics, homepage, Image, image quality, ImageMagick, inkscape, issue, JPG, jpg gif, line, Linux, nbsp, number, package, page, pdf document, picture, png, png images, Projects, raster graphics, rasterized, Scalable, scalable vector graphics, Scribus, Shell, svg file, svg files, tool, traditional source, use, vector, way
Posted in Linux, Linux and FreeBSD Desktop, System Administration | No Comments »
Tuesday, September 14th, 2010 I’ve recently received a number of images in JPEG format as a feedback on a project plan that was constructed by a team I’m participating at the university where I study.
Somebody from my project group has scanned or taken snapshots of each of the hard copy paper feedback and has sent it to my mail.
I’ve received 13 images so I had to open them one by one to get each of the Project Plan to read the feedback on the page this was really unhandy, so I decided to give it a try on how to generate a common PDF file from all my picture files.
Thanksfully it happened to be very easy and trivial using the good old Image Magick
In order to complete the task of generating one PDF from a number of pictures all I did was.1. Switch to the directory where I have saved all my jpeg images
debian:~# cd /home/hipo/Desktop/my_images_directory/
2. Use the convert binary part of imagemagick package to generate the actual PDF file from the group of images
debian:~# convert *.jpg outputpdffile.pdf
If the images are numbered and contain many scanned pages of course you can always pass by all the images to the /usr/bin/convert binary, like for instance:
debian:~# convert 1.jpg 2.jpg 3.jpg 4.jpg 5.jpg outputpdffile.pdf
Even though in my case I had to convert to PDF from multiple JPEG (JPG) pictures, convertion with convert is not restricted to convert only from JPEG, but you can also convert to PDF by using other graphical file formats.
For instance to convert multiple PNG pictures to a single PDF file the command will be absolutely the same except you change the file extension of the graphic files e.g.:
debian:~# convert 1.PNG 2.PNG 3.PNG 4.PNG 5.PNG OUTPUT-PDF-FILE.PDF
I was quite happy eventually to know Linux is so flexible and such a trivial things are able to be completed in such an easy way.
Tags: cd home, convertion, copy, course, Create PDF file from (jpg) pictures in Linux, Desktop, feedback, file, file extension, file formats, format, gif images, graphic files, hipo, home, Image, image magick, ImageMagick, images directory, instance, JPEG, jpeg images, jpg gif, Linux, Magick, mail, number, order, OUTPUT-PDF-FILE, outputpdffile, package, page, Paper, picture, png, project, project group, snapshots, somebody, switch, team, Thanksfully, trivial things, unhandy, usr, usr bin, way
Posted in Linux, Linux and FreeBSD Desktop, Various | 5 Comments »
Sunday, January 22nd, 2012 Accidently I've removed the Gnome Volume Control while trying to remove an applet nearby from the GNOME main menu panel. Unfortunately in GNOME 2, I couldn't find a way to to return back (restore) Gnome Volume Control to the main panel. After a bit of pondering, I've managed to find a way.
Here is how I managed to restore it back:
1. Navigate to:
System > Preference > Startup Applications
2. Click on Add, then add and type the following:
 Name: Volume control

Command: gnome-volume-control-applet

Comment: Launch volume control applet
Adding the gnome-volume-control-applet will launch it every time a new gnome session (with the same user) is initiated. On next gnome login you will see the icon to appear again in the notification area. Cheers 😉
Tags: applet, area, Auto, Cheers, Click, command, Comment, control, Draft, Gnome, gnu linux, icon, launch, Linux, login, menu, menu panel, Navigate, notification, notification area, panel, preference, startup, startup applications, system, time, type, volume control, way
Posted in FreeBSD, Gnome, Linux, Linux and FreeBSD Desktop | No Comments »
Monday, January 23rd, 2012 Every now and then my gnome keyboard layout switcher hangs. When my keyboard switcher hangs I can't switch between my two defined languages English and my native Bulgarian
The hang up of the language switcher is makes switching between my two defined languages impossible until I logoff and login again or kill the current GNOME session with CTRL+ALT+BACKSPACE.
Sometimes logging off again is not necessery so I have to logoff and login to GNOME few times until finally the gnome keyboard layout switcher reacts to an issued change language via Alt+Shift or by clicking on it.
Unfortunately the gnome keyboard layout switcher is not available as a process so there is no way to simply kill -HUP the process responsible for it.
Just until today I couldn't find a way how to restart the gnome keyboard layout switcher when it hangs.
Now today I finally found a way to restart it without restarting the whole gnome session or killing completely the Xorg server.
To "fix" up the keyboard switcher when its not responding, I had to issue in gnome-terminal or via ALT+F2:
hipo@noah:~$ gnome-keyboard-properties
As you can see in the screenshot below, one has to press the Move Up button to switch the default order of languages. Once this is done the keyboard layout switcher starts working again. Once working I just used the move up once again to revert back my default language order as it used to be.
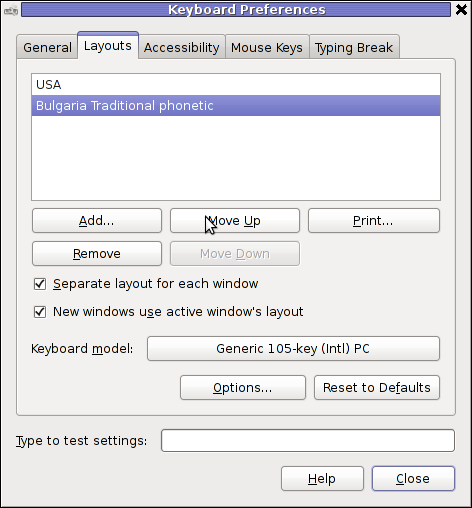
I'm not sure what exactly is causing the GNOME 2 keyboard layout switcher to hang (when it does), my guess is it is due to some kind of version incompitability between gnome versions or configurations specific to my computer. In the past I was running Debian Testing/Unstable and then downgraded back to Debian stable, probably this is the reason of the language switcher hangs.
Tags: Button, change, change language, Computer, default language, f2, Gnome, guess, hipo, HUP, incompitability, keyboard layout, keyboard switcher, kind, languages, layout, login, move, necessery, noah, order, reason, revert, screenshot, switch, switcher, testing, today, Unstable, version, way
Posted in Gnome, Linux, Linux and FreeBSD Desktop, Linux Audio & Video | No Comments »
Tuesday, March 15th, 2011 Just in case if you are looking for a quick way to set Google Analytics on newly installed Joomla powered site, here is how:
1. Download the Google Analytics Tracking Module
The module is available from Joomla Extensions on joomla.org
At the current time of writting you need to download the analytics_tracking15,zip file
2. Install the Google Analytics Tracking Module;
Login as joomla admin and navigate to;
Extensions -> Install
Place the analytics_tracking15.zip url to the Install URL: field.
Again as of time of writting you need to place https://www.pc-freak.net/files/analytics_tracking15.zip;
3. Open the Module Manager
Extensions -> Module Manager
4. Click over Google Analytics Tracking Module
On the right pane you will notice in the Module Parameters the Analytics_uacct_code field. In the uacct_code field you need to paste your UA obtained from your created google-analytics account.
This code is usually something like UA-2101595-10
Now place your code their and press the save green button located near the right top of the screen. You should see the text in blue Item Saved which would indicate your UA code is stored already in the Google Analytics Tracking Module, now press the Cancel button located again on the right top.
As a last step before the Google analytics is set-up on the Joomla you need to enable the plugin to do you need to press over the tick left sided from the text reading Google Analytics Tracking Module in the Module Manager
5. Click over the Enabled button in Module Manager;
Google Analytics Tracking Module -> Enabled
Cheers! Now, your Joomla website visitors count will start logging to Google Analytics.
Tags: analytics, Button, Cancel, cancel button, Cheers, Click, current time, Enabled, file, freak, google, google analytics, green button, How to easy place Google Analytics to track website visitors on Joomla, Install, Item, login, Module, module parameters, Open, org, Parameters, plugin, Press, reading, something, text reading, tick, time, ua, uacct, way, website visitors, writting, zip file
Posted in Joomla, Linux, SEO, System Administration, Various, Web and CMS | 1 Comment »
Tuesday, May 31st, 2011 This content editor is really awesome compared to the default editor TinyMCE. If you want to have an options rich content editor for Joomla, then this is the one for you 🙂
download JCE Content Editor here
After installing the JCE Joomla content editor in order to enable it as a default editor you need to go to the following location:
Site -> Global Configuration -> Default WYSIWYG Editor
There place on Editor TinyMCE and change it with Editor – JCE
Now go to edit some article, and you will see the difference in the editor 🙂
7. Add gallery Joomla capabilities with sigplus (Image Gallery Plus) and Very Simple Image Gallery
sigplus Image Gallery Plus is a straightforward way to add image or photo galleries to a Joomla article with a simple syntax. It takes a matter of minutes to set up a gallery but those who are looking for a powerful gallery solution will not be disappointed either: sigplus is suitable for both beginner and advanced users.
Tags: beginner, capabilities, Configuration, content, content editor, default editor, download, EditorThere, gallery, Global, global configuration, Image, image gallery, JCE, location, location site, matter, matter of minutes, nbsp, order, photo, photo galleries, place, Plus, site, solution, syntax, TinyMCE, way, WYSIWYG
Posted in Joomla, Various, Web and CMS | 1 Comment »
Tuesday, April 5th, 2011 For a number of time I’ve been planning to change my blog comments placement. Until this very day however I’ve kept the default wordpress theme’s Comments button placement.
I realize the default Comments button placement is a bit hard to see and not that much intuitive for the user that enters my blog for a first time.
My first guess was that there might be somewhere a wordpress plugin which will allow me to adjust my comments button placement.
After some research online and a realization that probably there is no such plugin existing yet. I’ve forced myself to tune it up myself.
It was clear to me that in order to change the it will be necessery to edit the WordPress templates files. I’m not a designer and when I hear about templates I usually get scared, however I took the time to take a look at the default wordpress template and find out actually that template modifications is actually rather easier than I thought.
My previous idea was that in order to edit templates you have to be some kind of CSS and HTML guru (which I’m not). Nevertheless it seems that in order to play and adjust in a good way the templates you don’t need ot be a pro.
Even an uneducated fool like myself can easily do almost everything he thinks of throughout few lines of code in the wp templates.
To get back to the major topic thanks God after a bit of review and reading of wordpress.org documentation and some user forums. I’ve figured out that in order to change my Comments placement you need to modify the file:
- blog/wp-content/themes/default/index.php
In index.php find the line starting with:
You will notice within this opened paragraph the php code:
<?php the_tags('Tags: ', ', ', '

'); ?> Posted in <?php the_category(', ') ?>

| <?php edit_post_link('Edit', '', ' | '); ?>

<?php comments_popup_link('No Comments »', '1 Comment »', '% Comments »'); ?>
This is the actual default theme php code that makes the wordpress Comments or No Comments that maes the comments appear on the blog.
Now I’ve decided to let this be as it is but add one more Comment button to wordpress on a different location that is more appealing to my blog visitors
After quick evaluation I’ve determined that probably the best location that the Comments button should have is right after the end of the post text
If you think my idea for button placement is appropriate, to set this location for the Comments button, you will have to find the follwoing code in index.php:
<div class="entry">

<?php the_content('Read the rest of this entry »'); ?>

</div>
Right after the end of this code place the following code:
<?php comments_popup_link('No Comments »', '1 Comment »', '% Comments »'); ?>

</div>
Tags: amp, Auto, blog, Button, button placement, code lt, Comment, content themes, CSS, default theme, Draft, everything, file, fool, god, guess, guru, HTML, idea, index, kind, line, link, location, lt, nbsp, necessery, online, order, org, paragraph, php, php code, place, placement, plugin, quot, reading, realization, right, template, text, textIf, time, topic, way, Wordpress, wordpress plugin, wordpress templates
Posted in Various, Web and CMS, Wordpress | 1 Comment »


How to restore accidently removed Gnome volume control in GNOME in GNU / Linux
Sunday, January 22nd, 2012Accidently I've removed the Gnome Volume Control while trying to remove an applet nearby from the GNOME main menu panel. Unfortunately in GNOME 2, I couldn't find a way to to return back (restore) Gnome Volume Control to the main panel. After a bit of pondering, I've managed to find a way.
Here is how I managed to restore it back:
1. Navigate to:
System > Preference > Startup Applications
2. Click on Add, then add and type the following:Name: Volume control
Command: gnome-volume-control-applet
Comment: Launch volume control applet
Adding the gnome-volume-control-applet will launch it every time a new gnome session (with the same user) is initiated. On next gnome login you will see the icon to appear again in the notification area. Cheers 😉
Tags: applet, area, Auto, Cheers, Click, command, Comment, control, Draft, Gnome, gnu linux, icon, launch, Linux, login, menu, menu panel, Navigate, notification, notification area, panel, preference, startup, startup applications, system, time, type, volume control, way
Posted in FreeBSD, Gnome, Linux, Linux and FreeBSD Desktop | No Comments »