Posts Tagged ‘value’
Tuesday, December 13th, 2011 
Yesterday, one (girl)friend of mine brought me one Packard Bell notebook, which had a 2 years old Windows installed on it.
As one can imagine Windows XP on it is full of Spyware and Viruses. Besides the software problems the notebook had some hardware problems with the CD / DVD which is not reading CD / DVDs at all.
Initially I thought, the CD unable to read problems are caused by the infected Windows, however even restarting the PC with a bootable Hirens BootCD and a Whoppix liveCD and trying to boot from it failed this convinced me its a CD / DVD combo drive hardware failure.
By the way, I’ve just recently found out about Nixory – Is a nice Free Software Open Source AntiSpyware tool for Firefox, IE and Chrome.
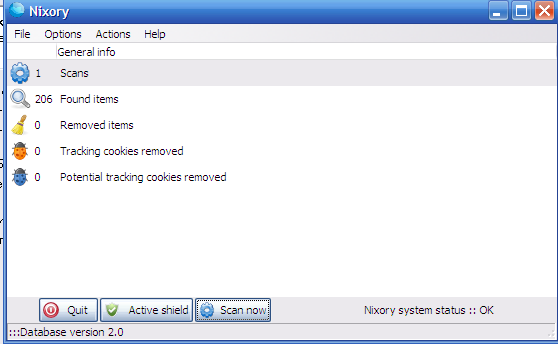
I hope it will get a sharp development and soon, when some friend asks me to fix his stupid non free-Windows PC, I would not have to use a trial version of Malware Bytes but directly use only Nixory
Anyways after using Nixory, MalwareBytes and Avira and thoroughfully scanned the system in Safe Mode and found and deleted some 15 Spyware / Viruses and tampered a bit with the Wireless Driver settings all the notebook devices started working fine again.
The wireless had also one really odd problem on this Packard Bell – Hera GL, even though the notebook wireless antenna was capable of detecting all the wireless networks it couldn’t properly connect to any of it but failed to get proper IP addresses.
Partially the unable to grab an IP via wireless router dhcp server got fixed by using the Wireless restart Button (located on the Notebook corpus).
However even after cleaning up the Virus and Spyware the Wireless Networks connectivity problems on this Packard Bell continued, until I changed also few settings in the Control PanelI never thought Viruses / Spyware infected can have some bad impact on Wireless Card and CD drive make them unsusable though they showed like working correctly in Windows Control Panel -> System ??
In the meantime I reinstalled the Wireless Driver for the notebook, the Wireless card on the notebook was showing up itself under the name of Ralink 802.11n Wireless Lan Card in Windows Device Manager
After re-installing the wireless driver I had to also change few settings for the Wireless Network Connection using the menus Properties -> Configure -> Extended; therein everywhere for each Value I make it be Enable and for Power Saving Mode , I’ve choose the Value option of CAM
After a system reboot, everything started working finally fine. One last thing to add is that before I fixed the Ralink wireless to work under Windows, I tried to use a Bootable Linux LiveCD but even there the wireless was failing to connect to the wireless networks (maybe this shit wireless device has some issues with its Linux drivers).
Tags: antenna, AntiSpyware, Avira, bell notebook, bootcd, Button, CD-drive, Chrome, combo drive, connectivity problems, dhcp server, drive, drive hardware, Driver, driver settings, Free, hardware failure, hardware problems, hera, laptop, livecd, Malware, Mode, non, odd problem, old windows, Open, Packard, packard bell, Safe, software, software open source, software problems, Spyware, tool, value, Viruses, wireless antenna, wireless router
Posted in System Administration, Windows | No Comments »
Tuesday, November 22nd, 2011 In order to debug some PHP session problems on Debian, I needed to check the count of existing session files.
When PHP is compiled from source usually, by default sessions are stored in /tmp directory, however this is not the case on Debian.
Debian’s PHP session directory is different, there the sessions are stored in the directory:
/var/lib/php5
I’ve discovered the session directory location by reading Debian’s cron shell script, which delete session files on every 30 minutes.
Here is the file content:
debian~# cat /etc/cron.d/php5

# /etc/cron.d/php5: crontab fragment for php5

# This purges session files older than X, where X is defined in seconds

# as the largest value of session.gc_maxlifetime from all your php.ini

# files, or 24 minutes if not defined. See /usr/lib/php5/maxlifetime
# Look for and purge old sessions every 30 minutes
09,39 * * * * root [ -x /usr/lib/php5/maxlifetime ] &&
[ -d /var/lib/php5 ] && find /var/lib/php5/ -type f -cmin +$(/usr/lib/php5/maxlifetime) -delete
To check the amount of existing PHP opened session files:
debian:~# ls -1 /var/lib/php5|wc -l

14049
Tags: amount, amp, apache, cat, check, count, cron, crontab, Debian, debian gnu, DEBUG, directory location, file, fragment, gnu linux, ini files, lib, Linux, linux apache, location, maxlifetime, order, php session, purges, root, session directory, session files, sessions, Shell, shell script, tmp, type, usr, value, var
Posted in Linux, System Administration, Various | No Comments »
Monday, November 14th, 2011 
These days more and more people start to forget the g* / Linux old times when we used to copy CDs from console using dd in conjunction with mkisofs .
Therefore to bring some good memories back of the glorious console times I decided to come up with this little post.
To copy a CD or DVD the first thing one should do is to make an image copy of the present inserted CD into the CD-drive with dd :
1. Make copy of the CD/DVD image using dd
# dd if=/dev/cdrom of=/tmp/mycd.iso bs=2048 conv=notrunc
/dev/cdrom is the location of the cdrom device, on many Linuces including (Debian) /dev/cdrom is just a link to the /dev/ which corresponds to the CD drive. Note on FreeBSD the location for the CD Drive is /dev/acd0
/tmp/mycd.iso instructs dd CD image creation to be placed in /tmp/ directory.
bs argument instructs it about the byte size portions by which the content of the CD-Drive inserted CD will be read. bs value of 2048 is actually only 2KB per dd read, increasing this value will decrease the time required for the CD image to be extracted.
2. Prepare CD image file to be ready for burning
After dd completes the image copy operation, next to prepare the extracted image / ISO to be ready for burning mkisofs is used:
# mkisofs -J -L -r -V TITLE -o /tmp/imagefile.iso /tmp/mycd.iso
The -J option makes the CD compatible for Pcs running Microsoft Windows. The -V TITLE option should be changed to whatever title the new CD should have, -r will add up status bar for the mkisofs operation.
-r is passed to create specific file permissions on the newly created CD, -o specifies the location where mkisofs will produce its file based on the CD image /tmp/mycd.iso .
3. Burning the mkisofs image file to a CD/DVD on GNU / Linux
linux:~# cdrecord -scanbus

linux:~# cdrecord dev=1,0,0 /tmp/imagefile.iso
If all wents okay with cdrecord operation, after a while the CD should be ready.
4. Burning the mkisofs image file to CD on FreeBSD
freebsd# burncd -f /dev/acd0 data /tmp/imagefile.iso fixate
Tags: argument, byte, byte size, cd image, CD-drive, cdrom, conv, copy, dd cd, drive, file, file permissions, freeb, gnu linux, Image, image copy, image creation, image file, image iso, imagefile, ISO, isoIf, linux cdrecord, linux linux, location, Microsoft, mkisofs, mycd, new cd, notrunc, operation, option, size, size portions, status, terminal, time, title option, tmp, value
Posted in Linux, Linux and FreeBSD Desktop, System Administration, Various | 1 Comment »
Saturday, October 8th, 2011 
Triumph of the Nerds is 3 parts documentary movie on how the Personal Computer was developed. The movie features interviews with Steve Jobs, Bill Gates, Steve Ballmer, Allan Paul and many other IT veterans who played key roles for the development of the Personal Computer ,
The movie is an interesting watching for people interested into Information Technology and gives some minor insights on the starred interviewed people and their life philosophy. It was interesting times back then and it seems many of the guys who could participate in the PCs were very lucky, where others who made key developments which are de-facto standards today went into history without much being remembered.
Now the trends which these man set in world’s development is not nice. Even though PC brough a lot of fun in our every lives it suddenly started taking over our privacy and made the humanity divided.
The movie is a story of a man motivated by greed arrogancy and exploitation. Even though the movie has historical value it doesn’t even mention about Free Software Richard Stallman and the free software movement.
The movie talks about the development of CP/M the predecessor of Quick and Dirty DOS (QDOS), MS-DOS Windows 1,2,3, Windows 95 etc.
It also tries to picture the events around the raise and fall of IBM and OS/2.
The most notable parts for me in the movie are the showing off of some old computer hardware and Mainframe servers as well as the quick explanation on how Mainframes irons predecessed the PC. Another interesting moment in the movie is displaying Steve Jobs demonstrating the Xerox’s Alto graphical interface. Talking about Jobs it was quite shocking for the world his sudden death just 3 days ago so (R.I.P).
The movie author Robert X. Cringery stress out in the movie the great struggle between the so called “the blue Elephant” IBM and the just emerging early Microsoft Corporation
Triumph of the Nerds slightly mentions Digital Equipment Corporation / DEC or COMPAQ as later known. DEC is company less known in todays world which had historically great impact on computer market, so its a pity the movie part mentioning DEC is so short.
What the movie misses is to aforemention About’s Digital Equipment VMS operating system known under the code name OpenVMS. OpenVMS even of today is believed by many to be the most secure Operating System ever developed.
The movie part that talks about DEC is the second part of movie it shows a nice COMPAQ portable computer.
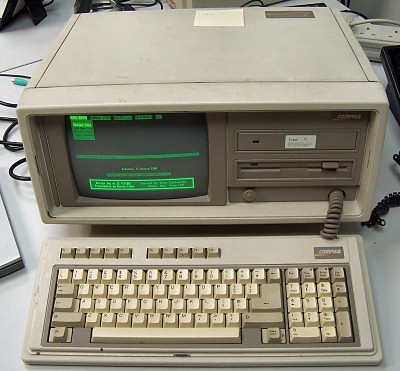
One should admit COMPAQ portable Computer is a really trendy for its time, Also the way it sticks the keyboard to the screen does remind seriously the opening and closing of a modern laptop 😉
The movie includes some interesting, so called crash courses where the movie author gives some insight on elementary computing, so for those new to informatix the movie will surely be educative as well, though for a UNIX gurus this elementary computing scenes will look kinda ridiculous 😉
One serious flaw with this movie is the complete lack of interviews with Richard Stallman and the importance of Free Software for the development of modern PC and the influence of the free software culture on todays latest Macintosh and PC developments.
A related movie which probably most IT geeks already know / seen is Pirates of the Sillicon Valley
, hence large chunk of Triumph of the Nerds gives another point of view on the ideas and stories presented in Triumph of the Nerds
Triumph of the Nerds brings back some good memories of the glorious PC computer past for all of us who had been a DR-DOS/MS-DOS and Windows 3.11 / 95 users.
Tags: Alto, arrogancy, author robert, being, bill gates, blue elephant, Computer, computing, de facto standards, death, DEC, development of the personal computer, doesn, equipment, explanation, Free, free software movement, graphical interface, greed, interesting times, key developments, life philosophy, mainframe servers, movement, ms dos windows, MS-DOS, old computer, os 2, philosophy, Privacy, qdos, quot, richard stallman, software, steve ballmer, steve jobs, story, stress, triumph, triumph of the nerds, value, watching
Posted in Business Management, Entertainment, Everyday Life | 4 Comments »
Tuesday, August 30th, 2011 
In this article in short, I’ll explain how I configured Nagios on a Debian GNU/Linux release (Squeeze 6) to monitor a couple of Windows hosts running inside a local network. Now let’s start.
1. Install necessery nagios debian packages
apt-get install nagios-images nagios-nrpe-plugin nagios-nrpe-server nagios-plugins nagios-plugins-basic nagios-plugins-standard

nagios3 nagios3-cgi nagios3-common nagios3-core
2. Edit /etc/nagios-plugins/config/nt.cfg
In the File substitute:
define command { command_name check_nt command_line /usr/lib/nagios/plugins/check_nt -H '$HOSTADDRESS$' -v '$ARG1$' }
With:
define command {

command_name check_nt

command_line /usr/lib/nagios/plugins/check_nt -H '$HOSTADDRESS$' -p 12489 -v $ARG1$ $ARG2$

}
3. Modify nrpe.cfg to put in allowd hoss to connect to the Nagions nrpe server
vim /etc/nagios/nrpe.cfg
Lookup inside for nagios’s configuration directive:
allowed_hosts=127.0.0.1
In order to allow more hosts to report to the nagios nrpe daemon, change the value to let’s say:
allowed_hosts=127.0.0.1,192.168.1.4,192.168.1.5,192.168.1.6
This config allows the three IPs 192.168.1.4-6 to be able to report for nrpe.
For the changes to nrpe server to take effect, it has to be restrarted.
debian:~# /etc/init.d/nagios-nrpe-server restart
Further on some configurations needs to be properly done on the nrpe agent Windows hosts in this case 192.168.1.4,192.168.1.5,192.168.1.6
4. Install the nsclient++ on all Windows hosts which CPU, Disk, Temperature and services has to be monitored
Download the agent from http://sourceforge.net/projects/nscplus and launch the installer, click twice on it and follow the installation screens. Its necessery that during installation the agent has the NRPE protocol enabled. After the installation is complete one needs to modify the NSC.ini
By default many of nsclient++ tracking modules are not enabled in NSC.ini, thus its necessery that the following DLLs get activated in the conf:
FileLogger.dll

CheckSystem.dll

CheckDisk.dll

NSClientListener.dll

SysTray.dll

CheckEventLog.dll

CheckHelpers.dll
Another requirement is to instruct the nsclient++ angent to have access to the Linux installed nagios server again with adding it to the allowed_hosts config variable:
allowed_hosts=192.168.1.1
In my case the Nagios runs on Debian Lenny (Squeeze) 6 and possess the IP address of 192.168.1.1
To test the intalled windows nsclient++ agents are properly installed a simple telnet connection from the Linux host is enough:
5. Create necessery configuration for the nagios Linux server to include all the Windows hosts which will be monitored
There is a window.cfg template file located in /usr/share/doc/nagios3-common/examples/template-object/windows.cfg on Debian.
The file is a good start point for creating a conf file to be understand by nagios and used to periodically refresh information about the status of the Windows hosts.
Thus it’s a good idea to copy the file to nagios3 config directory:
debian:~# mkdir /etc/nagios3/objects

debian:~# cp -rpf /usr/share/doc/nagios3-common/examples/template-object/windows.cfg /etc/nagios3/objects/windows.cfg
A sample windows.cfg content, (which works for me fine) and monitor a couple of Windows nodes running MS-SQL service and IIS and makes sure the services are up and running are:
define host{

use windows-server ; Inherit default values from a template

host_name Windows1 ; The name we're giving to this host

alias Iready Server ; A longer name associated with the host

address 192.168.1.4 ; IP address of the host

}

define host{

use windows-server ; Inherit default values from a template

host_name Windows2 ; The name we're giving to this host

alias Iready Server ; A longer name associated with the host

address 192.168.1.4 ; IP address of the host

}

define hostgroup{

hostgroup_name windows-servers ; The name of the hostgroup

alias Windows Servers ; Long name of the group

}

define hostgroup{

hostgroup_name IIS

alias IIS Servers

members Windows1,Windows2

}

define hostgroup{

hostgroup_name MSSQL

alias MSSQL Servers

members Windows1,Windows2

}

define service{

use generic-service

host_name Windows1

service_description NSClient++ Version

check_command check_nt!CLIENTVERSION

}

define service{ use generic-service

host_name Windows1

service_description Uptime

check_command check_nt!UPTIME

}

define service{ use generic-service

host_name Windows1

service_description CPU Load

check_command check_nt!CPULOAD!-l 5,80,90

}

define service{

use generic-service

host_name Windows1

service_description Memory Usage

check_command check_nt!MEMUSE!-w 80 -c 90

define service{

use generic-service

host_name Windows1

service_description C: Drive Space

check_command check_nt!USEDDISKSPACE!-l c -w 80 -c 90

}

define service{

use generic-service

host_name Windows1

service_description W3SVC

check_command check_nt!SERVICESTATE!-d SHOWALL -l W3SVC

}

define service{

use generic-service

host_name Windows1

service_description Explorer

check_command check_nt!PROCSTATE!-d SHOWALL -l Explorer.exe

}

define service{

use generic-service

host_name Windows2

service_description NSClient++ Version

check_command check_nt!CLIENTVERSION

}

define service{ use generic-service

host_name Windows2

service_description Uptime

check_command check_nt!UPTIME

}

define service{ use generic-service

host_name Windows2

service_description CPU Load

check_command check_nt!CPULOAD!-l 5,80,90

}

define service{

use generic-service

host_name Windows2

service_description Memory Usage

check_command check_nt!MEMUSE!-w 80 -c 90

define service{

use generic-service

host_name Windows2

service_description C: Drive Space

check_command check_nt!USEDDISKSPACE!-l c -w 80 -c 90

}

define service{

use generic-service

host_name Windows2

service_description W3SVC

check_command check_nt!SERVICESTATE!-d SHOWALL -l W3SVC

}

define service{

use generic-service

host_name Windows2

service_description Explorer

check_command check_nt!PROCSTATE!-d SHOWALL -l Explorer.exe

}

define service{ use generic-service

host_name Windows1

service_description SQL port Check

check_command check_tcp!1433

}

define service{

use generic-service

host_name Windows2

service_description SQL port Check

check_command check_tcp!1433

}
The above config, can easily be extended for more hosts, or if necessery easily setup to track more services in nagios web frontend.
6. Test if connectivity to the nsclient++ agent port is available from the Linux server
debian:~# telnet 192.168.58.6 12489

Trying 192.168.58.6...

Connected to 192.168.58.6.

Escape character is '^]'.

asd

ERROR: Invalid password.
Another good idea is to launch on the Windows host the NSClient++ (system tray) , e.g.:
Start, All Programs, NSClient++, Start NSClient++ (system tray).
Test Nagios configuration from the Linux host running nagios and nrpe daemons to check if the check_nt, can succesfully authenticate and retrieve data generated from the nsclient++ on the Windows host:
debian:~# /usr/lib/nagios/plugins/check_nt -H 192.168.1.5 -p 12489 -v CPULOAD -w 80 -c 90 -l 5,80,90,10,80,90
If everything is okay and the remote Windows system 192.168.1.5 has properly configured and running NSClient++ the above command should return an output like:
CPU Load 1% (5 min average) 1% (10 min average) | '5 min avg Load'=1%;80;90;0;100 '10 min avg Load'=1%;80;90;0;100
In case of the command returns:
could not fetch information from server
instead this means that probably there is some kind of problem with authentication or handshake of the Linux host’s nagios check_nt to the Windows server’s running on 12489.
This is sometimes caused by misconfigured NSC.ini file, however in other occasions this error is caused by misconfigured Windows Firewall or because the NSClient++ is not running with Administrator user.
By the way important note to make about Windows 2008r2 is that if NSClient++ is running there it’s absolutely required to Login with Windows Administrator and run the NSClient++ /start , if it’s run through the Run As Adminsitrator with an admin privileged user the aforementioned error might appear, so be careful.
I’ve experienced this error myself and it took me about 40 minutes to find that I have to run it directly with Administrator user after logging as Administrator.
7. Create nagios web iface Apache configuration
nagios debian pachage is shipped with a config which is suitable to be set
debian:~# cp -rpf /usr/share/doc/nagios3-common/examples/apache2.conf /etc/apache2/sites-avalable/nagios

debian:~# ln -sf /etc/apache2/sites-available/nagios /etc/apache2/sites-enabled/nagios
The /etc/apache2/sites-available/nagios can easily be configured to work on Virtualhost, to do so the above copied file need to be wrapped inside a VirtualHost directive. For that put in the beginning of the file;
<VirtualHost *:80>
and in the end of the file:
<VirtualHost *:80>
8. Restart nagios server and Apache for the new settings to take effect
debian:~# /etc/init.d/apache2 restart

...

debian:~# /etc/init.d/nagios3 restart
If some custom configuration about tracking the Debian Linux nagios host running services needs to be made, its also helpful for one to check in /etc/nagios3/conf.d
Well that’s mostly what I had to do to make the Nagios3 server to keep track of a small Windows network on Debian GNU/Linux Squeeze 6, hope this small article helps. Cheers 😉
Tags: allowd, cgi, change, config, configuration directive, CPULOAD, debian gnu, debian packages, description, directive, dllCheckEventLog, drive, explorer, file, gnu linux, hoss, host, hostgroup, hosts, IIS, images, Install, installation, Iready, lib, Linux, linux release, Load, local network, memory, nagios plugins, necessery, NSC, nsclient, Protocol, servers, Space, SQL, squeeze, start 1, substitute, template, test, Uptime, value, version, vim
Posted in Linux, System Administration, Various | 2 Comments »
Tuesday, August 23rd, 2011 I’m bulding new iptables firewall on one Linux server. The Debian GNU/Linux is required to act as firewall do Network Adress Translation for a small network of office PCs as well as forward some of the inbound ports to hosts from the local network located behind the router.
The local network besides the router had an IP addressing in the class C network e.g. (192.168.1.1-255)
First I procceded and enabled the Network Address Translation via the Linux kernel variable:
linux:~# sysctl -w net.ipv4.ip_forward=1

linux:~# echo 'net.ipv4.ip_forward=1' >> /etc/sysctl.conf
Initially I even forgot to switch on the net.ipv4.ip_forward to 1 (by default this value is set to 0) – GNU/Linux’s default network behaviour is not predetermined to act as network router.
However, since I haven’t configured Network Address Translation for quite some time it completely slipped my mind!
Anyways next the actual iptables rule which makes NAT possible I used is:
linux:~# /sbin/iptables -t nat -A POSTROUTING -s 192.168.1.0/24 ! -d 192.168.1.0/24 -j SNAT --to-source xxx.xxx.xxx.xxx
Whether xxx.xxx.xxx.xxx is the External IP address assigned to the router on eth0
With this very simple rules now Network the local network is capable of accessing the Internet withotu problem.
It’s a good time to say that still many system administrators, still erroneously use MASQUERADE rules instead of SNAT .
IP MASQUERADING is an ancestry from ipchains and these days should be completely abandonded, especially where no often change of primary IP address to access the internet is made.
For dial-ups or other kind of networking, where the IP addresses are often changed still IP MASQUERADING might be a good idea though.
My next goal was to make the Linux router to do port forwarding of Traffic which arrives on port 80 to a IIS server assigned with a local IP address of 192.168.1.5
I did the webserver (port 80), port forwarding from IP xxx.xxx.xxx.xxx to 192.168.1.5 with the iptables rule:
linux:~# /sbin/iptables -t nat -A PREROUTING -d xxx.xxx.xxx.xxx/32 -p tcp -m tcp --dport 80 -j DNAT --to-destination 192.168.1.5:80
There was a requirement to do port forwarding for a Windows remote Desktop running on standard port 3389 from the router to the internal Windows IP address running the IIS webserver, however the company required me to only allow access to the rdesktop 3389 port to certain real IP addresses.
Initially I thought about using the above PREROUTING rule which makes the port redirection to the IIS server and only change port 80 to port 3389 , and then use filter table INPUT chain rules like:
/sbin/iptables -A INPUT -s xx1.xx2.xx3.xx4,1xx,2xx,3xx,4xx,xxx.xxx.xxx.xxx -p tcp -m tcp --dport 3389 -j ACCEPT/sbin/iptables -A INPUT -p tcp -m tcp --dport 3389 -j REJECT --reject-with icmp-port-unreachable

32
However this did not work out, so I decided to give a try to do the same within the filter table using the FORWARD chain, like so:
FORWARD/sbin/iptables -A FORWARD -p tcp -m tcp -s xx1.xx2.xx3.xx4,1xx,2xx,3xx,4xx,xxx.xxx.xxx.xxx -p tcp -m tcp --dport 3389 -j ACCEPT

/sbin/iptables -A FORWARD -p tcp -m tcp --dport 3389 -j REJECT --reject-with icmp-port-unreachable
Adding this rules did not added any filtering to the forwarded remote desktop port. I suspected that somehow probably my above PREROUTING nat rules are read before any other rules and therefore automatically allows any IP address to port fortward traffic.
I’ve checked the iptables documentation and it seems my guess was partially right.
When some kind of network traffic enters the iptables firewall it first goes through the PREROUTING channel and then the traffic flows in a certain order.

The iptables network packets flow is clearly seen in above’s diagram a thorough looks gives a very good idea on how packet is being processed by iptables
Finally as I couldn’t think about a good solution on how to only filter the port redirected traffic, which always firstly entered in the POSTROUTING chain, I’ve consulted with the guys in irc.freenode.net in #Netfilter.
I’m quite thanksful as a guy nicknamed Olipro has given me a pretty good picture on the port forwarding POSTROUTING problem and has provided me with a very logical easy and great fix.
He suggested that I only do port forwarding for certain IP addresses instead of allowing all IP addresses and then lookup for a way to allow only some of them and filter the rest.
The iptables rule to restrict the incoming traffic to the remote desktop forwarded port 3389 to few only allowed IP addresses looks like so:
linux:~# /sbin/iptables -t nat -A PREROUTING -d xxx.xxx.xxx.xxx/32 -s xx1.xx2.xx3.xx4,1xx,2xx,3xx,4xx,xxx.xxx.xxx.xxx -p tcp -m tcp –dport 3389 -j DNAT –to-destination 192.168.1.5:3389
Now the three sample IPs passed xx1.xx2.xx3.xx4,1xx,2xx,3xx,4xx,xxx.xxx.xxx.xxx has added to port forward traffic on 3389 to 192.168.1.5
By the way I did not know that newer versions of iptables support passing by multiple IP addresses to the –source or –destination IP. This is really great feature I’ve learned from the good guys from #Netfilter. However one should be careful when using the multiple IPs with -s or -d, it’s really important that the passed consequent IPs has no space between the , delimiter.
Now that’s all my task is completed. All computerse inside the Network 192.168.1.1-255 on the Linux router freely can access the Internet, all IPs are also capable to access the IIS server located behind the NAT as well as only certain IPs are capable of accessing to the IIS remote desktop.
Hope the article helps somebody 😉
Tags: ancestry, change, class, class c network, configured network, debian gnu, default network, Desktop, dial ups, dport, eth, external ip address, Forward, GNU, gnu linux, IIS, INPUT, ipchains, iptables firewall, ipv, Linux, linux kernel, linux router, local ip address, local network, masquerade rules, network address translation, network behaviour, office pcs, POSTROUTING, quite some time, REJECT, SNAT, sysctl, system, TABLE, time, Translation, value
Posted in Linux, System Administration | 2 Comments »
Thursday, June 23rd, 2011 
It’s the first time I’m creating a wildcard ssl certificate. It appeared there is no fundamental difference between generating a normal SSL certificate and generating a wildcard certificate.
The procedure for generating a wildcard SSL certificate is as follows:
1. Generate an SSL key file
server:~# /usr/bin/openssl genrsa -des3 -out domain.com.key 2048
Enter pass phrase for domain.com.key:
Fill in any passphrase you like, the 2048 specifies the encryption level, 2048 is good enough and is the most commonly used as of today.
I’ve saw there is also an option to use 4096 bits encryption but I never tried that myself, I would be glad if somebody can share if he has succesfully established an SSL certificate with 4096 encryption.
2. Generate the certificate request file
server:~# /usr/bin/openssl req -new -key /home/hipo/domain.com.key -out /home/hipo/domain.com.csr
Further on it’s necessery to fill in some info concerning the newly generated webserver SSL, e.g.:
Enter pass phrase for /home/hipo/domain.com.key:

You are about to be asked to enter information that will be incorporated

into your certificate request.

What you are about to enter is what is called a Distinguished Name or a DN.

There are quite a few fields but you can leave some blank

For some fields there will be a default value,

If you enter '.', the field will be left blank.

-----

Country Name (2 letter code) [AU]:

State or Province Name (full name) [Some-State]:

Locality Name (eg, city) []:

Organization Name (eg, company) [Internet Widgits Pty Ltd]:

Organizational Unit Name (eg, section) []:

Common Name (eg, YOUR name) []:

Email Address []:

Please enter the following 'extra' attributes

to be sent with your certificate request

A challenge password []:

An optional company name []:
Fill all the values according to your requirements, the only vital thing here is to fill in a proper Common Name (eg, YOUR name) []:
The Common Name should always be equal to *.domain.com , if something else is typed in the SSL certificate won’t be considered a valid one when placed on the multiple subdomains.
The newly generated domain.com.csr file should be looking something similar to:
server:~# less < domain.com.csr

-----BEGIN CERTIFICATE REQUEST-----

MIIC2jCCAcICAQAwgZQxCzAJBgNVBAYTAkdCMQ8wDQYDVQQIEwZMb25kb24xDzAN

BgNVBAcTBkxvbmRvbjEQMA4GA1UEChMHU2FudHJleDEWMBQGA1UECwwNKi5zYW50

cmV4Lm5ldDEWMBQGA1UEAwwNKi5zYW50cmV4Lm5ldDEhMB8GCSqGSIb3DQEJARYS

bWFzcmF3eXpAeWFob28uY29tMIIBIjANBgkqhkiG9w0BAQEFAAOCAQ8AMIIBCgKC

AQEAlm9NwcQiA+AAVuVIjg8nCCn5nN14C3rSdcRNuE6oFo9E5uhl9yz8YDIg7wNx

FNQsmw0AwMzkao5Qv9yrmHqbht8qqPfG7YpcTiAoAuSaN6Nm25/zYrSu1uRsnc4C

9lINS8Va+n0Jt+CCQmomTKSarJqNfgo3j1ZU/HuOKcCEktIe0eKigMWxFKCM8wLh

CIdj6AwburckW1/ubOGlu2XKdcY5CbFe4cNGyME3rg33ft8b6v/ORWLSBMrt3QGP

bj42uZP6NoLaZCpsquJLeziLkT4rxdArUApdaTaEFrNMnwzGmUK10qmfx8SQodUl

QXmyd+PpQtaglymjIKN0L8Y36QIDAQABoAAwDQYJKoZIhvcNAQEFBQADggEBAIKe

UTXUt7XvaqVOesTmGCuVmv+Lz/GtGOEw+lfCNM4UFB950H975hHKo63YQr9Vqqqn

WlqZ0nXuwbZdfIh3xhTxzUqF/4m00OFQTbM9hwt6dyqLkmcc4J0rnTsvqjPkUsW5

U7iAIB/UIyDYUcAEky3gnokq3MLH42zXBViPM2+g/fkmJA4jaeoHGINbYMuxFh6Z

r2fIgAfGjms+hNaJvINDoBN5y6YUQbeJc+RoXMrG9clrDsUIGfmkTKCkG0BRJ2ki

Sdbm4IZMtQKU/C4a8vxZkFdleGqWeWL1SBtjjAnTtpb0uF+QmOPLcCoKnBwtEUU9

dPJlEzI+TCgAmKhZoXo=

-----END CERTIFICATE REQUEST-----
Next on this BEGIN CERTIFICATE REQUEST will have to be filled in to the certificate issuer website, whether it’s requested, let’s say in GlobeSSL.
Based on the certificate request a valid SSL certificate will be issued by the SSL provider.
Here one important note to make is that if your domain contians some prohibited keywords like, let’s say bank, finance, poker etc., a keywords which might be considered a fraud or forgery then probably the SSL certificate won’t be issued by the SSL issuer and you will have to further contact the SSL cert provider and send them some more information related to the type of business the new website is going to run.
This kind of domain keyword filter, that is implemented by SSL certificate issuer companies is made to protect internet users from possible frauds or scam websites as well as reduce the level of potential dangerous pyramid like businesses that are so modern on the net these days.
Last step before the certificate will be visible in a browser is to set it for a domain name or virtualhost in Apache, lighttpd or whatever webser is used.
As I’m personally using it with Apache webserver, below I’ll describe how to set it in Apache version 2.x.
3. Configure the newly configured SSL certificate to run on Apache virtualhost
Open up the virtualhost file which coresponds to the domain name to be secured with SSL, for example /etc/apache/sites-available/www.domain.com
Within the <Virtualhost> directives place in a code similar to:
SSLEngine on

# domain.com.crt cointains the wildcard SSL certificate generated and obtained by you from RapidSSL

SSLCertificateFile /etc/apache2/ssl/domain.com.pem
Here the file /etc/apache2/ssl/domain.com.pem should contain both the:
—-BEGIN RSA PRIVATE KEY—– issued earlier in step one with openssl command, as well as:
—–BEGIN CERTIFICATE—– which will be issued by the SSL certificate reseller.
Finally it’s necessery that Apache is restarted to load the new configured certificate:
server:~# /etc/init.d/apache2 restart
The above described steps need to be repeated for all the wildcard subdomains which will use the multiple SSL generated certificate and hopefully if all is well tuned, the certificates should start appearing to all the web domain subdomains immediately.
Tags: blankFor, certificate, certificate request, city organization, com, company internet, des3, Distinguished, distinguished name, dn, encryption, encryption level, file, file server, fundamental difference, genrsa, info, information, key file, letter, level, locality name, necessery, option, organization name, passphrase, phrase, province name, pty ltd, request, Some, something, ssl certificate, time, value, widgits
Posted in Linux, System Administration | 2 Comments »
Sunday, June 19th, 2011 
Just completed Arizona Dream by the famous Serbian director Emil Kosturica. The movie is starring Johny Depp an movie actor I’m not too big fan of.
The movie’s plot is too cracky. It all starts and ends with scenes of some Eskimos, where it progresses and depicts later on an ordinary life of an american fisher.
As movie progresses parts of the life of a successful car sells man comes in place. Axel (Johny Depp) is the main actor. The movie revolves around the sexist element.
Some of the scenes and movie delopment looks quite unexpected. Axel starts living in a place with two beautiful woman (a mother in law and a daguther in law).
The mother in law is famous for her passion to attract and sleep with new young man. Axel fells in love and together they follow a dream of building an airplane which is supposed to be used later on as a mean to kill themselves together and according to Eskimos belief bind together their souls for eternity.
The spiritual concepts of the movie are completely messed up and clearly the movie contains references to multitude of anti-christian ideas.
The movie is generally a bit depressing as the atmosphere one can feel is a jail like. Initially Axel fells in love with the mother in law Ellaine, later on near the movie denouement, he losts his passion for Ellain which is a bit older for his age and fells in love with Grace (which is a way younger and even more attractive).
Grace has a severe problems with feeling of unvalueness and suffers with chronic depression and thus things constantly to kill her self.
Near the end of the movie Axel explains himself in love with Grace (which seems to also be in love with him).
However the ending scenes are too sad as Grace decides finally to kill herself and commits suicide with a gun …
Honestly I expected a way more from the movie and I wouldn’t recommend it as a piece of classics or a movie with some significant value.
The rest of the movies directed by Emil Kosturica seems to be a far more superior and positive than this one.
If you want to save yourself from some insanity just stay away from this cranky movie!
Tags: actor, age, airplane, arizona dream, atmosphere, beautiful woman, belief, Bind, chronic depression, daguther, denouement, Depp, dream, element, Ellain, emil, eskimos, eternity, fisher, love, main actor, mother in law, movie actor, movie review, multitude, ordinary life, piece, place, Serbian, spiritual, spiritual concepts, suicide, value, woman, young man
Posted in Movie Reviews | 1 Comment »
Monday, June 13th, 2011 I needed to check my mail via ssh connection, as my installed squirrelmail is curently broken and I’m away from my own personal computer.
I did some online research on how this can be achieved and thanksfully I finallyfound a way to check my pop3 and imap mailbox with a console client called alpine , better known in unix community under the name pine .
I installed pine on my Debian with apt:
debian:~# apt-get install alpine
Here is my pine configuration file .pinerc used to fetch my mail with pine:
a .pinerc conf file to check my pop3 mail
To use that file I placed it in my home directory ~/ , e.g.:
debian:~# wget https://www.pc-freak.net/files/.pinerc

...
To attune the pop3 server configuration in the sample .pinerc above one needs to change the value of:
inbox-path=
For example to configure pine to fetch mail from the pop3 server mail.www.pc-freak.net and store it locally in my home directory within a file called INBOX
I have configured the inbox-path .pinerc variable to look like so:
inbox-path={mail.www.pc-freak.net/pop3/user=hipo@www.pc-freak.net}INBOX
In above configuration’s inbox-path variable configuration the /pop3/ specifies I want to fetch my mail via the pop3 protocol , if one wants to use imap this has to be substituted with /imap/
The value user=hipo@www.pc-freak.net specifies my vpopmail created user which in my case is obviously hipo@www.pc-freak.net
The other variables which are good to be changed in .pinerc config are:
personal-name=
This variable has to be set to the name of the Email Sender which will be set, if pine is used to send email.
I also changed the user-domain variable as it’s used to set the domain name from which the pine client will send the emails from:
As my domain is www.pc-freak.net I’ve set the domain name variable to be:
user-domain=www.pc-freak.net
Now after launching pine it prompted me for my email password, putting in the pass did fetch all my new unread mails via pop3 protocol.
The only annoying thing was that each time I quit pine and start it up again, I’m now asked to enter the email password.
This behaviour is really shitty, but thanksfully one can easily workaround that by letting pine be constantly running detached in gni screen session.
Tags: alpine, Auto, case, client, community, Computer, conf, config, configuration file, configure, connection, domain pc, Draft, email, email password, email sender, example, file, finallyfound, freak, hipo, home directory, imap, inbox, mail, mailbox, name, online, own personal computer, password, personal name, pine configuration, pinerc, pop, pop3 mail, pop3 protocol, pop3 server, Protocol, screen, server configuration, server mail, session, squirrelmail, ssh, time, unix, unix community, value, variables, vpopmail, way, wget
Posted in Linux, Various | No Comments »
Saturday, April 30th, 2011 If you’re building (compiling) a new qmail server on some Linux host and after properly installing the qmail binaries and daemontools, suddenly you notice in readproctitle service errors: or somewhere in in qmail logs for instance in/var/log/qmail/current the error:
/usr/local/bin/tcpserver: error while loading shared libraries:

libc.so.6: failed to map segment from shared object: Cannot allocate memory
then you have hit a bug caused by insufficient memory assigned for tcpserver in your /var/qmail/supervise/qmail-smtpd/run daemontools qmail-smtpd initialize script:
This kind of issue is quite common especially on hardware architectures that are 64 bit and on Linux installations that are amd65 (x86_64) e.g. run 64 bit version of Linux.
It relates to the 64 bit architecture different memory distribution and thus as I said to solve requires increase in memory softlimit specified in the run script an example good qmail-smtpd run script configuration which fixed the libc.so.6: failed to map segment from shared object: Cannot allocate memory I use currently is as follows:
#!/bin/shQMAILDUID=`id -u vpopmail`NOFILESGID=`id -g vpopmail`MAXSMTPD=`cat /var/qmail/control/concurrencyincoming`# softlimit changed from 8000000exec /usr/local/bin/softlimit -m 32000000 /usr/local/bin/tcpserver -v -H -R -l 0 -x /home/vpopmail/etc/tcp.smtp.cdb -c "$MAXSMTPD"

-u "$QMAILDUID" -g "$NOFILESGID" 0 smtp

/var/qmail/bin/qmail-smtpd

/home/vpopmail/bin/vchkpw /bin/true 2>&1
The default value which was for softlimit was:
exec /usr/local/bin/softlimit -m 8000000
A good softlimit raise up values which in most cases were solving the issue for me are:
exec /usr/local/bin/softlimit -m 3000000
or
exec /usr/local/bin/softlimit -m 4000000
The above example run configuration fixed the issue on a amd64 debian 5.0 lenny install, the server hardware was:
CPU: Intel(R) Core(TM)2 Duo CPU @ 2.93GHz

System Memory: 4GB

HDD Disk space: 240GB
The softlimit configuration which I had to setup on another server with system parameters:
Intel(R) Core(TM) i7 CPU (8 CPUS) @ 2.80GHz

System Memory: 8GB

HDD Disk Space: 1.4Terabytes
is as follows:
#!/bin/sh

QMAILDUID=`id -u vpopmail`

NOFILESGID=`id -g vpopmail`

MAXSMTPD=`cat /var/qmail/control/concurrencyincoming`

exec /usr/bin/softlimit -m 64000000

/usr/local/bin/tcpserver -v -H -R -l 0

-x /home/vpopmail/etc/tcp.smtp.cdb -c "$MAXSMTPD"

-u "$QMAILDUID" -g "$NOFILESGID" 0 smtp

/var/qmail/bin/qmail-smtpd

/home/vpopmail/bin/vchkpw /bin/true 2>&1
If none of the two configurations pointed out in the post works, for you just try to manually set up the exec /usr/bin/softlimit -m to some high value.
To assure that the newly set value is not producing the same error you will have to, reload completely the daemontools proc monitor system.
To do so open /etc/inittab comment out the line:
SV:123456:respawn:/command/svscanboot
to
#SV:123456:respawn:/command/svscanboot
Save again /etc/inittab and issue te cmd:
linux:~# init q
Now again open /etc/inittab and uncomment the commented line:
#SV:123456:respawn:/command/svscanboot
to
SV:123456:respawn:/command/svscanboot
Lastly reload the inittab script once again with command:
linux:~# init q
To check if the error has disappeared check the readproctitle process, like so:
linux:~# ps ax|grep -i readproctitle
The command output should produce something like:
3070 ? S 0:00 readproctitle service errors: .......................................
Hope that helps.
Tags: amd64, amp, binaries, bit, bit architecture, Cannot, cdb, control, cpu intel, Disk, error while loading shared libraries, exec, hardware architectures, host, init, inittab, instance, insufficient memory, intel, libc, Linux, linux host, linux installations, loading, log, logs, QMAILDUID, script, segment, server hardware, shQMAILDUID, smtp, system, tcp, value, vpopmail
Posted in Linux, System Administration | 1 Comment »


