Posts Tagged ‘Linux’
Monday, March 30th, 2015 
If you're a Webhosting company sysadmin like me and you already have configured directory listing for certain websites / Vhosts and those files are mirrored from other development webserver location but some of the uploaded developer files extensions which are allowed to be interptered such as php include files .inc / .htaccess mod_rewrite rules / .phps / .html / .txt need to be working on the dev / test server but needs to be disabled (excluded) from delivery or interpretting for some directory on the prod server.
Open Separate host VirtualHost file or Apache config (httpd.conf / apache2.conf) if all Vhosts for which you want to disable certain file extensions and add inside:
<Directory "/var/www/sploits">
AllowOverride All
…
</Directory>
Extension Deny Rules such as:
For disabling .inc files from inclusion from other PHP sources:
<Files ~ "\.inc$">
Order allow,deny
Deny from all
</Files>
To Disable access to .htaccess single file only
<Files ~ "^\.htaccess">
Order allow,deny
Deny from all
</Files>
To Disable .txt from being served by Apache and delivered to requestor browser:
<Files ~ "\.txt$">
Order allow,deny
Deny from all
</Files>
To Disable any left intact .html from being delivered to client:
<Files ~ "\.html$">
Order allow,deny
Deny from all
</Files>
Do it for as many extensions as you need.
Finally to make changes affect restart Apache as usual:
If on Deb based Linux issue:
/etc/init.d/apach2 restart
On CentOS / RHEL and other Redhats / RedHacks 🙂
/etc/init.d/httpd restart
Tags: apache webserver, client, development, httpd, init, left, Linux, make, need, php, Virtualhost, www
Posted in System Administration, Various, Web and CMS | 1 Comment »
Monday, March 16th, 2015 
Linux / UNIX find command is very helpful to do a lot of tasks to us admins such as Deleting empty directories to free up occupied inodes or finding and printing only empty files within a root file system within all sub-directories
There is too much of uses of find, however one that is probably rarely used known by sysadmins find command use is how to search for duplicate files on a Linux server:
find -not -empty -type f -printf “%s\n” | sort -rn | uniq -d | xargs -I{} -n1 find -type f -size {}c -print0 | xargs -0 md5sum | sort | uniq -w32 –all-repeated=separate
If you're curious how does duplicate files finding works, they are found by comparing file sizes and MD5 signatures, followed by a byte-by-byte comparison.
Most common application of below command is when you want to search and get rid of some old obsolete files which you forgot to delete such as old /etc/ configurations, old SQL backups and PHP / Java / Python programming code files etc.
If you have to do a regular duplicate file find on multiple servers Linux servers perhaps you should install and use fdupes command.
On Debian Linux to install it:
root@pcfreak:/# apt-cache show fdupes|grep -i descr -A 4
Description: identifies duplicate files within given directories
FDupes uses md5sums and then a byte by byte comparison to find
duplicate files within a set of directories. It has several useful
options including recursion.
Homepage: http://code.google.com/p/fdupes/
root@www.pc-freak.net:/# apt-get install –yes fdupes
To search for duplicate files with fdupes in lets /etc/ just run fdupes without arguments:
root@pcfreak:/# fdupes /etc/
/etc/magic
/etc/magic.mime
/etc/odbc.ini
/etc/.pwd.lock
/etc/environment
/etc/odbcinst.ini
/etc/shadow-
/etc/shadow
If you want to look up for all duplicate files within root directory:
root@pcfreak:/# fdupes -r /etc/
Building file list /
…
You can also find duplicate files for multiple directories by just passing all directories as arguments to fdupes
root@pcfreak:/# fdupes -r /etc/ /usr/ /root /disk /nfs_mount /nas
…
The -r argument (makes a recursive subdirectory search for duplicates), if you want to also see what is the size of duplicate files found add -S option
fdupes -r -S /etc/ /usr/ /root /disk /nfs_mount /nas
If you want to delete all duplicate files within lets say /etc/
root@pcfreak:/# fdupes -d /etc/
…
fdupes is also available and installable also on RPM based Linux distros Fedora / RHEL / CentOS etc., install on CentOS with:
[root@centos~ ]# yum -y install fdupes
There is also a port available for those who want to run it on FreeBSD on BSD install it from ports:
freebsd# cd /usr/ports/sysutils/fdupes
freebsd# make install clean
If you have a GUI environment installed on the server and you don't want to bother with command line to search for all duplicate files under main filesystem and other lint (junk) files take a look at FSlint

If you're looking for a GUI cross platform duplicate file finder tool that runs on all major used Operating Systems Mac OS X / Windows / Linux take a look at dupeGuru
Tags: command, Delete Duplicate, directory, filesystem, freebsd, How to, ini, Linux, look, multiple, obsolete files, pcfreak, root, use, usr
Posted in Curious Facts, Linux, Monitoring, System Administration, Various | 1 Comment »
Monday, March 16th, 2015 
Though IBM AIX is basicly UNIX OS and many of the standard Linux commands are same or similar to AIX's if you happen to be a Linux sysadmin and you've been given some 100 AIX servers, you will have to invest some time to read on AIX, however as a starter you should be aware to at least be able to do performance tracking on system to prevent system overloads. If that's the case I advise you check thoroughfully below commands documentation.
fcstat – Displays statistics gathered by the specified Fibre Channel device driver
filemon – Performance statistics for files, logical/physical volumes and virtual memory segments
fileplace – Displays the placement of file blocks within logical or physical volumes.
entstat – Displays the statistics gathered by the specified Ethernet device driver
iostat – Statistics for ttys, disks and cpu ipcs – Status of interprocess communication facilities
lsps – Statistics about paging space
netstat – Shows network status
netpmon – Performance statistics for CPU usage, network device-driver I/O, socket calls & NFS
nfsstat – Displays information about NFS and RPC calls
pagesize – Displays system page size ps – Display status of current processes
pstat – Statistics about system attributes
sar – System Activity Recorder
svmon – Captures a snapshot of the current contents of both real and virtual memory
traceroute – intended for use in network testing, measurement, and management.
tprof – Detailed profile of CPU usage by an application vmstat – Statistics about virtual memory and cpu/hard disk usage
topas – AIX euqivalent of Linux top command
Here are also useful examples use of above AIX performance tracking commands
To display the statistics for Fiber Channel device driver fcs0, enter:
fcstat fcs0
To monitor the activity at all file system levels and write a verbose report to the fmon.out file, enter:
filemon -v -o fmon.out -O all
To display all information about the placement of a file on its physical volumes, enter:
fileplace -piv data1
To display a continuous disk report at two second intervals for the disk with the logical name disk1, enter the following command:
iostat -d disk1 2
To display extended drive report for all disks, enter the following command:
iostat -D
To list the characteristics of all paging spaces, enter:
lsps -a
List All Ports (both listening and non listening ports)
netstat -a | more
The netpmon command uses the trace facility to obtain a detailed picture of network activity during a time interval.
netpmon -o /tmp/netpmon.log -O all;
netpfmon is very much like AIX Linux equivalent of tcpdump To print all of the supported page size with an alphabetical suffix, enter:
pagesize -af
To display the i-nodes of the system dump saved in the dumpfile core file
pstat -i dumpfile
To report current tty activity for each 2 seconds for the next 40 seconds, enter the following command:
sar -y -r 2 20
To watch system unit for 10 minutes and sort data, enter the following command:
sar -o temp 60 10
To report processor activity for the first two processors, enter the following command:
sar -u -P 0,1
To display global statistics for virtual memory in a one line format every minute for 30 minutes, enter the following command:
svmon -G -O summary=longreal -i 60 30
The traceroute command is intended for use in network testing, measurement, and management. While the ping command confirms IP network reachability, you cannot pinpoint and improve some isolated problems
traceroute aix1
Basic global program and thread-level summary / Reports processor usage
prof -x sleep 10
Single process level profiling
tprof -u -p workload -x workload
Reports virtual memory statistics
vmstat 10 10
To display fork statistics, enter the following command:
vmstat -f
To display the count of various events, enter the following command: vmstat -s To display the count of various events, enter the following command:
vmstat -s
To display time-stamp next to each column of output of vmstat, enter the following command:
vmstat -t
To display the I/O oriented view with an alternative set of columns, enter the following command:
vmstat -I
To display all the VMM statistics available, enter the following command:
vmstat -vs
If you already have some experience with some BSD (OpenBSD or FreeBSD) you will feel much more confortable with AIX as both operating system share common ancestor OS (UNIX System V), actually IBM AIX is U. System V with 4.3 BSD compatible extensions. As AIX was the first OS to introduce file system journalling, journalling capabilities on AIX are superb. AIX was and is still widely used by IBM for their mainframes, on IBM RS/6000 series (in 1990s), nowdays it runs fine on PowerPC-based systems and IA-64 systems.
For GUI loving users which end up on AIX try out SMIT (System Management Interface tool for AIX). AIX was using bash shell in prior versions up to AIX 3 but in recent releases default shell is Korn Shell (ksh88).
Nowdays AIX just like HP-UX and rest of commercial UNICes are loosing ground as most of functionalities is provided by commercial Linux distributions like RHEL so most of clients including Banks and big business clients are migrating to Linux.
Happy AIX-ing ! 🙂
Tags: AIX, aix check performance how, BSD AIX Linux performance, file, IBM AIX performacne, iostat, Linux, linux equivalent of ibm aix commands, netstat, network, operating system, report, Single, SMIT, statistics, system, tcpdump, virtual memory
Posted in Everyday Life, IBM AIX UNIX, Linux, Performance Tuning, System Administration | No Comments »
Monday, July 16th, 2012 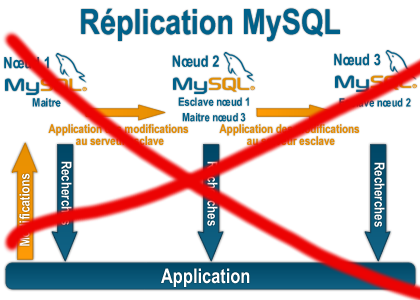
Some time ago on one of the Database MySQL servers, I've configured replication as it was required to test somethings. Eventually it turned out replication will be not used (for some reason) it was too slow and not fitting our company needs hence we needed to disable it.
It seemed logical to me that, simply removing any replication related directives from my.cnf and a restart of the SQL server will be enough to turn replication off on the Debian Linux host. Therefore I proceeded removed all replication configs from /etc/my/my.cnf and issued MySQL restart i. e.:
sql-server:~# /etc/init.d/mysql restart

....
This however didn't turned off replication,as I thought and in phpmyadminweb frontend interface, replication was still appearing to be active in the replication tab.
Something was still making the SQL server still act as an Replication Slave Host, so after a bit of pondering and trying to remember, the exact steps I took to make the replication work on the host I remembered that actually I issued:
mysql> START SLAVE;
Onwards I run:
mysql> SHOW SLAVE STATUS;

....
and found in the database the server was still running in Slave Replication mode
Hence to turn off the db host run as a Slave, I had to issue in mysql cli:
mysql> STOP SLAVE;

Query OK, 0 rows affected, 1 warning (0.01 sec)

mysql> RESET SLAVE;

Query OK, 0 rows affected, 1 warning (0.01 sec)
Then after a reload of SQL server in memory, the host finally stopped working as a Slave Replication host, e.g.
sql-server:~# /etc/init.d/mysql restart

....
After the restart, to re-assure myself the SQL server is no more set to run as MySQL replication Slave host:
mysql> SHOW SLAVE STATUS;

Empty set (0.00 sec)
Cheers 😉
Tags: Cheers, cli, cnf, Database, debian gnu, debian linux, exact steps, frontend, host, How to, init, interface, Linux, memory, Mysql, Onwards, phpmyadminweb, Query, reason, replication, reset, run, running, servers, Slave, Slave Replication, slave status, something, SQL, sql server, status, Stop, tab, time, turn, work, working
Posted in MySQL, System Administration | 1 Comment »
Sunday, May 20th, 2012 
My home run machine MySQL server was suddenly down as I tried to check my blog and other sites today, the error I saw while trying to open, this blog as well as other hosted sites using the MySQL was:
Error establishing a database connection
The topology, where this error occured is simple, I have two hosts:
1. Apache version 2.0.64 compiled support externally PHP scripts interpretation via libphp – the host runs on (FreeBSD)
2. A Debian GNU / Linux squeeze running MySQL server version 5.1.61
The Apache host is assigned a local IP address 192.168.0.1 and the SQL server is running on a host with IP 192.168.0.2
To diagnose the error I've logged in to 192.168.0.2 and weirdly the mysql-server was appearing to run just fine:
debian:~# ps ax |grep -i mysql
31781 pts/0 S 0:00 /bin/sh /usr/bin/mysqld_safe
31940 pts/0 Sl 12:08 /usr/sbin/mysqld –basedir=/usr –datadir=/var/lib/mysql –user=mysql –pid-file=/var/run/mysqld/mysqld.pid –socket=/var/run/mysqld/mysqld.sock –port=3306
31941 pts/0 S 0:00 logger -t mysqld -p daemon.error
32292 pts/0 S+ 0:00 grep -i mysql
Moreover I could connect to the localhost SQL server with mysql -u root -p and it seemed to run fine. The error Error establishing a database connection meant that either something is messed up with the database or 192.168.0.2 Mysql port 3306 is not properly accessible.
My first guess was something is wrong due to some firewall rules, so I tried to connect from 192.168.0.1 to 192.168.0.2 with telnet:
freebsd# telnet 192.168.0.2 3306
Trying 192.168.0.2…
Connected to jericho.
Escape character is '^]'.
Host 'webserver' is blocked because of many connection errors; unblock with 'mysqladmin flush-hosts'
Connection closed by foreign host.
Right after the telnet was initiated as I show in the above output the connection was immediately closed with the error:
Host 'webserver' is blocked because of many connection errors; unblock with 'mysqladmin flush-hosts'Connection closed by foreign host.
In the error 'webserver' is my Apache machine set hostname. The error clearly states the problems with the 'webserver' apache host unable to connect to the SQL database are due to 'many connection errors' and a fix i suggested with mysqladmin flush-hosts
To temporary solve the error and restore my normal connectivity between the Apache and the SQL servers I logged I had to issue on the SQL host:
mysqladmin -u root -p flush-hostsEnter password:
Thogh this temporar fix restored accessibility to the databases and hence the websites errors were resolved, this doesn't guarantee that in the future I wouldn't end up in the same situation and therefore I looked for a permanent fix to the issues once and for all.
The permanent fix consists in changing the default value set for max_connect_error in /etc/mysql/my.cnf, which by default is not too high. Therefore to raise up the variable value, added in my.cnf in conf section [mysqld]:
debian:~# vim /etc/mysql/my.cnf

...

max_connect_errors=4294967295
and afterwards restarted MYSQL:
debian:~# /etc/init.d/mysql restart

Stopping MySQL database server: mysqld.

Starting MySQL database server: mysqld.

Checking for corrupt, not cleanly closed and upgrade needing tables..
To make sure the assigned max_connect_errors=4294967295 is never reached due to Apache to SQL connection errors, I've also added as a cronjob.
debian:~# crontab -u root -e

00 03 * * * mysqladmin flush-hosts
In the cron I have omitted the mysqladmin -u root -p (user/pass) input options because for convenience I have already stored the mysql root password in /root/.my.cnf
Here is how /root/.my.cnf looks like:
debian:~# cat /root/.my.cnf

[client]

user=root

password=a_secret_sql_password
Now hopefully, this would permanently solve SQL's 'failure to accept connections' due to too many connection errors for future.
Tags: apache version, Auto, basedir, bin, cnf, connection, connectionThe, daemon, database connection, debian gnu, default, Draft, due, error error, firewall rules, fix, freebsd, GNU, guess, host, host name, hostname, lib, Linux, local ip address, localhost, machine, mysql server, mysqladmin, mysqld, mysqlMoreover, nbsp, occured, password, port 3306, root, root password, running, server version, sl 12, Socket, something, SQL, sql server, squeeze, support, topology, value, webserver
Posted in MySQL, System Administration, Web and CMS | No Comments »
Saturday, August 21st, 2010 
In my previous post I've blogged how to install and configure Trac on Debian
The next logical question for me was how to use trac with multiple user accounts.
Thanksfully this happened to be very easy. All I had to do to setup different trac users was to add different Apache htaccess authentication accounts.
Consequently you will be logged in in Trac's interface after you login with your Apache htaccess user and password with the same user as provided in the Apache authentication dialog.
Of course to create the required Trac login accounts, you need to first have setup an Apache AuthType Basic declaration.
For example you will have to add something similar to:
<Location "/">

AuthType Basic

AuthName "Trac - projects"

AuthUserFile /etc/apache2/trac.passwd

Require valid-user

</Location>
your Apache virtualhost or domain configuration file.
In order to add the two users user1 and user2 then I simply had to add the users with the htpasswd Apache password tool.
debian:~# htpasswd -c /etc/apache2/trac.passwd user1

debian:~# htpasswd -c /etc/apache2/trac.passwd user2
Thanks God this was easy 🙂
Tags: apache, apache authentication, apache htaccess, apache password, apache virtualhost, apache2, authentication dialog, AuthType, AuthUserFile, configuration file, configure, course, dialog, domain, domain configuration, file, god, How to, How to add/create user accounts to be used with Trac (issue tracking system) on Linux, htaccess authentication, htpasswd, interface, issue, Linux, logical question, login, lt, order, passwd, password, password tool, question, quot, setup, something, system, Thanksfully, tool, trac, user accounts, Virtualhost
Posted in Linux, System Administration, Web and CMS | No Comments »
Tuesday, January 17th, 2012 
My beloved sister was complaining games were failing to properly be played with wine emulator , therefore I decided to be kind and help her by installing a Windows XP to run inside a Virtual Machine.My previous install experiments with running MS Windows XP on Linux was on Debian using QEMU virtualmachine emulator.
However as Qemu is a bit less interactive and slower virtualmachine for running Windows (though I prefer it for being completely free software), this time I decided to install the Windows OS with Virtualbox.
My hope was using VirtualBox would be a way easier but I was wrong… I've faced few troubles and I thought many people who initially try to install Virtualbox VM to run Windows on Ubuntu and other Debian based Linux distros will probably experience the same problems as mine, so here is how this article was born.
Here is what I did to have a VirtualBox OS emulator to run Windows XP SP2 on Ubuntu 11.10 Linux
1. Install Virtualbox required packages with apt
root@ubuntu:~# apt-get install virtualbox virtualbox-dkms virtualbox-guest-dkms
root@ubuntu:~# apt-get install virtualbox-ose-dkms virtualbox-guest-utils virtualbox-guest-x11

...
If you prefer more GUI or lazy to type commands, the Software Package Manager can also be used to straight install the same packages.
virtualbox-dkms virtualbox-guest-dkms packages are the two which are absolutely necessery in order to enable VirtualBox to support installing Microsoft Windows XP. DKMS modules are also necessery to be able to emulate some other proprietary (non-free) operating systems.
The DKMS packages provide a source for building Vbox guest (OS) additional kernel modules. They also require the kernel source to be install otherwise they fail to compile.
Failing to build the DKMS modules will give you error every time you try to create new VirtualMachine container for installing a fresh Windows XP.
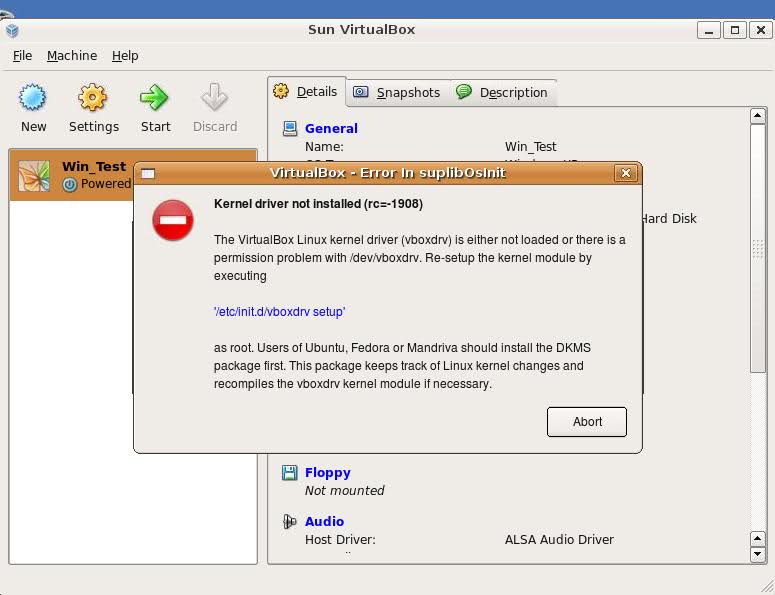
The error happens if the two packages do not properly build the vboxdrv extra Vbox kernel module while the Windows XP installer is loaded from a CD or ISO. The error to pop up is:
Kernel driver not installed (rc=-1908)
The VirtualBox Linux kernel driver (vboxdrv) is either not loaded or there is a permission problem with /dev/vboxdrv. Please reinstall the kernel module by executing
To fix the error:
2. Install latest Kernel source that corresponds to your current kernel version
root@ubuntu:~# apt-get install linux-headers-`uname -r`

...
Next its necessery to rebuild the DKMS modules using dpkg-reconfigure:
3. Rebuild VirtualBox DKMS deb packages
root@ubuntu:~# dpkg-reconfigure virtualbox-dkms

...

root@ubuntu:~# dpkg-reconfigure virtualbox-guest-dkms

...

root@ubuntu:~# dpkg-reconfigure virtualbox-ose-dkms

...
Hopefully the copilation of vboxdrv kernel module should complete succesfully.
To test if all is fine just load the module:
4. Load vboxdrv virtualbox kernel module
root@ubuntu:~# modprobe vboxdrv

root@ubuntu:~#
If you get some error during loading, this means vboxdrv failed to properly compile, try read thoroughfully what the error is and fix it) ;).
As a next step the vboxdrv has to be set to load on every system boot.
5. Set vboxdrv to load on every Ubuntu boot
root@ubuntu:~# echo 'vboxdrv' >> /etc/modules
I am not sure if this step is required, it could be /etc/init.d/virtualbox init script automatically loads the module, anyways putting it to load on boot would do no harm, so better do it.
That's all now, you can launch VirtualBox and use the New button to initiate a new Virtual Machine, I will skip explaining how to do the configurations for a Windows XP as most of the configurations offered by default would simply work without any tampering.
After booting the Windows XP installer I simply followed the usual steps to install Windows and all went smoothly.
Below you see a screenshot showing the installed Windows XP Virtualbox saved VM session. The screenshot letters are in Bulgarian as my sisters default lanaguage for Ubuntu is bulgarian 😉
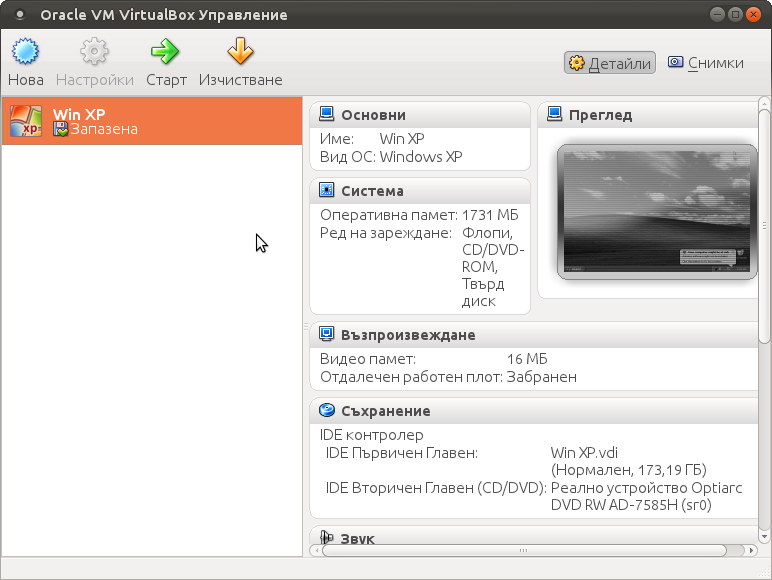
I hope this article helps someone out there. Please drop me a comment if you experience any troubles with it. Cya 🙂
Tags: Auto, beloved sister, DKMS, Draft, Failing, free operating systems, guest os, How to, init, init script, Install, ISO, kernel modules, kernel source, Linux, loading, Microsoft, microsoft windows, ms windows, necessery, Permission, qemu, root, screenshot, Set, software, software package, system boot, time, type, Ubuntu, uname, vbox, Virtual, virtual machine, VirtualBox, virtualmachine, vm, Windows, windows os, windows xp, windows xp sp2, wine, x11
Posted in Linux, Linux and FreeBSD Desktop, Linux Audio & Video | 1 Comment »
Tuesday, January 17th, 2012
Right after installing Windows XP inside VirtualBox, I've found out everything works fine except the screen. Even though pressing (Right CTRL + F) was changing the Windows XP running window to FullScreen the XP screen was taking only a part of the whole screen area, where almost half of the screen was visible as simply staying blank.
A bit of research and I found the issue is caused by missing VirtualBoxGuestAdditions .
VBoxAdditions is a package which should be installed inside the VirtualBox by navigating to Devices -> Install Guest Additions
Virtualbox offers a download of a VboxGuestAdditions_4.1.2_Ubuntu.iso from url;
http://dlc.sun.edgesuite.net/virtualbox/4.1.2_Ubuntu/VBoxGuestAdditions_4.1.2_Ubuntu.iso, anyways this download fails since the URL is currently unavailable.
To fix this two ways are possible:
1. Download VBoxGuestAdditions.iso from here and put it in directory /usr/share/virtualbox , e.g.:
root@ubuntu:~# cd /usr/share/virtualbox

root@ubuntu:/usr/share/virtualbox# wget https://www.pc-freak.net/files/VBoxGuestAdditions.iso

...
2. Download and install virtualbox-guest-additions-iso_4.1.2-1_all.deb
root@ubuntu:~# wget https://www.pc-freak.net/files/virtualbox-guest-additions-iso_4.1.2-1_all.deb

...

root@ubuntu:~# dpkg -i virtualbox-guest-additions-iso_4.1.2-1_all.deb

...
Next to enable and install guest additions once again use menus:
Devices -> Install Guest Additions
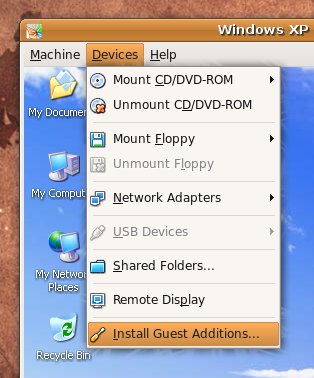
The screen to appear next will be similar to:
Further on follow the few dialogs to complete the installations and integration of Guest Additions and restart the Virtual machine and hooray the Windows will appear in Full screen in VirtualBox ! 😉
Tags: additions, area, deb, dialogs, dlc, download, dpkg, edgesuite, everything, freak, FULL, fullscreen, half, hooray, How to, Install, installing windows, integration, iso 2, issue, Linux, menus, net, package, root, screen, share, sun, two ways, Ubuntu, usr, Virtual, virtual machine, VirtualBox, VirtualBoxGuestAdditions, wget, windows xp
Posted in Linux, Linux and FreeBSD Desktop, System Administration, Virtual Machines | 1 Comment »
Wednesday, October 19th, 2011 
I've been using Debian GNU / Linux on my Thinkpad laptop for almost 3 years and half. Initially the Debian version which I had installed was a stable Debian Lenny. As I was mostly dissatisfied of the old versions of the programs, I migrated to testing / unstable
Testing / unstables shipped program versions were a bit better but still back in the day I wanted to get advantage of the latest program versions so for a while I switched to unstable .
Later I regretted for this bad idea, after the migration to Unstable, it was too buggy to run on a notebook one uses for everyday work.
Then to revert back to a bit stable I downgraded to testing unstable again.
When Debian launched Debian Squeeze I set in my /etc/apt/sources.list file software repositories to be the one for the stable Debian Squeeze.
As you can see, I've done quite a lot of "experiments" and "excersises". Many packages were installed, then removed, some became obsolete with time others I just temporary installed out of curiosity. Anyways as a result I ended up with many packages uninstalled / removed , which still kept some of their directory structres and configurations on the machine.
Today, I decided to check how many of these obsolete packages are still present in dpkg database and I was shocked to find out 412 debs were still in my package database! To check the number I used cmd:
root@noah:~# dpkg -l | grep -i '^rcs.*$'|wc -l
Considering the tremendous number of packs waiting to be purged, I decided to get rid of this old and already unnecessery files for the sake of clarity, besides that removing the old already uninstalled packages removes old configuration files, readmes, directories and frees some little space and therefore frees some inodes 😉
Before proceeding to remove them, I carefully reviewed and all the package names which I was about to completely purge in order to make sure there is no package with a configuration files I might need in future:
root@noah:~# dpkg -l |grep -i '^rcs.*$'

...
After reviewing all the deb packages possessing the rc – (remove candidate) flag, I used the following bash one liners to remove the obsolete deb packages:
root@noah:~# for i in $(dpkg -l |grep -i '^rcs.*$'|awk '{ print $2 }'); do echo dpkg --purge $i done...

root@noah:~# for i in $(dpkg -l |grep -i '^rcs.*$'|awk '{ print $2 }'); do dpkg --purge $i done
First line will just print out what will be purged with dpkg , so after I checked it out I used the second one to purge all the RC packs.
Tags: bad idea, bit, buggy, candidate, clarity, cmd, configuration files, curiosity, deb packages, debian version, debs, dpkg, everyday work, file, half, How to, inodes, laptop, Linux, little space, machine, need, noah, number, old versions, package, package database, package names, program versions, purge, quot, root, software, software repositories, squeeze, system, system directories, testing, time, Ubuntu, work
Posted in Linux, Linux and FreeBSD Desktop, Linux Audio & Video, System Administration, Various | 3 Comments »
Monday, January 23rd, 2012 
1. Add Medibuntu package repository
root@ubuntu:~# wget --output-document=/etc/apt/sources.list.d/medibuntu.list \

http://www.medibuntu.org/sources.list.d/$(lsb_release -cs).list \

&& apt-get --quiet update \

&& apt-get --yes --quiet --allow-unauthenticated install medibuntu-keyring \

&& apt-get --quiet update
2. Enable Ubuntu to play Restricted DVD
root@ubuntu:~# apt-get install --yes libdvdread4

...

root@ubuntu:~# /usr/share/doc/libdvdread4/install-css.sh
After that VLC will be ready to play DVDs for some programs which was compiled without DVD, source rebuilt is required.
If DVDs hang you might need to set a Region Code with regionset:
# regionset
3. Install non-free codecs
root@ubuntu:~# apt-get install non-free-codecs
4. Install Chromium ffmpeg nonfree codecs
root@ubuntu:~# apt-get install chromium

root@ubuntu:~# apt-get install chromium-codecs-ffmpeg-nonfree
5. Install w32codecs / w64codecs
Depending on the Ubuntu Linux installation architecture 32/64 bit install w32codecs or w64codecs
For 32 bit (x86) Ubuntu install w32codecs:
root@ubuntu:~# apt-get install w32codecs
For 64 bit arch Ubuntu:
root@ubuntu:~# apt-get install w64codecs
6. Install ubuntu-restricted-extras meta package
root@ubuntu:~# apt-get install ubuntu-restricted-extras
7. Install cheese for webcam picture/video snapshotting
root@ubuntu:~# apt-get install cheese
8. Install GIMP, Inkscape, xsane,sane, shotwell etc.
root@ubuntu:~# apt-get --yes install sane xsane gimp inkscape gimp-data-extras gimp-plugin-registry \

blender gcolor2 showtwell bluefish kompozer
9. Install multimedia Sound & Video utilities
Install Subtitle editor, video editiking , sound editing, mp3 player, iso mounters, DVD/CD Burners
root@ubuntu:~# apt-get install rhythmbox banshee smplayer mplayer \

realplayer audacity brasero jokosher istanbuk gtk-recordMyDesktop \acetoneisohexedit furiusisomount winff fala audacious dvdstyler lives hydrogen

subtitleeditor gnome-subtitles electricsheep k3b
10. Install CD / DVD RIP tools
root@ubuntu:~# apt-get install acidrip sound-juicer ogmrip thoggen
11. Install chat messanger programs, Browsers, mail pop3 clients, torrent, emulators, ftp clients etc.
apt-get install seamonkey thunderbird transmission transmission-gtk gbgoffice kbedic \

pidgin openoffice.org gxine mozilla-plugin-vlc wine dosbox samba filezilla amsn ntp \epiphany-browser ntpdate desktop-webmail alltray chmsee gftp xchat-gnome ghex \gnome-genius bleachbit arista
12. Install Non-Free Flash Player
Unfortunately Gnash is not yet production ready and crashes in many websites …
root@ubuntu:~# apt-get install flashplugin-nonfree flashplugin-nonfree-extrasound swfdec-gnome
13. Install Archive / Unarchive management programs
root@ubuntu:~# apt-get install unace unrar zip unzip p7zip-full p7zip-rar sharutils rar uudeview \

mpack lha arj cabextract file-roller
15. Install VirtualBox and QEmu
root@ubuntu:~# apt-get install qemu-launcher qemu-kvm-extras virtualbox virtualbox-ose \

virtualbox-ose-guest-dkms virtualbox-ose-guest-dkms
This should be enough to use Ubuntu normally for multimedia Desktop just as MS Windows for most of the daily activities.
Am I missing some important program?
Tags: amp, architecture, audacity, Auto, banshee, bit, blender, bluefish, cd burners, Chromium, Draft, editing, editing mp3, ffmpeg, free codecs, gcolor, inkscape, Install, installation, ISO, libdvdread, Linux, linux multimedia, list, lsb, Medibuntu, meta package, org, output document, package, player, plugin registry, regionset, repository, root, sane, shafter, shotwell, showtwell, smplayer, Sound, sound editing, Sound Video, subtitle editor, sudo, Ubuntu, ubuntu linux, Ubuntu Linux Multimedia, video, video utilities, VirtualBox, VLC, wget, WinFF, x86
Posted in Linux, Linux and FreeBSD Desktop, Linux Audio & Video, System Administration | 4 Comments »


