Posts Tagged ‘line’
Tuesday, April 5th, 2011 For a number of time I’ve been planning to change my blog comments placement. Until this very day however I’ve kept the default wordpress theme’s Comments button placement.
I realize the default Comments button placement is a bit hard to see and not that much intuitive for the user that enters my blog for a first time.
My first guess was that there might be somewhere a wordpress plugin which will allow me to adjust my comments button placement.
After some research online and a realization that probably there is no such plugin existing yet. I’ve forced myself to tune it up myself.
It was clear to me that in order to change the it will be necessery to edit the WordPress templates files. I’m not a designer and when I hear about templates I usually get scared, however I took the time to take a look at the default wordpress template and find out actually that template modifications is actually rather easier than I thought.
My previous idea was that in order to edit templates you have to be some kind of CSS and HTML guru (which I’m not). Nevertheless it seems that in order to play and adjust in a good way the templates you don’t need ot be a pro.
Even an uneducated fool like myself can easily do almost everything he thinks of throughout few lines of code in the wp templates.
To get back to the major topic thanks God after a bit of review and reading of wordpress.org documentation and some user forums. I’ve figured out that in order to change my Comments placement you need to modify the file:
- blog/wp-content/themes/default/index.php
In index.php find the line starting with:
You will notice within this opened paragraph the php code:
<?php the_tags('Tags: ', ', ', '

'); ?> Posted in <?php the_category(', ') ?>

| <?php edit_post_link('Edit', '', ' | '); ?>

<?php comments_popup_link('No Comments »', '1 Comment »', '% Comments »'); ?>
This is the actual default theme php code that makes the wordpress Comments or No Comments that maes the comments appear on the blog.
Now I’ve decided to let this be as it is but add one more Comment button to wordpress on a different location that is more appealing to my blog visitors
After quick evaluation I’ve determined that probably the best location that the Comments button should have is right after the end of the post text
If you think my idea for button placement is appropriate, to set this location for the Comments button, you will have to find the follwoing code in index.php:
<div class="entry">

<?php the_content('Read the rest of this entry »'); ?>

</div>
Right after the end of this code place the following code:
<?php comments_popup_link('No Comments »', '1 Comment »', '% Comments »'); ?>

</div>
Tags: amp, Auto, blog, Button, button placement, code lt, Comment, content themes, CSS, default theme, Draft, everything, file, fool, god, guess, guru, HTML, idea, index, kind, line, link, location, lt, nbsp, necessery, online, order, org, paragraph, php, php code, place, placement, plugin, quot, reading, realization, right, template, text, textIf, time, topic, way, Wordpress, wordpress plugin, wordpress templates
Posted in Various, Web and CMS, Wordpress | 1 Comment »
Saturday, October 15th, 2011 Since some time, I don’t know exactly where, after some updates of my WordPress running on a small server with FreeBSD 7.2. I’ve started getting a lot of Apache crashes. Often the wordpress scripts stopped working completely and I got only empty pages when trying to process the wordpress blog in a browser.
After a bunch of reading online, I’ve figured out that the cause might be PHP APC stands for Alternative PHP Cache .
I was not sure if the PHP running on the server had an APC configured at all so I used a phpinfo(); script to figure out if I had it loaded. I saw the APC among the loaded to show off in the list of loaded php modules, so this further led me to the idea the APC could be really causing the unexpected troubles.
Thus first I decided to disable the APC on a Virtualhost level for the domain where the crashing wordpress was hosted, to do I placed in the VirtualHost section in the Apache configuration /usr/local/etc/apache2/httpd.conf the following config directive:
php_flag apc.cache_by_default Off
These get me rid of the multiple errors:
PHP Warning: require_once() [function.require-once]: Unable to allocate memory for pool. in /usr/local/www/data-dist/blog/wp-content/plugins/tweet-old-post/top-admin.php on line 6
which constantly were re-occuring in php_error.log:
Further after evaluating all the websites hosted on the server and making sure none of which was really depending on APC , I’ve disabled the APC completely for PHP. To do so I issued:
echo 'apc.enabled = 0' >> /usr/local/etc/php.ini
Similarly on GNU/Linux to disable globally APC from PHP only the correct location to php.ini should be provided on Debian this is /etc/php5/apache2/php.ini .
Tags: apache, apache configuration, apc, blog, browser, cause, conf, config, configured, correct location, domain, error messages, freebsd, function, gnu linux, httpd, idea, ini, level, line, line 6, Linux, location, memory, OffThese, online, php cache, php error, pool, reading, scripts, time, virtualhost section, Warning, Wordpress, wordpress blog, www, www data
Posted in System Administration, Various, Wordpress | 1 Comment »
Thursday, February 2nd, 2012 I'm managing few wordpress installations which requires me to type in:
Hostname , FTP Username and FTP Password , every single time a plugin update is issued and I want to upgrade to the new version.
Below is a screenshot of this annoying behaviour:
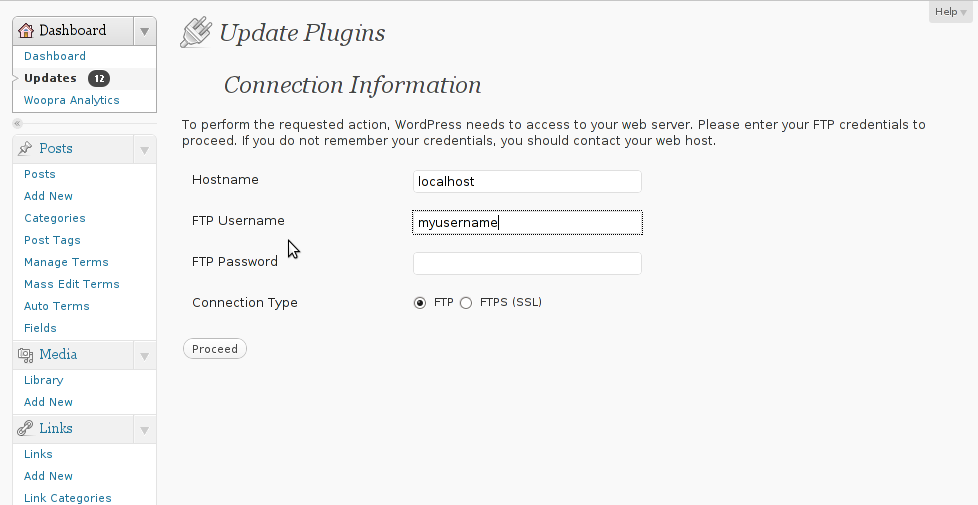
As you can see in the above screenshot, there is no way through Update Plugins web interface to store the password permanently. Hence the only option to store it permanently is to manually edit wp-config.php (file located in wordpress docroot, e.g. /path/to/wordpress/wp-config.php , inside the file find the line:
define ('WPLANG', '');
Right after it put a code similar to:
define('FS_METHOD', 'ftpsockets');

define('FTP_BASE', '/path/to/wordpress/');

define('FTP_CONTENT_DIR', '/path/to/wordpress/wp-content/');

define('FTP_PLUGIN_DIR ', '/path/to/wordpress/wp-content/plugins/');

define('FTP_USER', 'Username');

define('FTP_PASS', 'Password');

define('FTP_HOST', 'localhost');
Change the above defines:
path/to/wordpress/ – with your wordpress location directory.
Username and Password – with your respective FTP username and password. The localhost
That's all, from now onwards the User/Password prompt will not appear anymore. Consider there is a security downside of storing the FTP User/Pass in wp-config.php , if someone is able to intrude the wordpress install and access the documentroot of the wordpress install he we'll be able to obtain the ftp user/pass and log in the server directly via FTP protocol.
Tags: Auto, base path, behaviour, config, content, documentroot, downside, Draft, file, g path, host, line, localhost, location, location directory, password, Path, php, plugin, Protocol, screenshot, security, someone, time, type, update, User, version, way, web interface
Posted in System Administration, Web and CMS, Wordpress | 1 Comment »
Tuesday, January 10th, 2012 I've experienced plenty of problems with Pulseaudio and Skype output sound hell crappy. This stupid proprietary program Skype is a total crap … Anyways again thanks to ArchLinux's wiki, I've used the two mentioned steps to fix all this Skype in / out problems …
1. Fix problems with Glitches, voice skips and crackling In file /etc/pulse/default.pa its necessery to substitute the line;
load-module module-udev-detect
with
load-module module-udev-detect tsched=0
2. Resolve Choppy sound in (Pulseaudio) -> Skype
In /etc/pulse/daemon.conf two lines has to be also substituted:
; default-sample-rate = 44100
Should become;
default-sample-rate = 48000
3. Change /etc/default/pulseaudio to allow dynamic module loading
It is a good idea to the default settings from DISALLOW_MODULE_LOADING=1 to DISALLOW_MODULE_LOADING=0 .This step is not required and I'm not sure if it has some influence on solving sound in / out problems with Skype but I believe it can be helpful in some cases..
So in /etc/default/pulseaudio Substitute:
DISALLOW_MODULE_LOADING=1
to;
DISALLOW_MODULE_LOADING=0
4. Restart PulseAudio server
After the line is changed and substituted a restart of PulseAudio is required. For PulseAudio server restart a gnome session logout is necessery. Just LogOff logged Gnome user and issue cmd:
debian:~# pkill pulseaudio
This will kill any left pulseaudio server previous instances.
Tags: ArchLinux, Auto, Choppy, choppy sound, conf, crackling, crap, crappy, debian gnu, default settings, Draft, file, Glitches, Gnome, gnome user, hell, idea, influence, instances, issue, line, Linux, loading, logout, Module, nbsp, necessery, pkill, plenty, proprietary program, pulse, resolve, Skype, sound glitches, substitute, udev, voice, wiki
Posted in Linux and FreeBSD Desktop, Linux Audio & Video, Skype on Linux | 18 Comments »
Sunday, December 25th, 2011 There is a brand new remote FreeBSD vulnerability in telnetd in all its versions starting from version 7 to 9. It is therefore advisable that the telnet daemon be completely disabled.
To disable telnetd on FreeBSD:
1. Open /etc/inetd.conf
freebsd# vi /etc/inetd.conf
2. Comment out the line
telnet stream tcp nowait root /usr/libexec/telnetd telnetd
e.g.:
#telnet stream tcp nowait root /usr/libexec/telnetd telnetd
3. Restart inetd
freebsd# /etc/rc.d/inetd restart
The whole remote root telnetd FreeBSD security advisory (SA), can be read here
Tags: brand, Comment, conf, daemon, freebsd, freebsd security, inetd, libexec, line, line telnet, nowait, Restart, root, security, security advisory, stream, tcp, Telnet, telnetd, usr, version, vulnerability
Posted in Computer Security, FreeBSD, System Administration | 1 Comment »
Tuesday, November 29th, 2011 I guess everyone has ended up with problems into a script files written under Windows using some text editor which incorrectly placed into the end of lines Windows (rn) end of lines instead of the UNIX (r).
Those who have have already take advantage of the nice tiny utility dos2unix which is capable of convert the Windows end of lines to UNIX. However some older UNIXes, like SunOS or HP-UX does not have the dos2unix utility into the list of packages one can install or even if its possible to install dos2unix it takes quite a hassle.
In that cases its good to say convertion of end of lines can be done without using external end programs by simply using UNIX sed .
The way to remove the incorrect Windows ^M (as seen in unix text editors) is by using the sed one liner:
server# sed 's/.$//' file-with-wrong-windows-eol.txt > file-with-fixed-unix-eol.txt
Tags: Advantage, Convert, convertion, cr lf, dos2unix, editor, hassle, hp, HP-UX, line, liner, list, MS-DOS, script, server, sunos, text, tiny utility, TXT, unix, unix text editors, UNIXes, using unix, utility, way, Windows
Posted in FreeBSD, Linux, System Administration | No Comments »
Friday, October 28th, 2011 Every now and then I have to screenshot particular windows positioned on the screen on my GNOME Desktop envronment
Recently I was happy to find there is a very easy way to do this with the default Screenshotting program that is bundled with gnome gnome-screenshot
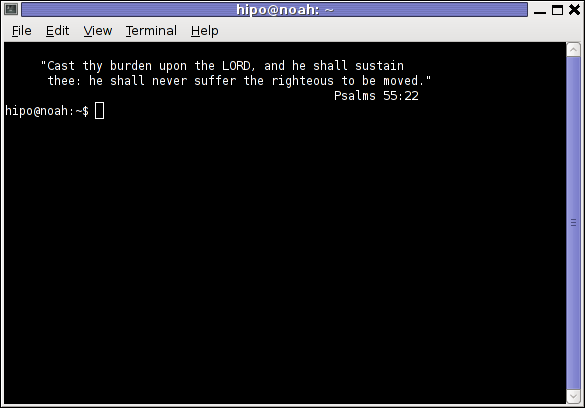
To screenshot a particular window using gnome-screenshot , its quite easy all one has to do is point the mouse cursor to the window he wants to snapshot and press:
Alt + PrtScr (Print Screen)
Here is a screenshot, I’ve taken of my gnome-terminal using the above command:
One can do it also via the command line using the /usr/bin/gnome-screenshot , by pressing Alt + F2 to invoke the run application and type in:
/usr/bin/gnome-screenshot -w
I was quite happy to find out that this is possible on Linux inside gnome without bothering to run GIMP or use any external programs for the cause. Hope this helps someone 😉
Tags: Alt, application, cause, command, cursor, Desktop, envronment, f2, GIMP, Gnome, gnome desktop, gnu linux, Hope, line, Linux, linux gnome, mouse, mouse cursor, nbsp, Press, Print, PrtScr, run, screen, screenshot, Screenshotting, snapshot, someone, type, usr, usr bin, way
Posted in Linux, Linux and FreeBSD Desktop | No Comments »
Friday, October 21st, 2011 I needed to convert a file which had a Bulgarian text written in UTF-8 encoding to Windows CP1251 in order to fix a website encoding problems after a move of the website from one physical server to another.
I tried first with enca – ( detects and convert encoding of text files from one encoding to another).
The exact way I tried to convert was:
linux:~# enca -L bg /home/site/www/includes/utf8_encoded_file.php

...
Unfortunately this attempt to conver was unsucesfully, and the second logical guess was to use iconv – Convert encoding of given files from one encoding to another to do the utf8 to cp1251 conversion.
I reached for some help in irc.freenode.net, #varnalab channel and Alex Kuklin helped me, giving me an example command line to do the conversion.
iconv winedows to cp1251 conversion line, he pointed to me was:
linux:~# iconv -f utf8 -t cp1251 < in > out
Further on I adapted Alex’s example to convert my utf8_encoded_file.php encoded Bulgarian characted to CP1251 and used the following commands to convert and create backups of my original UTF8 file:
linux:~# cd /home/site/www/includes

linux:/home/site/www/includes# iconv -f utf8 -t cp1251 < utf8_encoded_file.php in > utf8_encoded_file.php.cp1251

linux:/home/site/www/includes# mv utf8_encoded_file.php utf8_encoded_file.php.bak

linux:/home/site/www/includes# mv utf8_encoded_file.php.cp1251 utf8_encoded_file.php
Tags: alex, attempt, bg, bulgarian text, cd home, command, conver, conversion, Convert, enca, file, file linux, freenode, gnu linux, guess, help, home, iconv, includeslinux, line, Linux, lt, move, mv, order, outFurther, php, physical server, UTF, varnalab, way, www
Posted in Linux, System Administration, Various, Web and CMS | No Comments »
Friday, September 30th, 2011 
If you're looking for a command line utility to generate PDF file out of any webpage located online you are looking for Wkhtmltopdf
The conversion of webpages to PDF by the tool is done using Apple's Webkit open source render.
wkhtmltopdf is something very useful for web developers, as some webpages has a requirement to produce dynamically pdfs from a remote website locations.
wkhtmltopdf is shipped with Debian Squeeze 6 and latest Ubuntu Linux versions and still not entered in Fedora and CentOS repositories.
To use wkhtmltopdf on Debian / Ubuntu distros install it via apt;
linux:~# apt-get install wkhtmltodpf

...
Next to convert a webpage of choice use cmd:
linux:~$ wkhtmltopdf www.pc-freak.net www.pc-freak.net_website.pdf

Loading page (1/2)

Printing pages (2/2)

Done
If the web page to be snapshotted in long few pages a few pages PDF will be generated by wkhtmltopdf
wkhtmltopdf also supports to create the website snapshot with a specified orientation Landscape / Portrait
-O Portrait options to it, like so:
linux:~$ wkhtmltopdf -O Portrait www.pc-freak.net www.pc-freak.net_website.pdf
wkhtmltopdf has many useful options, here are some of them:
- Javascript disabling – Disable support for javascript for a website
- Grayscale pdf generation – Generates PDf in Grayscale
- Low quality pdf generation – Useful to shrink the output size of generated pdf size
- Set PDF page size – (A4, Letter etc.)
- Add zoom to the generated pdf content
- Support for password HTTP authentication
- Support to use the tool over a proxy
- Generation of Table of Content based on titles (only in static version)
- Adding of Header and Footers (only in static version)
To generate an A4 page with wkhtmltopdf:
wkhtmltopdf -s A4 www.pc-freak.net/blog/ www.pc-freak.net_blog.pdf
wkhtmltopdf looks promising but seems a bit buggy still, here is what happened when I tried to create a pdf without setting an A4 page formatting:
linux:$ wkhtmltopdf www.pc-freak.net/blog/ www.pc-freak.net_blog.pdf

Loading page (1/2)

OpenOffice path before fixup is '/usr/lib/openoffice' ] 71%

OpenOffice path is '/usr/lib/openoffice'

OpenOffice path before fixup is '/usr/lib/openoffice'

OpenOffice path is '/usr/lib/openoffice'

** (:12057): DEBUG: NP_Initialize

** (:12057): DEBUG: NP_Initialize succeeded

** (:12057): DEBUG: NP_Initialize

** (:12057): DEBUG: NP_Initialize succeeded

** (:12057): DEBUG: NP_Initialize

** (:12057): DEBUG: NP_Initialize succeeded

** (:12057): DEBUG: NP_Initialize

** (:12057): DEBUG: NP_Initialize succeeded

Printing pages (2/2)

Done

Printing pages (2/2)

Segmentation fault
Debian and Ubuntu version of wkhtmltopdf does not support TOC generation and Adding headers and footers, to support it one has to download and install the static version of wkhtmltopdf
Using the static version of the tool is also the only option for anyone on Fedora or any other RPM based Linux distro.
Tags: apple, authentication support, CentOS, choice, command, command line utility, content support, conversion, DEBUG, DoneIf, fedora, freak, generation, gnu linux, Grayscale, Initialize, Javascript, Landscape, landscape portrait, line, Linux, linux versions, loading page, low quality, nbsp, online, Open, open source, OpenOffice, orientation, page, password, PDF, pdf content, pdf size, portrait options, printing, quality pdf, repositories, requirement, Set, size a4, snapshot, something, squeeze, static version, support, table of content, tool, Ubuntu, use, Useful, web developers, web page, Webkit, webpage, www
Posted in Linux Audio & Video, System Administration, Various, Web and CMS | 2 Comments »
Saturday, July 9th, 2011 I’m currently writting a script which is supposed to be adding new crontab jobs and do a bunch of other mambo jambo.
By so far I’ve been aware of only one way to add a cronjob non-interactively like so:
linux:~# echo '*/5 * * * * /root/myscript.sh' | crontab -
Though using the | crontab – would work it has one major pitfall, I did completely forgot | crontab – OVERWRITES CURRENT CRONTAB! with the crontab passed by with the echo command.
One must be extremely careful if he decides to use the above example as you might loose your crontab definitions permanently!
Thanksfully it seems there is another way to add crontabs non interactively via a script, as I couldn’t find any good blog which explained something different from the classical example with pipe to crontab –, I dropped by in the good old irc.freenode.net to consult the bash gurus there 😉
So I entered irc and asked the question how can I add a crontab via bash shell script without overwritting my old existing crontab definitions less than a minute later one guy with a nickname geirha was kind enough to explain me how to get around the annoying overwridding.
The solution to the ovewrite was expected, first you use crontab to dump current crontab lines to a file and then you append the new cron job as a new record in the file and finally you ask the crontab program to read and insert the crontab definitions from the newly created files.
So here is the exact code one could run inside a script to include new crontab jobs, next to the already present ones:
linux:~# crontab -l > file; echo '*/5 * * * * /root/myscript.sh >/dev/null 2>&1' >> file; crontab file
The above definition as you could read would make the new record of */5 * * * * /root/myscript.sh >/dev/null be added next to the existing crontab scheduled jobs.
Now I’ll continue with my scripting, in the mean time I hope this will be of use to someone out there 😉
Tags: bash scripts, bash shell script, blog, classical example, cron, cron job, cron jobs, crontab, definitions, dev, echo, echo 5, echo command, exact code, file, fileThe, gurus, irc, jambo, kind, line, Linux, mambo jambo, mean time, minute, nbsp nbsp nbsp nbsp nbsp, nickname, ovewrite, pipe, pitfall, root, scripting, Shell, solution, someone, Thanksfully, time, use, way
Posted in Linux, System Administration | 9 Comments »


How to change default Comments and No Comments location in WordPress in wordpress default theme
Tuesday, April 5th, 2011For a number of time I’ve been planning to change my blog comments placement. Until this very day however I’ve kept the default wordpress theme’s Comments button placement.
I realize the default Comments button placement is a bit hard to see and not that much intuitive for the user that enters my blog for a first time.
My first guess was that there might be somewhere a wordpress plugin which will allow me to adjust my comments button placement.
After some research online and a realization that probably there is no such plugin existing yet. I’ve forced myself to tune it up myself.
It was clear to me that in order to change the it will be necessery to edit the WordPress templates files. I’m not a designer and when I hear about templates I usually get scared, however I took the time to take a look at the default wordpress template and find out actually that template modifications is actually rather easier than I thought.
My previous idea was that in order to edit templates you have to be some kind of CSS and HTML guru (which I’m not). Nevertheless it seems that in order to play and adjust in a good way the templates you don’t need ot be a pro.
Even an uneducated fool like myself can easily do almost everything he thinks of throughout few lines of code in the wp templates.
To get back to the major topic thanks God after a bit of review and reading of wordpress.org documentation and some user forums. I’ve figured out that in order to change my Comments placement you need to modify the file:
In index.php find the line starting with:
You will notice within this opened paragraph the php code:
<?php the_tags('Tags: ', ', ', ''); ?> Posted in <?php the_category(', ') ?>
| <?php edit_post_link('Edit', '', ' | '); ?>
<?php comments_popup_link('No Comments »', '1 Comment »', '% Comments »'); ?>
This is the actual default theme php code that makes the wordpress Comments or No Comments that maes the comments appear on the blog.
Now I’ve decided to let this be as it is but add one more Comment button to wordpress on a different location that is more appealing to my blog visitors
After quick evaluation I’ve determined that probably the best location that the Comments button should have is right after the end of the post text
If you think my idea for button placement is appropriate, to set this location for the Comments button, you will have to find the follwoing code in index.php:
<div class="entry"><?php the_content('Read the rest of this entry »'); ?>
</div>
Right after the end of this code place the following code:
<?php comments_popup_link('No Comments »', '1 Comment »', '% Comments »'); ?></div>
Tags: amp, Auto, blog, Button, button placement, code lt, Comment, content themes, CSS, default theme, Draft, everything, file, fool, god, guess, guru, HTML, idea, index, kind, line, link, location, lt, nbsp, necessery, online, order, org, paragraph, php, php code, place, placement, plugin, quot, reading, realization, right, template, text, textIf, time, topic, way, Wordpress, wordpress plugin, wordpress templates
Posted in Various, Web and CMS, Wordpress | 1 Comment »