Posts Tagged ‘nbsp’

The Satanic roots of Metal and Rock Music genre – Two parts Christian movie exposing connection between Satanism and Metal music

Tuesday, May 1st, 2012

Some long time ago a bit before I repent and believed in Jesus Christ as my Lord and Saviour, I've done quite an extensive research on the trustability of the Holy Bible and mostly the Church and Christian writtings. In that times, as an ex-metal head I had a profound interest if there is really a connection between Modern Hard Rock and Heavy Metal Music?

My research back then was quite thoroughful and I found plenty of proofs clearly showing a clear connection between most of the hard rock and heavy / death metal bands to satanism. I used to listen this anti-christian music for about 8 years repeatedly believing the message is not  really bad, even though subconsciously I knew something is not right with the music.

It was quite shocking to me to find that one of my favourite hard rock / psychedelic bands Led Zeppelin, The Beatles, The Doors, Rolling Stones etc. e, had a clear connection with Alester Crawley (a new age occultist magician and a forefather of modern satanism …).

Crawley was a completely insane person proclaiming himself under the alias "The Beast". This psycho travelled all around America, cursing people and cities and teaching people to worship evil. In other words the guy was a complete modern day anti-christ. I found in youtube few short 20 minute, movies exposing the relation between the new age ecumenistic beliefs and Crawley. Along with the musicians spoken about and their exposure to be a bible and God deniers, the movie explains why the message of this popular figures is anti-Christian in essence. This short few movies explains how this terrible guy Crawley become an inspirator of many of the today world popular played rock bands in most of the radio stations …


Satanism – The Root of Rock Music (part 1)


Satanism – The Root of Rock Music (part 2)

Another interesting documentary exposing some of the major pop and rock culture and musicians connection with satanism and the occult is They Sold Their Souls to the devil. The movie is again a short research on popular musicians, who openly say in their interviews they sold their souls for fame to the devil. . Many of the star musicians featured in this videos, even say openly they're possessed by evil spirits.


They Sold Their Souls to the devil part 1 of 3


They Sold Their Souls to the devil part 2 of 3


They Sold Their Souls to the devil part 3 of 3


They Sold Thir Souls to the devil part 4 of 4

Some people might think this is a joke non-serious, some crazy christian propaganda, but if you watch it without bias and analyze it nomatter if Christian or atheist you will see most of the things said in the video reflect the reality. Actually it's very sad reality, today's world has rapidly headed towards non-christianity, occult and satanism. Believe it or not, the elite in the world, we see daily on TV or hear on the Radio and read for as heroes in the newspapers has a strong connection with magicians, occult and fake spirituality. Many of them think loving evil is fun and okay but in fact it is a big lie we're said. As I've red someone says, once a lie is repeated many times it appears to sound like truth….
Anyways we should know Evil is evil and no good can come of worshipping the evil our ancestors and forefathers knew that pretty well and they used to teach us in a spirit to obey good and walk after good and not evil. Modern pop-rock culture teach us something else it teach us to go after the ways of dis-obeying satan took … Pitily our dying generation forgot that evil seeking will bring just evil and now systematically many  governments and medias are working seriously for  destroying the Christian moral and pureness hence by that we  seek to destroy ourselves hurrying towards our own destruction….

Lets hope God will be merceful and turn more people to him and unveil them the truth we read in the Holy Bible. I have hope more and more people will realize that we have to be living in a moderate and saintly way and not like the rock and pop stars shown in those videos. We should pray for each other and love each other and keep an eye on our children to let them not go the bad ways of witchcraft, unholiness and sinfulness  the modern pop – rock culture push us to.

How to make screenshot in /dev/tty console on GNU / Linux – Taking picture JPEG / PNG snapshot of text console in systems without graphical environment

Monday, April 30th, 2012

I'm used to making picture screenshots in GNOME desktop environment. As I've said in my prior posts, I'm starting to return to my old habits of using console ttys for regular daily jobs in order to increase my work efficiency. In that manner of thoughts sometimes I need to take a screenshot of what I'm seeing in my physical (TTY consoles) to be able to later reuse this. I did some experimenting and this is how this article got born.

In this post, I will shortly explain how a picture of a command running in console or terminal in GNU / Linux can be made

Before proceeding to the core of the article, I will say few words on ttys as I believe they might be helpful someone.
The abbreviation of tty comes after TeleTYpewritter phrase and is dating back somewhere near the 1960s. The TTY was invented to help people with impaired eyesight or hearing to use a telephone like typing interface.

In Unix / Linux / BSD ttys are the physical consoles, where one logs in (typing in his user/password). There are physical ttys and virtual vtys in today *nixes. Today ttys, are used everywhere in a modern Unixes or Unix like operating system with or without graphical environments.
Various Linux distributions have different number of physical consoles (TTYs) (terminals connected to standard output) and this depends mostly on the distro major contributors, developers or surrounding OS community philosophy.
Most modern Linux distributions have at least 5 to 7 physical ttys. Some Linux distributions like Debian for instance as of time of writting this, had 7 active by default physical consoles.
Adding 3 more ttys in Debian / Ubuntu Linux is done by adding the following lines in /etc/inittab:
 

7:23:respawn:/sbin/getty 38400 tty7
8:23:respawn:/sbin/getty 38400 tty8
9:23:respawn:/sbin/getty 38400 tty9

On some Linux distributions like Fedora version 9 and newer ones, new ttys can no longer be added via /etc/inittab,as the RedHat guys changed it for some weird reason, but I guess this is too broad issue to discuss ….

In graphical environments ttys are called methaphorically "virtual". For instance in gnome-terminal or while connecting to a remote SSH server, a common tty naming would be /dev/pts/8 etc.

tty command in Linux and BSDs can be used to learn which tty, one is operating in.

Here is output from my tty command, issued on 3rd TTY (ALT+F3) on my notebook:
 

noah:~# tty
/dev/tty3

A tty cmd output from mlterm GUI terminal is like so:
 

hipo@noah:~$ tty/dev/pts/9

Now as mentioned few basic things on ttys I will proceed further to explain how I managed to:

a) Take screenshot of a plain text tty screen into .txt file format
b) take a (picture) JPG / PNG screenshot of my Linux TTY consoles content

1. Take screenshot of plain text tty screen into a plain (ASCII) .txt file:

To take a screenshot of tty1, tty2 and tty3 text consoles in a txt plain text format, cat + a standard UNIX redirect is all necessery:
 

noah:~# cat /dev/vcs1 > /home/hipo/tty1_text_screenshot.txt
noah:~# cat /dev/vcs2 > /home/hipo/tty2_text_screenshot.txt
noah:~# cat /dev/vcs3 > /home/hipo/tty3_text_screenshot.txt

This will dump the text content of the console into the respective files, if however you try to dump an ncurses library like text interactive interfaces you will end up with a bunch of unreadable mess.
In order to read the produced text 'shots' onwards less command can be used …
 

noah:~# less /home/hipo/tty1_text_screenshot.txt
noah:~# less /home/hipo/tty2_text_screenshot.txt
noah:~# less /home/hipo/tty3_text_screenshot.txt

2. Take picture JPG / PNG snapshot of Linux TTY console content

To take a screenshot of my notebook tty consoles I had to first install a "third party program" snapscreenshot . There is no deb / rpm package available as of time of writting this post for the 4 major desktop linux distributions Ubuntu, Debian, Fedora and Slackware.
Hence to install snapscreenshot,I had to manually download the latest program tar ball source and compile e.g.:
 

noah:~# cd /usr/local/src
noah:/usr/local/src# wget -q http://bisqwit.iki.fi/src/arch/snapscreenshot-1.0.14.3.tar.bz2
noah:/usr/local/src# tar -jxvvvf snapscreenshot-1.0.14.3.tar.bz2

noah:/usr/local/src# cd snapscreenshot-1.0.14.3
noah:/usr/local/src/snapscreenshot-1.0.14# ./configure && make && make install
Configuring…
Fine. Done. make.
make: Nothing to be done for `all'.
if [ ! "/usr/local/bin" = "" ]; then mkdir –parents /usr/local/bin 2>/dev/null; mkdir /usr/local/bin 2>/dev/null; \
for s in snapscreenshot ""; do if [ ! "$s" = "" ]; then \
install -c -s -o bin -g bin -m 755 "$s" /usr/local/bin/"$s";fi;\
done; \
fi; \
if [ ! "/usr/local/man" = "" ]; then mkdir –parents /usr/local/man 2>/dev/null; mkdir /usr/local/man 2>/dev/null; \
for s in snapscreenshot.1 ""; do if [ ! "$s" = "" ]; then \
install -m 644 "$s" /usr/local/man/man"`echo "$s"|sed 's/.*\.//'`"/"$s";fi;\
done; \
fi

By default snapscreenshot command is made to take screenshot in a tga image format, this format is readable by most picture viewing programs available today, however it is not too common and not so standartized for the web as the JPEG and PNG.
Therefore to make the text console tty snapshot taken in PNG or JPEG one needs to use ImageMagick's convert tool. The convert example is also shown in snapscreenshot manual page Example section.

To take a .png image format screenshot of lets say Midnight Commander interactive console file manager running in console tty1, I used the command:
 

noah:/home/hipo# snapscreenshot -c1 -x1 > ~/console-screenshot.tga && convert ~/console-screenshot.tga console-screenshot.png

Linux text console tty mc screenshot with snapscreenshot terminal / console snapshotting program

Note that you need to have read/write permissions to the /dev/vcs* otherwise the snapscreenshot will be unable to read the tty and produce an error:
 

hipo@noah:~/Desktop$ snapscreenshot -c2 -x1 > snap.tga && convert snap.tga snap.pngGeometry will be: 1x2Reading font…/dev/console: Permission denied

To take simultaneous picture screenshot of everything contained in all text consoles, ranging from tty1 to tty5, issue:
 

noah:/home/hipo# snapscreenshot -c5 -x1 > ~/console-screenshot.tga && convert ~/console-screenshot.tga console-screenshot.png

Here is a resized 480×320 pixels version of the original screenshot the command produces:

All text Consoles tty1 to tty5 merged screenshot png image with snapscreenshot taken on Debian GNU / Linux

Storing a picture shot of the text (console) screen in JPEG (JPG) format is done analogously just the convert command output extension has to be changed to jpeg i.e.:
 

noah:/home/hipo# snapscreenshot -c5 -x1 > ~/console-screenshot.tga && convert ~/console-screenshot.tga console-screenshot.jpeg

I've also written a tiny wrapper shell script, to facilitate myself picture picture taking as I didn't like to type each time I want to take a screenshot of a tty the above long line.

Here is the wrapper script I wrote:
 

#!/bin/sh
### Config
# .tga produced file name
output_f_name='console-screenshot.tga';
# gets current date
cur_date=$(date +%d_%m_%Y|sed -e 's/^ *//');
# png output f name
png_f_name="console-screenshot-$cur_date.png";
### END Config
snapscreenshot -c$arg1 -x1 > $output_f_name && convert $output_f_name $png_f_name;
echo "Output png screenshot from tty1 console produced in";
echo "$PWD/$png_f_name";
/bin/rm -f $output_f_name;

You can also download my console-screenshot.sh snapscreenshot wrapper script here

The script is quite simplistic to use, it takes just one argument which is the number of the tty you would like to screenshot.
To use my script download it in /usr/local/bin and set it executable flag:
 

noah:~# cd /usr/local/bin
noah:/usr/local/bin# wget -q https://www.pc-freak.net/~bshscr/console-screenshot.sh
noah:/usr/local/bin# chmod +x console-screenshot.sh

Onwards to use the script to snapshot console terminal (tty1) type:
 

noan:~# console-screenshot.sh

I've made also mirror of latest version of snapscreenshot-1.0.14.3.tar.bz2 here just in case this nice little program disappears from the net in future times.


Text mode (console) browsing with tabs with Elinks / Text browsers – (lynx, elinks, links and w3m) useful HTTP debugging tools for Linux and FreeBSD servers

Friday, April 27th, 2012

The last days, I'm starting to think the GUI use is making me brainless so I'm getting back to my old habits of using console.
I still remember with a grain of nostalgy how much more efficient I used to be when the way to interact with my computer was primary in text mode console.
Actually, I'm starting to get this idea the more new a software is the more inefficient it makes your use of computer, not to mention the hardware resources required by newer software is constantly increasing.

With this said, I started occasionally browsing again like in the old days by using links text browser.
In the old days I mostly used lynx and its more advanced "brother" text browser links.
The main difference between lynx and links is that lynx does not have any support for the terrible "javascript", whether links supports most of the Javascript ver 2.
Also links and has a midnight commander like pull down menus on the screen top, – handy for people who prefer some more interactivity.

In the past I remember I used also to browse graphically in normal consoles (ttys) with a hacked version of links calledTThere is also a variation of linksxlinks suitable for people who would like to have graphical browser in console (ttys).

I used xlinks quite heavily in the past, when I have slower computer P166Mhz with 64MB of memory 2.5 GB HDD (What a times boy what a times) .
Maybe when I have time I will install it on my PC and start using it again like in the old days to boost my computer use efficiency…
I remember the only major xlinks downside was it doesn't included support for Adobe flash (though this is due to the bad non-free software nature of Adobe lack of proper support for free software and not a failure of xlinks developers. Anyways for me this wasn't a big trouble since, ex Macromedia (Adobe) Flash support is not something essential for most of my work…

links2 is actually the naming of links version 2. elinks emerged later (if I remember correctly, as fork project of links).
elinks difference with links constitutes in this it supports tabbed browsing as well as colors (links browser displays results monochrome).

Having a tabbed browsing support in tty console is a great thing…
I personally belive text browsing if properly used can in many ways outbeat, graphic browsing in terms of performance and time spend to obtain data. I'm convinced text browsing is superior for two reasons:
1. with text there is way less elements to obstruct your attention.
– No graphical annoying flash banners, no annoying taking the attention pictures

2. Navigating in web pages using the keyboard is more efficient than mouse
– Using keyboard shorcuts is always quicker than mouse, generally keboard has always been a quicker way to access computer commands.

Another reason to use text browsing is, it is mostly the text part of a page that matters, most of the pages that provide images to better explain a topic are bloated (this is my personal view though, i'm sure designer guys will argue me :D).
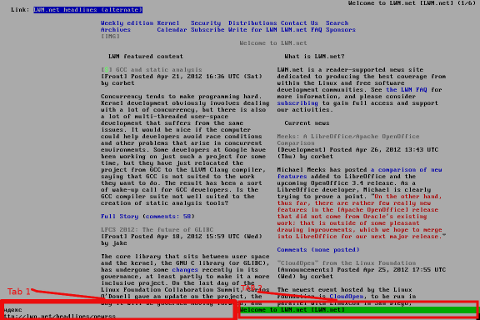
Here is a screenshot of a my links text browser in action, I'm sorry the image is a bit unreadable, but after taking a screenshot of the console and resizing it with GIMP this is what I got …

Links text console browser screenshot with 2 tabs opened Debian GNU / Linux

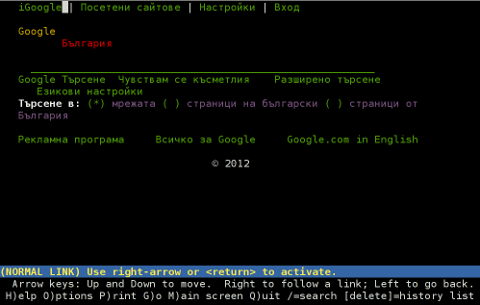
For all those new to Linux who didn't tried text browsing yet and for those interested in computer history, I suggest you install and give a try to following text browsers:
 

  • lynx
  • (Supports colorful text console text browsing)
    lynx text console browser Debian Squeeze GNU / Linux Screenshot

  • links
  • Links www text console browser screenshot on Debian Linux

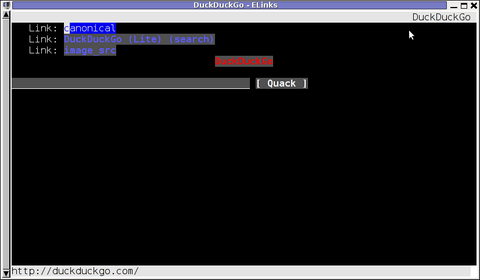
  • elinks
  • (Supports colors filled text browsing and tabs)
    elinks opened duckduckgo.com google alternative search engine in mlterm terminal Debian Linux

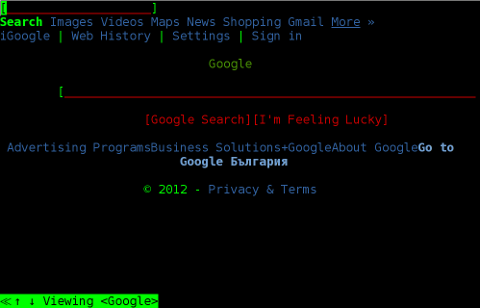
  • w3m
  • w3m one of the oldest text console browsers screenshot Debian Linux Squeeze 6.2

By the way having the 4 text browsers is very useful for debugging purposes for system administrators too, so in any case I think this 4 web browsers are absoutely required software for newly installed GNU / Linux or BSD* based servers.

For Debian and the derivatives Linux distributions, the 4 browsers are available as deb packages, so install them with following apt 1 liner:
 

debian:~# apt-get –yes install w3m elinks links lynx
….

FreeBSD users can install the browsers using, cmd:
 

freebsd# cd /usr/ports/www/w3mfreebsd# make install clean
….
freebsd# cd /usr/ports/www/elinksfreebsd# make install clean
….
freebsd# cd /usr/ports/www/linksfreebsd# make install clean
….
freebsd# cd /usr/ports/www/lynxfreebsd# make install clean
….

In links using the tabs functionality appeared, somewhere near the 2001 or 2000 (at least that was the first time I saw links with tabbed browsing enabled). My first time to saw links support opening multiple pages within the same screen under tabs was on Redhat Linux 9

Opening multiple pages in tabs in the text browser is done by pressing the t key and typing in the desired URL to open isnide.
For more than 2 tabs, again t has to be pressed and same procedure goes on and on.
It was pretty hard for me to figure out how I can do a text browsing with tabs, though I found a way to open new tabs it took me some 10 minutes in pondering how to switch between the new opened links browser tabs.

Hence, I thought it would be helpful to mention here how tabs can be switched in links text browser. Actually it turned it is pretty easy to Switch tabs tabs back and foward.

1 tab to move backwards is done with < (key), wheter switching one tab forward is done with the > key.

On UK and US qwerty keyboards alignment the movement a tab backward and forward is done with holding shift and pressing < onwards holding both keys simultaneously and analogously with pressing shift + >
 

How to run your Own / Personal Domain Web WHOIS service in a minute with SpeedyWHOIS

Thursday, April 5th, 2012

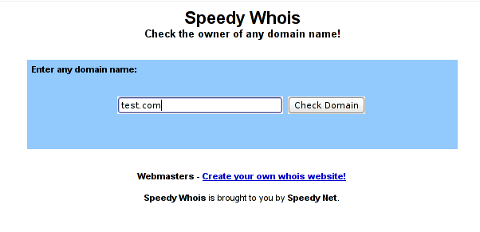
Running your own personal WHOIS service speedy whois in browser screenshot

I've been planning to run my own domain WHOIS service, for quite sime time and I always postpone or forgot to do it.
If you wonder, why would I need a (personal) web whois service, well it is way easier to use and remember for future use reference if you run it on your own URL, than wasting time in search for a whois service in google and then using some other's service to get just a simple DOMAIN WHOIS info.

So back to my post topic, I postpopned and postponed to run my own web whois, just until  yesterday, whether I have remembered about my idea to have my own whois up and running and proceeded wtih it.

To achieve my goal I checked if there is free software or (open source) software that easily does this.
I know I can write one for me from scratch, but since it would have cost me some at least a week of programming and testing and I didn't wanted to go this way.

To check if someone had already made an easy to install web whois service, I looked through in the "ultimate source for free software" sourceforge.net

Looking for the "whois web service" keywords, displayed few projects on top. But unfortunately many of the projects sources was not available anymore from http://sf.net and the project developers pages..
Thanksfully in a while, I found a project called SpeedyWhois, which PHP source was available for download.

With all prior said about project missing sources, Just in case if SpeedyWhois source  disappears in the future (like it probably) happened with, some of the other WHOIS web service projects, I've made SpeedyWhois  mirror for download here

 
Contrary to my idea that installing the web whois service might be a "pain in the ass", (like is the case  with so many free software php scripts and apps) – the installation went quite smoothly.
 
To install it I took the following 4 steps:
 
1. Download the source (zip archive) with wget 
 
# cd /var/www/whois-service;
/var/www/whois-service# wget -q https://www.pc-freak.net/files/speedywhois-0.1.4.zip
 
2. Unarchive it with unzip command 
 
 
/var/www/whois-service# unzip speedywhois-0.1.4.zip
3. Set the proper DNS records

My NS are using Godaddy, so I set my desired subdomain record from their domain name manager.
 

4. Edit Apache httpd.conf to create VirtualHost
 
This step is not mandatory, but I thought it is nice if I put the whois service under a subdomain, so add a VirtualHost to my httpd.conf
 
The Virtualhost Apache directives, I used are:
 
<VirtualHost *:80>
        ServerAdmin hipo_aT_www.pc-freak.net
        DocumentRoot /var/www/whois-service
        ServerName whois.www.pc-freak.net
        &lt;Directory /var/www/whois-service
        AllowOverride All
        Order Allow,Deny
        Allow from All
        </Directory>
</VirtualHost>
 
Onwards to take effect of new Webserver configs, I did Apache restart
 
# /usr/local/etc/rc.d/apache2 restart
 
Further on You can test whois a domain using my new installed SpeedyWHOISWeb WHOIS service  on http://whois.www.pc-freak.net
Whenever I have some free time, maybe I will work on the code, to try to add support for logging of previous whois requests and posting links pointing to the previous whois done via the web WHOIS service on the main whois page.
 
One thing that I disliked about how SpeedyWHOIS is written is, if there is no WHOIS information returned for a domain request (e.g.) a:
 
# whois domainname.com
 
returns an empty information, the script doesn't warn with a message there is no WHOIS data available for this domain or something.
 
 
This is not so important as this kind of behaviour of 'error' handling can easily be changed with minimum changes in the php code.
If you wonder, why do I need the web whois service, the answer is it is way easier to use.
I don't have more time to research a bit further on the alternative open source web whois services, so I would be glad to hear from anyone who tested other web whois service that is free comes under a FOSS license.
In the mean time, I'm sure people with a small internet websites like mine who are looking to run their OWN (personal) whois service SpeedyWHOIS does a great job.

Tiny PHP script to dump your browser set HTTP headers (useful in debugging)

Friday, March 30th, 2012

While browsing I stumbled upon a nice blog article

Dumping HTTP headers

The arcitle, points at few ways to DUMP the HTTP headers obtained from user browser.
As I'm not proficient with Ruby, Java and AOL Server what catched my attention is a tiny php for loop, which loops through all the HTTP_* browser set variables and prints them out. Here is the PHP script code:

<?php<br />
foreach($_SERVER as $h=>$v)<br />
if(ereg('HTTP_(.+)',$h,$hp))<br />
echo "<li>$h = $v</li>\n";<br />
header('Content-type: text/html');<br />
?>

The script is pretty easy to use, just place it in a directory on a WebServer capable of executing php and save it under a name like:
show_HTTP_headers.php

If you don't want to bother copy pasting above code, you can also download the dump_HTTP_headers.php script here , rename the dump_HTTP_headers.php.txt to dump_HTTP_headers.php and you're ready to go.

Follow to the respective url to exec the script. I've installed the script on my webserver, so if you are curious of the output the script will be returning check your own browser HTTP set values by clicking here.
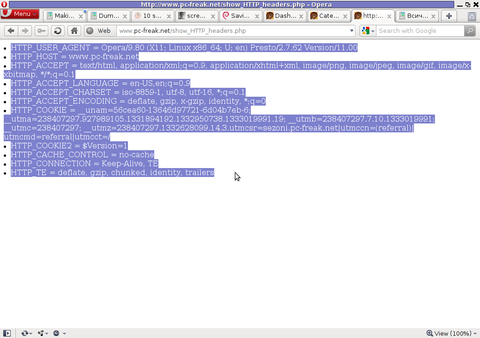
PHP will produce output like the one in the screenshot you see below, the shot is taken from my Opera browser:

Screenshot show HTTP headers.php script Opera Debian Linux

Another sample of the text output the script produce whilst invoked in my Epiphany GNOME browser is:

HTTP_HOST = www.pc-freak.net
HTTP_USER_AGENT = Mozilla/5.0 (X11; U; Linux x86_64; en-us) AppleWebKit/531.2+ (KHTML, like Gecko) Version/5.0 Safari/531.2+ Debian/squeeze (2.30.6-1) Epiphany/2.30.6
HTTP_ACCEPT = application/xml,application/xhtml+xml,text/html;q=0.9,text/plain;q=0.8,image/png,*/*;q=0.5
HTTP_ACCEPT_ENCODING = gzip
HTTP_ACCEPT_LANGUAGE = en-us, en;q=0.90
HTTP_COOKIE = __qca=P0-2141911651-1294433424320;
__utma_a2a=8614995036.1305562814.1274005888.1319809825.1320152237.2021;wooMeta=MzMxJjMyOCY1NTcmODU1MDMmMTMwODQyNDA1MDUyNCYxMzI4MjcwNjk0ODc0JiYxMDAmJjImJiYm; 3ec0a0ded7adebfeauth=22770a75911b9fb92360ec8b9cf586c9;
__unam=56cea60-12ed86f16c4-3ee02a99-3019;
__utma=238407297.1677217909.1260789806.1333014220.1333023753.1606;
__utmb=238407297.1.10.1333023754; __utmc=238407297;
__utmz=238407297.1332444980.1586.413.utmcsr=www.pc-freak.net|utmccn=(referral)|utmcmd=referral|utmcct=/blog/

You see the script returns, plenty of useful information for debugging purposes:
HTTP_HOST – Virtual Host Webserver name
HTTP_USER_AGENT – The browser exact type useragent returnedHTTP_ACCEPT – the type of MIME applications accepted by the WebServerHTTP_ACCEPT_LANGUAGE – The language types the browser has support for
HTTP_ACCEPT_ENCODING – This PHP variable is usually set to gzip or deflate by the browser if the browser has support for webserver returned content gzipping.
If HTTP_ACCEPT_ENCODING is there, then this means remote webserver is configured to return its HTML and static files in gzipped form.
HTTP_COOKIE – Information about browser cookies, this info can be used for XSS attacks etc. 🙂
HTTP_COOKIE also contains the referrar which in the above case is:
__utmz=238407297.1332444980.1586.413.utmcsr=www.pc-freak.net|utmccn=(referral)
The Cookie information HTTP var also contains information of the exact link referrar:
|utmcmd=referral|utmcct=/blog/

For the sake of comparison show_HTTP_headers.php script output from elinks text browser is like so:

* HTTP_HOST = www.pc-freak.net
* HTTP_USER_AGENT = Links (2.3pre1; Linux 2.6.32-5-amd64 x86_64; 143x42)
* HTTP_ACCEPT = */*
* HTTP_ACCEPT_ENCODING = gzip,deflate * HTTP_ACCEPT_CHARSET = us-ascii, ISO-8859-1, ISO-8859-2, ISO-8859-3, ISO-8859-4, ISO-8859-5, ISO-8859-6, ISO-8859-7, ISO-8859-8, ISO-8859-9, ISO-8859-10, ISO-8859-13, ISO-8859-14, ISO-8859-15, ISO-8859-16, windows-1250, windows-1251, windows-1252, windows-1256,
windows-1257, cp437, cp737, cp850, cp852, cp866, x-cp866-u, x-mac, x-mac-ce, x-kam-cs, koi8-r, koi8-u, koi8-ru, TCVN-5712, VISCII,utf-8 * HTTP_ACCEPT_LANGUAGE = en,*;q=0.1
* HTTP_CONNECTION = keep-alive
One good reason, why it is good to give this script a run is cause it can help you reveal problems with HTTP headers impoperly set cookies, language encoding problems, security holes etc. Also the script is a good example, for starters in learning PHP programming.


How to digital watermark to a picture – Protect pic with copyright image or text with composite, convert and Phatch on GNU / Linux

Friday, March 23rd, 2012

Watermarking is a technique to identify a physical or non-physical object with its owner (creator). First watermarks in history originates from very ancient times.

There are two basic types of Watermark types:

I. Physical Watermarks (classical)

II. Digital Watermarks

Historically Classical Watermarks, were mostly important. As we tend to use more and more visible and we switch to use of more invisible stuff, nowdays the importance and use of digital watermarks is steadily raising.

You have most likely already seen pictures from websites which contain a copyright holder message stamp or website logo on it.
As you could imagine the picture watermark is placed in order to prevent pictures from being re-used in another internet space ,without the picture copyright holder explicit permission…

Watermarks have entered most if not all areas of our life, but we often don't recognize they're there / rarely think about them.
Few of the many "physical watermarks" we use daily are:
 

  • paper money watermark (to protect against anti money forgery)
  • bank debit / credit cards stamps near the card chip
  • postcards paper stamps

There are too many different kind of "physical watermarks" and since this is not the accent of this article, I will continue straight to explaiin a bit on Digital (picture) watermarks and how to watermark images with ImageMagick image editting command line suit.

Just like with physical watermarks, there are different kinds of digital watermarks. There are:
 

  • Picture (Images) digital watermarks
  • – Steganography

  • Video watermarks
  • Audio stream digital watermarks
  • Visual digital watermarks
  • – Visible area of text or picture over another text picture or video

  • Invisible digital watermarks
  • – digital information (files) metadata with watermark content etc.

The topic of watermarking is quite wide, so I will stop here and focus on the main idea of this article – to show how to place digital watermark on graphic image or collection of pictures.

The most straightway non-interactive way to do picture watermarking is with ImageMagick's composite command line tool. This little handy tool is capable of creating watermarks in single and multiple pictures.

If you prefer to have a simple text as a watermark, then you should use imagick's convert cmd.

1. Putting a watermark of picture in the right bottom corner

$ composite -gravity southeast -dissolve 100 \
watermark_picture.png image-to-watermark.png \
output-watermarked-image.png

Snoopy Writting pc freak watermark picture text watermark on the right bottom corner with composite

2. Placing watermark to picture in the bottom right corner

$ composite -gravity northeast -dissolve 80 \
watermark_picture.png image-to-watermark.png \
output-watermarked-image.png

Snoopy Writting pc freak picture text watermark on the right bottom corner with composite

3. Watermarking picture in the bottom left corner

$ composite -gravity southwest -dissolve 90 \
watermark_picture.png image-to-watermark.png \
output-watermarked-image.png

Snoopy writting watermarking picture on the bottom left corner imagemagick (composite)

4. Watermarking picture in the top left corner

$ composite -gravity northwest -dissolve 100 \
watermark_picture.png image-to-watermark.jpg \
output-watermarked-image.jpg

As you see from above example, composite even accept mixing up input / output between PNG and JPEG pictures 🙂

Output Watermarked Image picture on top left corner with pc-freak logo image Imagick composite

5. Put a watermark in the image center

$ composite -gravity center -dissolve 100 \
watermark_picture.png image-to-watermark.png \
output-watermarked-image.png

position watermark on the picture middle (center) composite output picture

6. Sealing image with custom text / Text Watermarking a picture

a) Writting text watermark to an image centered in "footer"

$ convert image-to-watermark.png -pointsize 20 \
-draw "gravity south fill black text 0,12 \
'hip0s Watermark'" output-watermarked-image.jpg

This will place a watermark in position 0,12, meaning the text will be added in the bottom center of the watermarked image.

Watermarking a picture sealing with custom text image imagick composite pic

-pointsize 20 defines the text font size. hip0s Watermark is the actual text that will be stamped.

b) Writting image watermark with font type customization (Arial Tahoma etc.):

To list all available fonts ready to be used by convert, type:

$ convert -list font
$ convert -list font |grep -i arial
Font: Arial-Black-Regular
family: Arial Black
glyphs: /usr/share/fonts/truetype/msttcorefonts/Arial_Black.ttf
Font: Arial-Bold
family: Arial
glyphs: /usr/share/fonts/truetype/msttcorefonts/Arial_Bold.ttf
Font: Arial-Bold-Italic
family: Arial
glyphs: /usr/share/fonts/truetype/msttcorefonts/arialbi.ttf
Font: Arial-Italic
family: Arial
glyphs: /usr/share/fonts/truetype/msttcorefonts/ariali.ttf
Font: Arial-Regular
family: Arial
glyphs: /usr/share/fonts/truetype/msttcorefonts/Arial.ttf

$ convert -list type
Bilevel
ColorSeparation
ColorSeparationMatte
Grayscale
GrayscaleMatte
Optimize
Palette
PaletteBilevelMatte
PaletteMatte
TrueColorMatte
TrueColor

On my system, I have 392 of fonts installed, to check the number of installed fonts ready for use by convert I used:

$ convert -list font|grep -i 'font:'|wc -l
392

To only check exact fonts names usable in convert:

$ convert -list font|grep -i 'font:'

To use the red marked Arial-Regular for font of the text picture timestamp issue;

$ convert watermark_picture.jpg -font Arial-Regular \
-pointsize 20 -draw "gravity south fill black text 0,12 'hip0s Watermark'" \
output-watermarked-image.jpg

Watermark and with Arial-Regular font image magick convert screenshot dog type writter

c) Using external font with convert to place image text watermark

Lets say you would like to use an external font (arhangai.ttf) not listed in convert -font list usable fonts:

$ convert image-to-watermark.png -pointsize 20 \
-font /usr/share/fonts/truetype/arhangai/arhangai.ttf \
-draw "gravity south fill black text 0,12 \
'hip0s Watermark'" output-watermarked-image_7.png

Talking about fonts, if you would like to add some external, nice free-fonts (ttf) files to your current logged in user, exec:

hipo@noah:~$ cd ~/fonts
hipo@noah:/fonts$ for i in \
$(lynx -dump http://www.webpagepublicity.com/free-fonts.html|grep -i .ttf|grep -i http|awk '{ print $2 }'); \
do wget -r -l2 -nd -Nc $i;
done

This will add 85 new nice looking fonts. Putting fonts in .fonts/ directory, are red while fonts are looked up by applications installed on respective the server or desktop GNU / Linux systems. Any font put there is ready to be used across all ImageMagick command line tools, as well as will be added across the list of possible fonts to use in GIMP and the rest of gui editors installed on the system.

According to the (watermark) texts font size passed to convert on some pictures the text written will exceed the picture dimensions and only partially some of the text intended as watermark will be visible.
If you encounter the exceed picture text problem, take few minutes and play with fonts sizes until you have a good font size to fit the approximate dimensions of the (expected minimum / maximum – horizontal and vertical) stamped picture dimensions.

For the sake of clarity, here is a list with arguments used in above, composite and convert examples.
 

  • composite — The ImageMagick command that combines two images.
  • -dissolve 80 — The number after the option determines the brightness of the watermark.  100 is full strength.
  • -gravity southeast — Determines the placement of watermark.
    Possible options are; north, west, south, east, northwest, northeast, southeast, southwest, center
  • watermark_picture.png — The watermark image is the first argument.
  • image-to-watermark.jpg — The second argument is the original image to be watermarked.
  • output-watermarked-image.jpg — The third argument is the new composite image to be created.
    N. B. !  If you don't specify a new file, be careful, the original file will be overwritten.

As ImageMagick is cross platform graphic editting suit – it runs on both *nix (Linux,BSD) and Windows. I have tested it on Linux, only but on FreeBSD and other BSDs it should work without any problem.
The composite and convert above examples should be easily rewritten to run on achieve watarmarking on MS Windows too.

7. Watermarking multiple pictures in a directory

To watermark multiple pictures within a directory use, a short bash loop in combination with either convert or composite could be used:

$ cd your-directory/
$ for i in *; do
convert $i -pointsize 20 -draw "gravity south fill black text 0,12 'hip0s Watermark'" output-watermarked-image.jpg
done

convert and composite also support wildcards like '*.JPG, *.PNG', but I'm not sure if this syntax can be used for mass picture marking?

8. Adding watermark and doing other various advanced Image Edit, Convert and Compose stuff with Phatch GUI program

Another program that is capable to put watermarks on pictures and besides that doing a number of routine graphic manipulation operations achievable with expert Image manipulation programs like GIMP / Inkscape is PHATCH = PHOTO & BATCH

Phatch is swiss army knife for doing web design or or graphics design on Linux.

Phatch is really great and easy to use program. Tt makes putting basic designer effects on pictures with no requirement for any design skills.
With Phatch you can become a designer for a day literally 😉

If you haven't used it yet, make sure you try it!
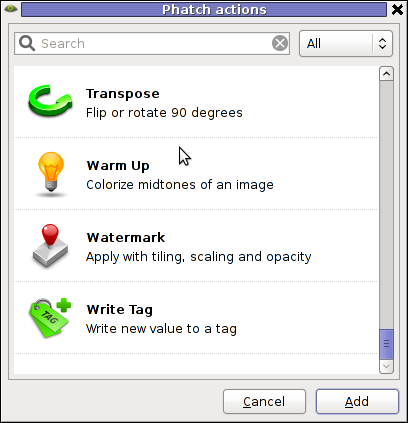
Below, are two screenshots of Phatch running on my Debian G* / Linux
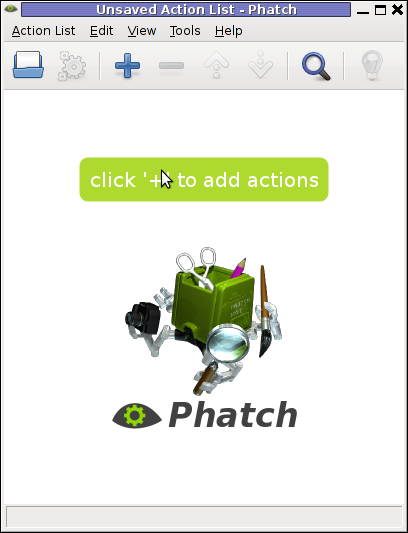
Phatch Linux Debian Squeeze Screenshot

Phatch Linux Debian Squeeze Screenshot Watermark effect

Phatch is installable via apt on Debian and Ubuntu Linux. It has also a phatch-cli tools, which are a possible substitute to ImageMagick's composite / convert tools.

On deb based distros install Phatch with:

noah:~# apt-get --yes install phatch phatch-cli

In Phatch it is also possible, to create a combination of filters to be later applied to an image file or a group of image files all in a directory. The program capabilities are really outstanding, it is pure joy to work with it.

Using Phatch GUI interface is hard to comprehend in the beginning, I needed few minutes until I can get the idea how to use it. Anyhow once you know the basics, its very easy to use onwards.

Phatch currently can perform the following actions:
 

  • Auto Contrast – Maximize image contrast
  • Border – Crop or add border to all sides
  • Brightness – Adjust brightness from black to white
  • Canvas – Crop the image or enlarge canvas without resizing the image
  • Colorize – Colorize grayscale image
  • Common – Copies the most common pixel value
  • Contrast – Adjust from grey to black & white
  • Convert Mode – Convert the color mode of an image (grayscale, RGB, RGBA or CMYK)
  • Effect – Blur, Sharpen, Emboss, Smooth, ..
  • Equalize – Equalize the image histogram
  • Fit – Downsize and crop image with fixed ratio
  • Grayscale – Fade all colours to gray
  • Invert – Invert the colors of the image (negative)
  • Maximum – Copies the maximum pixel value
  • Median – Copies the median pixel value
  • Minimum – Copies the minimum pixel value
  • Offset – Offset by distance and wrap around
  • Posterize – Reduce the number of bits of colour channel
  • Rank – Copies the rank'th pixel value
  • Rotate – Rotate with random angle
  • Round – Round or crossed corners with variable radius and corners
  • Saturation – Adjust saturation from grayscale to high
  • Save – Save an image with variable compression in different types
  • Scale – Scale an image with different resample filters.
  • Shadow – Drop a blurred shadow under a photo with variable position, blur and color
  • Solarize – Invert all pixel values above threshold
  • Text – Write text at a given position
  • Transpose – Flip or rotate an image by 90 degrees
  • Watermark – Apply a watermark image with variable placement (offset, scaling, tiling) and opacity

Most of the function / effects Phatch in the up list works fine as I tested them to get to know the program.
The only effect that didn't worked for me is Blender effect.
Trying to apply the Blending effect I got error:

Can not apply action Blender:
'dict' object has no attribute 'rfind'
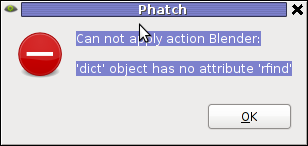
dict object has not attribiture rfind error screenshot my linux

Its really a pity blender filter don't work. I've seen on Phatch's website some pictures showing the blender effect in action and it looks really awesome.

In attempt to work around the err, I tried downloading Phatch's latest release and running it with python interpreter but it didn't work out …
I tried also to install some packages to the system that somehow seemed to be related to blenderversatile 3D modeller/renderer program but this worked neither.
I suspect Phatch blender effect is not working on Ubuntu too as I've red complains in some Ubuntu forums.
If someone succeeding making blend effect work please let me know how?

Interesting feature of Phatch is the program support for applying its predefined filters using a cli interface.
The syntax for phatch cli, should be something like:

phatch -console action_list.phatch

Where action_list.phatch is a Phatch predefined filter. Anyways I didn't manage to figure out how to use the program CLI. I'll be glad to hear if someone succeeded in using the program console, if so please share with me how?

9. Adding Watermark to pictures with GIMP

To add a watermark text or picture in GIMP, there are plenty of ways but is more time consuming by both Phatch or convert, composite..
There is a script in gimp plugin registry site – watermark.scm which adds watermarking capability to GIMP

On my system this script was installed with the deb package gimp-data-extras. To apply the plugin on a pic, I used GIMP menus:

Filters -> Eg -> Copyright Placer

GIMP Copyright Holder plugin Watermark Screenshot

If someone knows about better or quicker ways to do watermarking, please share 🙂
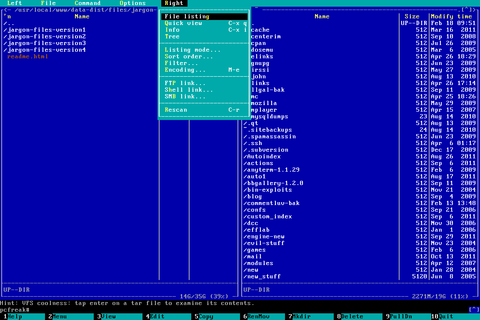
How to delete million of files on busy Linux servers (Work out Argument list too long)

Tuesday, March 20th, 2012

How to Delete million or many thousands of files in the same directory on GNU / Linux and FreeBSD

If you try to delete more than 131072 of files on Linux with rm -f *, where the files are all stored in the same directory, you will get an error:

/bin/rm: Argument list too long.

I've earlier blogged on deleting multiple files on Linux and FreeBSD and this is not my first time facing this error.
Anyways, as time passed, I've found few other new ways to delete large multitudes of files from a server.

In this article, I will explain shortly few approaches to delete few million of obsolete files to clean some space on your server.
Here are 3 methods to use to clean your tons of junk files.

1. Using Linux find command to wipe out millions of files

a.) Finding and deleting files using find's -exec switch:

# find . -type f -exec rm -fv {} \;

This method works fine but it has 1 downside, file deletion is too slow as for each found file external rm command is invoked.

For half a million of files or more, using this method will take "long". However from a server hard disk stressing point of view it is not so bad as, the files deletion is not putting too much strain on the server hard disk.
b.) Finding and deleting big number of files with find's -delete argument:

Luckily, there is a better way to delete the files, by using find's command embedded -delete argument:

# find . -type f -print -delete

c.) Deleting and printing out deleted files with find's -print arg

If you would like to output on your terminal, what files find is deleting in "real time" add -print:

# find . -type f -print -delete

To prevent your server hard disk from being stressed and hence save your self from server normal operation "outages", it is good to combine find command with ionice, e.g.:

# ionice -c 3 find . -type f -print -delete

Just note, that ionice cannot guarantee find's opeartions will not affect severely hard disk i/o requests. On  heavily busy servers with high amounts of disk i/o writes still applying the ionice will not prevent the server from being hanged! Be sure to always keep an eye on the server, while deleting the files nomatter with or without ionice. if throughout find execution, the server gets lagged in serving its ordinary client requests or whatever, stop the execution of the cmd immediately by killing it from another ssh session or tty (if physically on the server).

2. Using a simple bash loop with rm command to delete "tons" of files

An alternative way is to use a bash loop, to print each of the files in the directory and issue /bin/rm on each of the loop elements (files) like so:

for i in *; do
rm -f $i;
done

If you'd like to print what you will be deleting add an echo to the loop:

# for i in $(echo *); do \
echo "Deleting : $i"; rm -f $i; \

The bash loop, worked like a charm in my case so I really warmly recommend this method, whenever you need to delete more than 500 000+ files in a directory.

3. Deleting multiple files with perl

Deleting multiple files with perl is not a bad idea at all.
Here is a perl one liner, to delete all files contained within a directory:

# perl -e 'for(<*>){((stat)[9]<(unlink))}'

If you prefer to use more human readable perl script to delete a multitide of files use delete_multple_files_in_dir_perl.pl

Using perl interpreter to delete thousand of files is quick, really, really quick.
I did not benchmark it on the server, how quick exactly is it, but I guess the delete rate should be similar to find command. Its possible even in some cases the perl loop is  quicker …

4. Using PHP script to delete a multiple files

Using a short php script to delete files file by file in a loop similar to above bash script is another option.
To do deletion  with PHP, use this little PHP script:

<?php
$dir = "/path/to/dir/with/files";
$dh = opendir( $dir);
$i = 0;
while (($file = readdir($dh)) !== false) {
$file = "$dir/$file";
if (is_file( $file)) {
unlink( $file);
if (!(++$i % 1000)) {
echo "$i files removed\n";
}
}
}
?>

As you see the script reads the $dir defined directory and loops through it, opening file by file and doing a delete for each of its loop elements.
You should already know PHP is slow, so this method is only useful if you have to delete many thousands of files on a shared hosting server with no (ssh) shell access.

This php script is taken from Steve Kamerman's blog . I would like also to express my big gratitude to Steve for writting such a wonderful post. His post actually become  inspiration for this article to become reality.

You can also download the php delete million of files script sample here

To use it rename delete_millioon_of_files_in_a_dir.php.txt to delete_millioon_of_files_in_a_dir.php and run it through a browser .

Note that you might need to run it multiple times, cause many shared hosting servers are configured to exit a php script which keeps running for too long.
Alternatively the script can be run through shell with PHP cli:

php -l delete_millioon_of_files_in_a_dir.php.txt.

5. So What is the "best" way to delete million of files on Linux?

In order to find out which method is quicker in terms of execution time I did a home brew benchmarking on my thinkpad notebook.

a) Creating 509072 of sample files.

Again, I used bash loop to create many thousands of files in order to benchmark.
I didn't wanted to put this load on a productive server and hence I used my own notebook to conduct the benchmarks. As my notebook is not a server the benchmarks might be partially incorrect, however I believe still .they're pretty good indicator on which deletion method would be better.

hipo@noah:~$ mkdir /tmp/test
hipo@noah:~$ cd /tmp/test;
hiponoah:/tmp/test$ for i in $(seq 1 509072); do echo aaaa >> $i.txt; done

I had to wait few minutes until I have at hand 509072  of files created. Each of the files as you can read is containing the sample "aaaa" string.

b) Calculating the number of files in the directory

Once the command was completed to make sure all the 509072 were existing, I used a find + wc cmd to calculate the directory contained number of files:

hipo@noah:/tmp/test$ find . -maxdepth 1 -type f |wc -l
509072

real 0m1.886s
user 0m0.440s
sys 0m1.332s

Its intesrsting, using an ls command to calculate the files is less efficient than using find:

hipo@noah:/tmp/test$ time ls -1 |wc -l
509072

real 0m3.355s
user 0m2.696s
sys 0m0.528s

c) benchmarking the different file deleting methods with time

– Testing delete speed of find

hipo@noah:/tmp/test$ time find . -maxdepth 1 -type f -delete
real 15m40.853s
user 0m0.908s
sys 0m22.357s

You see, using find to delete the files is not either too slow nor light quick.

– How fast is perl loop in multitude file deletion ?

hipo@noah:/tmp/test$ time perl -e 'for(<*>){((stat)[9]<(unlink))}'real 6m24.669suser 0m2.980ssys 0m22.673s

Deleting my sample 509072 took 6 mins and 24 secs. This is about 3 times faster than find! GO-GO perl 🙂
As you can see from the results, perl is a great and time saving, way to delete 500 000 files.

– The approximate speed deletion rate of of for + rm bash loop

hipo@noah:/tmp/test$ time for i in *; do rm -f $i; done

real 206m15.081s
user 2m38.954s
sys 195m38.182s

You see the execution took 195m en 38 secs = 3 HOURS and 43 MINUTES!!!! This is extremely slow ! But works like a charm as the running of deletion didn't impacted my normal laptop browsing. While the script was running I was mostly browsing through few not so heavy (non flash) websites and doing some other stuff in gnome-terminal) 🙂

As you can imagine running a bash loop is a bit CPU intensive, but puts less stress on the hard disk read/write operations. Therefore its clear using it is always a good practice when deletion of many files on a dedi servers is required.

b) my production server file deleting experience

On a production server I only tested two of all the listed methods to delete my files. The production server, where I tested is running Debian GNU / Linux Squeeze 6.0.3. There I had a task to delete few million of files.
The tested methods tried on the server were:

– The find . type -f -delete method.

– for i in *; do rm -f $i; done

The results from using find -delete method was quite sad, as the server almost hanged under the heavy hard disk load the command produced.

With the for script all went smoothly. The files were deleted for a long long time (like few hours), but while it was running, the server continued with no interruptions..

While the bash loop was running, the server load avarage kept at steady 4
Taking my experience in mind, If you're running a production, server and you're still wondering which delete method to use to wipe some multitude of files, I would recommend you go  the bash for loop + /bin/rm way. Yes, it is extremely slow, expect it run for some half an hour or so but puts not too much extra load on the server..

Using the PHP script will probably be slow and inefficient, if compared to both find and the a bash loop.. I didn't give it a try yet, but suppose it will be either equal in time or at least few times slower than bash.

If you have tried the php script and you have some observations, please drop some comment to tell me how it performs.

To sum it up;

Even though there are "hacks" to clean up some messy parsing directory full of few million of junk files, having such a directory should never exist on the first place.

Frankly, keeping millions of files within the same directory is very stupid idea.
Doing so will have a severe negative impact on a directory listing performance of your filesystem in the long term.

If you know better (more efficient) ways to delete a multitude of files in a dir please share in comments.

Improve default picture viewing on Slackware Linux with XFCE as Desktop environment

Saturday, March 17th, 2012

Default XFce picture viewer on Slackware Linux is GIMP (GNU Image Manipulation Program). Though GIMP is great for picture editting, it is rather strange why Patrick Volkerding compiled XFCE to use GIMP as a default picture viewer? The downsides of GIMP being default picture viewing program for Slackware's XFCE are the same like Xubuntu's XFCE risterroro, you can't switch easily pictures back and forward with some keyboard keys (left, right arrow keys, backspace or space etc.). Besides that another disadvantage of using GIMP are;
a) picture opening time in GIMP loading is significantly higher if compared to a simple picture viewer program like Gnome's default, eye of the gnomeeog.

b) GIMP is more CPU intensive and puts high load on each picture opening

A default Slackware install comes with two good picture viewing programs substitute for GIMP:
 

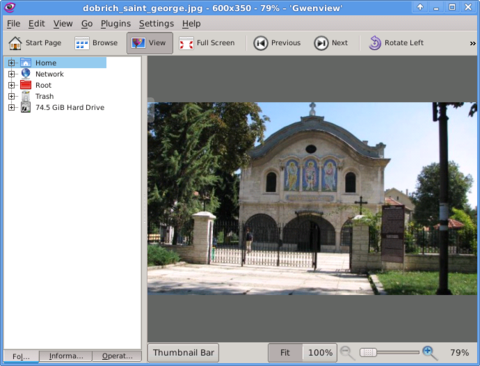
  • Gwenview

    Gwenview on Slackware Linux picture screenshot XFCE

  •  
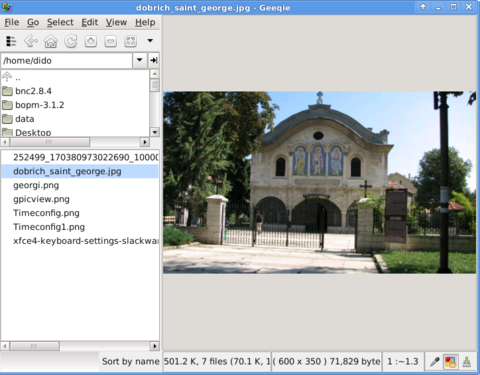
  • Geeqie
  • Geeqie Slackware Linux Screenshot XFCE

    Both of the programs support picture changing, so if you open a picture you can switch to the other ones in the same directory as the first opened one.
    I personally liked more Gwenview because it has more intutive picture switching controls. With it you can switch with keyboard keys space and backspace

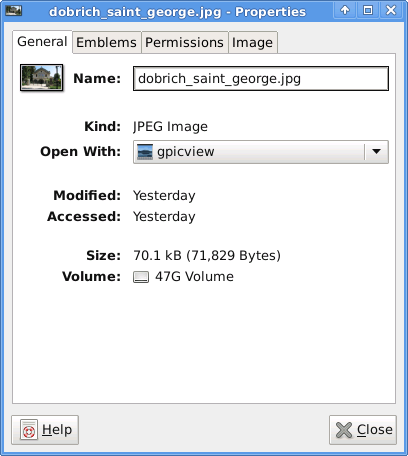
    To change GIMP's default PNG, JPEG opening I had with mouse right button over a pic and in properties change, Open With: program.

    XFCE4 Slackware Linux picture file properties window

    If you're curious about the picture on on all screenshots, this is Church – Saint George (situated in the city center of Dobrich, Bulgaria).
    St. Georgi / St. George Church is built in 1842 and is the oldest Orthodox Church in Dobrich.
    In the Crimean War (1853-1856) the church was burned down and was restored to its present form in 1864.

    gpicview is another cool picture viewing program, I like. Unfortunately on Slackware, there is no prebuild package and the only option is either to convert it with alien from deb package or to download source and compile as usual with ./configure && make && make install .
    Downloading and compiling from source went just fine on Slackware Linux 13.37gpicview has more modern looking interface, than gwenview and geeqie. and is great for people who want to be in pace with desktop fashion 🙂

Boost local network performance (Increase network thoroughput) by enabling Jumbo Frames on GNU / Linux

Saturday, March 10th, 2012

Jumbo Frames boost local network performance in GNU / Linux

So what is Jumbo Frames? and why, when and how it can increase the network thoroughput on Linux?

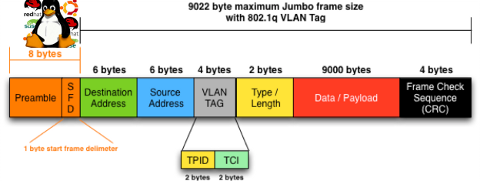
Jumbo Frames are Ethernet frames with more than 1500 bytes of payload. They can carry up to 9000 bytes of payload. Many Gigabit switches and network cards supports them.
Jumbo frames is a networking standard for many educational networks like AARNET. Unfortunately most commercial ISPs doesn't support them and therefore enabling Jumbo frames will rarely increase bandwidth thoroughput for information transfers over the internet.
Hopefully in the years to come with the constant increase of bandwidths and betterment of connectivity, jumbo frames package transfers will be supported by most ISPs as well.
Jumbo frames network support is just great for is small local – home networks and company / corporation office intranets.

Thus enabling Jumbo Frame is absolutely essential for "local" ethernet networks, where large file transfers occur frequently. Such networks are networks where, there is often a Video or Audio streaming with high quality like HD quality on servers running File Sharing services like Samba, local FTP sites,Webservers etc.

One other advantage of enabling jumbo frames is reduce of general server overhead and decrease in CPU load / (CPU usage), when transferring large or enormous sized files.Therefore having jumbo frames enabled on office network routers with GNU / Linux or any other *nix OS is vital.

Jumbo Frames traffic is supported in GNU / Linux kernel since version 2.6.17+ in earlier 2.4.x it was possible through external third party kernel patches.

1. Manually increase MTU to 9000 with ifconfig to enable Jumbo frames

debian:~# /sbin/ifconfig eth0 mtu 9000

The default MTU on most GNU / Linux (if not all) is 1500, to check the default set MTU with ifconfig:

linux:~# /sbin/ifconfig eth0|grep -i mtu
UP BROADCAST MULTICAST MTU:1500 Metric:1

To take advantage of Jumbo Frames, all that has to be done is increase the default Maximum Transmission Unit from 1500 to 9000

For those who don't know MTU is the largest physical packet size that can be transferred over the network. MTU is measured by default in bytes. If a information has to be transferred over the network which exceeds the lets say 1500 MTU (bytes), it will be chopped and transferred in few packs each of 1500 size.

MTUs differ on different netework topologies. Just for info here are the few main MTUs for main network types existing today:
 

  • 16 MBit/Sec Token Ring – default MTU (17914)
  • 4 Mbits/Sec Token Ring – default MTU (4464)
  • FDDI – default MTU (4352)
  • Ethernet – def MTU (1500)
  • IEEE 802.3/802.2 standard – def MTU (1492)
  • X.25 (dial up etc.) – def MTU (576)
  • Jumbo Frames – def max MTU (9000)

Setting the MTU packet frames to 9000 to enable Jumbo Frames is done with:

linux:~# /sbin/ifconfig eth0 mtu 9000

If the command returns nothing, this most likely means now the server can communicate on eth0 with MTUs of each 9000 and therefore the network thoroughput will be better. In other case, if the network card driver or card is not a gigabit one the cmd will return error:

SIOCSIFMTU: Invalid argument

2. Enabling Jumbo Frames on Debian / Ubuntu etc. "the Debian way"

a.) Jumbo Frames on ethernet interfaces with static IP address assigned Edit /etc/network/interfaces and you should have for each of the interfaces you would like to set the Jumbo Frames, records similar to:

Raising the MTU to 9000 if for one time can be done again manually with ifconfig

debian:~# /sbin/ifconfig eth0 mtu 9000

iface eth0 inet static
address 192.168.0.5
network 192.168.0.0
gateway 192.168.0.254
netmask 255.255.255.0
mtu 9000

For each of the interfaces (eth1, eth2 etc.), add a chunk similar to one above changing the changing the IPs, Gateway and Netmask.

If the server is with two gigabit cards (eth0, eth1) supporting Jumbo frames add to /etc/network/interfaces :

iface eth0 inet static
address 192.168.0.5
network 192.168.0.0
gateway 192.168.0.254
netmask 255.255.255.0
mtu 9000

iface eth1 inet static
address 192.168.0.6
network 192.168.0.0
gateway 192.168.0.254
netmask 255.255.255.0
mtu 9000

b.) Jumbo Frames on ethernet interfaces with dynamic IP obtained via DHCP

Again in /etc/network/interfaces put:

auto eth0
iface eth0 inet dhcp
post-up /sbin/ifconfig eth0 mtu 9000

3. Setting Jumbo Frames on Fedora / CentOS / RHEL "the Redhat way"

Enabling jumbo frames on all Gigabit lan interfaces (eth0, eth1, eth2 …) in Fedora / CentOS / RHEL is done through files:
 

  • /etc/sysconfig/network-script/ifcfg-eth0
  • /etc/sysconfig/network-script/ifcfg-eth1

etc. …
append in each one at the end of the respective config:

MTU=9000

[root@fedora ~]# echo 'MTU=9000' >> /etc/sysconfig/network-scripts/ifcfg-eth


a quick way to set Maximum Transmission Unit to 9000 for all network interfaces on on Redhat based distros is by executing the following loop:

[root@centos ~]# for i in $(echo /etc/sysconfig/network-scripts/ifcfg-eth*); do \echo 'MTU=9000' >> $i
done

P.S.: Be sure that all your interfaces are supporting MTU=9000, otherwise increase while the MTU setting is set will return SIOCSIFMTU: Invalid argument err.
The above loop is to be used only, in case you have a group of identical machines with Lan Cards supporting Gigabit networks and loaded kernel drivers supporting MTU up to 9000.

Some Intel and Realtek Gigabit cards supports only a maximum MTU of 7000, 7500 etc., so if you own a card like this check what is the max MTU the card supports and set it in the lan device configuration.
If increasing the MTU is done on remote server through SSH connection, be extremely cautious as restarting the network might leave your server inaccessible.

To check if each of the server interfaces are "Gigabit ready":

[root@centos ~]# /sbin/ethtool eth0|grep -i 1000BaseT
1000baseT/Half 1000baseT/Full

If you're 100% sure there will be no troubles with enabling MTU > 1500, initiate a network reload:

[root@centos ~]# /etc/init.d/network restart
...

4. Enable Jumbo Frames on Slackware Linux

To list the ethernet devices and check they are Gigabit ones issue:

bash-4.1# lspci | grep [Ee]ther
0c:00.0 Ethernet controller: D-Link System Inc Gigabit Ethernet Adapter (rev 11)
0c:01.0 Ethernet controller: D-Link System Inc Gigabit Ethernet Adapter (rev 11)

Setting up jumbo frames on Slackware Linux has two ways; the slackware way and the "universal" Linux way:

a.) the Slackware way

On Slackware Linux, all kind of network configurations are done in /etc/rc.d/rc.inet1.conf

Usual config for eth0 and eth1 interfaces looks like so:

# Config information for eth0:
IPADDR[0]="10.10.0.1"
NETMASK[0]="255.255.255.0"
USE_DHCP[0]=""
DHCP_HOSTNAME[1]=""
# Config information for eth1:
IPADDR[1]="10.1.1.1"
NETMASK[1]="255.255.255.0"
USE_DHCP[1]=""
DHCP_HOSTNAME[1]=""

To raise the MTU to 9000, the variables MTU[0]="9000" and MTU[1]="9000" has to be included after each interface config block, e.g.:

# Config information for eth0:
IPADDR[0]="172.16.1.1"
NETMASK[0]="255.255.255.0"
USE_DHCP[0]=""
DHCP_HOSTNAME[1]=""
MTU[0]="9000"
# Config information for eth1:
IPADDR[1]="10.1.1.1"
NETMASK[1]="255.255.255.0"
USE_DHCP[1]=""
DHCP_HOSTNAME[1]=""
MTU[1]="9000"

bash-4.1# /etc/rc.d/rc.inet1 restart
...

b.) The "Universal" Linux way

This way is working on most if not all Linux distributions.
Insert in /etc/rc.local:

/sbin/ifconfig eth0 mtu 9000 up
/sbin/ifconfig eth1 mtu 9000 up

5. Check if Jumbo Frames are properly enabled

There are at least two ways to display the MTU settings for eths.

a.) Using grepping the MTU from ifconfig

linux:~# /sbin/ifconfig eth0|grep -i mtu
UP BROADCAST MULTICAST MTU:9000 Metric:1
linux:~# /sbin/ifconfig eth1|grep -i mtu
UP BROADCAST MULTICAST MTU:9000 Metric:1

b.) Using ip command from iproute2 package to get MTU

linux:~# ip route get 192.168.2.134
local 192.168.2.134 dev lo src 192.168.2.134
cache mtu 9000 advmss 1460 hoplimit 64

linux:~# ip route show dev wlan0
192.168.2.0/24 proto kernel scope link src 192.168.2.134
default via 192.168.2.1

You see MTU is now set to 9000, so the two server lans, are now able to communicate with increased network thoroughput.
Enjoy the accelerated network transfers 😉


How to resolve (fix) WordPress wp-cron.php errors like “POST /wp-cron.php?doing_wp_cron HTTP/1.0″ 404” / What is wp-cron.php and what it does

Monday, March 12th, 2012

fix wordpress wp-cron.php 404 HTTP error, what is wp-cron.php schedule logo

One of the WordPress websites hosted on our dedicated server produces all the time a wp-cron.php 404 error messages like:

xxx.xxx.xxx.xxx - - [15/Apr/2010:06:32:12 -0600] "POST /wp-cron.php?doing_wp_cron HTTP/1.0

I did not know until recently, whatwp-cron.php does, so I checked in google and red a bit. Many of the places, I've red are aa bit unclear and doesn't give good exlanation on what exactly wp-cron.php does. I wrote this post in hope it will shed some more light on wp-config.php and how this major 404 issue is solved..
So

what is wp-cron.php doing?


  • wp-cron.php is acting like a cron scheduler for WordPress.
  • wp-cron.php is a wp file that controls routine actions for particular WordPress install.
  • Updates the data in SQL database on every, request, every day or every hour etc. – (depending on how it's set up.).
  • wp-cron.php executes automatically by default after EVERY PAGE LOAD!
  • Checks all pending comments for spam with Akismet (if akismet or anti-spam plugin alike is installed)
  • Sends all scheduled emails (e.g. sent a commentor email when someone comments on his comment functionality, sent newsletter subscribed persons emails etc.)
  • Post online scheduled articles for a day and time of particular day

Suppose you're writting a new post and you want to take advantage of WordPress functionality to schedule a post to appear Online at specific time:

What is wordpress wp-cron.php, Scheduling wordpress post screenshot

The Publish Immediately, field execution is being issued on the scheduled time thanks to the wp-cron.php periodic invocation.

Another example for wp-cron.php operation is in handling flushing of WP old HTML Caches generated by some wordpress caching plugin like W3 Total Cache
wp-cron.php takes care for dozens of other stuff silently in the background. That's why many wordpress plugins are depending heavily on wp-cron.php proper periodic execution. Therefore if something is wrong with wp-config.php, this makes wordpress based blog or website partially working or not working at all.
 

Our company wp-cron.php errors case

In our case the:
212.235.185.131 – – [15/Apr/2010:06:32:12 -0600] "POST /wp-cron.php?doing_wp_cron HTTP/1.0" 404
is occuring in Apache access.log (after each unique vistor request to wordpress!.), this is cause wp-cron.php is invoked on each new site visitor site request.
This puts a "vain load" on the Apache Server, attempting constatly to invoke the script … always returning not found 404 err.

As a consequence, the WP website experiences "weird" problems all the time. An illustration of a problem caused by the impoper wp-cron.php execution is when we are adding new plugins to WP.

Lets say a new wordpress extension is download, installed and enabled in order to add new useful functioanlity to the site.

Most of the time this new plugin would be malfunctioning if for example it is prepared to add some kind of new html form or change something on some or all the wordpress HTML generated pages.
This troubles are result of wp-config.php's inability to update settings in wp SQL database, after each new user request to our site.
So the newly added plugin website functionality is not showing up at all, until WP cache directory is manually deleted with rm -rf /var/www/blog/wp-content/cache/

I don't know how thi whole wp-config.php mess occured, however my guess is whoever installed this wordpress has messed something in the install procedure.

Anyways, as I researched thoroughfully, I red many people complaining of having experienced same wp-config.php 404 errs. As I red, most of the people troubles were caused by their shared hosting prohibiting the wp-cron.php execution.
It appears many shared hostings providers choose, to disable the wordpress default wp-cron.php execution. The reason is probably the script puts heavy load on shared hosting servers and makes troubles with server overloads.

Anyhow, since our company server is adedicated server I can tell for sure in our case wordpress had no restrictions for how and when wp-cron.php is invoked.
I've seen also some posts online claiming, the wp-cron.php issues are caused of improper localhost records in /etc/hosts, after a thorough examination I did not found any hosts problems:

hipo@debian:~$ grep -i 127.0.0.1 /etc/hosts
127.0.0.1 localhost.localdomain localhost

You see from below paste, our server, /etc/hosts has perfectly correct 127.0.0.1 records.

Changing default way wp-cron.php is executed

As I've learned it is generally a good idea for WordPress based websites which contain tens of thousands of visitors, to alter the default way wp-cron.php is handled. Doing so will achieve some efficiency and improve server hardware utilization.
Invoking the script, after each visitor request can put a heavy "useless" burden on the server CPU. In most wordpress based websites, the script did not need to make frequent changes in the DB, as new comments in posts did not happen often. In most wordpress installs out there, big changes in the wordpress are not common.

Therefore, a good frequency to exec wp-cron.php, for wordpress blogs getting only a couple of user comments per hour is, half an hour cron routine.

To disable automatic invocation of wp-cron.php, after each visitor request open /var/www/blog/wp-config.php and nearby the line 30 or 40, put:

define('DISABLE_WP_CRON', true);

An important note to make here is that it makes sense the position in wp-config.php, where define('DISABLE_WP_CRON', true); is placed. If for instance you put it at the end of file or near the end of the file, this setting will not take affect.
With that said be sure to put the variable define, somewhere along the file initial defines or it will not work.

Next, with Apache non-root privileged user lets say www-data, httpd, www depending on the Linux distribution or BSD Unix type add a php CLI line to invoke wp-cron.php every half an hour:

linux:~# crontab -u www-data -e

0,30 * * * * cd /var/www/blog; /usr/bin/php /var/www/blog/wp-cron.php 2>&1 >/dev/null

To assure, the php CLI (Command Language Interface) interpreter is capable of properly interpreting the wp-cron.php, check wp-cron.php for syntax errors with cmd:

linux:~# php -l /var/www/blog/wp-cron.php
No syntax errors detected in /var/www/blog/wp-cron.php

That's all, 404 wp-cron.php error messages will not appear anymore in access.log! 🙂

Just for those who can find the root of the /wp-cron.php?doing_wp_cron HTTP/1.0" 404 and fix the issue in some other way (I'll be glad to know how?), there is also another external way to invoke wp-cron.php with a request directly to the webserver with short cron invocation via wget or lynx text browser.

– Here is how to call wp-cron.php every half an hour with lynxPut inside any non-privileged user, something like:
01,30 * * * * /usr/bin/lynx -dump "http://www.your-domain-url.com/wp-cron.php?doing_wp_cron" 2>&1 >/dev/null

– Call wp-cron.php every 30 mins with wget:

01,30 * * * * /usr/bin/wget -q "http://www.your-domain-url.com/wp-cron.php?doing_wp_cron"

Invoke the wp-cron.php less frequently, saves the server from processing the wp-cron.php thousands of useless times.

Altering the way wp-cron.php works should be seen immediately as the reduced server load should drop a bit.
Consider you might need to play with the script exec frequency until you get, best fit cron timing. For my company case there are only up to 3 new article posted a week, hence too high frequence of wp-cron.php invocations is useless.

With blog where new posts occur once a day a script schedule frequency of 6 up to 12 hours should be ok.