Posts Tagged ‘ssh’
Friday, August 5th, 2011 One of the servers running Cpanel has been suspended today and the Data Center decided to completely bring down our server and gave us access to it only through rescue mode running linux livecd.
Thus I had no way to access the Cpanel web interface to suspend the “hacker” who by the way was running a number of instances of this old Romanian script kiddies brute force ssh scanner called sshscan .
Thanksfully Cpanel is equipped with a number of handy scripts for emergency situations in /scripts directory. These shell management scripts are awesome for situations like this one, where no web access is not avaiable.
To suspend the abuser / (abusive user ) I had to issue the command:
root@rescue [/]# /scripts/suspendacct abuse_user

Changing Shell to /bin/false...chsh: Unknown user context is not authorized to change the shell of abuse_user

Done

Locking Password...Locking password for user abuse_user.

passwd: Success

Done

Suspending mysql users

warn [suspendmysqlusers] abuse_user has no databases.

Notification => reports@santrex.net via EMAIL [level => 3]

Account previously suspended (password was locked).

/bin/df: `/proc/sys/fs/binfmt_misc': No such file or directory

Using Universal Quota Support (quota=0)

Suspended document root /home/abuse_user/public_html

Suspended document root /home/abuse_user/public_html/updateverificationonline.com

Using Universal Quota Support (quota=0)

Updating ftp passwords for abuse_user

Ftp password files updated.

Ftp vhost passwords synced

abuse_user's account has been suspended
That’s all now the user is suspended, so hopefully the DC will bring the server online in few minutes.
Tags: brute force, center, data, document root, emergency, emergency situations, few minutes, file, Ftp, ftp passwords, hacker, handy scripts, home abuse, instances, level, level 3, livecd, management scripts, mysql users, notification, number, password, password files, quot, Quota, quota support, rescue, rescue mode, root, santrex, scanner, script, script kiddies, Shell, shell command, ssh, Success, Universal, web access, web interface
Posted in System Administration, Various, Web and CMS | 1 Comment »
Friday, December 30th, 2011 Earlier I've blogged about how to prevent brute force attacks with fail2ban, denohosts and blockhosts , however there is easier way to secure against basic brute force attacks by not installing or configuring any external programs.
The way I'm talking about uses simple iptables rules to filter out brute force attacks.
Here is a small script to stop ssh and FTP invaders which try to initiate more than 3 consequential connections in 5 minutes time to port 22 or port 23:
SERVER_MAIN_IP='AAA.BBB.CCC.DDD';/sbin/iptables -N SSH_WHITELIST

/sbin/iptables -A INPUT -p tcp --dport 22 --syn -m recent --name sshbr --set

/sbin/iptables -A INPUT -p tcp --dport 22 --syn -j SSH_WHITELIST

/sbin/iptables -A INPUT -p tcp --dport 22 --syn -m recent --name sshbr \

--update --rttl --hitcount 3 --seconds 300 -j REJECT --reject-with tcp-reset

/sbin/iptables -A SSH_WHITELIST -s $SERVER_MAIN_IP -p tcp --dport 22 --syn -m recent --rttl --remove
The only thinIf the rules are matched iptables filter rules will be added to the iptables CHAIN SSH_WHITELIST
In case if you want to add some more truested IPs add some more iptables rules, like:
ALLOW_IP='BBB.CCC.DDD.EEE';

/sbin/iptables -A SSH_WHITELIST -s $ALLOW_IP -p tcp --dport 22 --syn -m recent --rttl --remove
Each filtered IP that matches the rules will be filtered for 5 minutes, if 5 minutes is enough, the 300 value has to be increased.
Tags: ALLOW, BBB, blogged, brute force, CCC, ddd, dport, EEE, filter rules, INPUT, ips, iptables, Linux, Main, name, nbsp, port, port 22, port 23, removeEach, sbin, server, ssh, sshbr, SYN, time, value, way, whitelist
Posted in Computer Security, Linux, System Administration | 2 Comments »
Tuesday, November 29th, 2011 The classical way to keep a process running in background after log out of a shell is using screen
Anyways using screen is not the only way to detach a running process , GNU / Linux and BSDs (Free, Open, Net BSDs) had a command nohup which aim is to run a command immune to hangups, with output to a non-tty
Let’s say one wants to keep track (log) constantly ICMP traffic to a certain host with ping command on a UNIX server / desktop which doesn’t have the screen manager … terminal emulation program installed. Achieving this task is possible with nohup cmd by backgrounding the ping process, like so:
guoi@host:~$ nohup ping google.com >ping.log &[1] 45931hipo@host:~$ nohup: ignoring input and redirecting stderr to stdout
Afterwards even after closing up the opened ssh session or console (tty) / terminal (pts) on which the ping process is background nohup prevents the ping to be sent kill SIGNAL so the process continues running in the background.
Later on to check in real time the statistics of the continuous ICMP ping requests tail, less, or cat can be used for example watching the tail:
hipo@host:~$ tail -f ping.log

64 bytes from fx-in-f106.1e100.net (74.125.39.106): icmp_req=562 ttl=51 time=44.0 ms

64 bytes from fx-in-f106.1e100.net (74.125.39.106): icmp_req=563 ttl=51 time=43.8 ms

64 bytes from fx-in-f106.1e100.net (74.125.39.106): icmp_req=564 ttl=51 time=43.3 ms

64 bytes from fx-in-f106.1e100.net (74.125.39.106): icmp_req=565 ttl=51 time=43.1 ms

64 bytes from fx-in-f106.1e100.net (74.125.39.106): icmp_req=566 ttl=51 time=43.4 ms

64 bytes from fx-in-f106.1e100.net (74.125.39.106): icmp_req=567 ttl=51 time=43.6 ms
I’m using Linux / BSD for quite a lot of time and never before put in use the nohup cmd I guess there are more ppl who never heard of this handy UNIX basic command. Hope I’m not the only one who never heard about it and its useful knowledge to someone out. Cheers 😉
Tags: aim, BSDs, cheer, Cheers, cmd, com, Desktop, detach, Free, fx, gnu linux, google, Hope, host, ICMP, icmp ping, log amp, manager, msi, net, nohup, Open, ping, ping command, ppl, real time, req, screen, server desktop, Shell, someone, ssh, ssh session, stderr, terminal, terminal emulation program, time, tty, unix server, useful knowledge
Posted in FreeBSD, Linux, System Administration | 1 Comment »
Thursday, November 24th, 2011 
As a System Administrator I need to check daily the log files produced on various GNU / Linux distributions or FreeBSD. This can sometimes take too much time if the old fashioned way using the normal system tools cat, less and tail etc. is used.
Reading logs one by one eats too much of my time and often as logs are reviewed in a hurry some crucial system irregularities, failed ssh or POP3 / Imap logins, filling disk spaces etc. are missed.
Therefore I decided to implement automated log parsing programs which will summary and give me an overview (helicopter view) on what were the system activities from the previous day (24h) until the moment I logged the system and issued the log analyzer program.
There are plenty of programs available out there that does “wide scale” log analysis, however there are two applications which on most GNU / Linux and BSD systems had become a de-facto standard programs to scan system log files for interesting lines.
These are:
- 1. logwatch – system log analyzer and reporter
- 2. logcheck – program to scan system log files for interesting lines
1. logwatch is by default installed on most of the Redhat based Linux systems (Fedora, RHEL, CentOS etc.). On Debian distributions and as far as I know (Ubuntu) and the other deb based distros logwatch is not installed by default. Most of the servers I manage these days are running Debian GNU / Linux so, to use logwatch I needed to install it from the available repository package, e.g.:
debian:~# apt-get install logwatch

...
logwatch is written in perl and with some big files to analyze, parsing them might take hell a lot of time. It does use a bunch of configuration scripts which defines how logwatch should read and parse the various services logwatch support by default. These conf scripts are also easily extensible, so if one has to analyze some undefined service in the conf files he can easily come up with a new conf script that will support the service/daemon of choice.Using logwatch is very easy, to get an overview about server system activity invoke the logwatch command:
debian:~# logwatch

################### Logwatch 7.3.6+cvs20080702-debian (07/02/08) ####################

Processing Initiated: Thu Nov 24 05:22:07 2011

Date Range Processed: yesterday

( 2011-Nov-23 )

Period is day.

Detail Level of Output: 0

Type of Output/Format: stdout / text

Logfiles for Host: debian

 #################################################
——————— dpkg status changes Begin ————-
Upgraded:
libfreetype6 2.3.7-2+lenny7 => 2.3.7-2+lenny8
libfreetype6-dev 2.3.7-2+lenny7 => 2.3.7-2+lenny8
———————- dpkg status changes End ————————-
——————— httpd Begin ————————
Requests with error response codes
400 Bad Request
HTTP/1.1: 2 Time(s)
admin/scripts/setup.php: 2 Time(s)
401 Unauthorized
…
…
———————- vpopmail End ————————-
——————— Disk Space Begin ————————
Filesystem Size Used Avail Use% Mounted on
/dev/md0 222G 58G 154G 28% /
———————- Disk Space End ————————-
###################### Logwatch End #########################
The execution might take up from 10 to 20 seconds up to 10 or 20 minutes depending on the log files size and the CPU / RAM hardware on the machine where /var/log/… logs will be analyzed.
logwatch output can be easily mailed to a custom mail address using a crontab if the server runs a properly configured SMTP server. Using a cron like:
00 5 * * * /usr/sbin/logwatch | mail -s "$(hostname) log files for $(date)"
Here is time to make a note that logwatch is ported also to FreeBSD and is available from BSD’s port tree, from a port with path:
/usr/ports/security/logcheck
2. logcheck is another handy program, which does very similar job to logwatch . The “interesting” information it returns is a bit less than compared to logwatch
The good thing about logcheck is that by default it is made to mail every 1 hour a brief data summary which might be of an interest to the sys admin.
Logcheck is available for install on RedHat distros via yum and has existing package for Debian as well as a port for FreeBSD under the port location /usr/ports/security/logcheck
To install on logcheck on Debian:
debian:~# apt-get install logcheck

...
After installation I found it wise to change the default mailing time from each and every hour to just once per day to prevent my email from overfilling with “useless” mails.
This is done by editting the default cron tab installed by the package located in /etc/cron.d/logcheck
The default file looks like so:
# /etc/cron.d/logcheck: crontab entries for the logcheck package

PATH=/usr/local/sbin:/usr/local/bin:/sbin:/bin:/usr/sbin:/usr/bin

MAILTO=root

@reboot logcheck if [ -x /usr/sbin/logcheck ]; then nice -n10 /usr/sbin/logcheck -R; fi

2 * * * * logcheck if [ -x /usr/sbin/logcheck ]; then nice -n10 /usr/sbin/logcheck; fi

# EOF
To change it run only once per day its content should looks something like:
# /etc/cron.d/logcheck: crontab entries for the logcheck package

PATH=/usr/local/sbin:/usr/local/bin:/sbin:/bin:/usr/sbin:/usr/bin

MAILTO=root

@reboot logcheck if [ -x /usr/sbin/logcheck ]; then nice -n10 /usr/sbin/logcheck -R; fi

2 5 * * * logcheck if [ -x /usr/sbin/logcheck ]; then nice -n10 /usr/sbin/logcheck; fi

# EOF
Altering it that way the log summary interesting info analysis will be sent on mail every day in 05:02 a.m.
Changing the default email logcheck will ship its log analyzer report emails on deb based distros is done via editting the file:
/etc/logcheck/logcheck.conf
And changing the SENDMAILTO=”” variable to point to the appropriate admin email email addr.
Tags: Begin, bsd systems, CentOS, configuration scripts, cron, Date, deb, debian distributions, debian gnu, Disk, dpkg, end, fedora, freebsd, gnu linux, helicopter view, hurry, imap, irregularities, libfreetype, linux distributions, linux systems, logcheck, logwatch, nbsp, Output, package, quot, reading, reading log files, reading logs, reporter, repository, Space, ssh, summary, system administrator, system tools, time, Ubuntu
Posted in FreeBSD, Linux, System Administration, Various | 1 Comment »
Monday, November 21st, 2011 
Many of us have already taken advantage of the powerful Rsync proggie, however I'm quite sure there are still people who never used rsync to transfer files between servers.. That's why I came with this small post to possibly introduce rsync to my blog readers.
Why Rsync and not Scp or SFTP? Well Rsync is designed from the start for large files transfer and optimized to do the file copying job really efficient. Some tests with scp against rsync will clearly show rsync's superiority.
Rsync is also handy to contiue copying of half copied files or backups and thus in many cases saves bandwidth and machine hdd i/o operations.
The most simple way to use rsync is:
server:~# rsync -avz -e ssh remoteuser@remotehost:/remote/directory /local/directory/
Where remoteuser@remotehost — is the the username and hostname of remote server to copy files to.
/remote/directory — is the directory where the rsync copied files should be stored
/local/directory — is the local directory from which files will be copied to remote directory
If not a preliminary passwordless ssh key (RSA / DSA) authentication is configured on remote server, the above command will prompt for a password otherwise the rsync will start doing the transfer.
If one needs to have a RSA or DSA (public / private key) passwordless SSH key authentication , a RSA key first should be generated and copied over to the remote server, like so:
server:~# ssh-keygen -t dsa

...

server:~# ssh-copy-id -i ~/.ssh/id_dsa.pub root@remotehost

...
That's all folks, enjoy rsyncing 😉
Tags: authentication, backups, bandwidth, blog, bsd unix, command, copying, directoryIf, DSA, file, half, hostname, job, Linux, local directory, password, passwordless ssh, private key, proggie, remote server, remotehost, remoteuser, root, rsa key, rsync, scp, sftp, ssh, ssh copy, superiority, transfer, unix, unix servers, username, way
Posted in Everyday Life, Linux, System Administration, Various, Web and CMS | No Comments »
Monday, October 17th, 2011 Often when some of my companies, I’m employed with rents dedicated GNU / Linux servers co-located in data centers,
usually the local hostname is configured while the system is being installed, therefore many times when we forget to tell the Dedicated provider what kind of hostname, we’re intending to use they came up with some kind of hostname which is randomly set based on the dedicated provider’s company name or a server ID number. Cosenquently the machine hostname assigned due to company local server numbering policy.
Hence after one logs in to the newly purchased server with over SSH protocol, then we end up with a hostname like for example:
server56663:~#
This hostname naming, often doesn’t make much sense for the services running on the server and doesn’t have nothing to do to the provided internet services by the server, however its really important for me to orientate myself which server I have logged to. Therefore one of the first things I do while configuring a new server is to change the local server assigned hostname .
Besides having the hostname shown by the shell prompt, there is a quick command to print out the Fully Qualified Domain hostname, by issuing:
>server56663:~# hostname --fqdn

server56663.dedicompany.com
The Universal GNU / Linux way which works on almost all Linux distributions to change the configured hostname goes like this:
Edit /etc/hosts . A default /etc/hosts file looks something like:
server56663:~# cat /etc/hosts127.0.0.1 localhost.localdomain localhost

127.0.1.1 server56663.dedicompany.com server56663

# The following lines are desirable for IPv6 capable hosts

::1 ip6-localhost ip6-loopback

fe00::0 ip6-localnet

ff00::0 ip6-mcastprefix

ff02::1 ip6-allnodes

ff02::2 ip6-allrouters
On the second line which assigns the hostname for the loopback IP address 127.0.0.1 , you see the identifier for the local hostname:
127.0.1.1 server56663.dedicompany.com server56663
To change that to a custom local hostname of choice, the line should be modified to look like:
127.0.1.1 CustomHostName server56663.dedicompany.com server56663
On some GNU / Linux distributions the line 127.0.1.1 might be completely absent, this is the case with for example CentOS and Fedora and many other distros
On these Gnu / Linux distributions the /etc/hosts might looks like:
# Do not remove the following line, or various programs# that require network functionality will fail.127.0.0.1 localhost.localdomain localhost
Alas on Fedora, CentOS and other distros to set the localhost hostname, one more line should be added to /etc/hosts . The line to add looks like so:
123.123.123.123 CustomHostName
After modification and adding the custom hostname name there the file should look something like:
[root@centos ~]# cat /etc/hosts127.0.0.1 localhost localhost123.123.123.123 CustomHostName
After including correct records in /etc/hosts , next the hostname command is used to change the localhost name configured to show as a machine name on user ssh login:
server56663:~# hostname CustomHostName

server56663:~#
Further to check that the new hostname is set for all ssh sessions incoming to the ssh server from now on the hostname command is used without arguments:
server56663:~# hostname

CustomHostName
Even though now the hostname is changed to CustomHostName still, the hostname for the current opened ssh session is keeping the old hostname:
server56663:~# hostname

server56663
To see the hostname change in your shell prompt you will have to logout and login again to the system.
Here its good to mention the Linux kernel has a variable kernel.hostname, which can be used to set the local machine hostname. Actually the hostname command automatically set the kernel.hostname kernel variable.
If of course one want to change the kernel var directly without using the hostname command, this can be achieved with sysctl, e.g.:
server56663:~# sysctl kernel.hostname=CustomHostName
On Debian GNU / Linux the way to change the hostname there is a “debian way” approach:
Debian has a file /etc/hostname , which is there just for the sake of configuring the system hostname. During system boot process Debian reads /etc/hostname file and sets the machine hostname to the word inside. The /etc/hostname file is being red and configured by Debian’s /etc/init.d/hostname.sh shell script.
Therefore after changing the hostname in Debian by editting /etc/honstmame , the /etc/init.d/hostname.sh needs to be invoked for the new hostname to be set system wide, like so;
server56663:~# /etc/init.d/hostname.sh
Just like with other GNU / Linux distributions for the new hostname to be active on the current shell a logout and login via ssh is necessery again.
With Fedora, CentOS and other Redhat based distributions the “proper” way to change the hostname is:
a. change the /etc/hosts way described above in the aticle.
b. Edit /etc/sysconfig/network file and write inside the new custom hostname.
[root@centos ~]# grep -i hostname /etc/sysconfig/network

HOSTNAME=localhost.localdomain
After HOSTNAME value is set to the new desired hostname and file is saved, the network script should be invoke with restart argument:
[root@centos ~]# /etc/init.d/network restart
One more thing to consider always when changing a hostname is that some of the system services are using the configured local machine hostname, and hence need to be restarted also from a active shell where the new hostname is already set and active.
Since the system hostname is being configured usually, with the rest of server configurations on system boot, after setting the desired hostname it is a good idea to have a system reboot. This will guarantee that all running daemons will read the newly set hostname:
E.g.:
server56663:~# shutdown -r now
On next boot the hostname should be set to whatever you put as a custom hostname.
Tags: allnodesff, allroutersOn, CentOS, change, com, custom, doesn, domain, file, gnu linux, hostname, hosts file, init, internet services, ip6, Linux, linux distributions, linux servers, localdomain, localhost, localnet, localnetff, login, logs, loopback, mcastprefix, mcastprefixff, number, orientate, Protocol, Qualified, quot, rents, root, sense, server id, Shell, something, ssh, Universal
Posted in Linux, System Administration, Various | 1 Comment »
Wednesday, August 17th, 2011 
I’ve been hired, just recently by a company to make them a quick security audit analysis as they complain of having severe Denial of Service problems against an online e-store.
As a mean of securing the local network of the company, the old Linux server had to be replaced with a freshly installed one, which I had to configure to run smooth firewall and create DMZ zone.
The company System Administrator has installed Debian Linux and brought up sshd to allow me to futher take the lead and secure the server
After few hours, I’ve noticed unusual activities. For example processes like:
./a 207
as well as processes like ./ssh 212
debian:~# ps axu|grep -i ./ssh|wc -l

216
On the server and after checking in /etc/shadow I found that users like admin, test had a password string assigned , interestingly even system users like postgresql and man was enabled and ready for login and had a password hash assigned in /etc/shadow
I’ve seen the ./ssh shit before and I know pretty well this is a famous romanian script kiddies tools which circulates in the wild for at least 5 years already.
A quick look up in the usual places, where script kiddies store their files, like: /var/tmp, /tmp, /proc, /sys and /var/run has helped me find the ssh brute forcer the kiddie has issues on the machine in my case it was located in /var/run/2012 inside I found of course the usual sk bad stuff:
root@debian:/var/run/2012# ls1 3 5 a data.conf find internet.txt pass_file screen ssh stricat.txt vuln.txt

2 4 64.37.find.22 atack derbedeu.txt full mfu.txt ronet13.txt ss start tefac.txt x
As well as an archive in /var/run/2012.tgz which was obviously quickly extracted and the brute force ssh tool was started to lookup for some more targets.
As I like keeping script kiddie stuff to expose and share with people, to help them get a better understanding what they can expect on their servers I made a copy of the 2012.tgz brute forcer tool, download the romanian ssh brute forcer shit is here if somebody wants to take a look, though I suggest to be very careful with it as some files might contain rootkits and other unwanted tool.
If someone wants to give it a try be sure not to launch it as root.
Anyways, after finding the abuser I quickly removed all the active users, which were not supposed to be existent on the newly installed system from /etc/shadow changed the server root password, give a reinstall the openssh-server and openssh-client (as I was not if they had not been substituted with some rootkited version), e.g.:
debian:~# apt-get install --reinstall openssh-client openssh-server
Consequentially I killed all the active ./ssh and ./a processes to assure the script kiddie ssh brute forcer is no longer running on the server as well killed all connections to the ssh server manually with kill cmd to the unknown IPs.
Finally to make sure, the server is not rootkited or not backdoored I run some tests with chkrootkit, rkhunter and unhide :
On Debian the 3 tools are available as packages, so this saved me time and I proceeded installing like so:
debian:~# apt-get install rkhunter unhide chkrootkit

...
In few seconds the tools were installed so I used them to check if the server is irreversably damaged or root kitted by the kiddie.
1. unhide
First I used unhide to make sure there are no hidden backdoor processes listening on the server:
for i in $(echo proc sys brute); do unhide $i; done

Unhide 20100201

http://www.security-projects.com/?Unhide

[*]Searching for Hidden processes through /proc scanning

Unhide 20100201

http://www.security-projects.com/?Unhide

[*]Searching for Hidden processes through kill(..,0) scanning

[*]Searching for Hidden processes through comparison of results of system calls

[*]Searching for Hidden processes through getpriority() scanning

[*]Searching for Hidden processes through getpgid() scanning

[*]Searching for Hidden processes through getsid() scanning

[*]Searching for Hidden processes through sched_getaffinity() scanning

[*]Searching for Hidden processes through sched_getparam() scanning

[*]Searching for Hidden processes through sched_getscheduler() scanning

[*]Searching for Hidden processes through sched_rr_get_interval() scanning

[*]Searching for Hidden processes through sysinfo() scanning

HIDDEN Processes Found: 1

Unhide 20100201

http://www.security-projects.com/?Unhide

[*]Starting scanning using brute force against PIDS with fork()

[*]Starting scanning using brute force against PIDS with Threads
The above command checks with unhide in /proc and /sys for hidden processes as well as next uses brute option to try to brute force all PIDs on the server attempting to locate listening backdoors processes.
There are 2 more unhide binaries that can be used to check for hidden backdoors, unhide-posix and unhide-tcp
For some reason unhide-posix sys detected the /usr/sbin/rsyslogd -c4 process as some kind of hidden process, which is most probably a false positive, though I can’t be one hundred sure until I try to scan completely the server remotely after mounting the filesystem via ssh and scan it with clamav chkrootkit and rkhunter and even maybe with drweb .
I assume the HIDDEN Processes Found: 1 bells the alarm, however even though I did profound look up on the server with lsof, netstat and fuser cmds I cannot find nothing suspicious any more.
2. chkrootkit scan
Next I used chkrootkit to check if some common rootkit is not installed on the server:
debian:~# chkrootkit

ROOTDIR is `/'

Checking `amd'... not found

Checking `basename'... not infected

Checking `biff'... not found

Checking `chfn'... not infected

Checking `chsh'... not infected

Checking `cron'... not infected

Checking `crontab'... not infected

Checking `date'... not infected

...
The chkrootkit output displayed thanksfully failed to detect that the system is rootkitted.
3. rkhunter
Finally, tested with rkhunter to assure chkrootkit to expand the range of rootkits the system is scanned for:
debian:~# rkhunter --check

[ Rootkit Hunter version 1.3.6 ]
Checking system commands…
Performing ‘strings’ command checks
Checking ‘strings’ command [ OK ]
Performing ‘shared libraries’ checks
Checking for preloading variables [ None found ]
Checking for preloaded libraries [ None found ]
Checking LD_LIBRARY_PATH variable [ Not found ]
…
After a long screen of consequential rootkit tests, each of which requires the user to press enter rkhunter was unable to detect any rootkits installed on host as well.
Finally to make sure for one more time there are no some backdoors left or some unwanted users still connected to the server I used netstat:
debian:~# netstat -tanp

Active Internet connections (servers and established)

Proto Recv-Q Send-Q Local Address Foreign Address State PID/Program name

tcp 0 0 0.0.0.0:22 0.0.0.0:* LISTEN 7269/sshd

tcp 0 0 192.168.0.1:22 83.228.93.76:54913 ESTABLISHED 24545/1

tcp 0 0 192.168.0.1:22 83.228.93.76:50240 ESTABLISHED 7059/0

tcp6 0 0 :::22 :::* LISTEN 7269/sshd
As the output shows, I coulnd’t find anything suspiciou, still I can’t be 100% percent sure the system is clean and there is no something left from the cracker, probably the Debian server will be re-installed as it doesn’t matter since it’s newly installed Debian machine.
What is amazing is that the server was compromised immediately after it was installed. This means that either the very easy default root password the admin who installed the server was cracked, or his whole network has been compromised by the script kiddie.
Tomorrow will have to investigate further to assure the security breach is closed hopefully once and for all.
Tags: administrator, atack, axu, bad stuff, brute force, brute forcer, chkrootkit, configure, Denial, denial of service, e store, forcer, handy tools, hash, kill, lead, linux server, local network, login, mfu, password, password string, postgresql, rkhunter, Romanian, root, script kiddie, script kiddies, security audit, Service, shadow, ssh, system users, test, tgz, tmp, tool, xas
Posted in Linux, System Administration | 5 Comments »
Tuesday, August 2nd, 2011 
Today I’ve learned from a admin colleague, a handy tip.
I’m administrating some Linux servers which are configured on purpose not to run on the default ssh port number (22) and therefore each time I connect to a host I have to invoke the ssh command with -p PORT_NUMBER option.
This is not such a problem, however when one has to administrate a dozen of servers each of which is configured to listen for ssh connections on various port numbers, every now and then I had to check in my notes which was the correct ssh port number I’m supposed to connect to.
To get around this silly annoyance the ssh client has a feature, whether a number of ssh server hosts can be preconfigured from the ~/.ssh/config in order to later automatically recognize the port number to which the corresponding host will be connecting (whenever) using the ssh user@somehost without any -p argument specified.
In order to make the “auto detection” of the ssh port number, the ~/.ssh/config file should look something similar to:
hipo@noah:~$ cat ~/.ssh/config

Host home.*.www.pc-freak.net

User root

Port 2020

Host www.remotesystemadministration.com

User root

Port 1212

Host sub.www.pc-freak.net

User root

Port 2222

Host www.example-server-host.com

User root

Port 1234
The *.www.pc-freak.net specifies that all ssh-able subdomains belonging to my domain www.pc-freak.net should be by default sshed to port 2020
Now I can simply use:
hipo@noah:~$ ssh root@myhosts.com
And I can connect without bothering to remember port numbers or dig into an old notes.
Hope this ssh tip is helpful.
Tags: administrate, annoyance, auto detection, cat, client, com, configHost, domain pc, example server, file, freak, handy tip, home, linux servers, net, noah, number 22, number option, order, port, port 22, port numbers, purpose, remotesystemadministration, root, root port, server host, server hosts, somehost, ssh, ssh client, ssh command, ssh connections, ssh port number, sub, subdomains, time, tip, www
Posted in Linux, System Administration | No Comments »
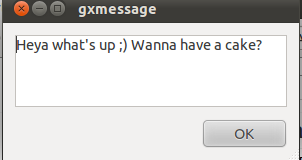
Wednesday, July 27th, 2011 I just had some fun as, my work day is over. I was curious if I can send message directly to a logged in Gnome user on Ubuntu / Debian environment.
After quick investigation I’ve found gxmessage which is available as deb package for both Debian and Ubuntu.
I installed it and use in the following way:
root@linux:~# apt-get install gxmessage
hipo@linux:~$ ssh root@remotehost.com

hipo@remote-desktop:~$ DISPLAY=:0; XAUTHORITY=~owner_of:0/.Xauthority; export DISPLAY XAUTHORITY

hipo@remote-desktop:~$ gxmessage 'Heya what's up ;) Wanna have a cake?"
Below you see what pops up on the screen on the remote-desktop Gnome Desktop 😉
Tags: cake, deb, deb package, Desktop, export, export display, Gnome, gnome desktop, gnome user, gxmessage, gxmessagehipo, investigation, Linux, package, remote desktop, remotehost, root, root linux, screen, ssh, terminal, terminal session, Ubuntu, use, way, work, Xauthority, XAUTHORITYhipo
Posted in Linux, Linux and FreeBSD Desktop, Linux Audio & Video | No Comments »
Monday, July 4th, 2011 If you’re administrating a Cpanel server and you come across an error message while trying to use cpanel’s domain addon menu and you want to fix that you will need to do the following logged in as root over an ssh connection:
1. Remove dns related stuff in /var/named and /var/named/cache
cpanel:~# rm -f /var/named/mydomain.com.dbcpanel:~# rm -f /var/named/cache/mydomain.com.db
2. Edit the current used httpd.conf on the server and remove all virtualhost domain definitions
cpanel:~# vim /etc/httpd/conf/httpd.conf

# find the mydomain.com Virtualhost definitions and completely remove them
3. Remove any domain occurance in /var/cpanel/users
cpanel:~# cd /var/cpanel/users/

cpanel:/var/cpanel/users# grep -rli 'mydomain.com' *

/var/cpanel/users/hipo

cpanel:~# vim /var/cpanel/users/hipo

# remove in above file any domain related entries
3. Remove anything related to mydomain.com in /etc/userdomains and /etc/localdomains
cpanel:~# vim /etc/userdomains

cpanel:~# vim /etc/localdomains

# again look inside the two files and remove the occuring entries
4. Edit /etc/named.conf and remove any definitions of mydomain.com
cpanel:~# vim /etc/named.conf

# in above file remove DNS configuration for mydomain.com
5. Run /scripts/updateuserdomains
cpanel:~# /scripts/updateuserdomains
6. Delete any valias configurations
cpanel:~# rm -f /etc/valiases/mydomain.com

cpanel:~# rm -f /etc/vdomainaliases/mydomain.com

cpanel:~# rm -f/etc/vfilters/mydomain.com
7. Remove any occurance of mydomain.com in the user directory which experiences the Error from park wrapper: error
Let’s say the user testuser is experiencing the error, in that case you will have to remove:
cpanel:~# rm -rf /home/testuser/public_html/mydomain.com
8. Restart Cpanel
This step is optional though I think it’s also a good practice as it will at least restart the Cpanel webserver (Apache or Litespeed depending on your conf)
cpanel:~# /etc/init.d/cpanel restart
Now try to add up the domain via the Cpanel domain addon interface, hopefully the issue should be fixed by now. If not you might also check if there is no some record about mydomain.com in the mysql server.
Cheers 😉
Tags: addon, apache, Cheers, com, comcpanel, connection, cpa, dbcpanel, Delete, DNS, domain definitions, error message, file, hipo, init, litespeed, menu, mydomain, occurance, occuring, Restart, rf, rli, root, scripts, ssh, ssh connection, testuser, userdomainscpanel, vim, wrapper
Posted in Linux, System Administration | No Comments »


